Focal Beryllium BMW
Printed From: the12volt.com
Forum Name: Rides and Systems Gallery
Forum Discription: Show off your vehicles, systems, and installations.
URL: https://www.the12volt.com/installbay/forum_posts.asp?tid=110922
Printed Date: April 25, 2024 at 4:01 AM
Topic: Focal Beryllium BMW
Posted By: robolop
Subject: Focal Beryllium BMW
Date Posted: January 23, 2009 at 3:01 PM
A couple of years ago, my wife was making ( read: painting) christmasballes, to hang in the christmastree. She also hooked on making special things When i looked at the plexy balls, i know, that sometime, i could use it for another project Well, ladies and gents, IT'S TIME
These are the plexy balls, you can buy 'm in every size. (according to his wife)..
:D:D:D
A old friend of my Earl Zausmer build 12 or 13 years ago something like this. 

Then I made a hole in the bigget bal, so the little one stands a bit 'in' it 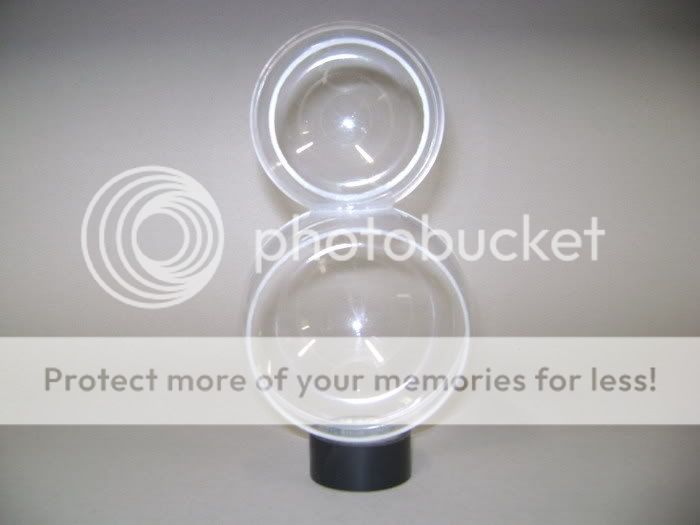
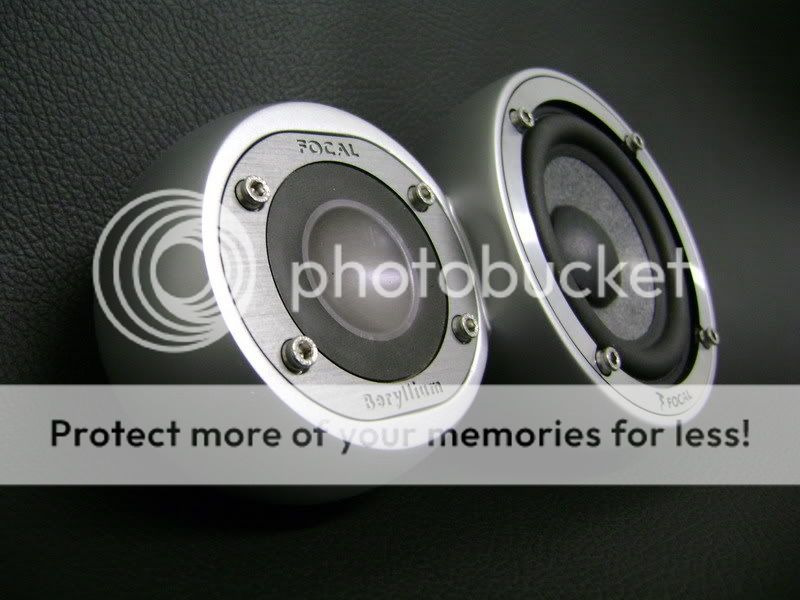
On this pic you can see the ball with the speaker, stands a bit further away. I did this on purpose.

pic with speakers in it. 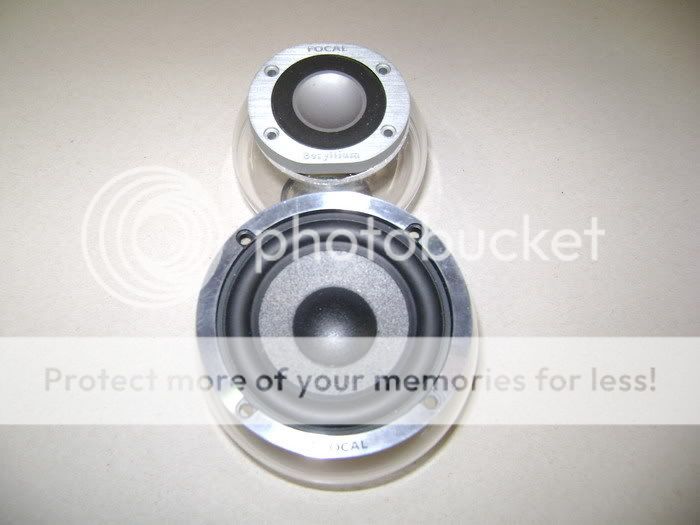

Replies:
Posted By: whiterob
Date Posted: January 23, 2009 at 7:41 PM
I've seen people make something like this using plexiglass balls as a mold. I have not seen any one actually put the speakers in the plexi balls though.
Posted By: robolop
Date Posted: August 20, 2009 at 3:03 PM
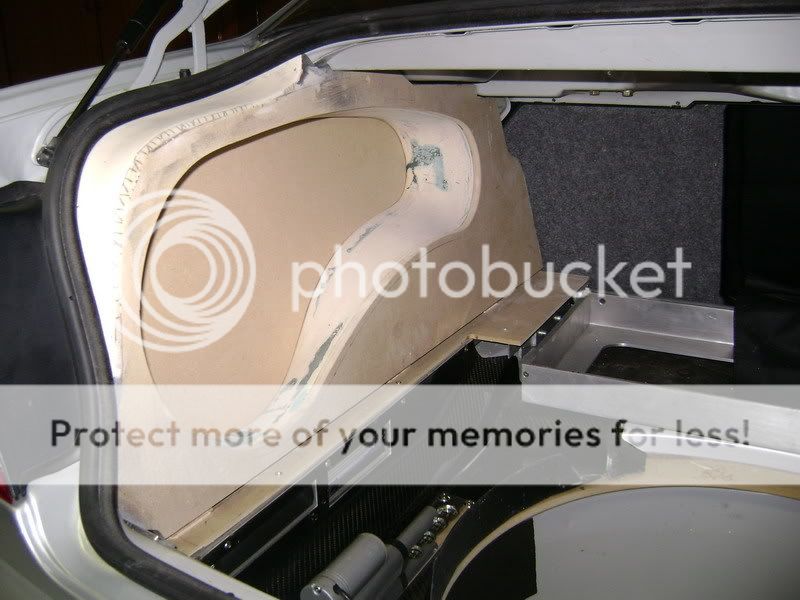
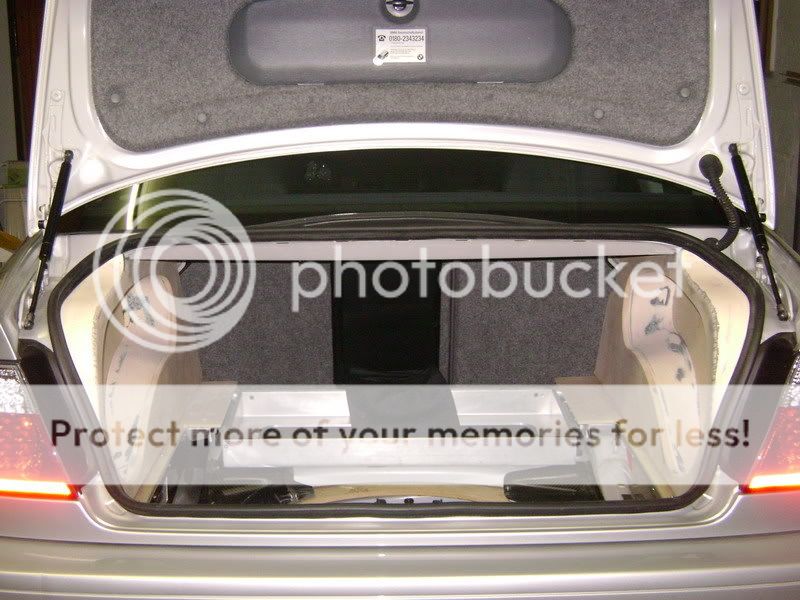
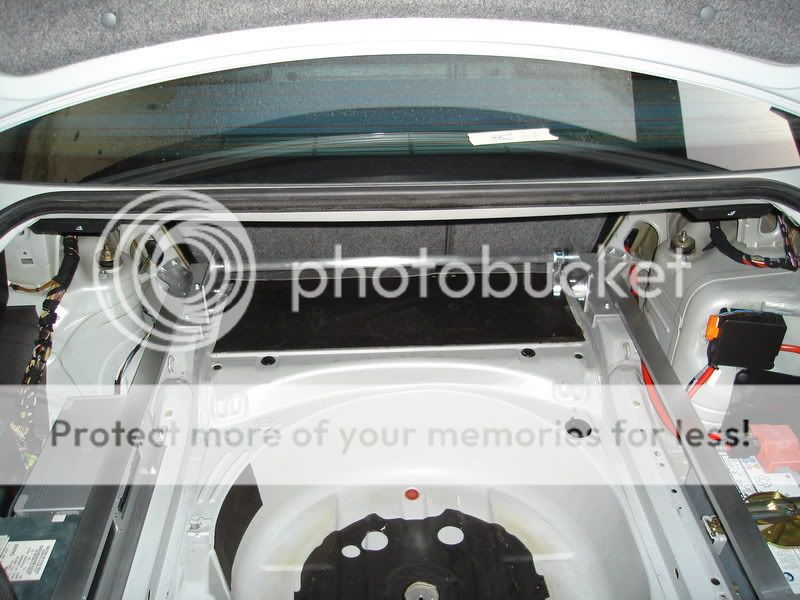
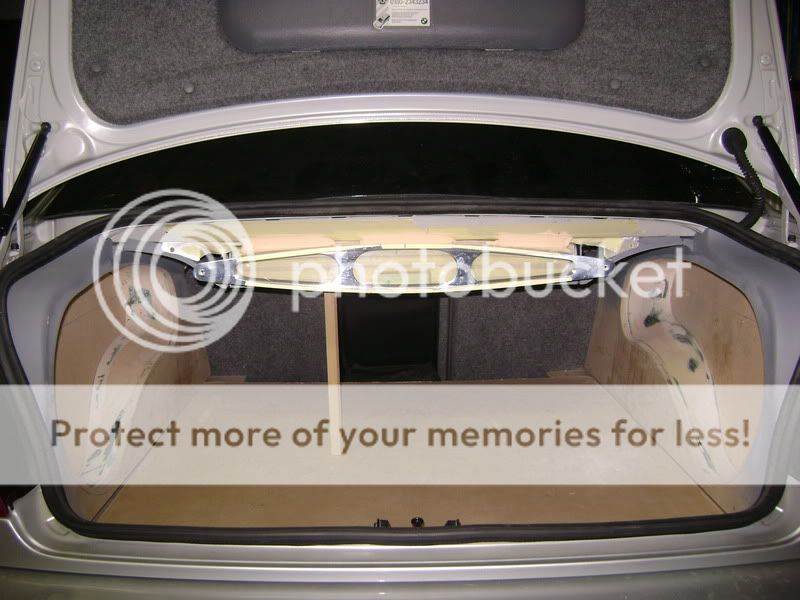
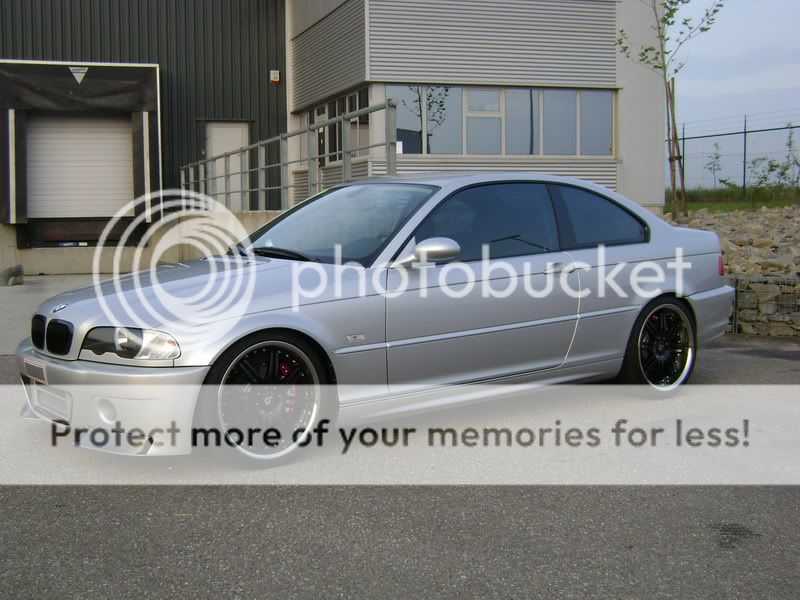
pic of the car:
 

There is still some adaption work. ] 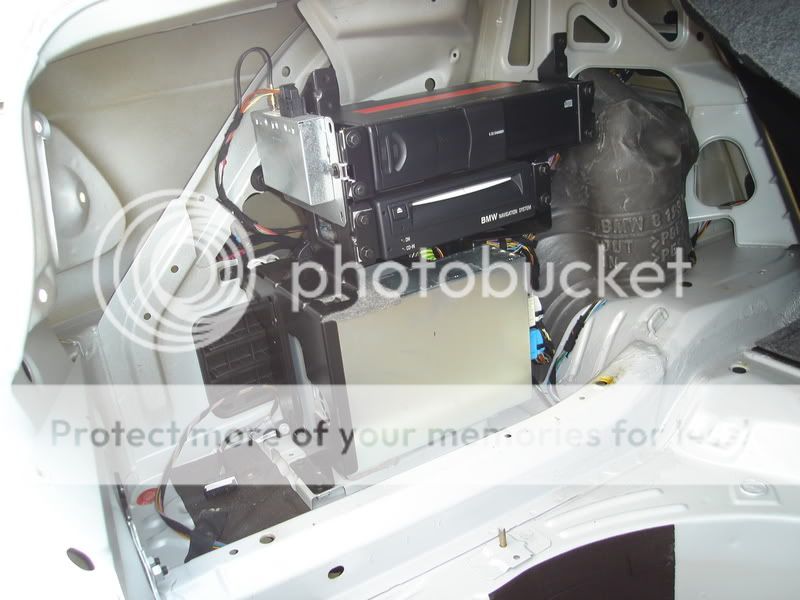
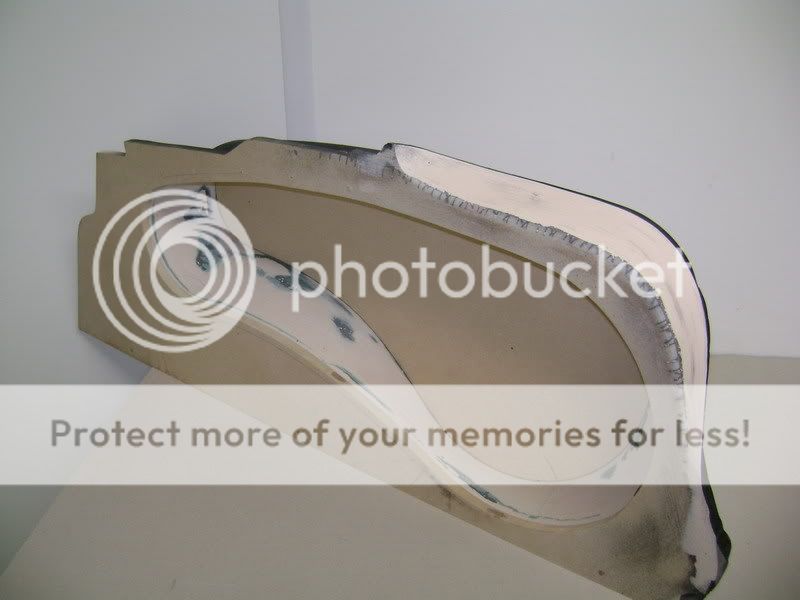
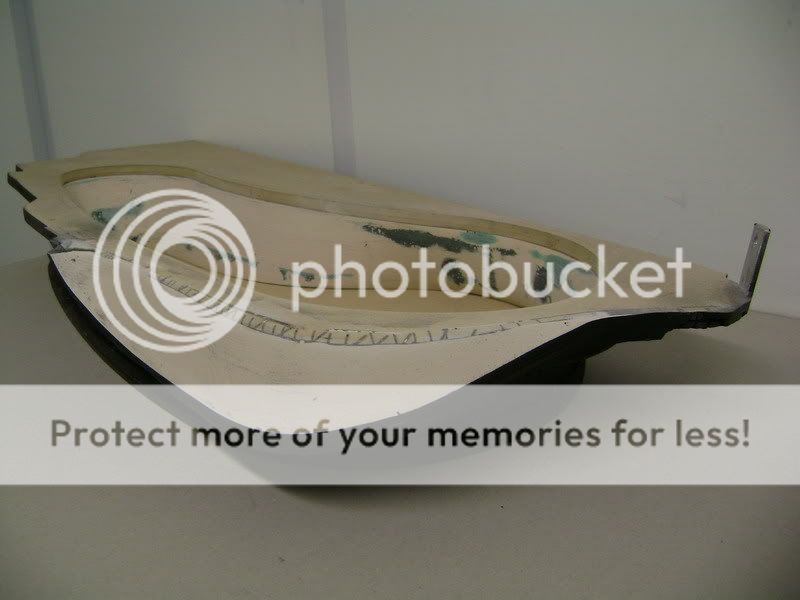
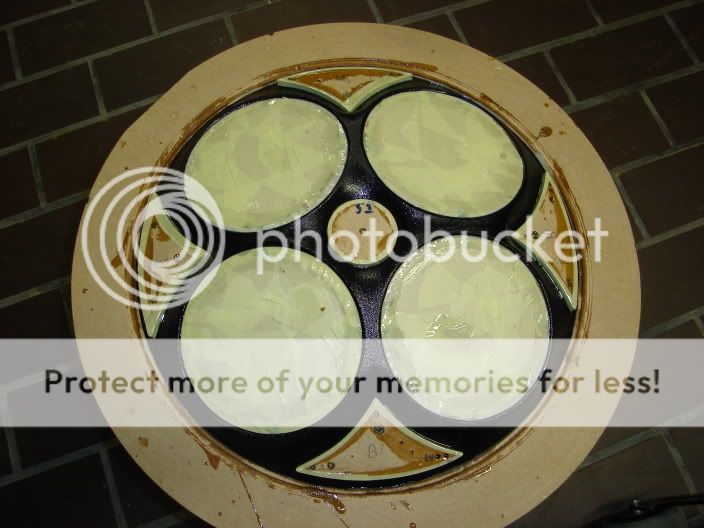
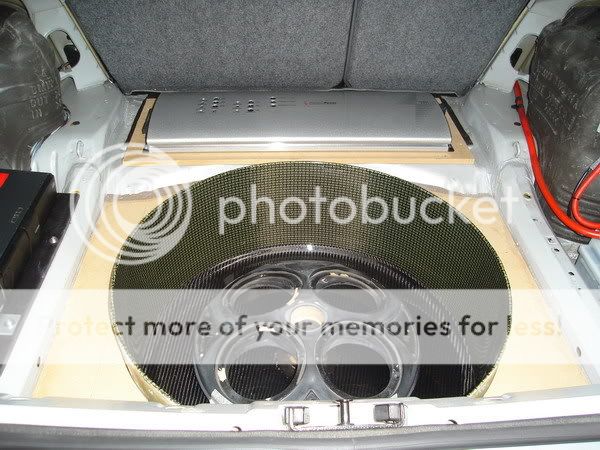
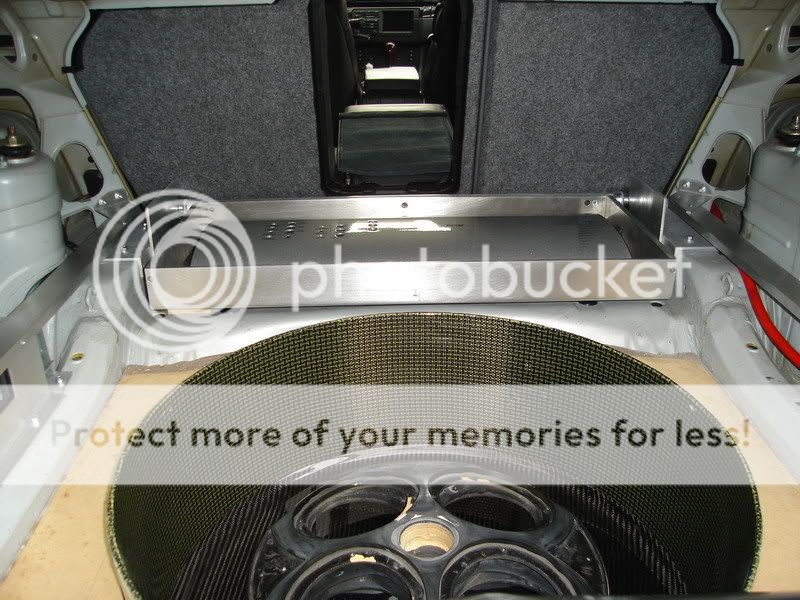
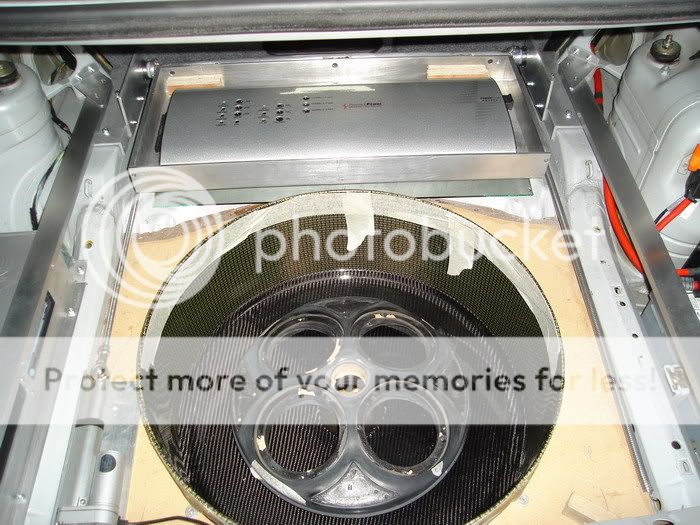
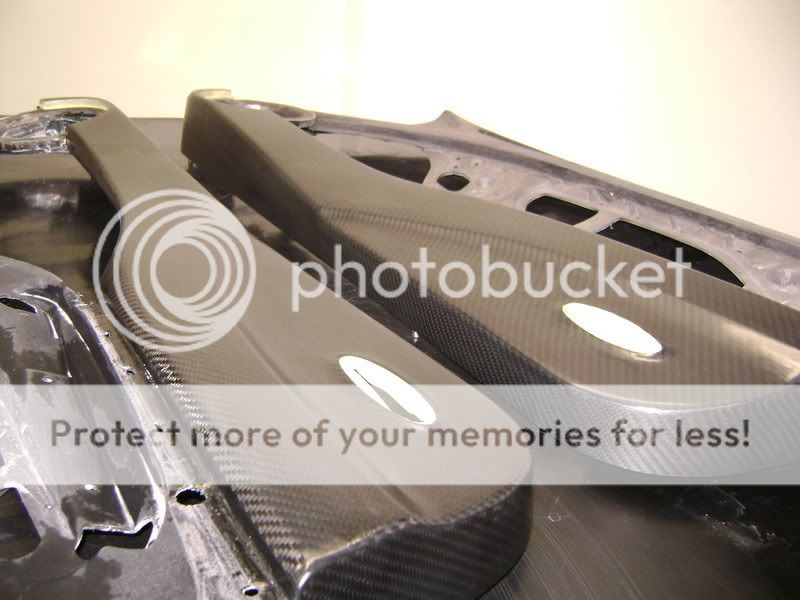
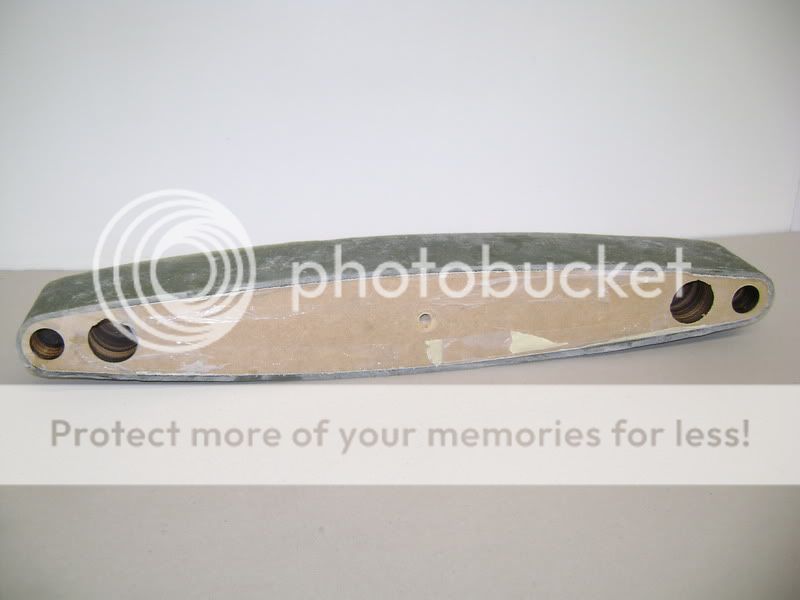
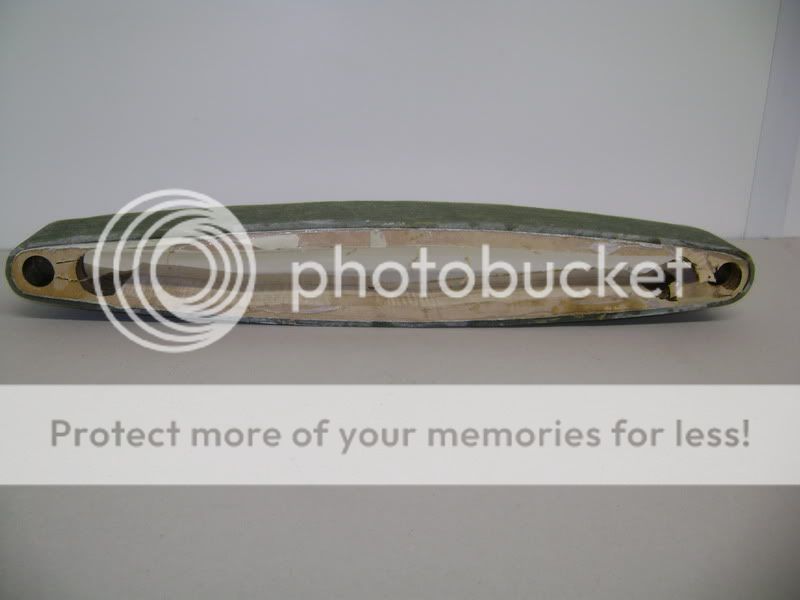
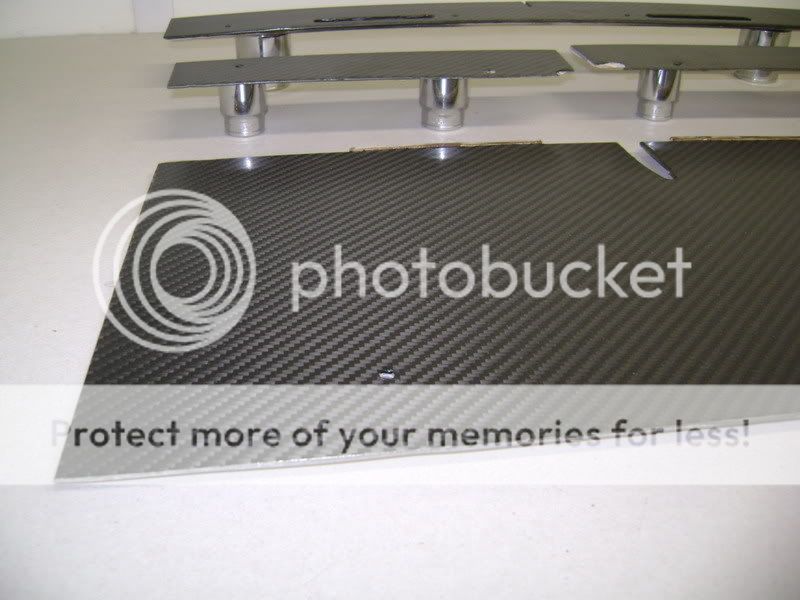
This will be the Sub-box.
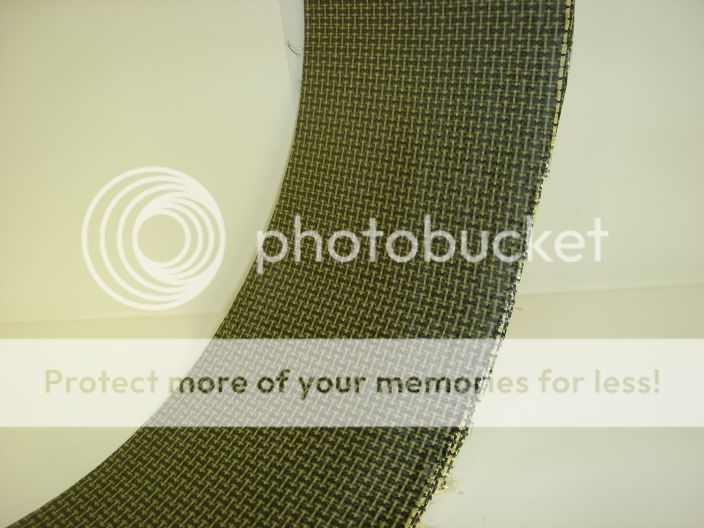
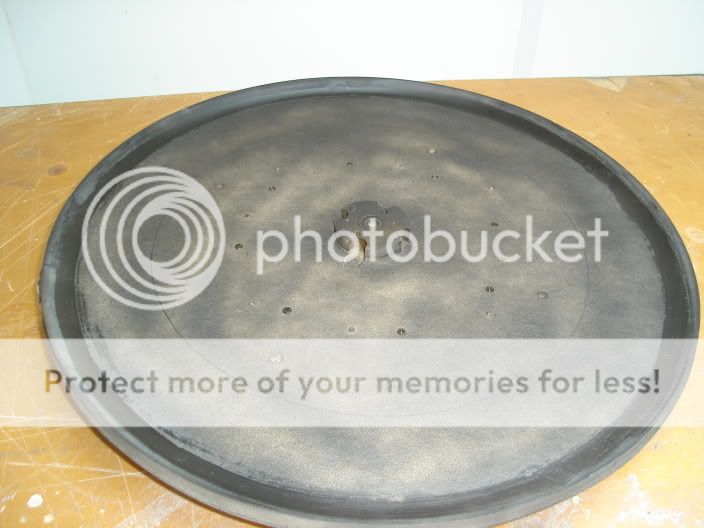
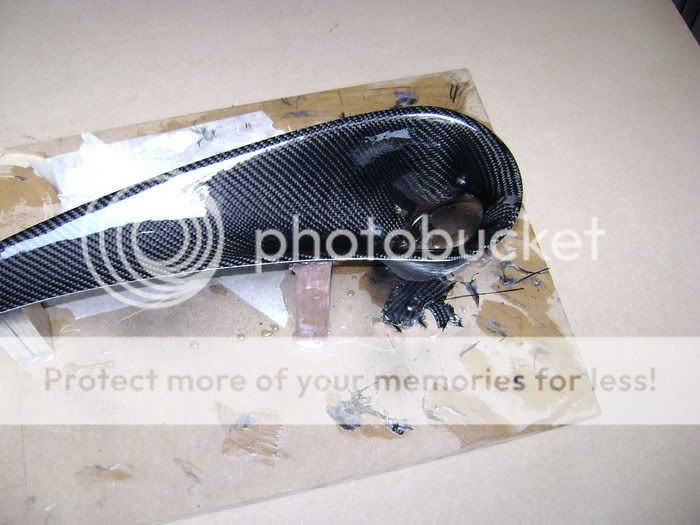
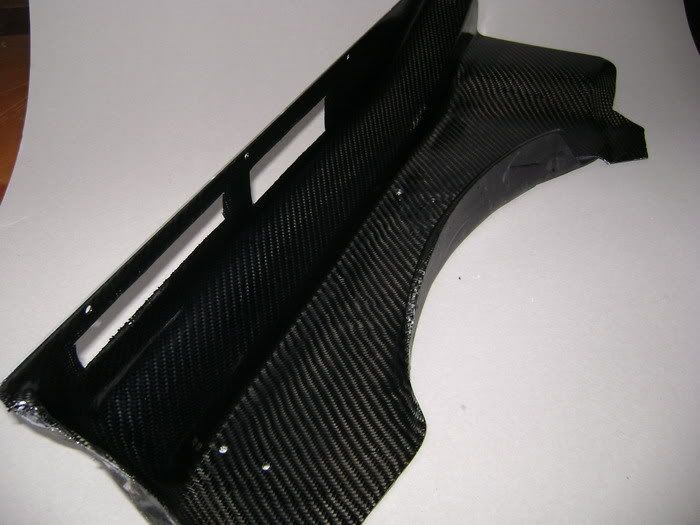
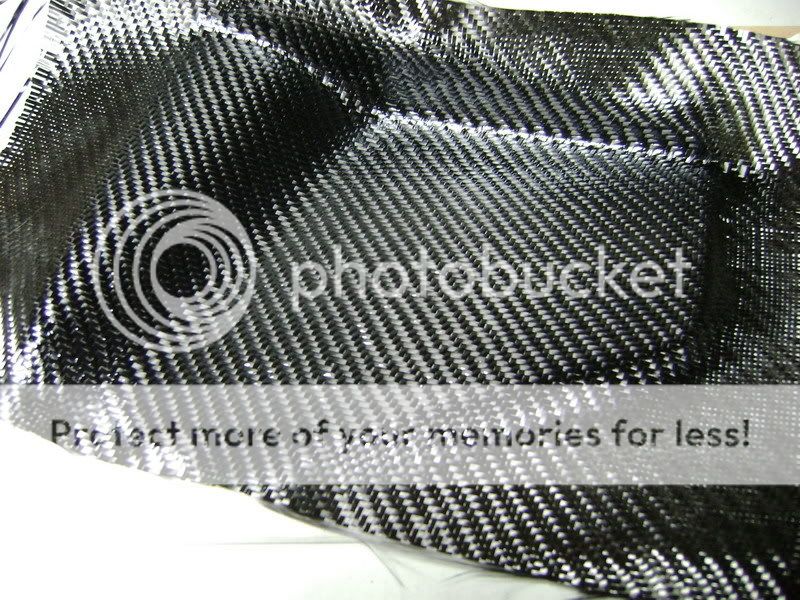
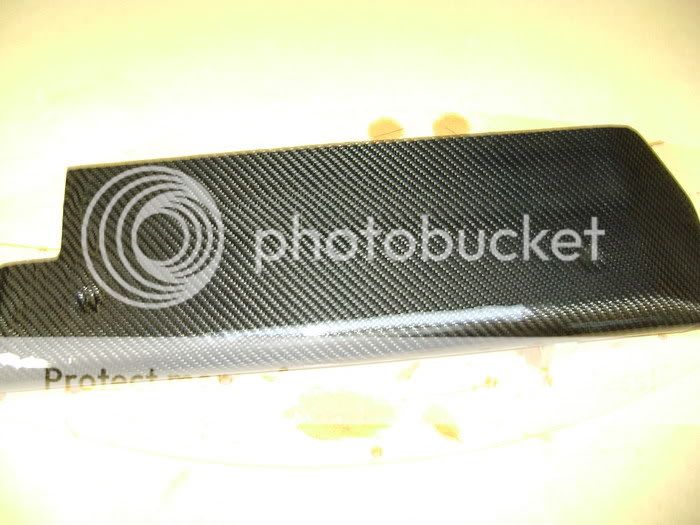
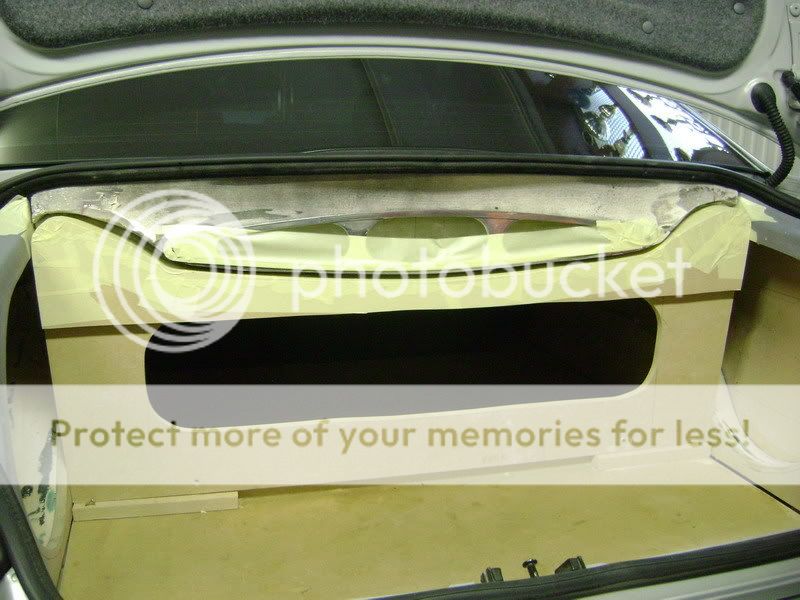
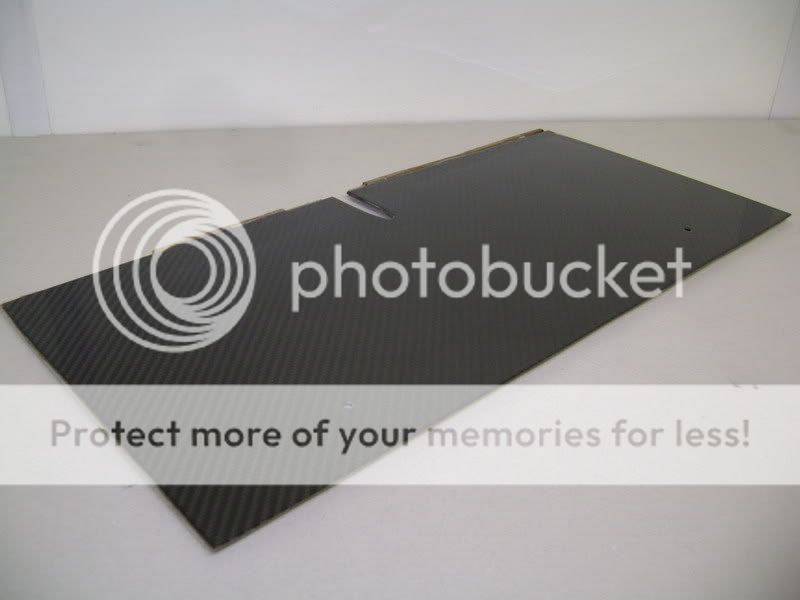
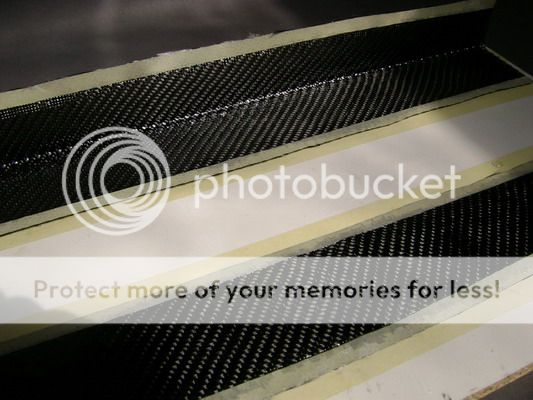
The piece I wanted to cover in Carbonkevlar, I painted black, to be sure the layer underneath won't show.
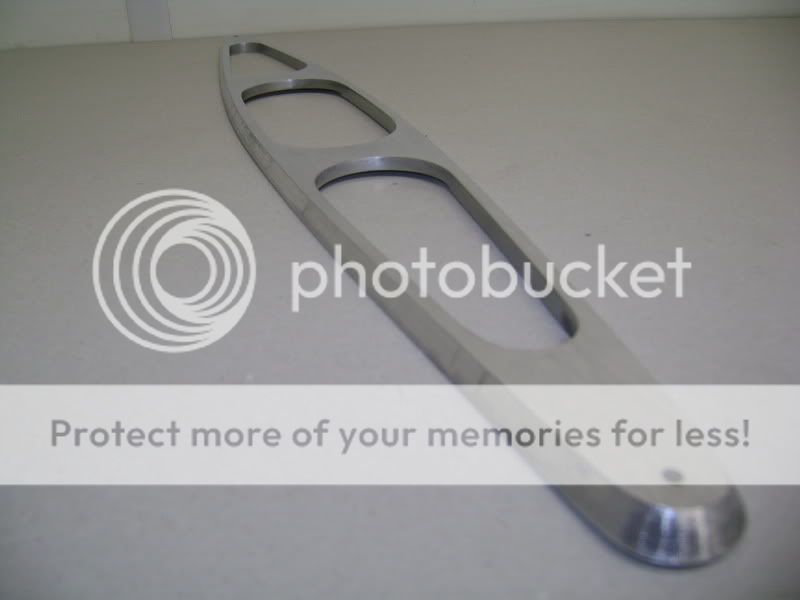
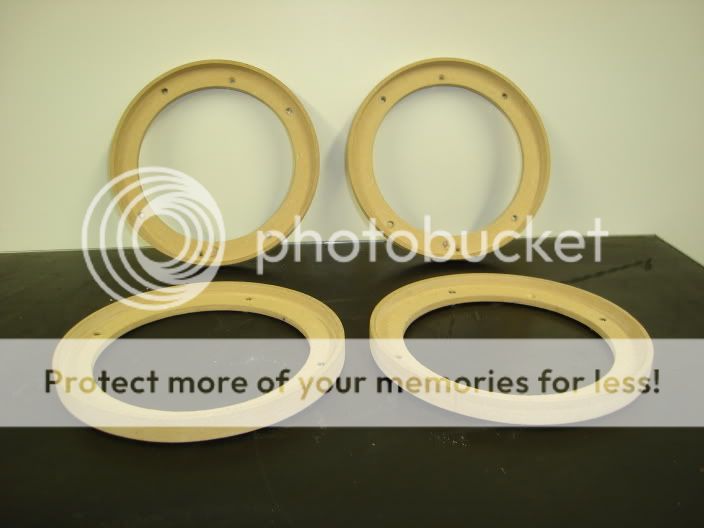
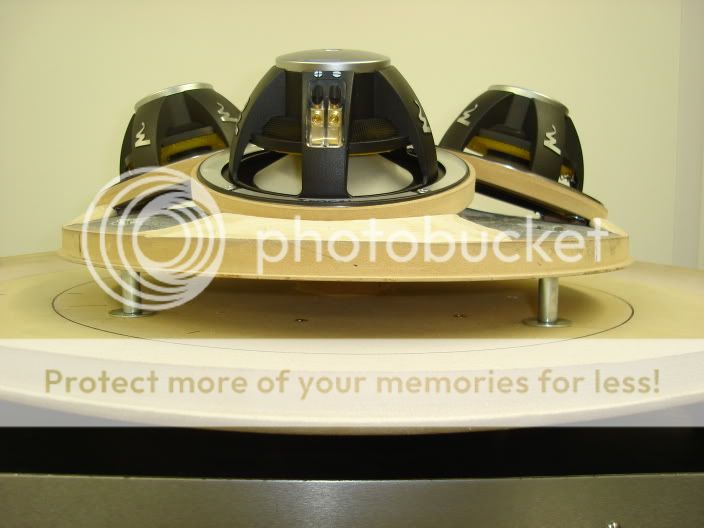
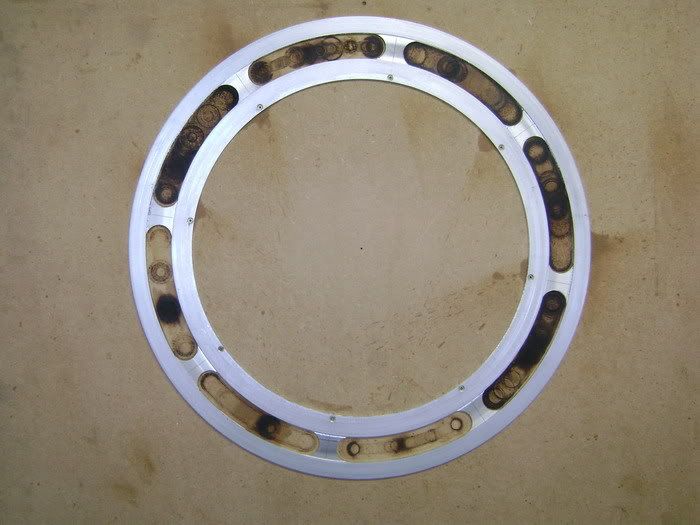
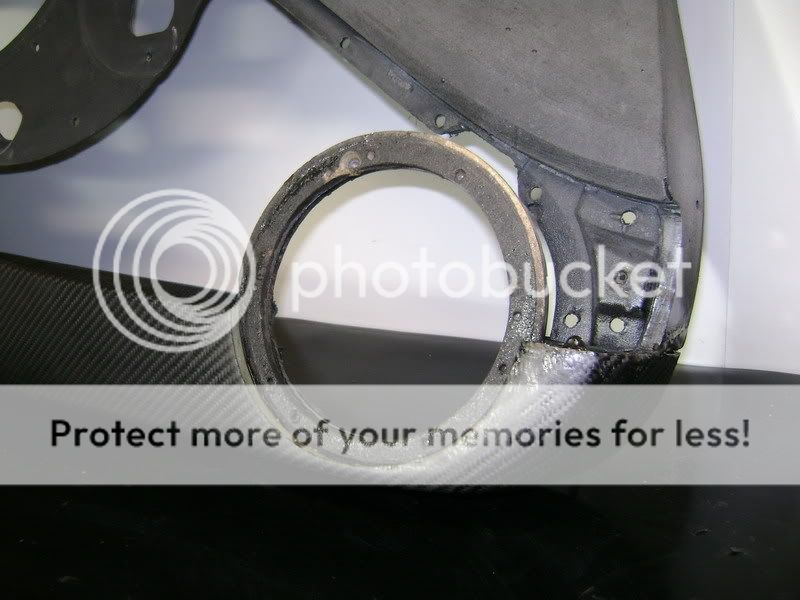
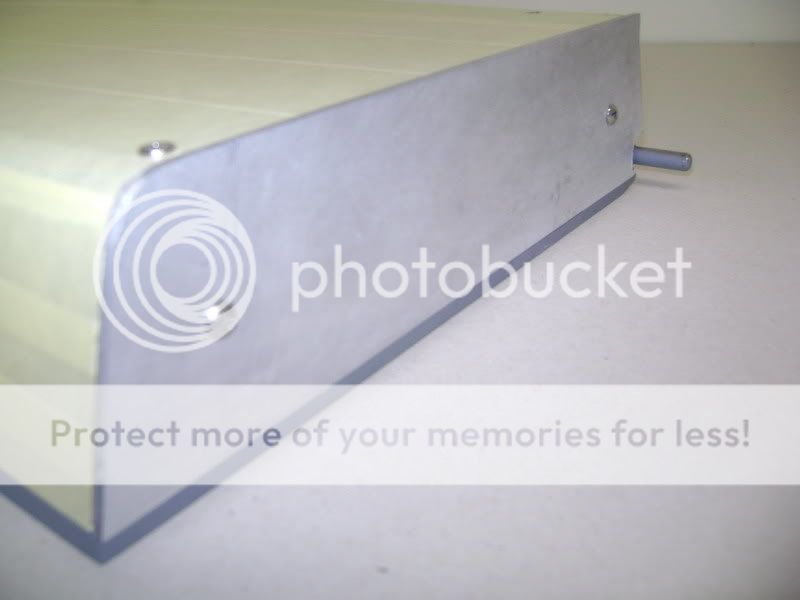
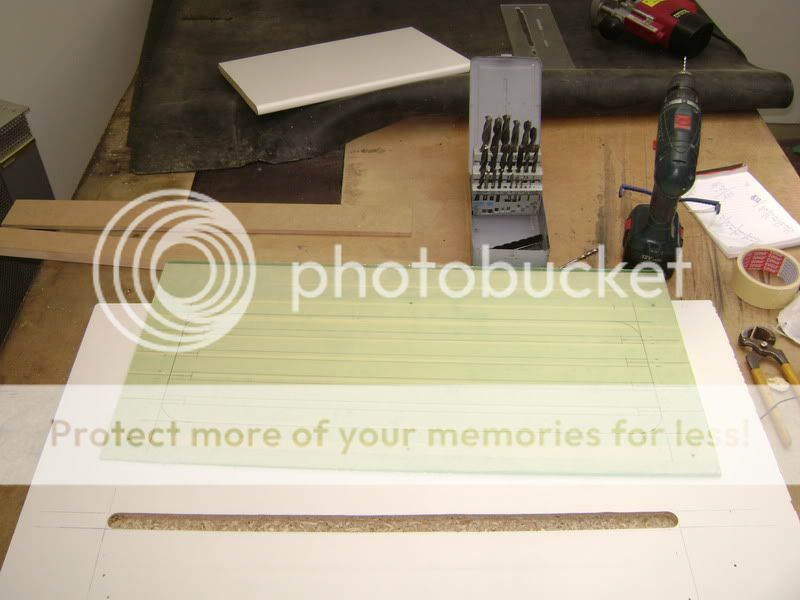
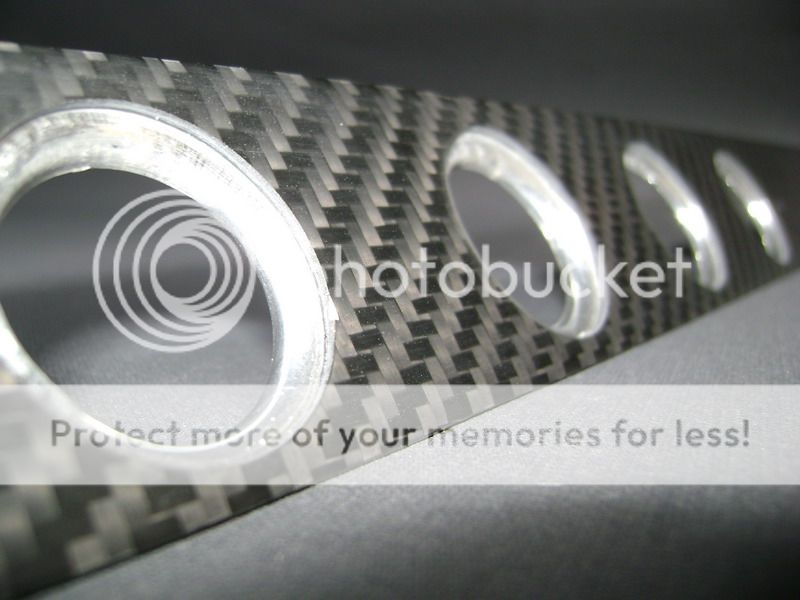
milled some rings to put the woofers in.
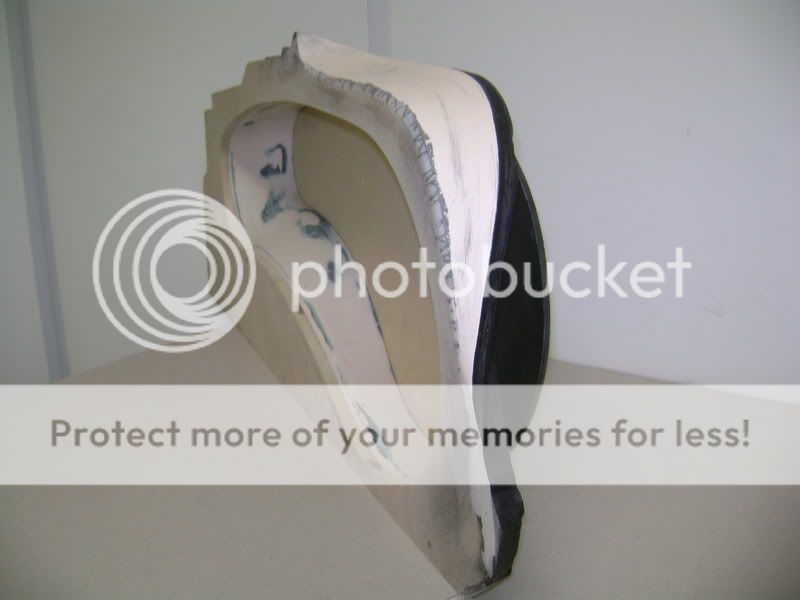
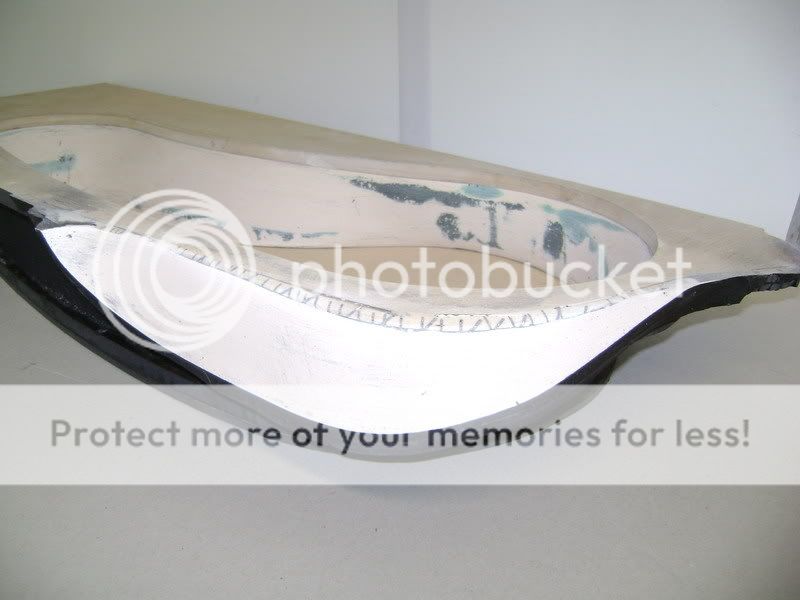
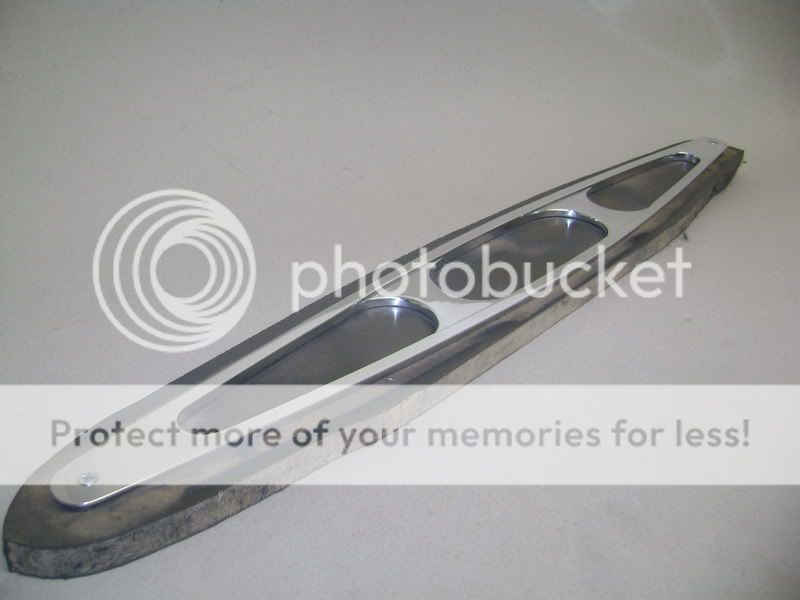
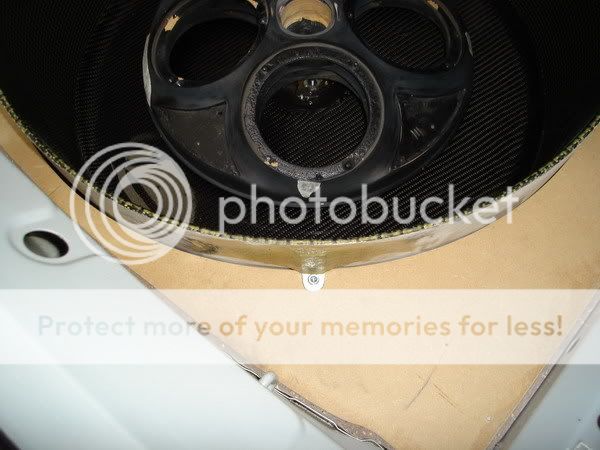
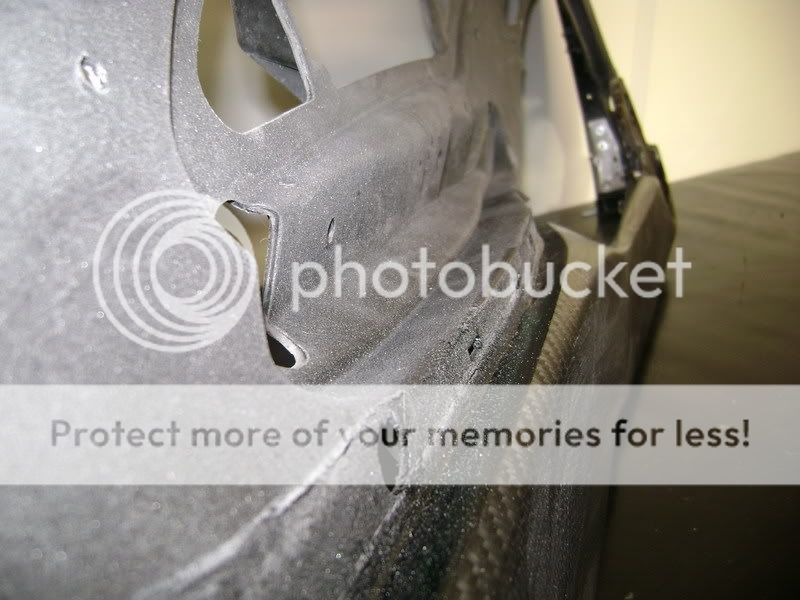
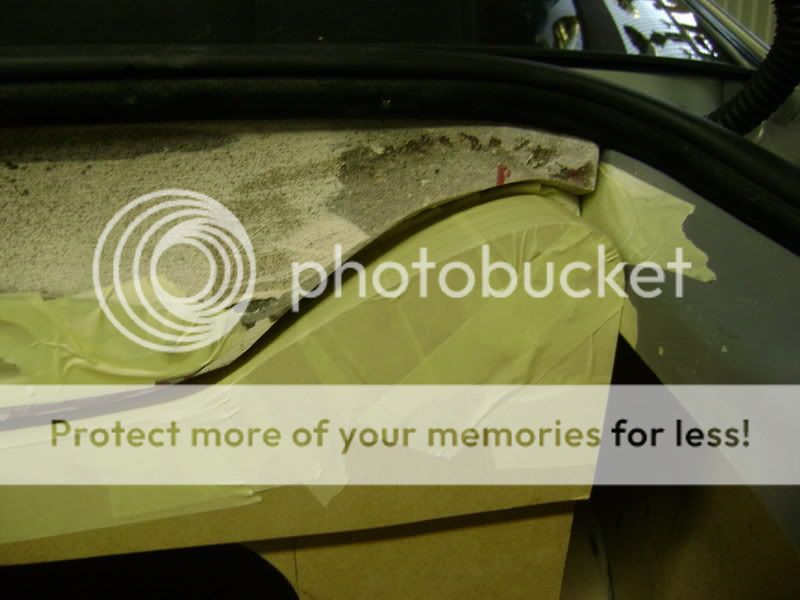
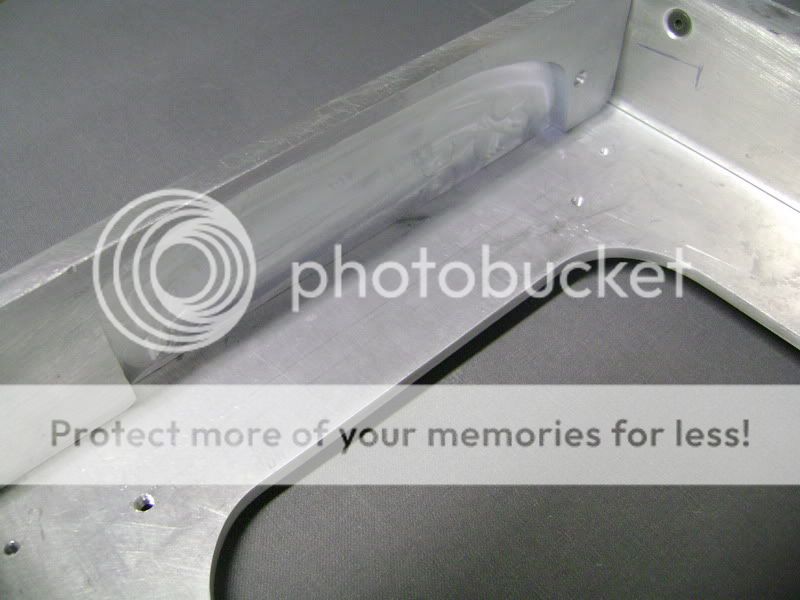
Here a picture of the bottomside, where he made wholes , to let the sound flow outside. 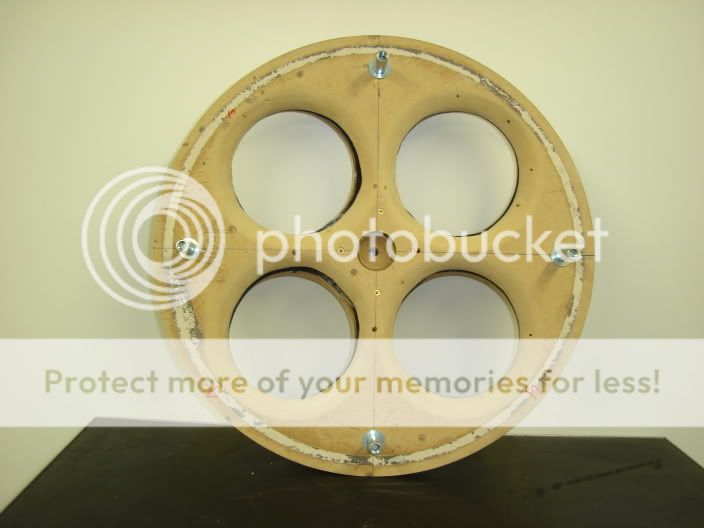
Still some more polyester work to do.
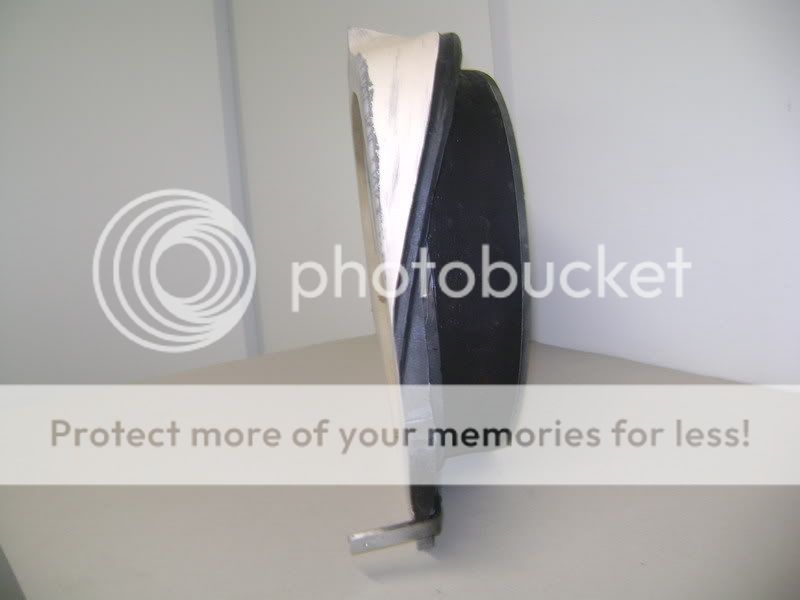
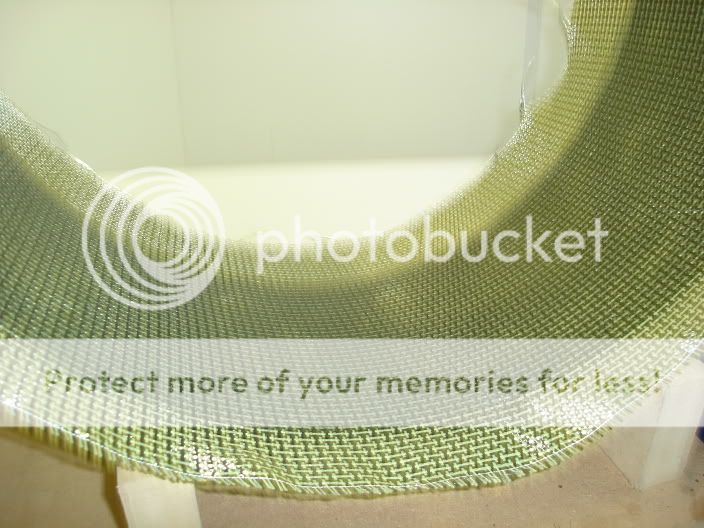
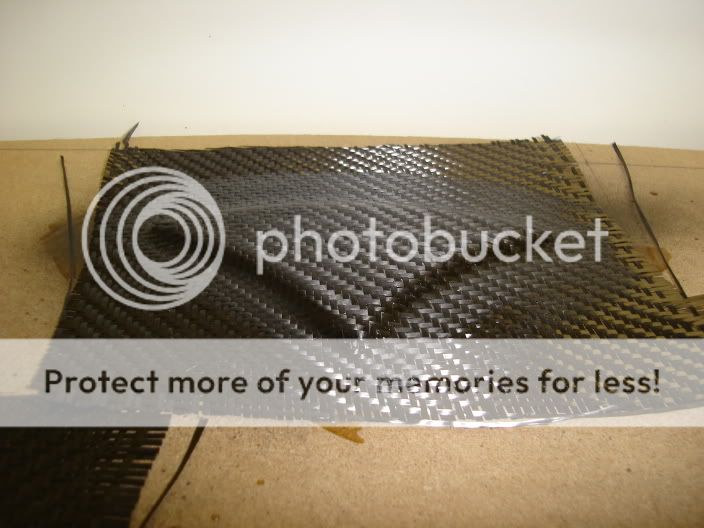
Did some preparation to stretch the cloth nicely.
The wholes you can see in the alu, don't worry about it.
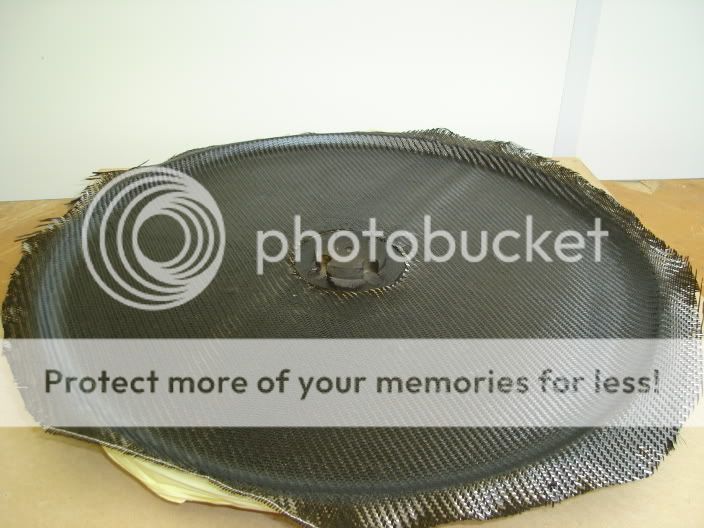
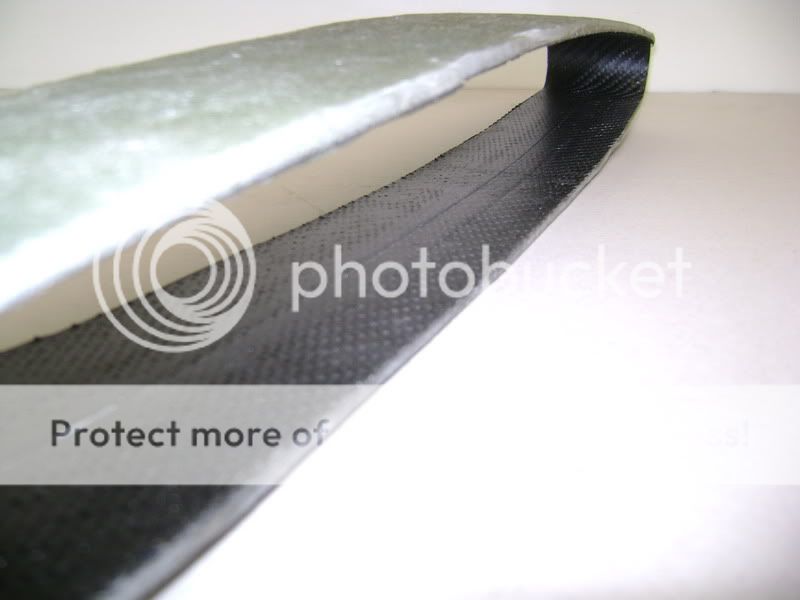
It'll be covered in CF..
The next thing on the list is something very difficult.
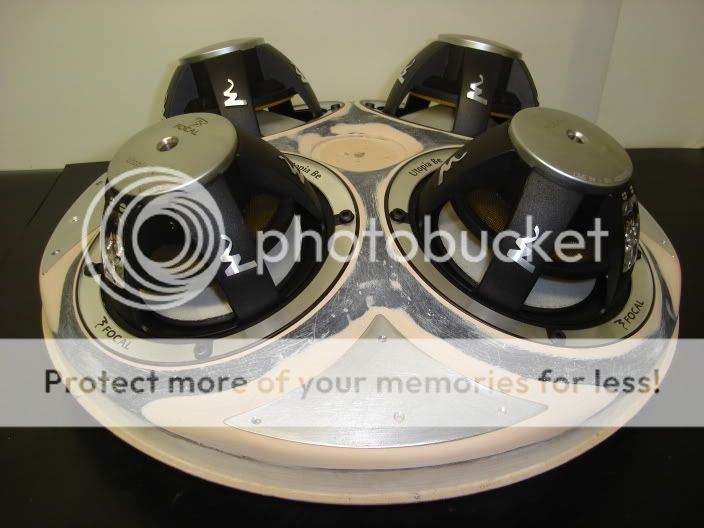
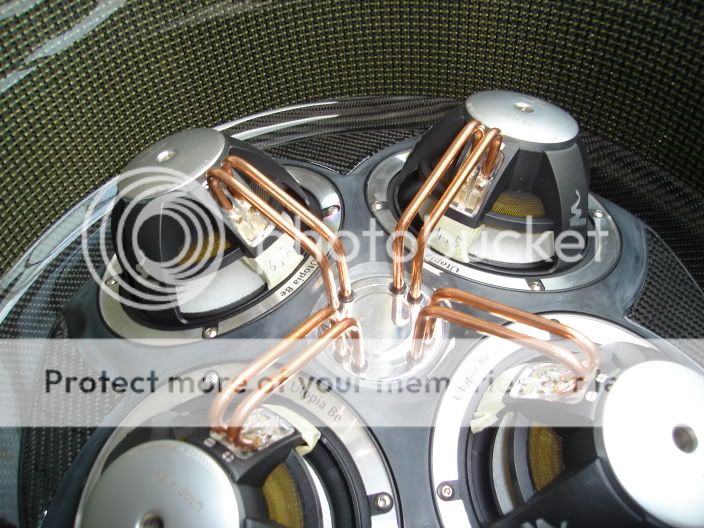
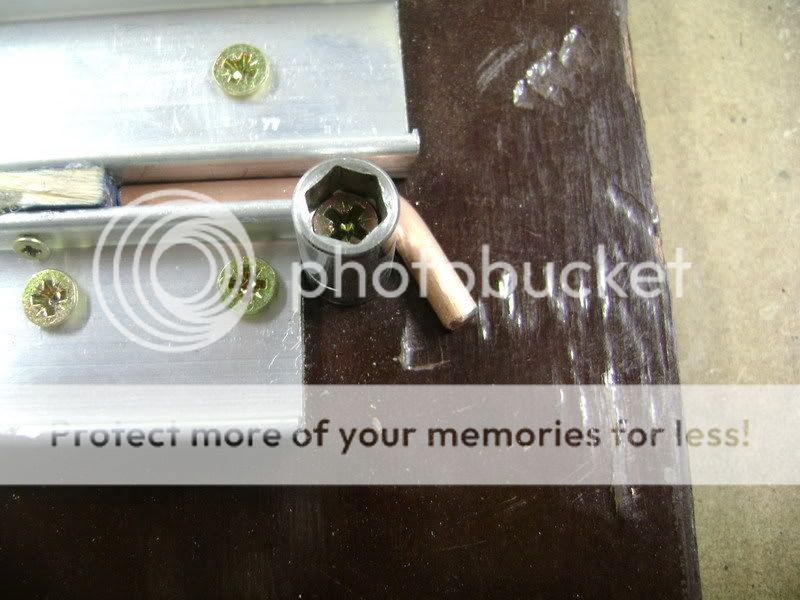
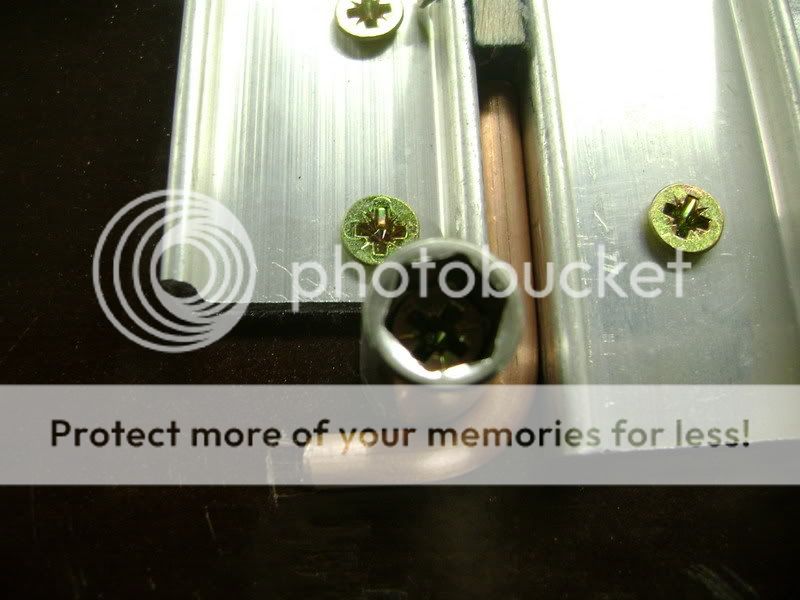
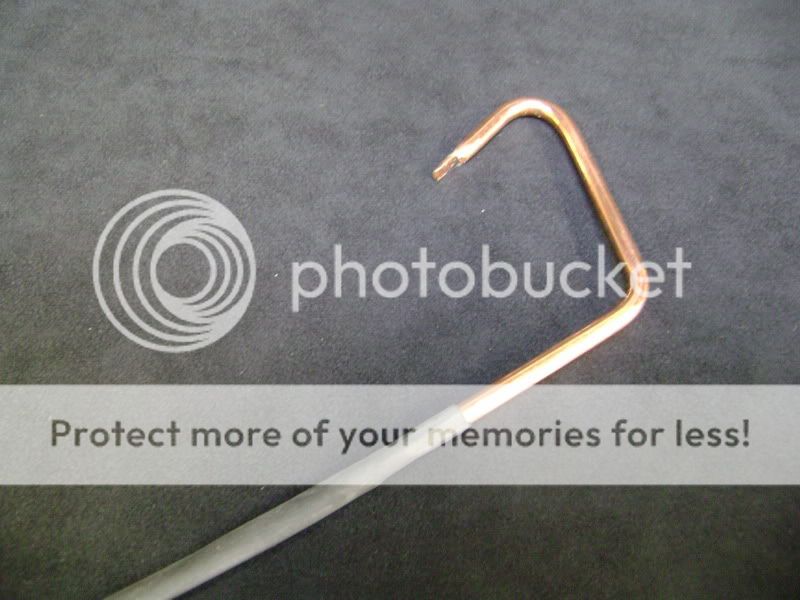
The connections of the speakers he'll make in copper, of 5mm thickness.
Cables are so boring
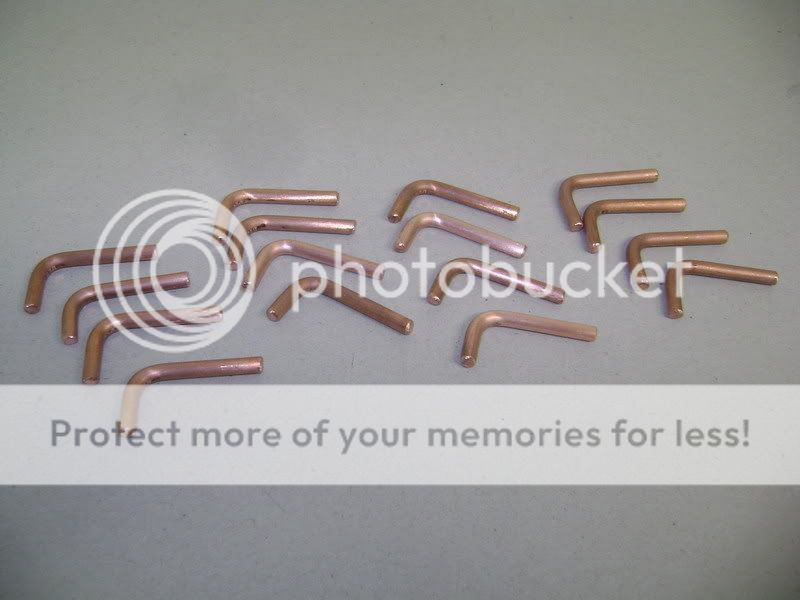
some cupper
5mm thickness, more didn't fit in the speaker. 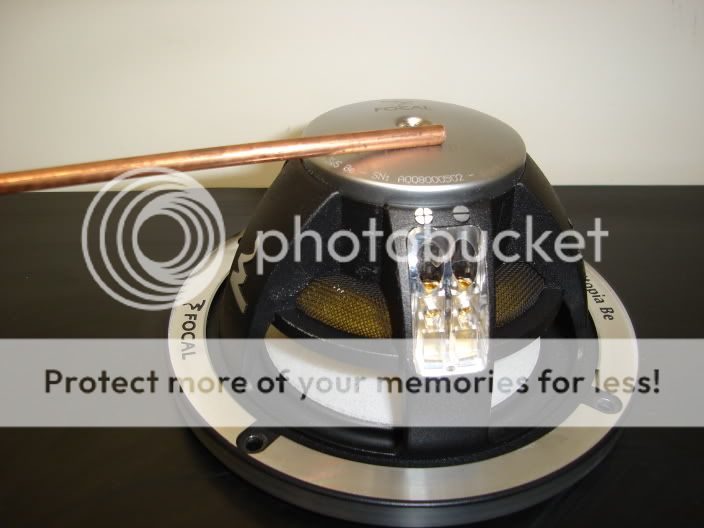
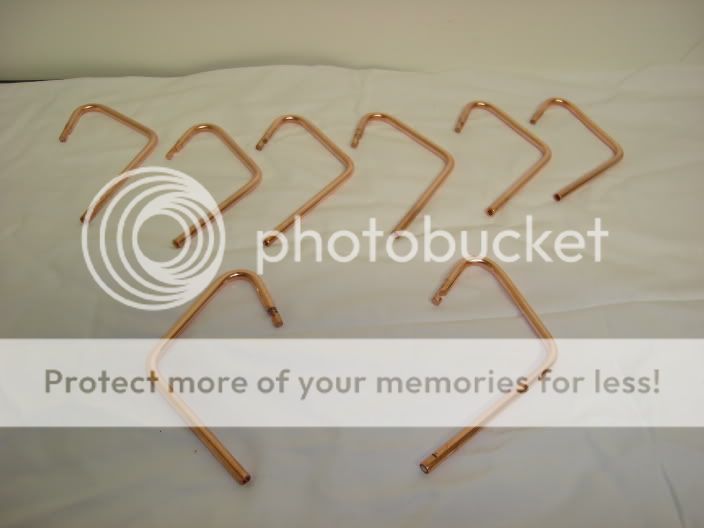
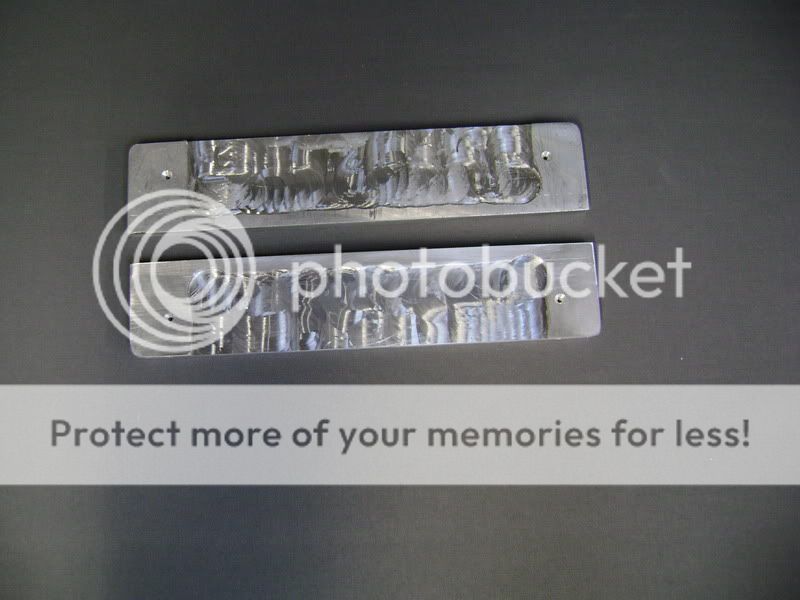
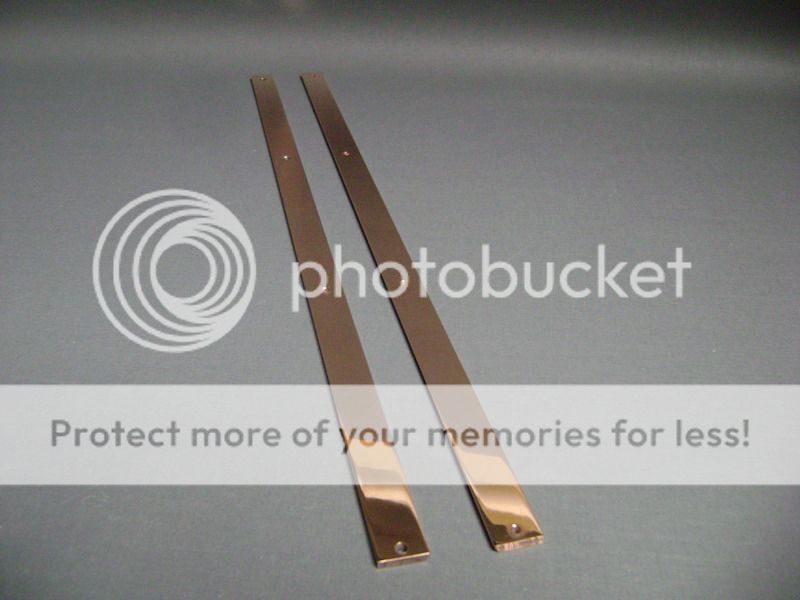
Copper connections are ready. made a model first, took a mold, and fold it the same way.
Sawed it all, rubbed it, and polished. 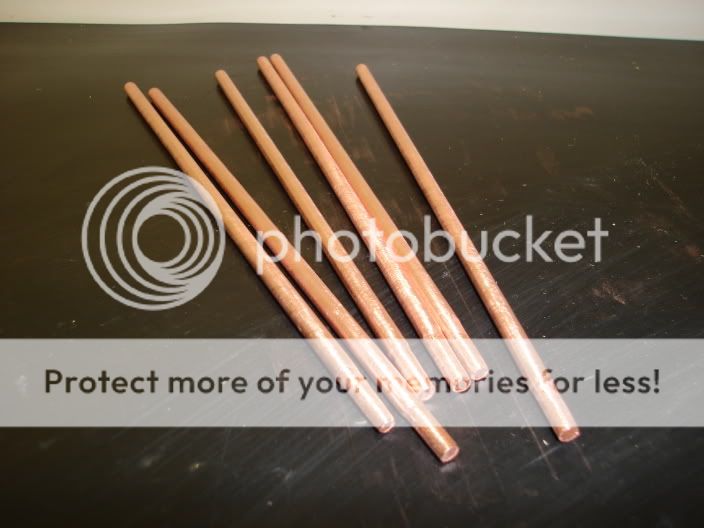
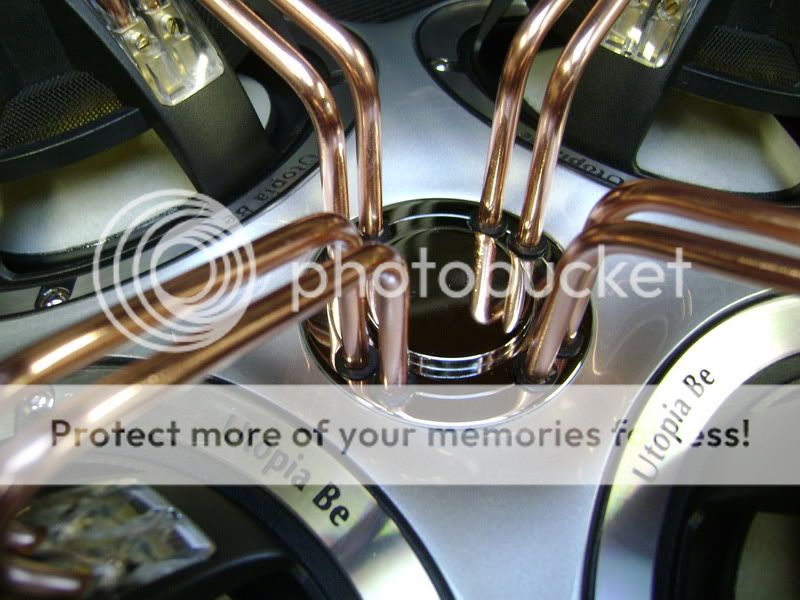
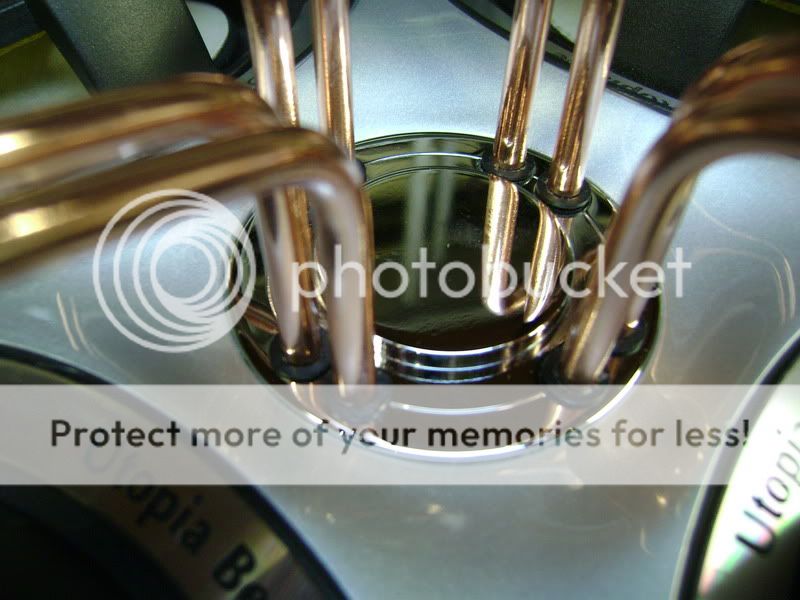
On this picture you can see he putt a whole in the bottomside to connect the cables.
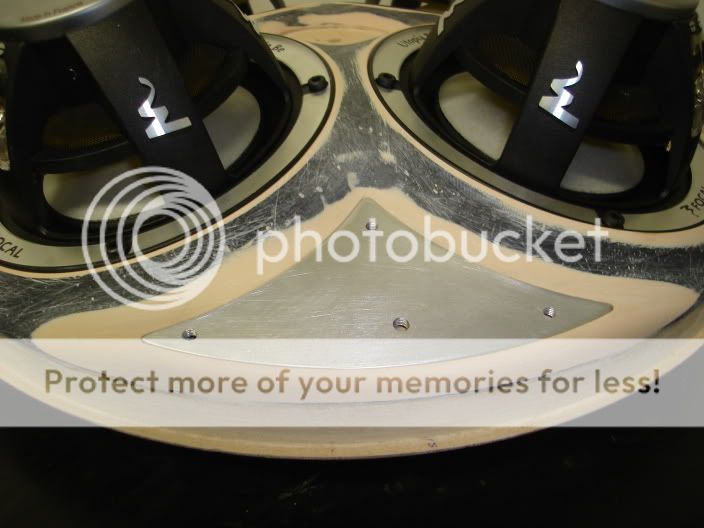
 The cupper wil go to the middle, so I made a alu plated where the bars fitt right on in. 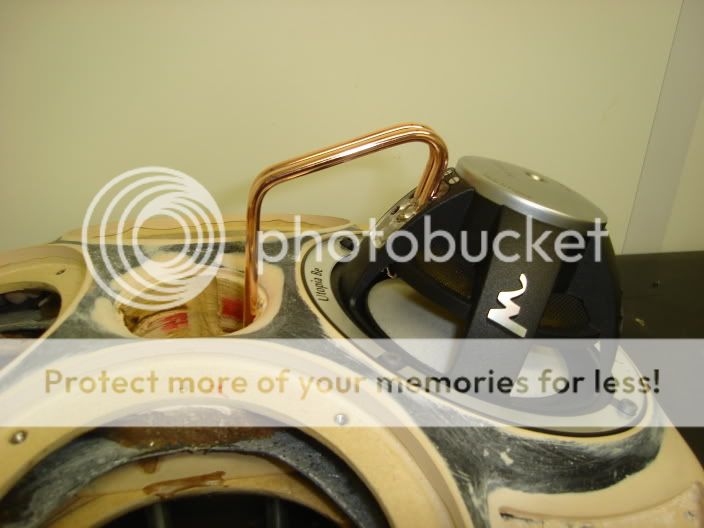


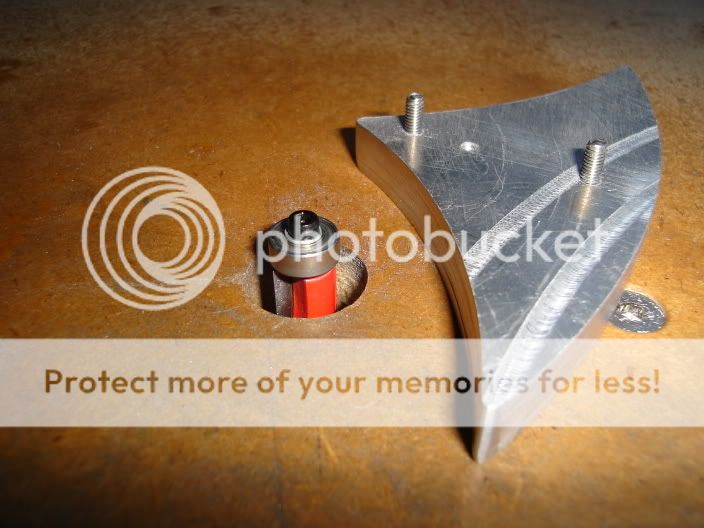
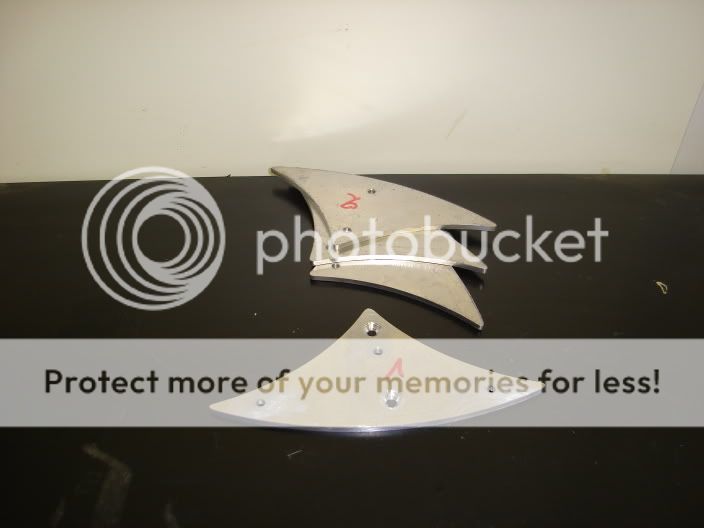
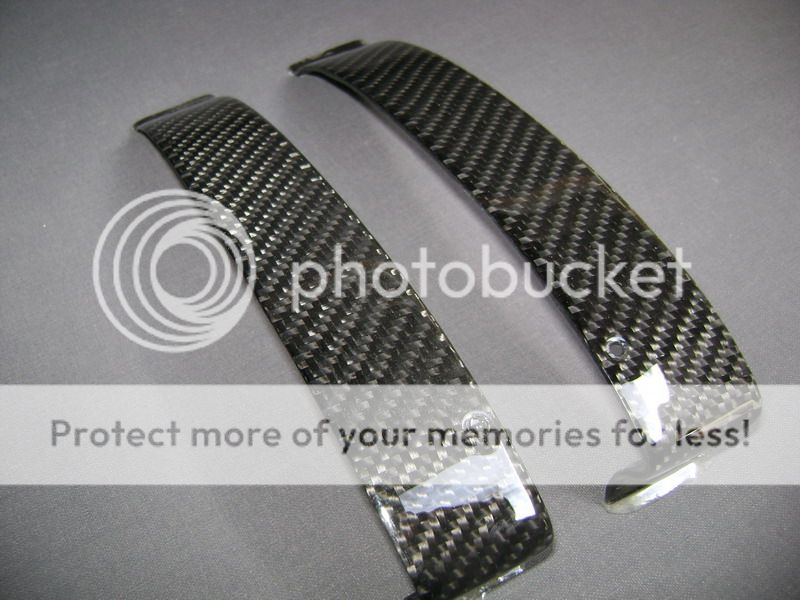
alu triangles bade in a little CF. 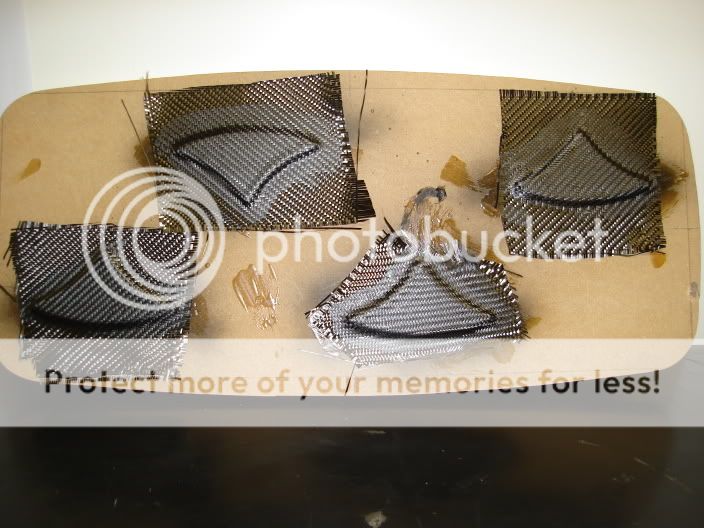
Posted By: robolop
Date Posted: August 20, 2009 at 3:05 PM
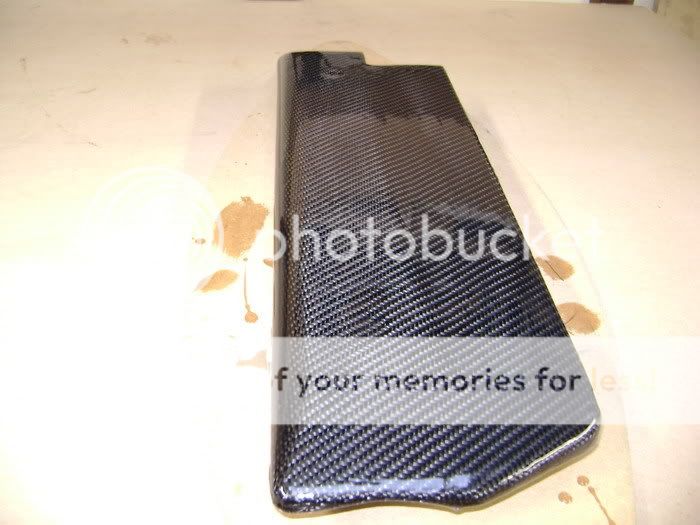
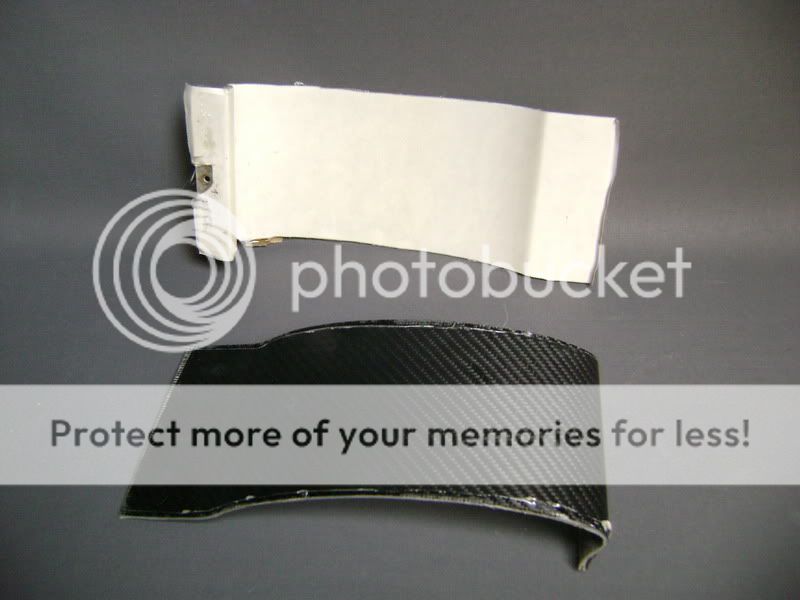
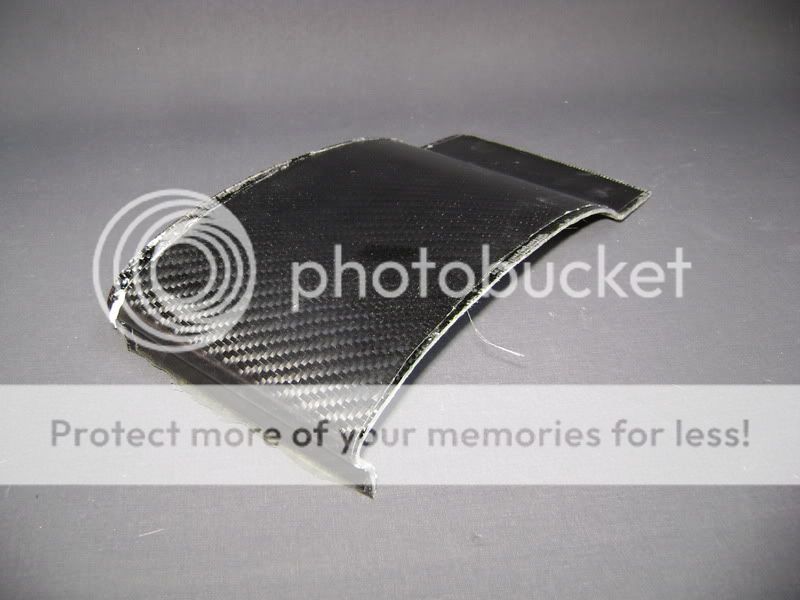
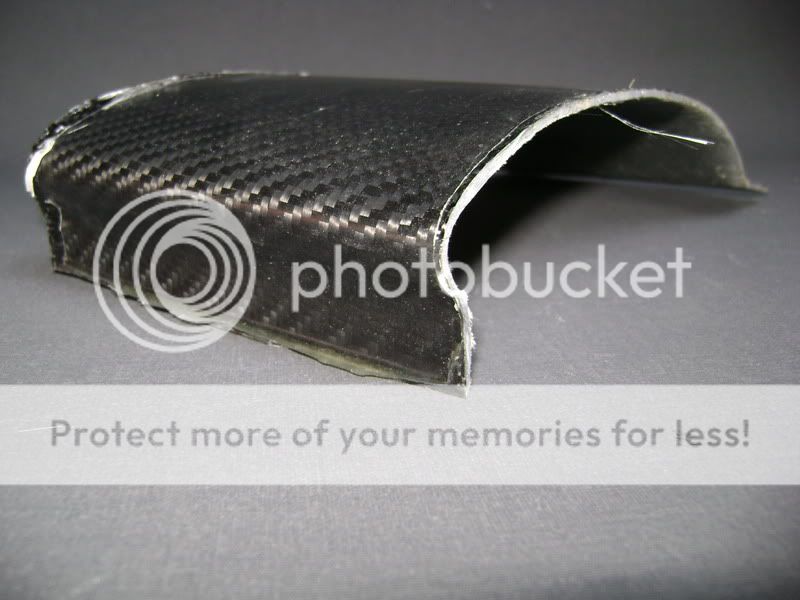
some more CF.
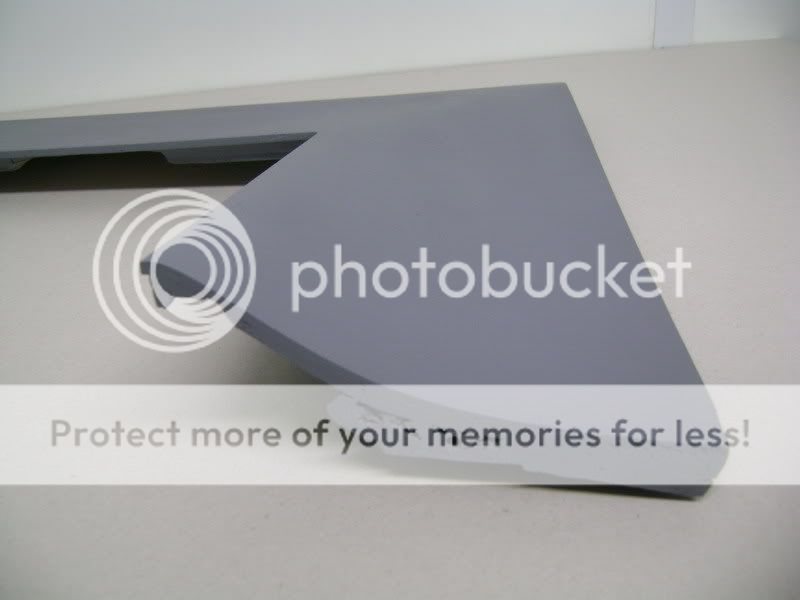
This is the bottom plate where the box is put on.
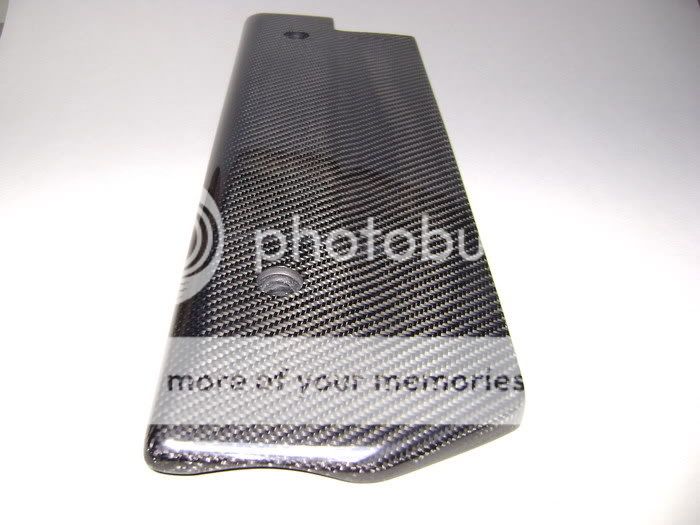
sprayed it in black offcourse, don't want the colour of the wood come throu
 Varnished it for the first time, rubbed some more, varnished, rubbed, varnished, rubbed, ........... 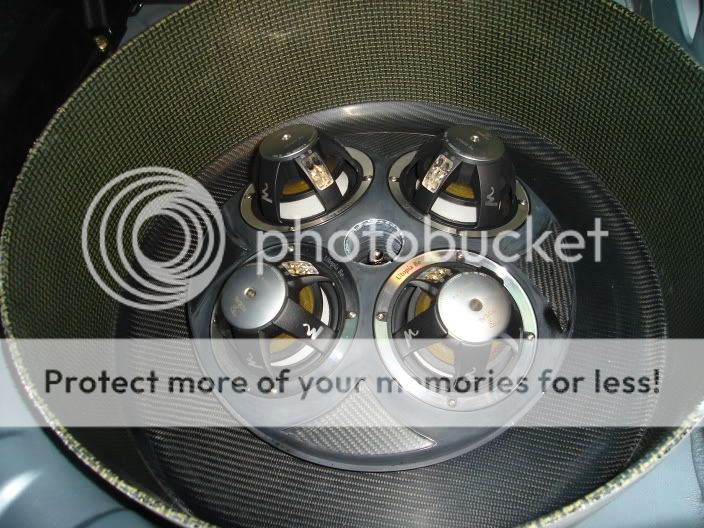
Posted By: robolop
Date Posted: August 20, 2009 at 3:06 PM
started to make the bottomplate. She will be around the BOX and rest on the chassis of the car. did it as good as possible. Leveled it with waterleveler.
Once this plate is right, you take the messurements always from this plate, so it has to be 100% correcT.
 milled to upperboard 

Posted By: robolop
Date Posted: August 20, 2009 at 3:06 PM
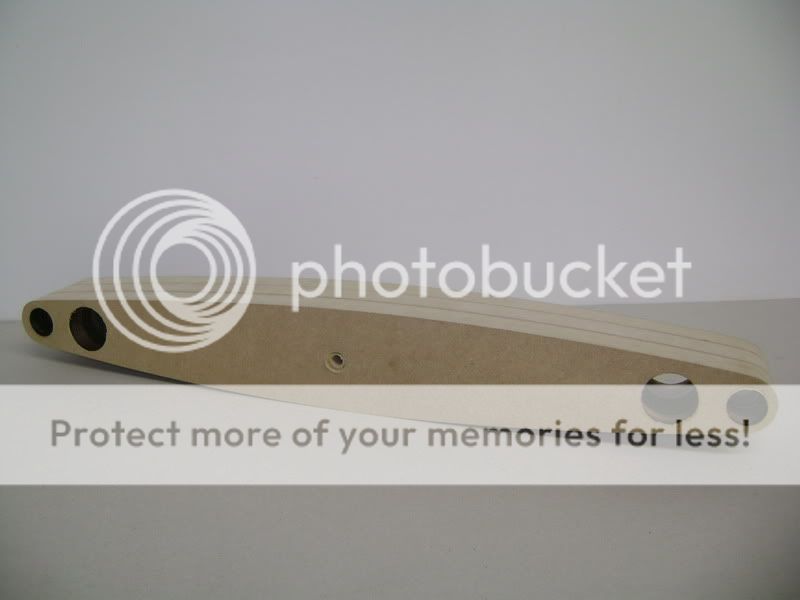
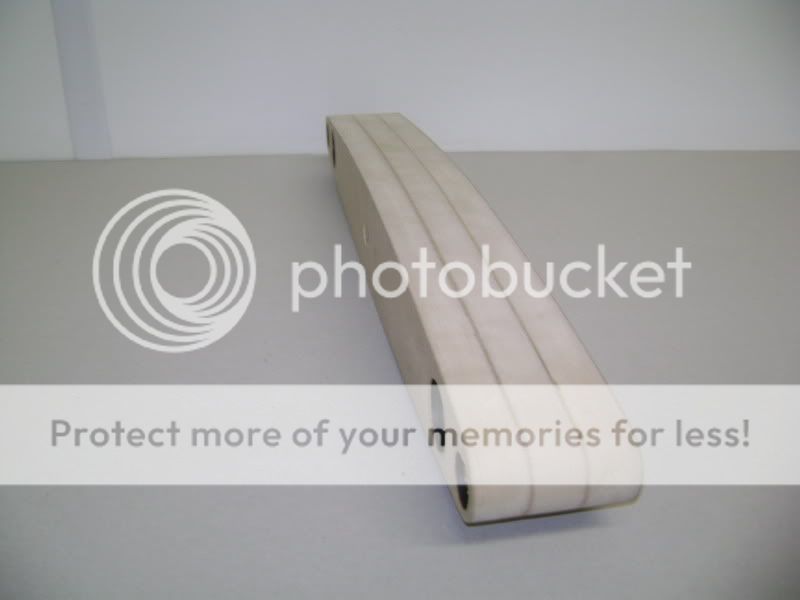
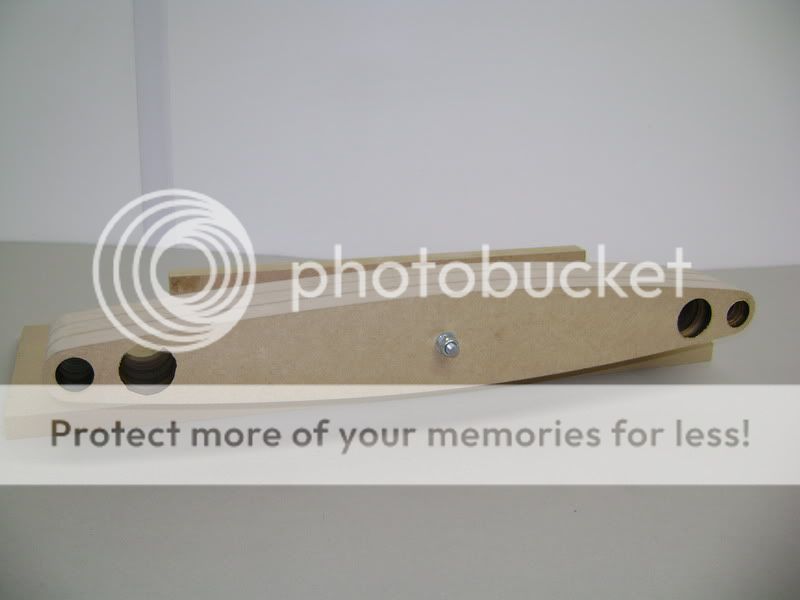
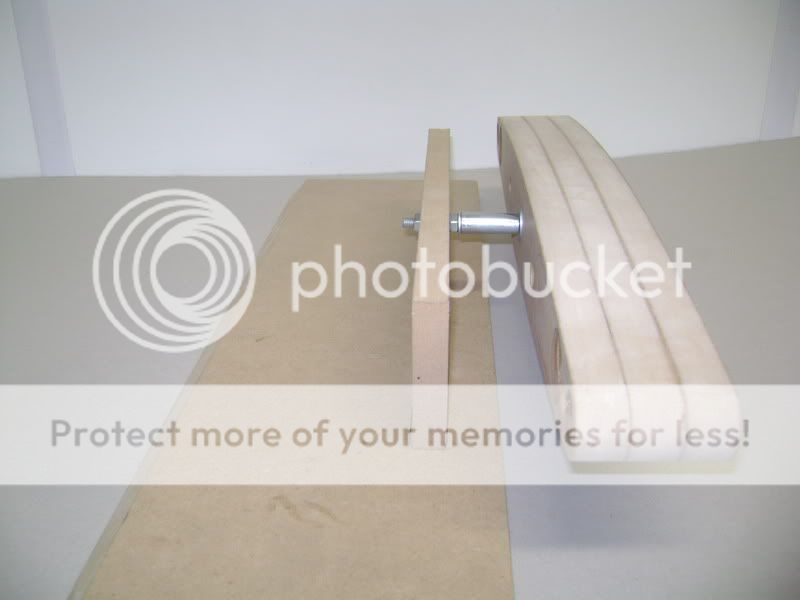
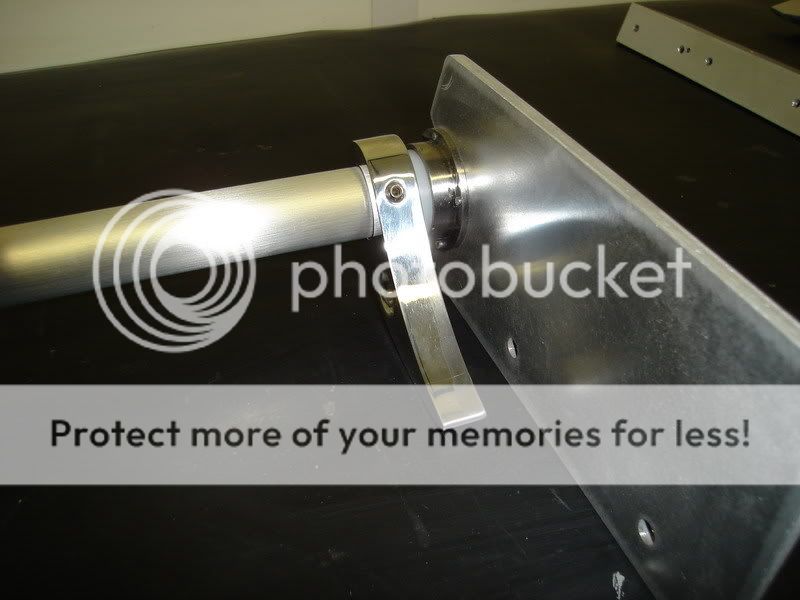
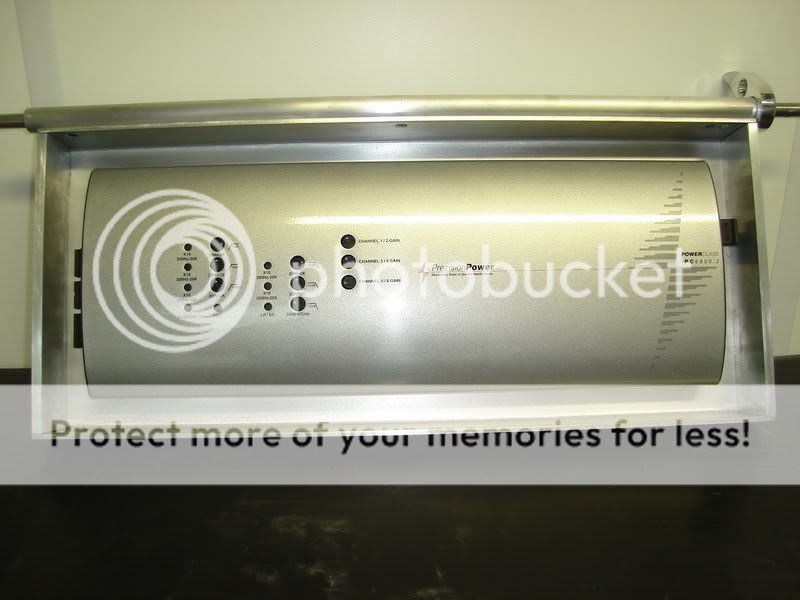
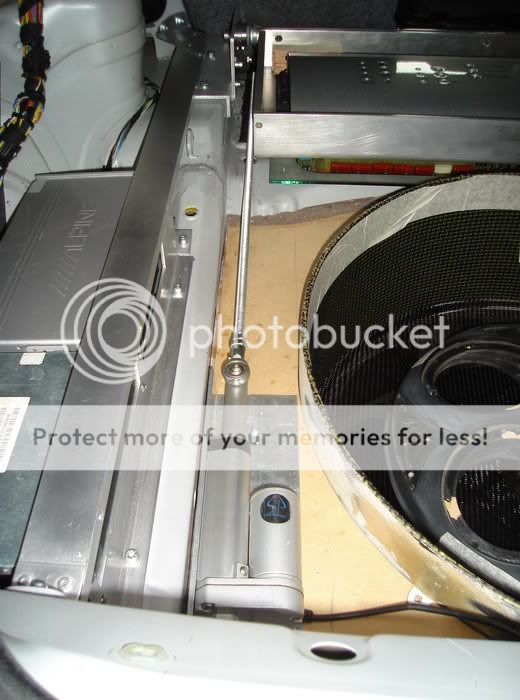
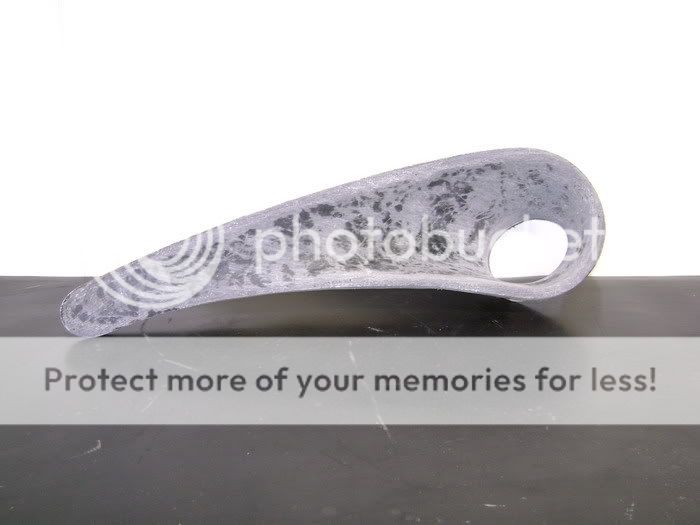
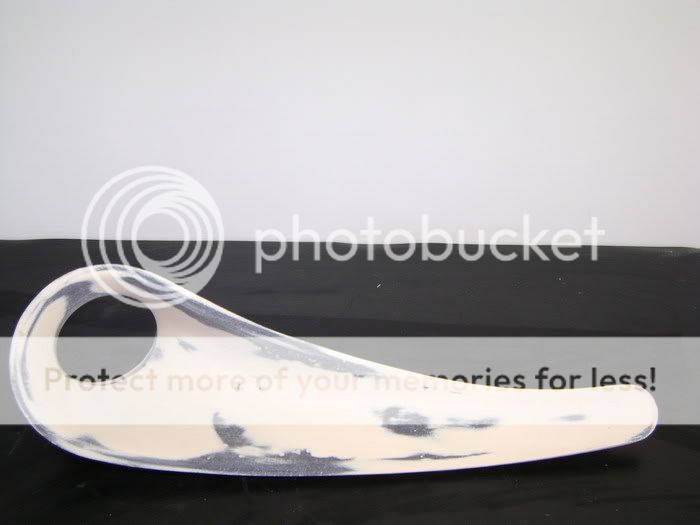
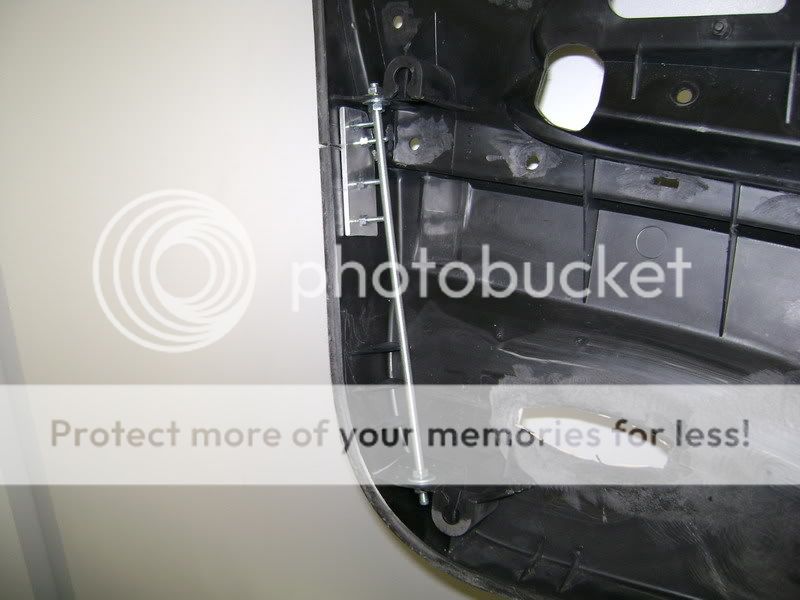
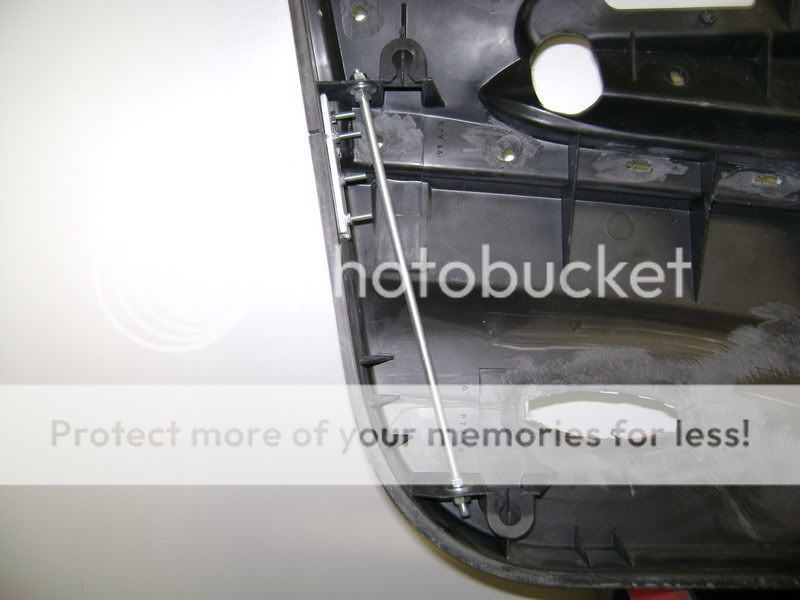
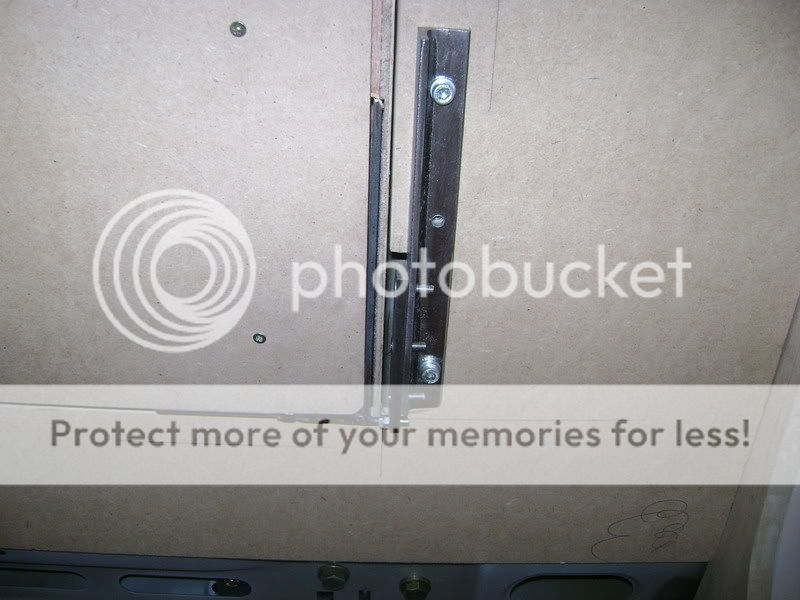
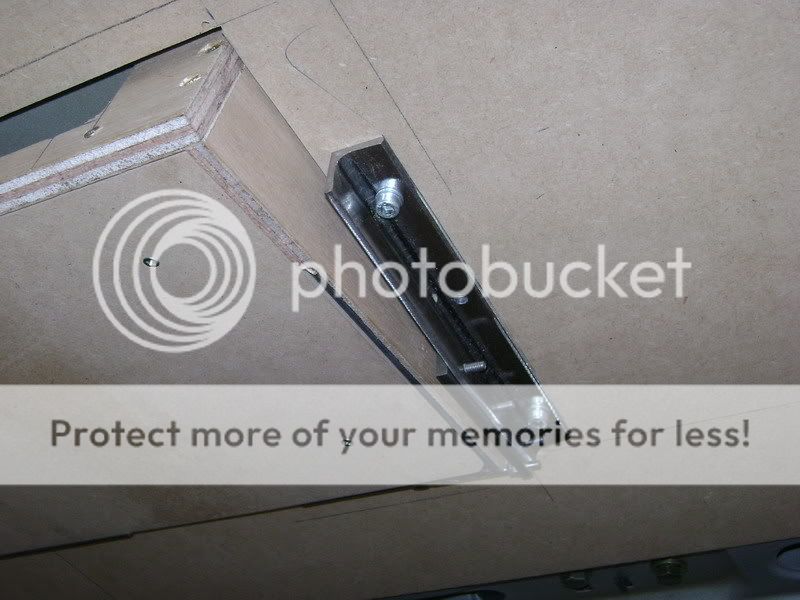
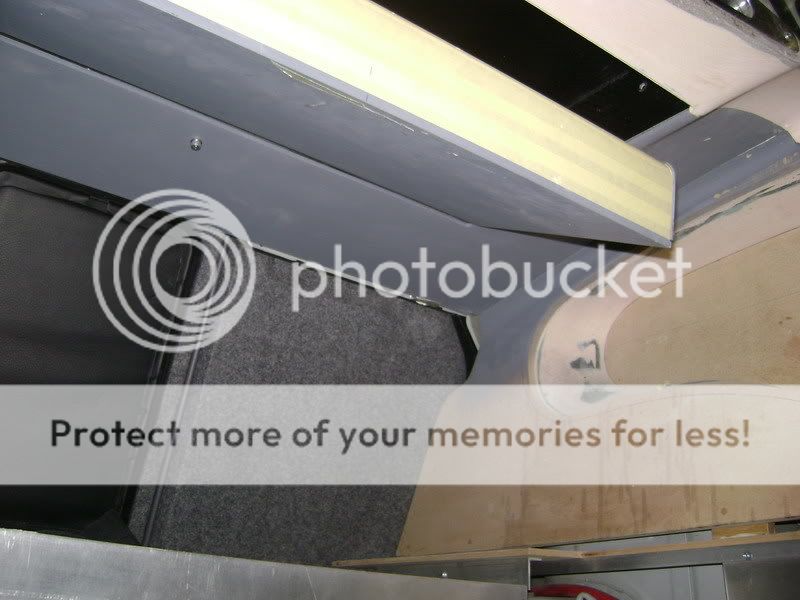
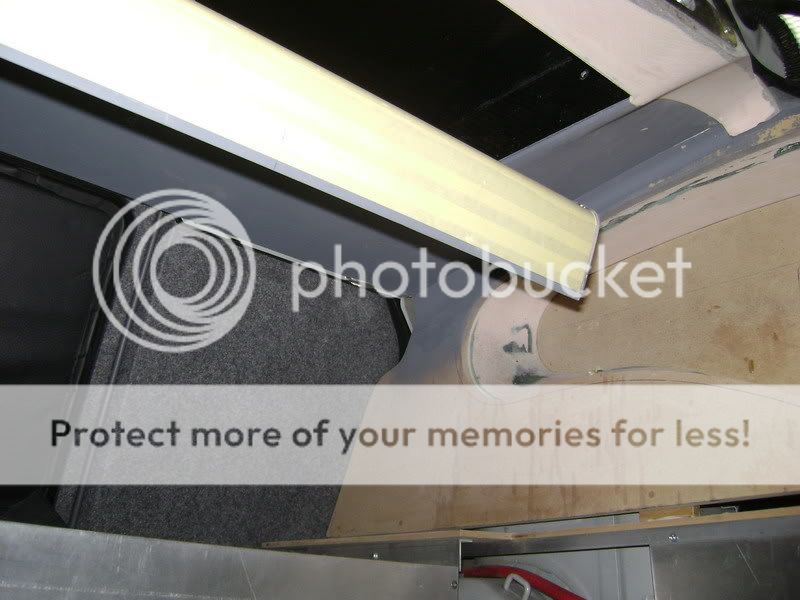
Started to make a hinge. He went to see the store, but they didn't had what he needed. So got some aluminium .. 
The meaning of this hinge, is that the amplifier can go up. So the crowbar needed to be something nice.
Cause the crowbar wil be very shot/small, he made it strong enought. (15mm thickness) 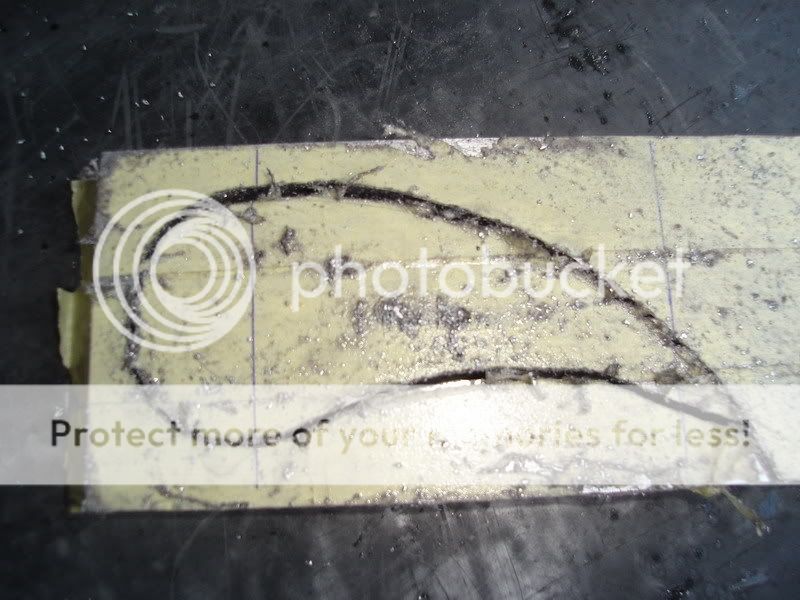
there are nicer things in life to do, but when it's finished, it was worth the work in his eyes.
Against the alu tube, he's going to weld a piece to, where he can hook the amp on. 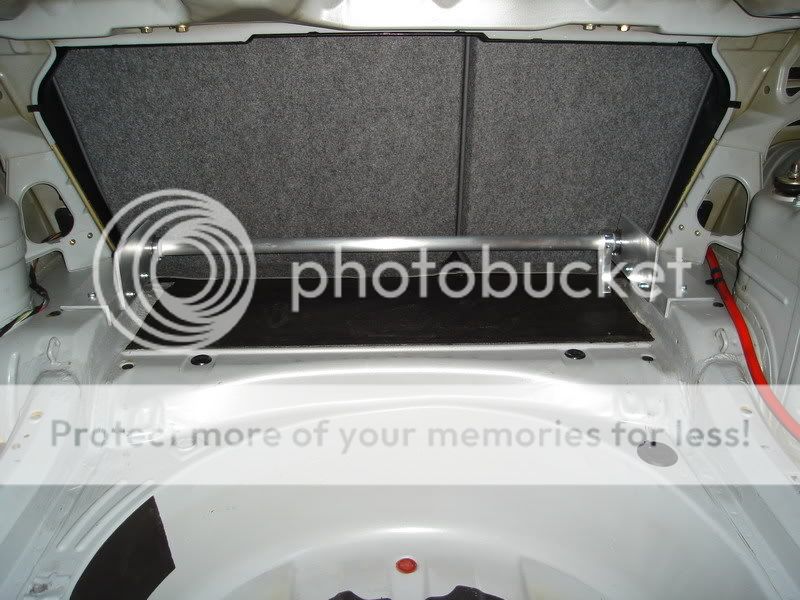

Posted By: robolop
Date Posted: August 20, 2009 at 3:07 PM
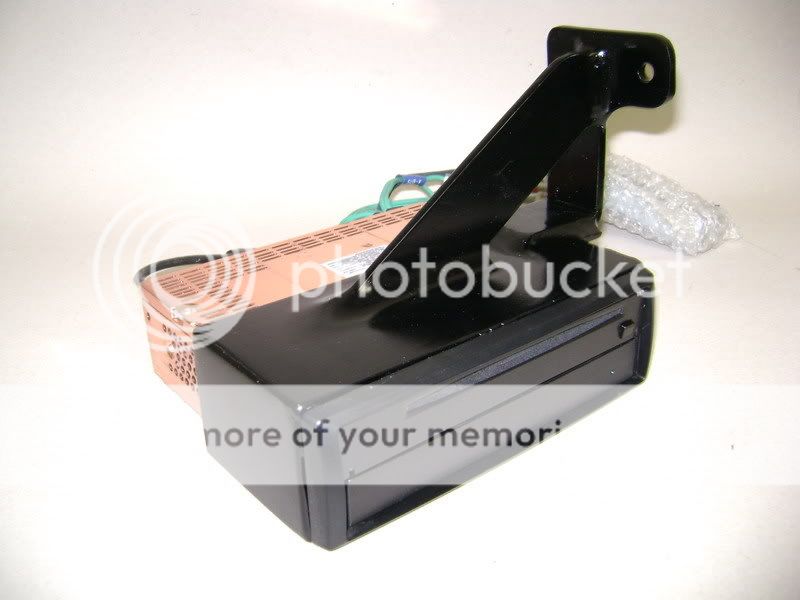
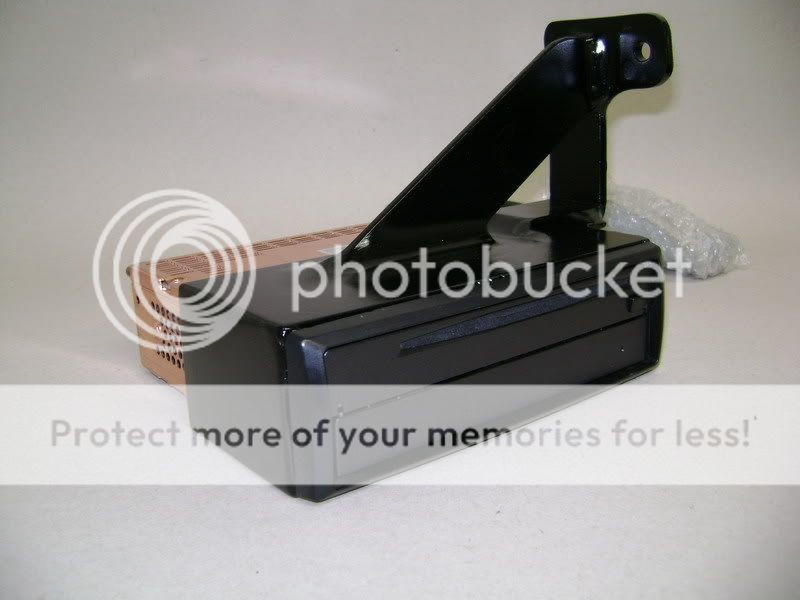
Then I started to tair apart the Alpine CD player.
Did away the front, and made some trolleys to fasten the thing. 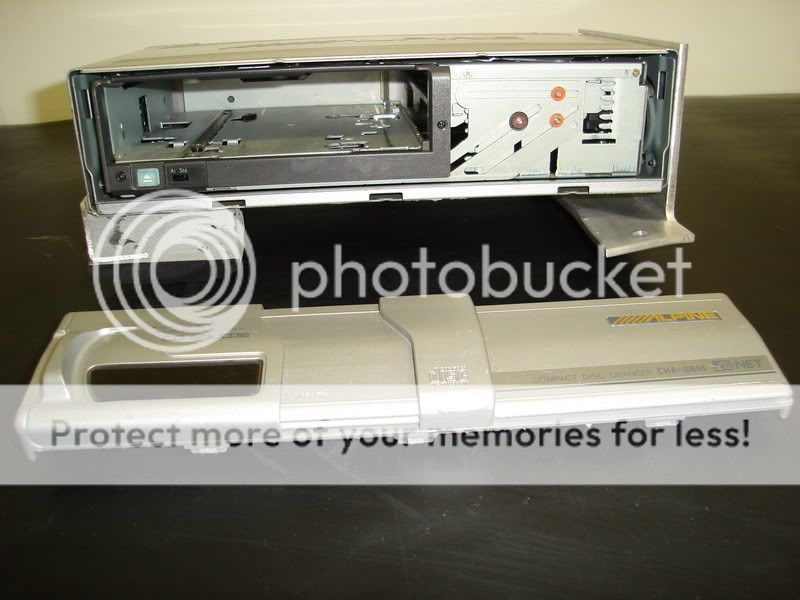
here you can see the front of the CD player

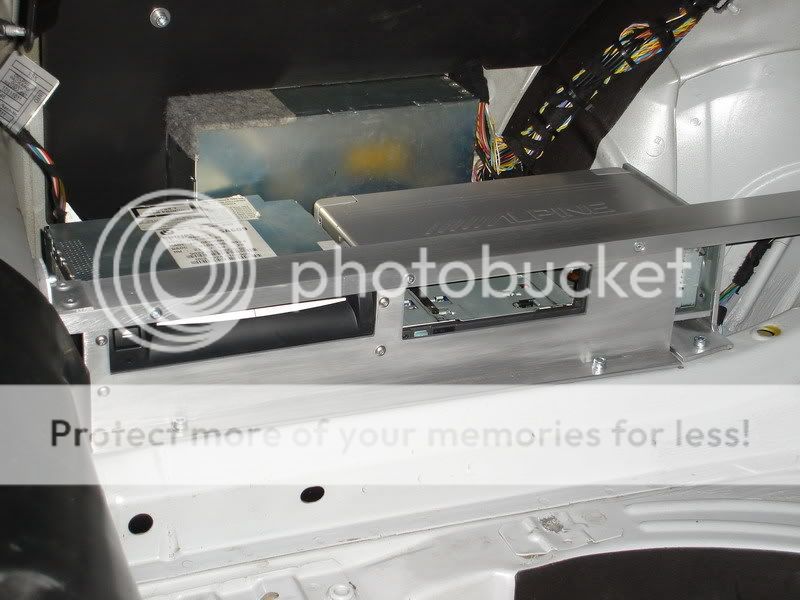
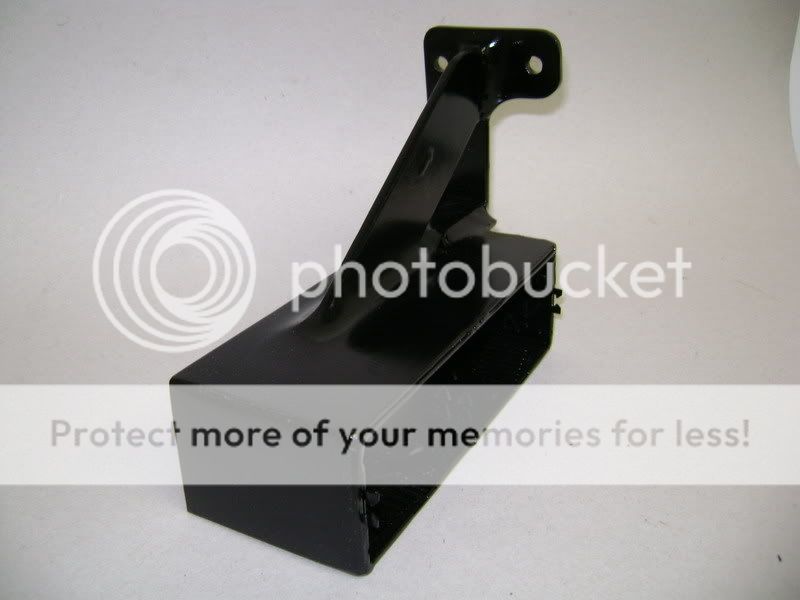
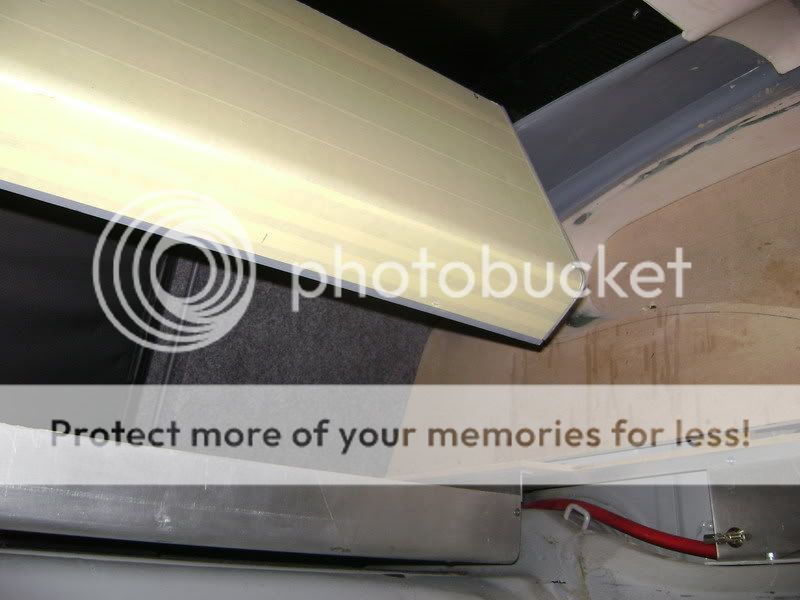
The ALU- box where the amp should come is foreseen with the hinge.
This one, he screwed on. I going to try it'l go this way.
If not, he can always weld it on...
I doesn't want to try it now, cause he's afraid it all bend of the heat.
But it's a final option...
 Will look like......
put some movement in the amp. 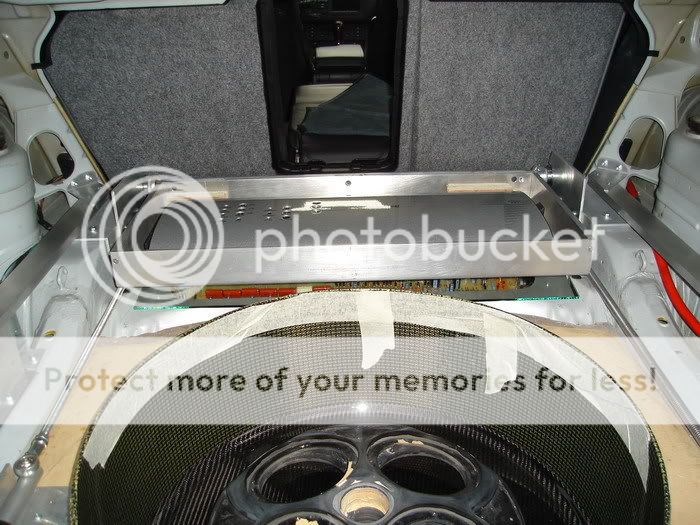

Made a fiberglass plate.
Here will be some change soon, but you have to start somewhere. 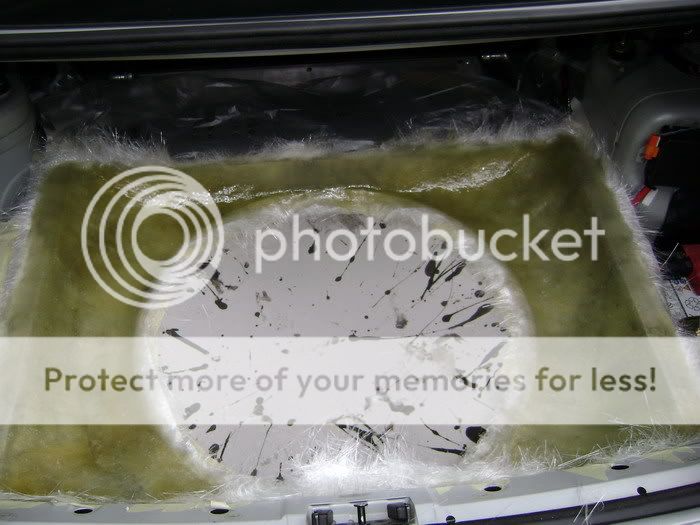
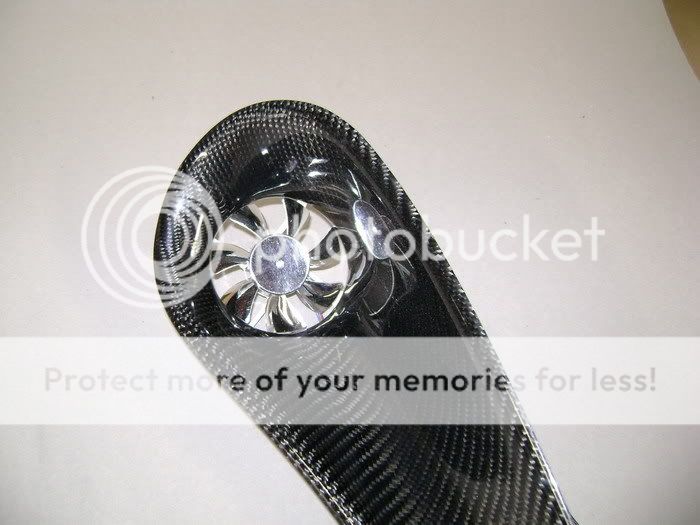
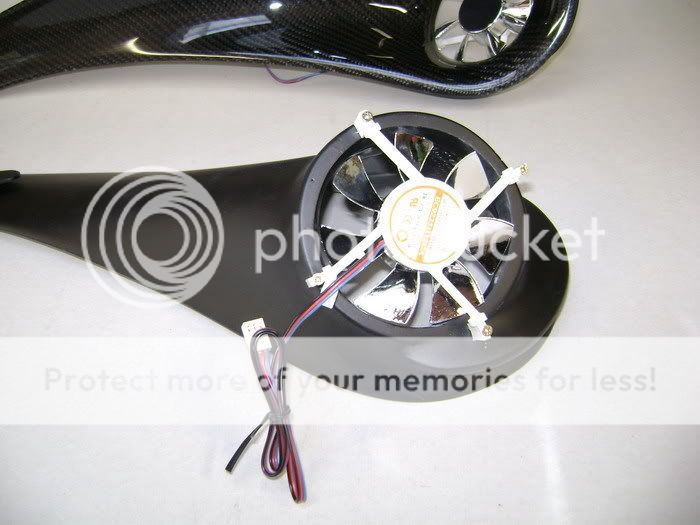
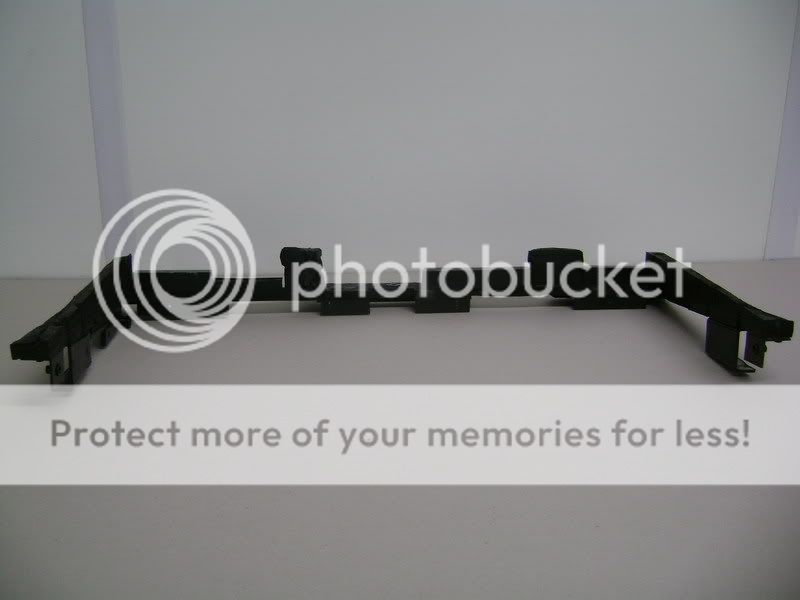
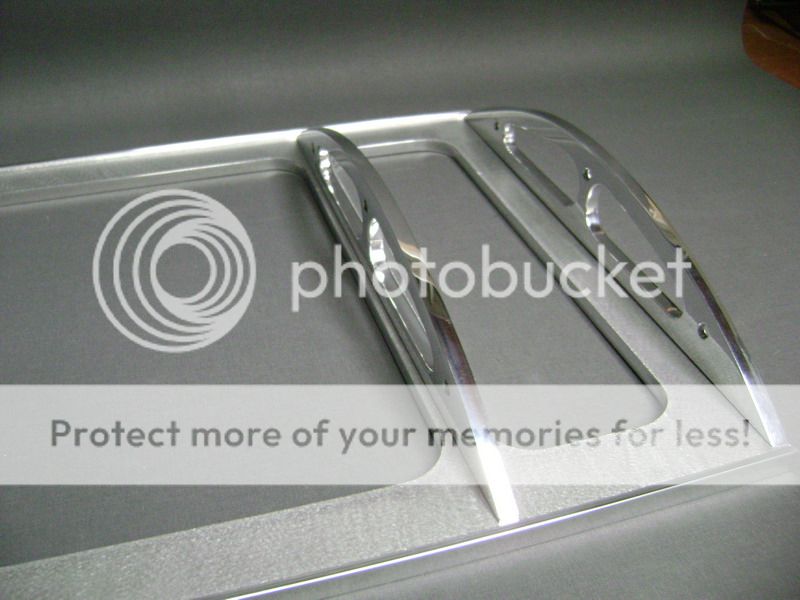
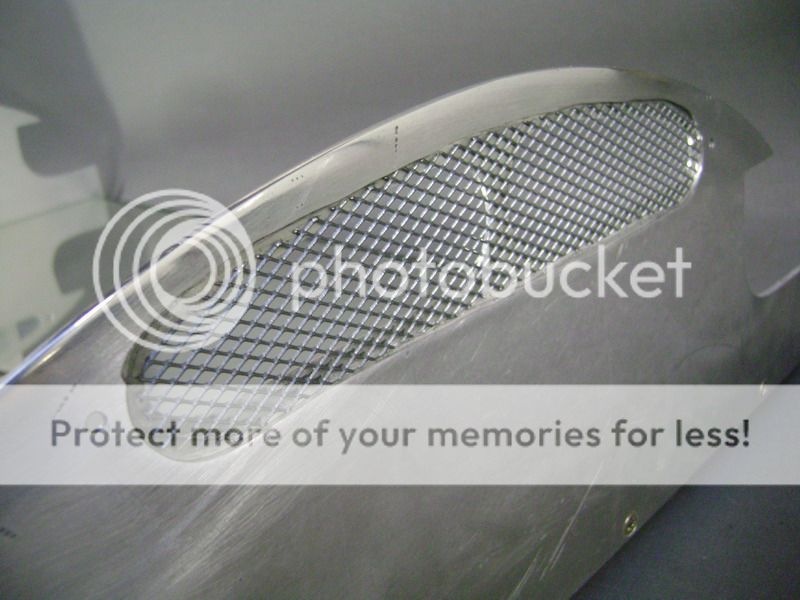
found some vents that you can take from each other.
These are from aluminium, but the frame they're in, goes in the bin.
There will be an -minor modded- version of it
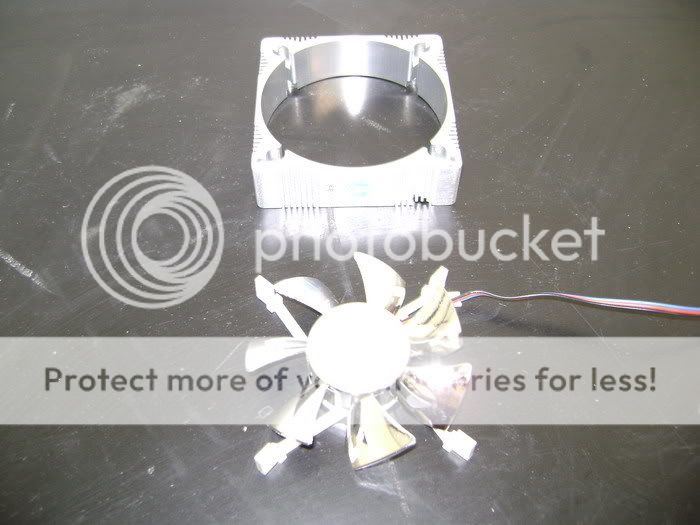 2 pieces to place in the vents, so the cooling on the amp will be better. Some chinese sticks 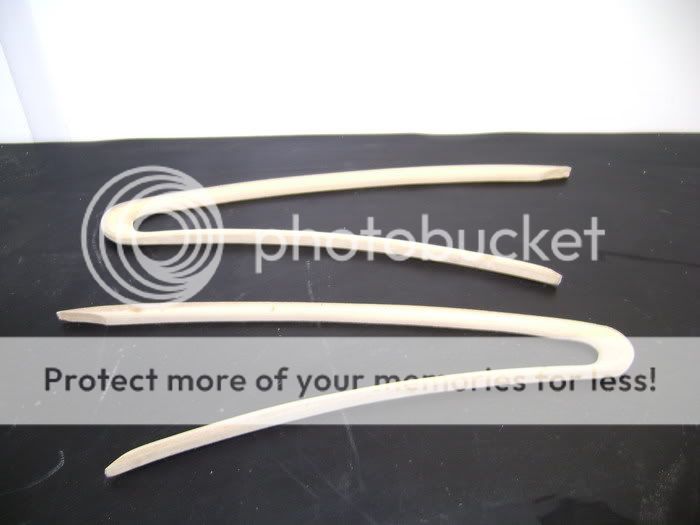
put them together 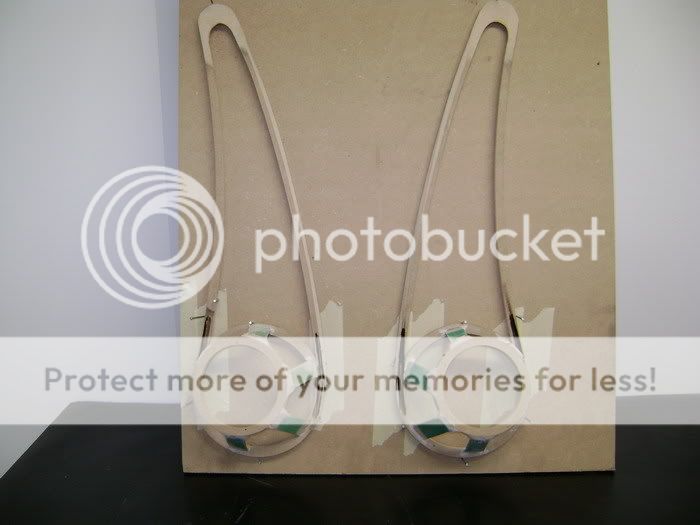
painted with polyester/fiberglass
rubbed and filled, filled and rubbed 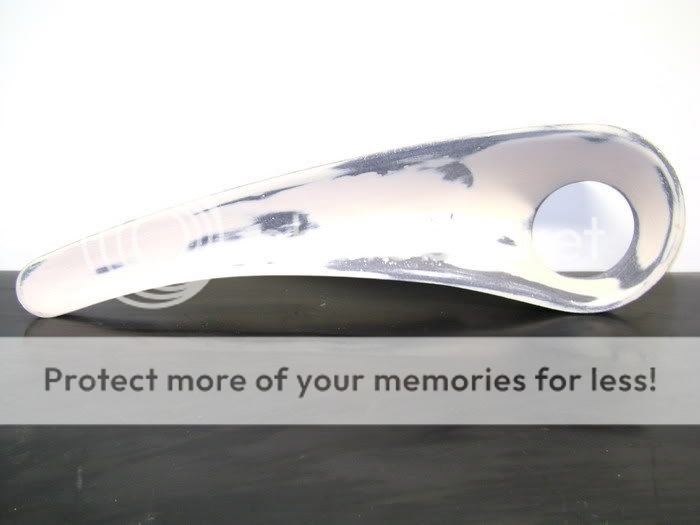
this will be carbonized 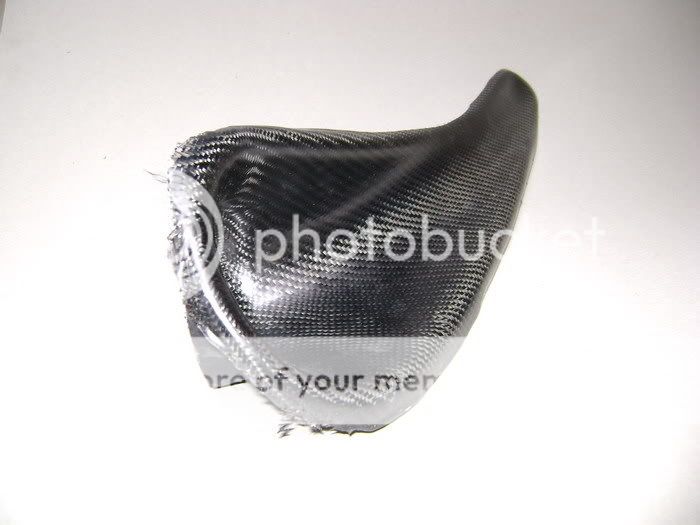
The pieces are finally done.
all that work, pppfffffff, but it was worth it .
Here's a picture from the front. You can see a V where everythings slides into.
Then he fiberglassed a little alu piece that is fastened bigtime.
In the whole those things are layed into, fiberglassed a firm alu bridge, and there the backside slides into.
These things have to come out really fast, cause his GPS and CD loader is behind it. 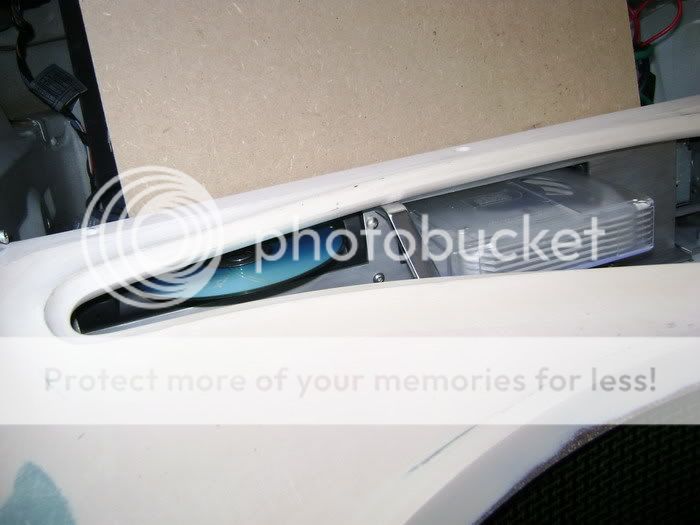
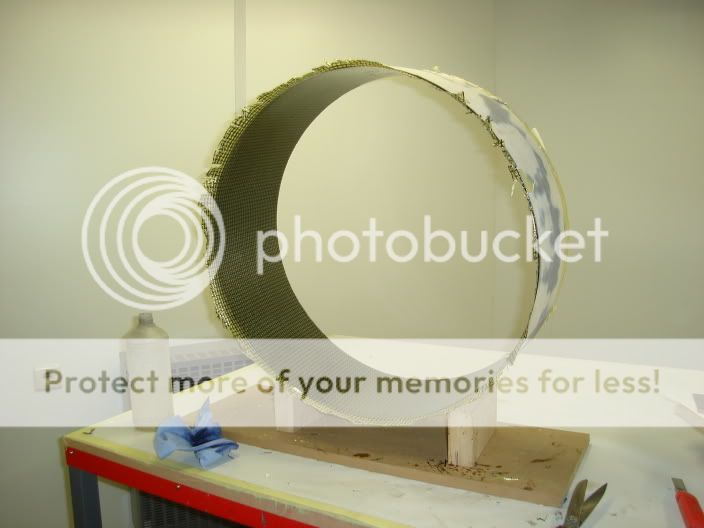
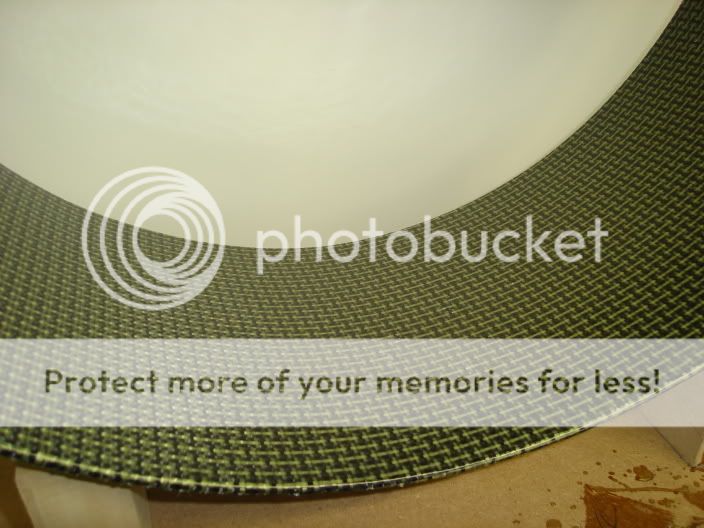
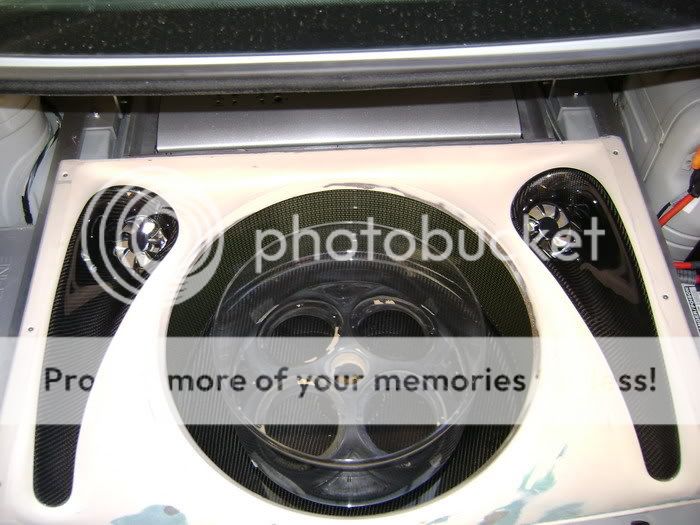
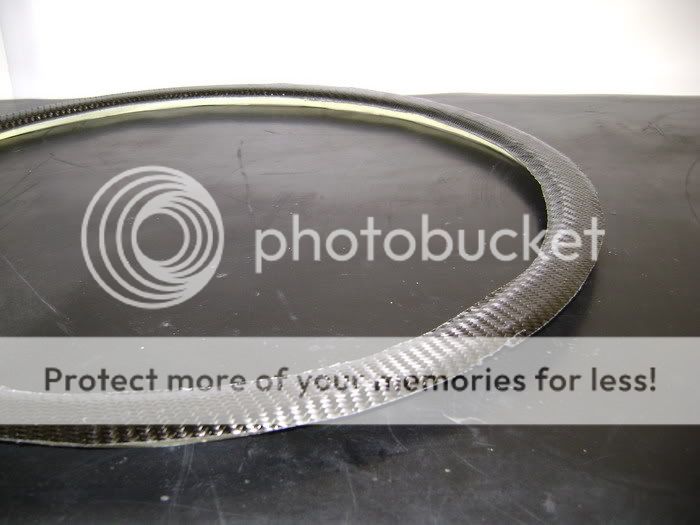
I made a grill, to cover the sub-box.
The frame es milled out of MDF wood.
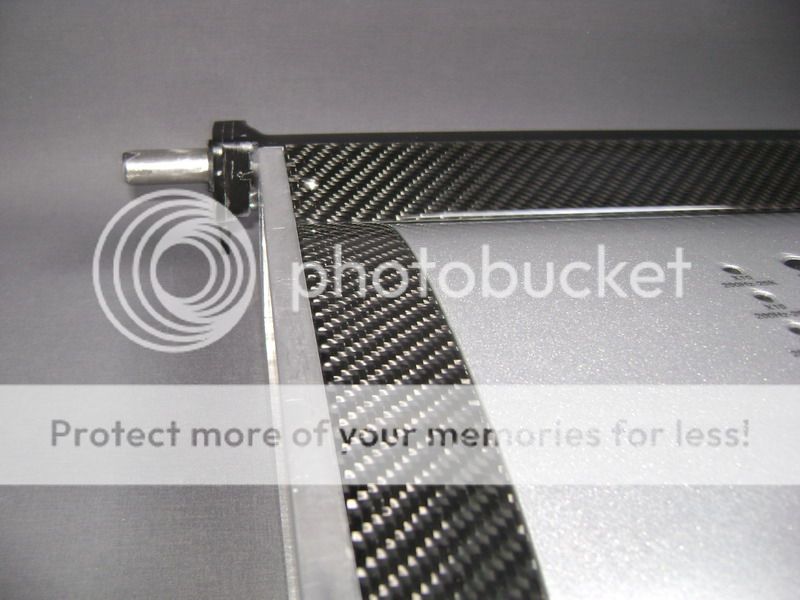
Here you can see the top of the upper ring. This one, you will see, and will be covered in Carbon

On the picture, you can see he miled a little ditch. 
covering the frame in Carbon 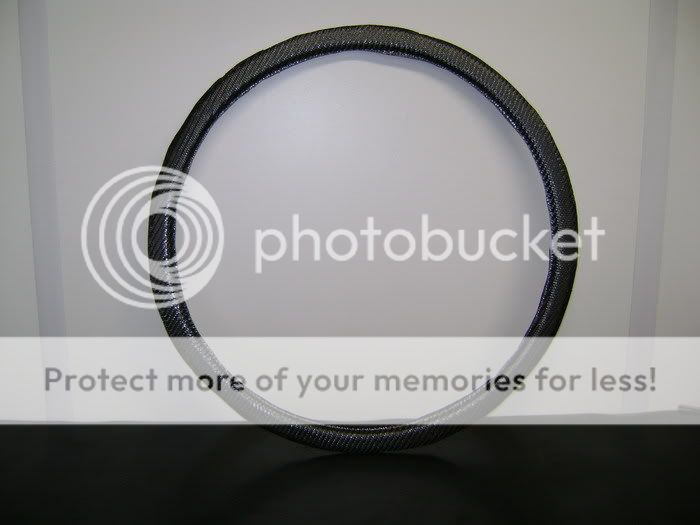
Posted By: robolop
Date Posted: August 20, 2009 at 3:10 PM
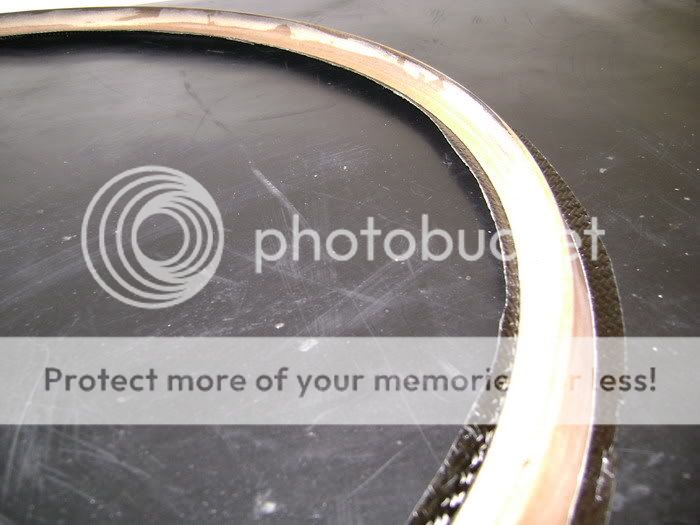
This will be the inner-ring, what goes in the grill.
First I mild a MDF wooden ring and rounded the edges. What you see now is the upperside. Comes in CF btw

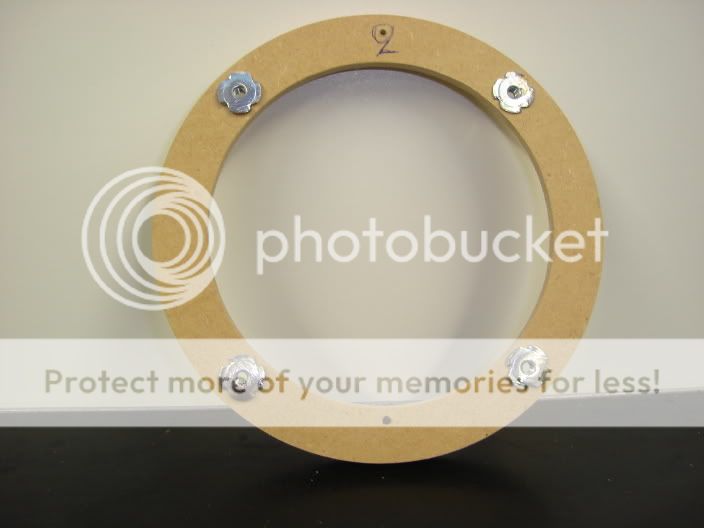
this is the bottomside. You see I made some screwbusses in it.

Made an alu ring of 3mm thick for on the bottomside. Must be very solid so the grill can't bend in the middle. 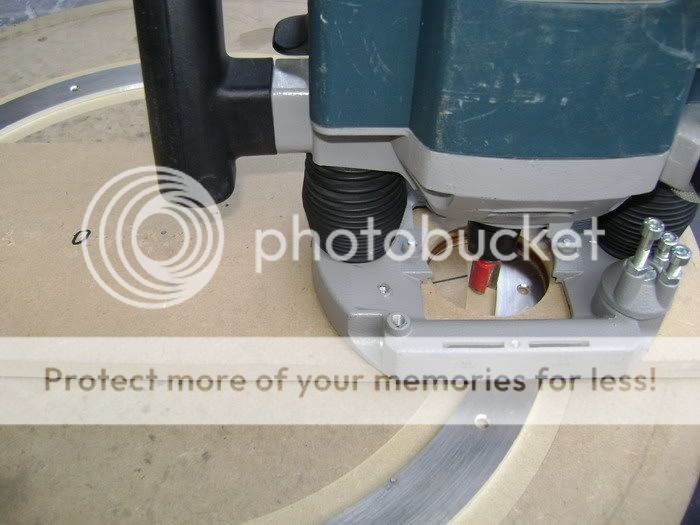
Here you see the 2 parts on each other. Between there's 2mm place for the innox plate on the outside, and the alu from in the centre. 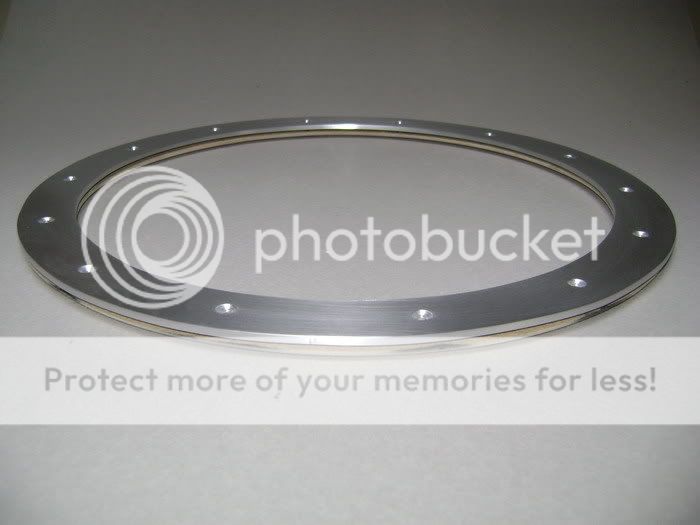
The middle ring going into Carbon Fibre. Need some more layers of epoxy though.. 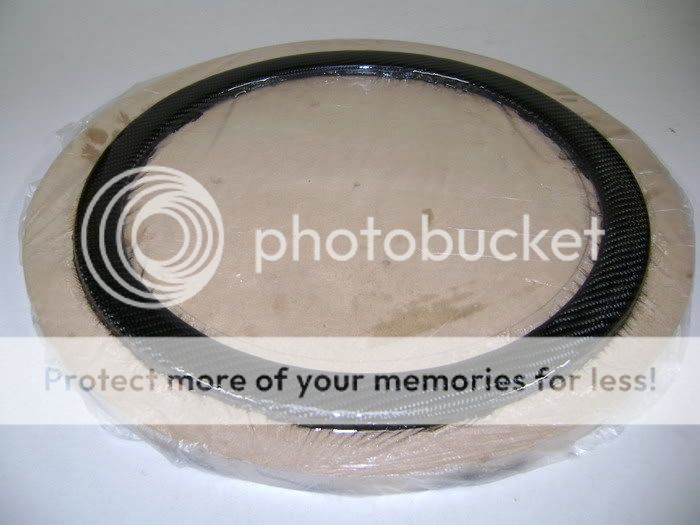
Posted By: robolop
Date Posted: August 20, 2009 at 3:11 PM
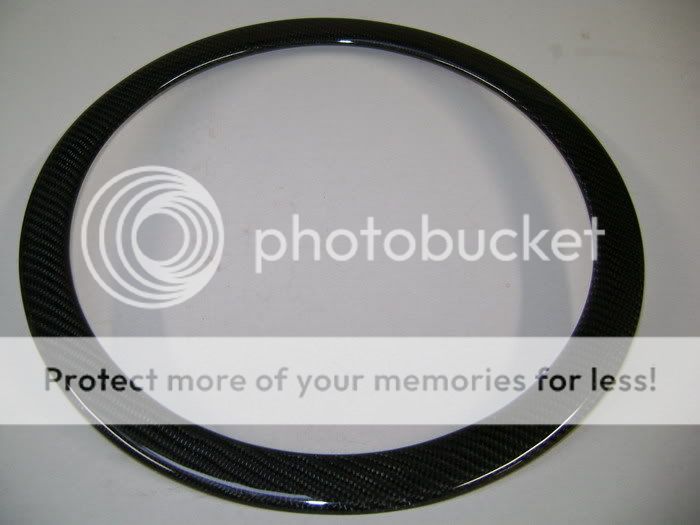
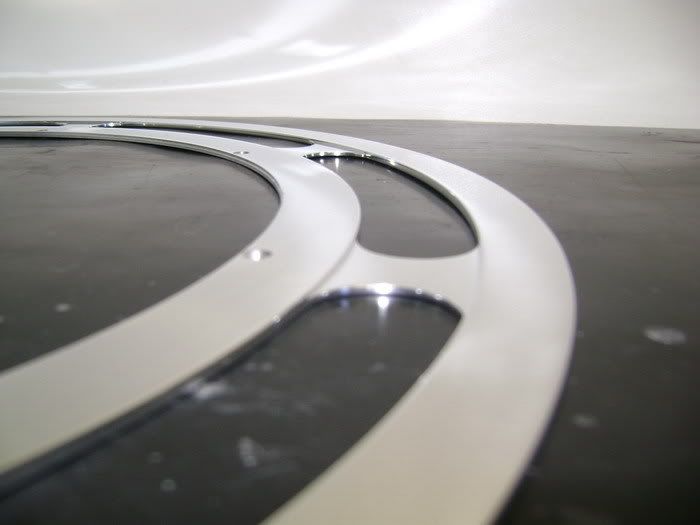
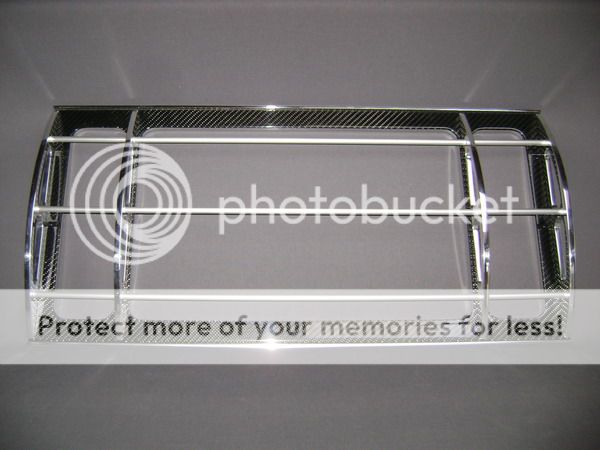
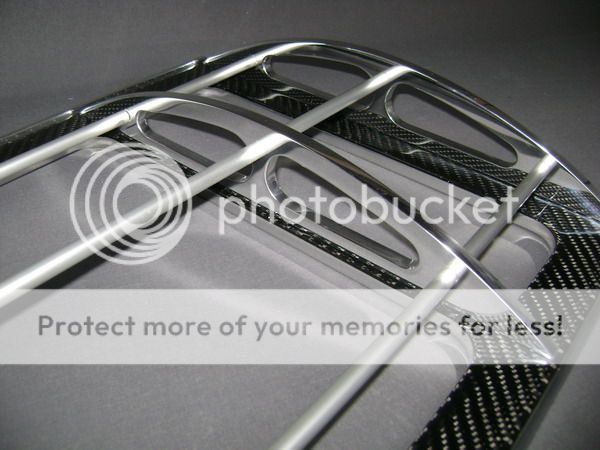
Took the uppermill and started the outer-ring. 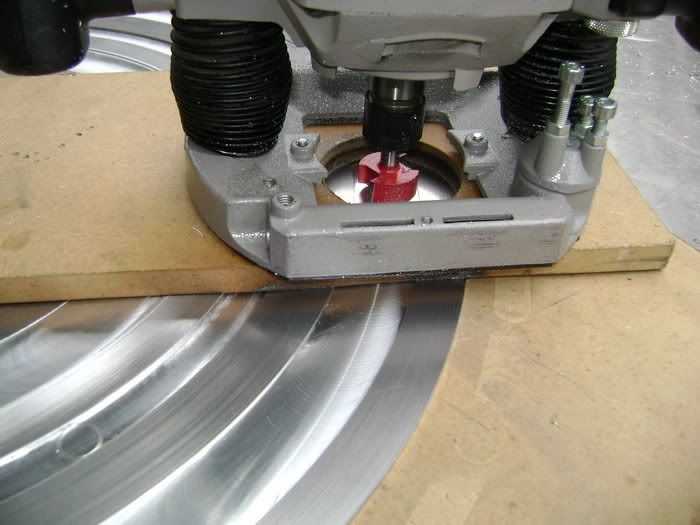
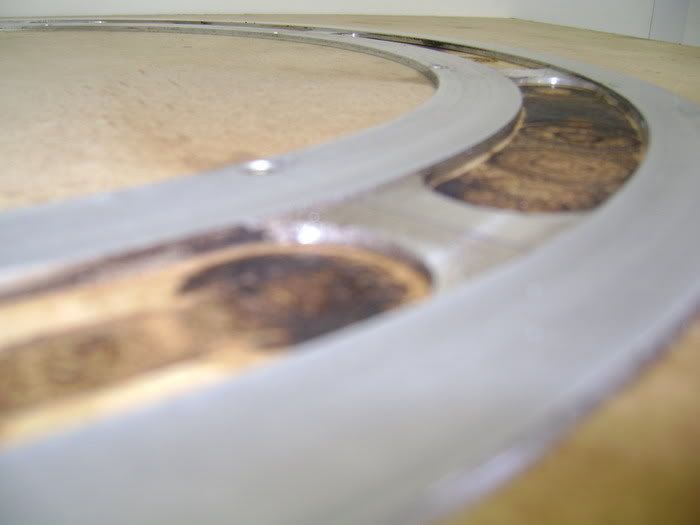

Started to begin polishing. Is a heck of a job, people who polished with heavy machinery before know...
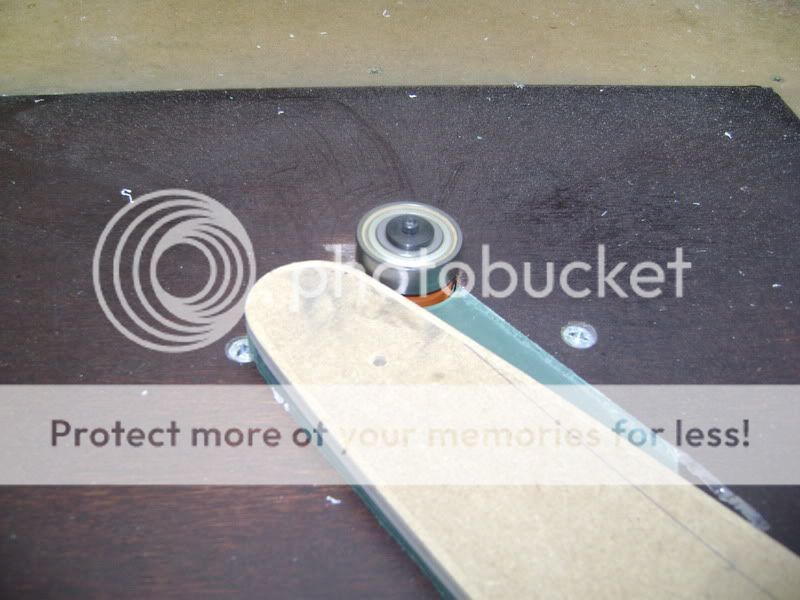
It's kinda hard to do this without the brushes hacking into the alu.. I did this:
Screw the piece on a piece of wood that you can hold on tight.
1) you won't burn ya fingers/hands on the alu
2) the brush can't bite himself into sth 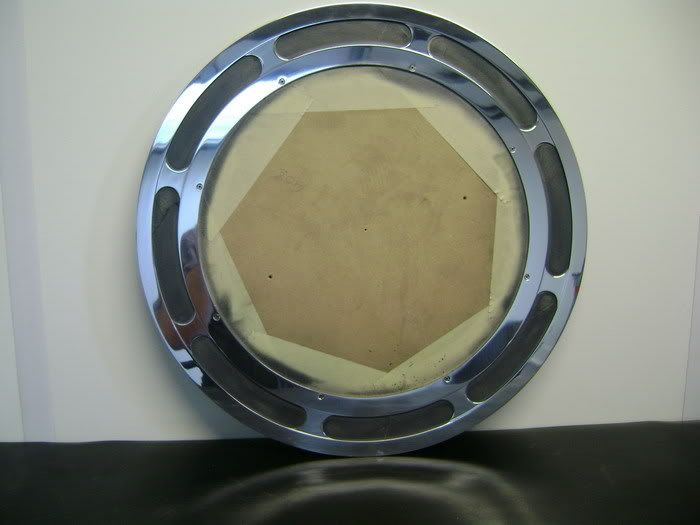

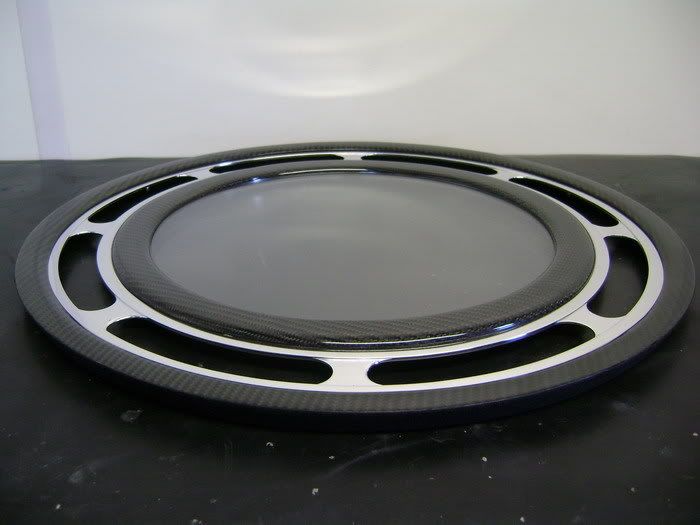
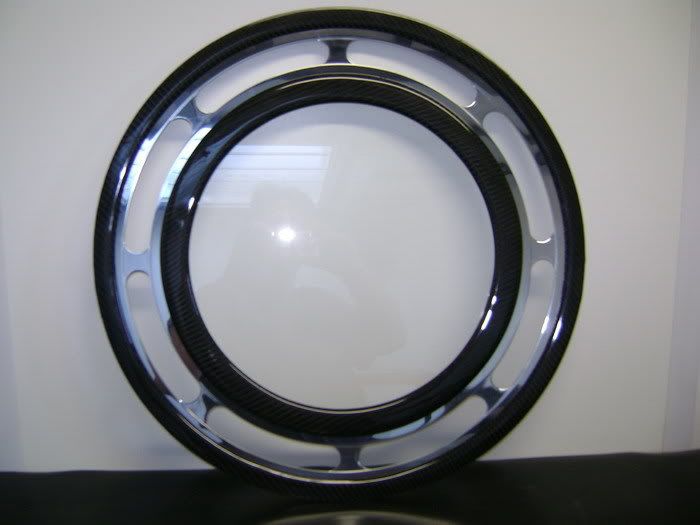


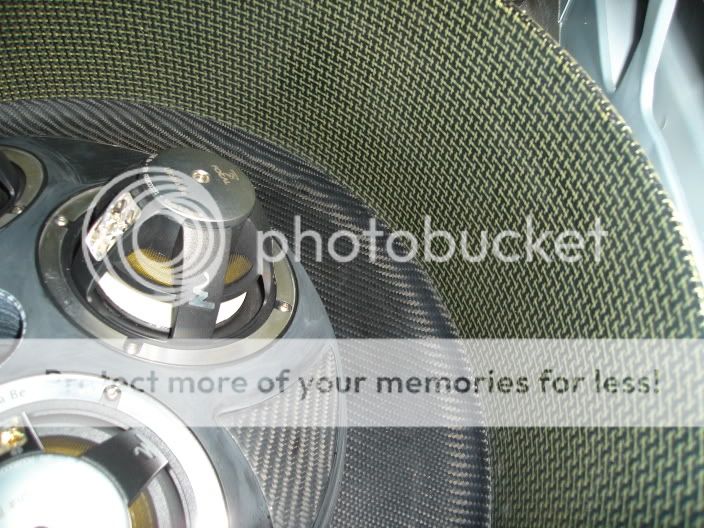
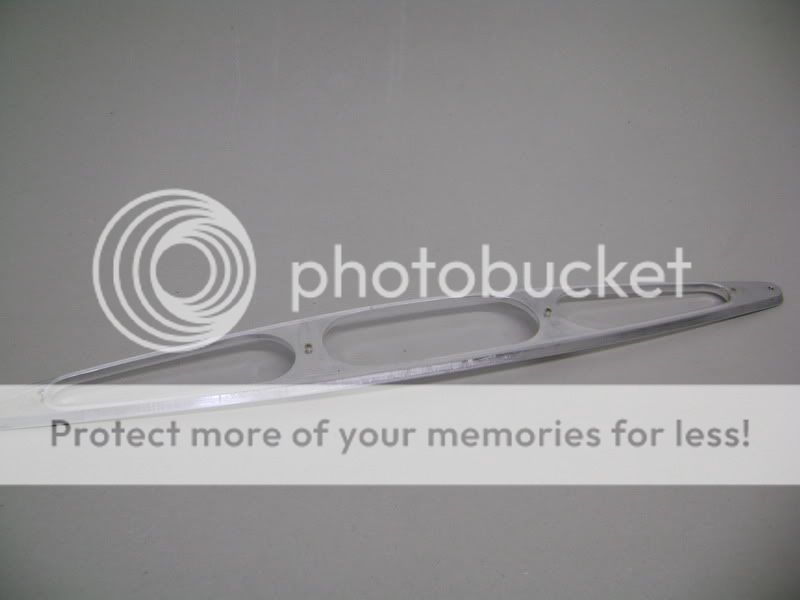
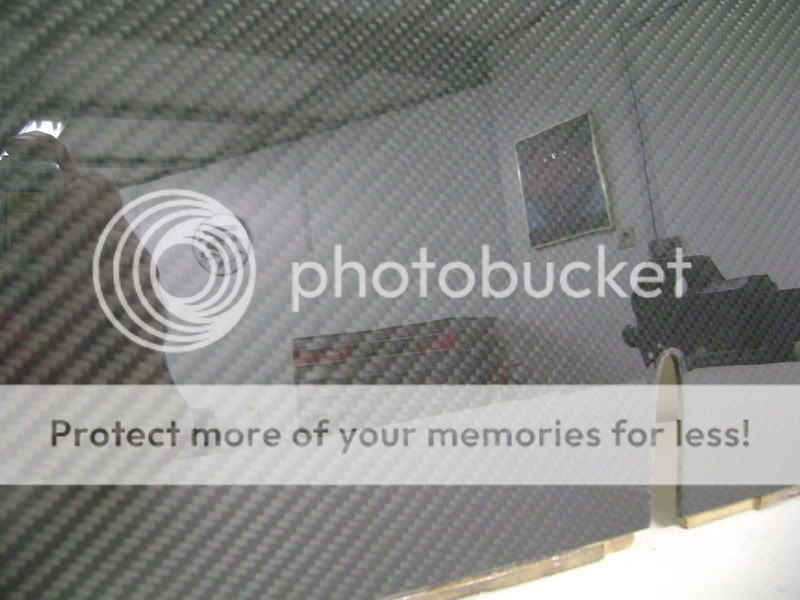
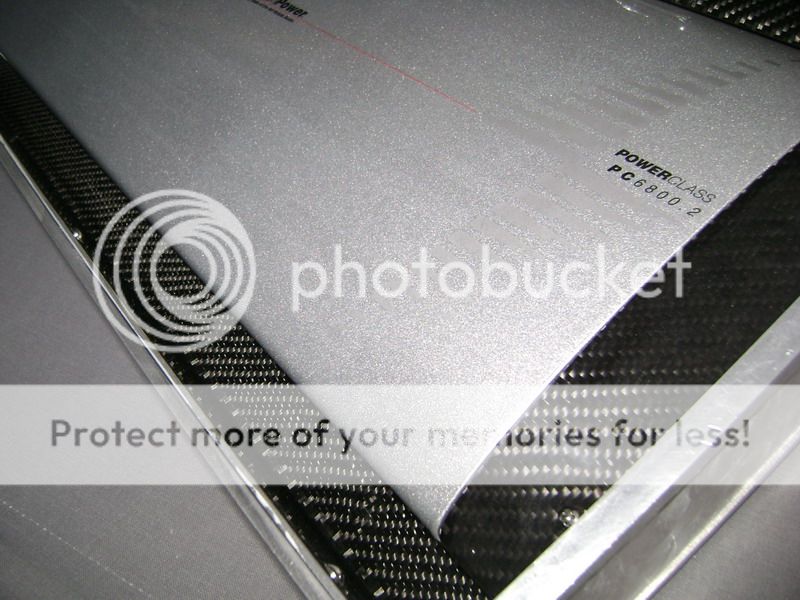
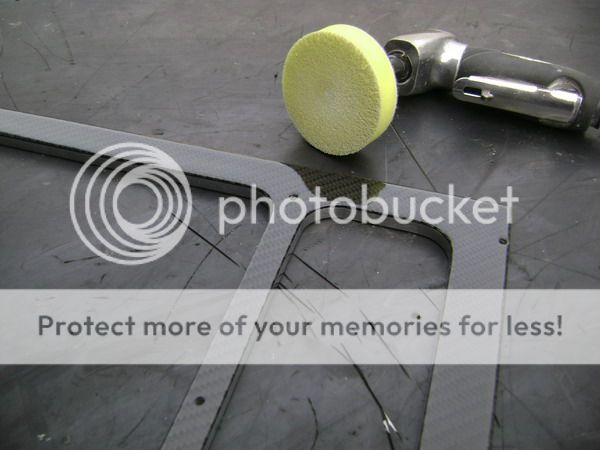
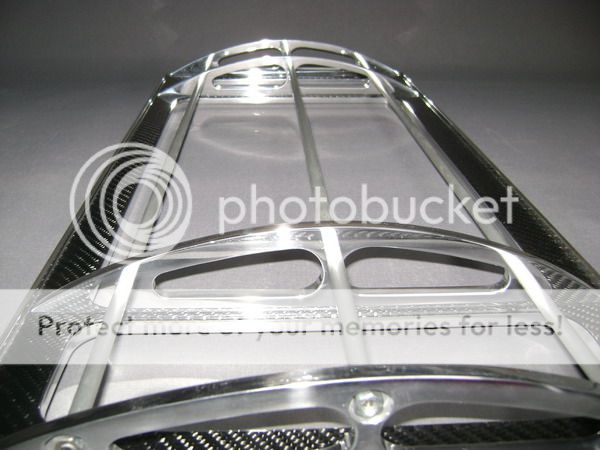
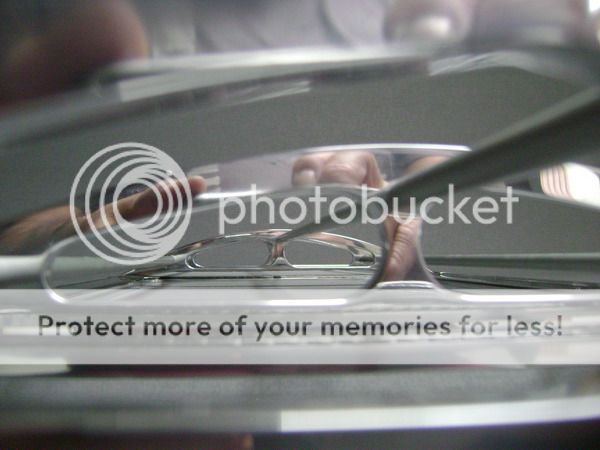
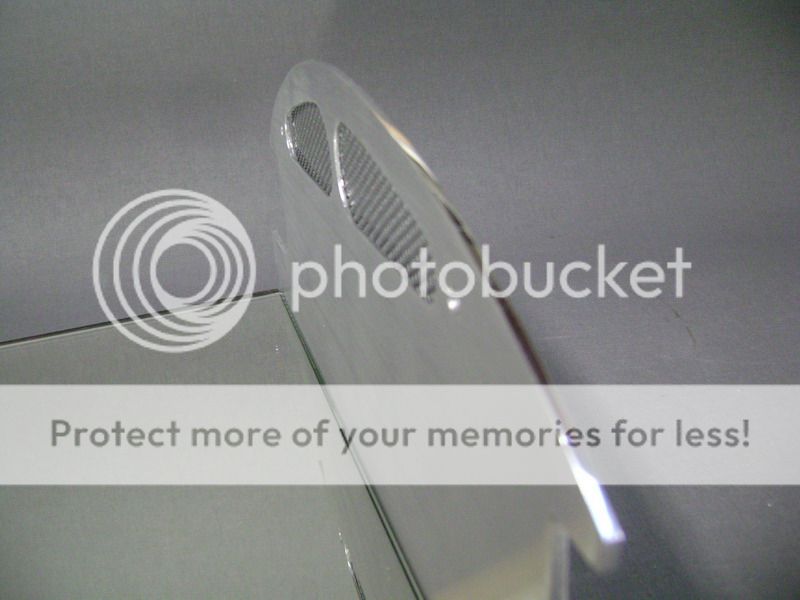
As you can see, the whoel sub part is see-able and yet, it's covered with real glass I can clean as much as he wants, without making scratches.
The nice thing about this grille, is that I made it with a simple milling tool. This is the proof everyone can make something really nice, with non-expensive equipment. The grill is almost complete. for now, no Focal Logo's anymore
althought...
The next work on the list is for next days, maybe weeks.
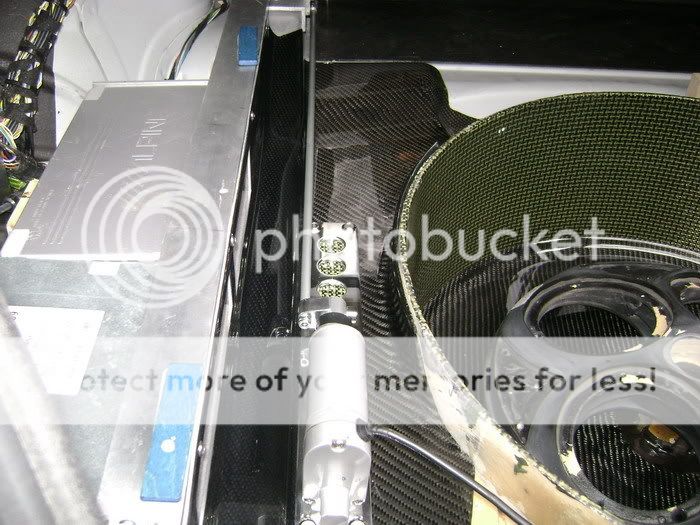
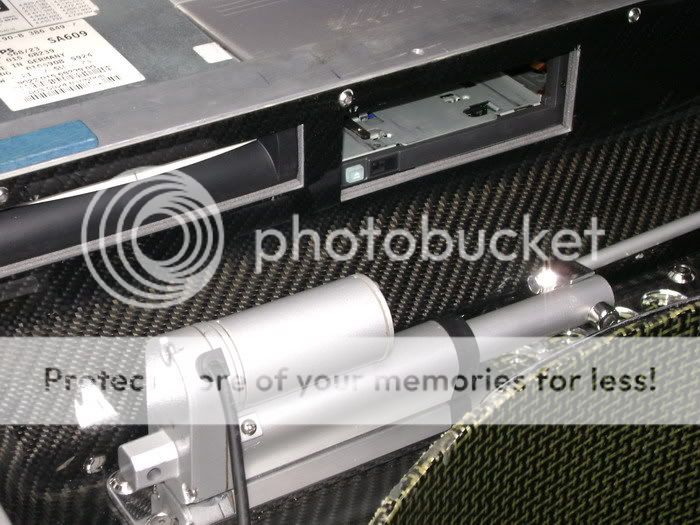
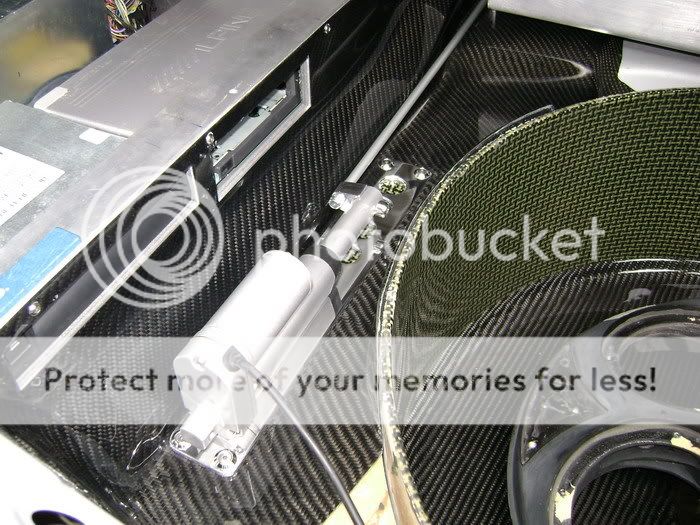
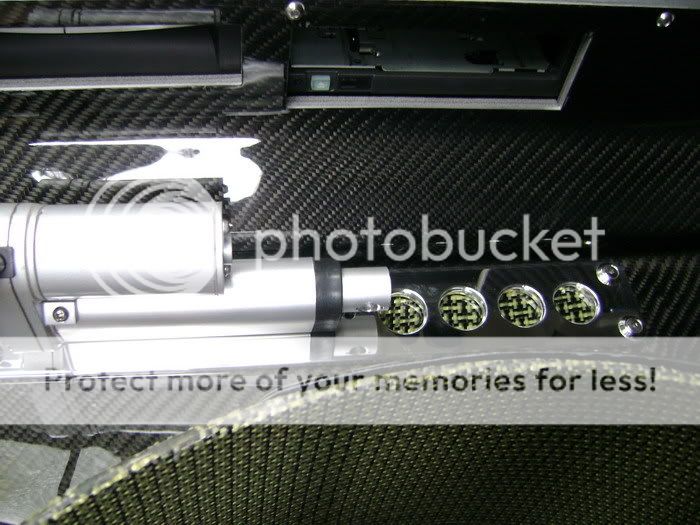
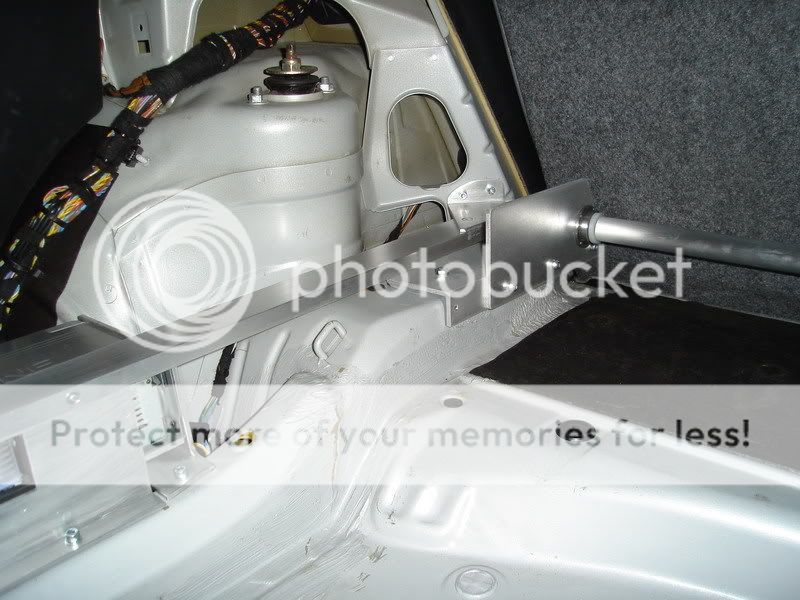
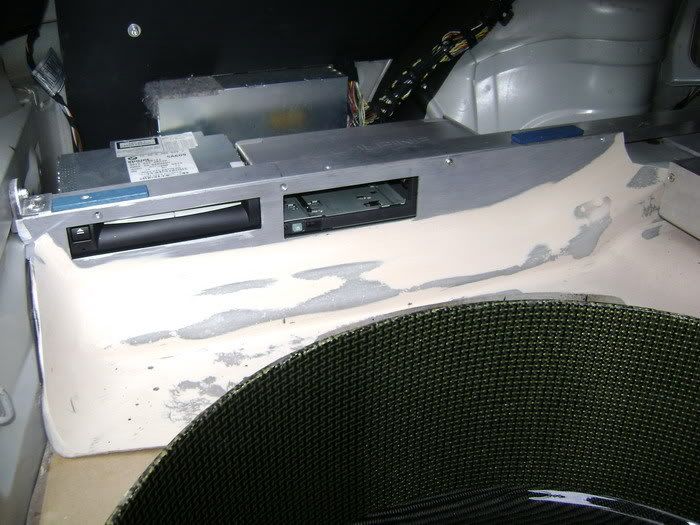
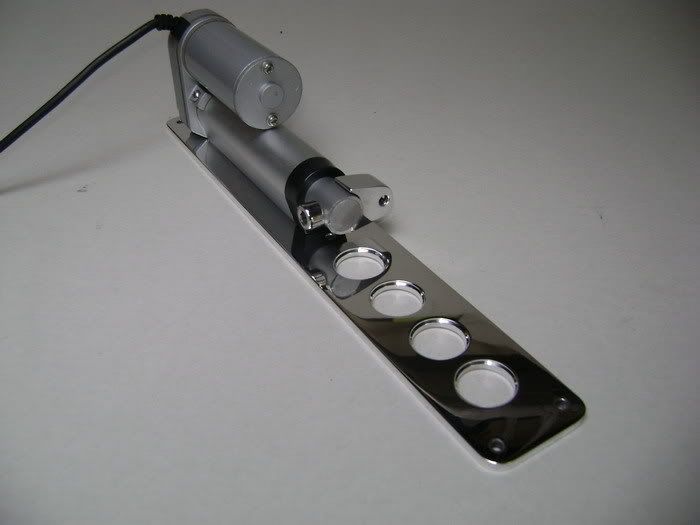
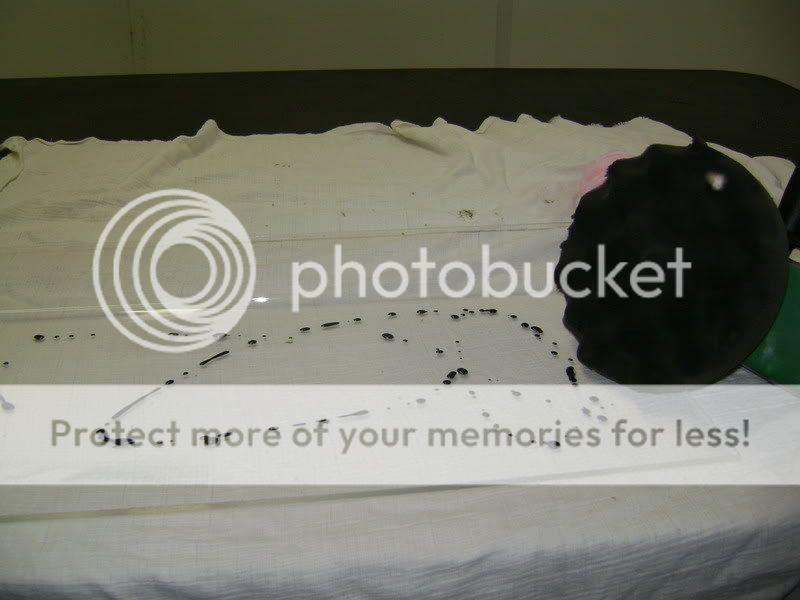
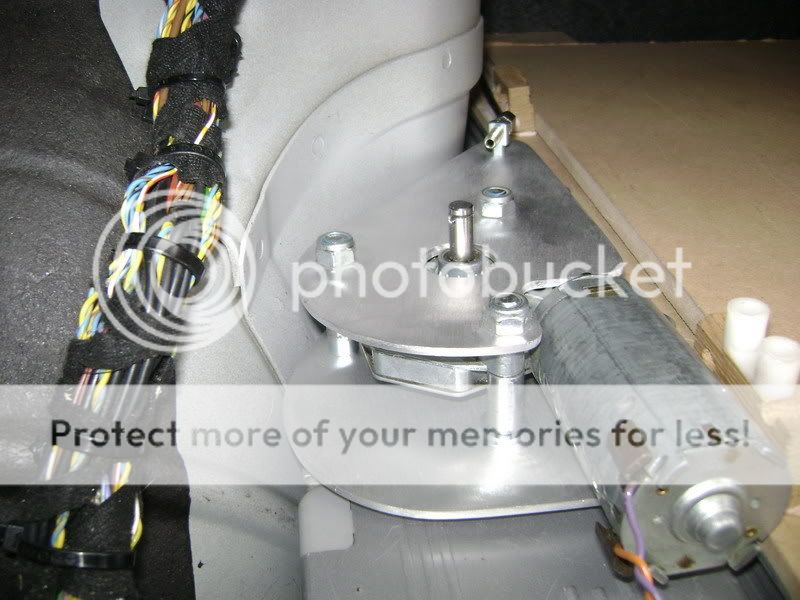
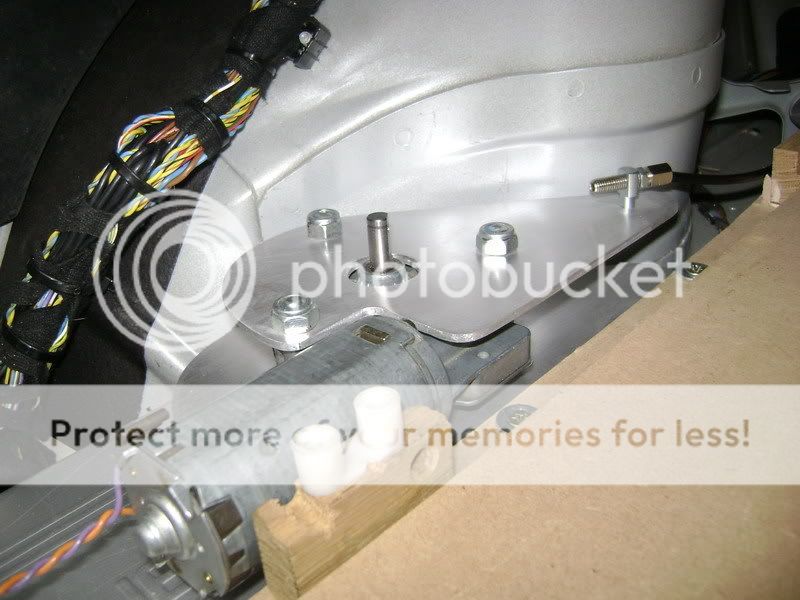
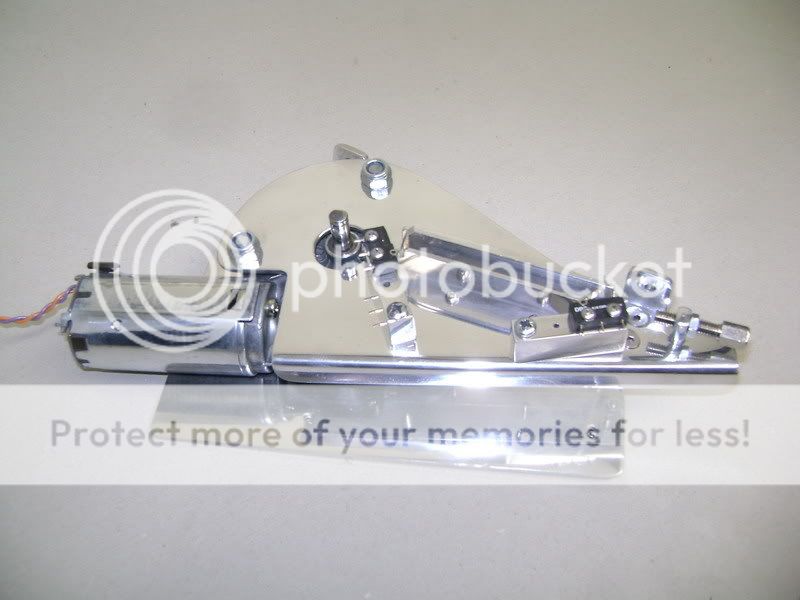
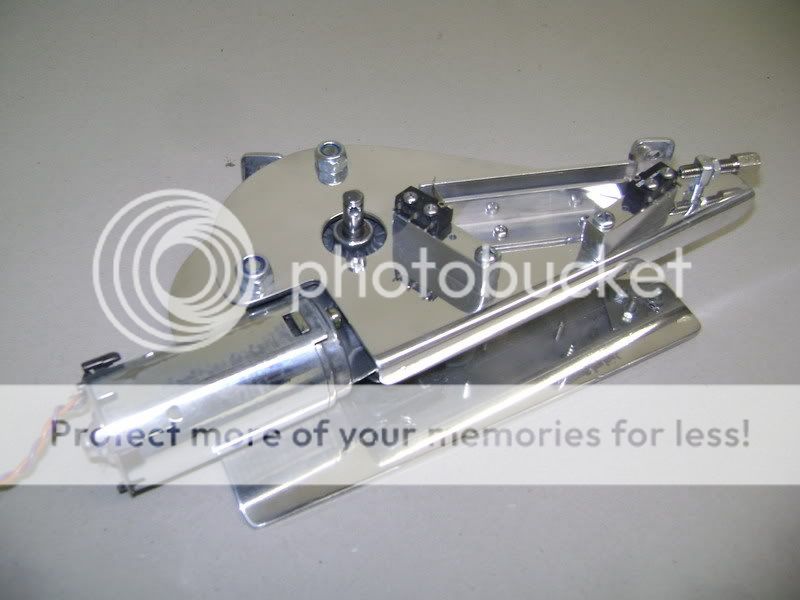
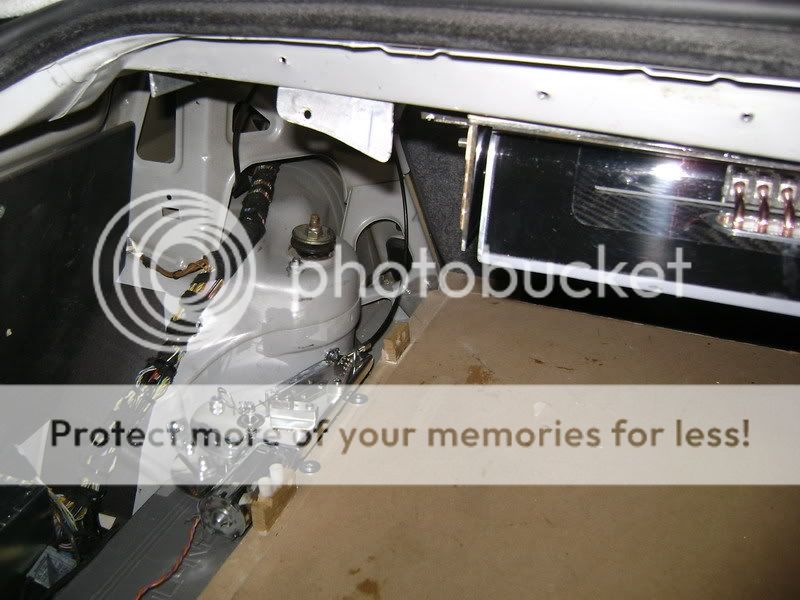
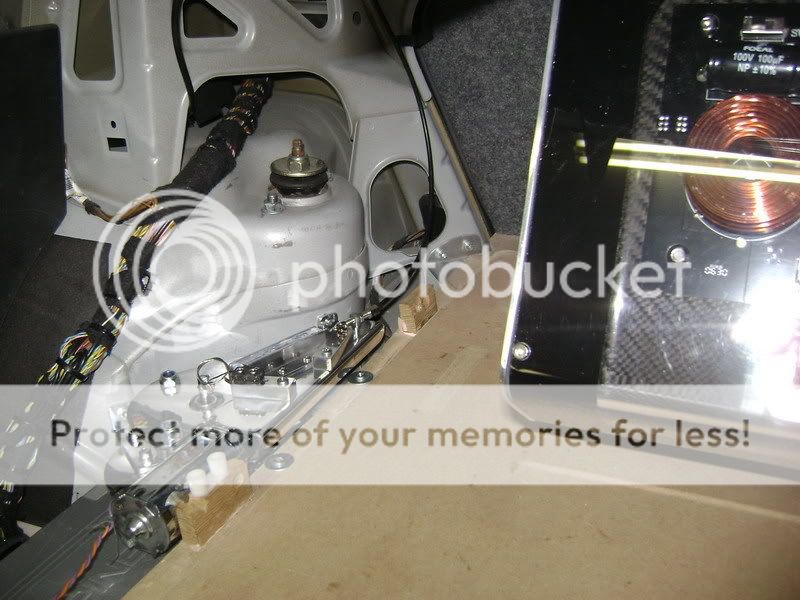
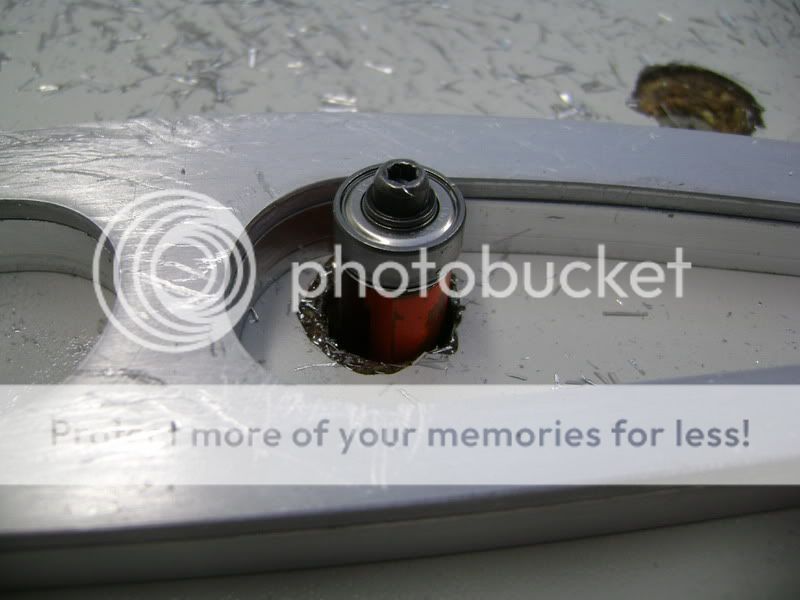
The actuator, that bringt the amplifier to life, will get a nice place.
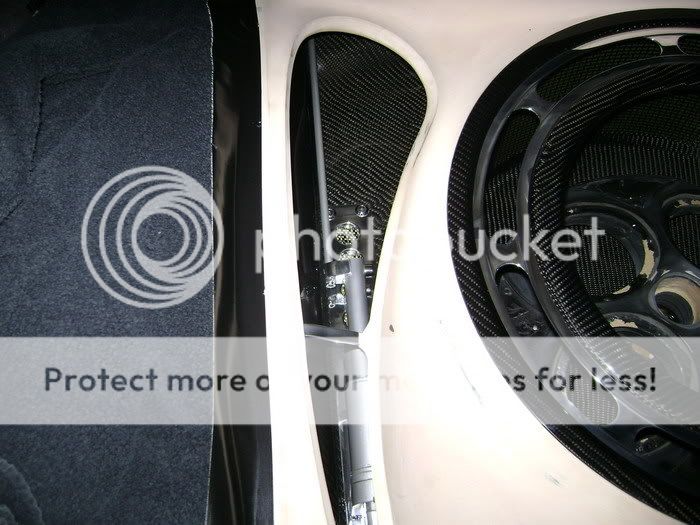
For those who forgot, this is how the motor was placed.
This was only to see if the thing worked like I wanted.
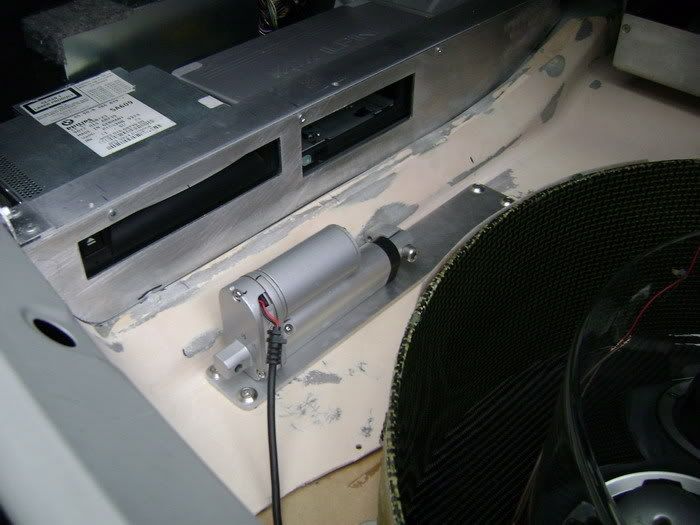
The meaning is, if you take the left carbon piece away, you see the motor and the cd-changer. If I wanted to show this, it must be made SHOWABLE 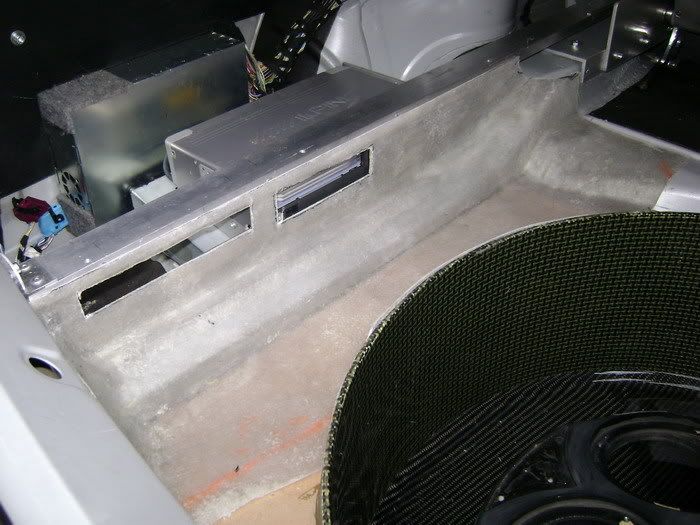
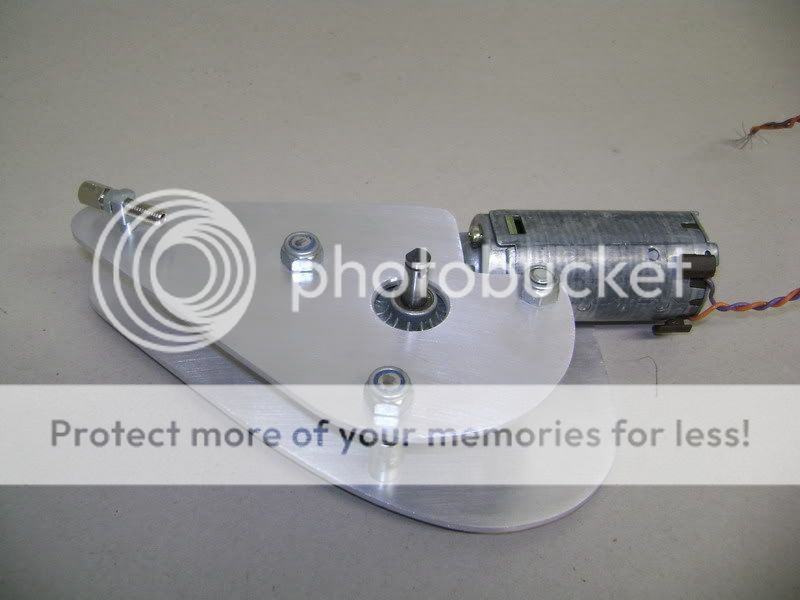
Then, I put the actuartor on a alu plate of 4mm thick.
The fiberglassed part where the motor will be put on tight, is as good as ready. 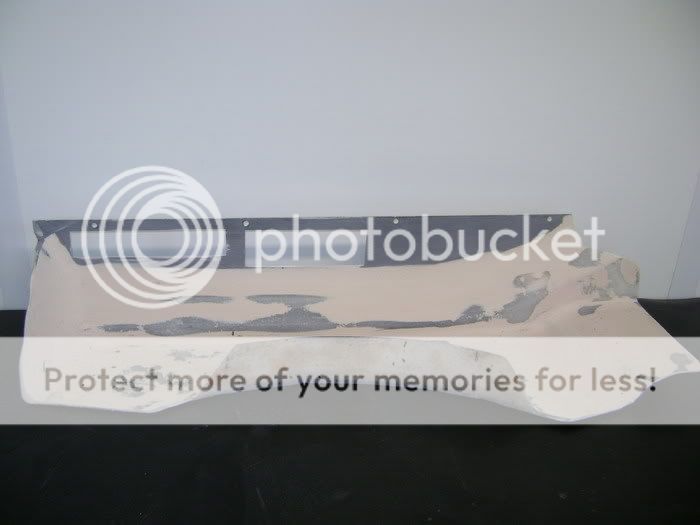
I sprayed this black. Those who read all thread, now what that means . 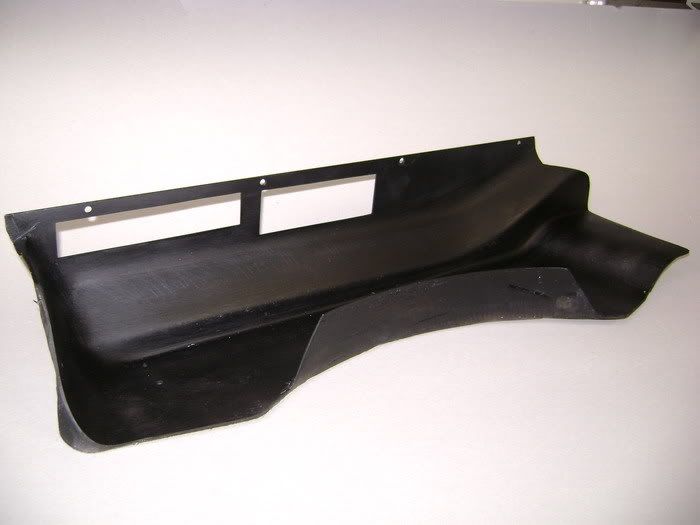
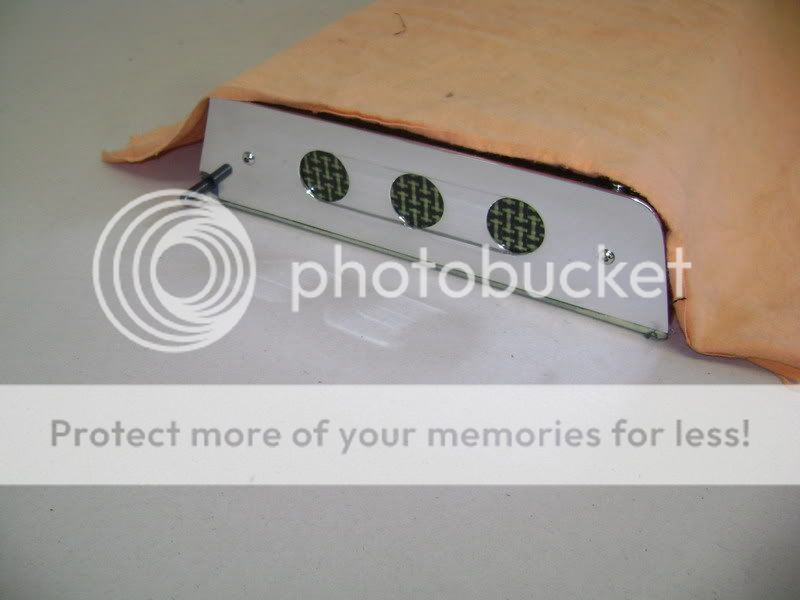
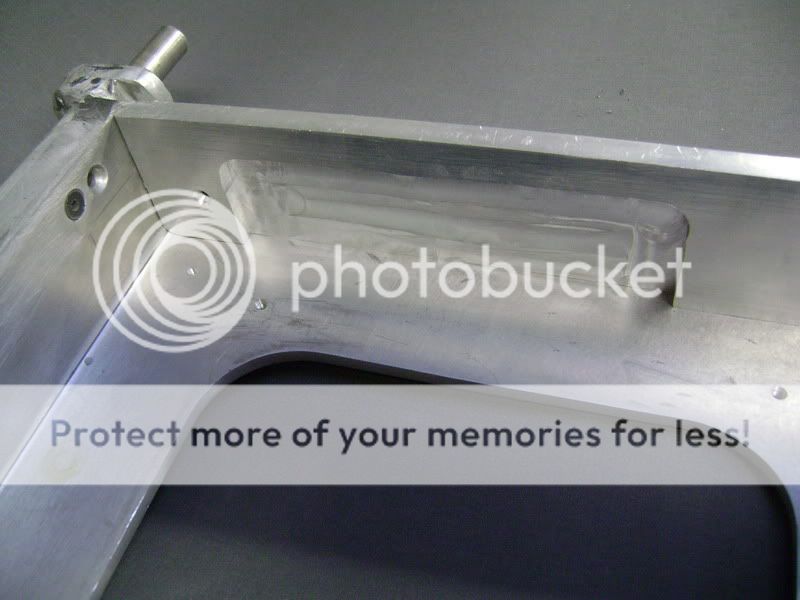
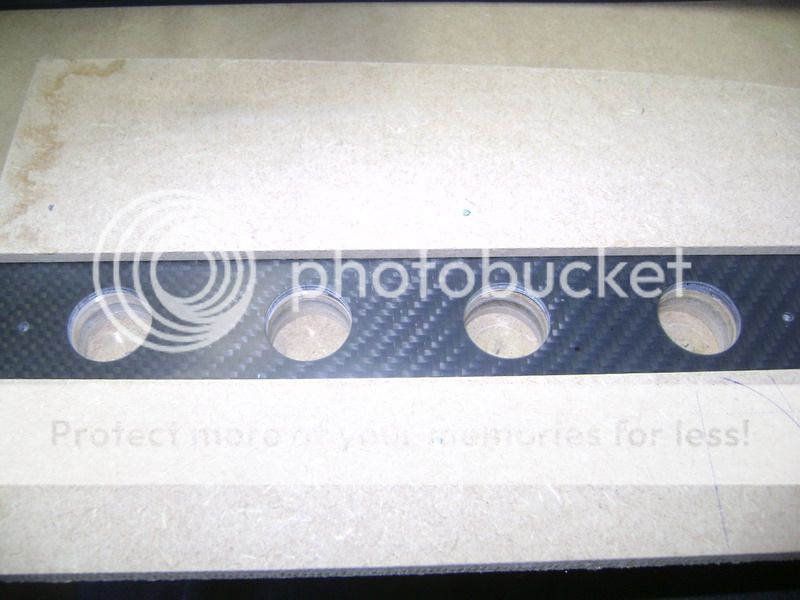
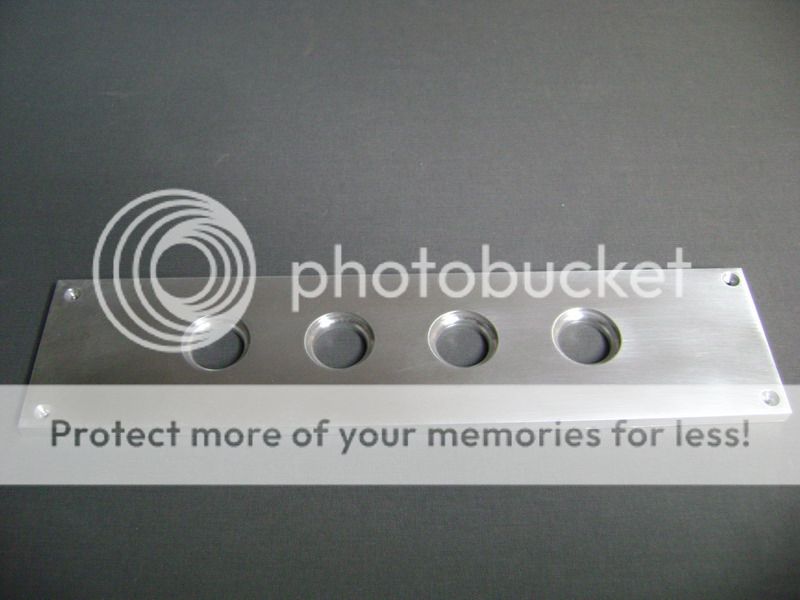
This will be the alu plated where the motor will locked on.
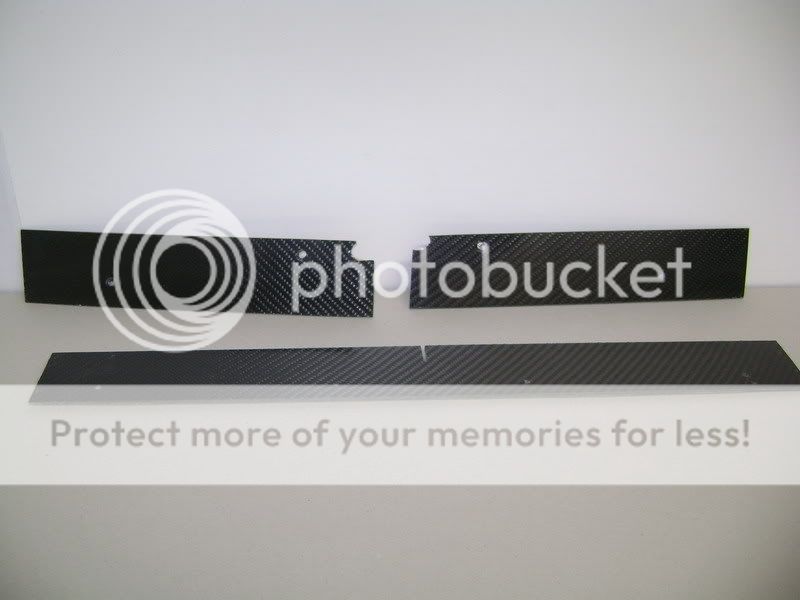
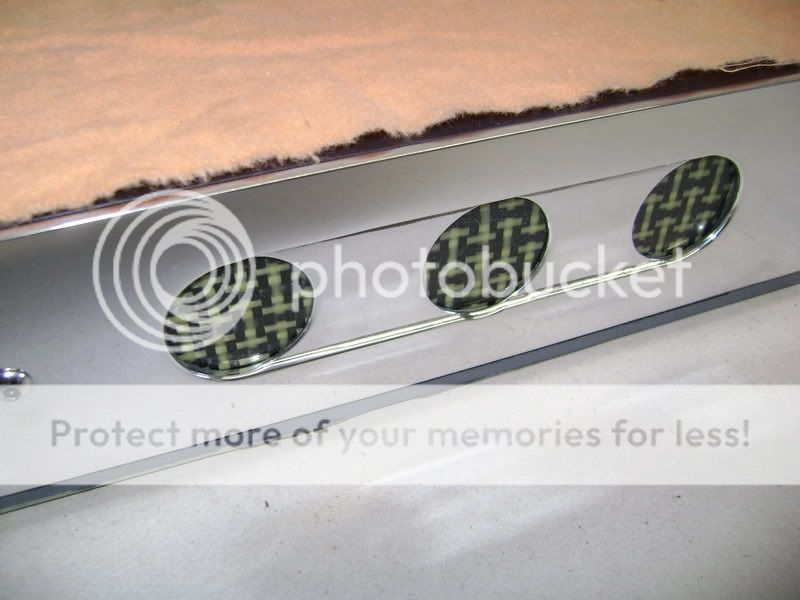
As you can see, I made 4 big wholes in it. Under these, put a carbonkevlar plate. The look will be a little bit better I think.
Also you can see I made a alu piece with M5 screws. Here will be a "bar" in connection with the amp. I took everything on a trip to polish-land. The fiberglass part that comes under the motor, is already covered in a layer of carbon... needs some more epoxy. 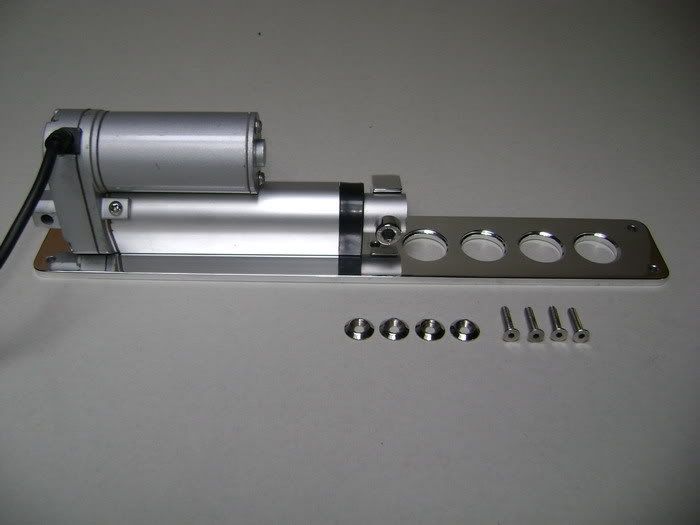
Not simple to cover it in carbon, but it worked.
Couple of layers of epoxy are needed, and then rubb the whole piece, while working on the sides.. Damn, this piece looks great, but you're not going to see much of it . 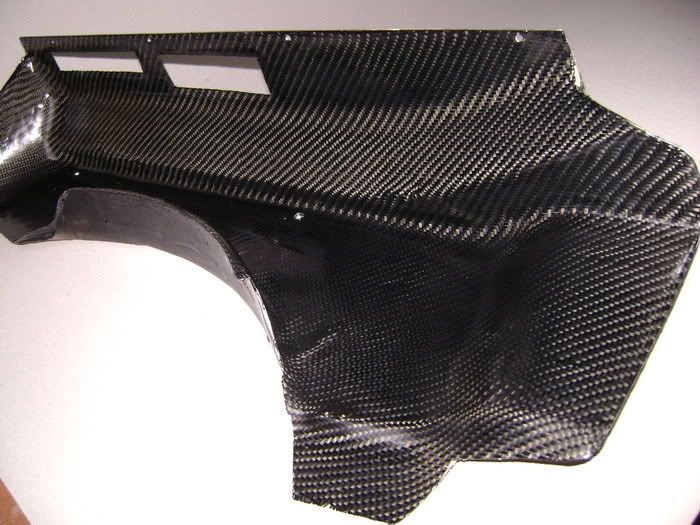
The CF piece, to put the motor on is ready... I did some long long long rubbing, but it was worth the effort. 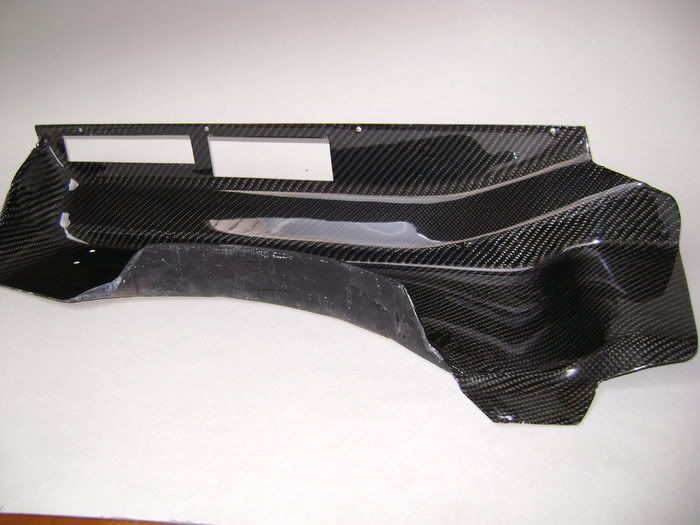
Posted By: robolop
Date Posted: August 20, 2009 at 3:25 PM
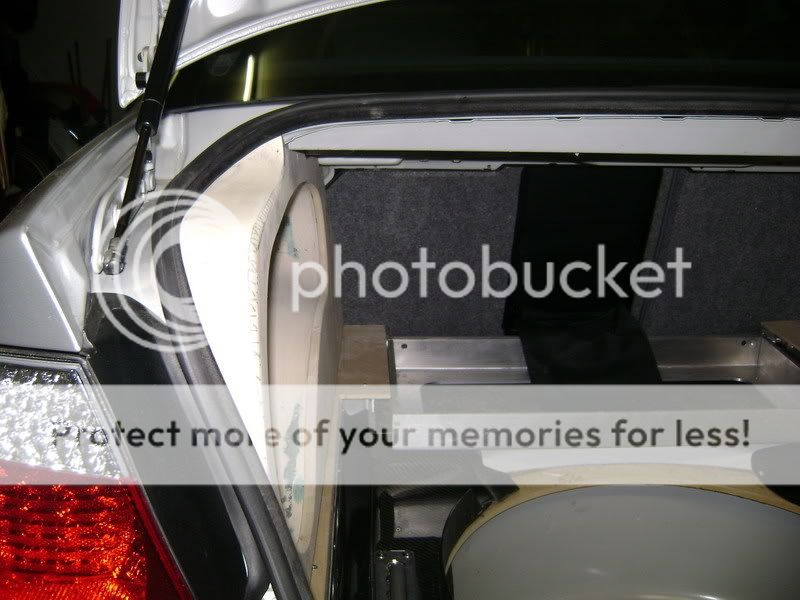
These are a few pics from the install i'm currently building. The install is still in progress, and I'll post everything what's already made.
Posted By: robolop
Date Posted: August 21, 2009 at 1:13 PM
Posted By: robolop
Date Posted: August 21, 2009 at 1:14 PM
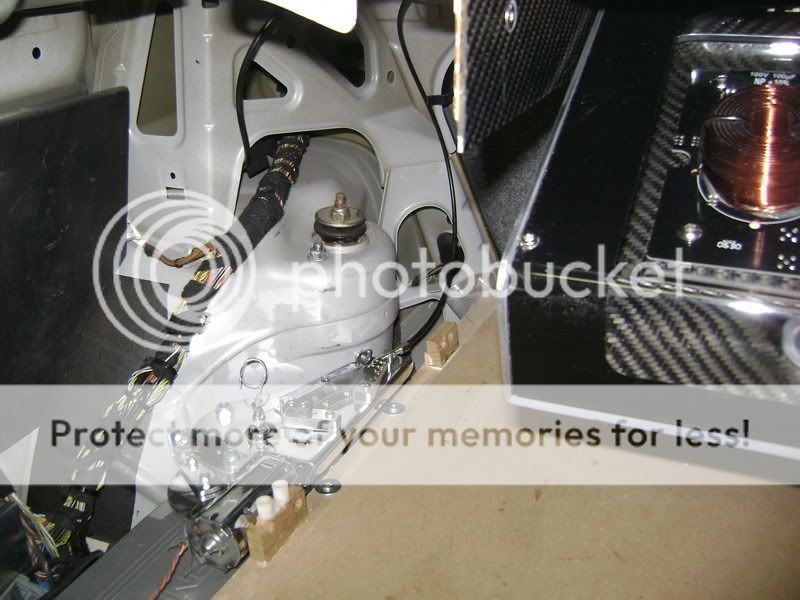
Now the big question is, WHY THE HECK make such a big piece of CF, but i wanted to be sure that EVERYTHING looks perfect, from what ever angle you look. Again with the neon.
 
This will come under the right vent, just for looks.
On the leftside we have the CF piece where the motor is at, so it looks more the same on the right side went you look through the vents.

Posted By: robolop
Date Posted: August 21, 2009 at 1:15 PM
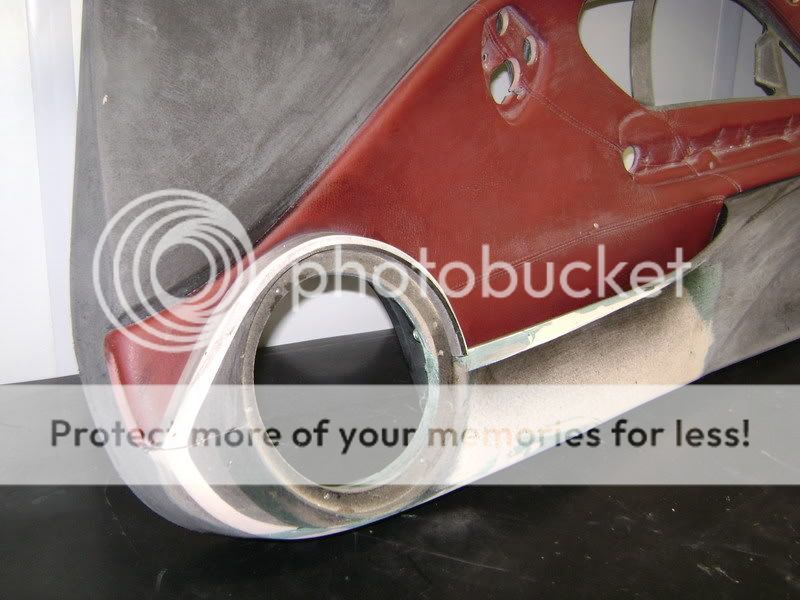
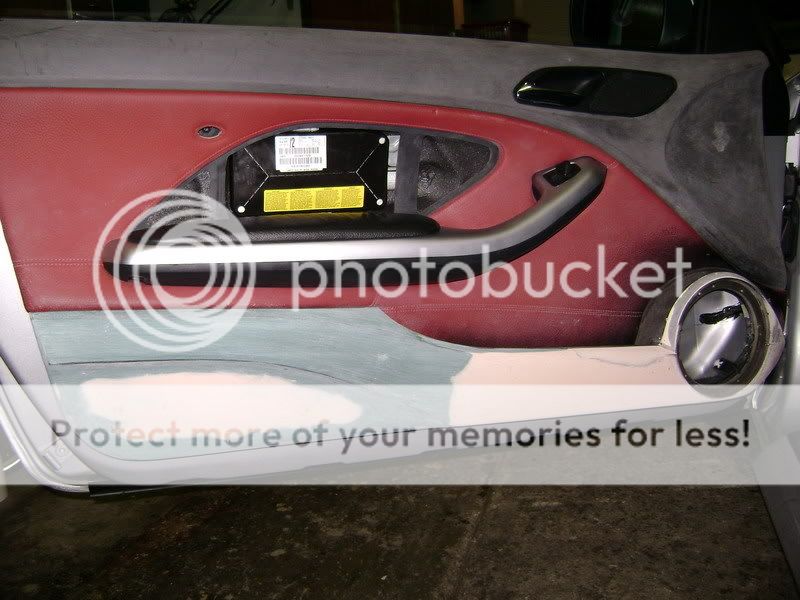
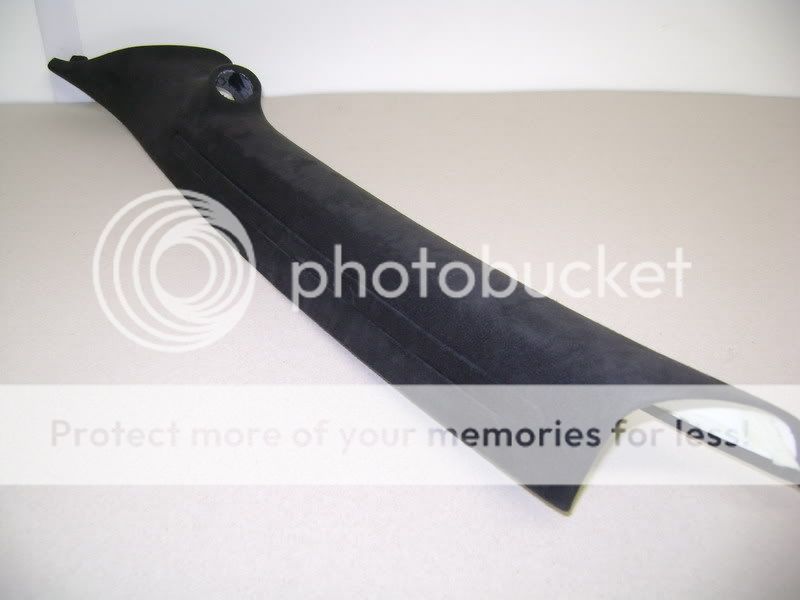
I'ts time to rebuild the doorpanels.
The doorpanels i using are secondhanded. So the car remains complete, and I doesn't have to drive without panels all winter.
Demounted some stuff. 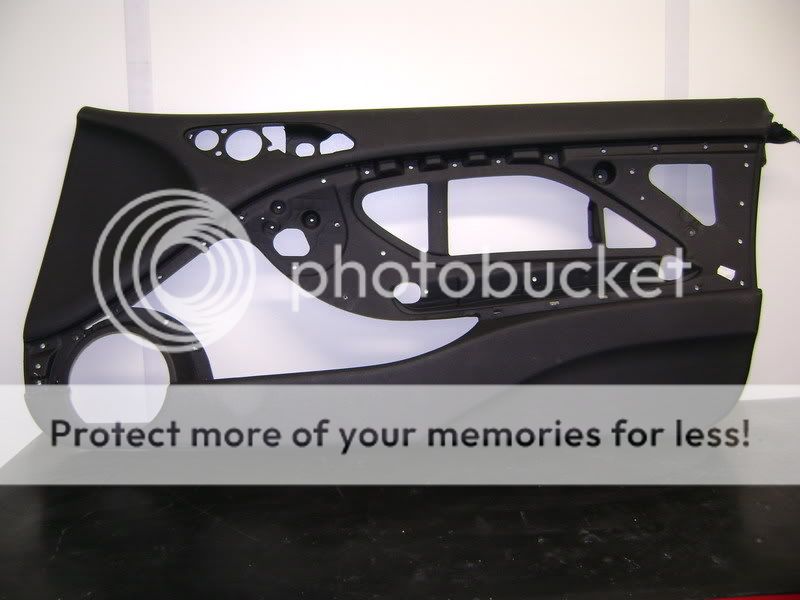
Started taking off the leather. awefull job The 16cm FOCAL speaker is taking approximately the same place where the original speak is.
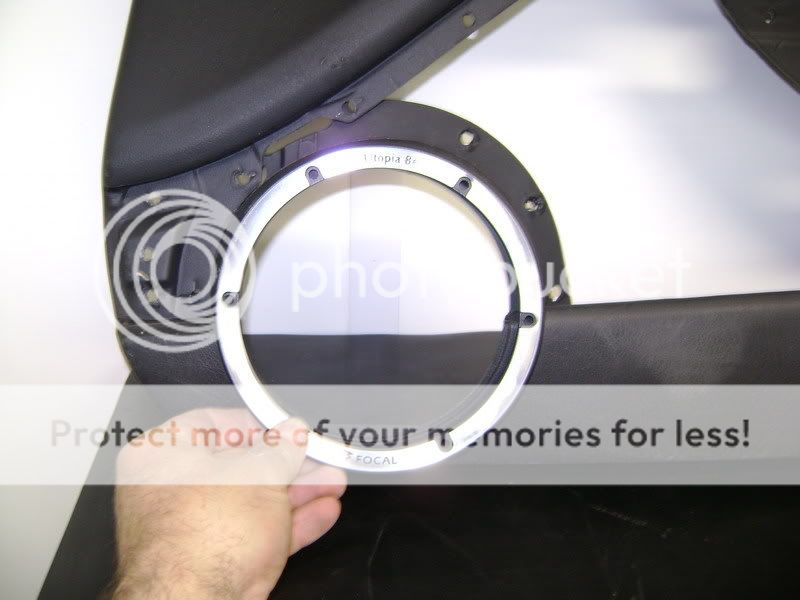
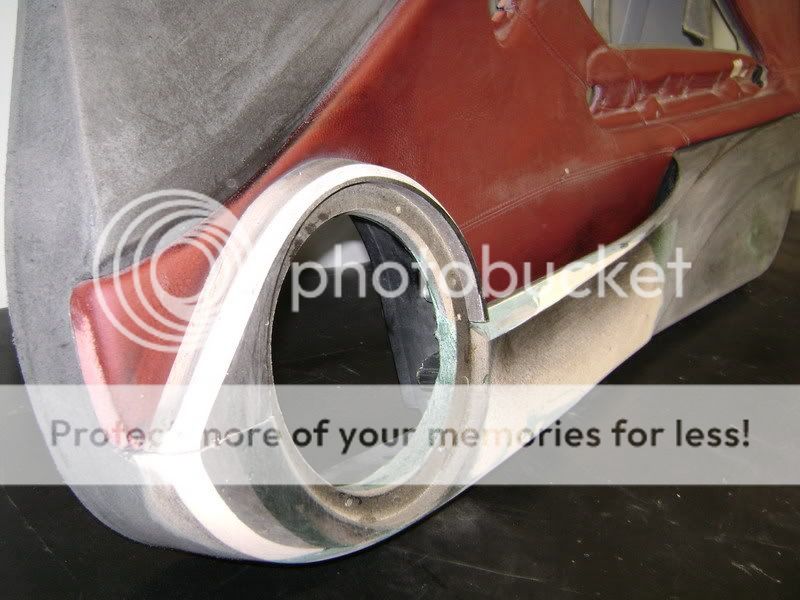
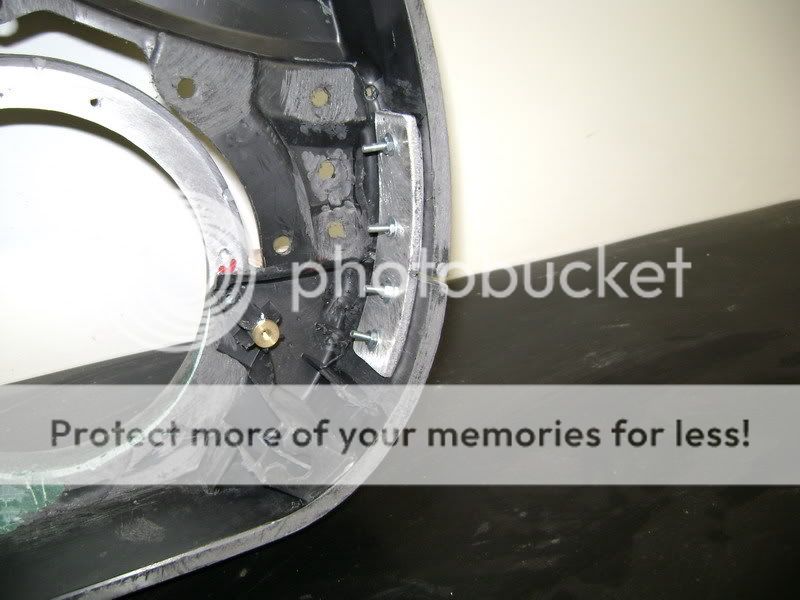
In the meanwhile , I let the rings mild nicely. 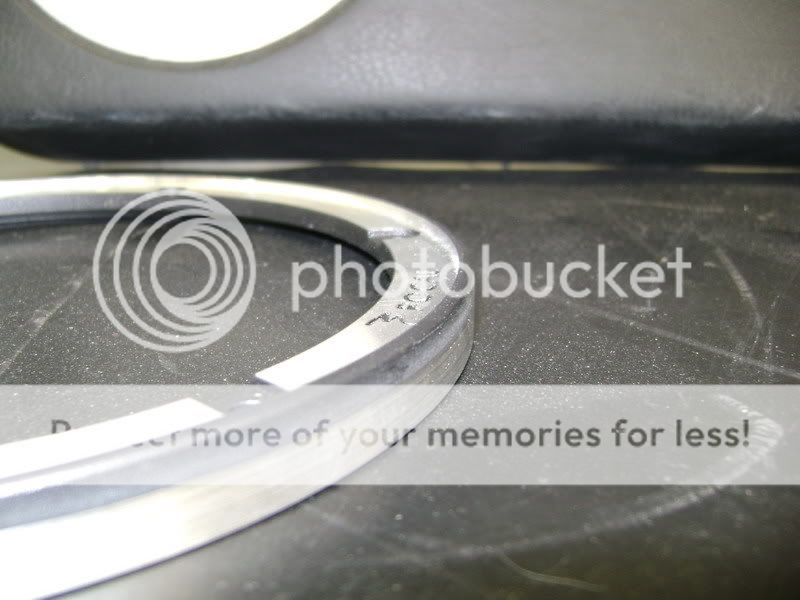
I milded some MDF wooden rings to tighten on the doorpanel. 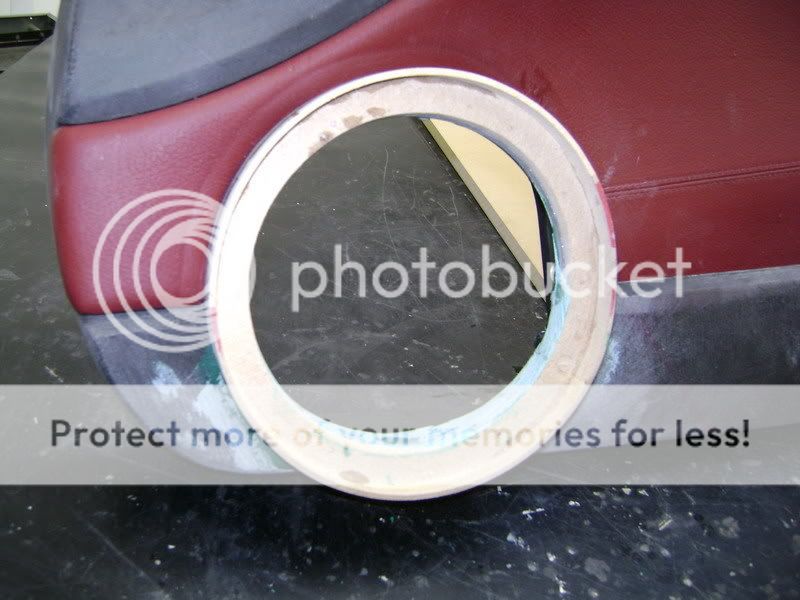
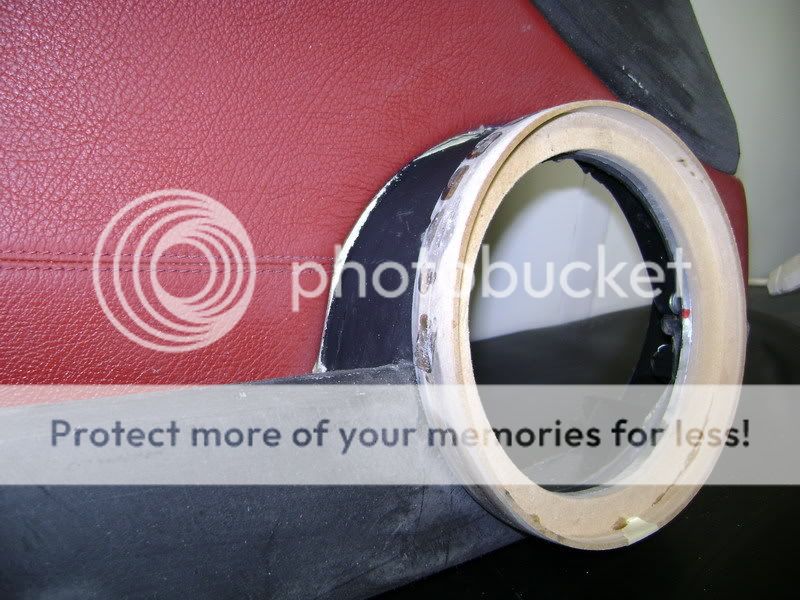
To lock the speakers tight I made a extra alu plate of 6mm thick.
Here I can use the screws that came with the FOCALS. These are special screws that click-in the grill. 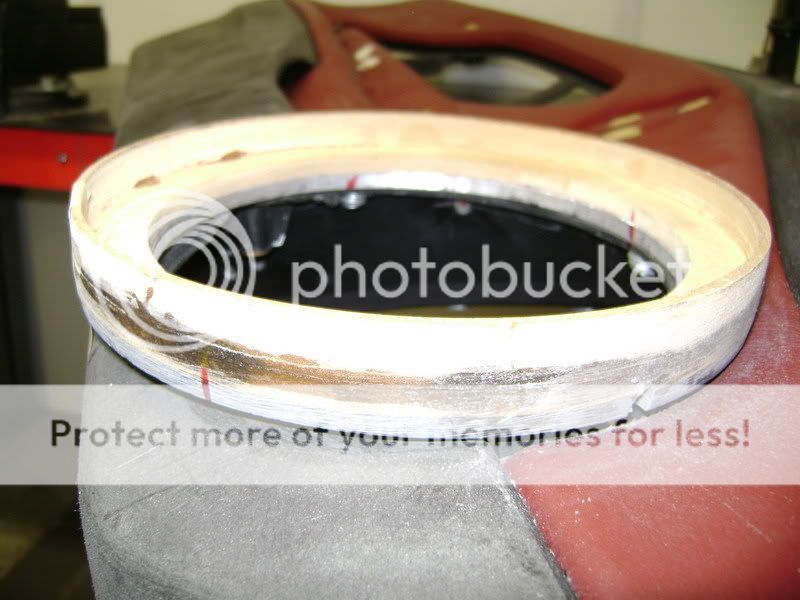
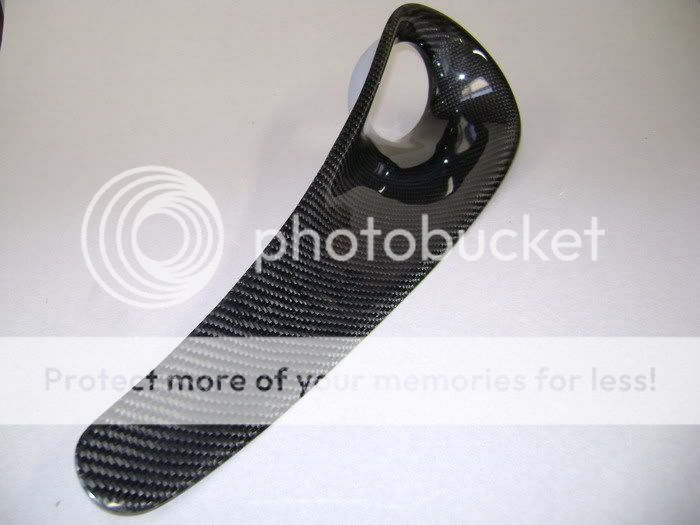
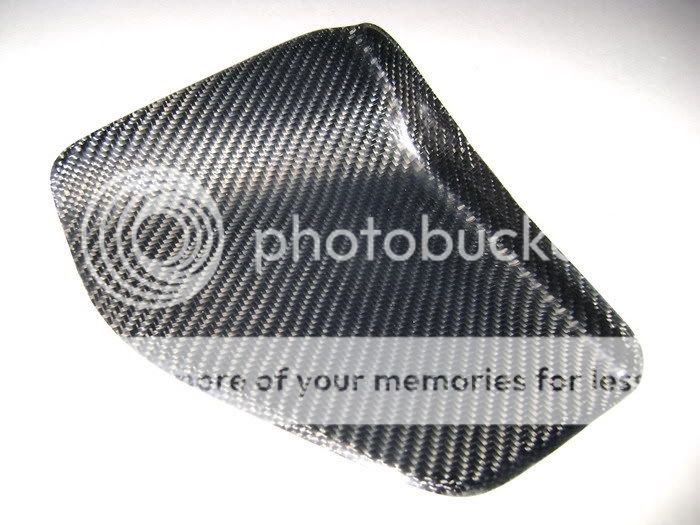
This is an seperate little cap that goes on top. This model will be editted more.
This will come nice when it's finished. 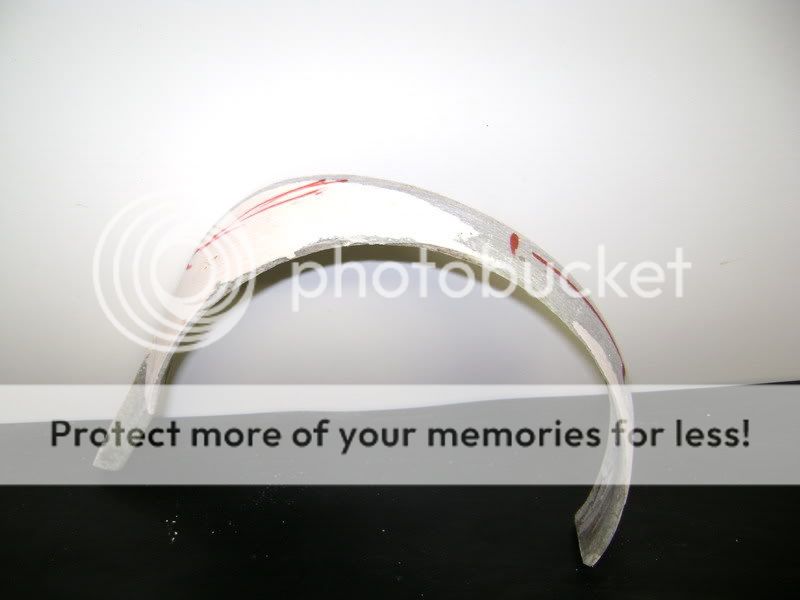
Designerdepartment going at full speed
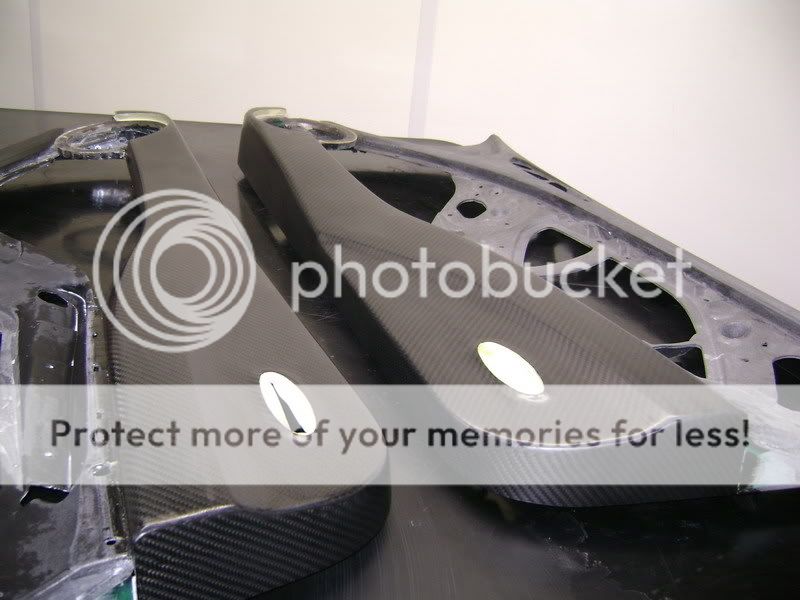
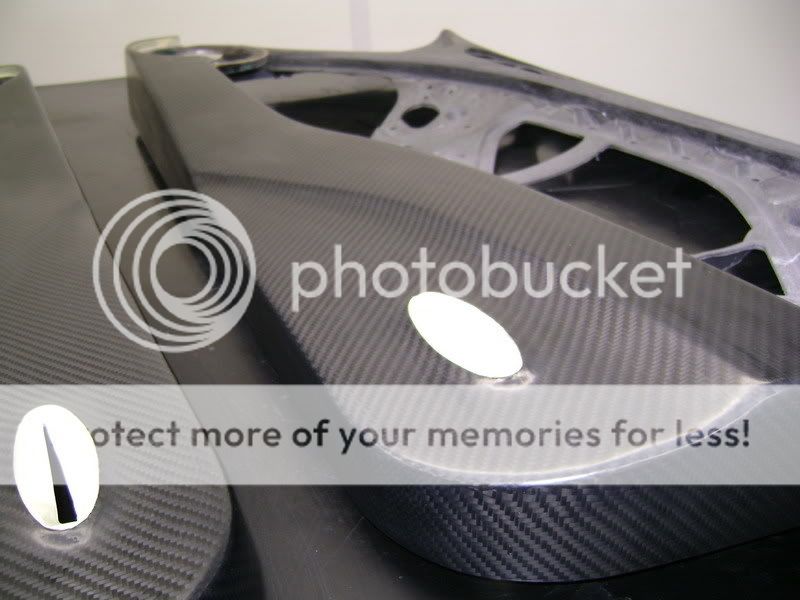
Worked on the ring where the speaker goes in, more smooth now.
Step by step, till it workes out to something he likes; 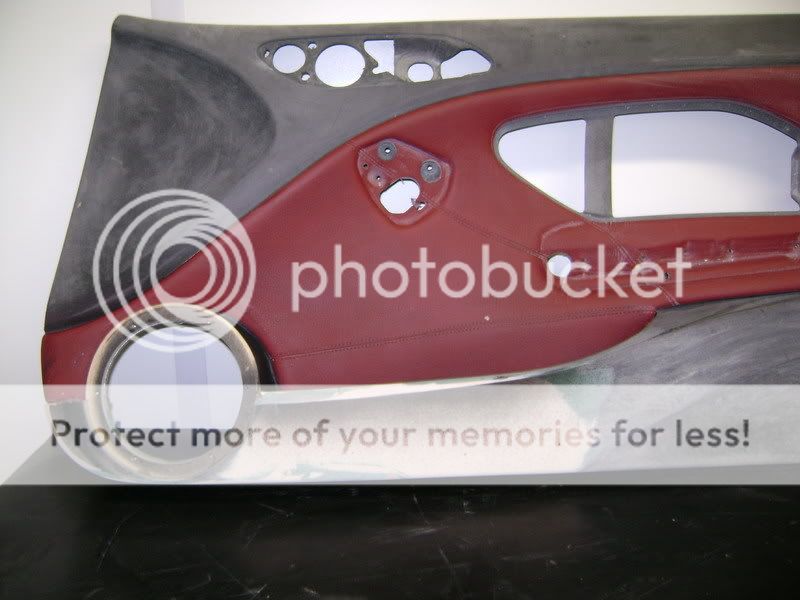
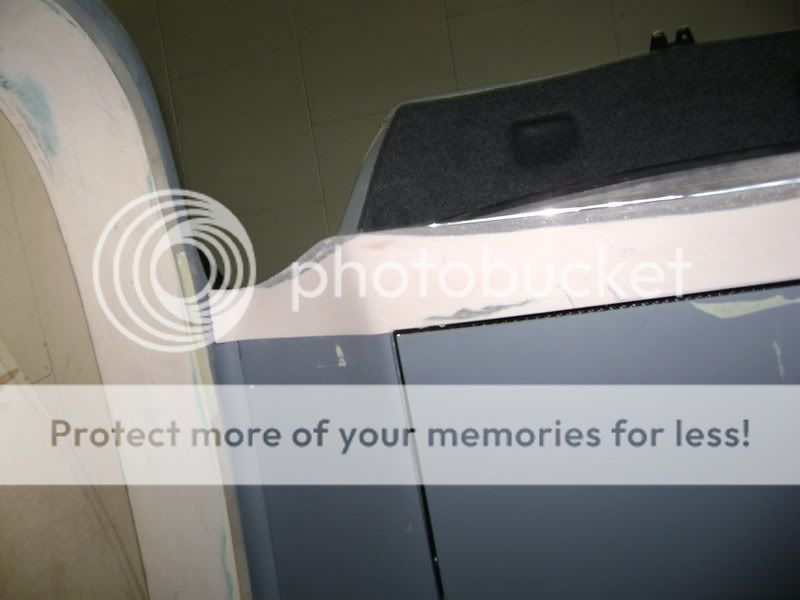
On picture, maybe it doesn't look so good, but IRL it looks fine. The forms i made also come back in the original panel. So it's more styled this way.
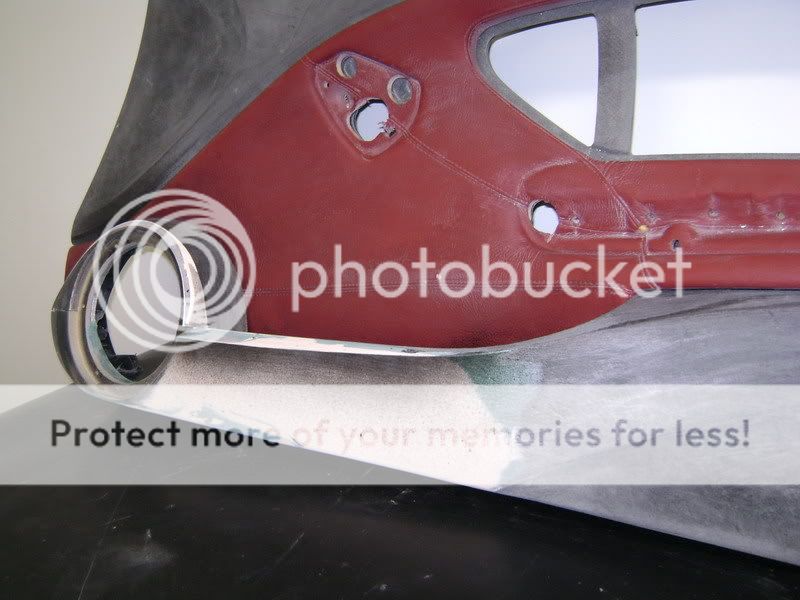
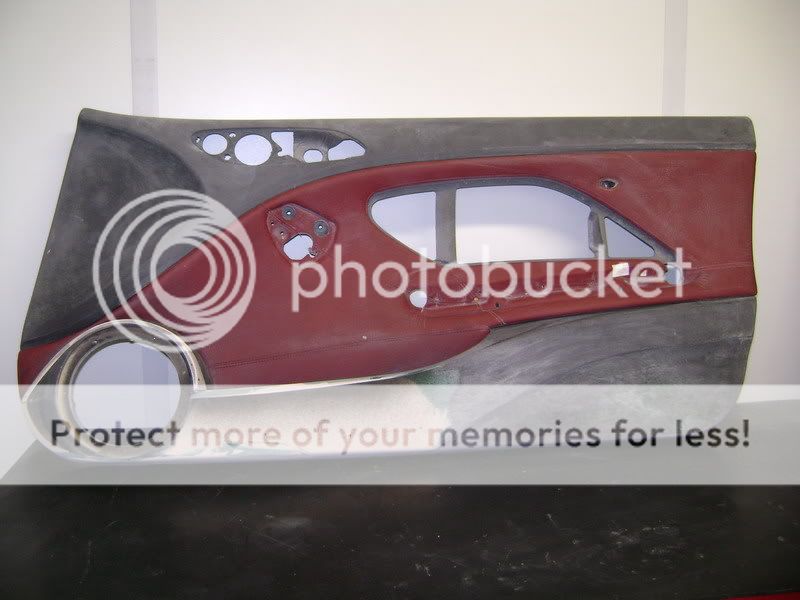
Here a couple of pics of the original doorpanel, to compare more easy.

And this is what it's going to be. The door, on the speaker, gained 2cm more to the inside of the car. This is what I had to do to get the speaker in there in a good way.


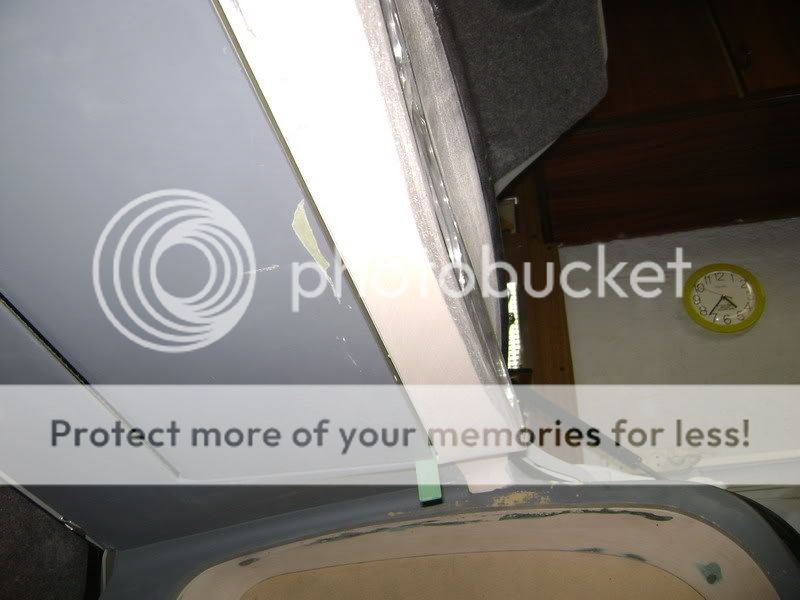
The seperate polyester cap, that goes over the speaker, will come in silver, like the trim.
This will contrast with the rest. 
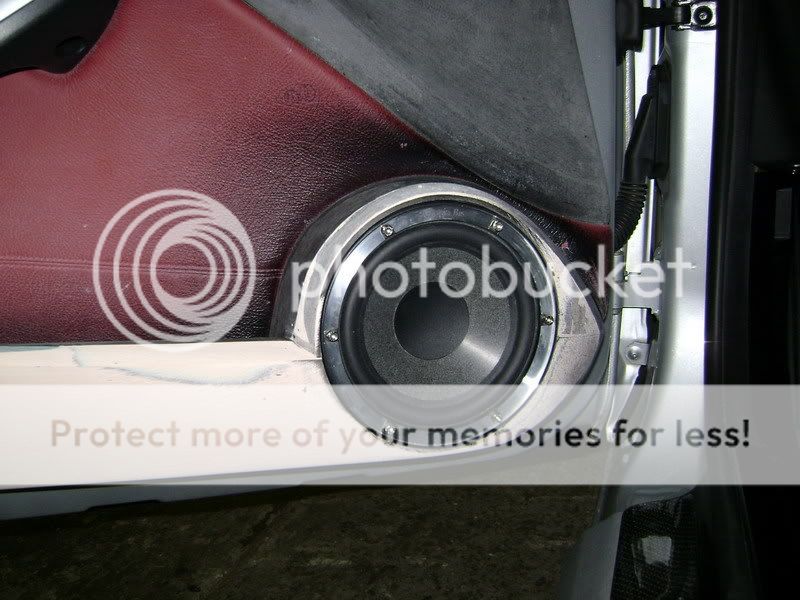
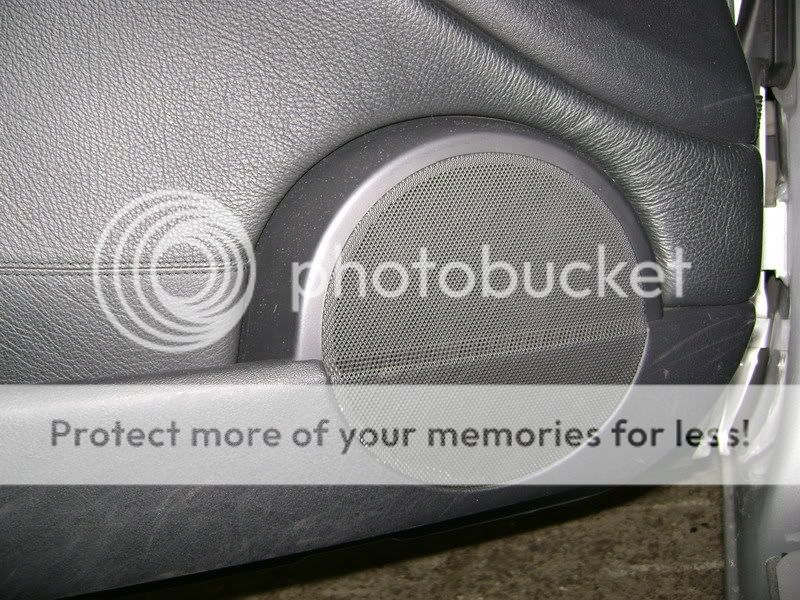
Picture with the grill. 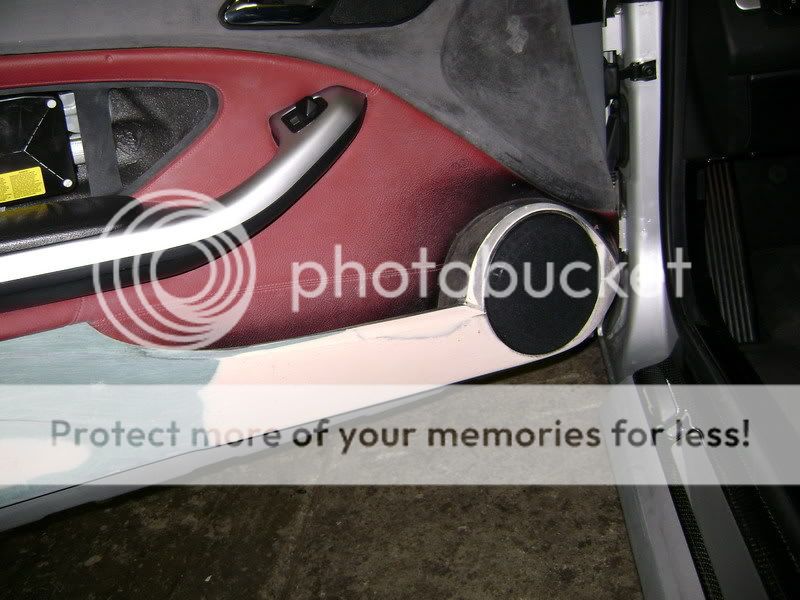
If I look at this all, I think it doesn't contrast to much with the lines, shape of the original panel. Has to be rubbed and finished some more.
On the backside of the panel, maybe there will come a little light, that shines when the door is opened. Partially to fill up the big piece.
Posted By: robolop
Date Posted: August 21, 2009 at 1:16 PM
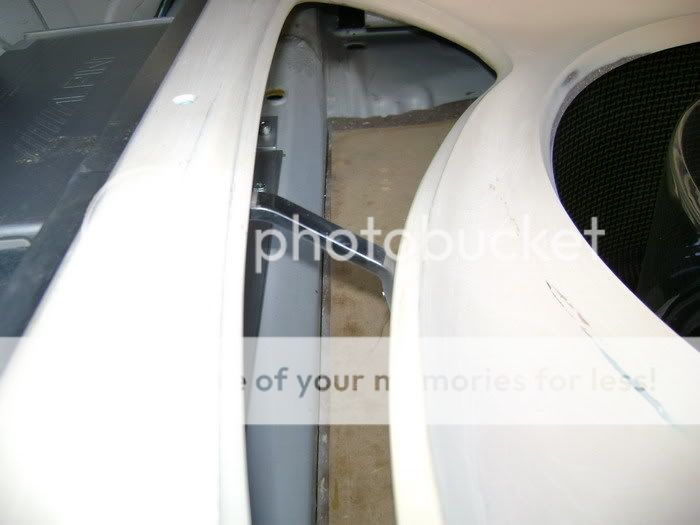
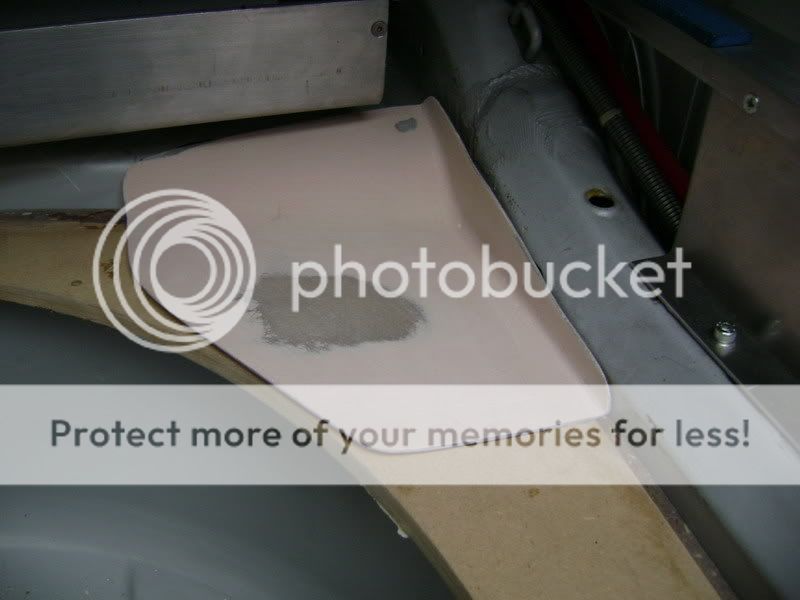
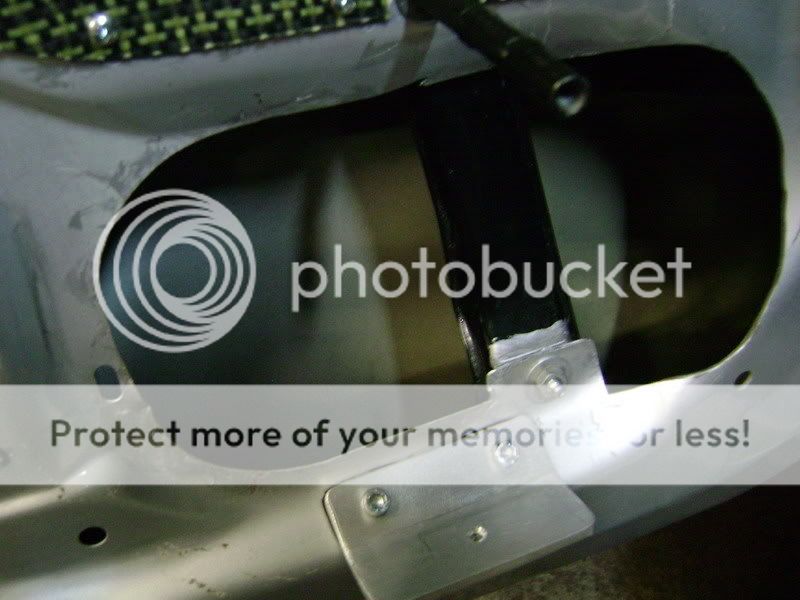
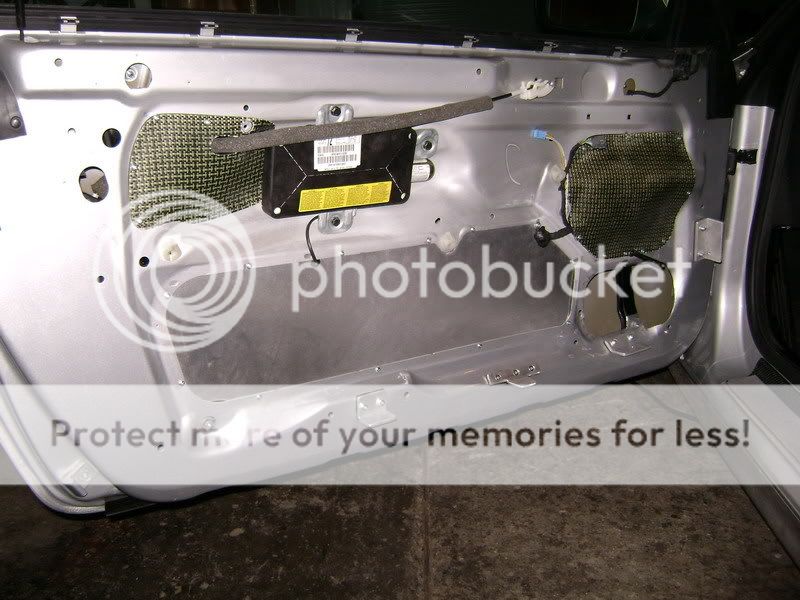
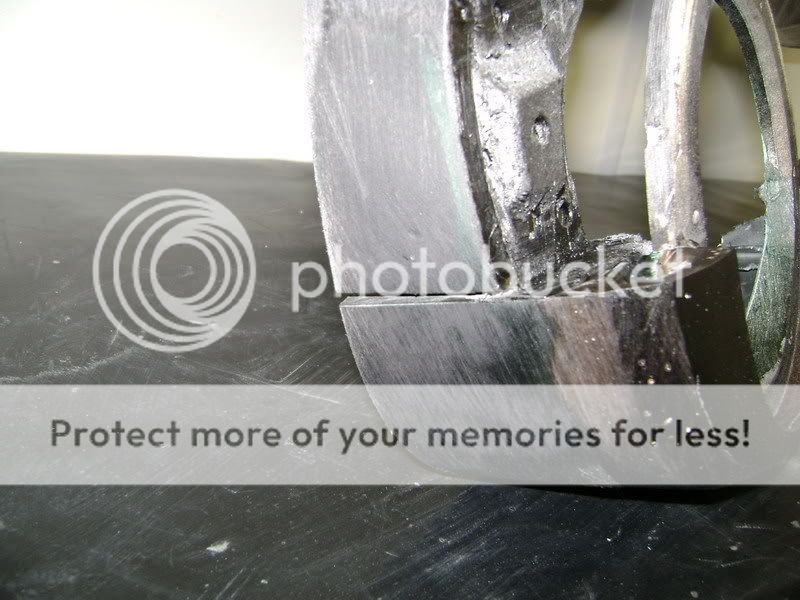
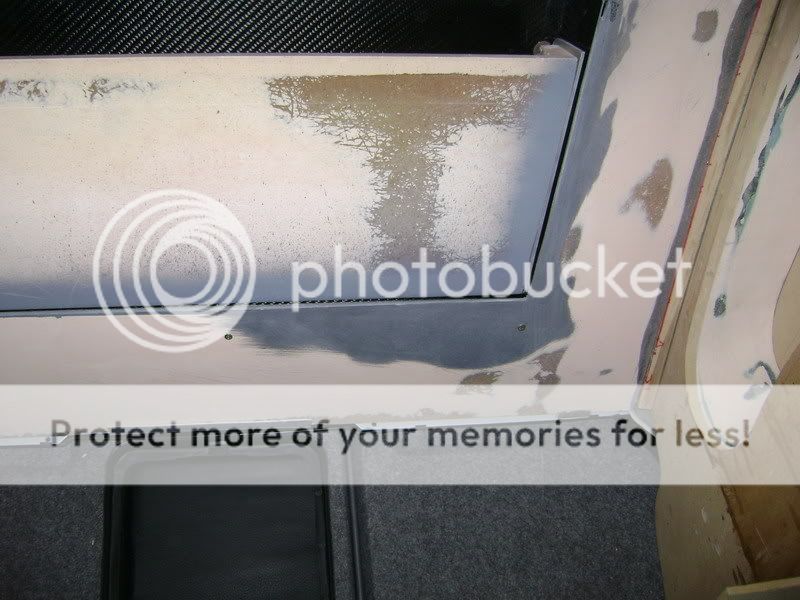
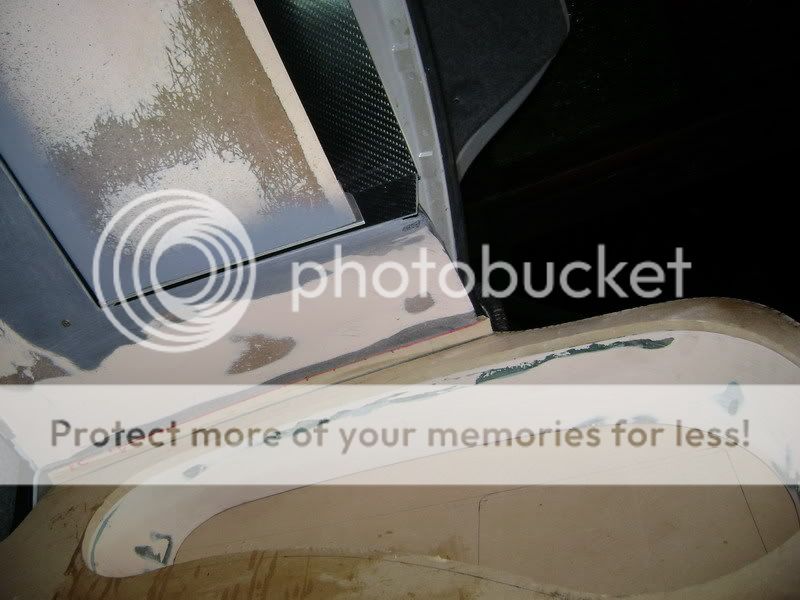
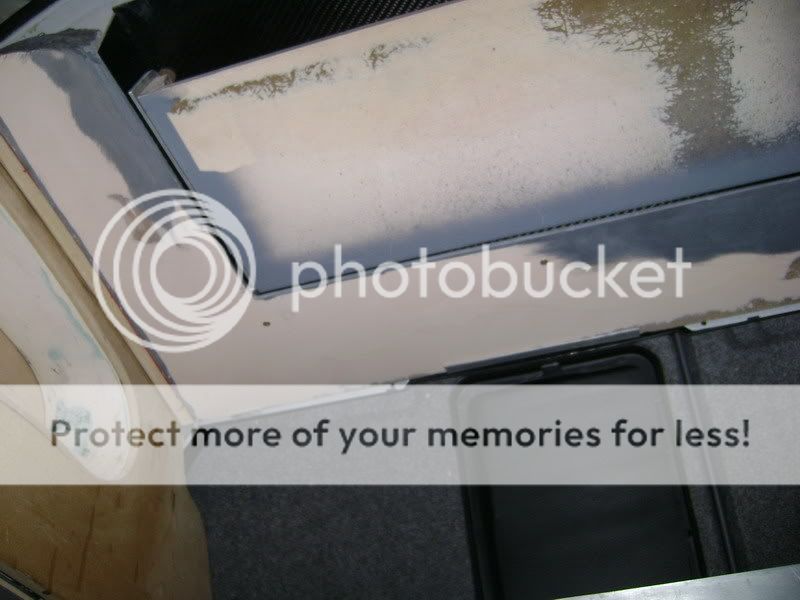
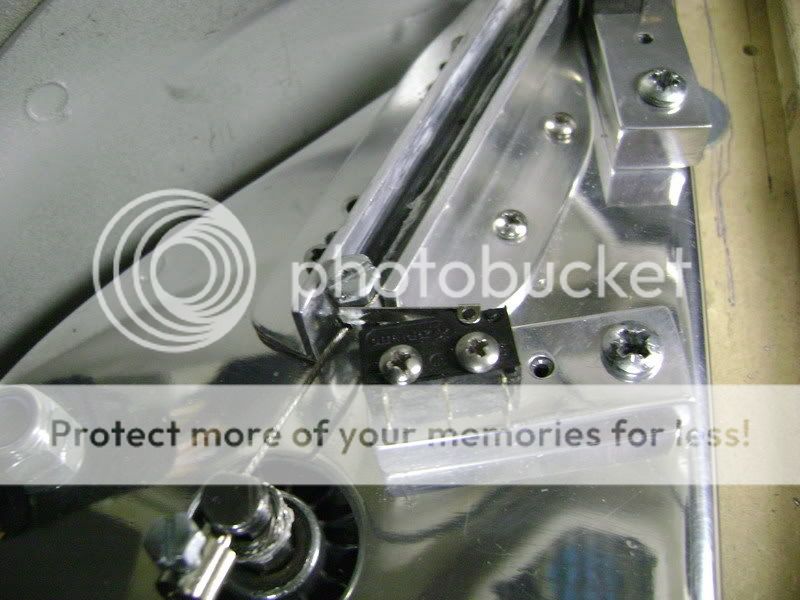
In the meanwhile I made a whole into the doors platework, behind the speaker.
You can see the windowglider. Just nog touching the speaker.
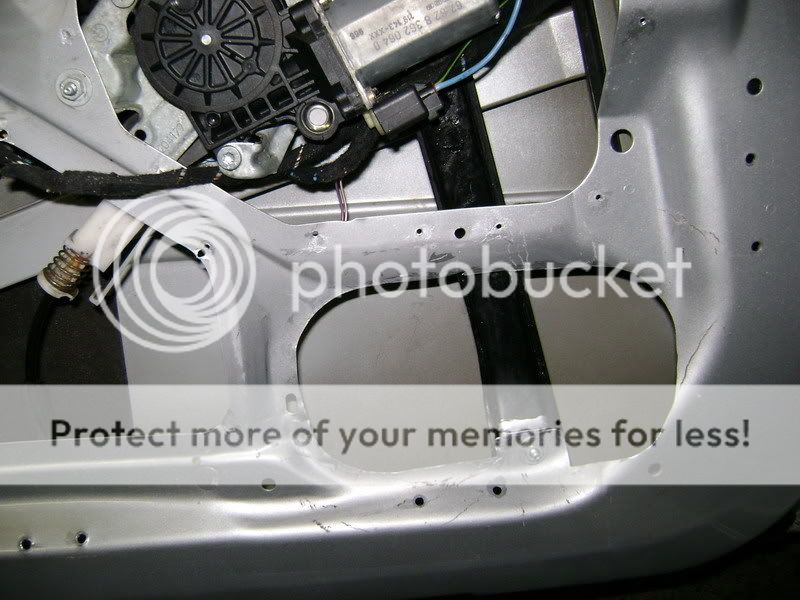 Made some more parts, to fill up the other wholes. 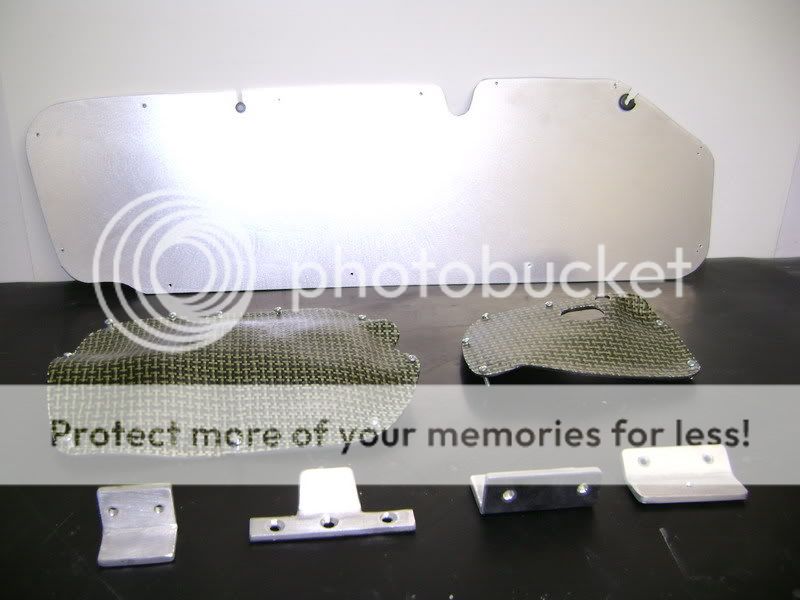
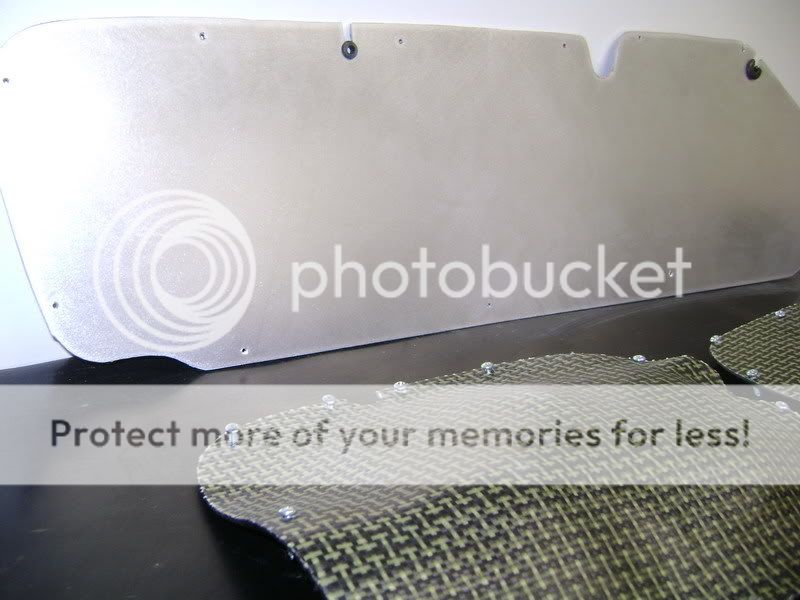
On the background, there's a alu plate of 4mm thick. Very hard and strong.
In the middle you can see 2 Carbonkevlar parts. I made em as thin als possible .
On the foreground you see 4 little rings I made, to screw the doorpanel extra tight. If you look to the second on the right, there's a little rubber he pasted on. On the place where he screwed it. This to prevent resonance. 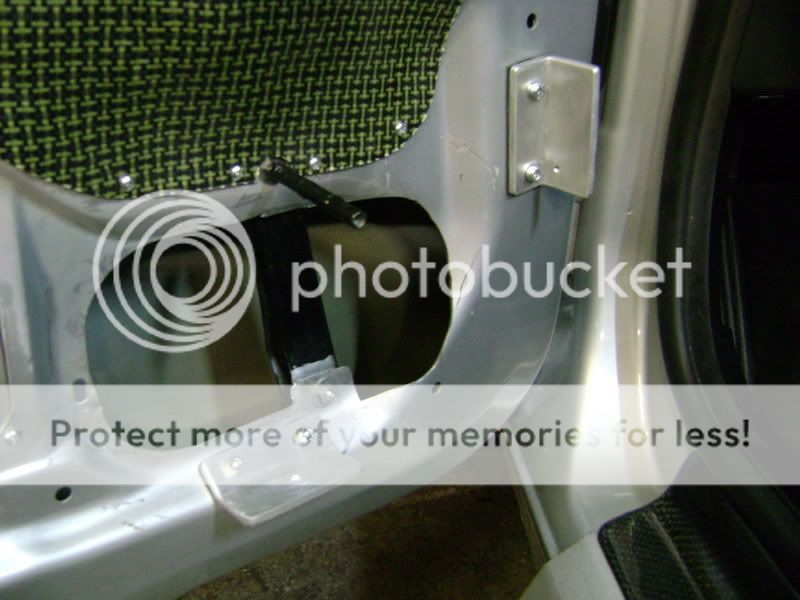
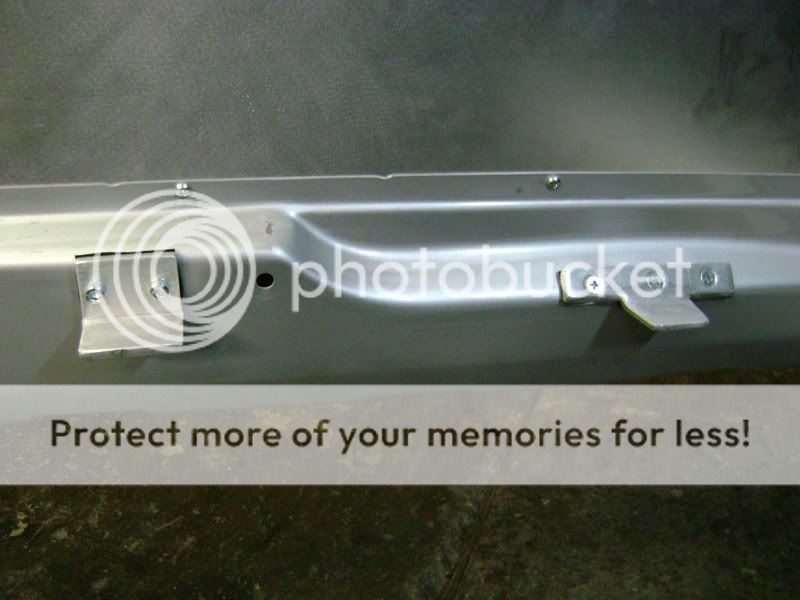
On the picture you see a little pole picking out. That's MEGA IMPORTANT.
Behind the speaker, there'll be another screw, so we can attach it even more in the middle.
 Everything mounted: 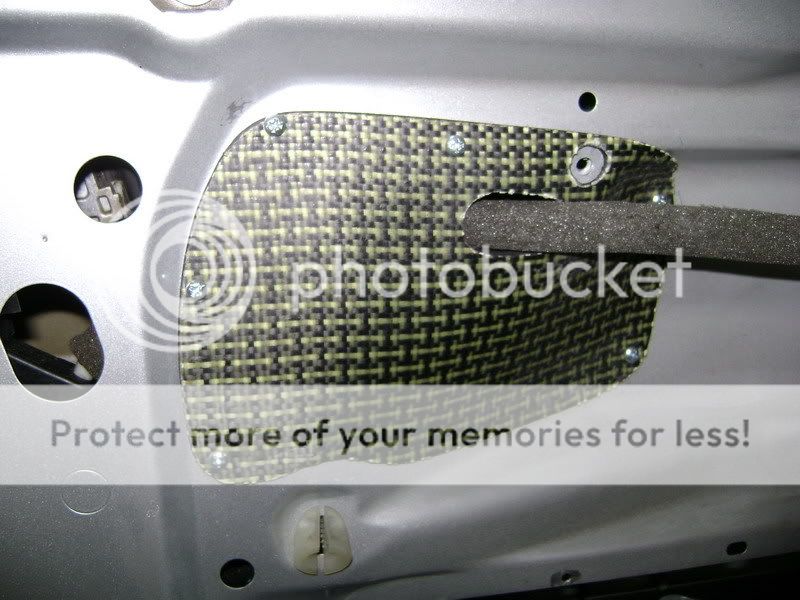
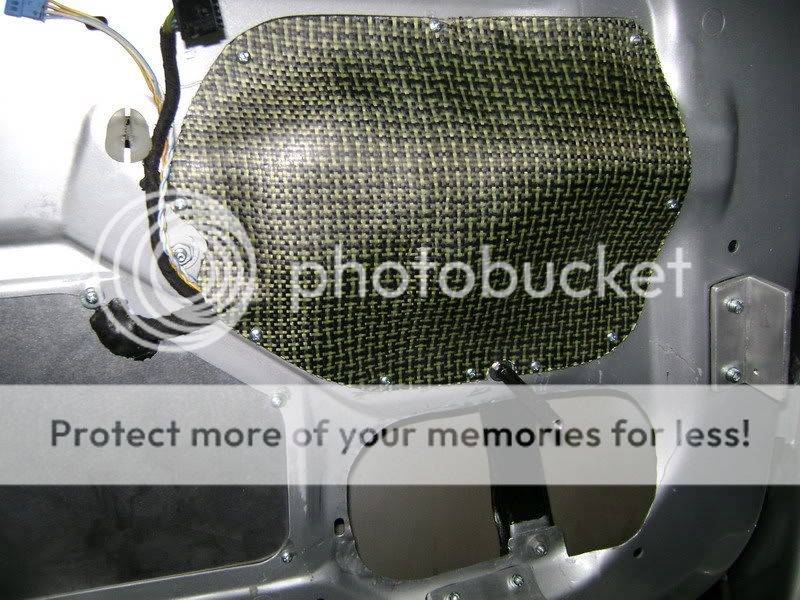
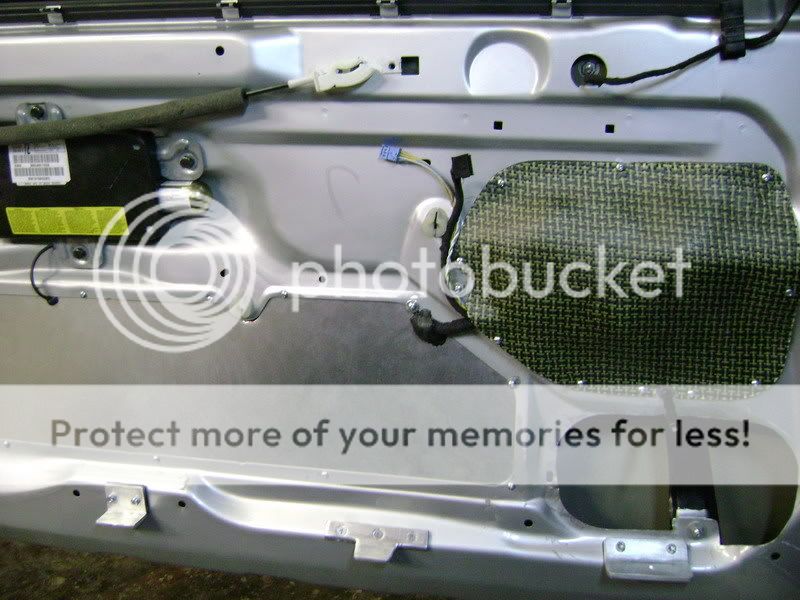
This won't be the end of the door. I has to make some tiny wholes airtight, but that won't go untill the has all the material to fill up the sound.
All I makes, will be filled up with this material. What exactly I going to use, he's not sure. we'ill keep u informed.
As you can see, I putting a lot of work into all this. And more work is coming up so the sound won't be lost... I think this is a type of work, that is underestimated be many people. But the work will pay of in the end, that's what we are sure of...
Posted By: robolop
Date Posted: August 21, 2009 at 1:17 PM
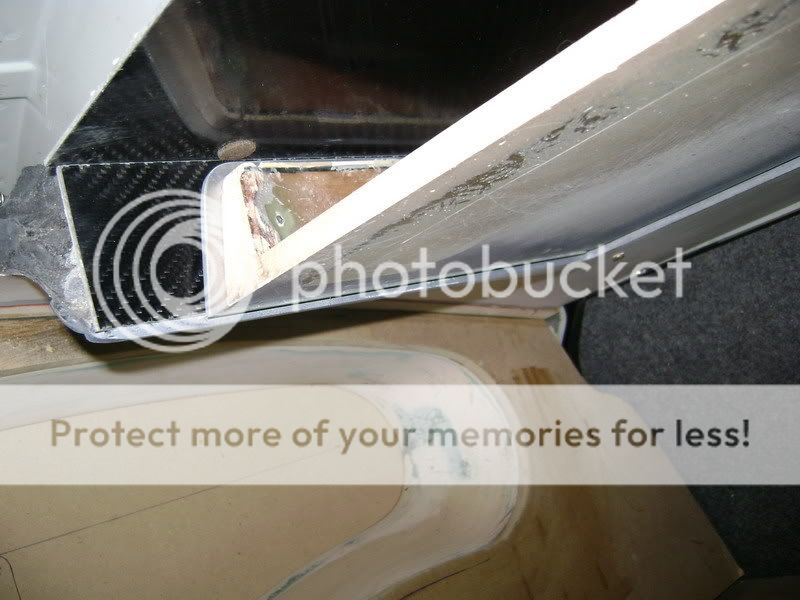
As you can see, het got the disc in there again. Disced a ditch in there so I gots some place to get the overflowingin leather away. The alu and the pole I got on there so it all stays equal when it gets overlayed.
you see, the plates can be rattled off.
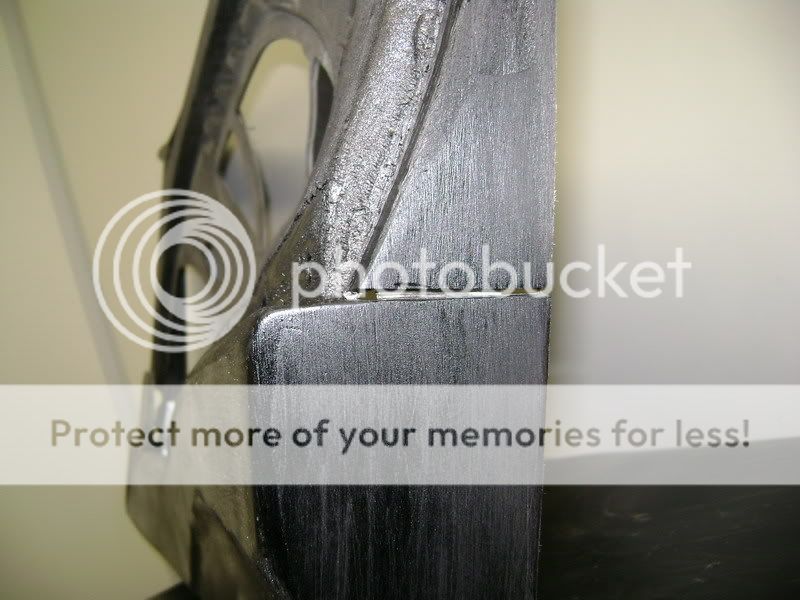 
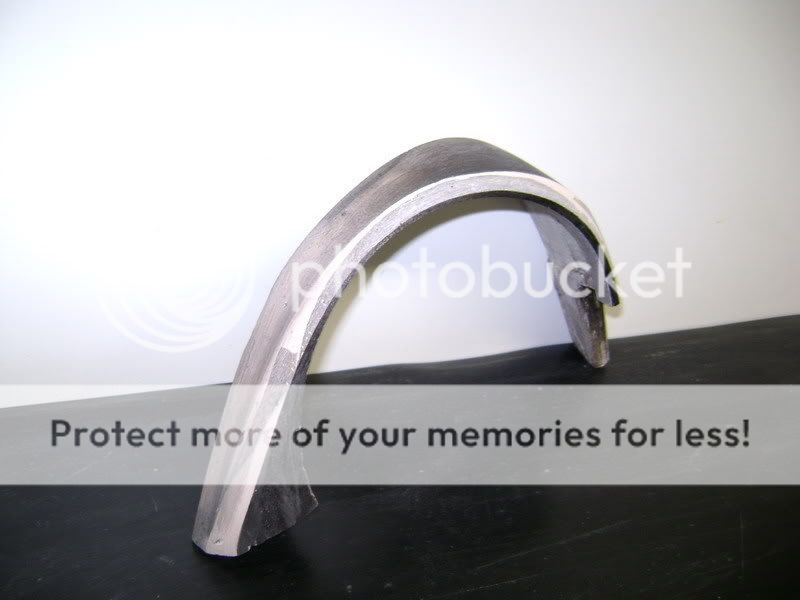
as you guys can see, the bottom part is already painted black, you all know what happens then... indeed, CARBON TIME The bottomsides of the doorpanels will have to be done in CARBON FIBRE. So a dificcult object to get in the Carbon fibre. But we must admit, it's done nicely..
Many time was put into preparation the prevent the CF - overlay to got wrong at any place. 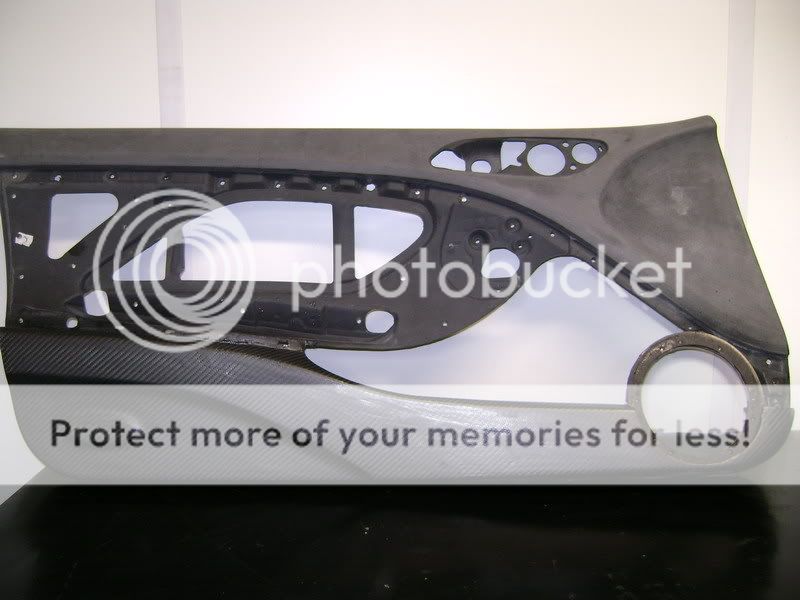
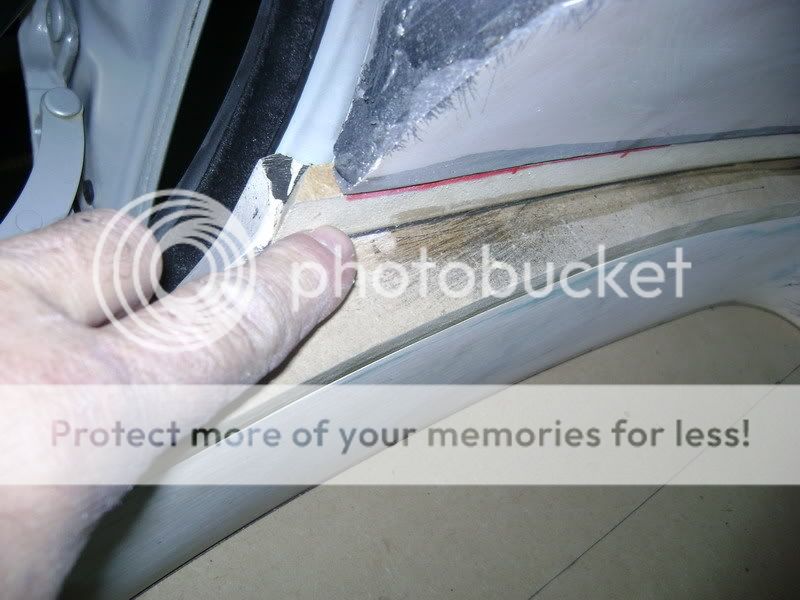
This annoying little side was one of the many things that could go wrong.
Also, I was satisfied to get the little lamp in there. makes the piece a bit more interesting then one big lumb piece. 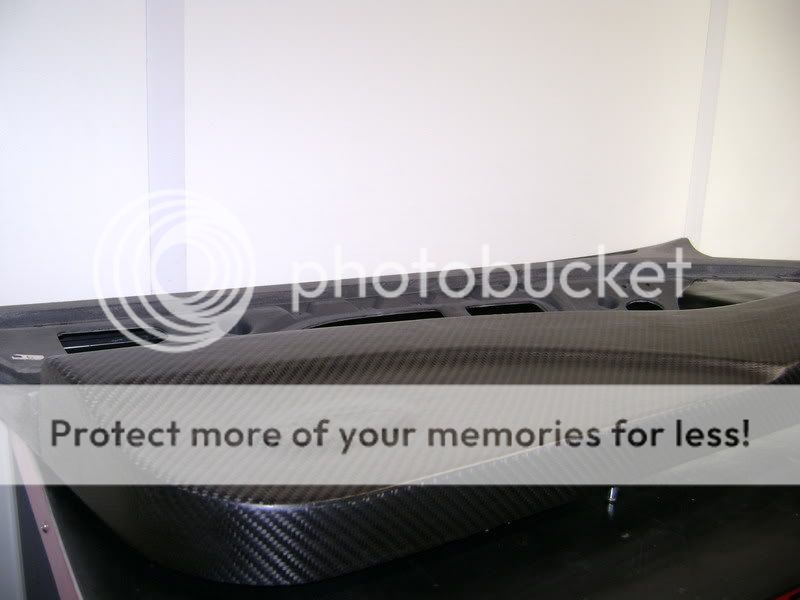
This is the ditch I disced into the panel. For those who don't get the picture. When it's all done, the upperside of the panel will be overlayed in leather. Then I needs a little space the get rid of the too much leather.
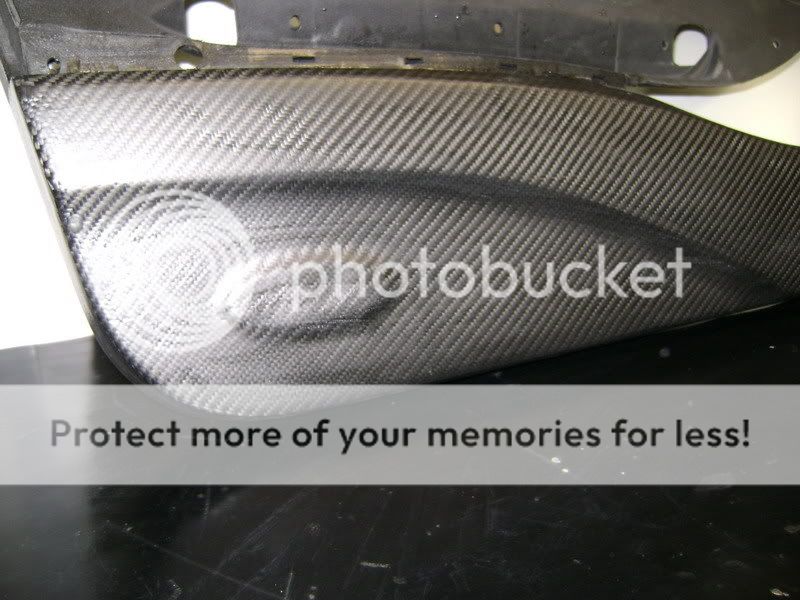
To get a nicer finishing off You see on this pic that everything at the bottom is in CF.. 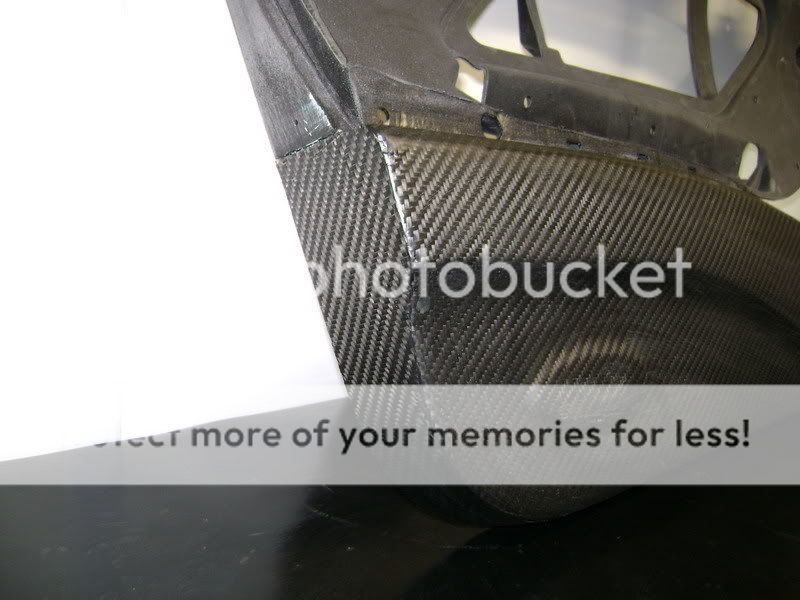
Now the big work is to get it all nice and flat. Put some more layers of epoxy on there till it's all nice and smooth.
so, lots of work and patience...
Posted By: robolop
Date Posted: August 21, 2009 at 1:18 PM
This is the 3th layer of epoxy. Rubb it all down flat and equal everywhere, and then another 4th layer of epoxy. Some pics 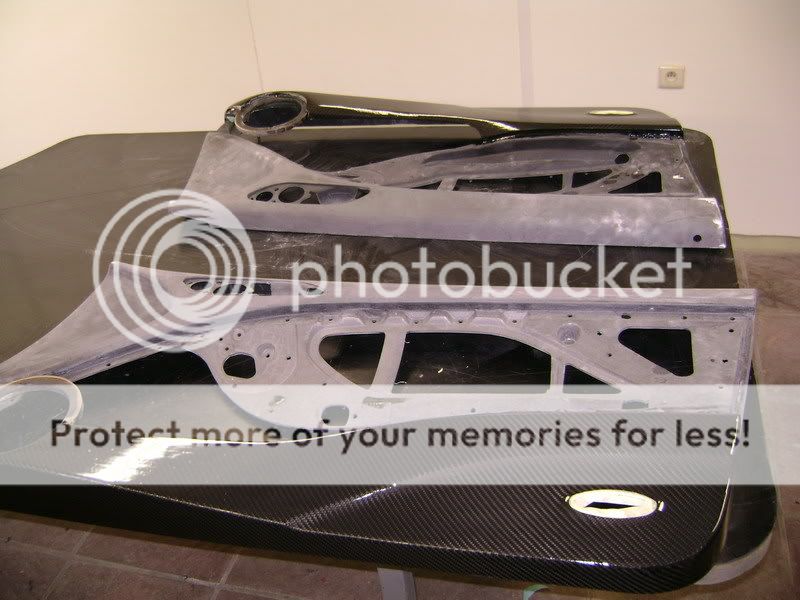 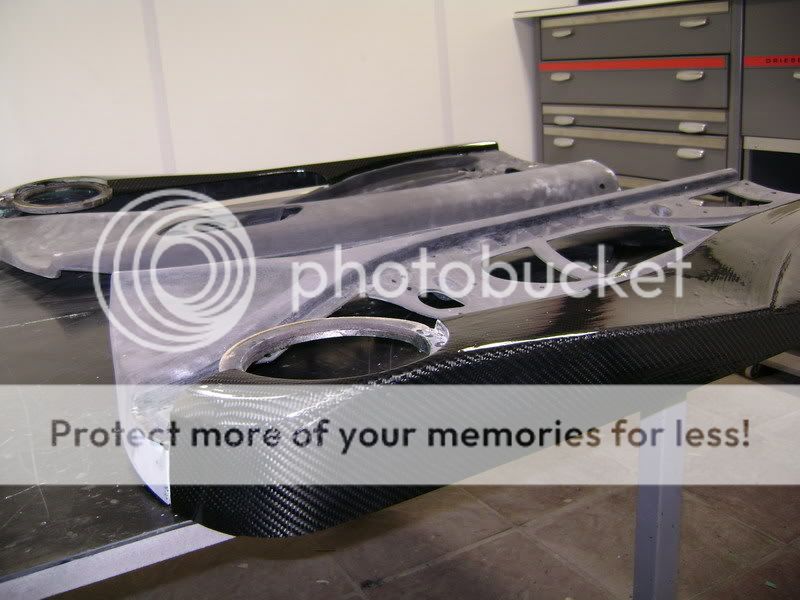 
Posted By: robolop
Date Posted: August 21, 2009 at 1:22 PM
After firmly rubbin' the epoxy, I added another layer op expoxy.
Maybe it's not so visible on the pic, but it's quit flat already.
4th layer of epoxy. Now it's important to rub the last layer good. Start with an 800 and end with a 2000. I also found the same black leather to cover the panel like the original one.
A couple of years ago, my wife was making ( read: painting) christmasballes, to hang in the christmastree. She also hooked on making special things When i looked at the plexy balls, i know, that sometime, i could use it for another project Well, ladies and gents, IT'S TIME
These are the plexy balls, you can buy 'm in every size. (according to his wife)..
:D:D:D
A old friend of my Earl Zausmer build 12 or 13 years ago something like this.
Then I made a hole in the bigget bal, so the little one stands a bit 'in' it
On this pic you can see the ball with the speaker, stands a bit further away. I did this on purpose.
pic with speakers in it.
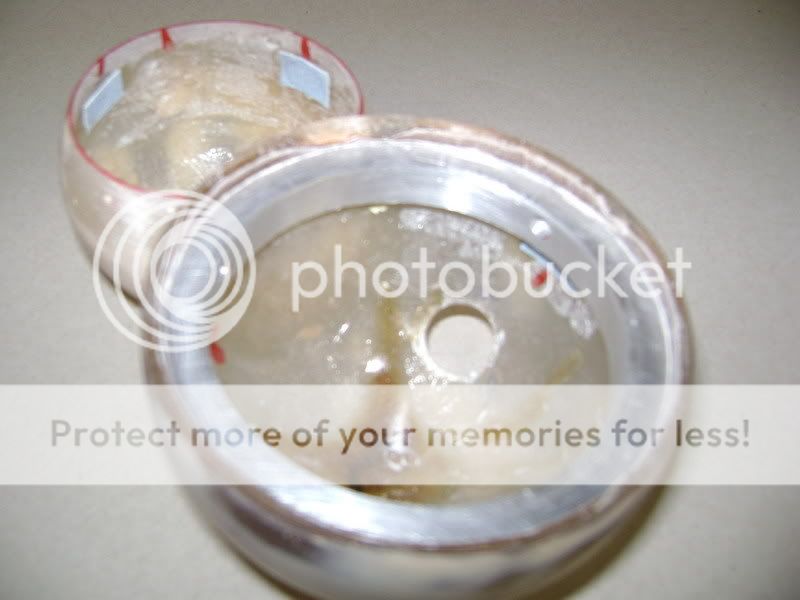
__________________They will go on horizontally against the A-pillar of the car. I made already 4 copies in polyester.
Made a hole in it, and taped it all with some tape. Then I polished it all a few times, so when he takes them apart, no polyester stays sticking on the plexy.
It also took some work to make the fiberglass so smooth with as less airbubbles as possible. 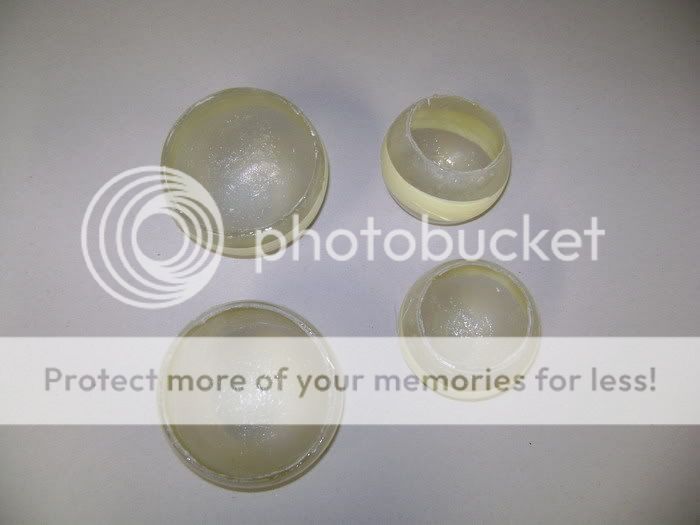
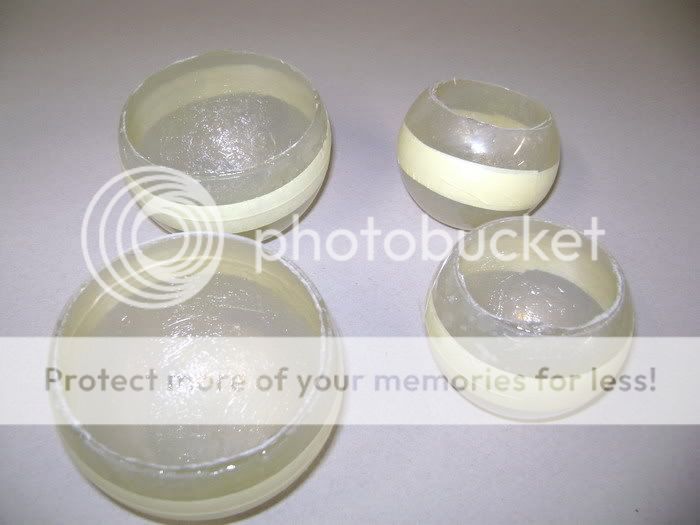
There are 2 layers of polyester now, what should be strong enough. Don't want these things to get TOO heavy.
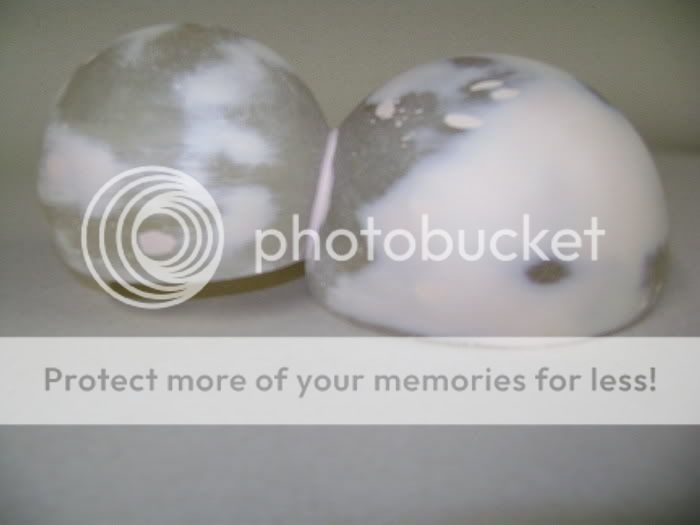
Made another 4 alu-rings that will come in there. So it will be possible to screw the speakers tight into the alu rings. It also popped to mind that it would be cool to cover this in CF, but that's almost not possible. The polyester balls are ready, and look good.
On the right bal, you see a piece of polyester go loose from the plexy.
Ticked it with a hammer.
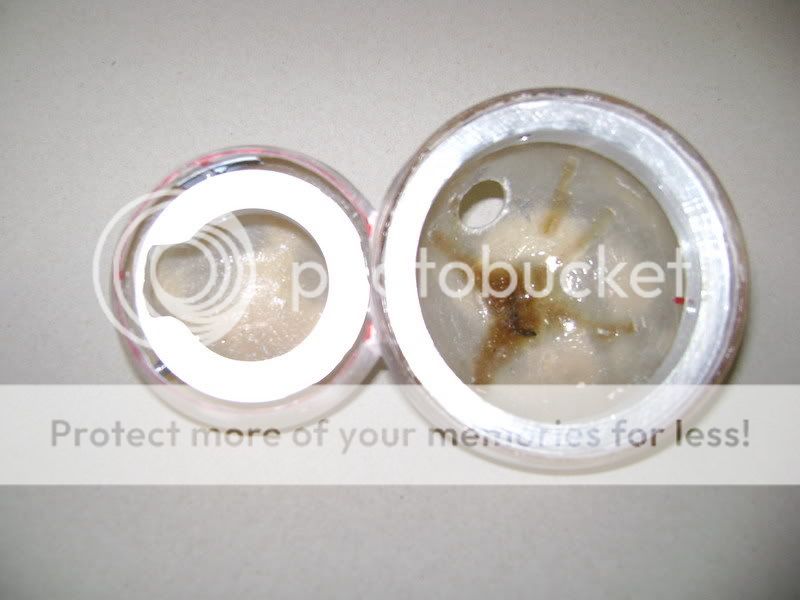
IMG]https://i82.photobucket.com/albums/j272/robola/DSC02020_resize.jpg[/IMG] removed the plexy (upper) 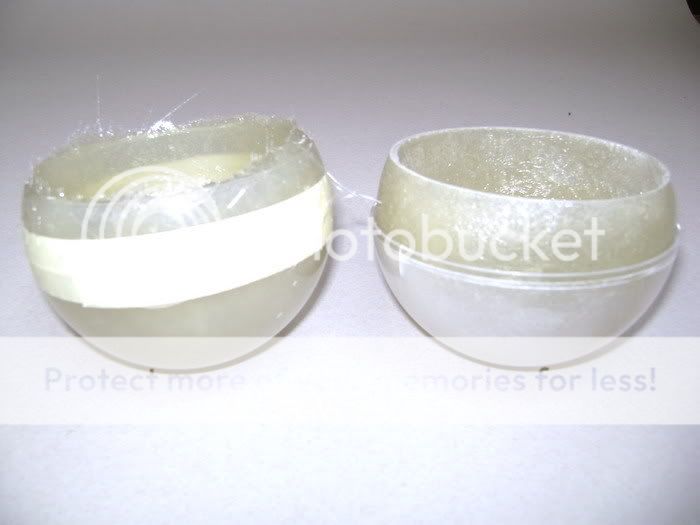
Removed the lower plexy.
I made them each the same height.
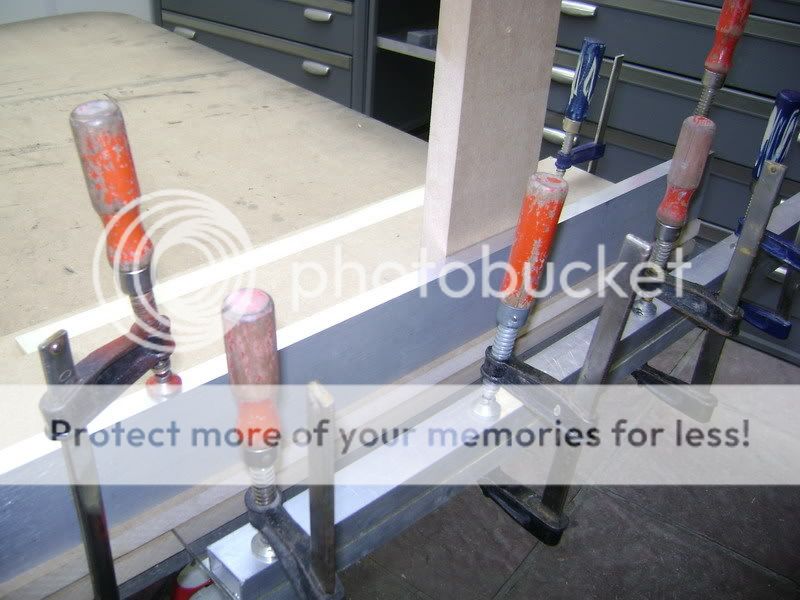
First I leveled the plank. Then rubbed it in one time... 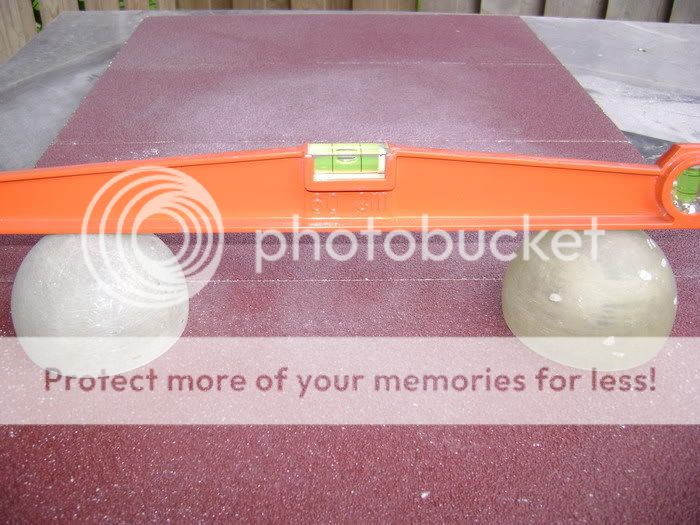

Put them together. Mesured a couple of times how much the tweeter must go backwards, and put a piece of MDF wood under it, and glued it together.
You can see I put a little filler to fill the wholes in the polyester. 
I made the smaller ball crossed over in the big ball. It seemed cool...

Before I going further with this, I needs some alu, which my friend is going to suply. So I started making some bridles to hook them up to the A-pillars. We can assure you, a f** job which will take a while Got some alu rings from 10mm thick to center the speakers..
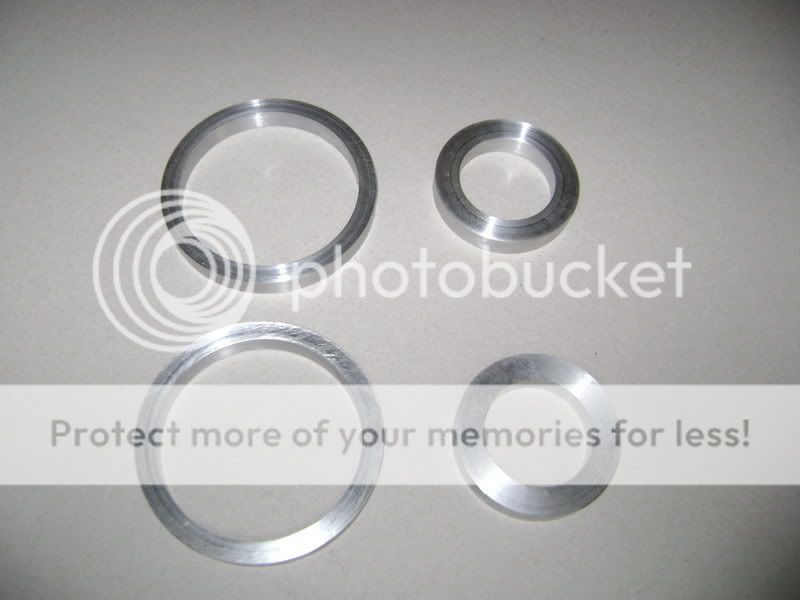 The rings must go into the whole, and got tightened at a specific depth.
I can asure you, i was on this for HOURS. Screwed each ring with 3 screws.
As you can see, I made the side of the ring a bit raw, and put some slots in it. I did this, so the polyester can flow nicely and everything will be fastened tight. 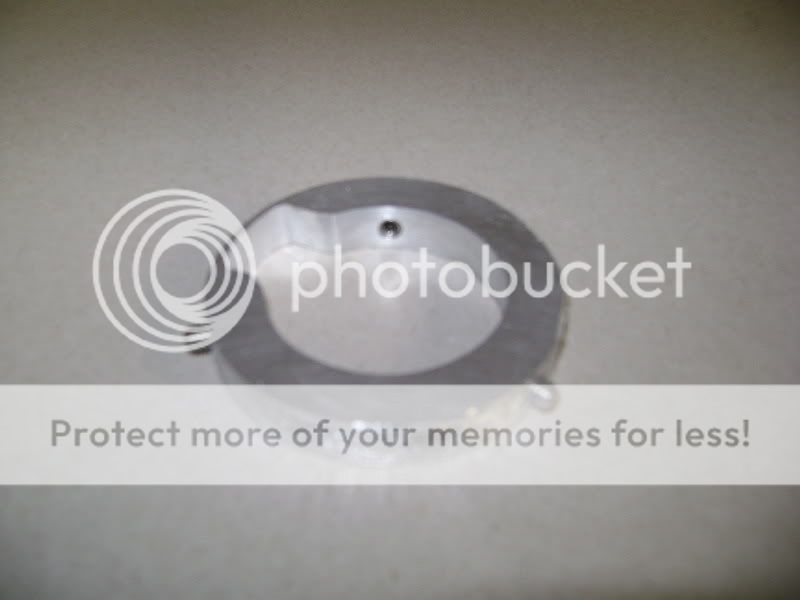
On this picture, you can see, that where the screws are, hI pasted a little piece of rubbingpaper. To keep it from moving. 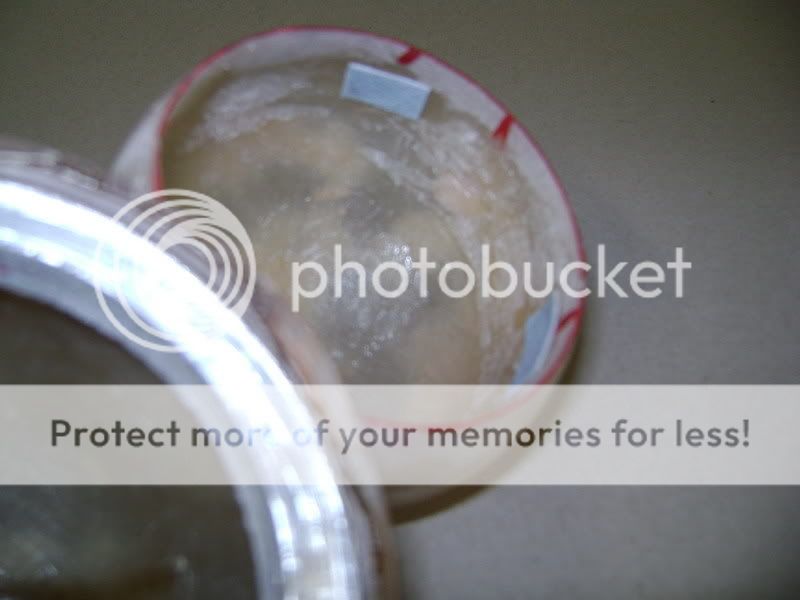
In the little ring for the tweeter, I milled out a little hole. for the cables. [Got some alu rings from 10mm thick to center the speakers..
The rings must go into the whole, and got tightened at a specific depth.
I can asure you, i was on this for HOURS. Screwed each ring with 3 screws.
As you can see, I made the side of the ring a bit raw, and put some slots in it. I did this, so the polyester can flow nicely and everything will be fastened tight.
On this picture, you can see, that where the screws are, hI pasted a little piece of rubbingpaper. To keep it from moving.
I already kept the balls in the car, to see if they were straight, and how they would look on the dash. 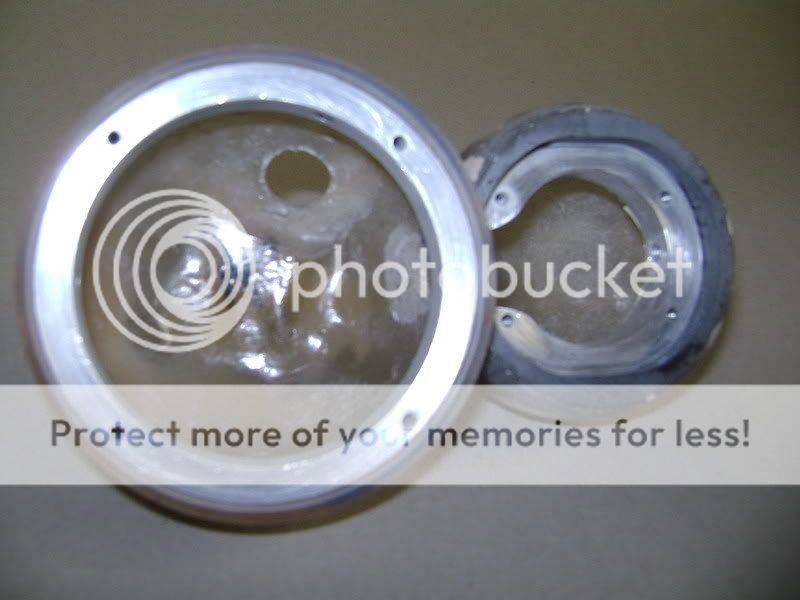
This work seems very simple, until you do it.
To know if Left and Right are exactly the same, I took out my laser.
With that thing it's actually very easy. You place it in the centre of the mid. I got lucky it fitted right in . 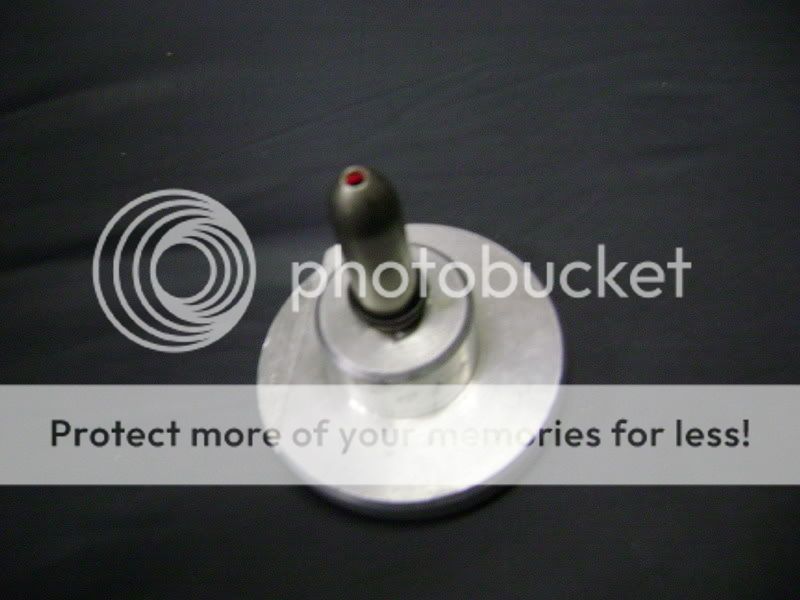
You turn the thing on, and aim where you want it. 
In the background you see some trophies what i won in IASCA COMPETITION . Include;EUROPEAN CHAMPION and BEST OF INSTAL.: Here's how i fastened the christmasballs against the A-pillar.
As you can see, i put in a big fat roundel in the biggest ball. This was so I could hold it all firmly.
Also you can see that the hole is bigger than the screw. i did that so i can aim it.
The head of the screw I cut off a little, cause I hit the back of the speaker. 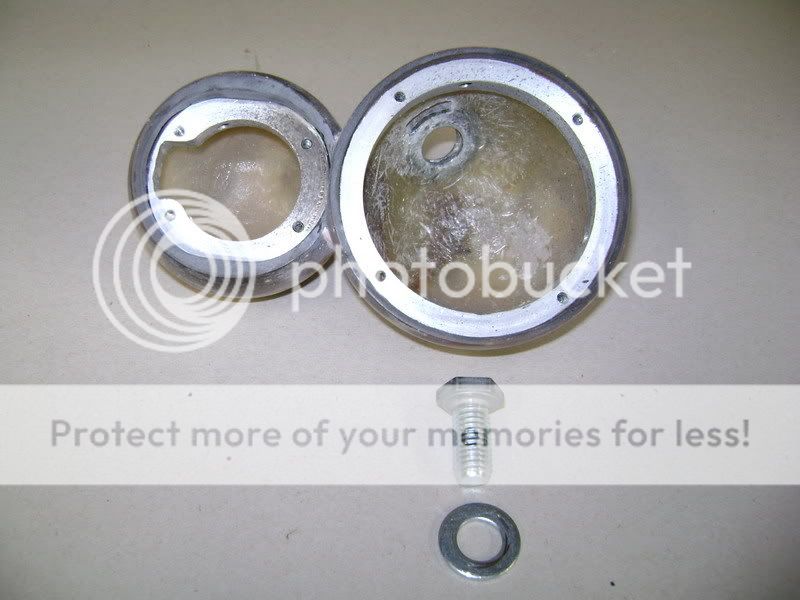
Upside the hole, you can see a little slot. i made that to get the cables through. 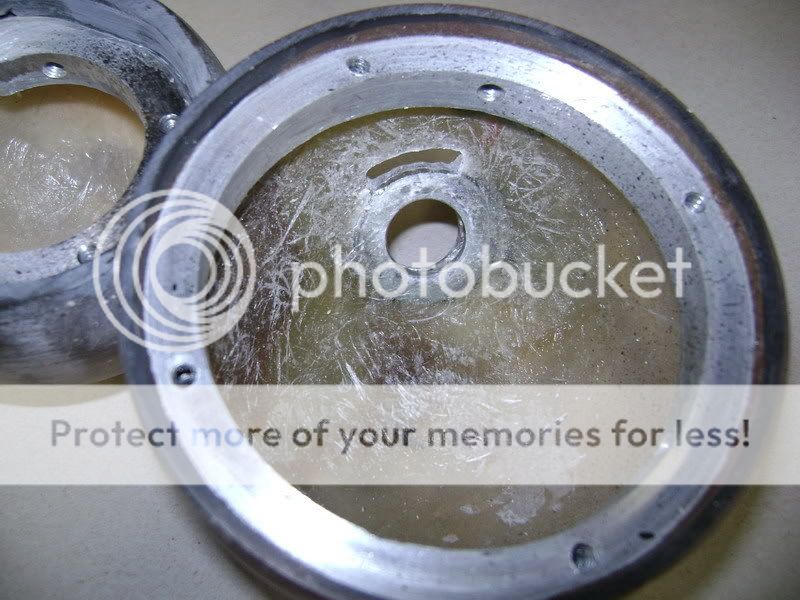
This is the Iron trolley who is screwed on the A-pillar. 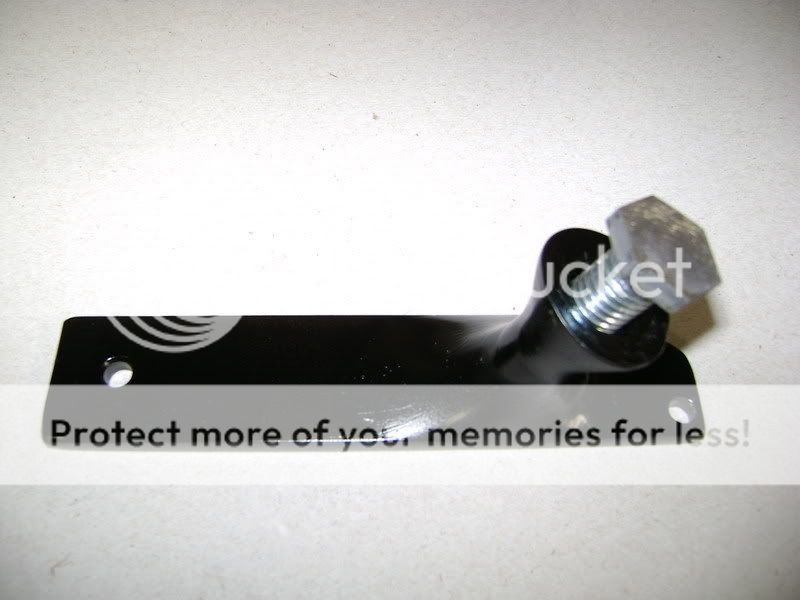
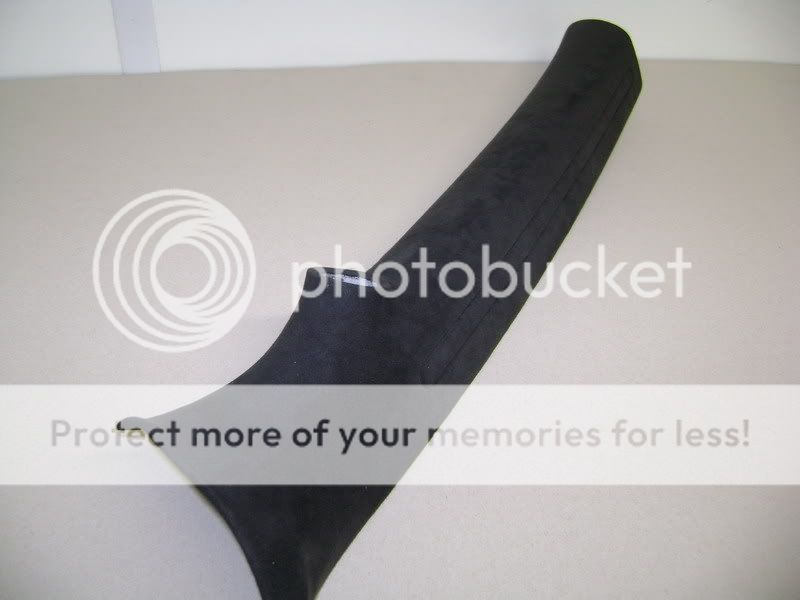
This is the adapted A-Pillar. 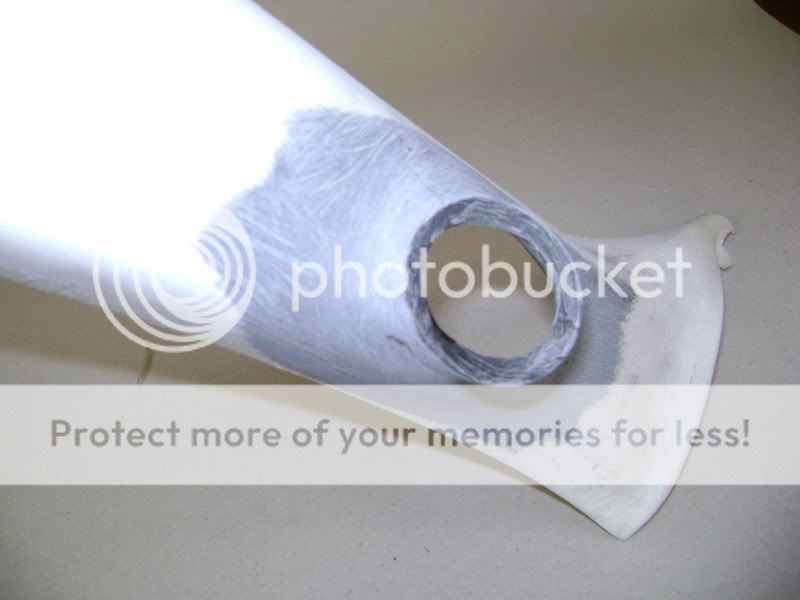
So it looks in the car. The A-pillars will be covered in black alcantara. 

It's tight, LOCK TIGHT ! 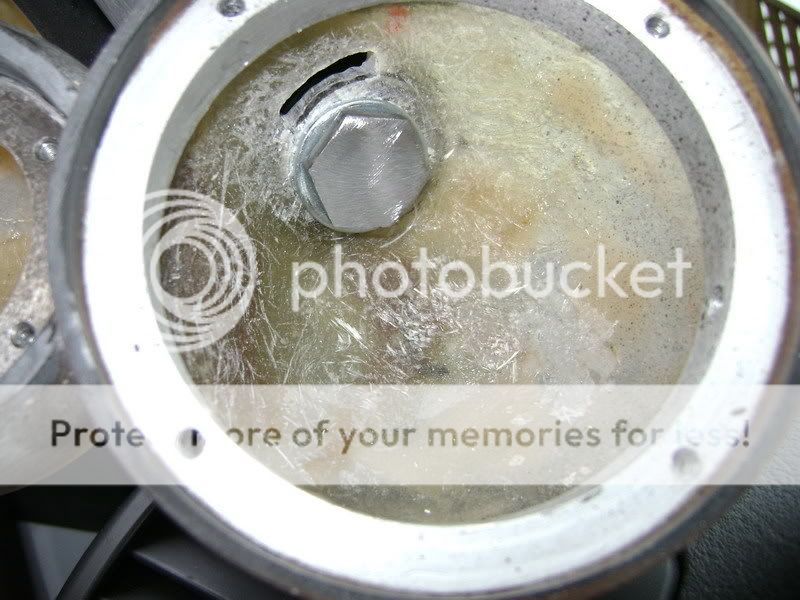
Here the christmasballs of he's wifey, in the car
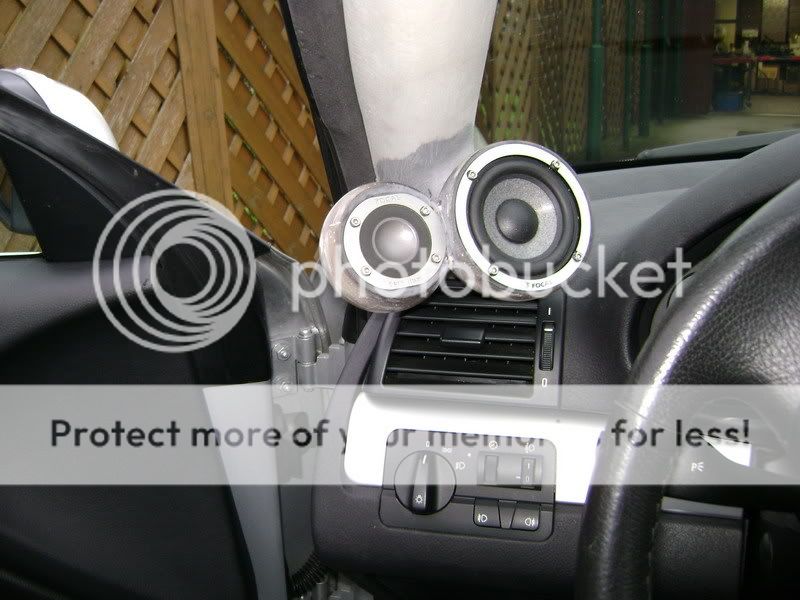

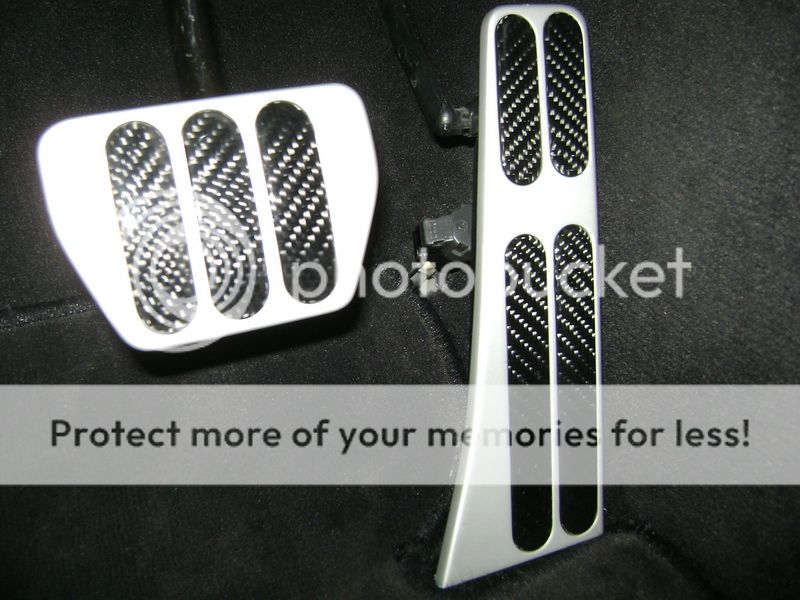
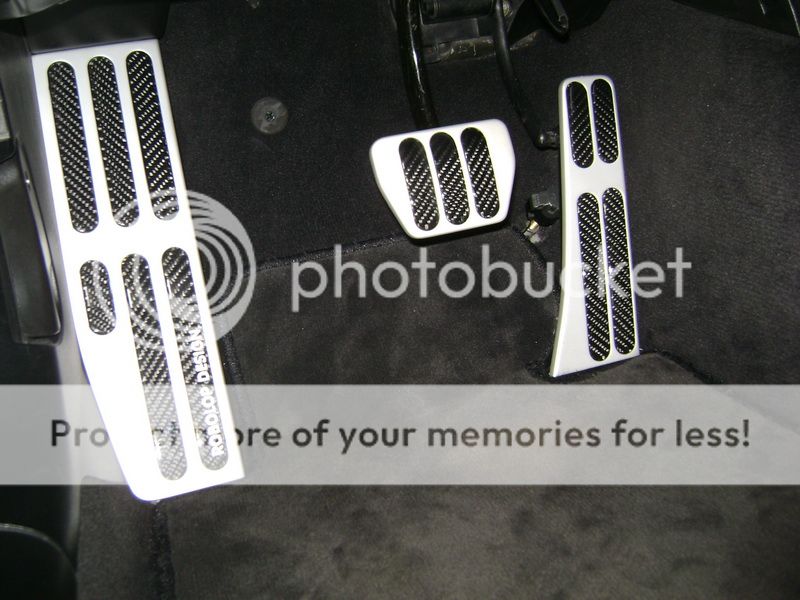
The original focal grill's 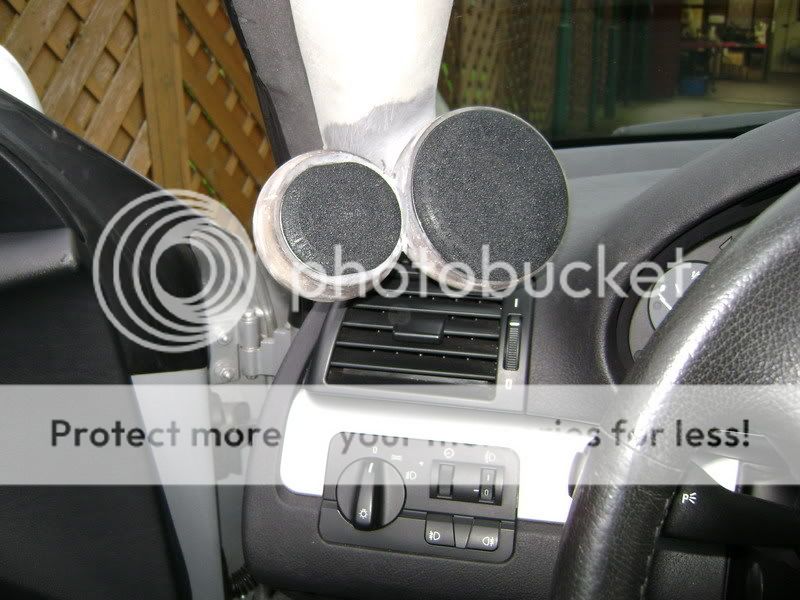
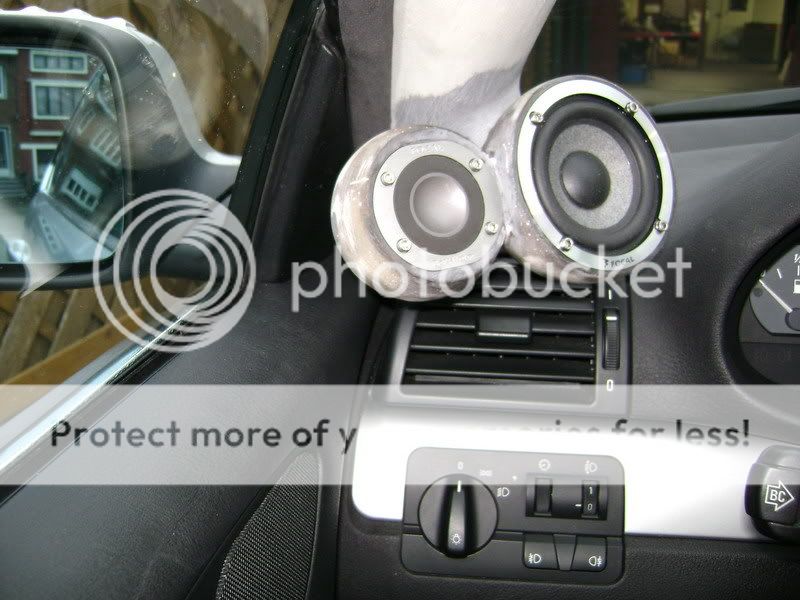
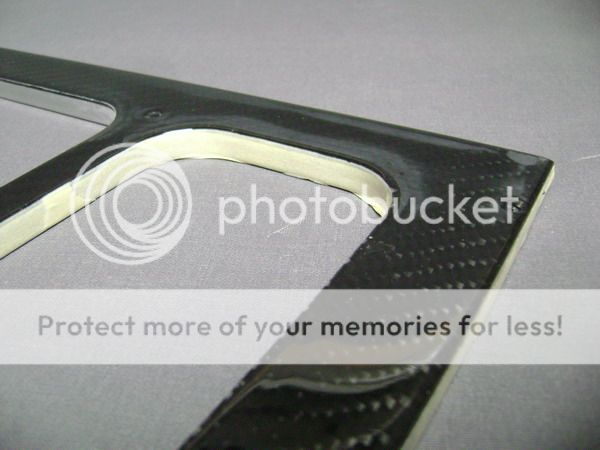
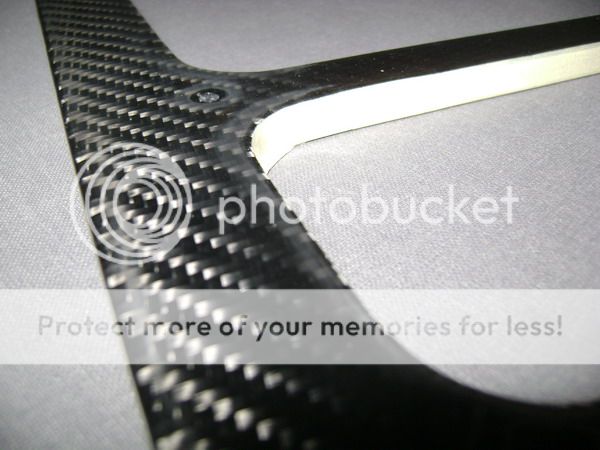
You may also notice that the wooden trim in the car is changed by alu...
i also made some in CF, but i didn't like it, so sold those ones, together with his wooden.
Wanted some contrast in the interior.
That's why the polyester balls will be sprayed in the silver, like the trim. The A-Pillars are finally covered in Alcantara.
That was not so easy...
Where the hole is for the speakers, i had some alcantara to much. So pulled everything out of he sleave to make it nice and smooth.
A good thing I had big sleaves on his jumper that day .
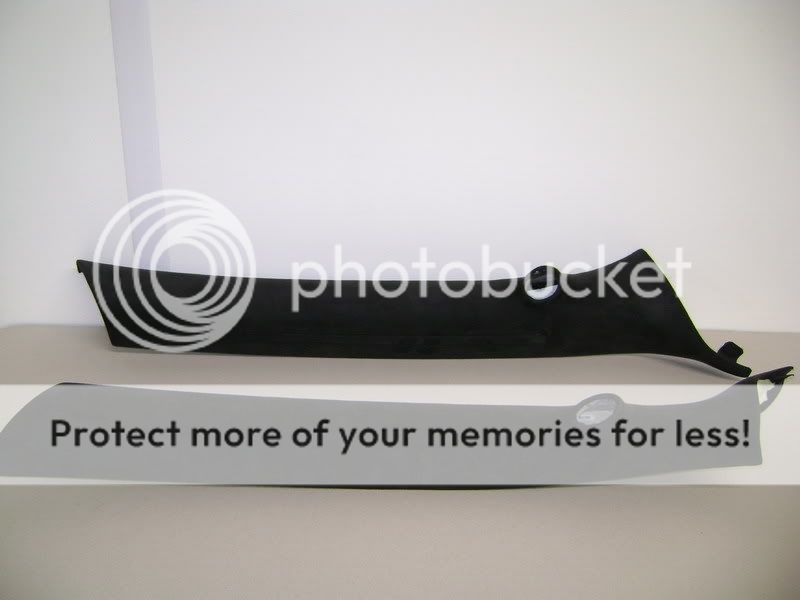 
That little doodiety thing wasn't easy to cover.. 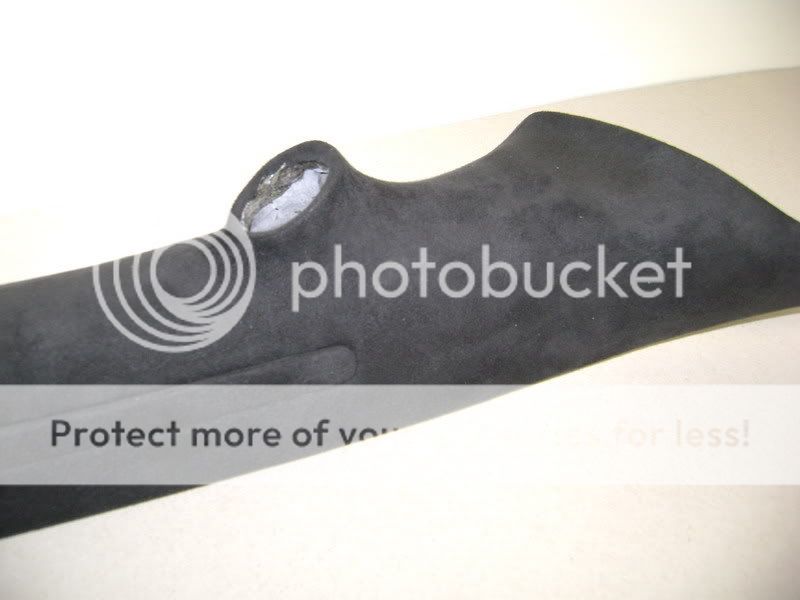
the rest of the interior will be another 3m of alcantara... My balls are primered....:eek::eek::eek::eek::eek: 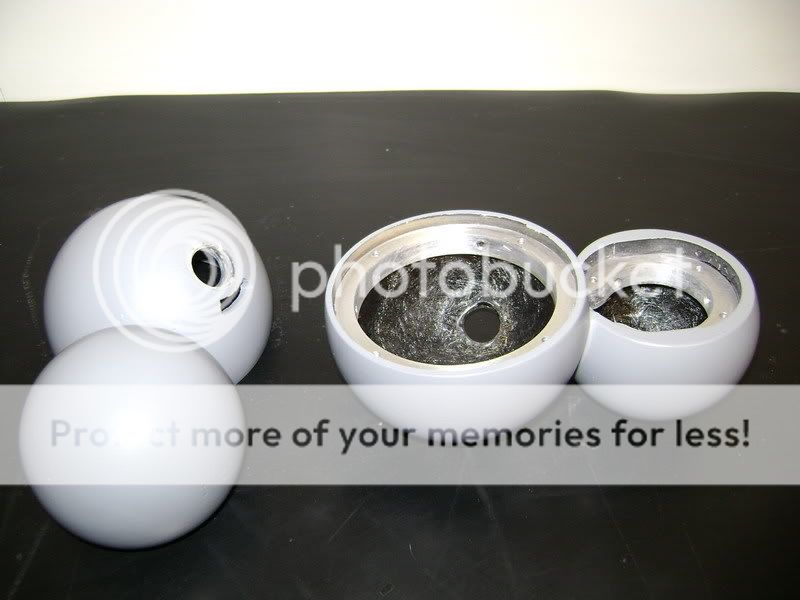

The balls are painted, and look just about perfect.
That's what I had in mind, and I made it for 100%.
Colour matches the trim perfectly.... 

About the little ditch in the big ball, i satisfied. Not so easy to make, and rubb it there. 


This is what you see on the outside. 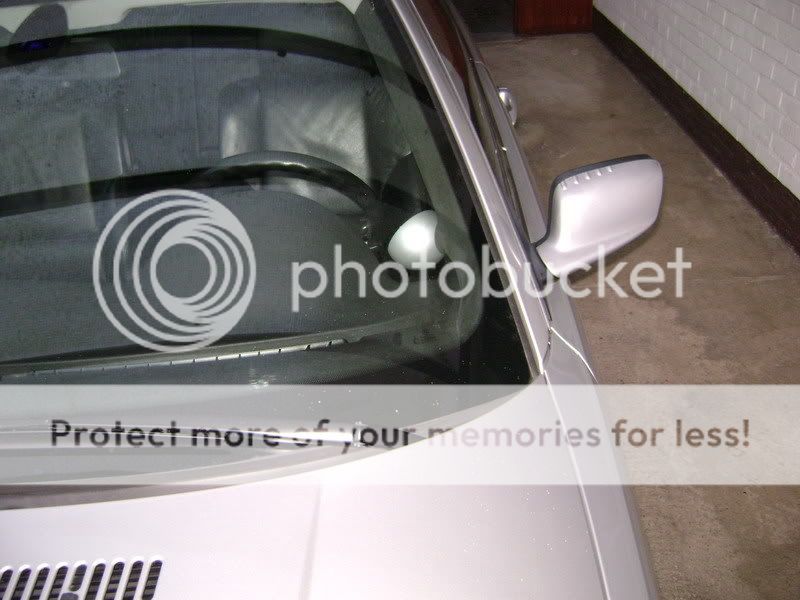
Again something that's finished. When I thinks about it know, it has worth the effort again....
up to the next!
Posted By: robolop
Date Posted: August 21, 2009 at 1:30 PM
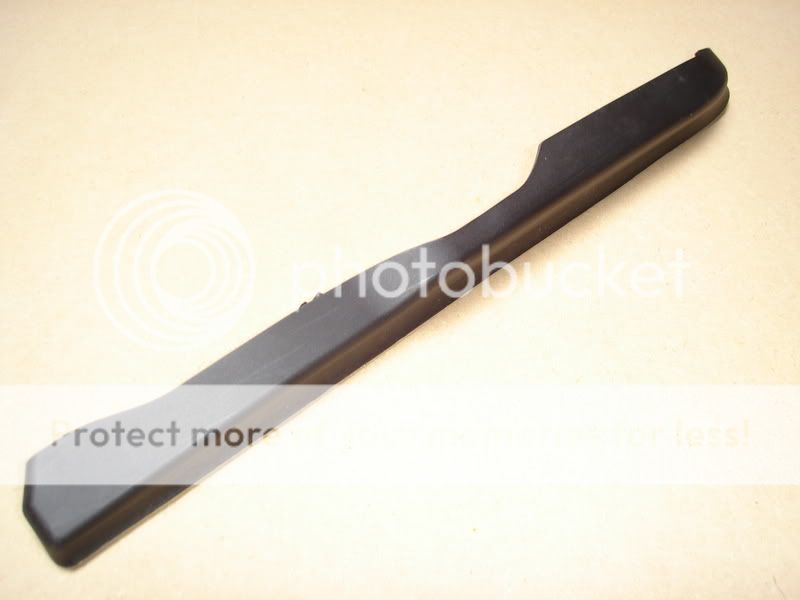
Don't know how you cal these things, but I gonna make some in CF..:D:D

Milled a whole in there, to put a plexi glass.
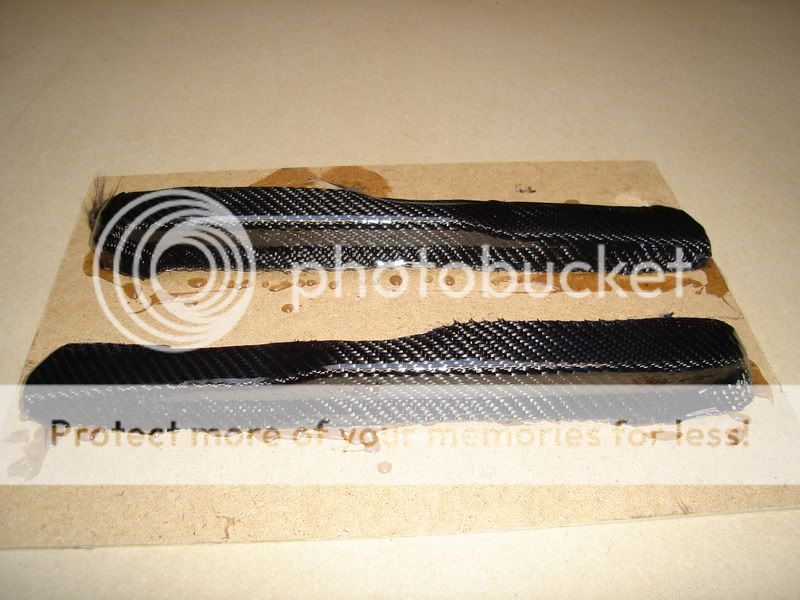
I will get a little neon, or ledlight in there in future. PLexy was a little hard work though.
Layer of CF and epoxy.
Do it a couple of times to make it smooth. 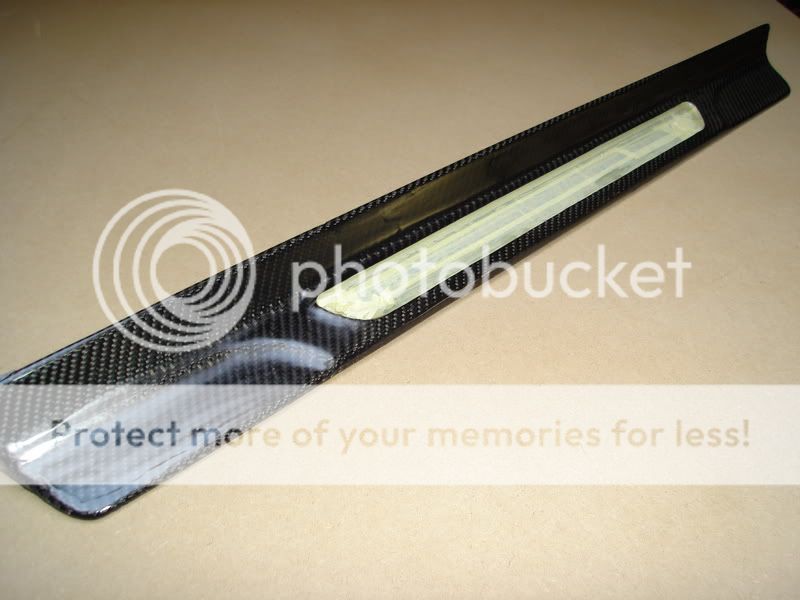
In the plexy, there'l come a logo. still not sure what it's gonna be...
time will tell..:D:D:D 
:
Posted By: robolop
Date Posted: August 21, 2009 at 1:31 PM
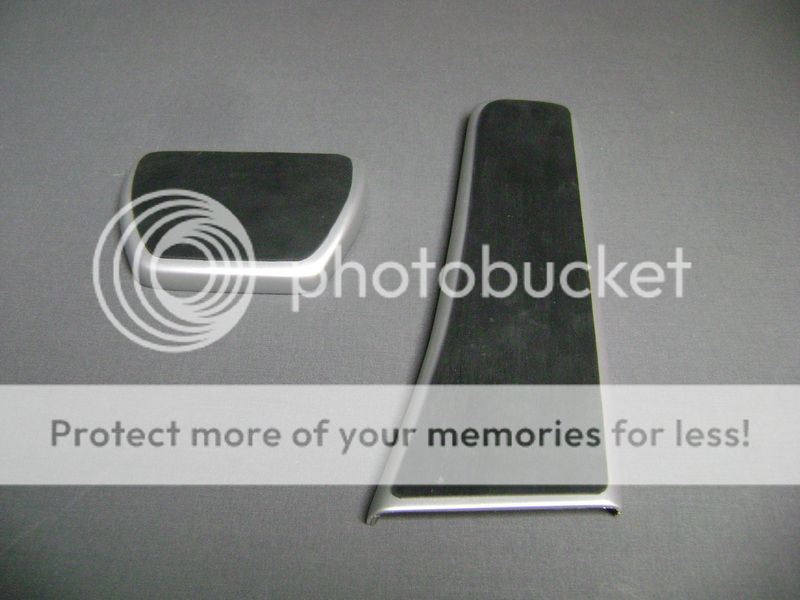
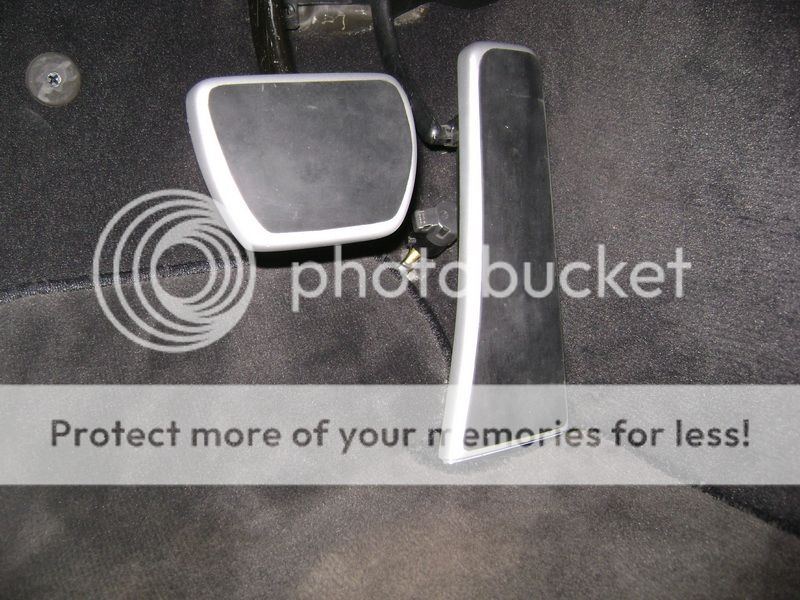
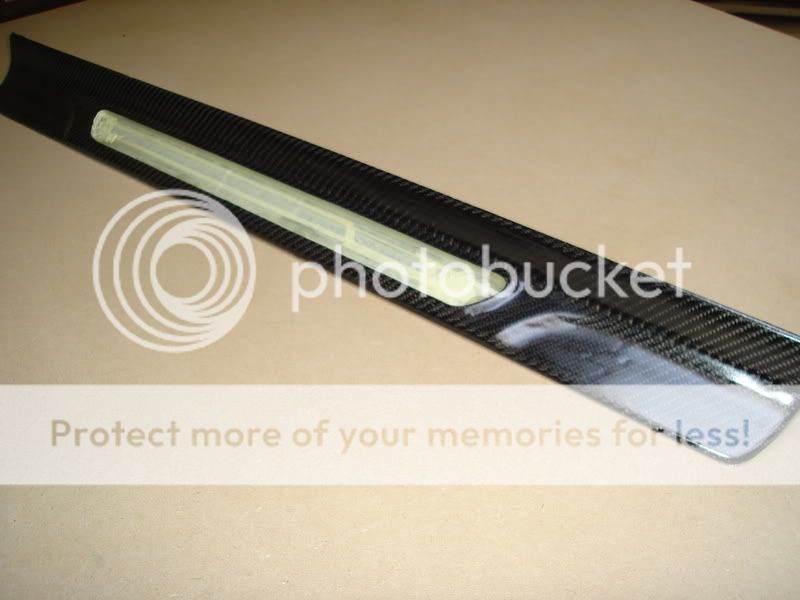
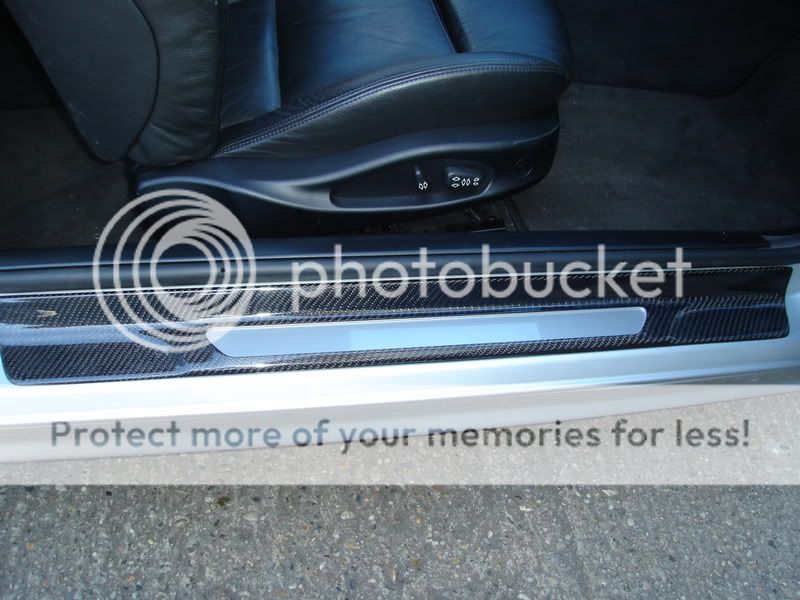
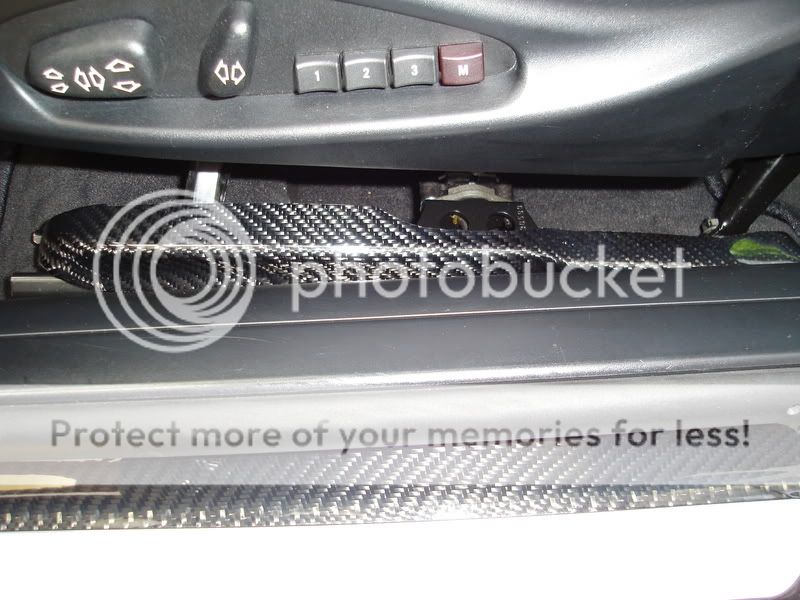
little pieces under the seats.
Carbon pieces ready to get mounted again.
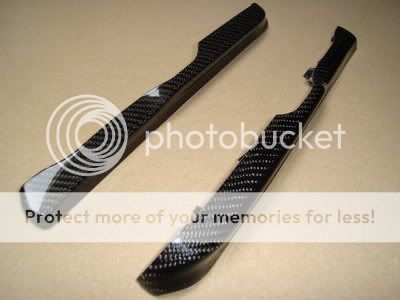

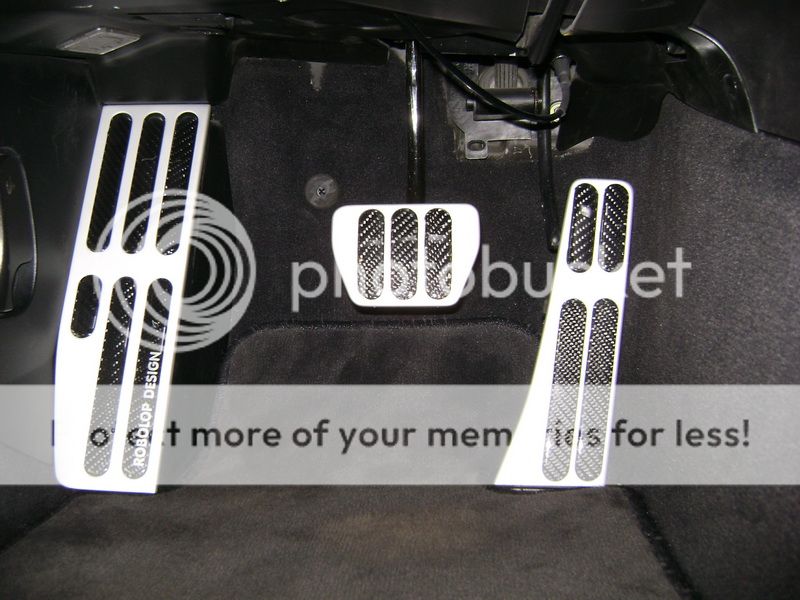
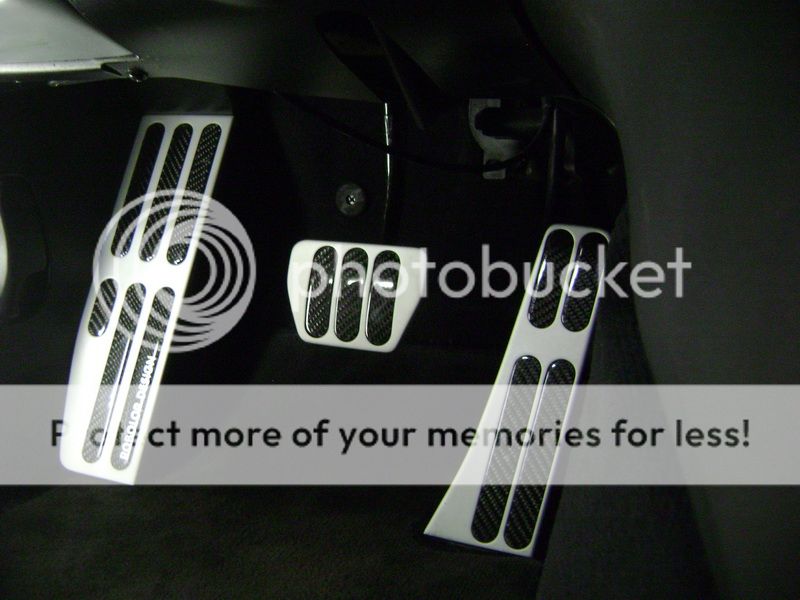
looks like: 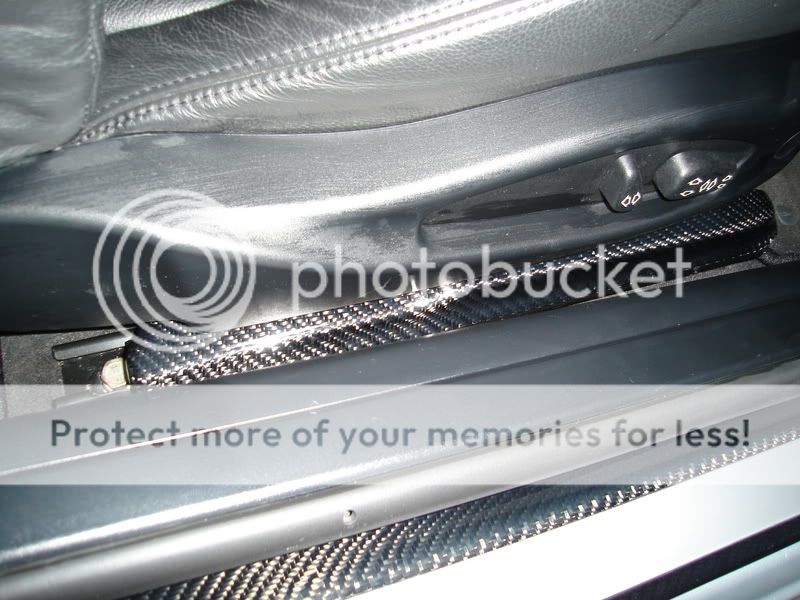
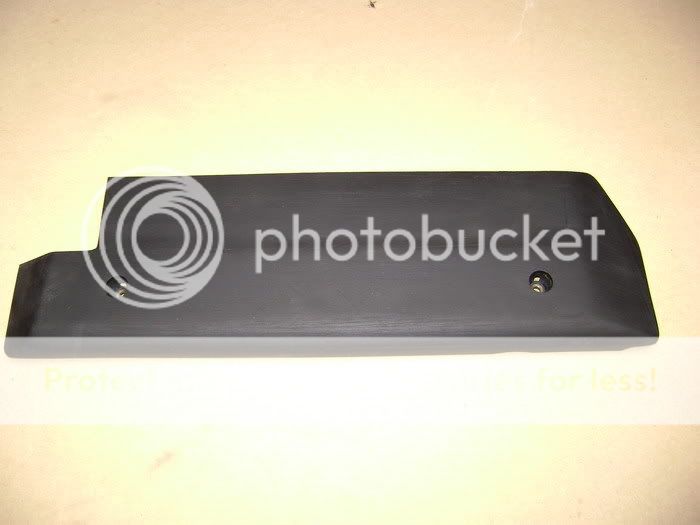
a little plastic piece on the engine.
Posted By: robolop
Date Posted: August 21, 2009 at 1:32 PM
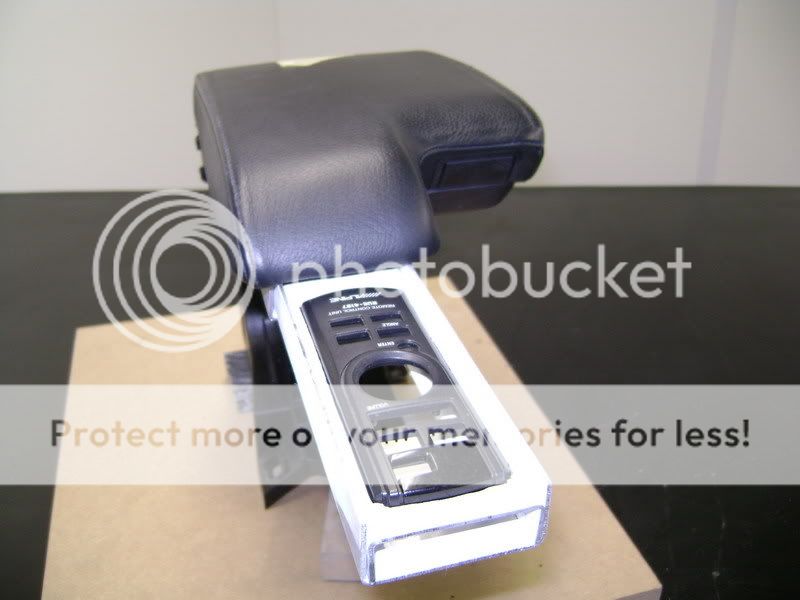
Cause I didn't want to change thie original 16:9 screen in the console, I had to find a place for my ALPINE CDA-7998 Phantom Face. I wanted to do this in the middle, under the armrest. Then I had to get of the front en extend it with cables. If this was an ordinary radio, no problem, but with this radio I didn't want to take the risk.
So looked for another option to place the radio, without doing harm to the looks of the interior. Made little trolley to fasten the radio. 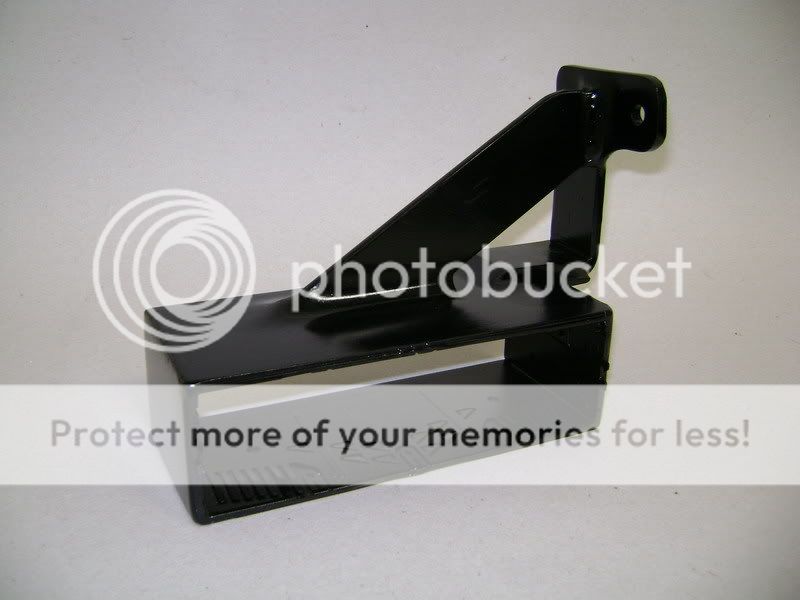
Because I can only tighten this trolley with 2 screws, I made it extra strong. all made of iron.
The radio won't move a mini-mm, it's locked TIGHT !
I also weld the original sleigh of the radio onto it. 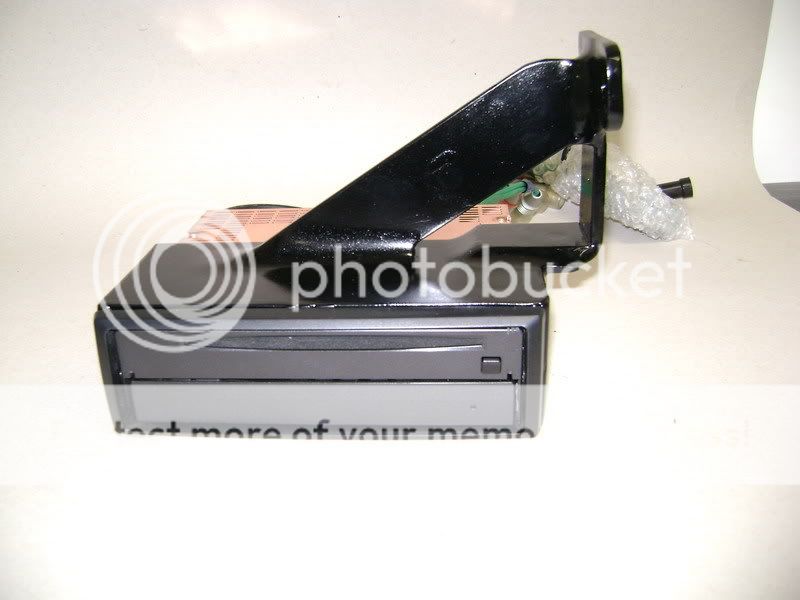
The fiberglass piece I made for the radio, is finished.
I lost about a day on this piece to get this perfect. When u sit down and
look closely, it was a bit slanting.
reason: the dashboard of the beemer was slanting also: conclusion:
THEY WERE ALL MADE ON MONDAYS
So I placedit, so the lines in the dashboard flow with the piece for the radio. 
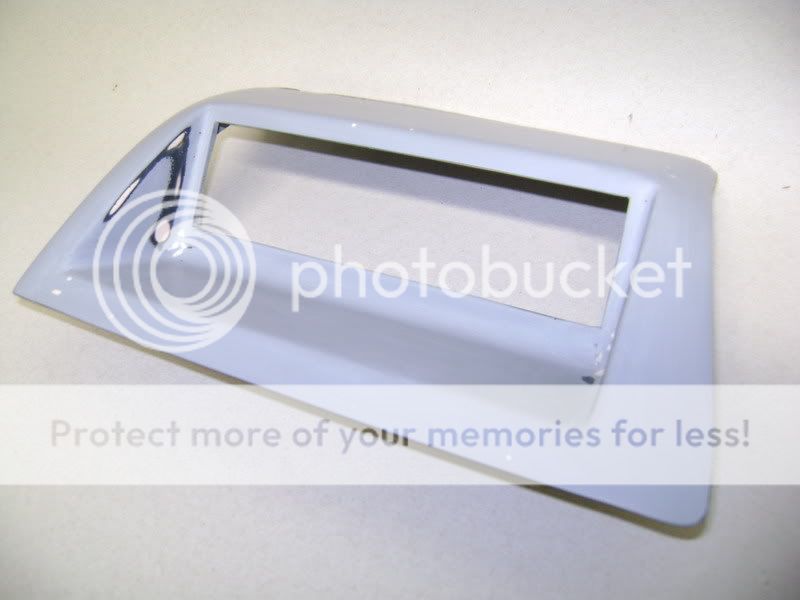
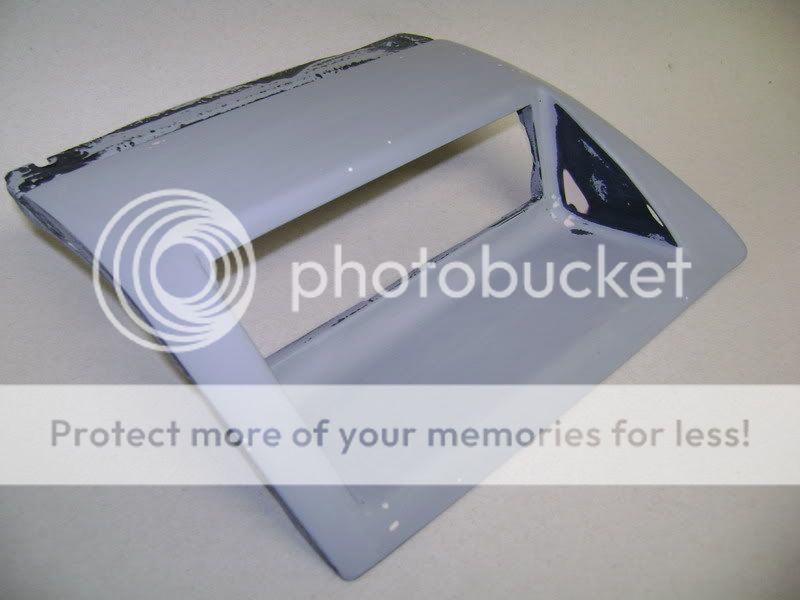
This will be the new place for the radio.
There was a little meaninglesscompartiment here for some useless stuff, so lets give the space some meaning ! Not the normal place for a radio, but that's was just so we didn't have to **up the middleconsole...
There will be people who don't like the setup over there... but didn't have an other (GOOD) option.
In the iron... 
This is the result of the fiberglass piece.
Thougt of covering it in CF, or doing it in matt black, but changed his mind on the last minute and sprayed it silver? like the christmas-speaker-balls. 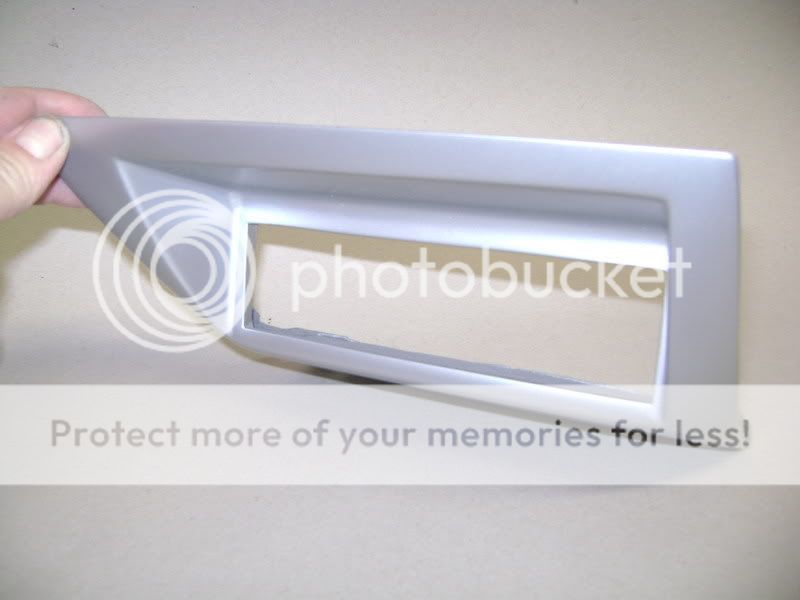
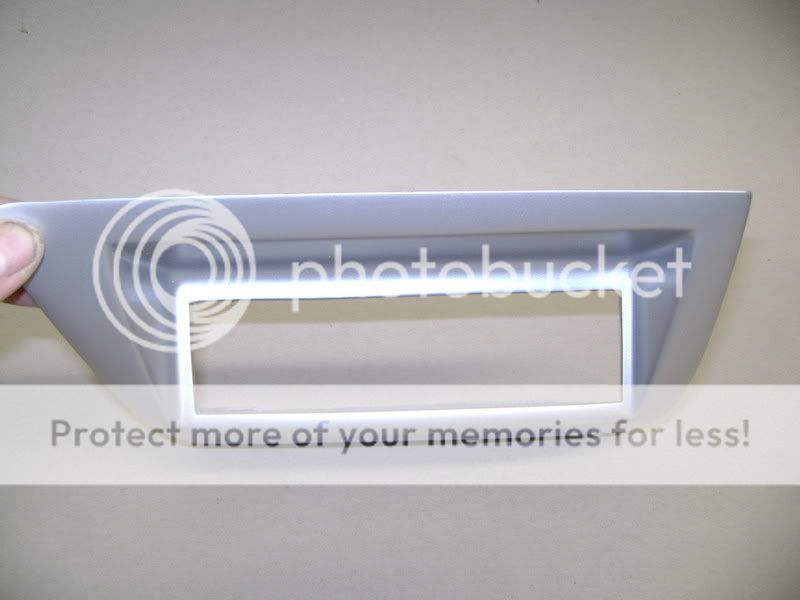
We were afraid it may be a bit too much silver, but cause the piece is really far down
If he changes my mind about the colour, it can be resprayed in black orso. This is the radio with the screen clapped in. .
 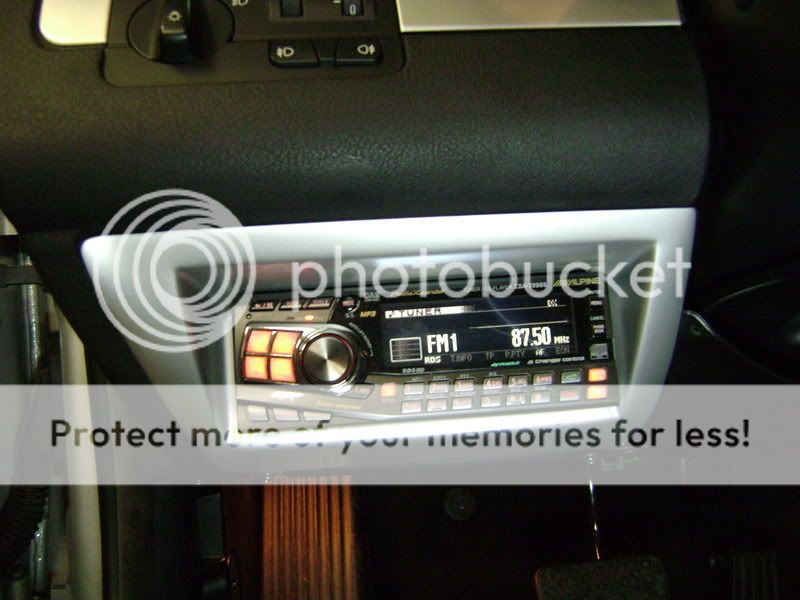

This is the sight when I sits in the car. Just enough the see all of the radio. 


Posted By: robolop
Date Posted: August 21, 2009 at 1:35 PM
got the armrest between the seats and screwed it onto a wooden plate.
So it look originally 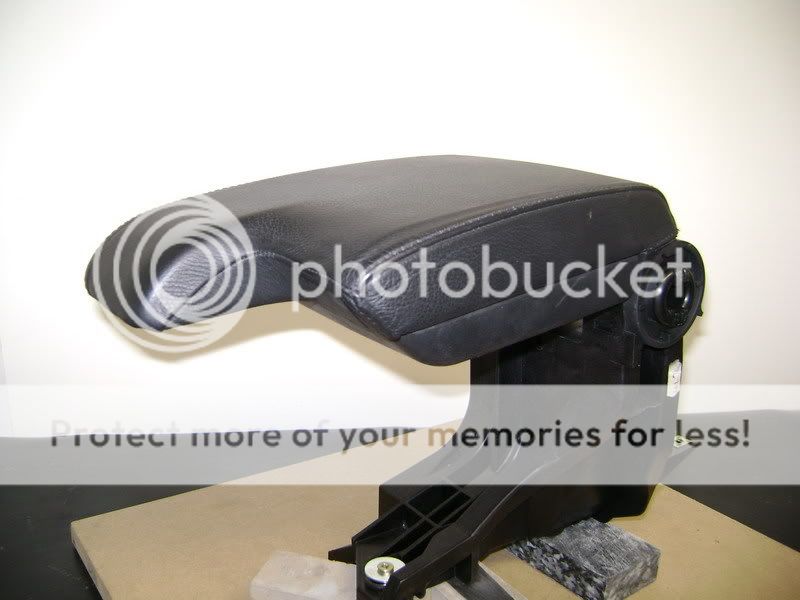
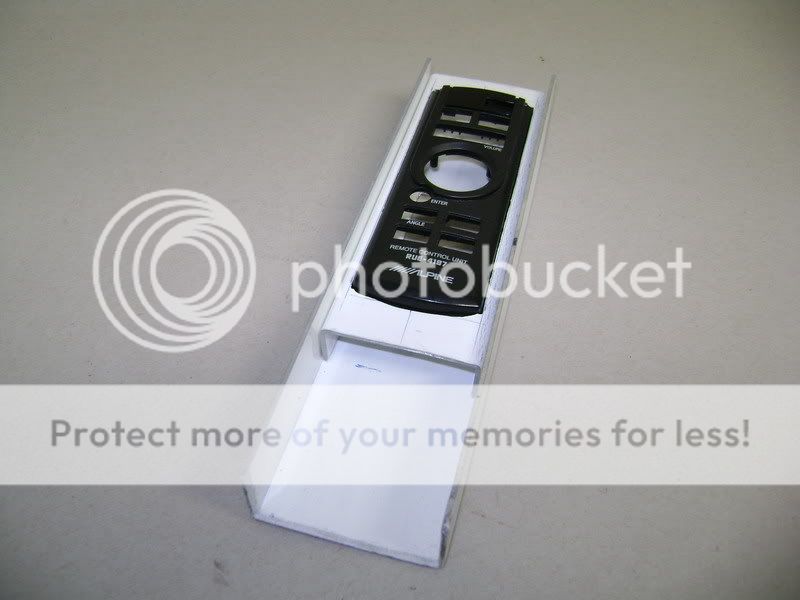
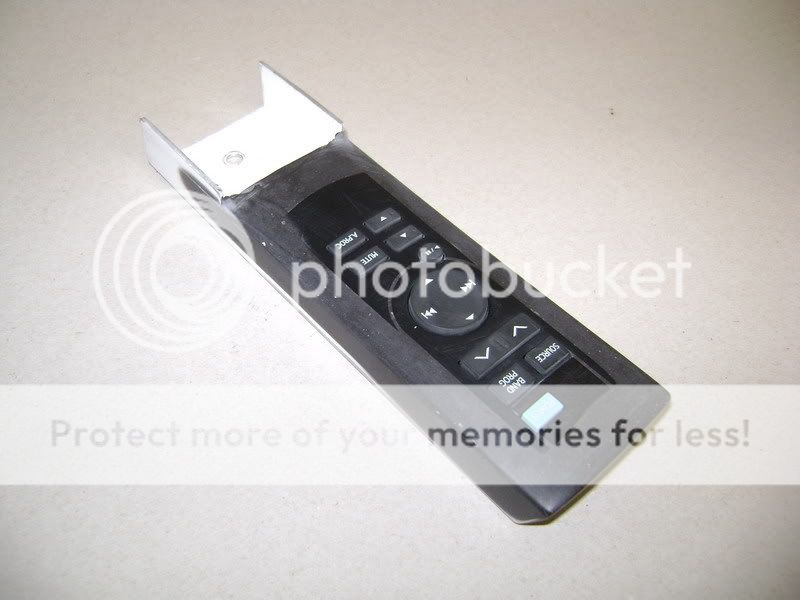
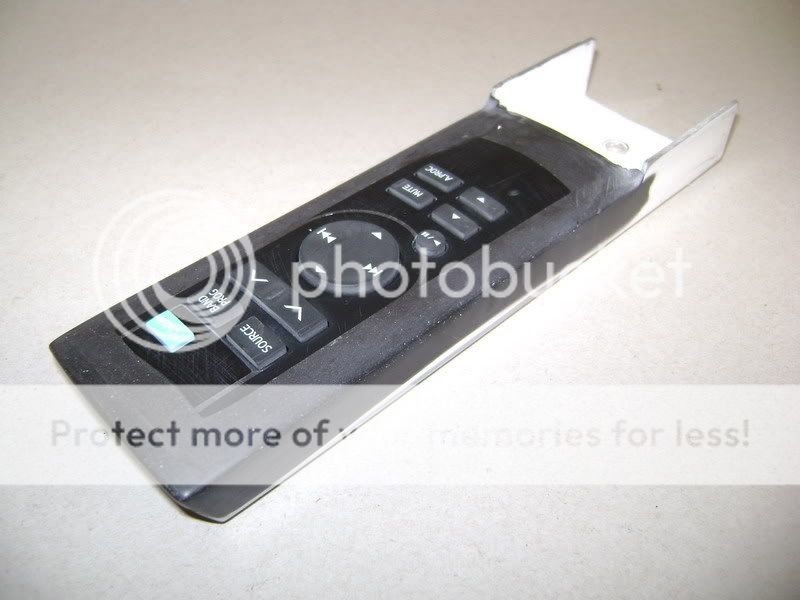
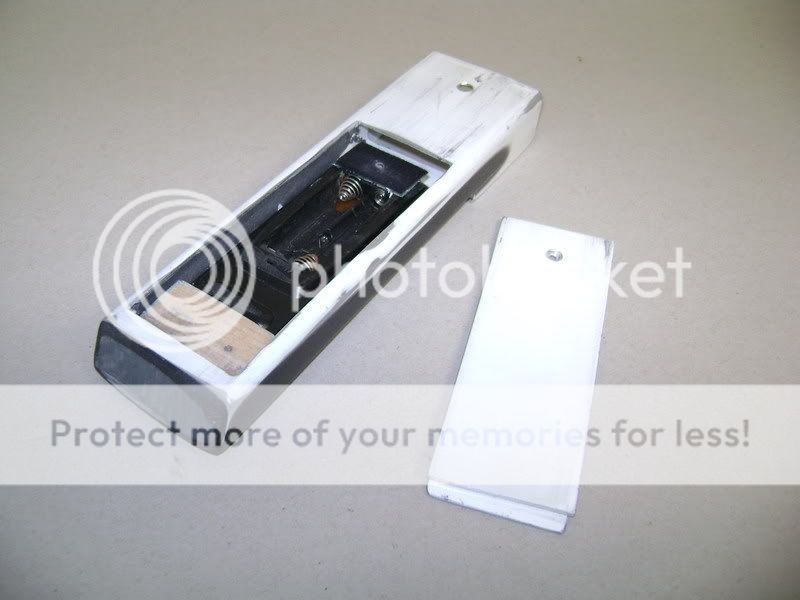
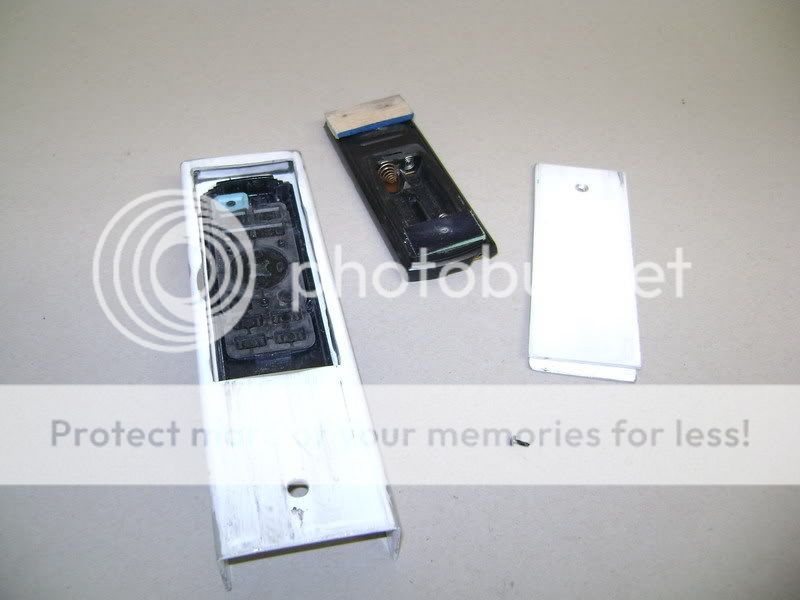
This is the original remote controle that came with the radio. 
Took it apart. First thing I did is take the eye (aiming to the radio) out of the remotecontrol (out of the printplate), and I will place it under the seat.
problem solved. 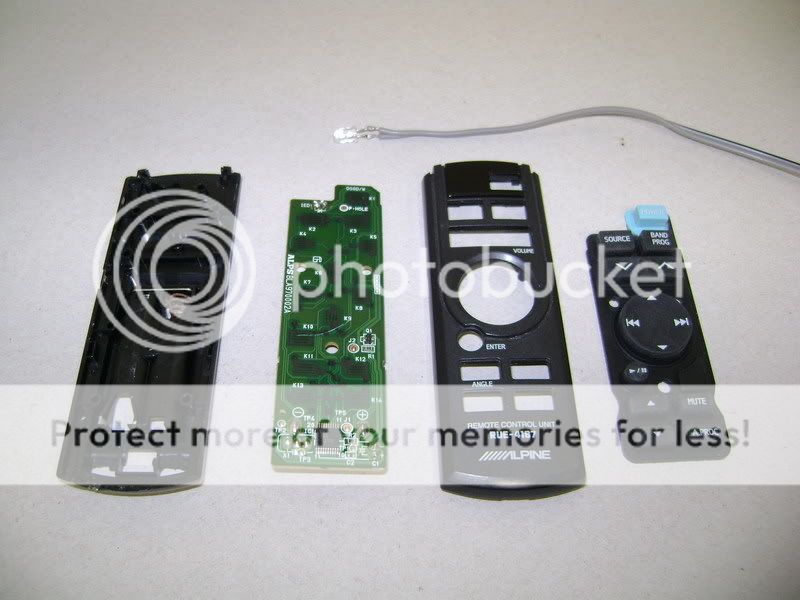
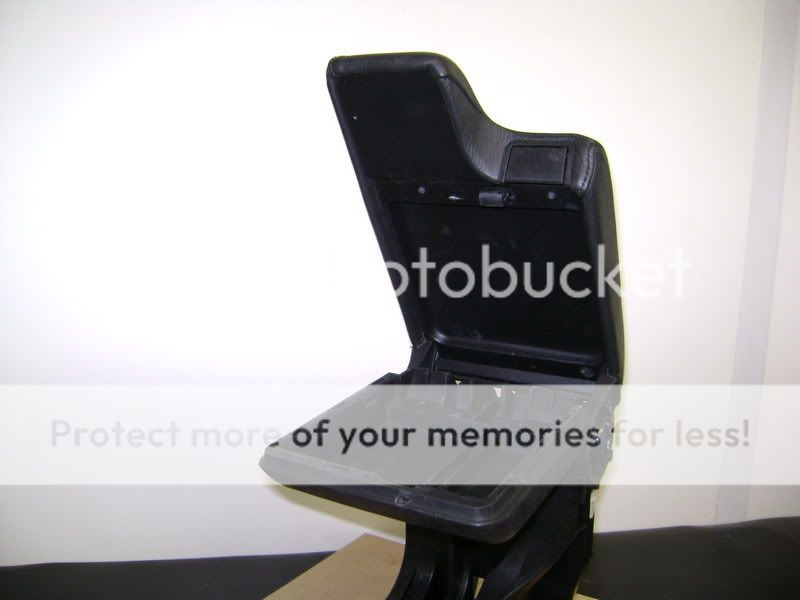
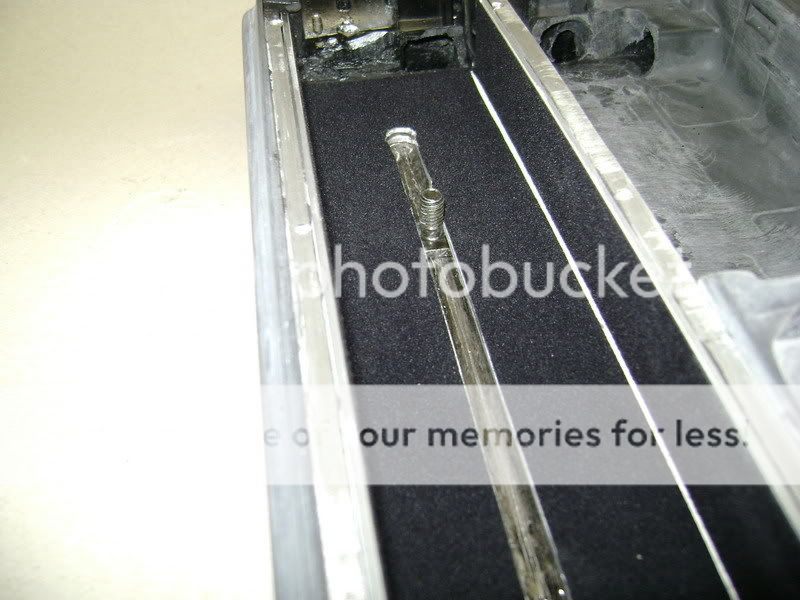
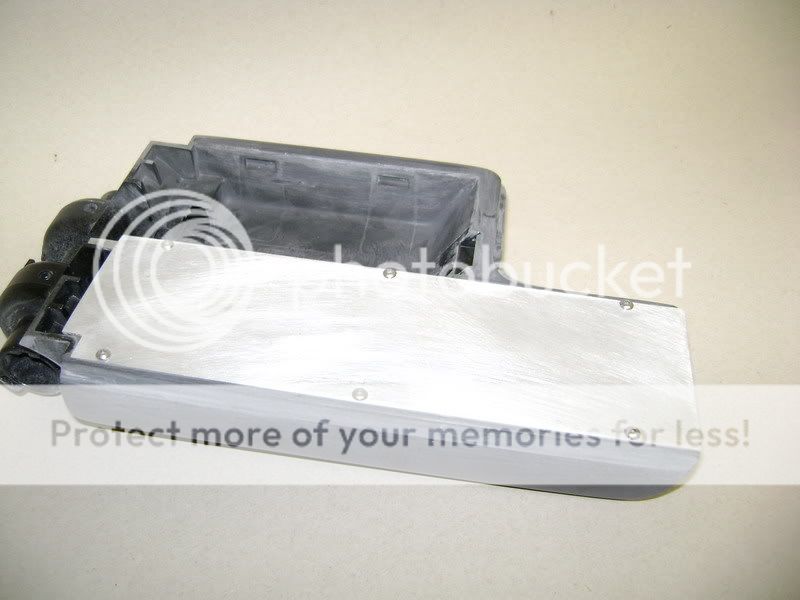
the meaning is the remote will glide out of the armrest.
This is the -so called- glider where it will run into 
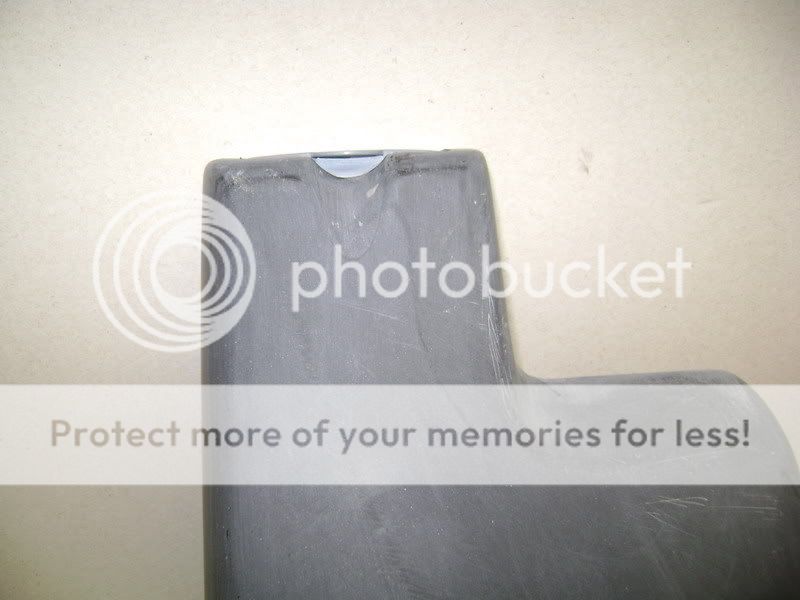
you can see, I did a disc-job into the armrest
Where the thing stopped, it'll get the same shape as the upperside. 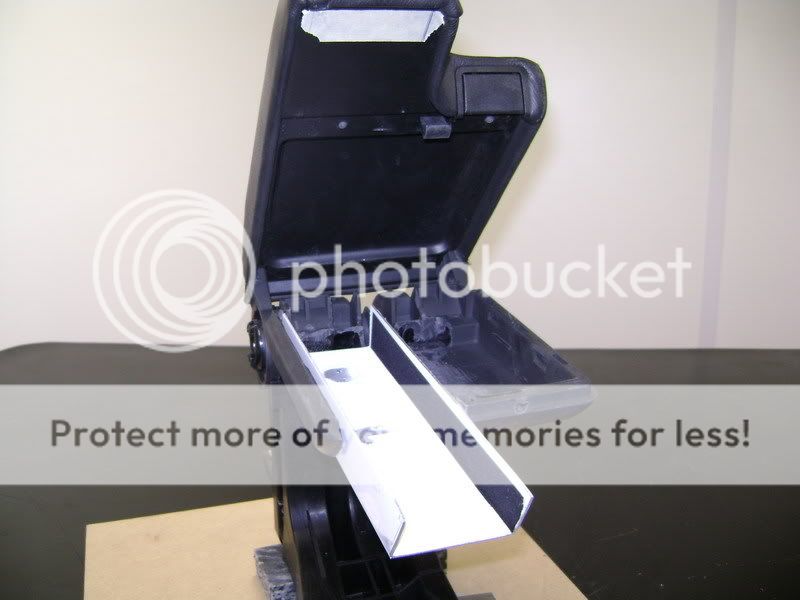
You also can see I bended some white alu plate.
I took this specially so be stick-vilt, where the piece is getting into, sticks good.
The upper plate of the remote controle will become 1 with the alu.
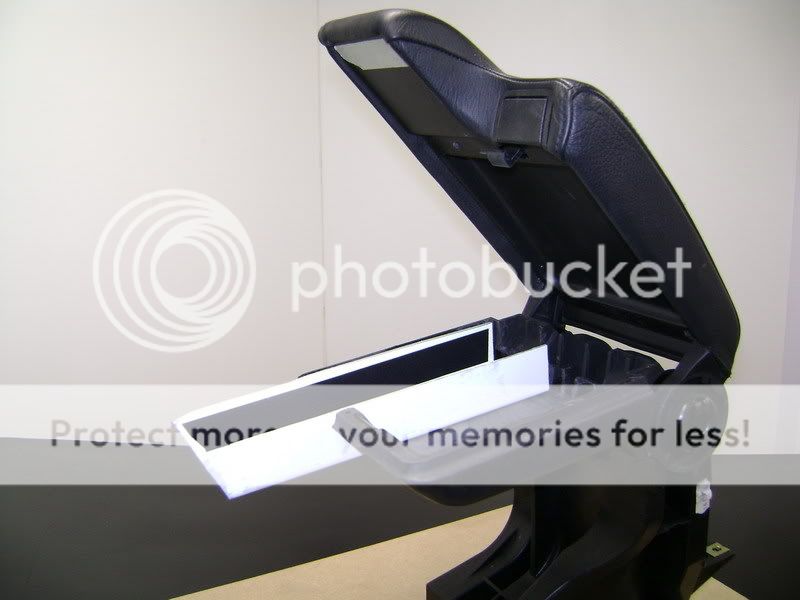
Better look on everything
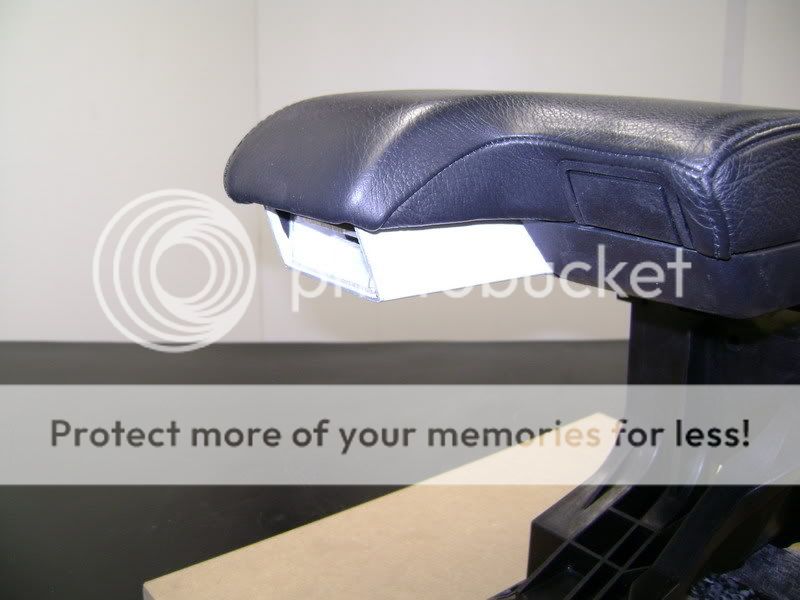
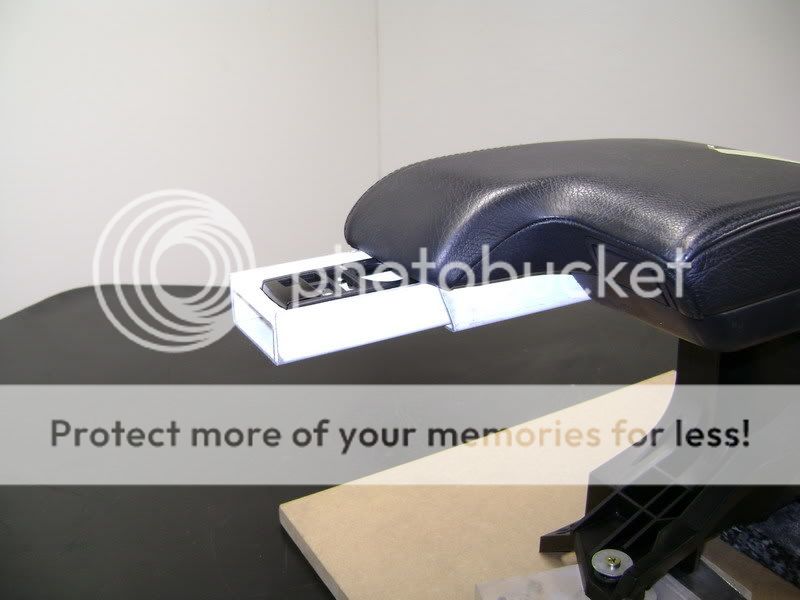
This is how it will appear
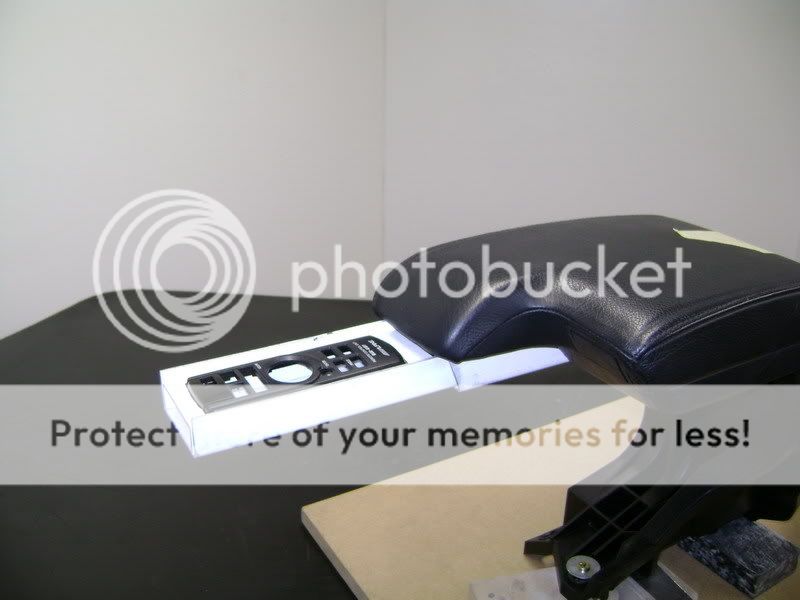
There will be a lot of work to it, but we think it all pay of...
IF IT WORKS remote control.
In the alu piece where I made this, I made an extra plate on the bottomside, fastened with one tiny screw.
like this, I can always get into the inside, and he can changes the batterie from time to time.

Posted By: robolop
Date Posted: August 21, 2009 at 1:37 PM
Here you can see where the remote control will slide into. As you can see, I put some selfclitting vilt on the sides, and the bottom.
Did this to make sure it all glides nicely...

You see the slot in the middle.
backside, tightened with that screw.
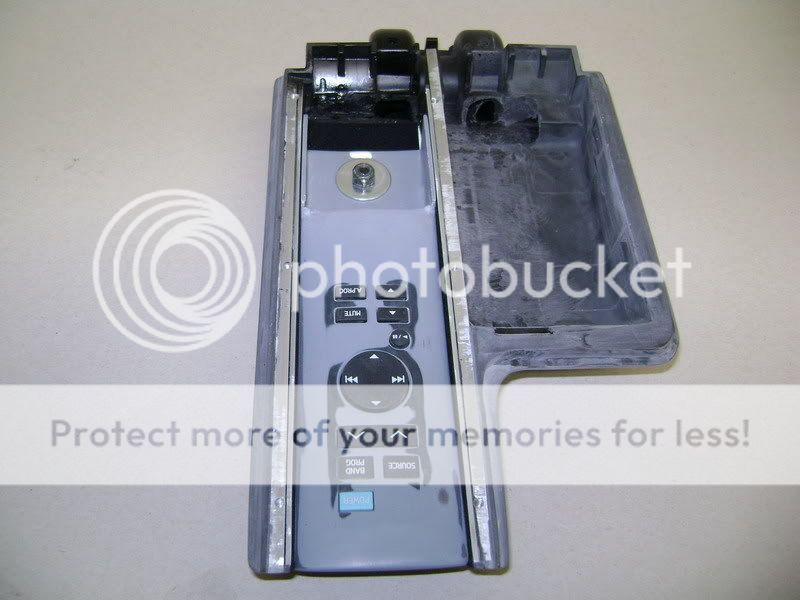
This alu plate lays on top, and is tightened with little screws. If there would be a problem, it's not hard to get into it all.
On the bottomside, you see I made something simple where he can get into with the finger, to glide it all out.

The thing in the car.
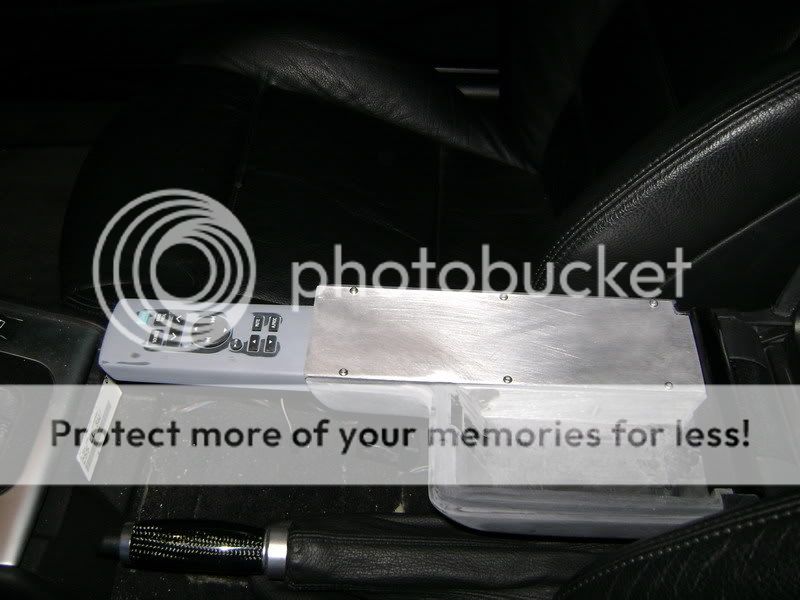
It'll be super easy to control the radio. Nothin' will feel stodgy while riding the car.
 All of this has to go in primer.
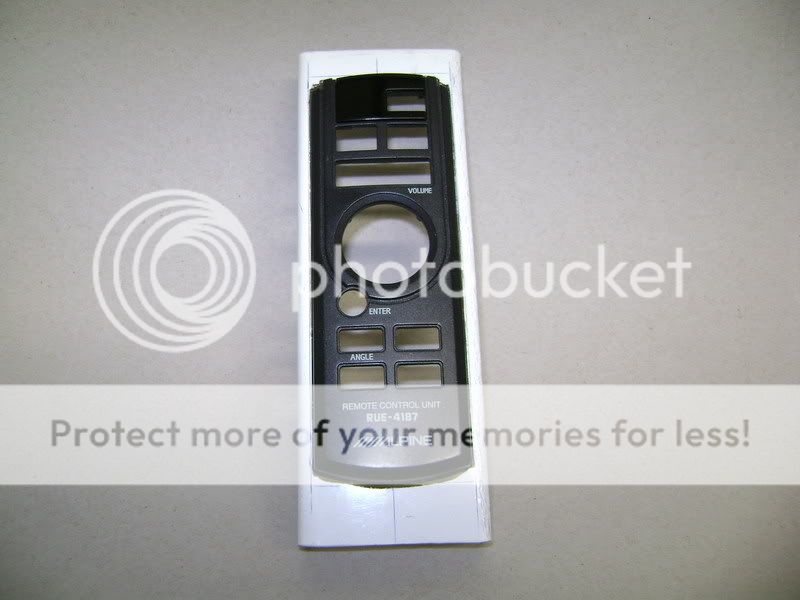
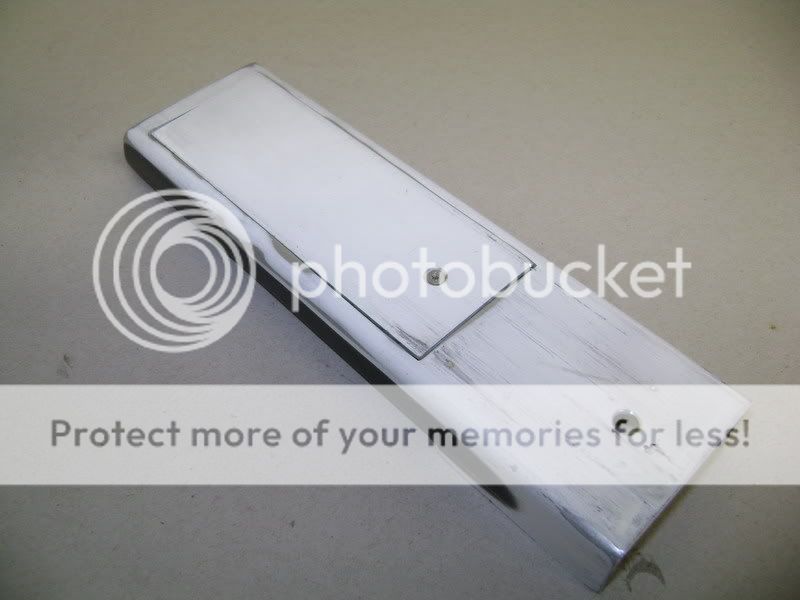
After that the console is going in satin-black, like he original was. the remote will be sprayed in the same silver as the rest (trims, ...) The remote got it's color.
It also got a nice contract with the Alpine buttons. 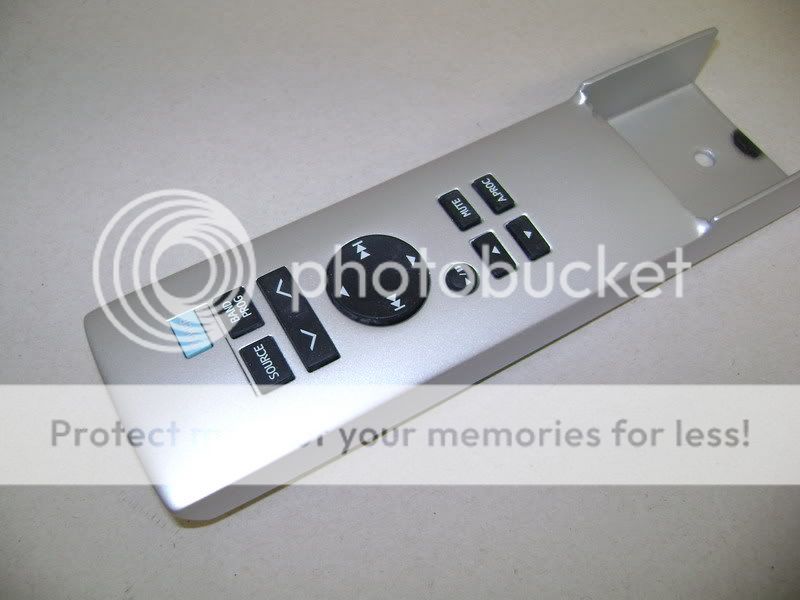
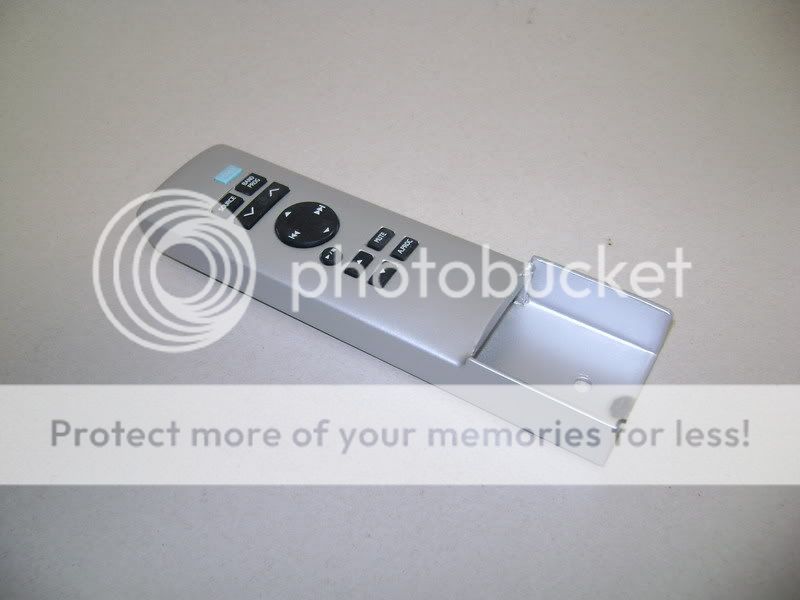
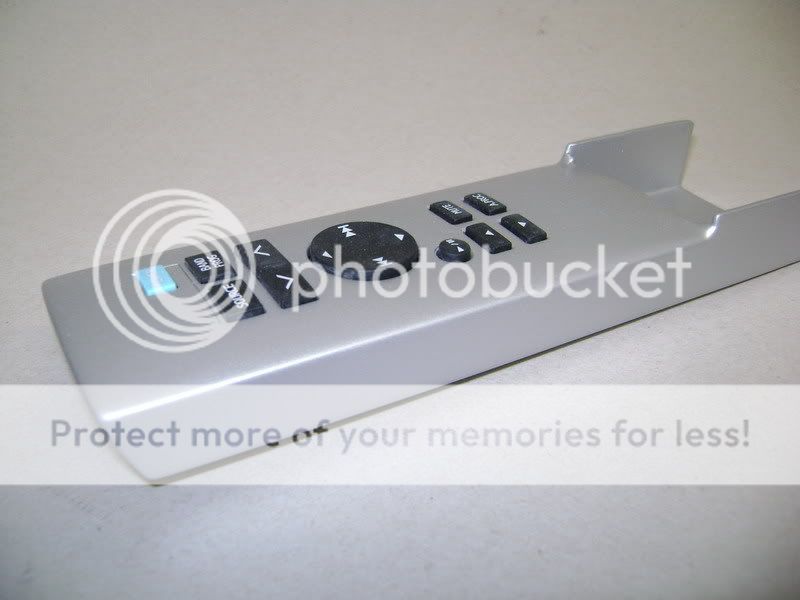
One thing to do still, is to paint the little screw (where it's tightened with) in silver. 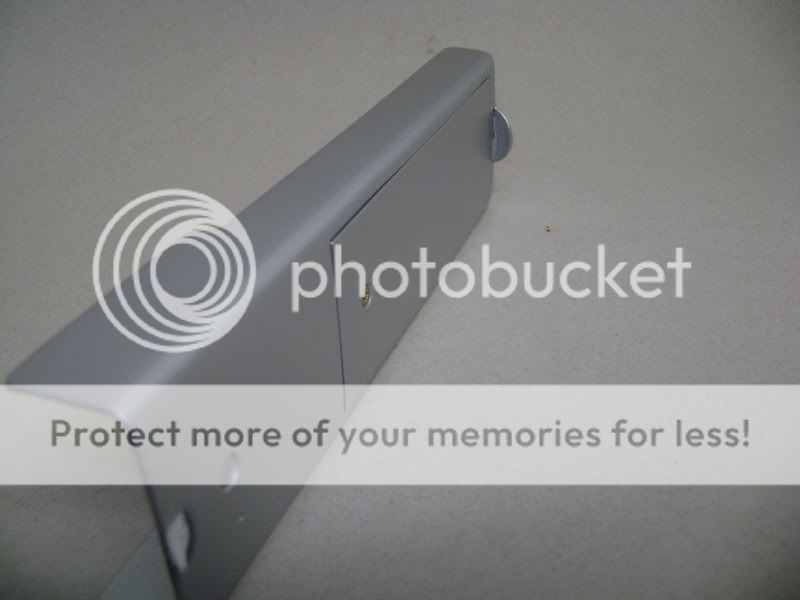
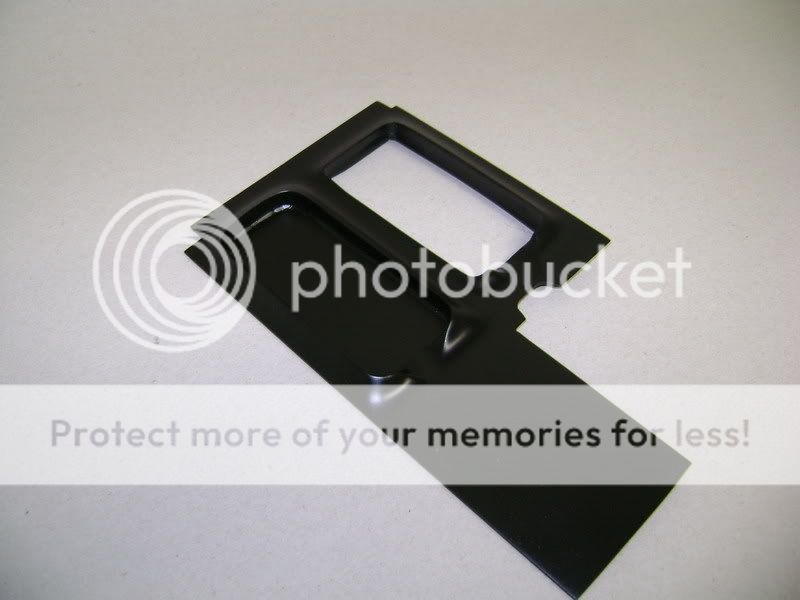
This would be the innerview of the armrest. This will be the new coverplate that'll come above the remote control.
I made little heights. (do not understimate the time that goes into this, it's a ****ed up job)
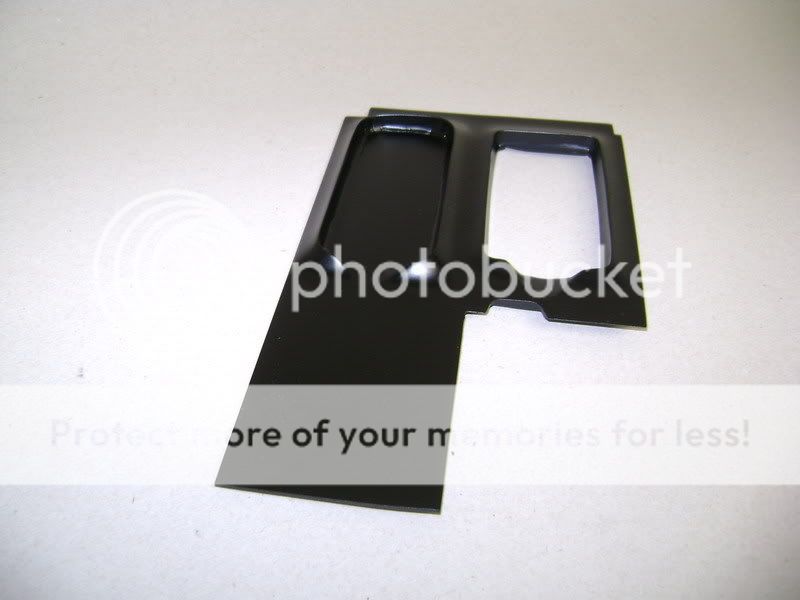 
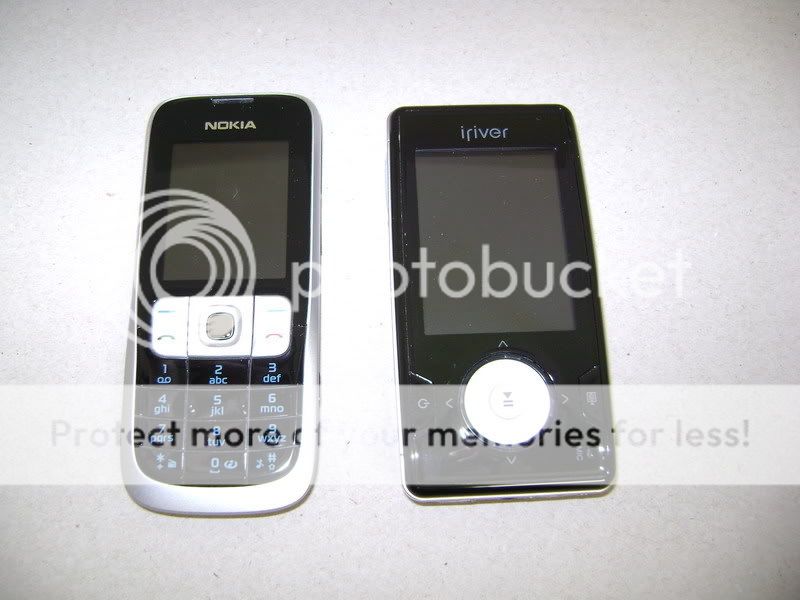
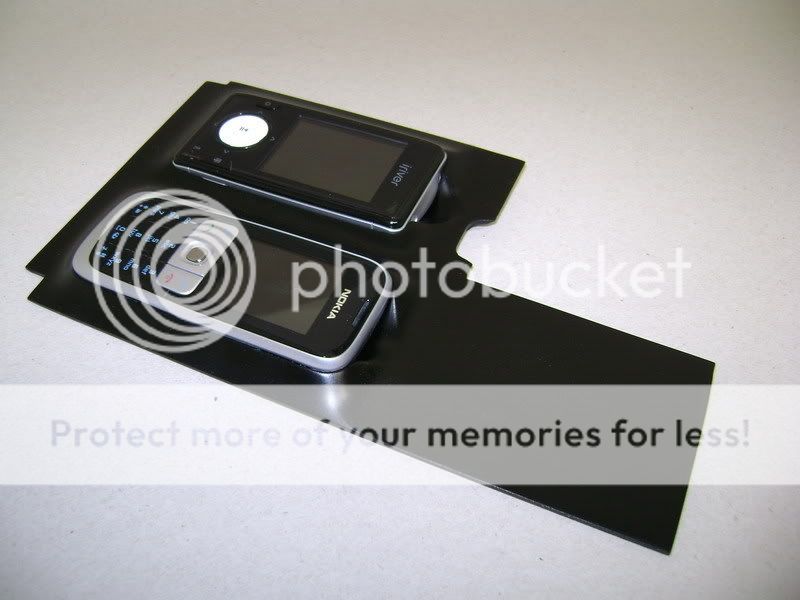
On the left,you can see the Nokia mobile phone. Took this one for takin' pictures.
On the right, you see a IRIVER MP4 player.I can attach this on the radio, and watch movies en pictures on it.
I normally doesn't buy this stuff, but it will look pretty cool...
Gotta help belgium economy.
They'll be worked in on the alu plate like this 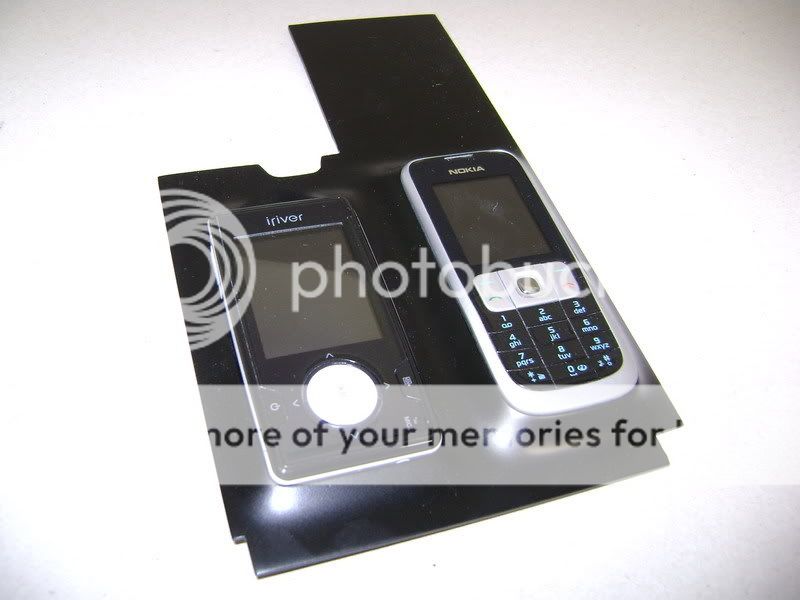
On the front of these toys, I made a little ditch, so you can get the things with your finger Don't mind the dust. 
this silver box will be under the mp4 player. 
here the ears will be, and a lamp. So this also gets a good space and doesn't lay beneath my feet or something. The amrest almost finished, and put back in the beemer.
If you see it like this, nothing special...That's the beauty of it. 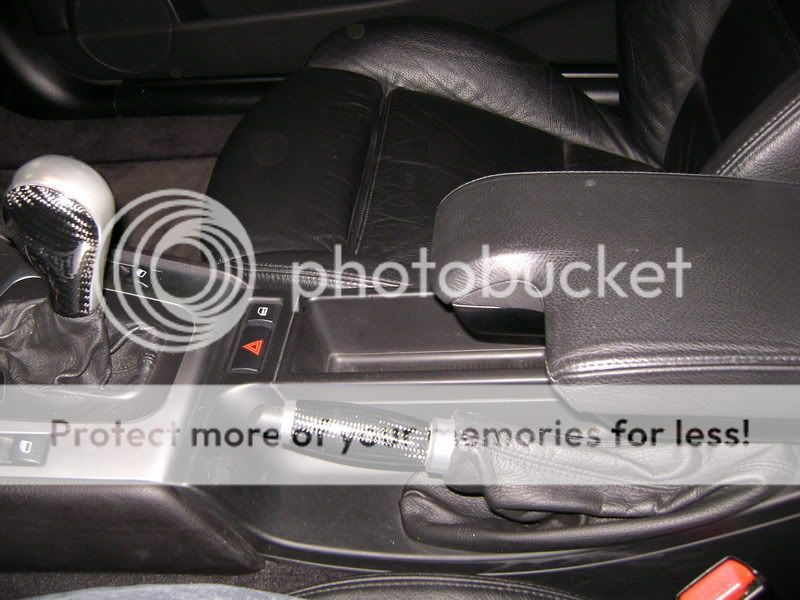
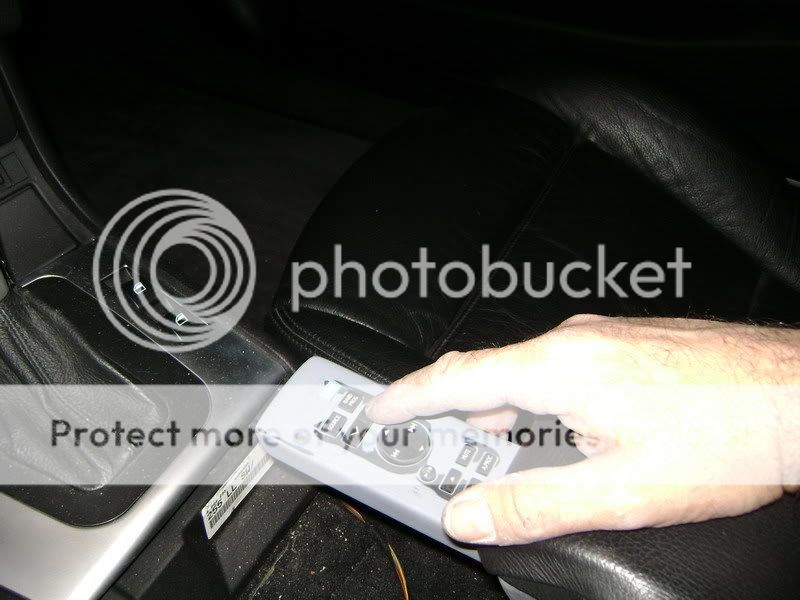
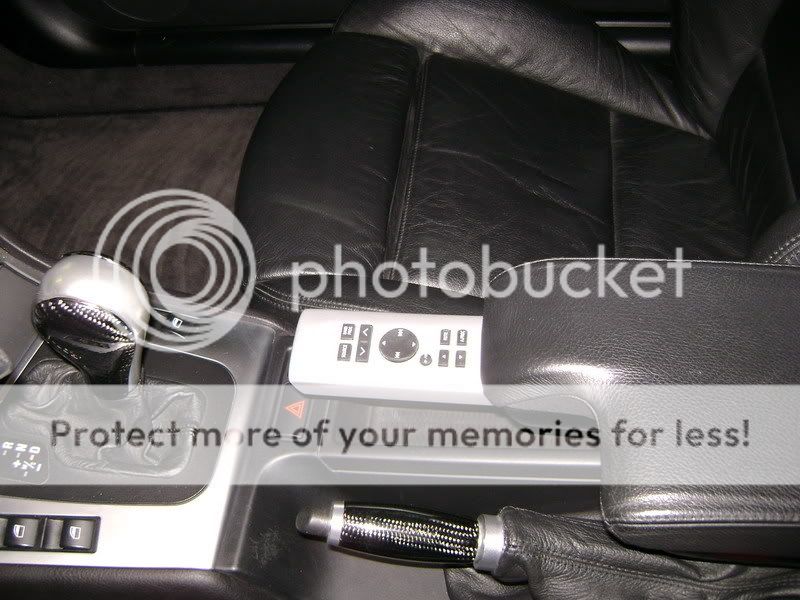
On the bottom the little grey lip to pull out the remote control. 
This is how it looks like when the remote is out. Easy to control now.
The gear is set to D, so can't go further the back.
You can see there's enought place between both things. 


Posted By: robolop
Date Posted: August 21, 2009 at 1:38 PM
Pic with the armrest open. 

The silver box, under the mp4 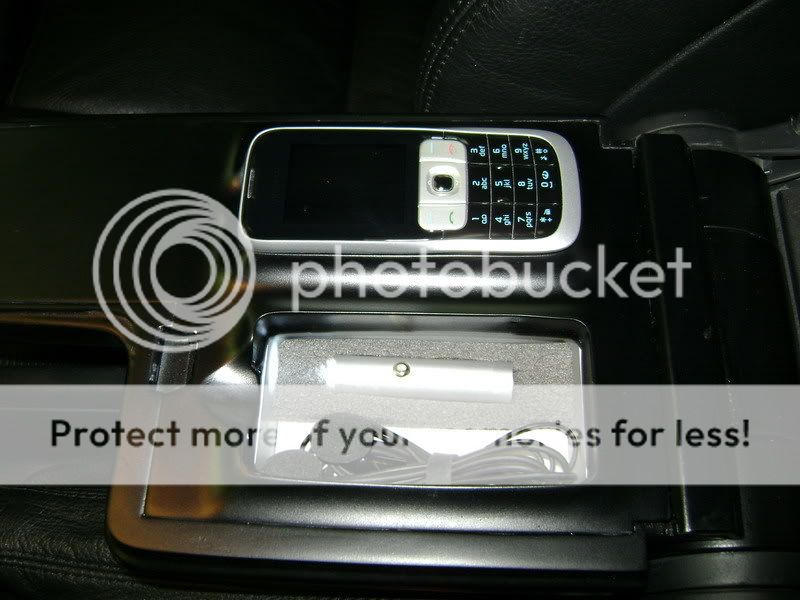
some other pics 


So the armrest is finished and looks good to us.
Posted By: robolop
Date Posted: August 21, 2009 at 1:39 PM
Posted By: robolop
Date Posted: August 21, 2009 at 1:41 PM
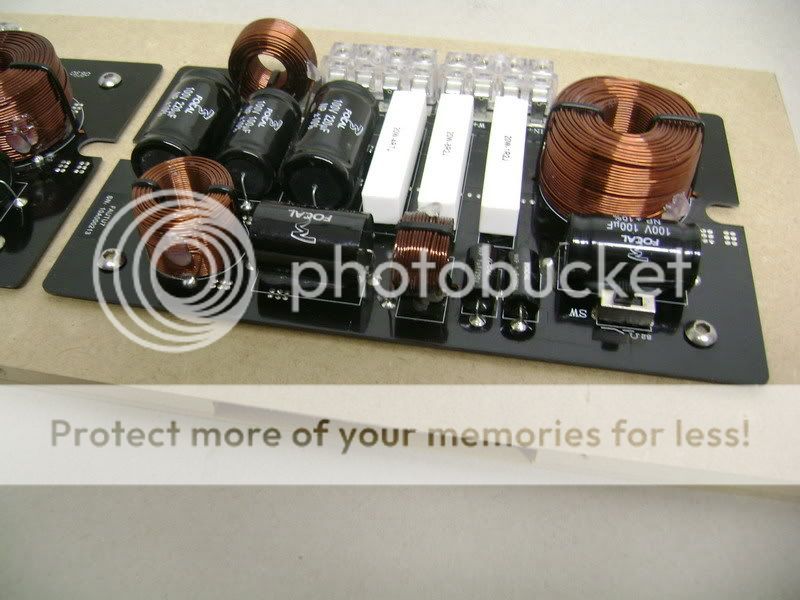
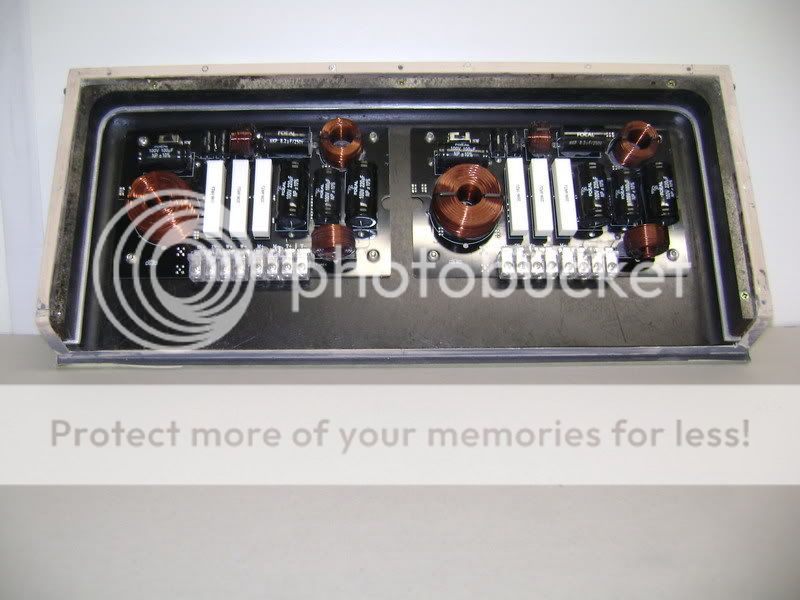
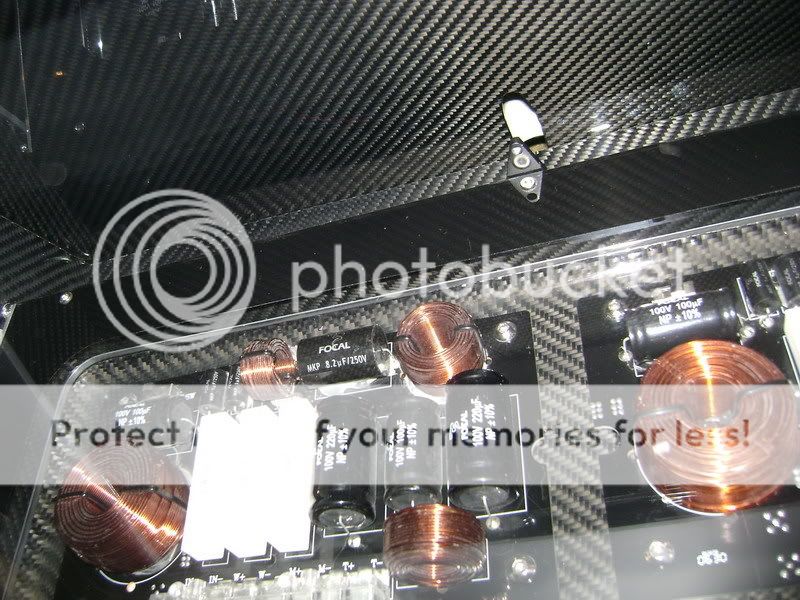
I have been thinking things over. I forgot that i still have a set of realy ugly Focal crossover.
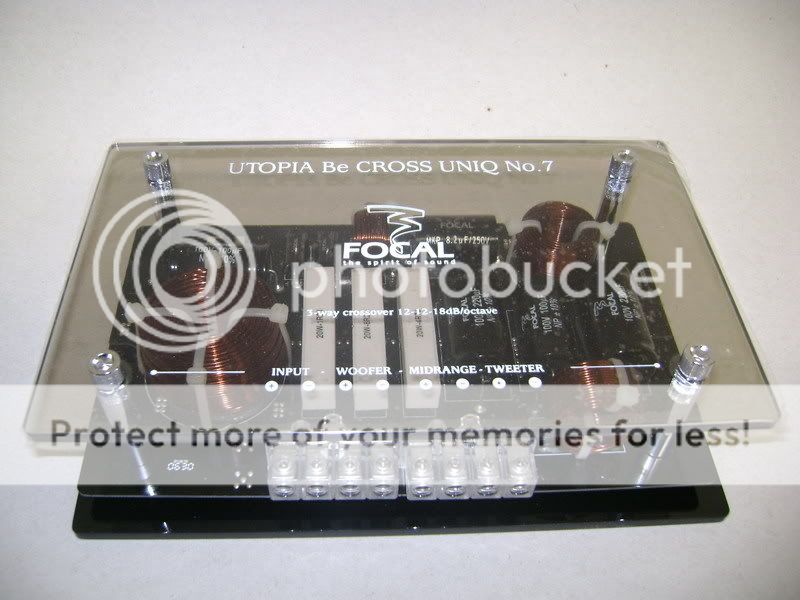
At first i wanted to integrate them in an MDF board, but that's not flashy enough.
Now i'm going to integrate then completely so that i can let them come out automaticly. At least i'm going to try...
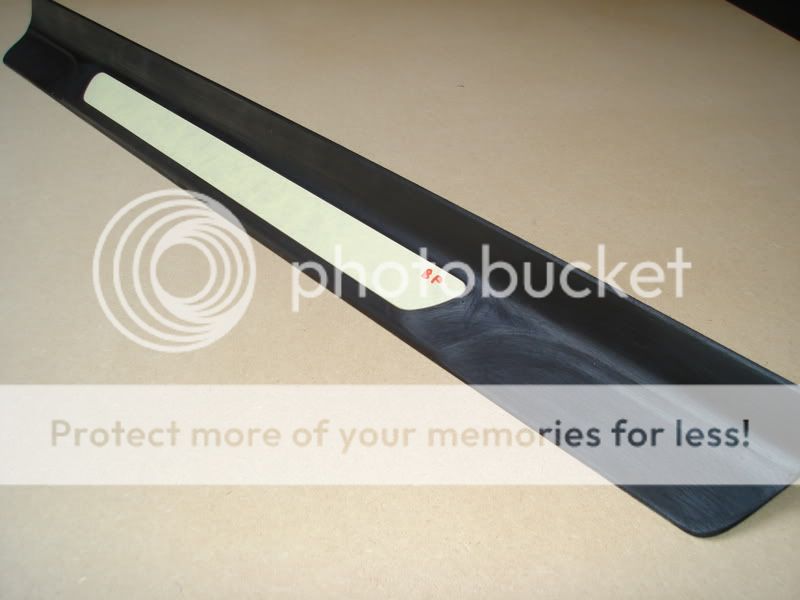
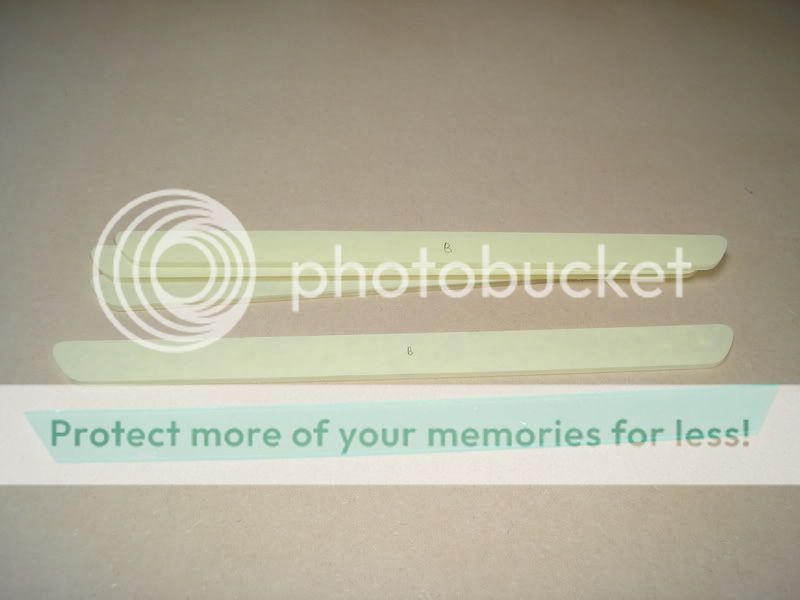
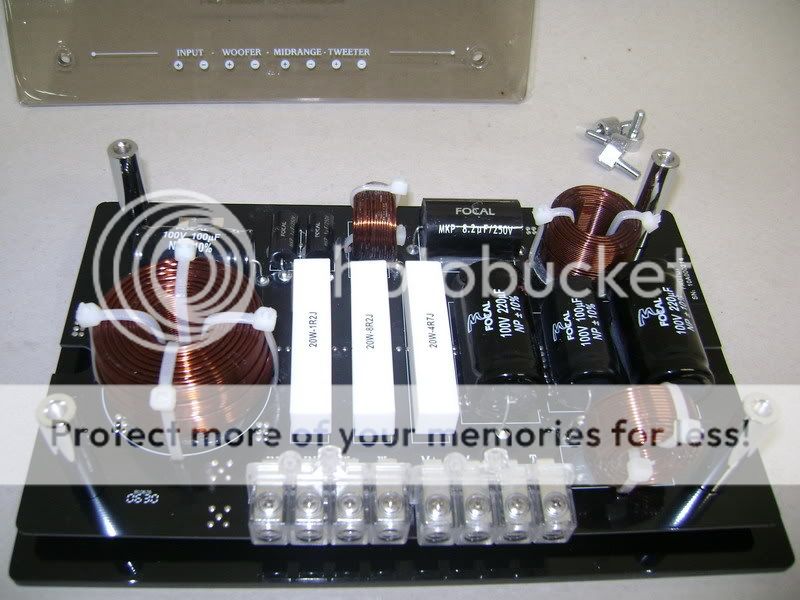
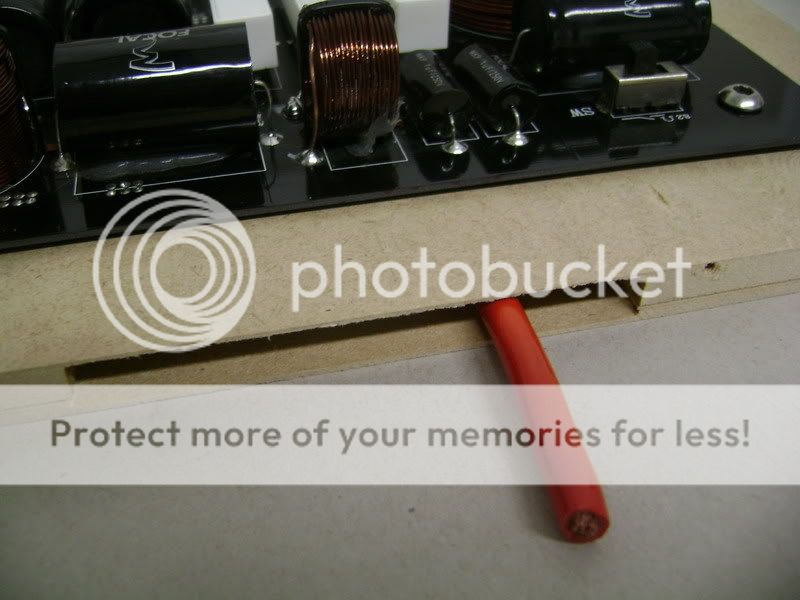
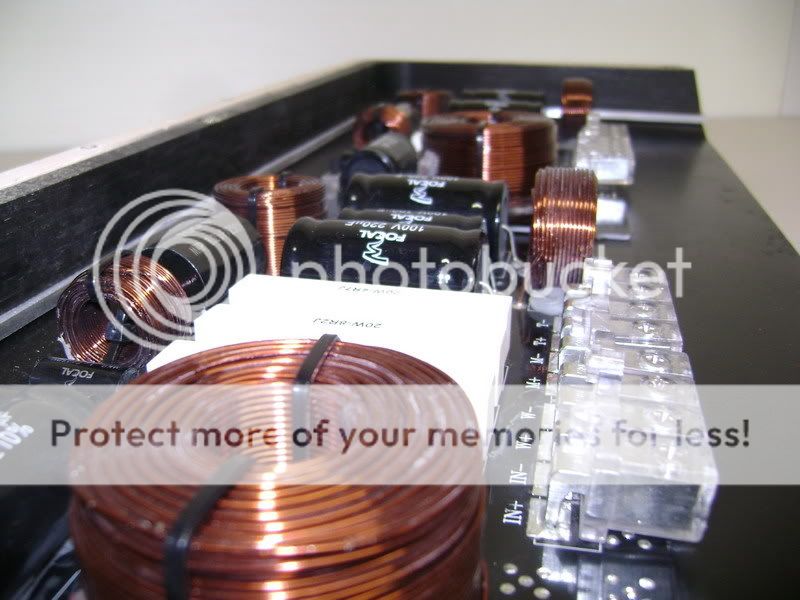
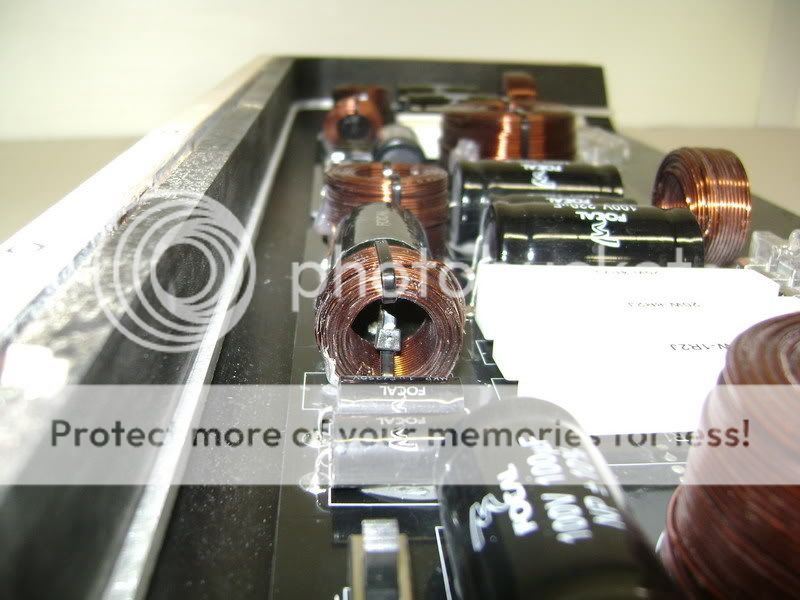
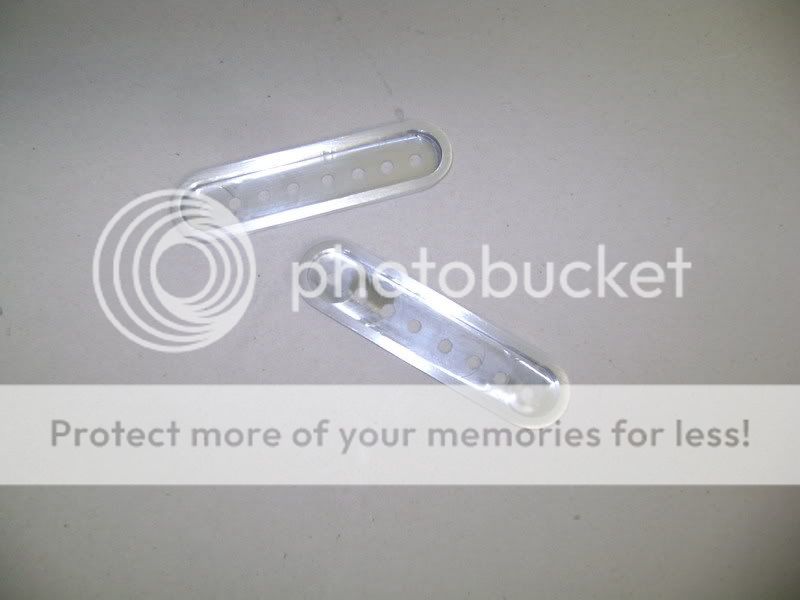
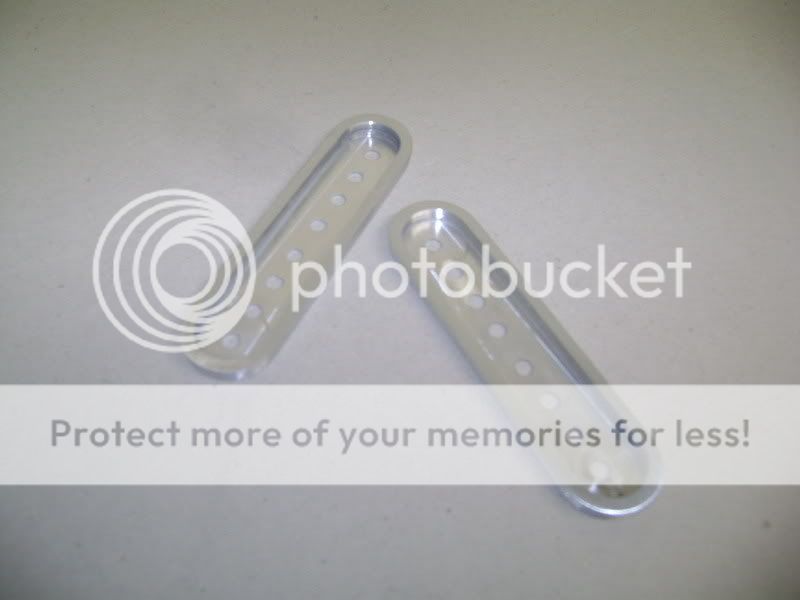
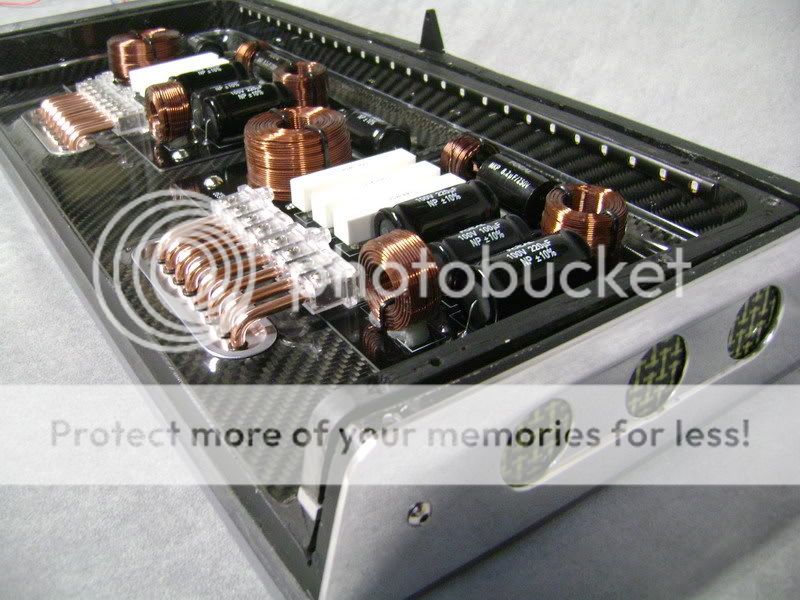
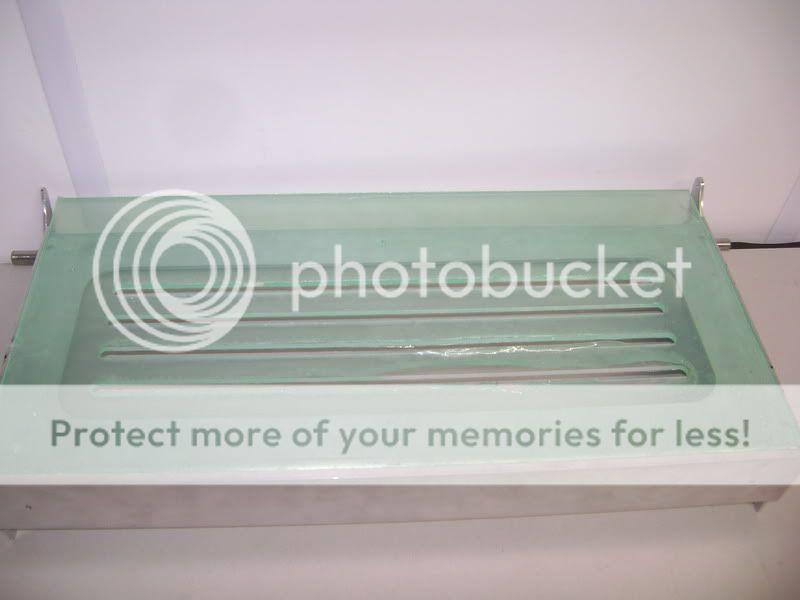
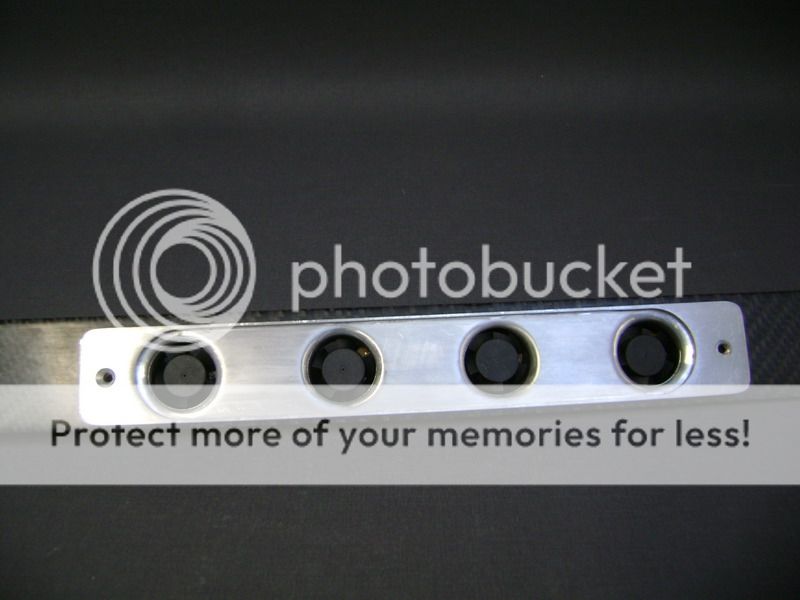
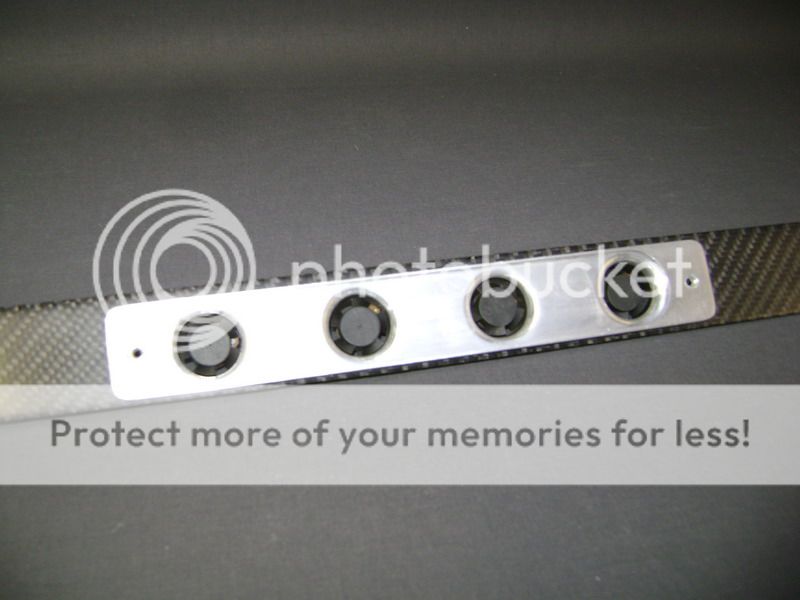
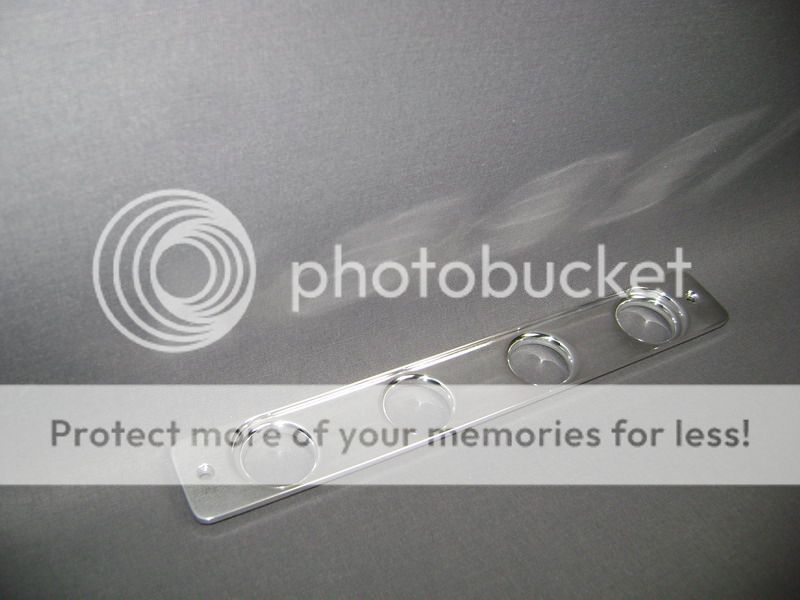
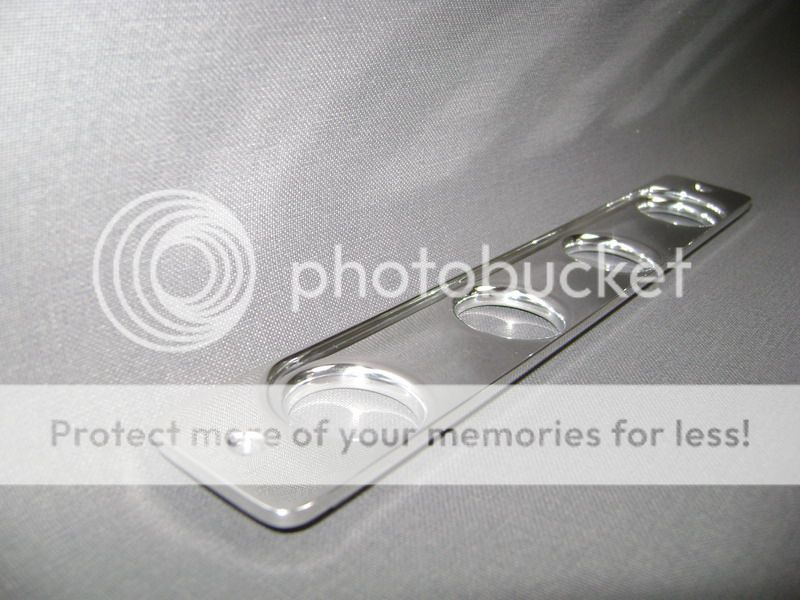
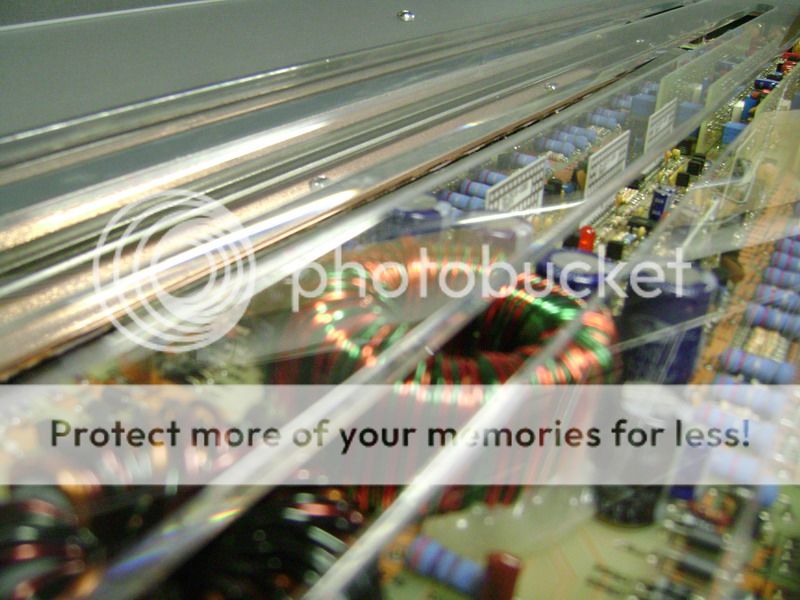
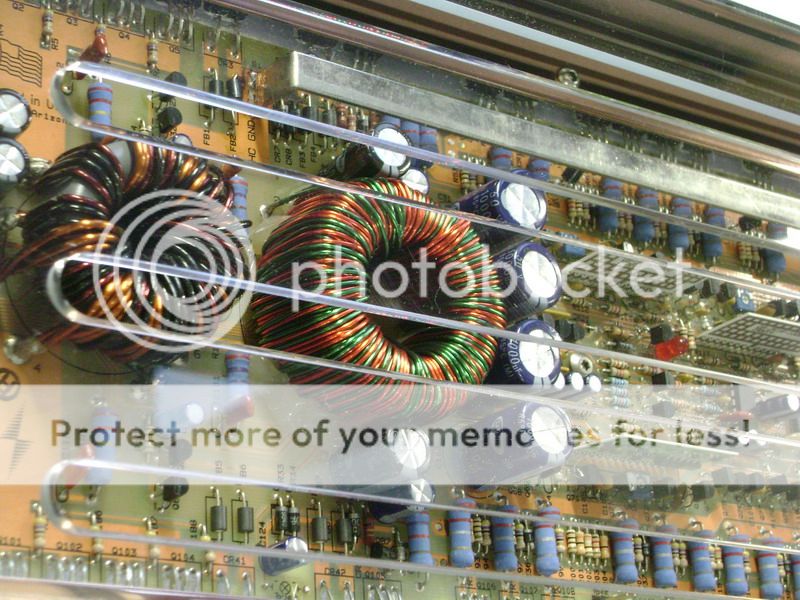
These are the filters i was talking about.
The white plastic strips will be replaced by black strips. 
I can say that this looks much better. 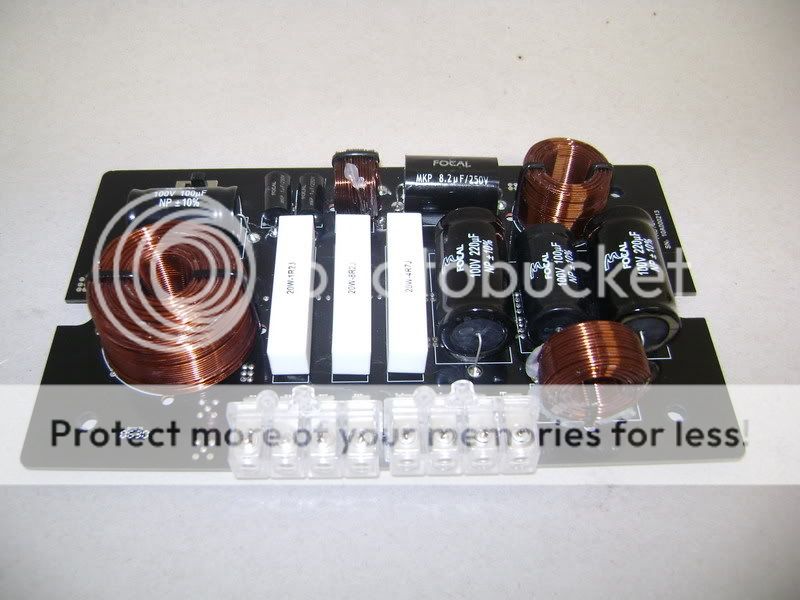
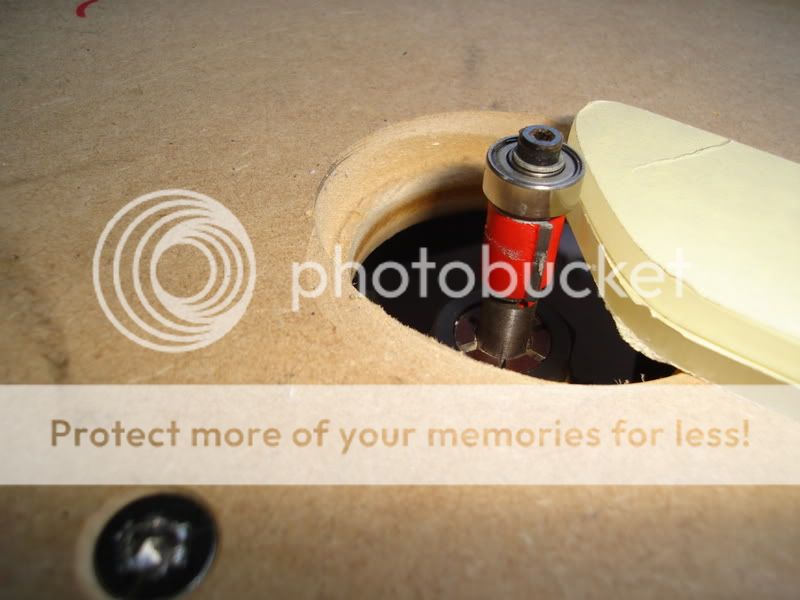
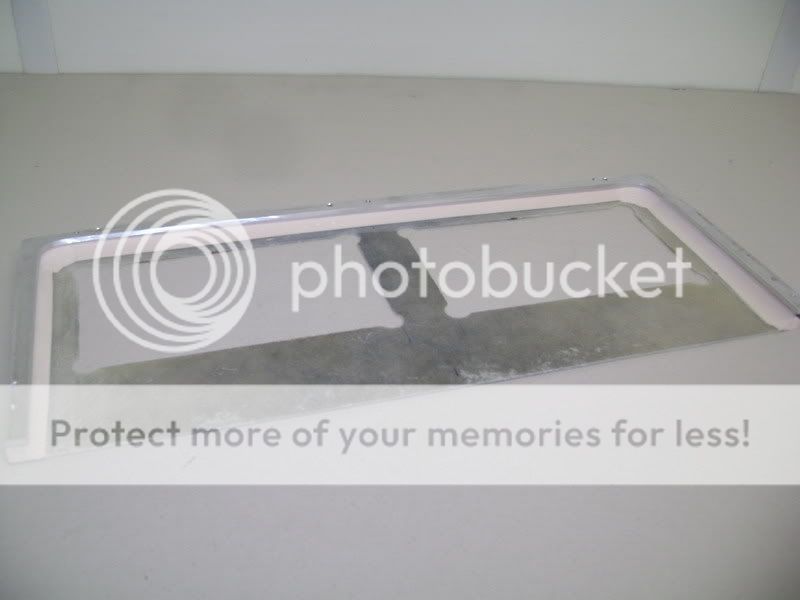
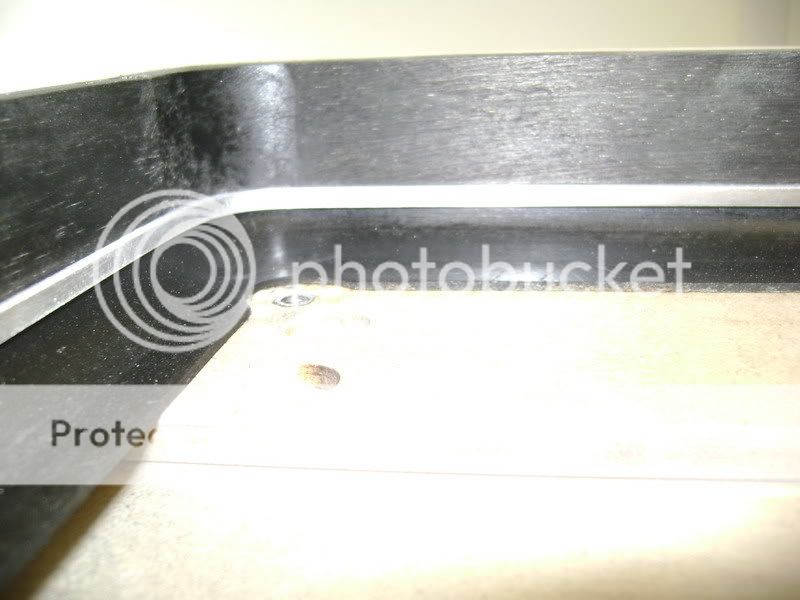
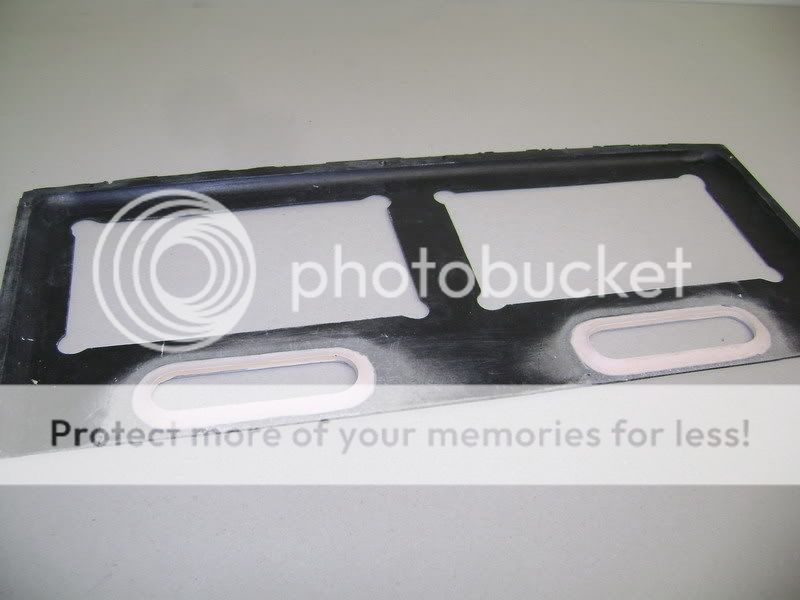
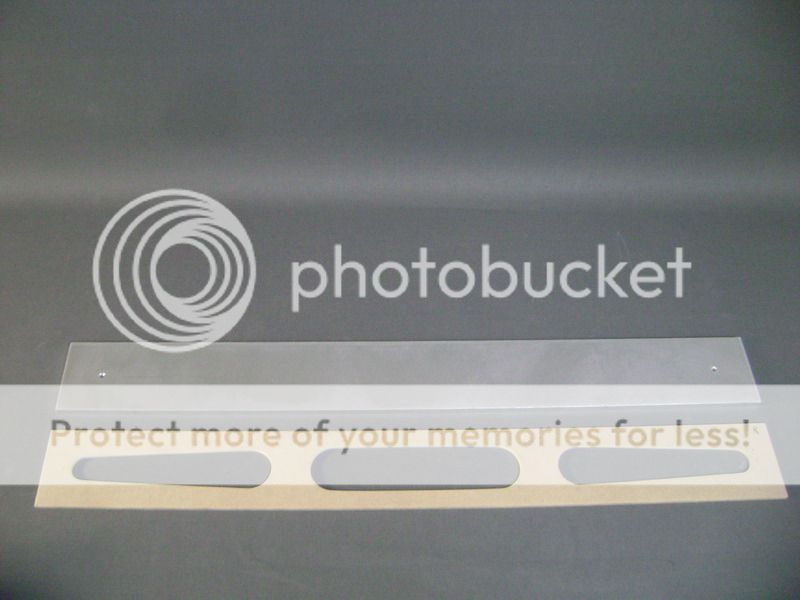
The plexy boards were the filters used to be mounted on are now removed.
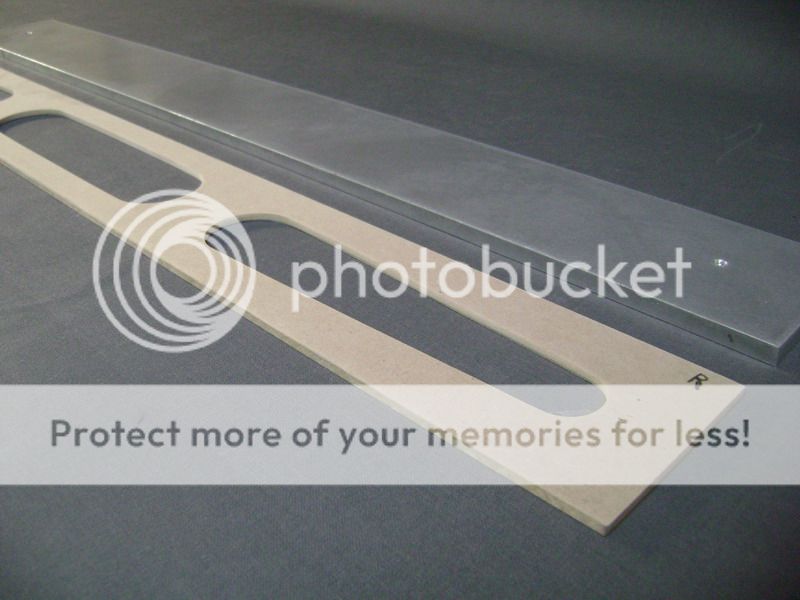
I've replaced them with an MDF board wich got an "uppermill treatement' 

This board will be mounted on top of the other one 
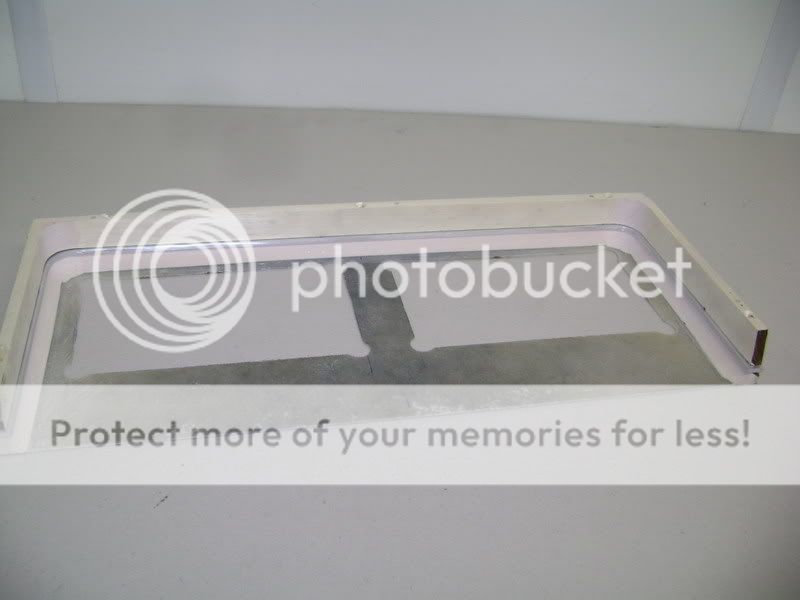
Here you can see them on top of eachother

I made this because i didn't want the speakercables to be visible. 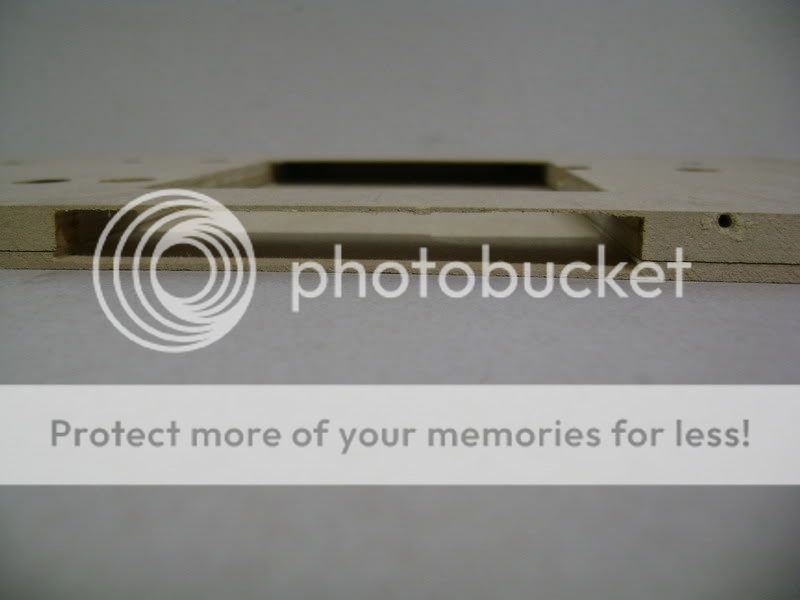
So the cables are guided from one side to another inbetween the 2 boards. 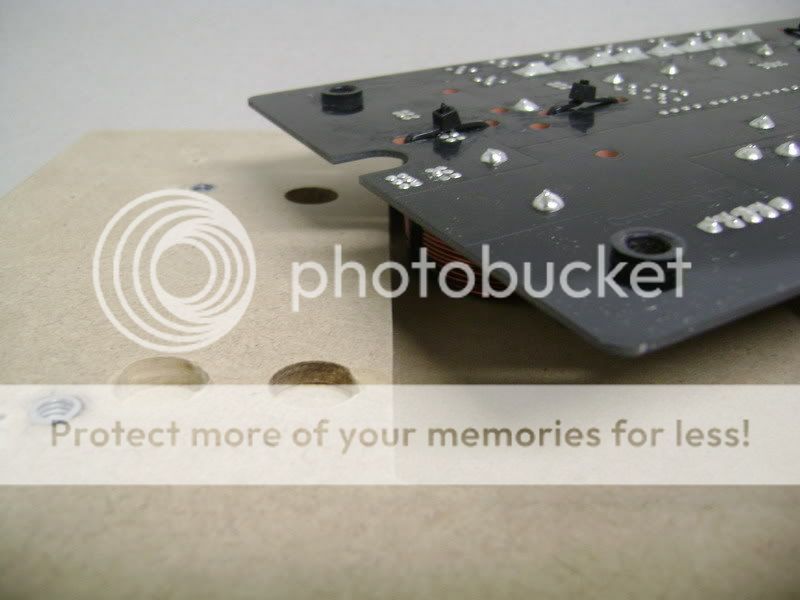
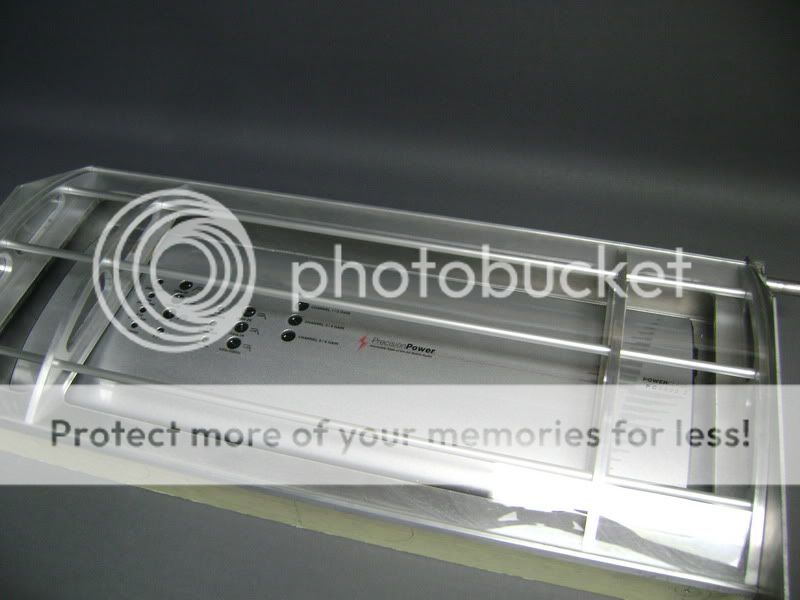
Filters mounted... 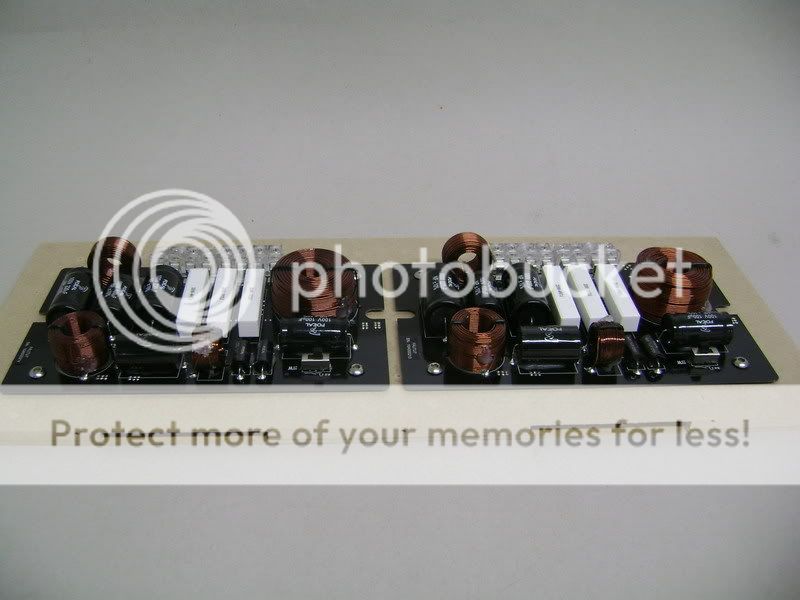
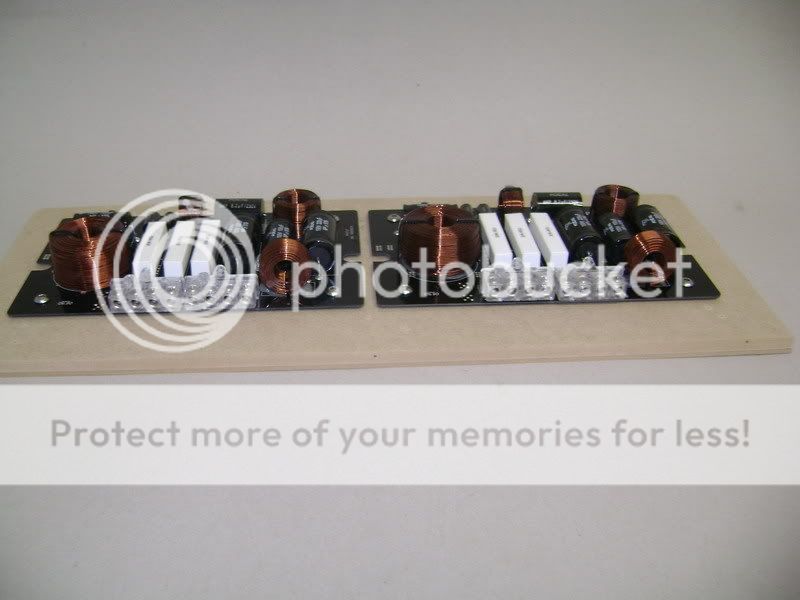
Here you can see that i have enough space between the board for the wires. 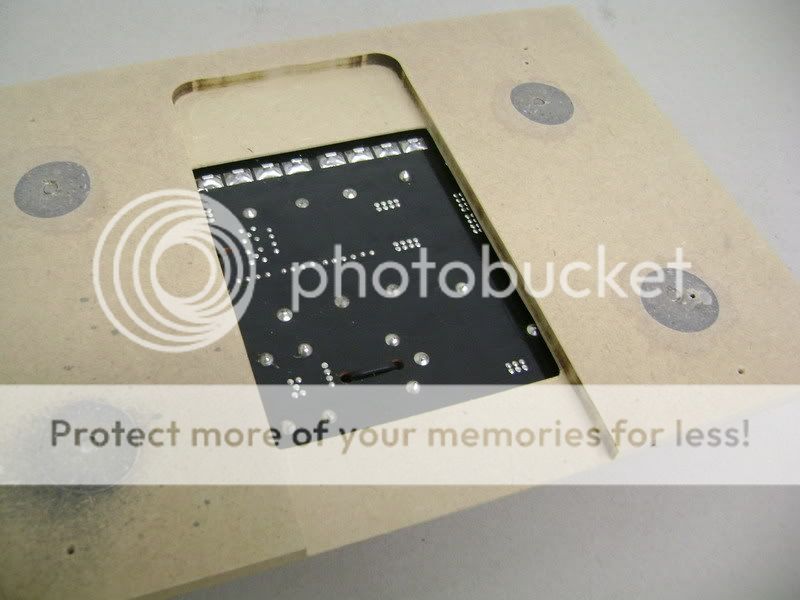
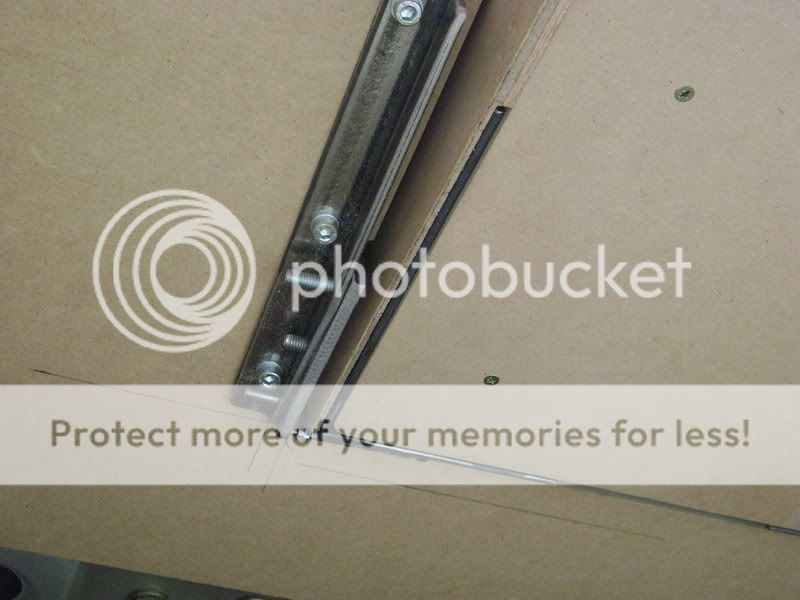
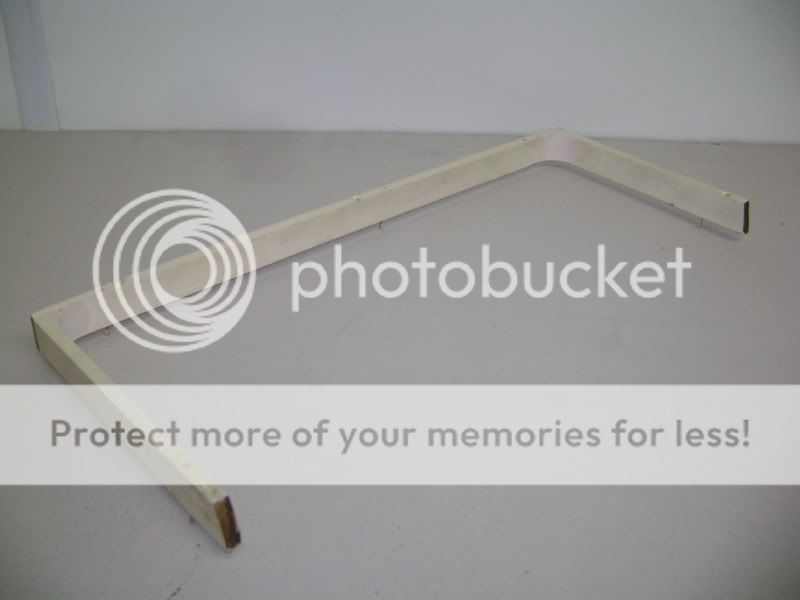
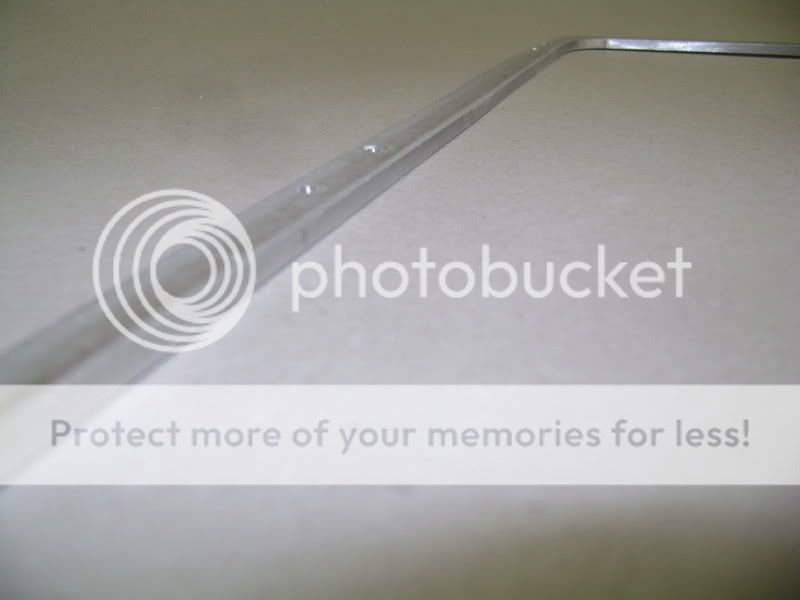
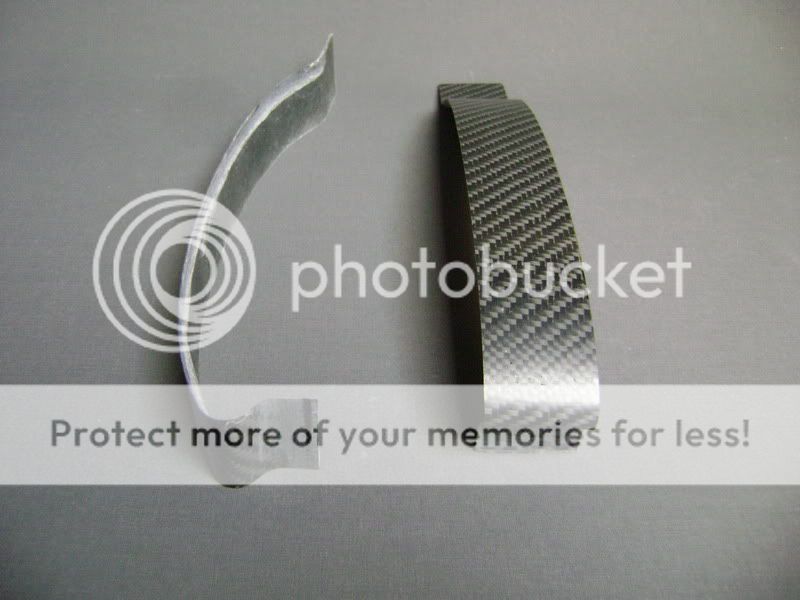
Than the time came to make a hinge. after thinking it over i came up with this. 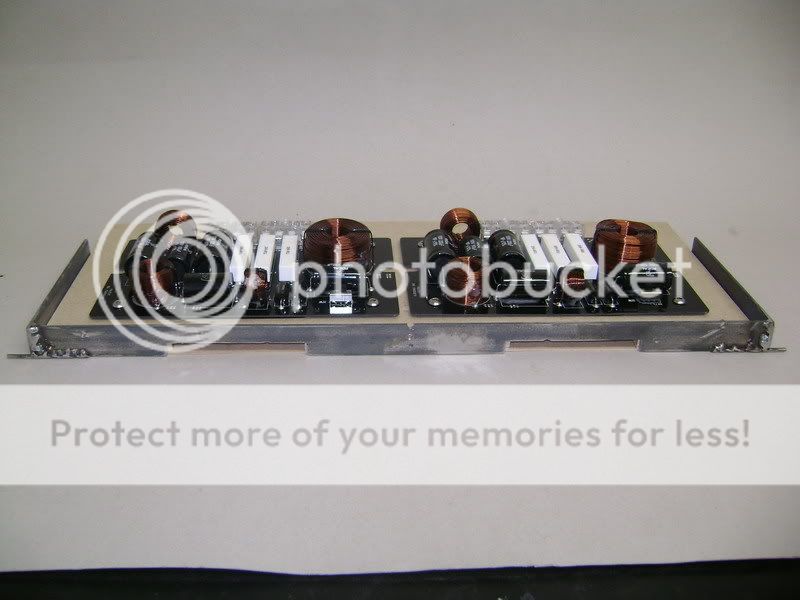
I took a flat piece of iron, and welded a twist bit on the left and right side.
As simple as that. 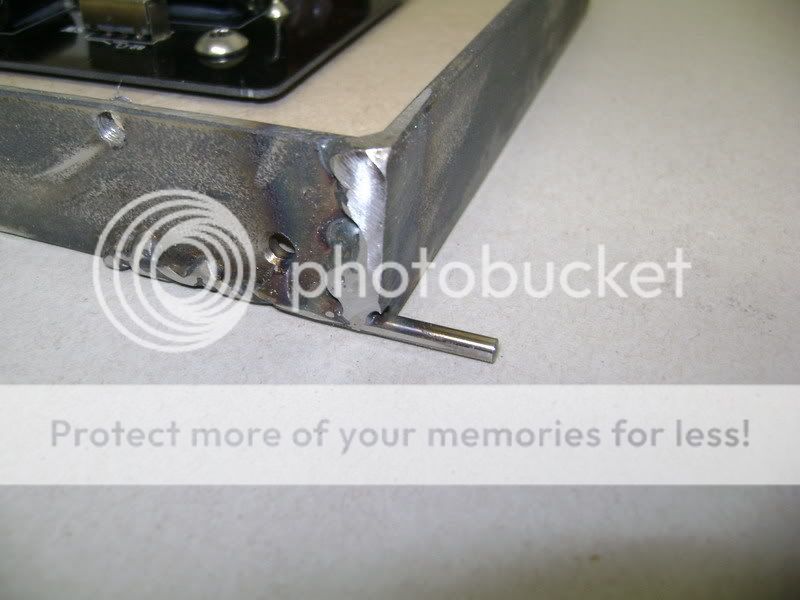
Then i made 2 other pieces which fit in. 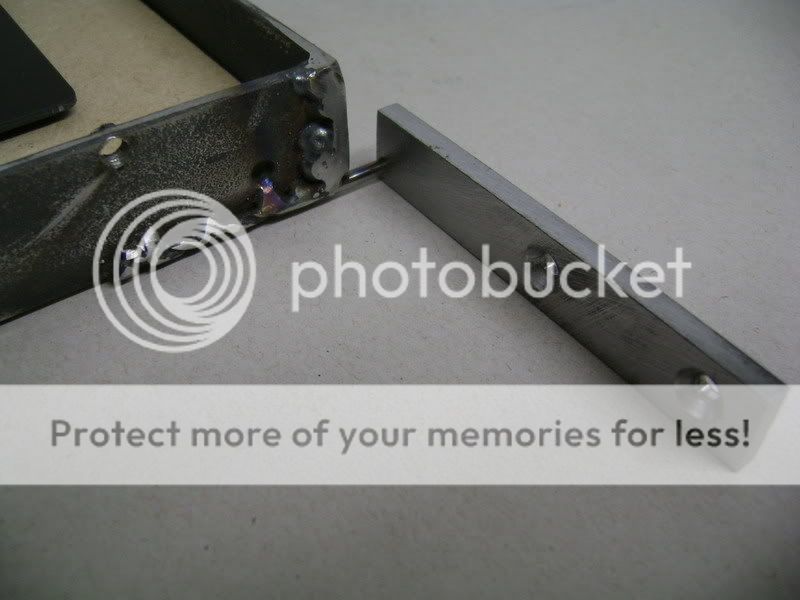
By mounting this on the ends, i will keep the margin as small as possible
Posted By: robolop
Date Posted: August 21, 2009 at 1:42 PM
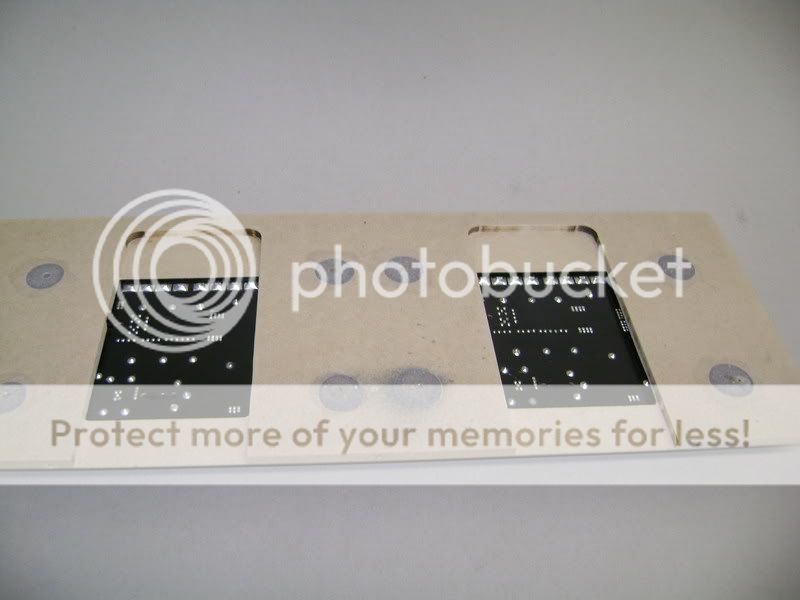
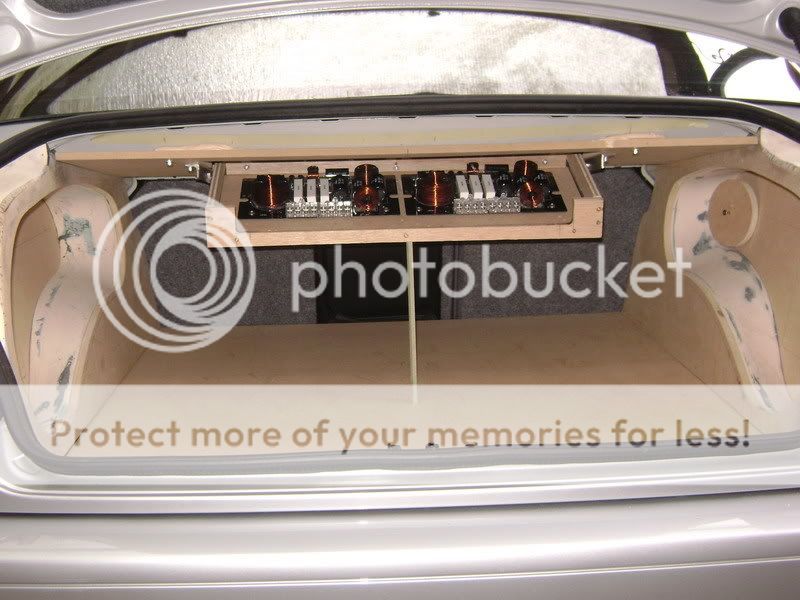
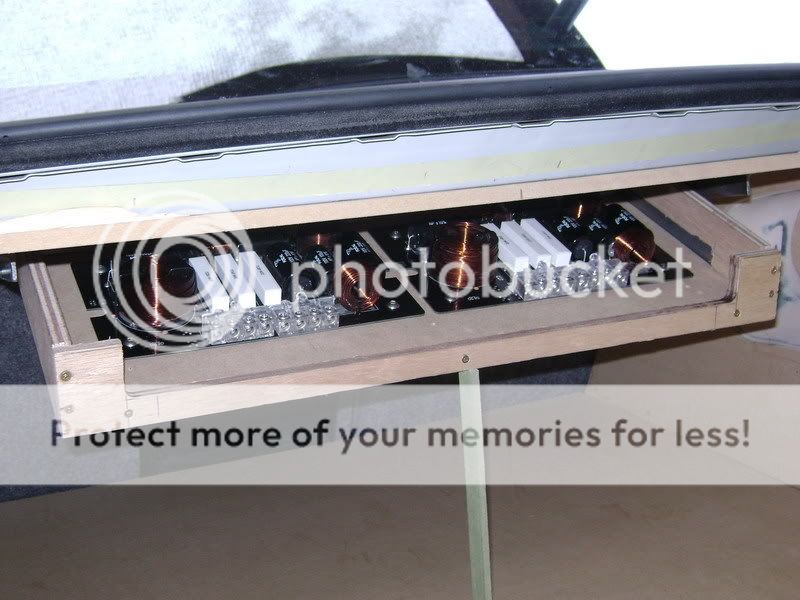
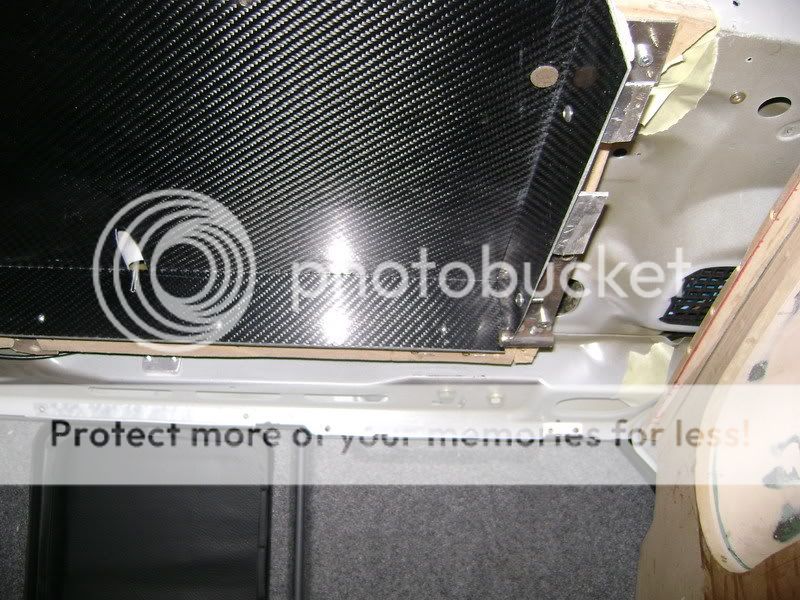
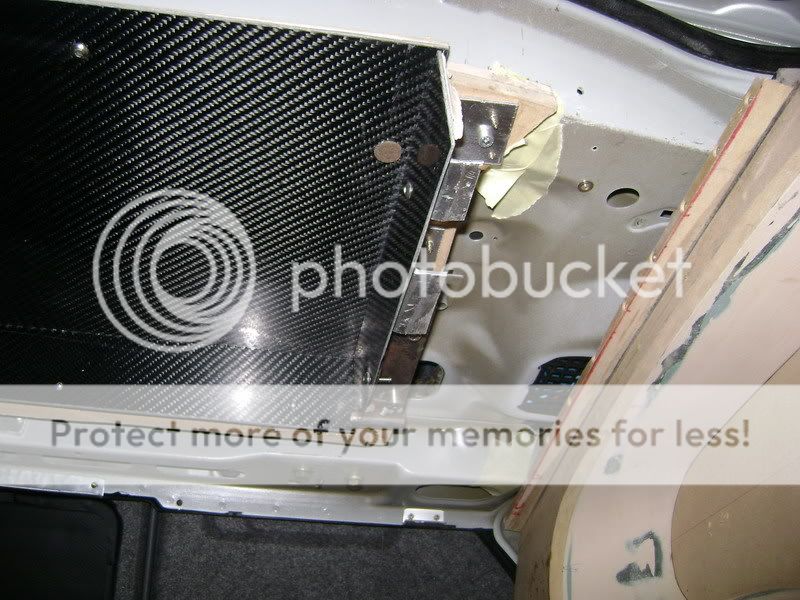
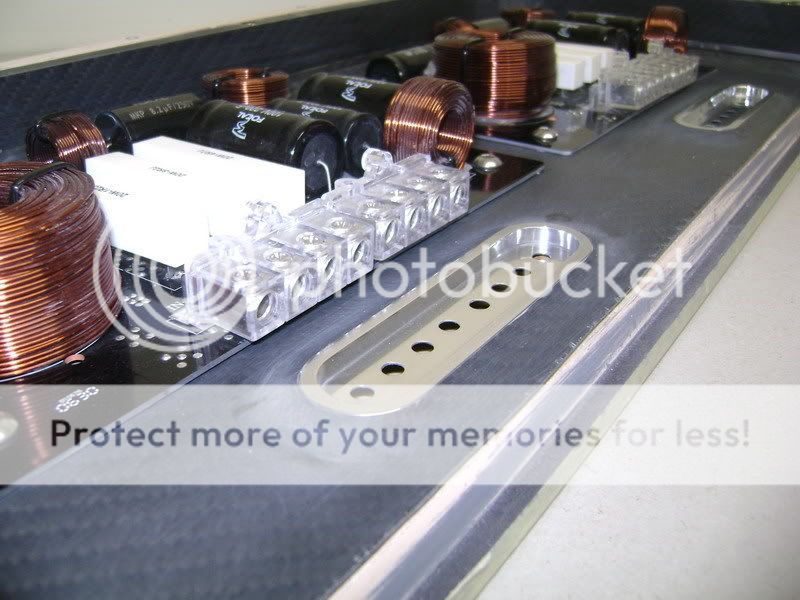
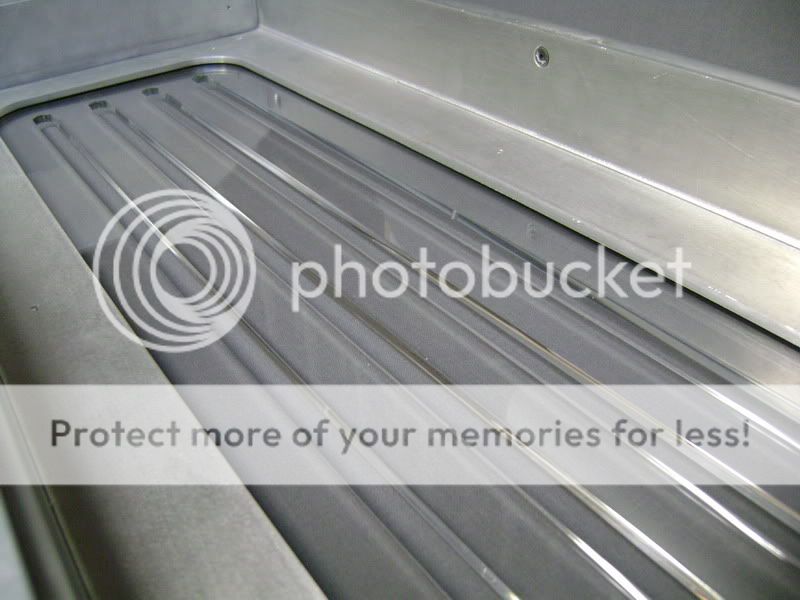
Here you can see how i'm going to mount the crossover tray underneath the back shelf.
I started by mounting a MDF board, afterwards i've cut a hole so that the tray fits.
On that board i'm going to mount the hiinges.
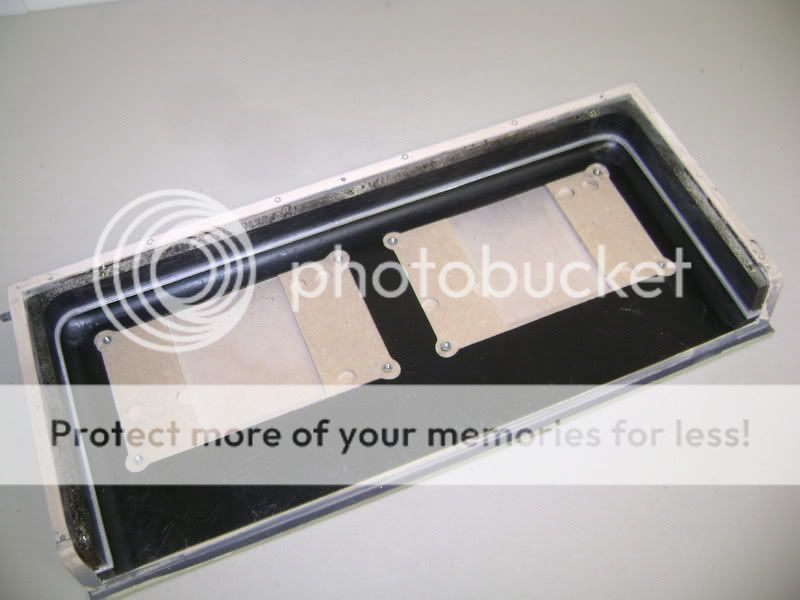
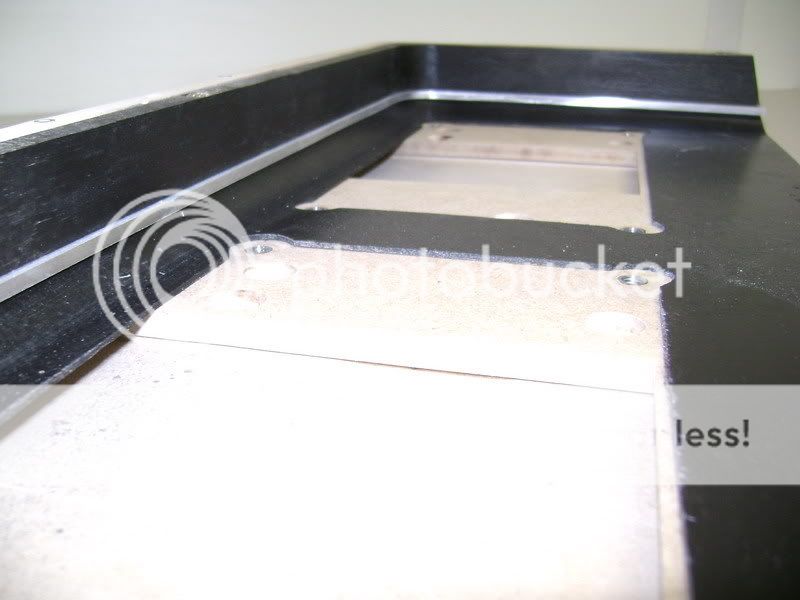
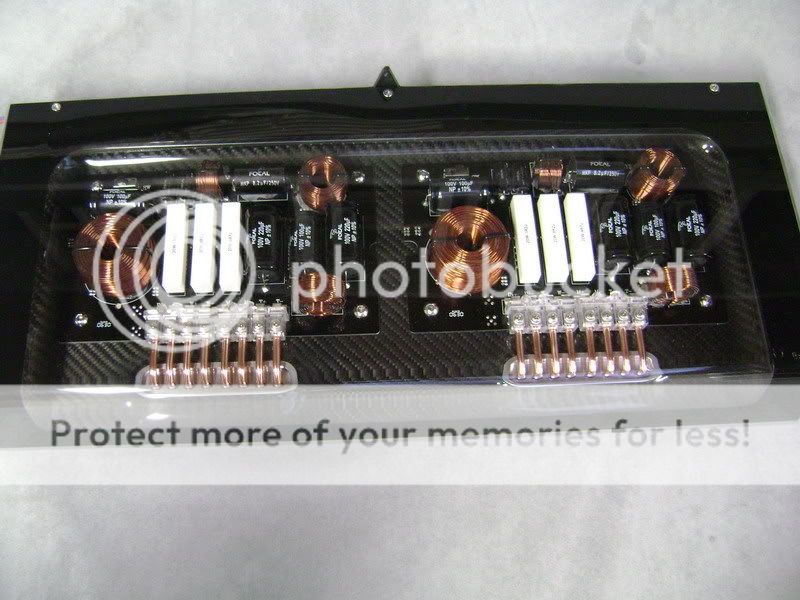
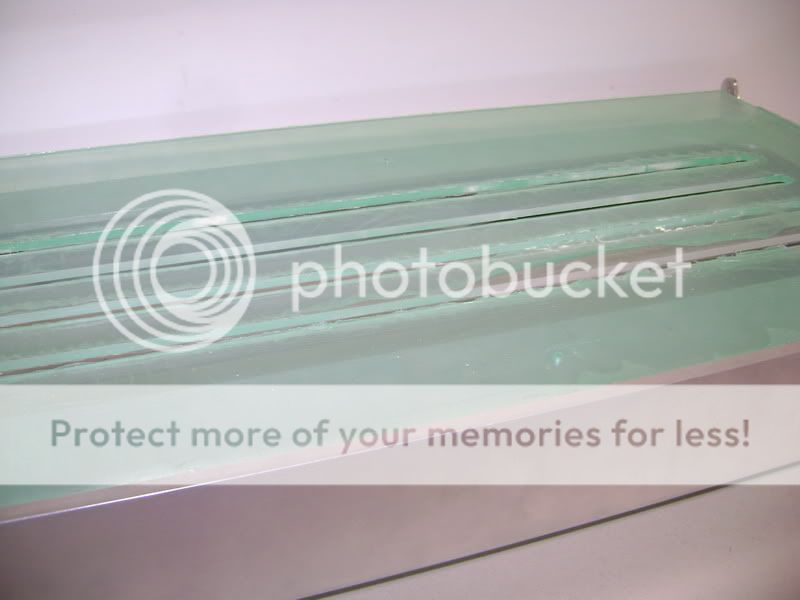
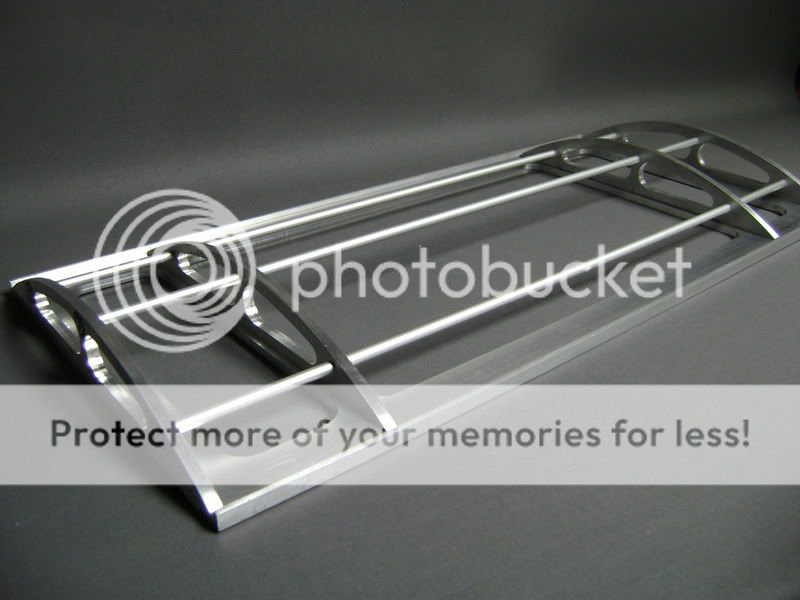
Here you can see a part of the tray where the crossovers will be mounted in. 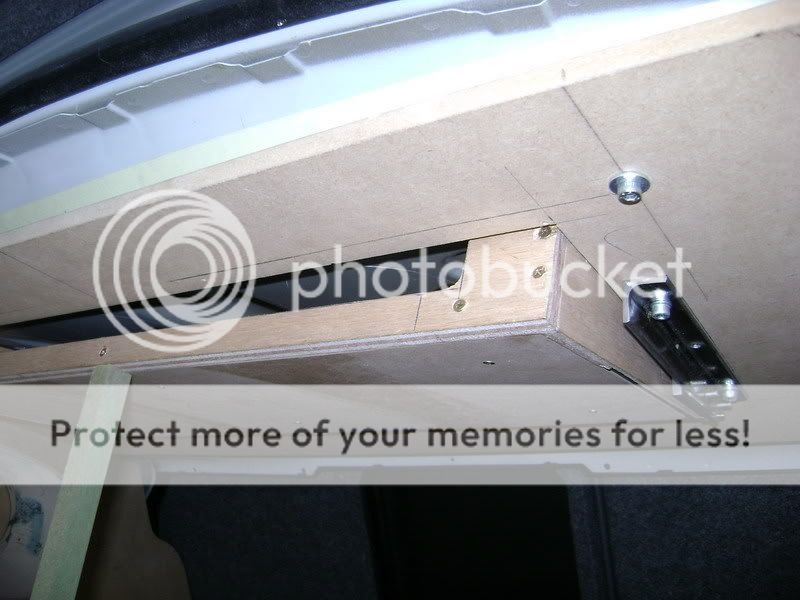
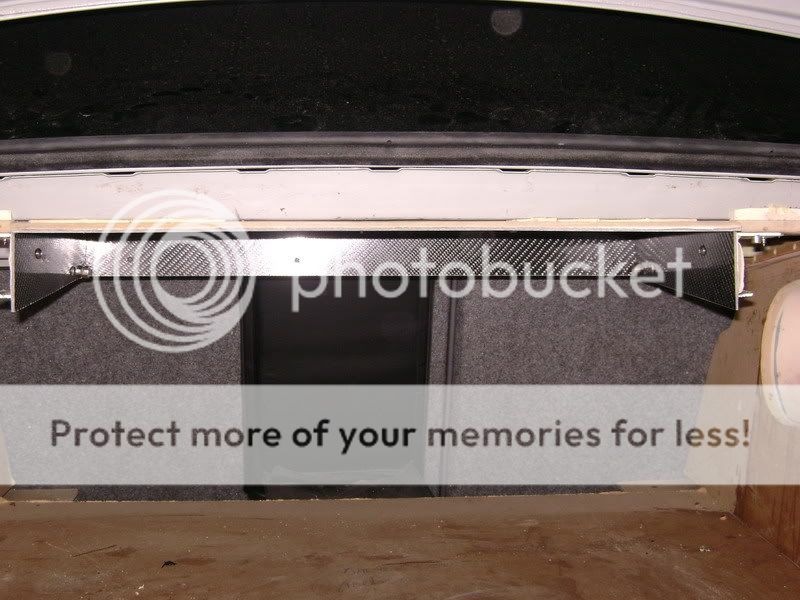
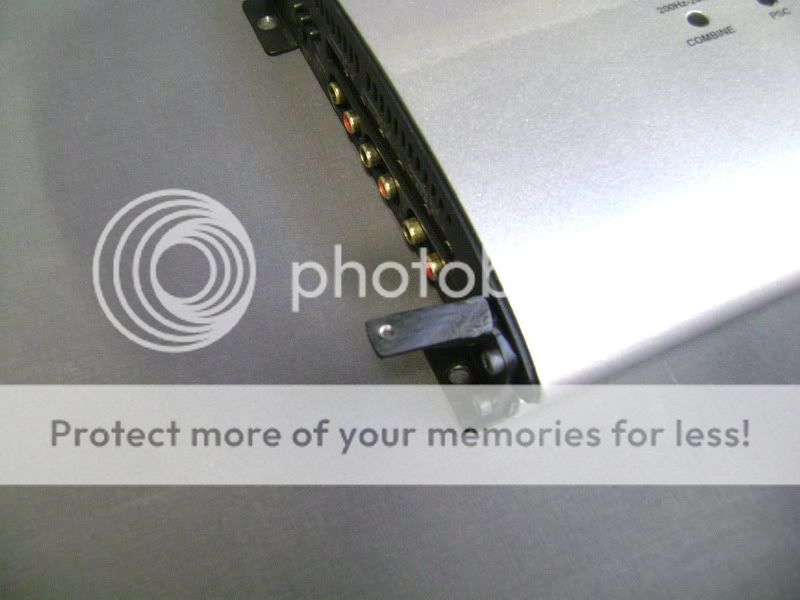
On this picture you can see the tray while it is closing. The hightec stick you can see will be made out of carbon. 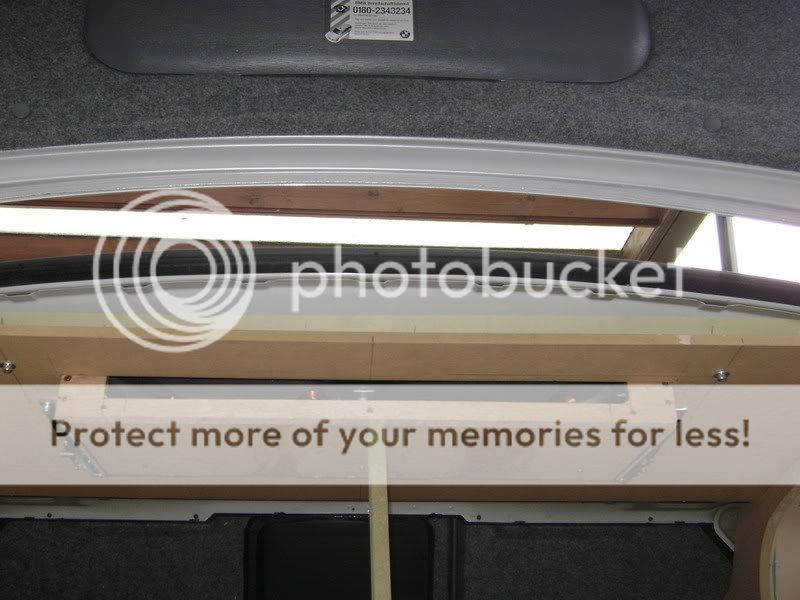
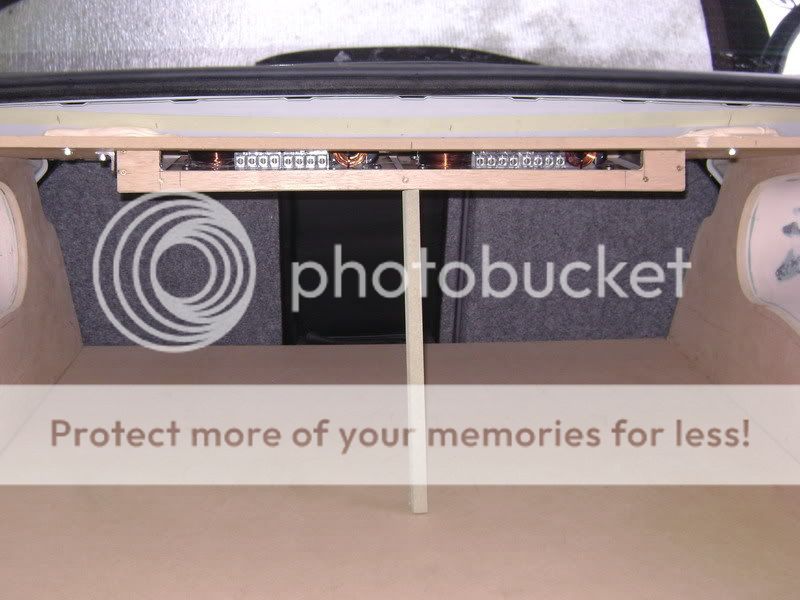
This is what it lookes like when it is fully opened. 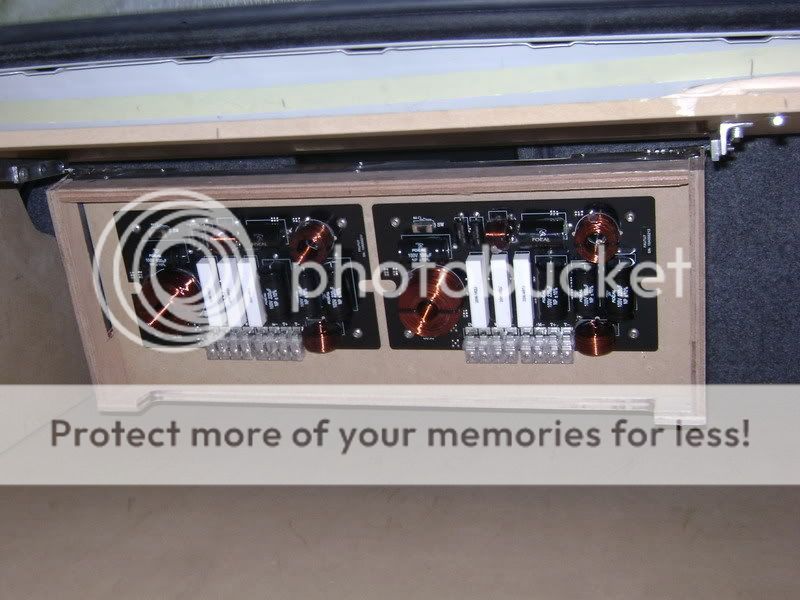
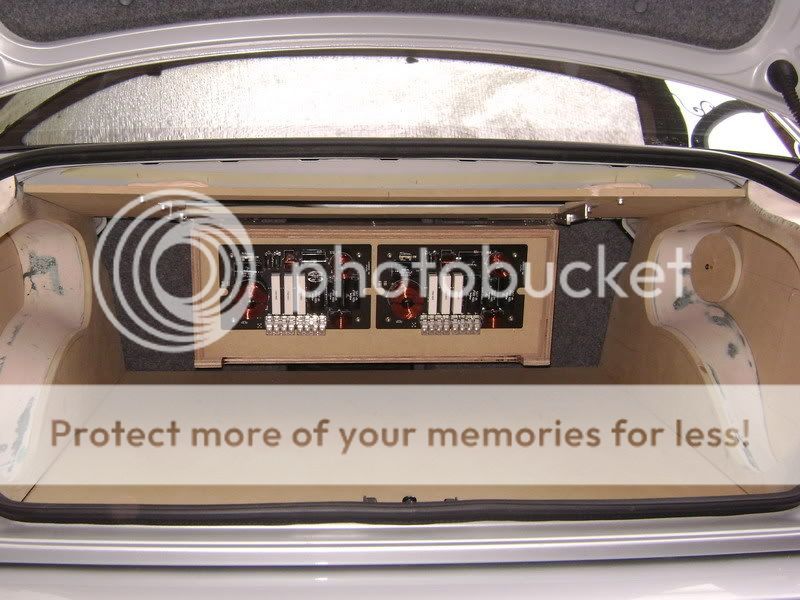
Here i show you how far i'm going to allow it to open. 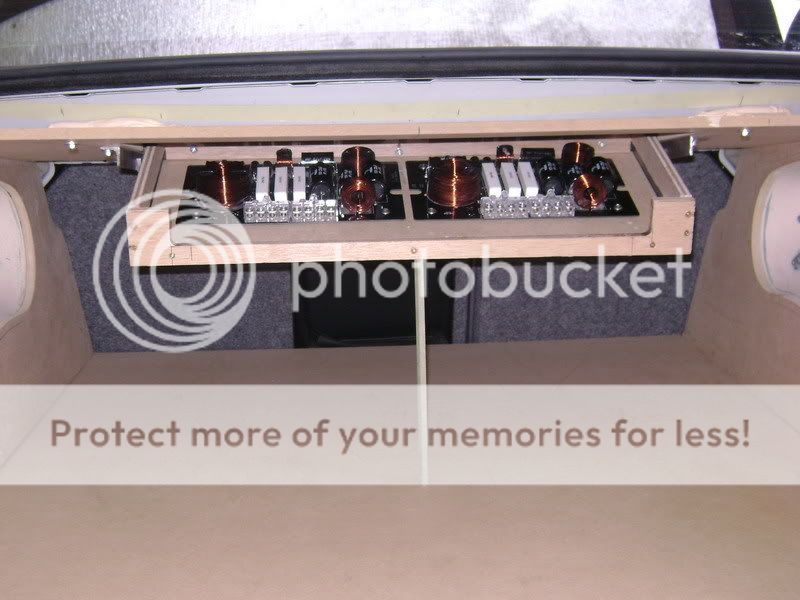
Posted By: robolop
Date Posted: August 21, 2009 at 1:44 PM
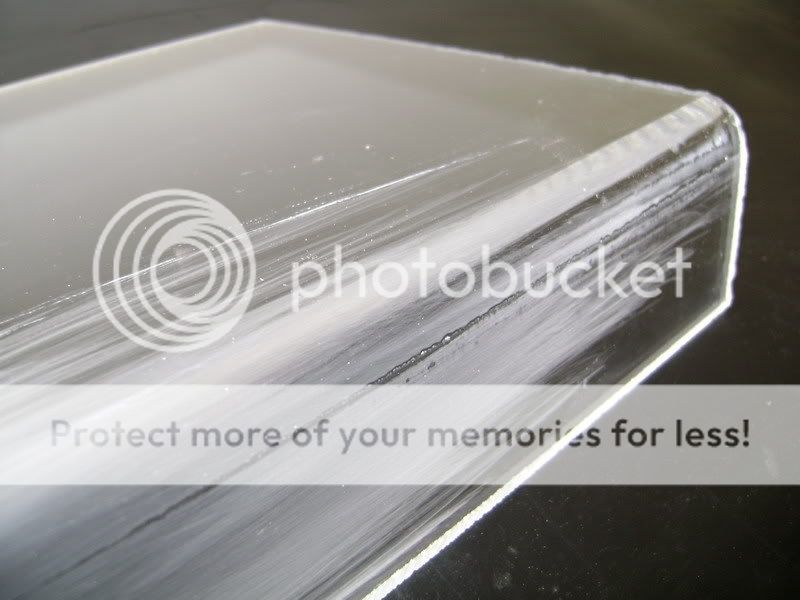
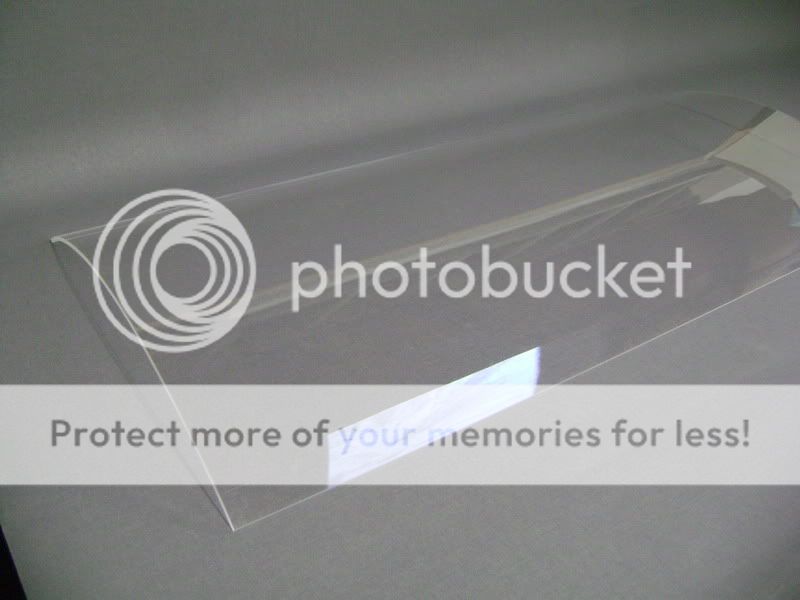
I'm going to cover the crossovercase with a piece of plexy. I usually allway try to use real glass, but because i want this one to bend a bit, i'm forced to use plexy.
I first intended to just order a "ready-made" piece, but instead i'm going to try to bend it myself.
the plexy has a 5mm gauche.
The first test came out pretty good.
I've clamped and than heated it with a hot air paint remover.
This is the result. 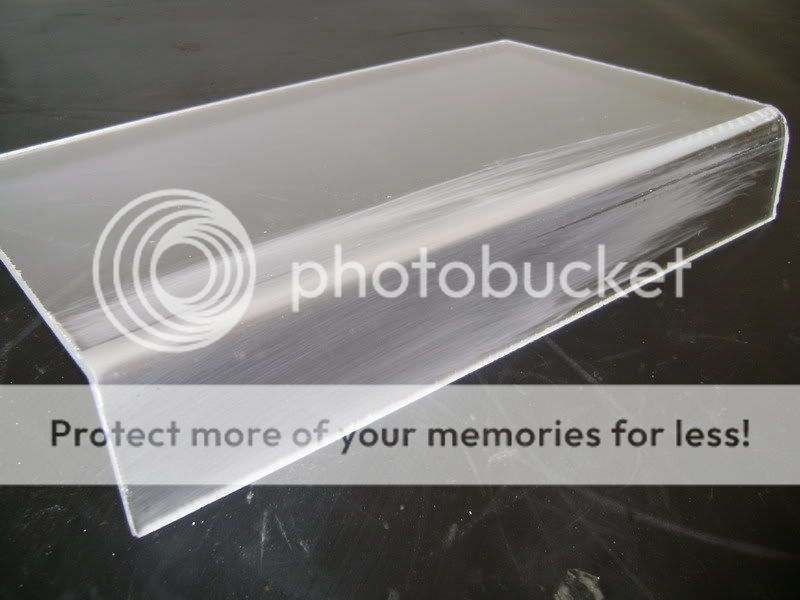
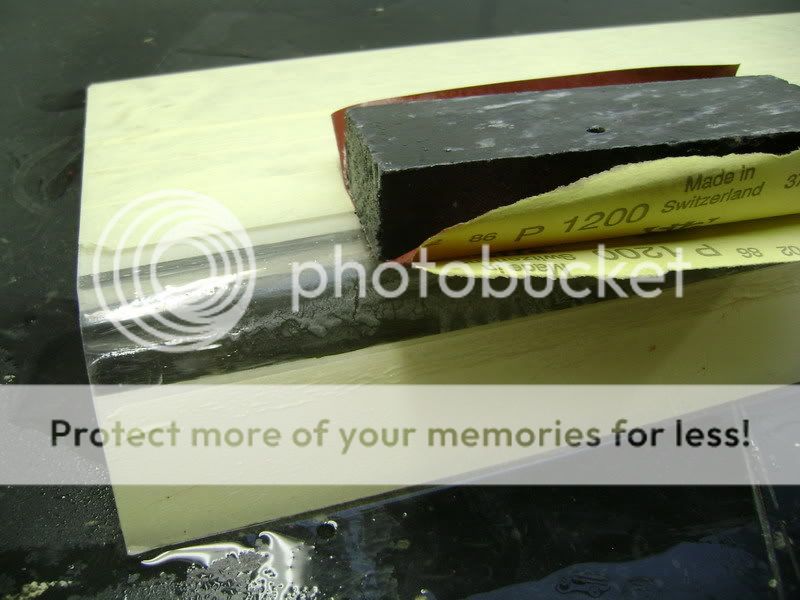
I noticed that by heating it, it get's rough.
so i had to sand the irregularity. First with a wet nr 800 sandpaper, then with a nr 1200, to end with a nr 2000. Afterwards i polished the entire piece.
 The ends of the plexy piece were pretty deformed, but i was able to fix this.
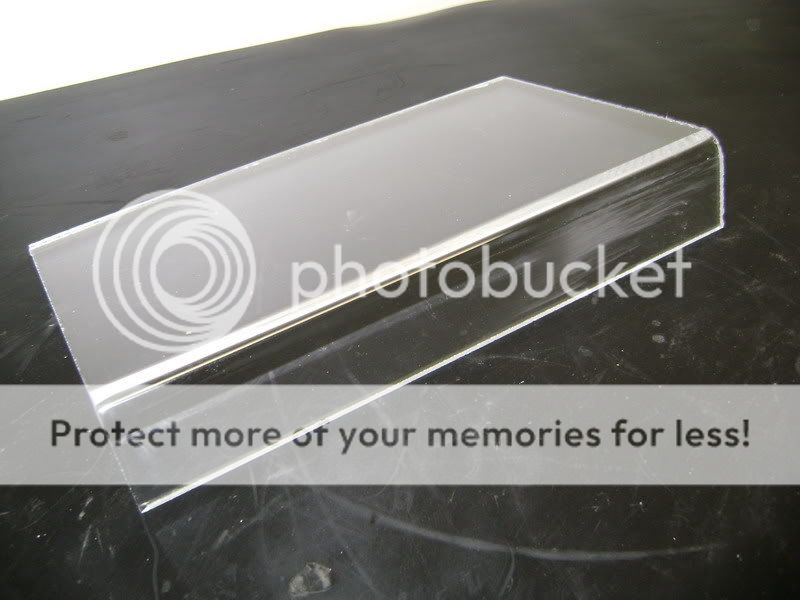
Then it was time to start on the big piece op plexy wich had to cover the entire crossover case.
This i had to clamp on as much points as possible, bucause i was affraid that it would easely deform because of the heat. 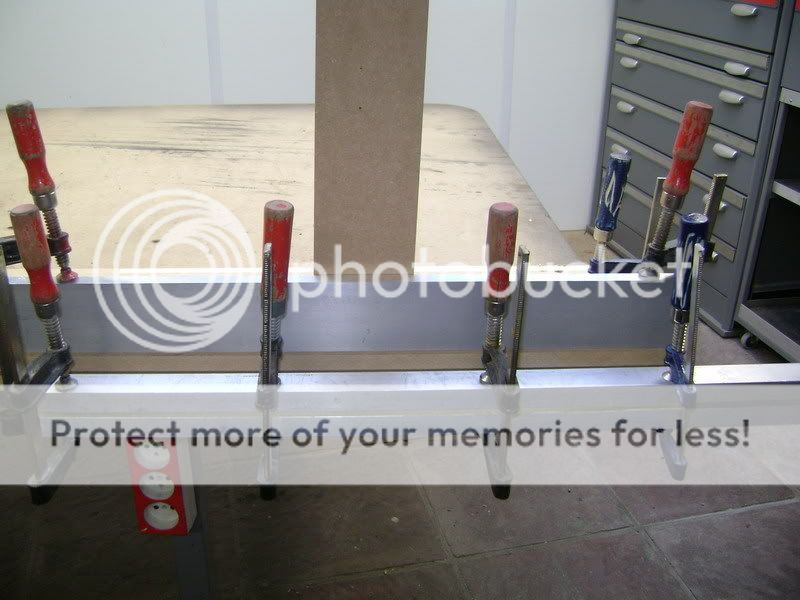
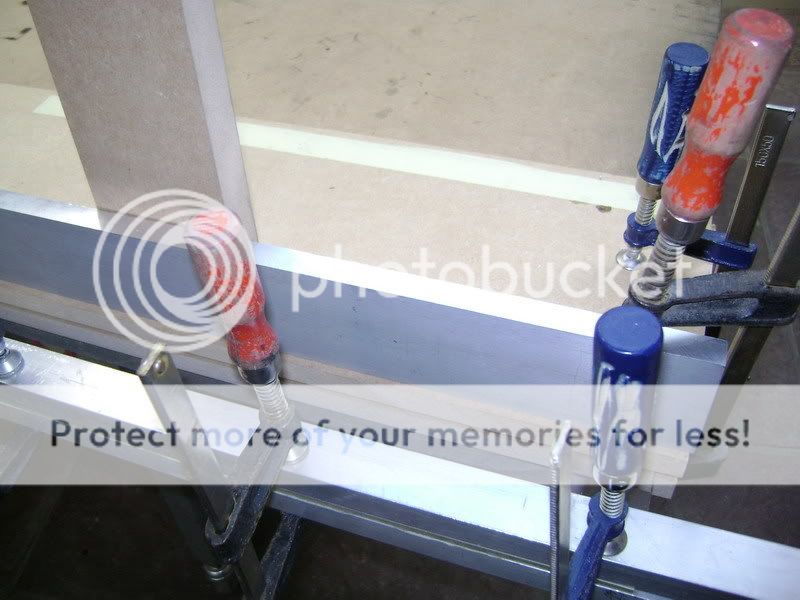
than i heated it nicely so that it would easely bent. 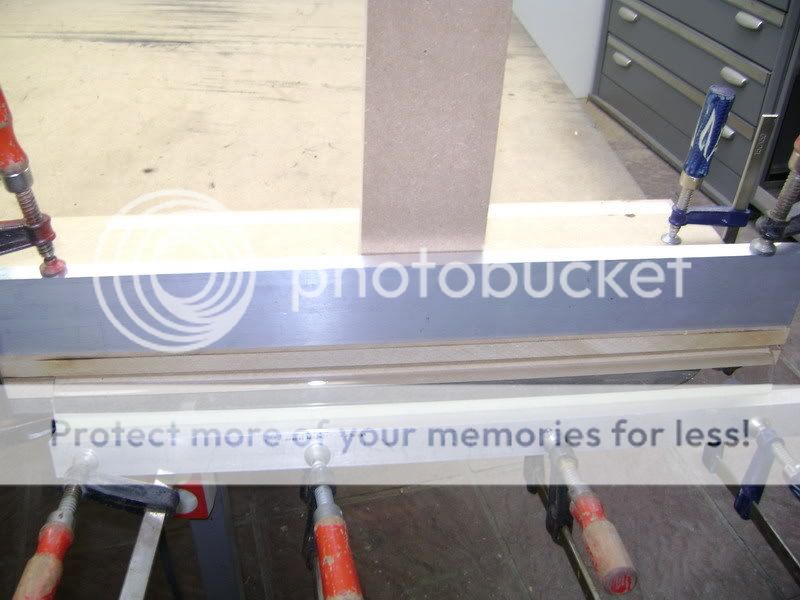
If you don't fixate it firmly, everything will deform for sure. Here you can see that my piece is pretty straight.
Then i started sanding. I started with a nr 1200 to end with a nr 2000.
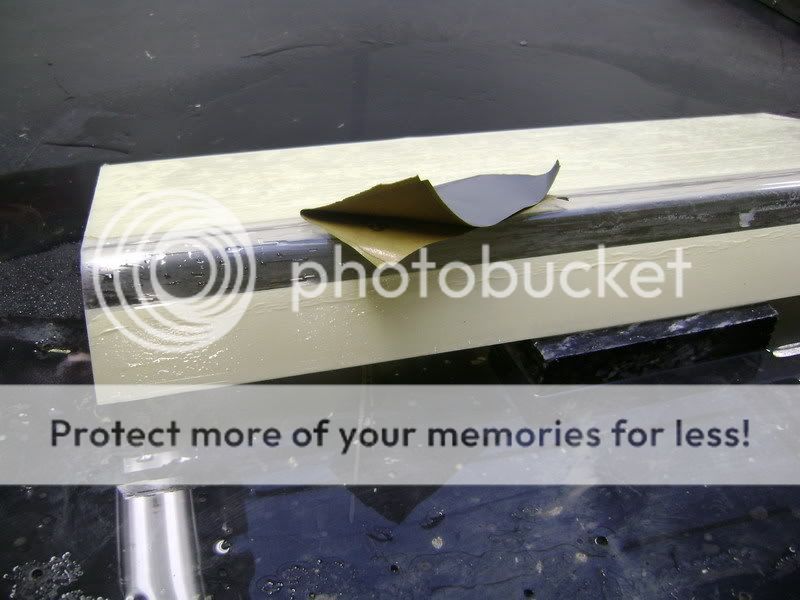
Afterward i started polishing. 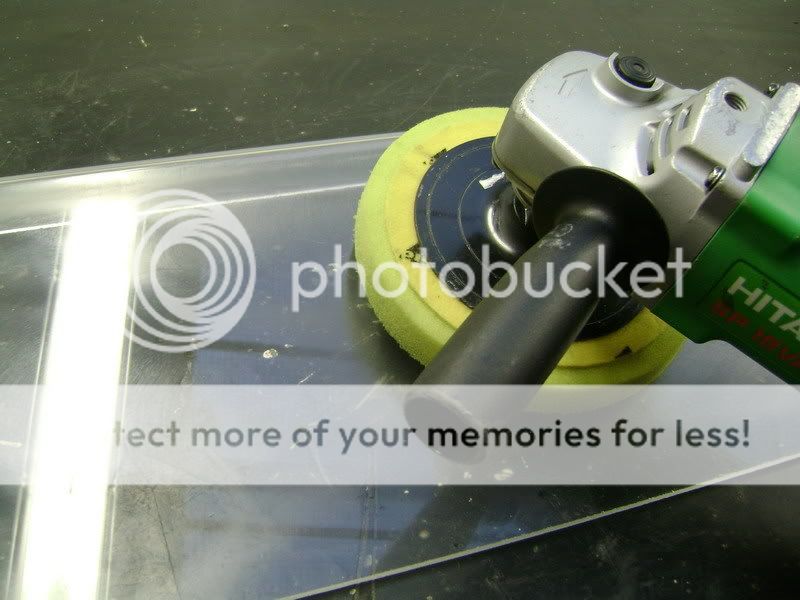
My plexy cover looks great, and has only cost me 7 euro.
Posted By: robolop
Date Posted: August 21, 2009 at 1:45 PM
I wasn't satisfied about the result i became by using the springs, so i've decided to use a motor instead. 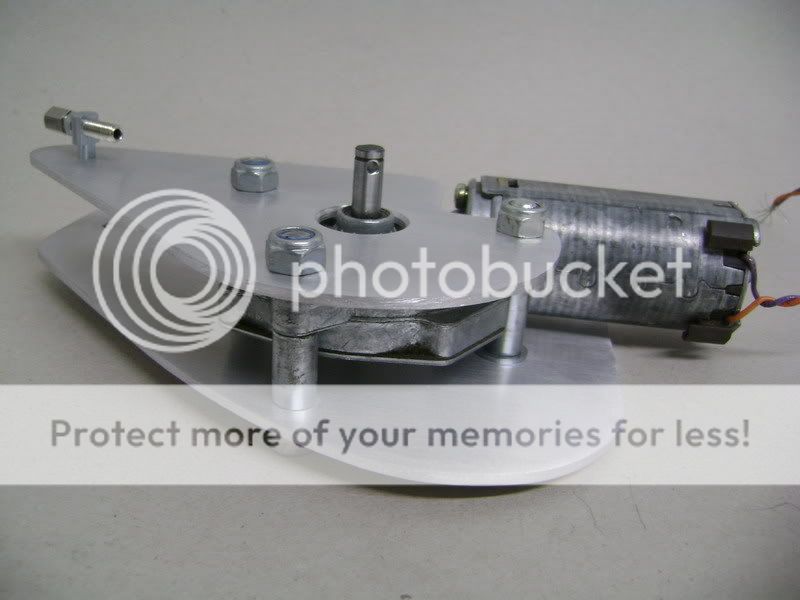
The frame to mount the cross over tray also needed some extra attention to make it stronger.
Now, finally, everthing works as planned.
So now it is time to complete the next step: make the covers for all this... As you can see, i've made a decent hinge.
The alloy plates that were supposed to mount on the sides of the tray ended up with the trash.
The ones you see on this pictures still need to be polished 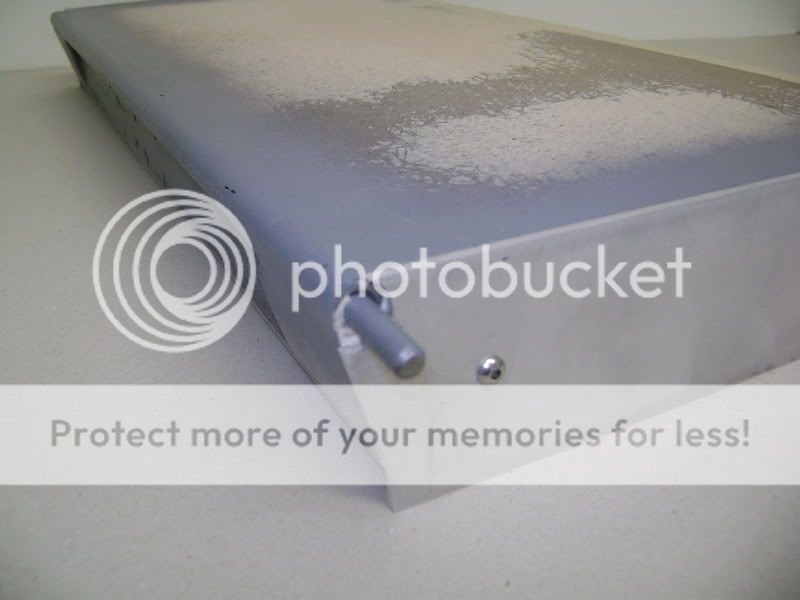
Than i used a big piece of glass to create a large piece of carbon. Clearly it still needs some layers of varnish.

These have been cut into several pieces.
These parts will be mounted on the inside of the tray (visible when opened) 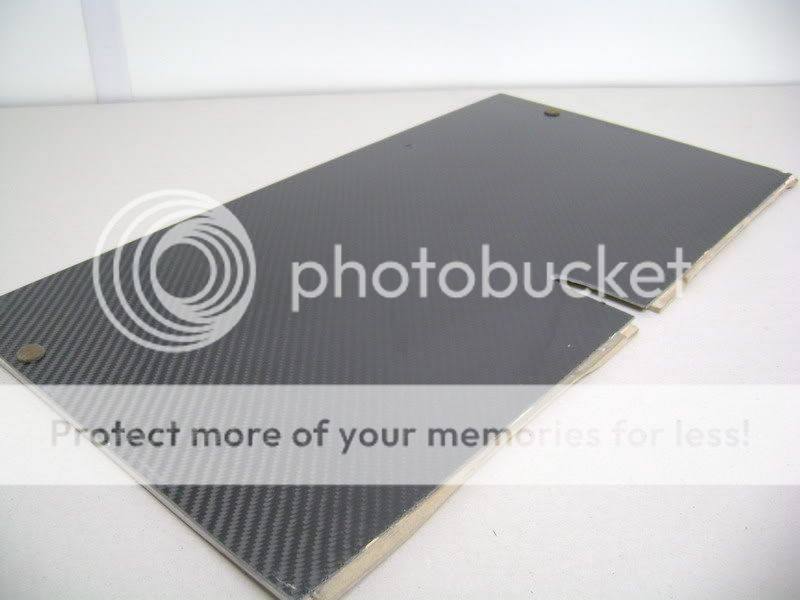


Afterward i made a cover for the bottom of the trunk.
A hell of a job.

The beautifull curves a not visible on the picture. 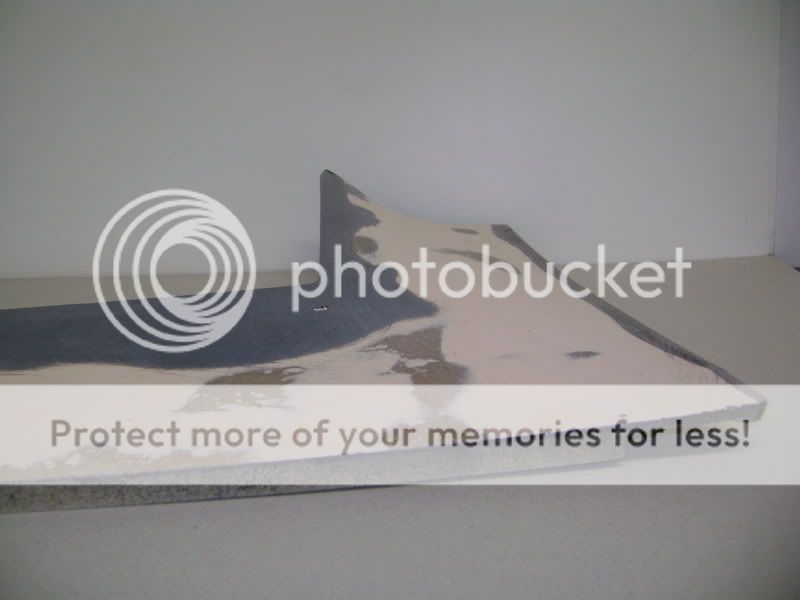
This piece is mounted using 5 screws, still 3 visible (for now...)
This is the front view, for this i still have a cool trick up my sleeve, but more details lateron. 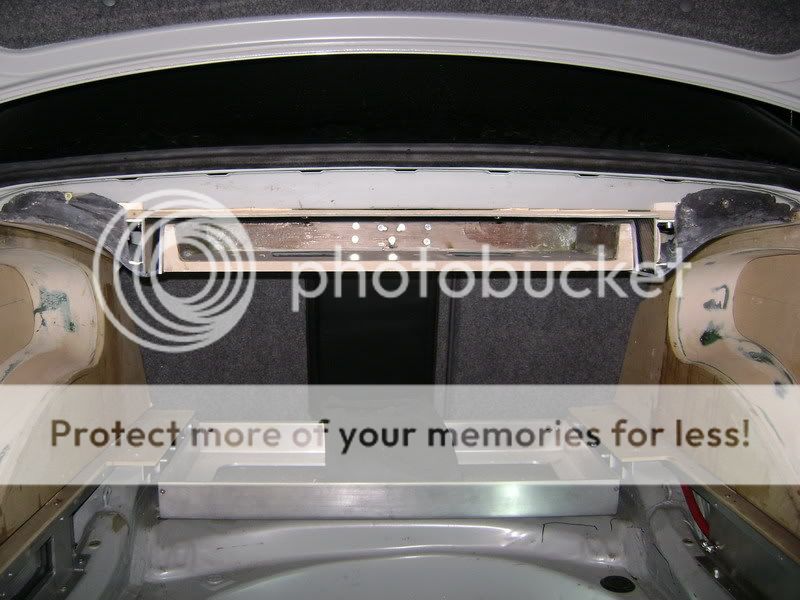
Here it shows that my side pieces are too long, but i did that on purpose.
It als shows that the bottom needs some filling so that everything become nice and smooth.
 On this pic i show you were i've stopped with the curver. the staight mdf piece will eventually become round. i really hate straight lines!
Posted By: robolop
Date Posted: August 21, 2009 at 1:46 PM
These 2 holes will be used to guide the speakerwires. I've made them big enough so that it doesn't create friction when the entire things moves up and down.

 In the meanwhile i've reinforced the suspension of the cross over tray and spray painted it black 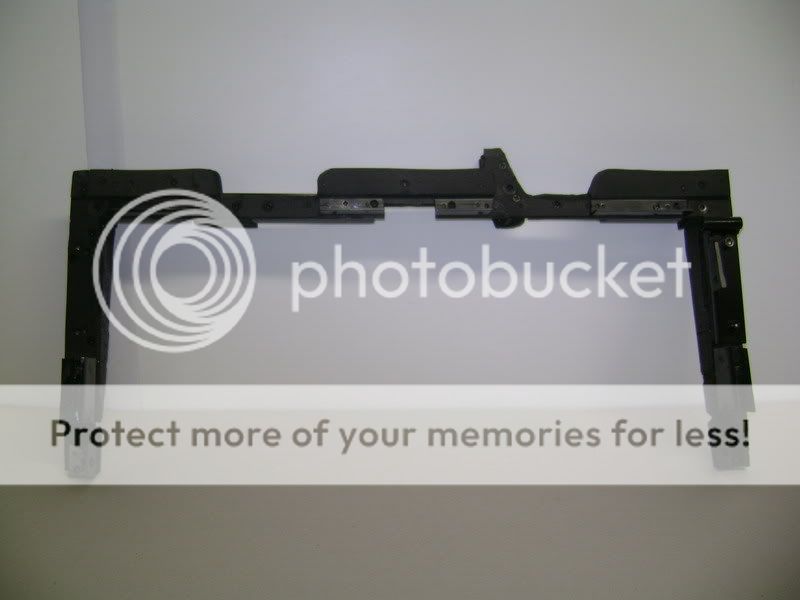
I've also modified the tray itself. As you can see, the alloy and plexi parts are no longer going all the way down. 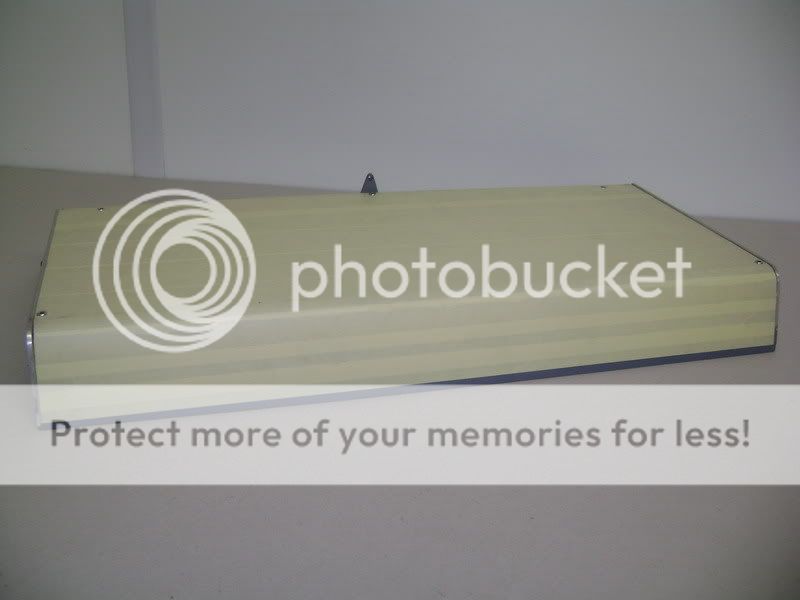
I've also modified the curver here and there. 

I created some nice curves on the side pannels so that they nicely fit te curver.


I've mounted a alloy bracket left and right xich will be used to hold the curver. 
This is the minimum margin. 

When opened, you see the small carbon border. I thing this is the nicest look. 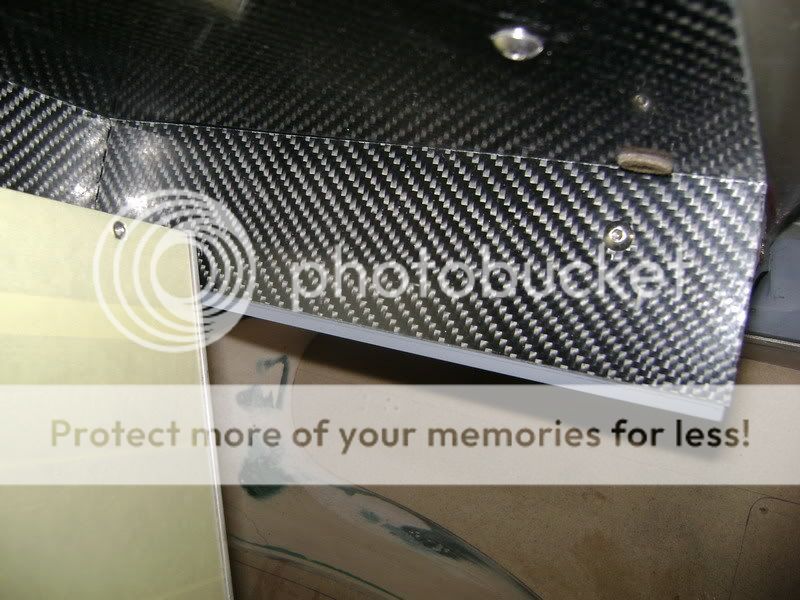
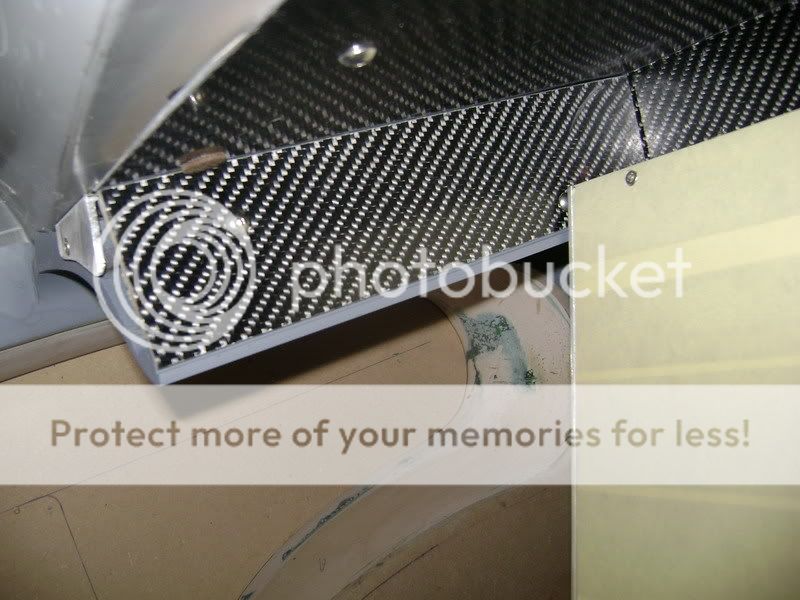
Overall picture 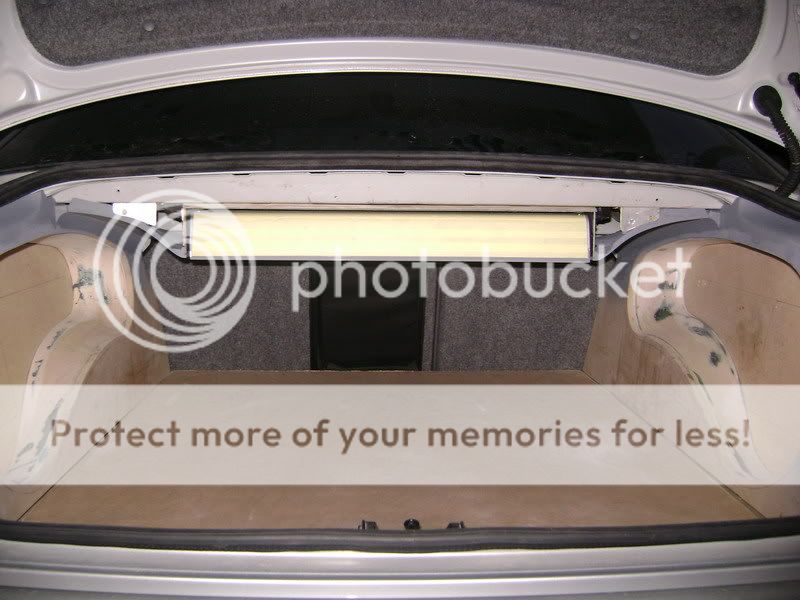
The front piece of this set up will be mounted seperately. This will be a huge task!
Posted By: robolop
Date Posted: August 21, 2009 at 1:49 PM
Because i had to mill some parts, i've integrated my uppermill in wy workbench.

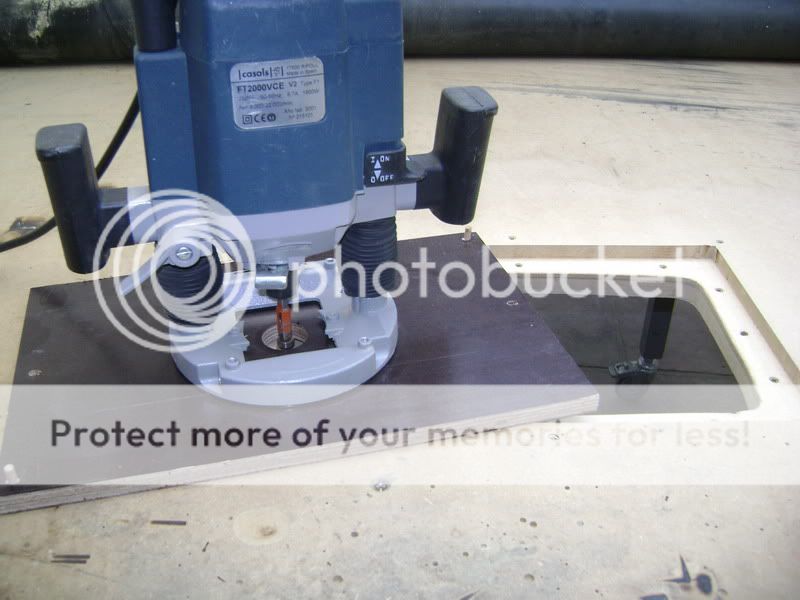
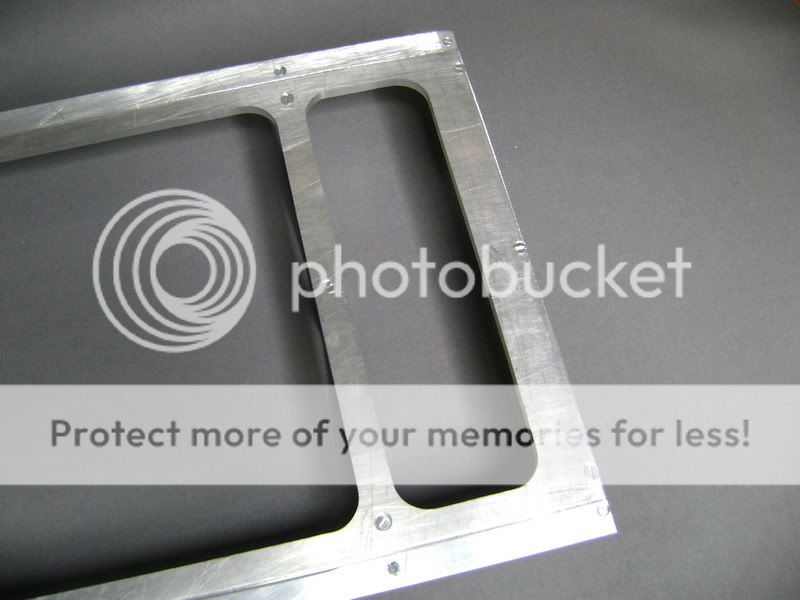
Once this was done, i was ready to start. The alu part on this picture will be mounted on the frontside of the crossovertray.
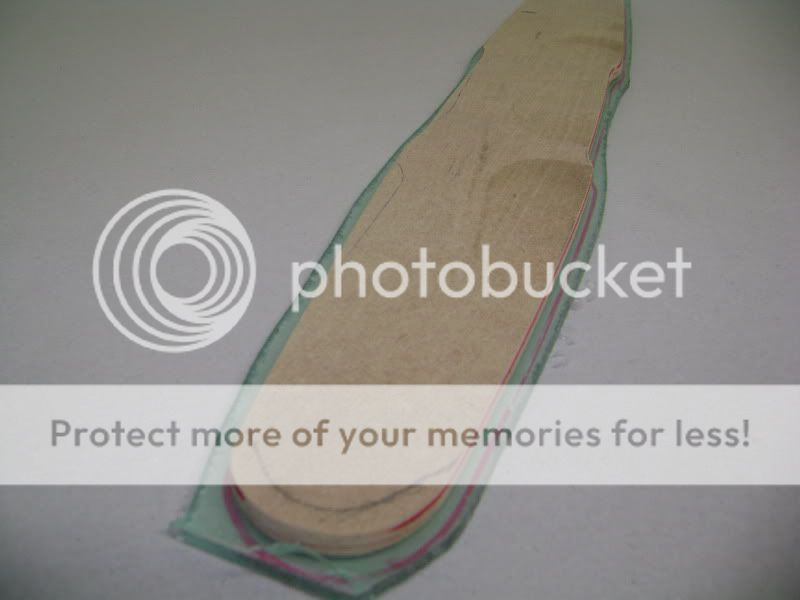
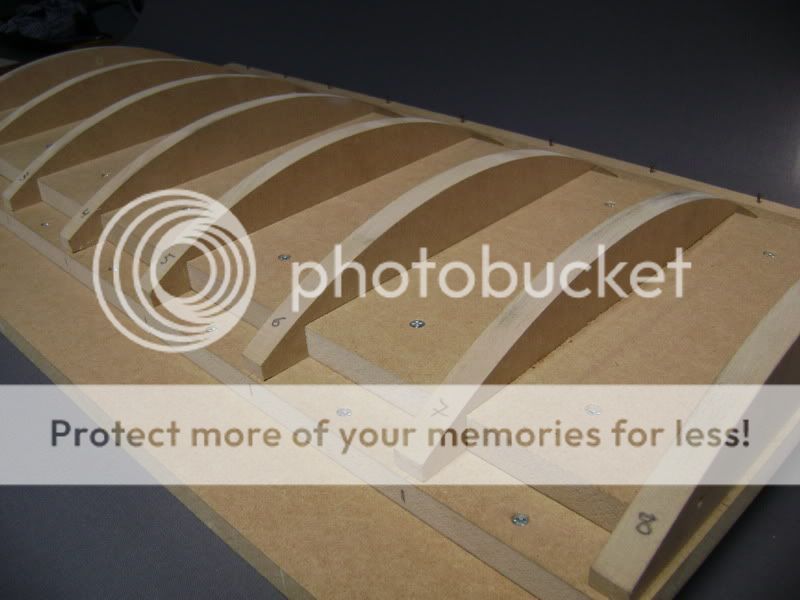
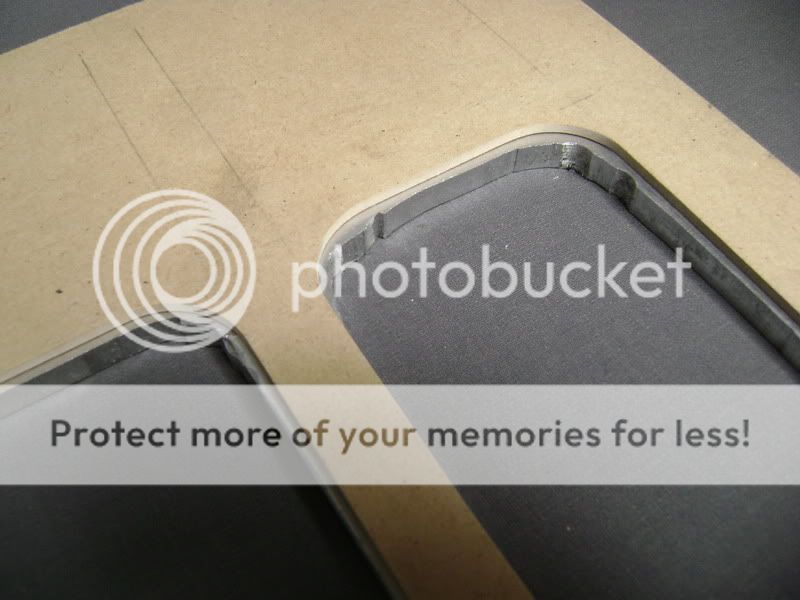
First is made a dummy out of cardboard. This was necesary to have a preview of the actual result.
 Afterwards i made a drawing on a 8mm MDF board 
Afterwards i used an electrical saw to cut everything out.
Then i mounted a smal piece of wood on top of it, so that it was easy to work with my copymill 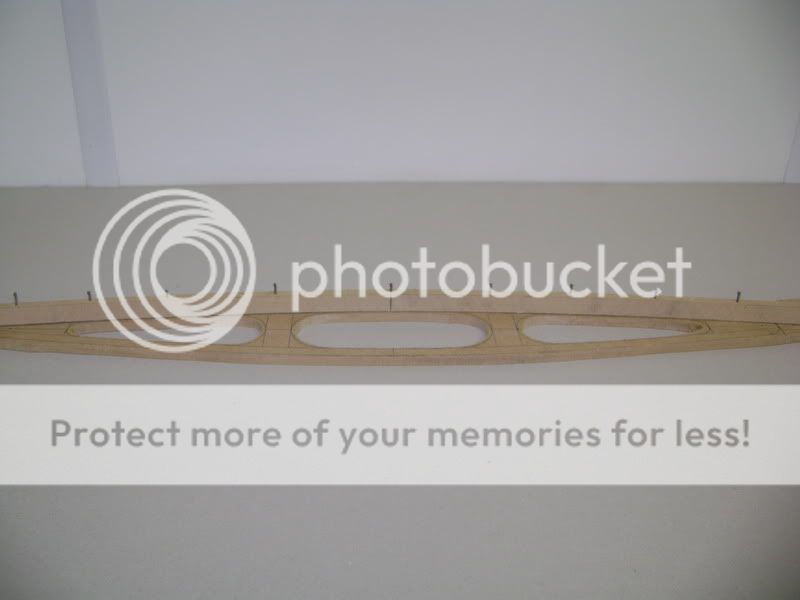
The 8 curves have been sanded by hand.
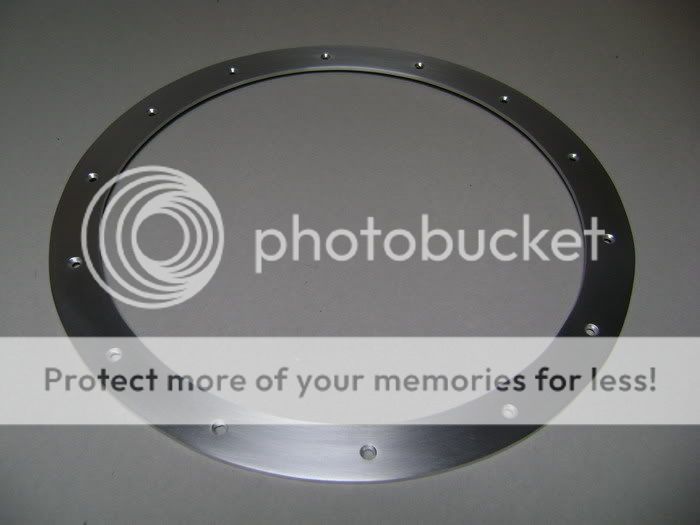
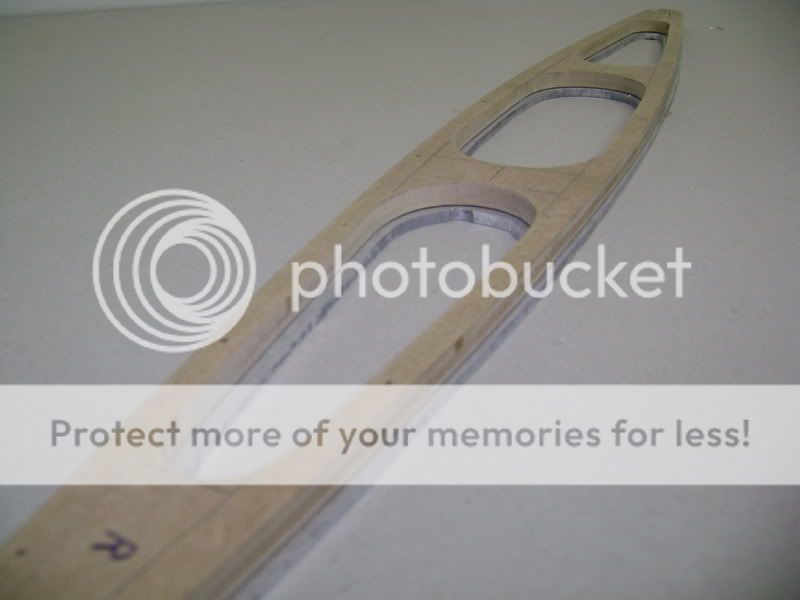
This is the model that will get milled out of aluminium 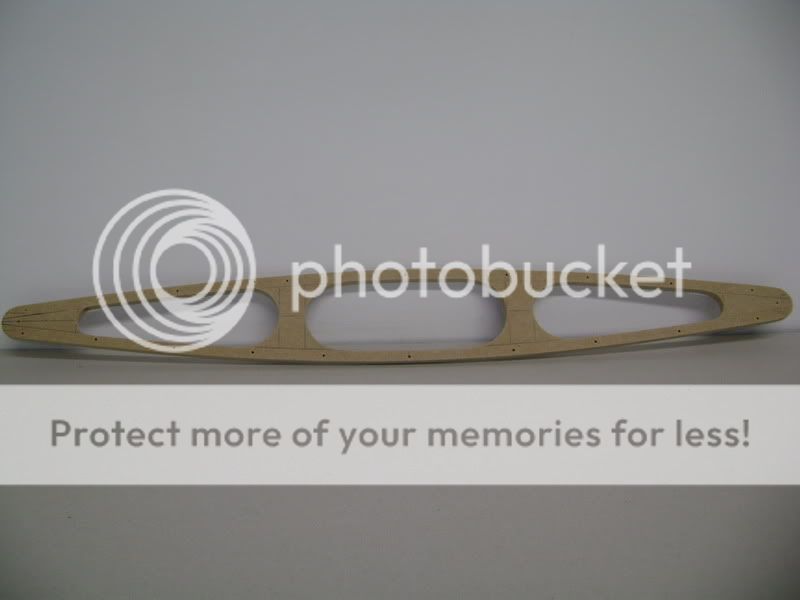
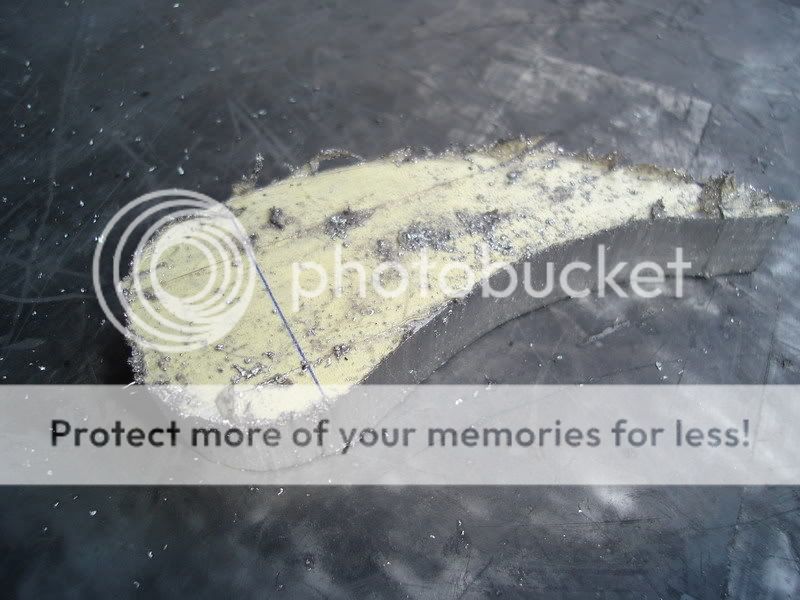
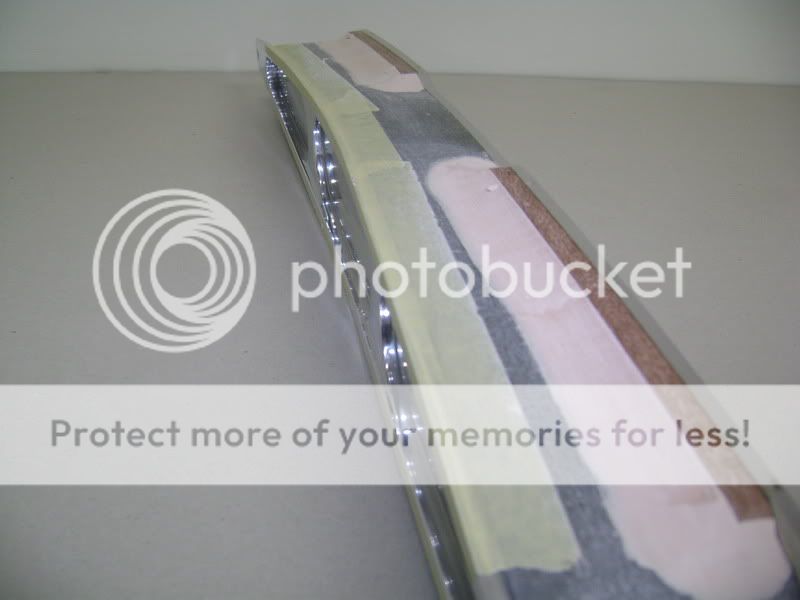
Here you can see that i've glued a 5mm alloy piece to the MDF board. 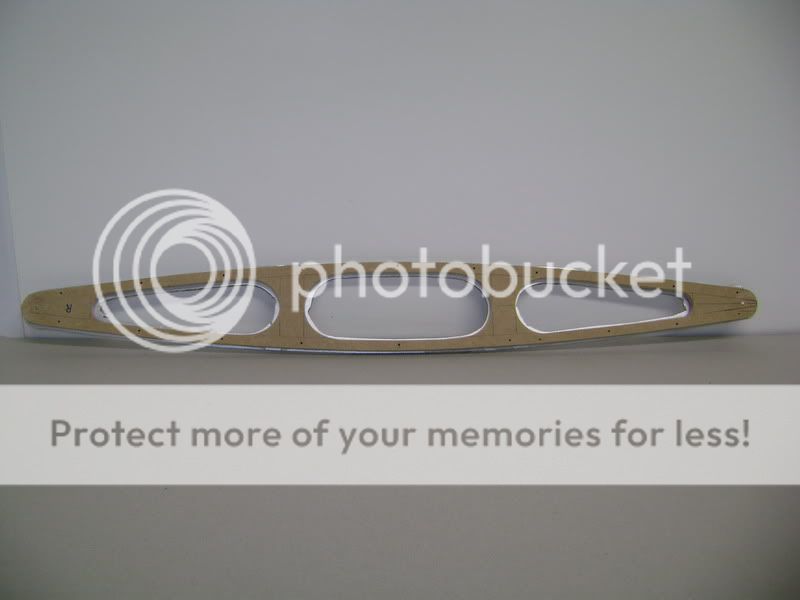
Afterwards i've used the copymill again to mill everything nice and easy... 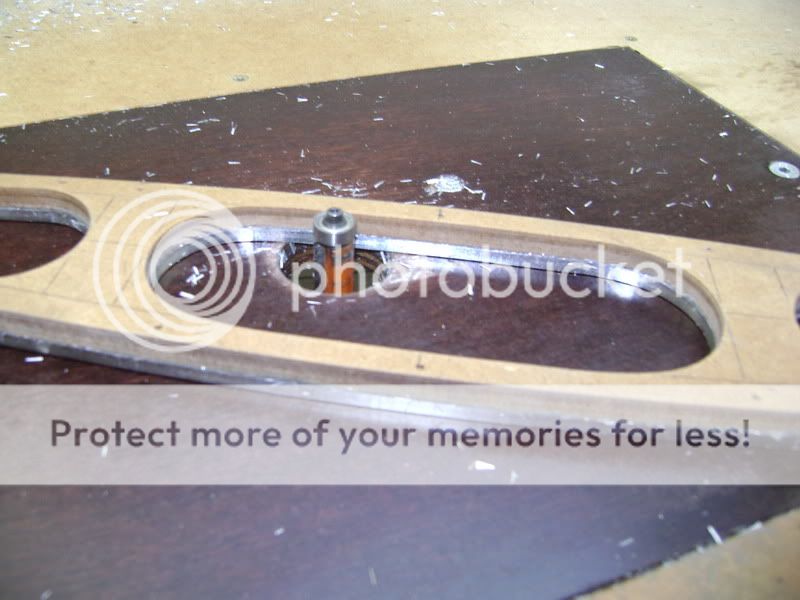
Once everything was ready i found it rather *****. I didn't like the result because it was too thin.
So i took another 8mm aluminium piece en started all over again.
As you can see, i've used the original 4mm part as a mould for the new 8mm part. 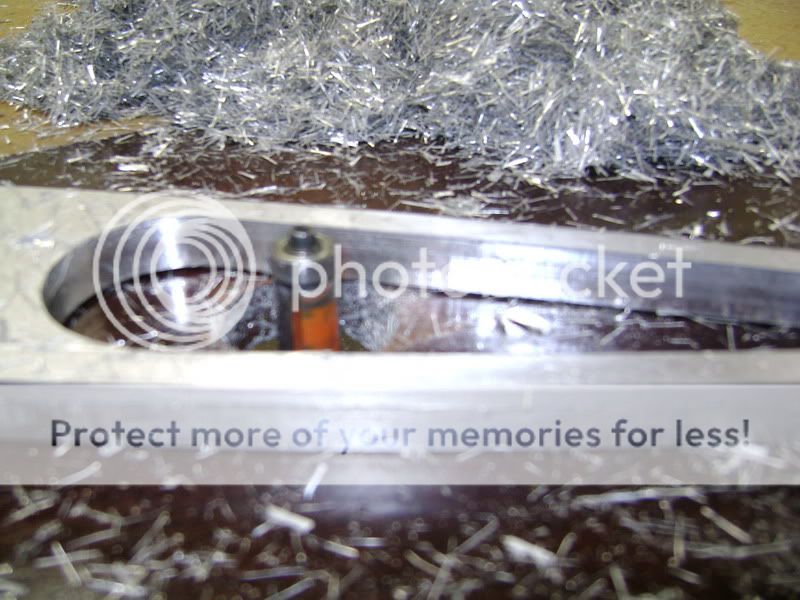
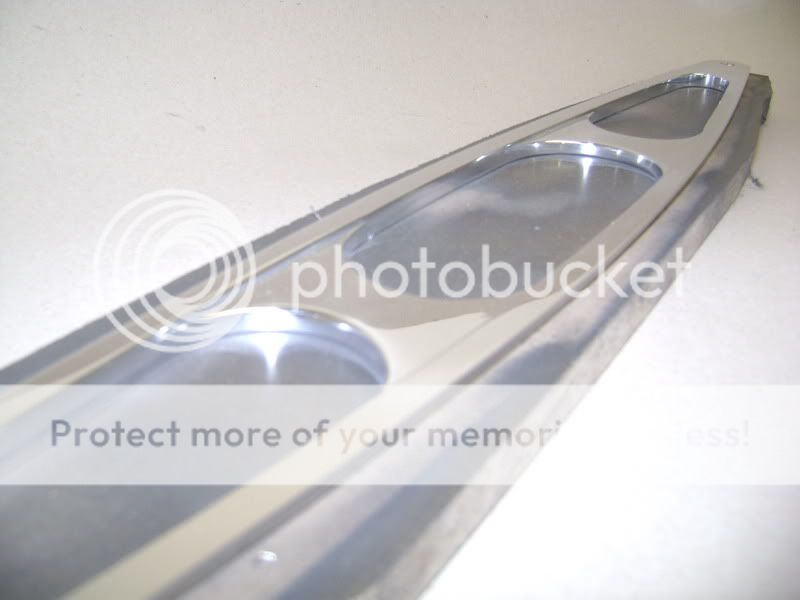
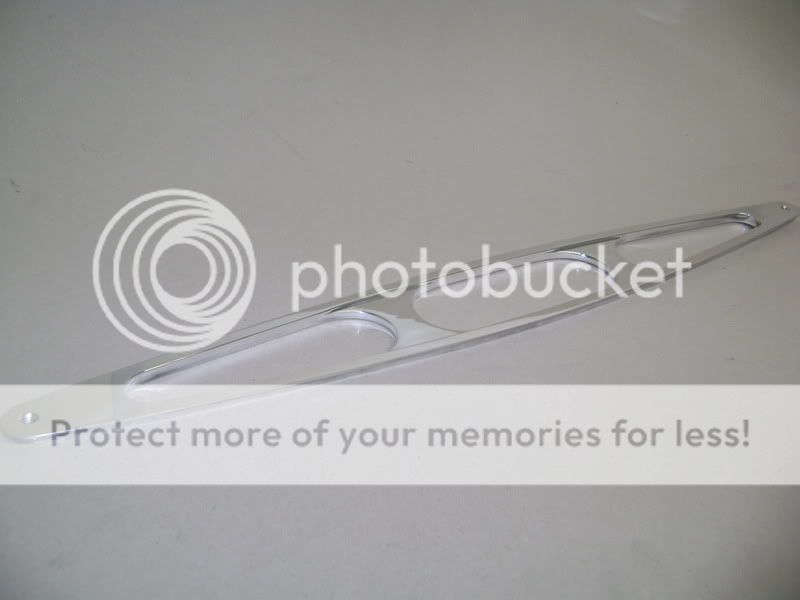
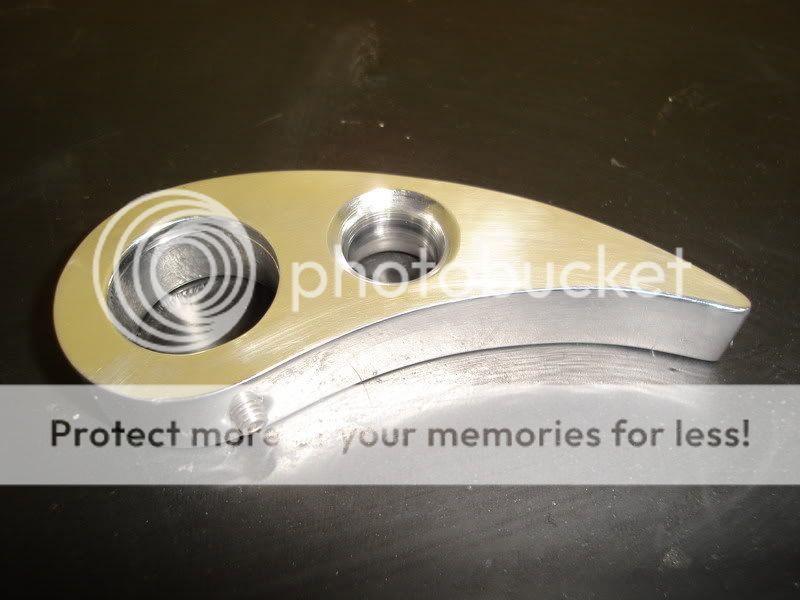
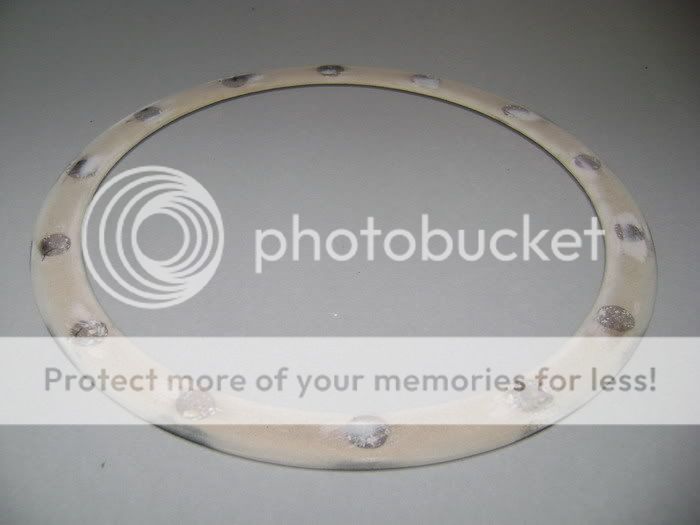
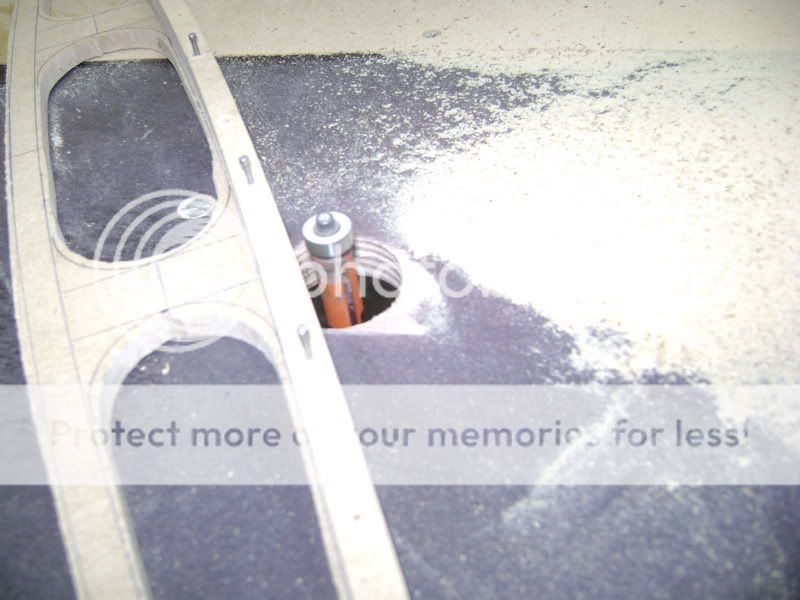
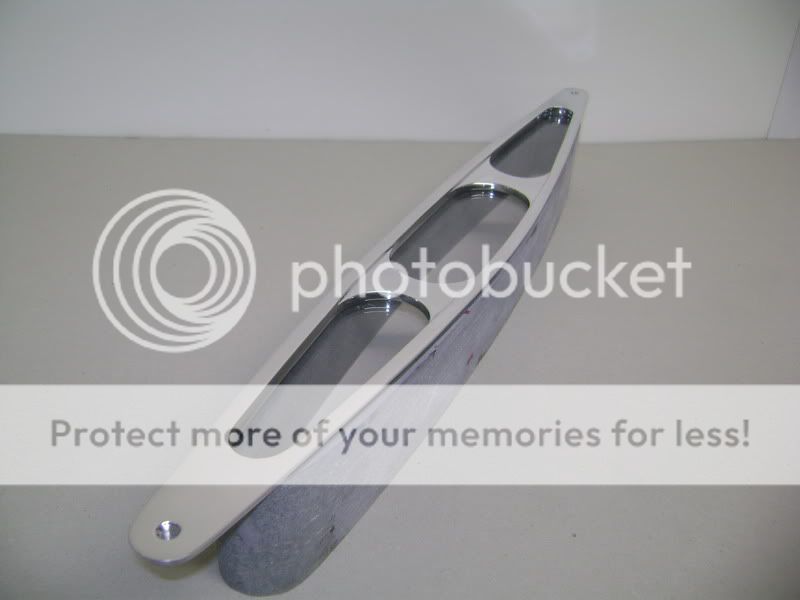
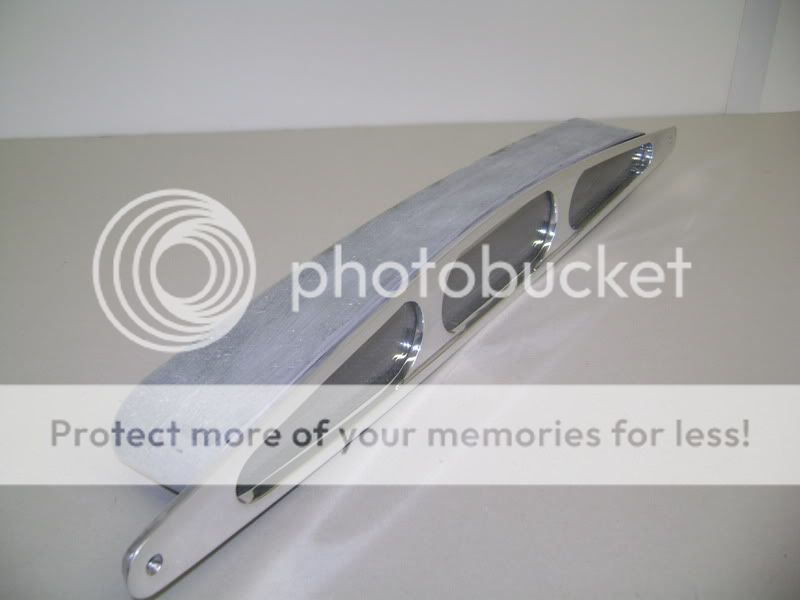
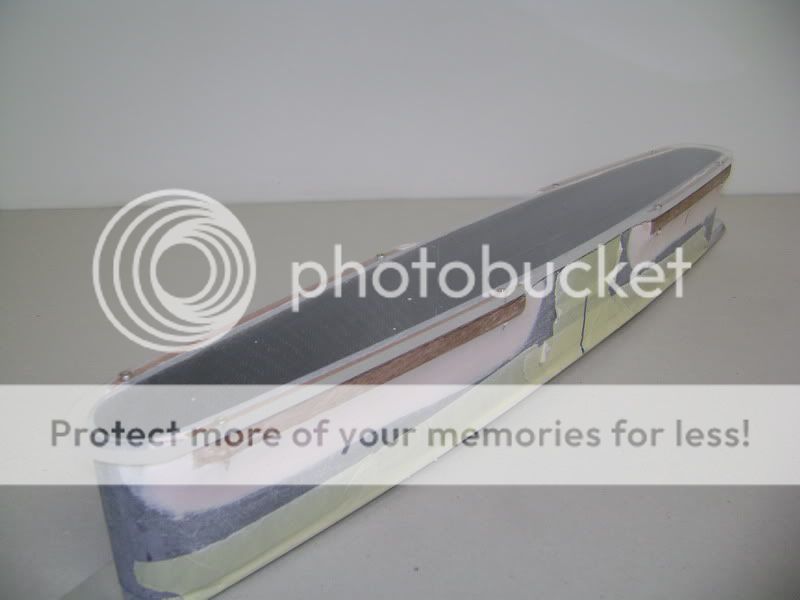
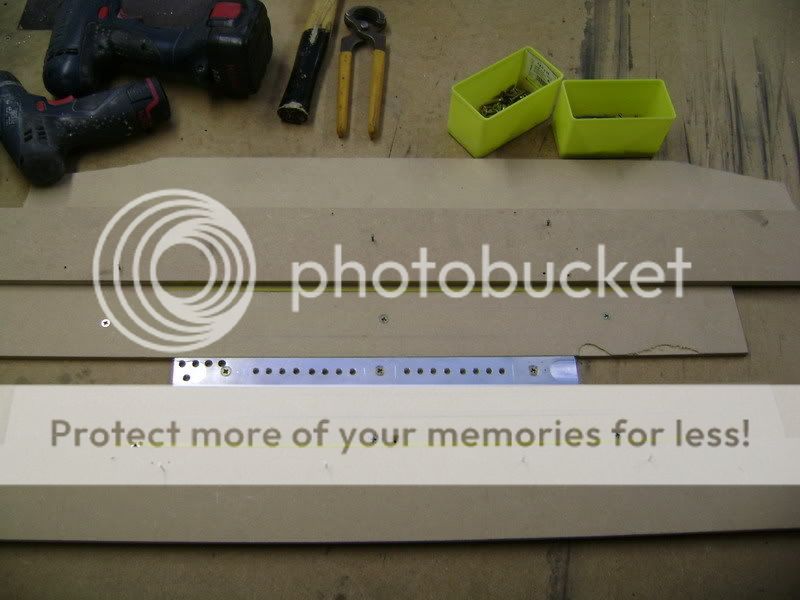
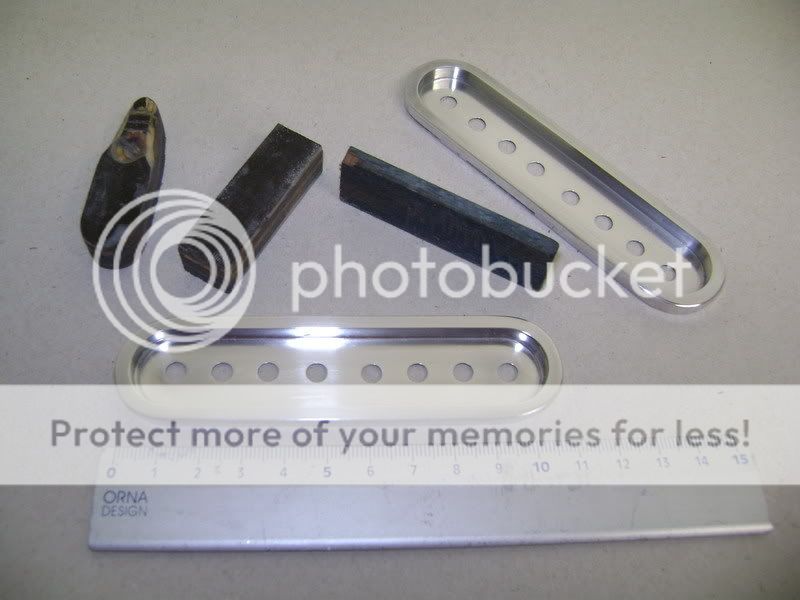
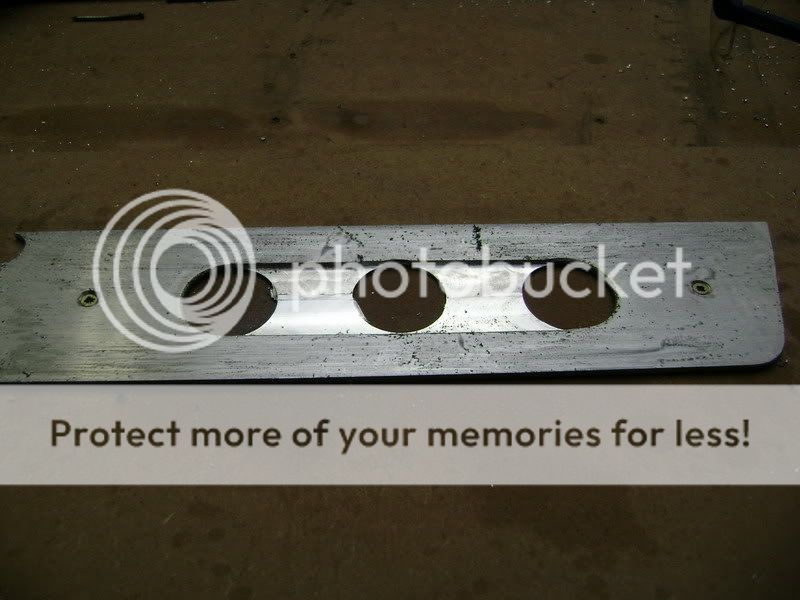
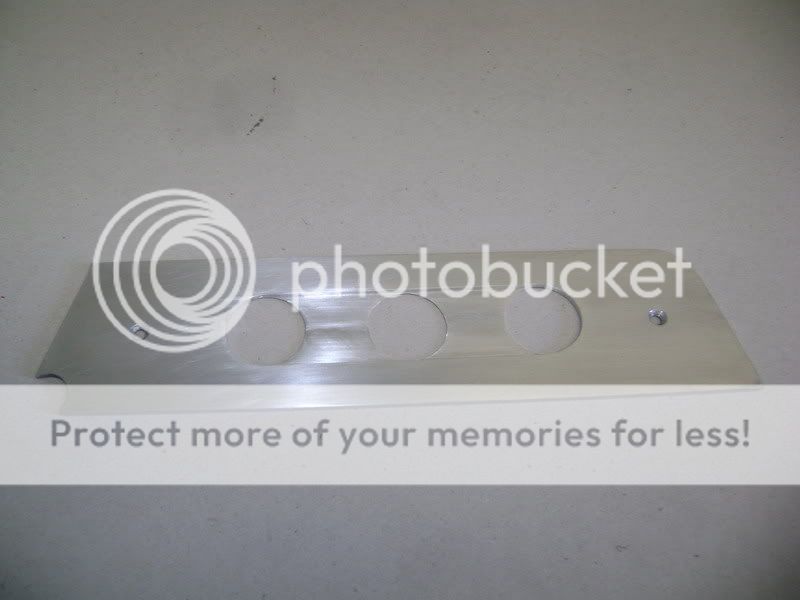
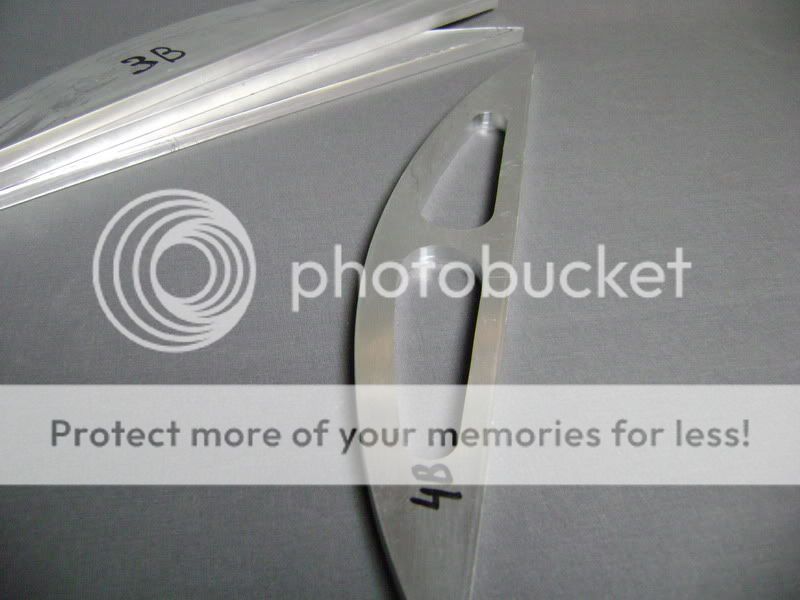
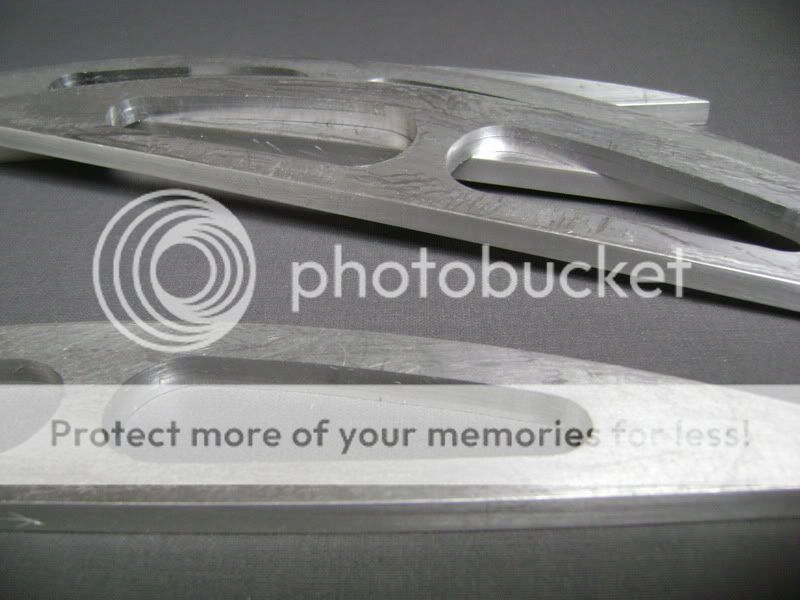
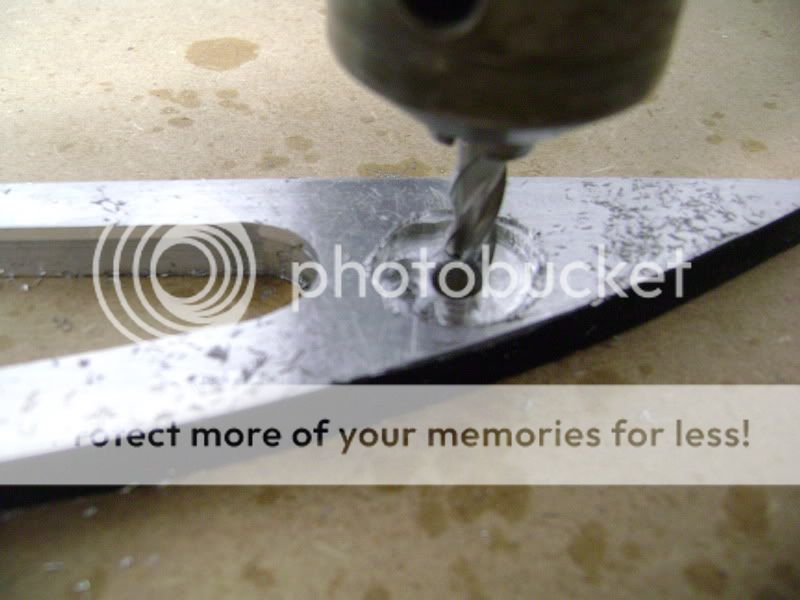
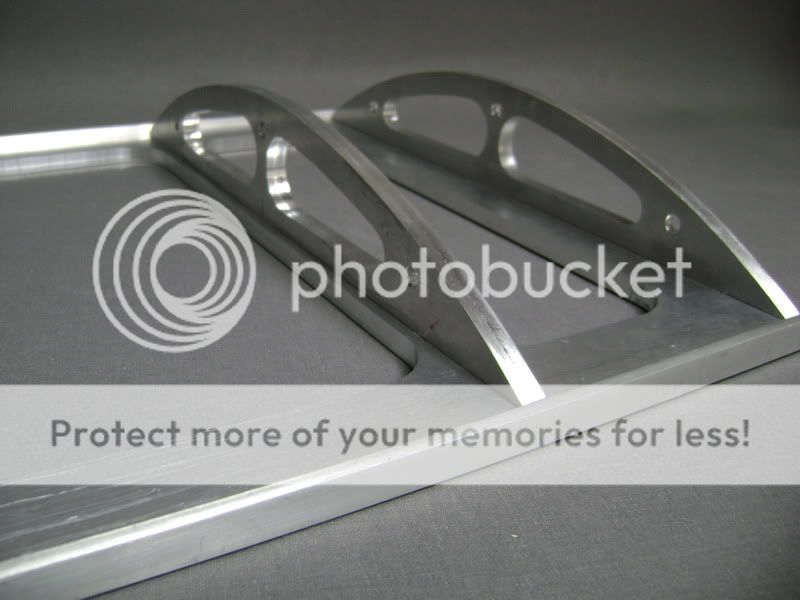
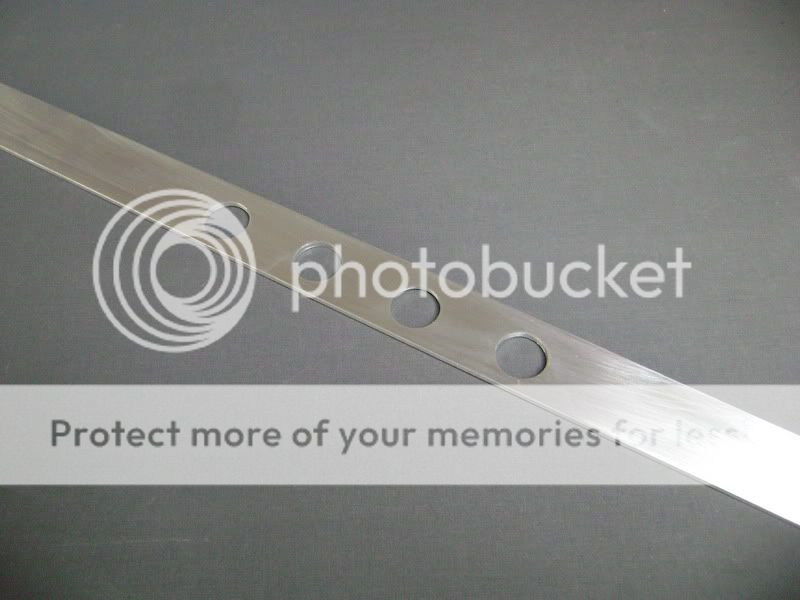
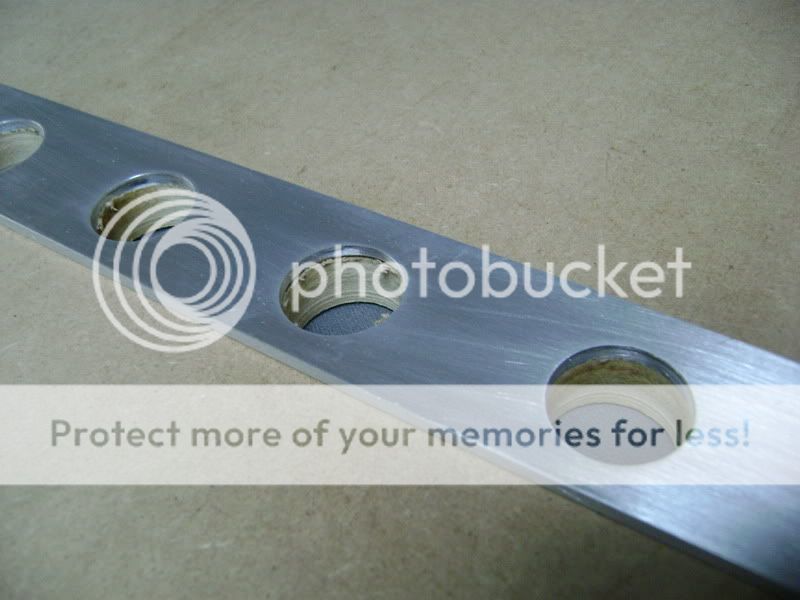
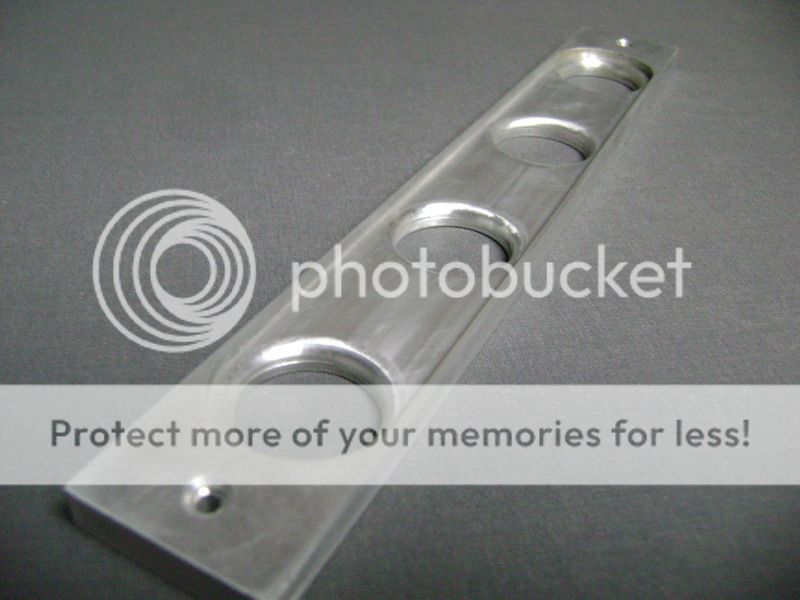
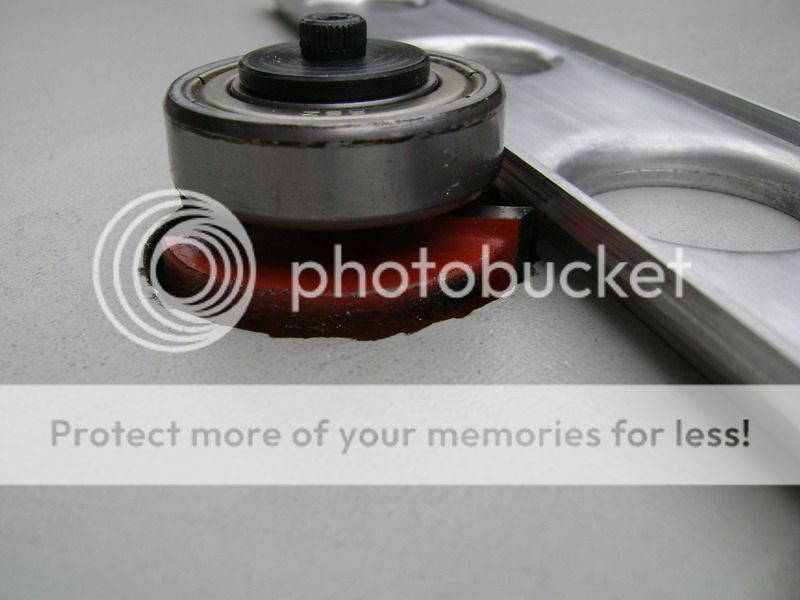
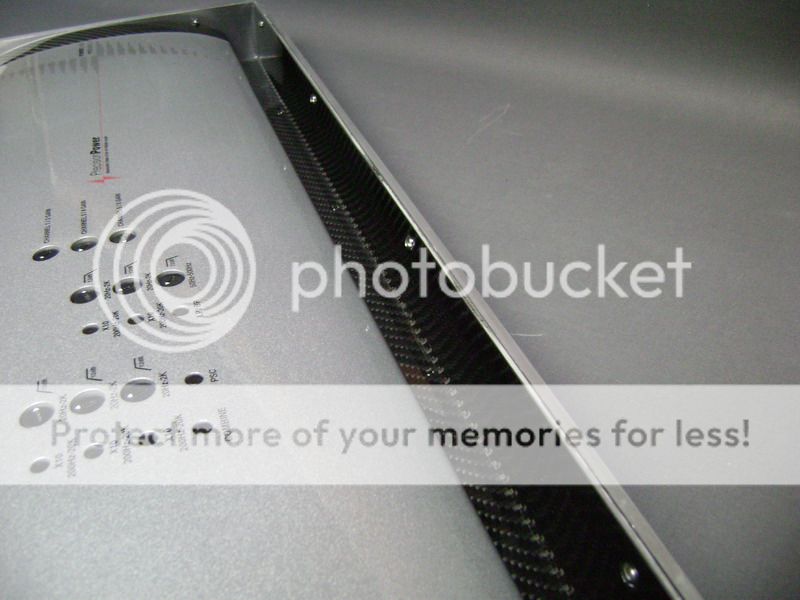
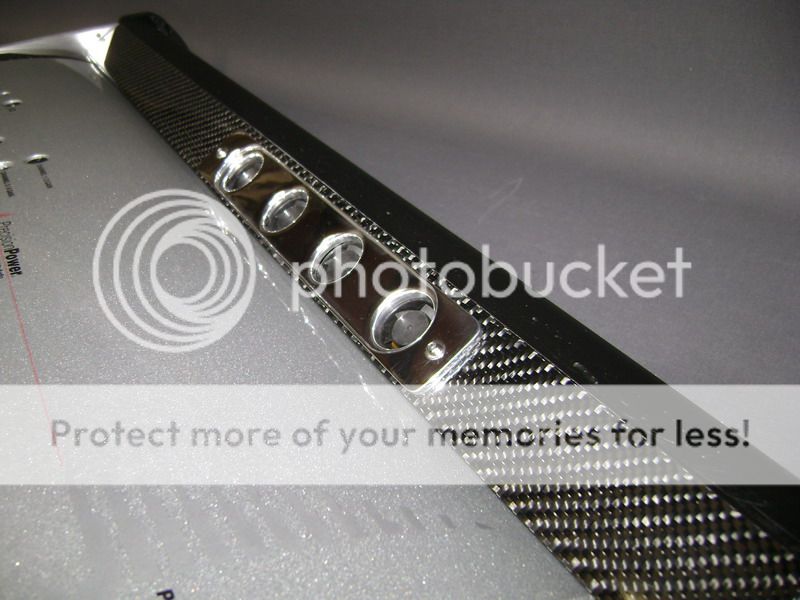
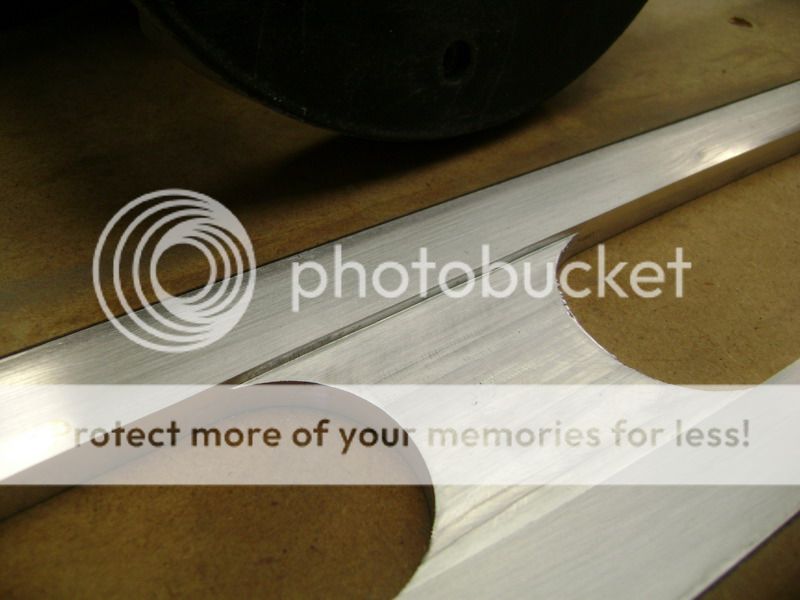
To obtain the same design as the grill on the subbox, i had to work magic.
Remember this??? The difference between the holes.
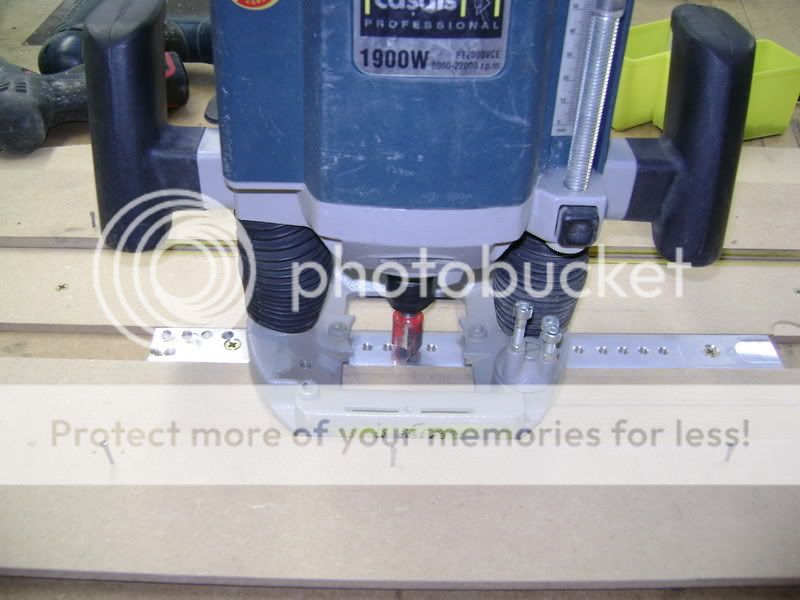
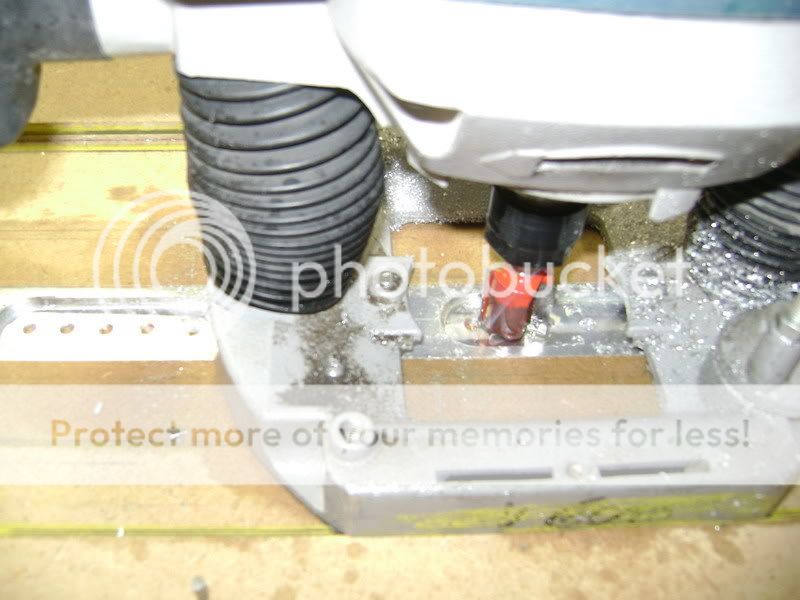
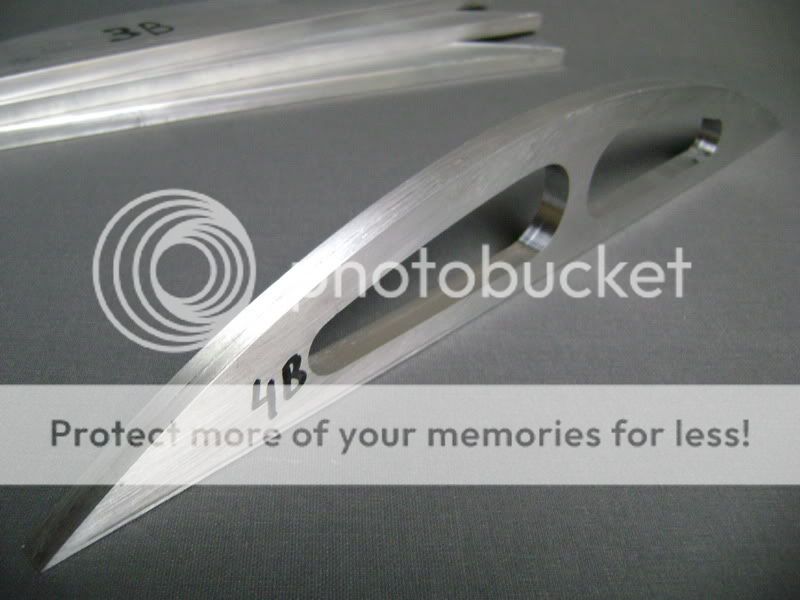
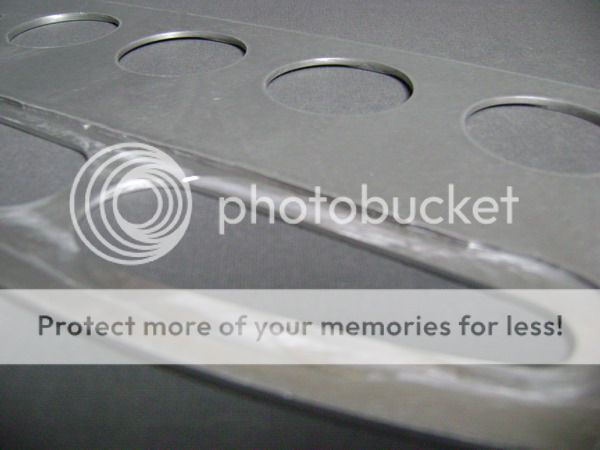
First i made a board with a thickness of 8mm so that myuppermill couldn't flip over.
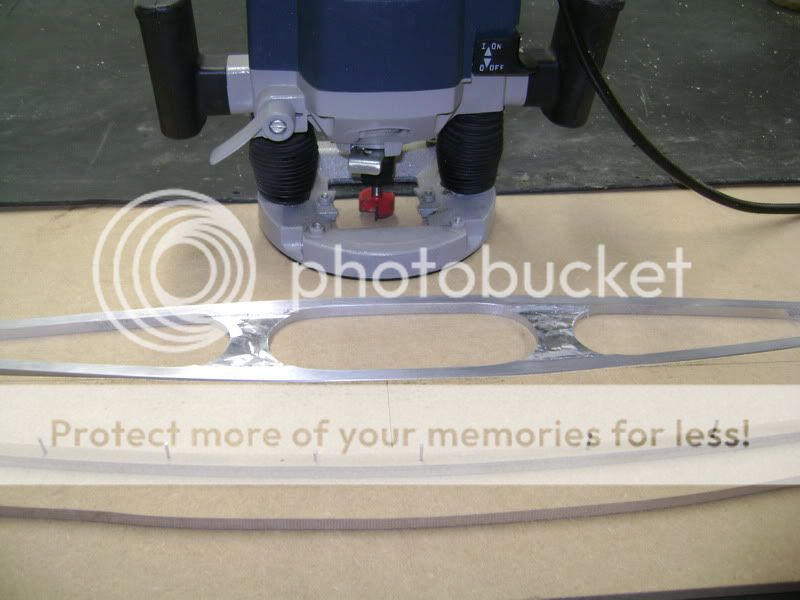 Then i've milled out the 2 parts. Here i've milled 3 mm deep. 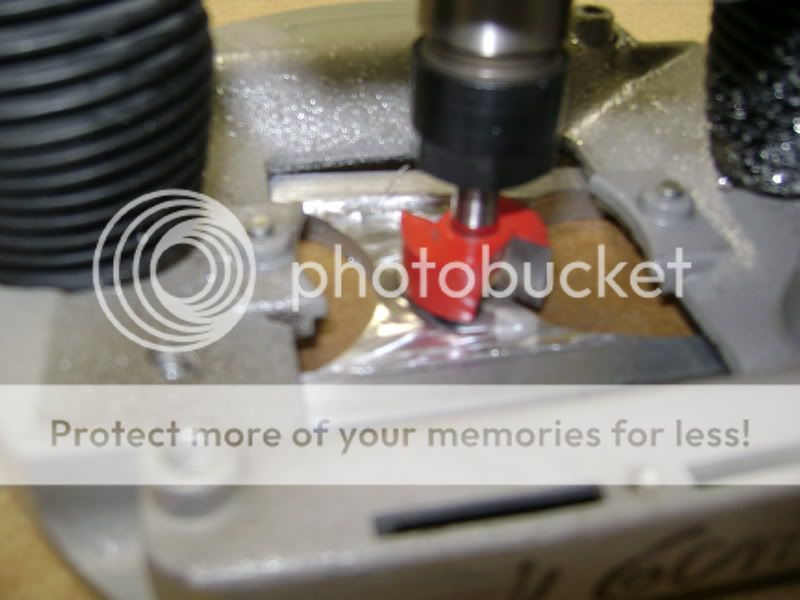
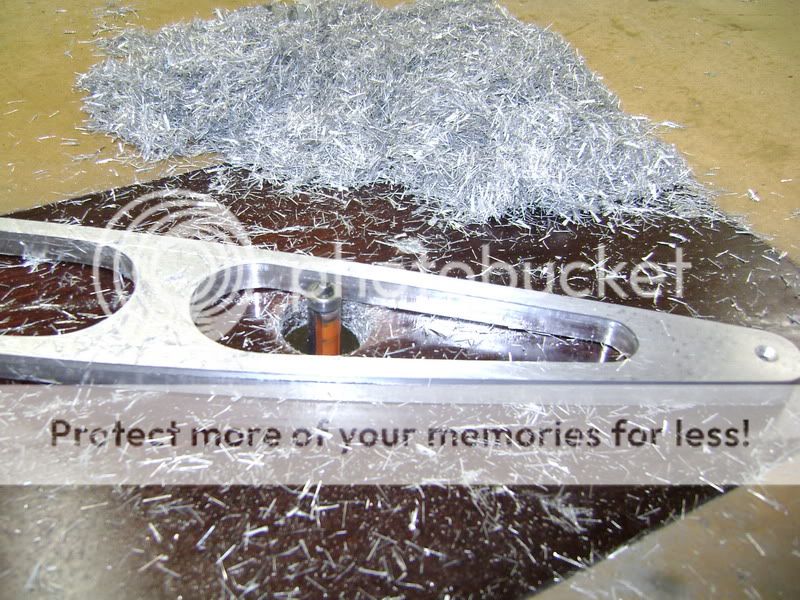
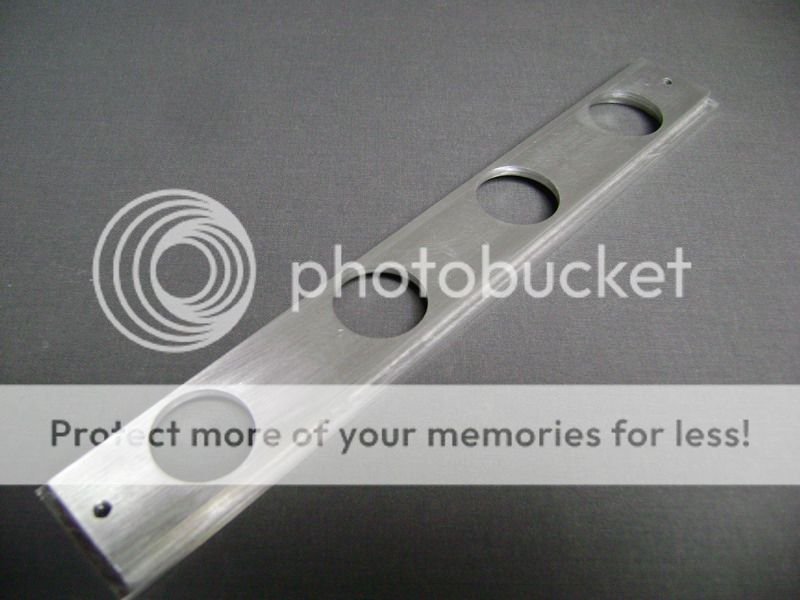
Now this piece had the same look as the grill.

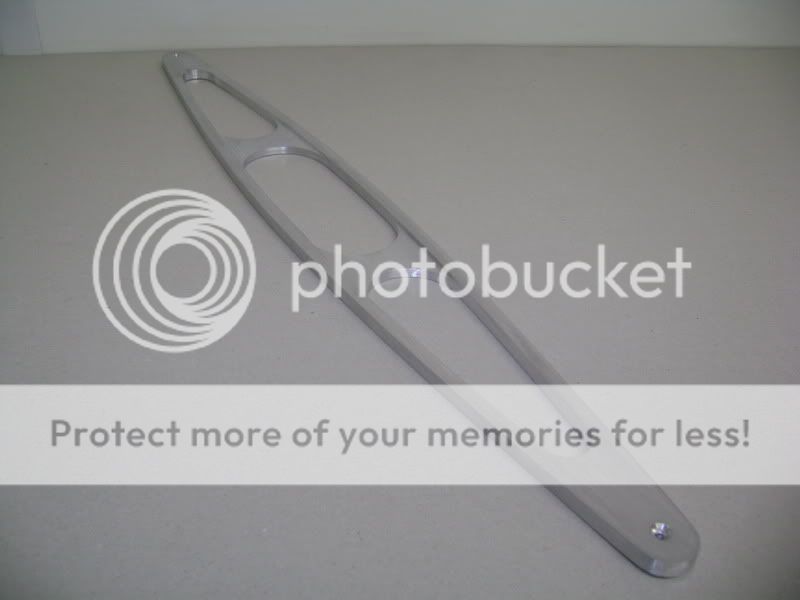

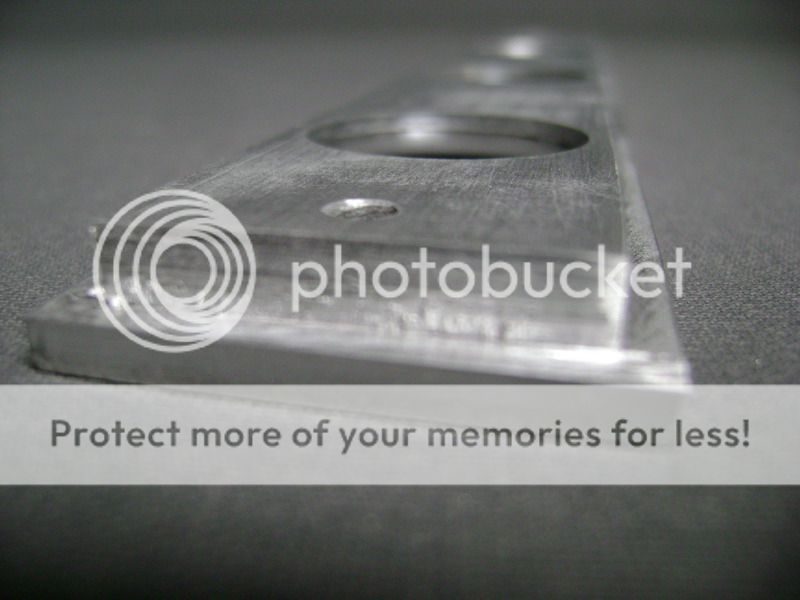
It took me about 8 hours to make this part.
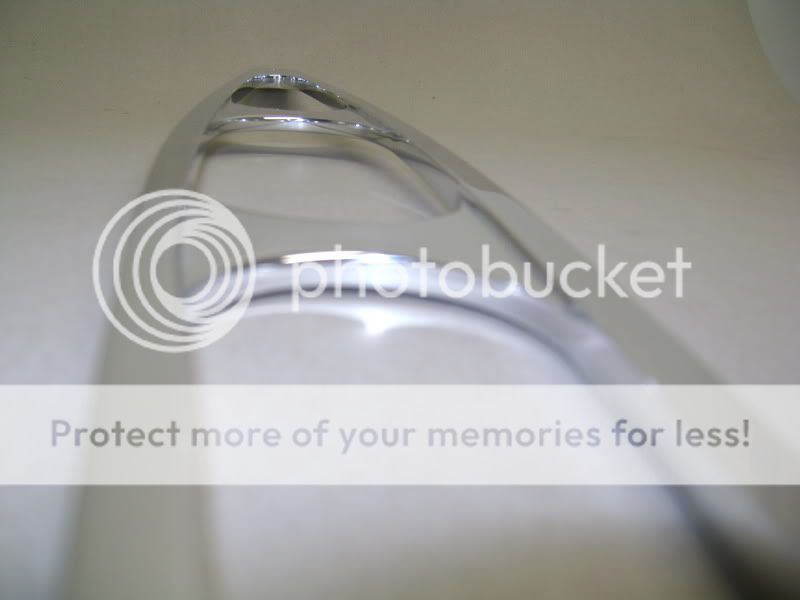
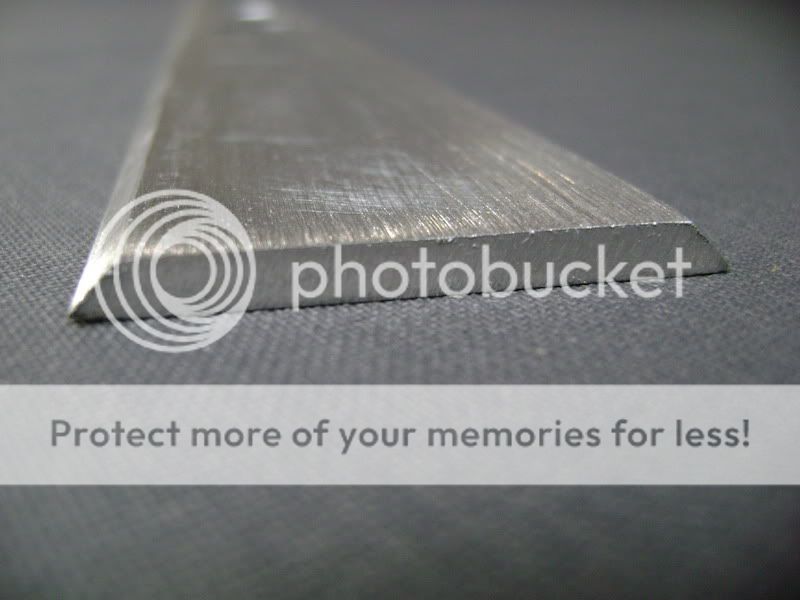
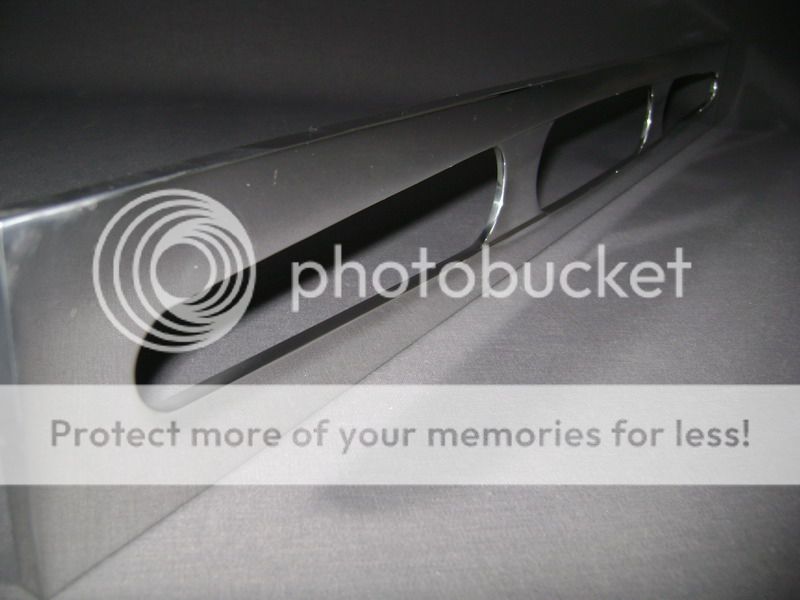
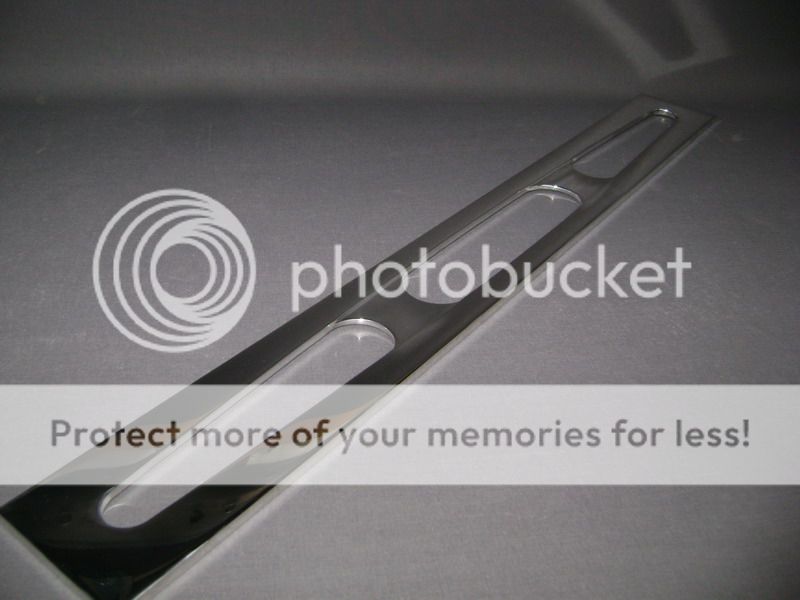
Now it needs some more hours to sand and pollish it.
That's what they call: making an alloy piece..
Posted By: robolop
Date Posted: August 21, 2009 at 1:51 PM
Posted By: robolop
Date Posted: August 21, 2009 at 1:52 PM
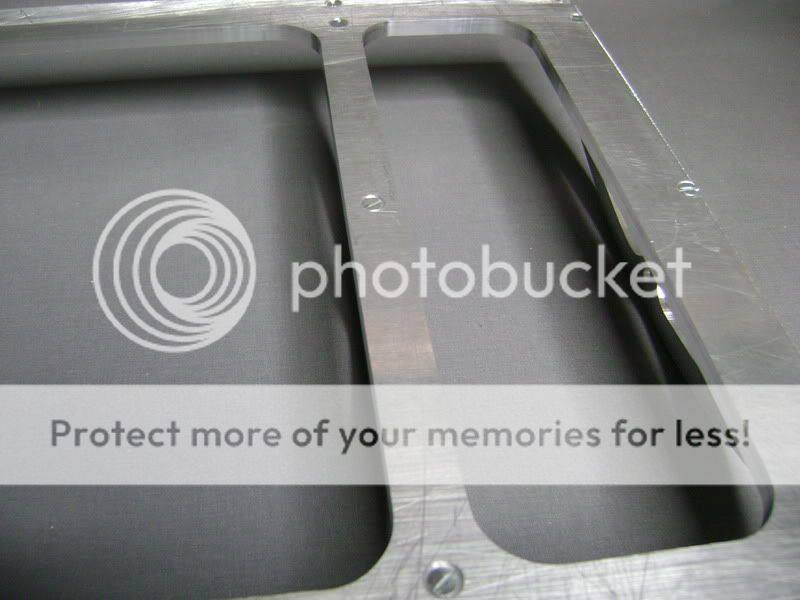
Now that evering thing is dry, the mdf parts are no longer needed.
So i'll use a saw to get them out.
I'm not sure if it will work...
It's a risk i had to take.
 I continued taking the piece out of the mould.
I had to clean it up a bit.
With an electrical saw i was able to remove the biggest pieces.
So now you see why i made the 2 holes in the board. Much easier to saw!
The rest was taken out by hand. 
Posted By: robolop
Date Posted: August 21, 2009 at 1:53 PM
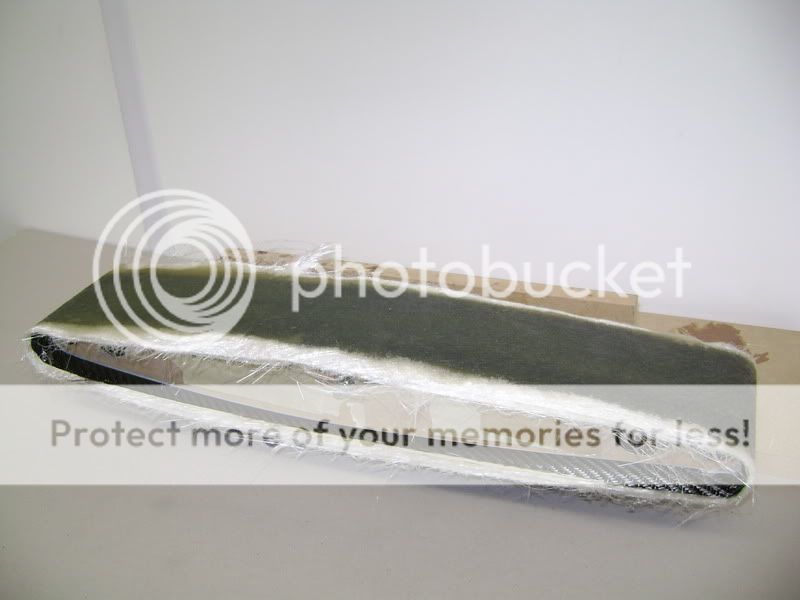
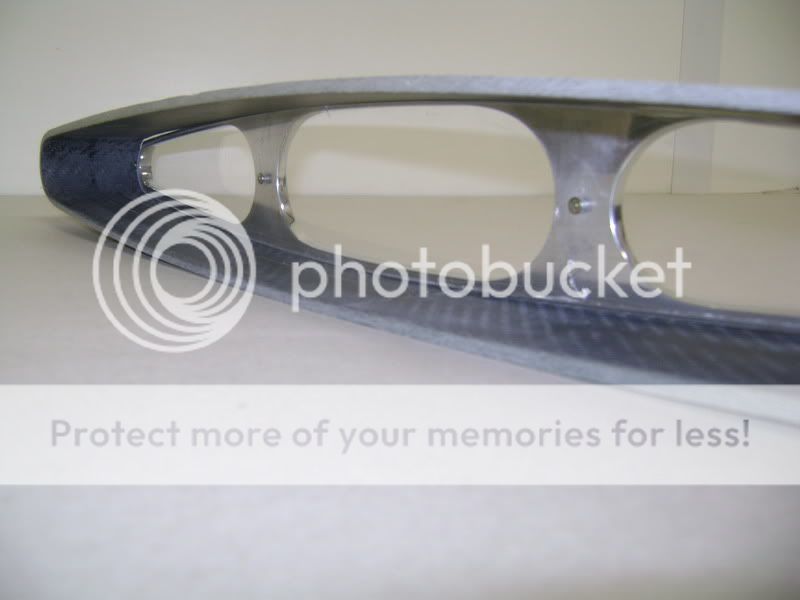
This is what it lookes like on the inside. In the middle you can see whe the 2 pieces of tape came together. after a few more layers of epoxy, it will look spotless.
Time to use my GIANT sandingtool. 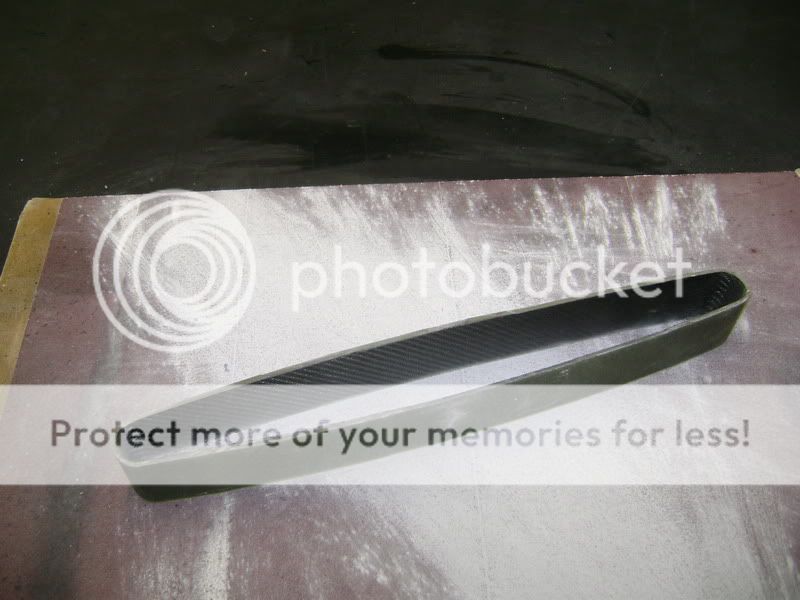
On the other side i've sanded the curves of the allow part. 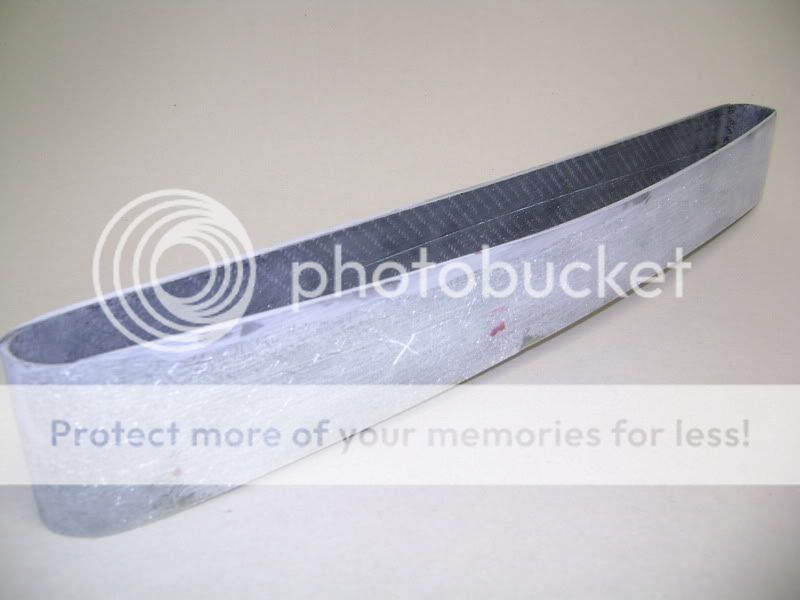
He're i'm using my router to mill out a piece of plexyglass.
The plexy will get mounted on the backside of the allow part.
This is how everything should look like in the end. 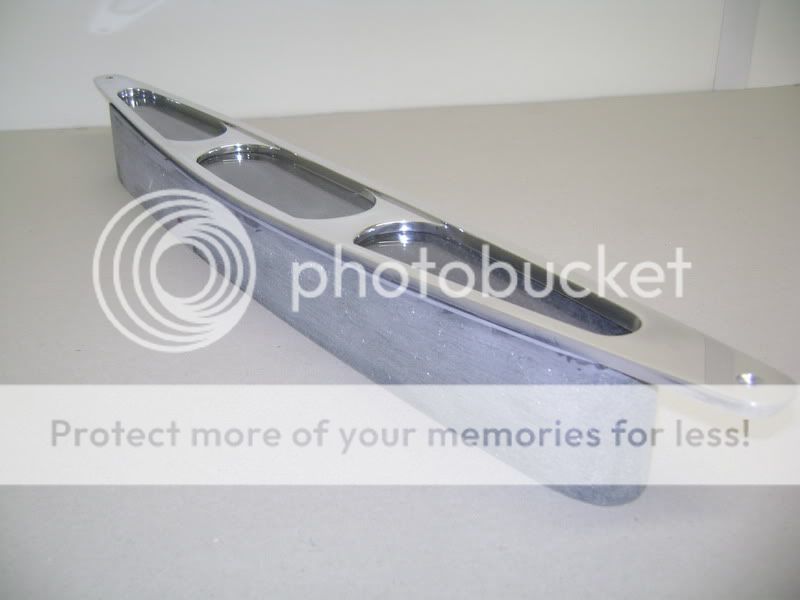
Don't go thinking that it's done! I planning on doing something special with the carbonpart, but i have to figure out if it is possible and if i have enough space to to it.
Now i going to make the front to mount on the crossovertray.
I still need to make a piece of plexy to mount on the rear of the carbon tray
Plexy mounted.
 Here y ou can see how it will be mounted on the frontside
Posted By: robolop
Date Posted: August 21, 2009 at 1:55 PM
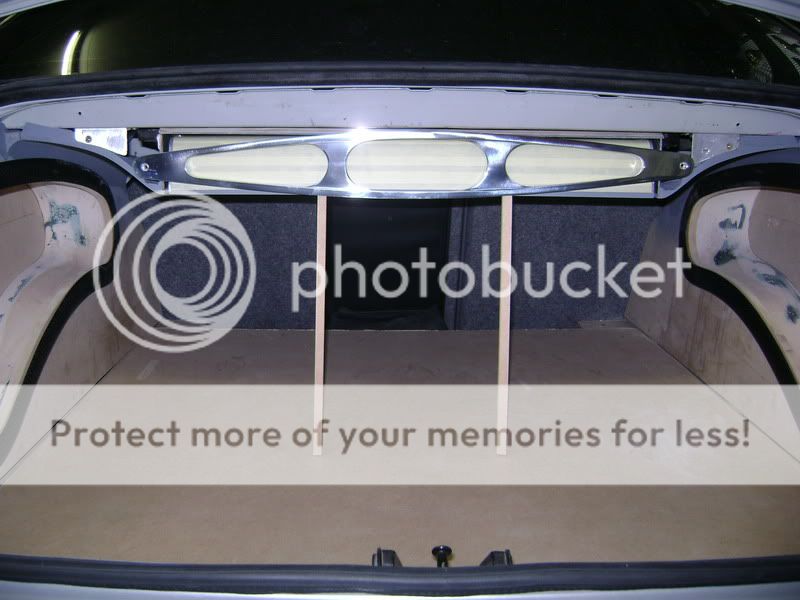
Here you can see the frontside of the crossovertray under construction.
I've made a board out of MDF with left and right exactly the same curves en mounted them in the trunk.
Afterwards i've filled it up with poly.
Once it was dry, i did the same on the left and right side. 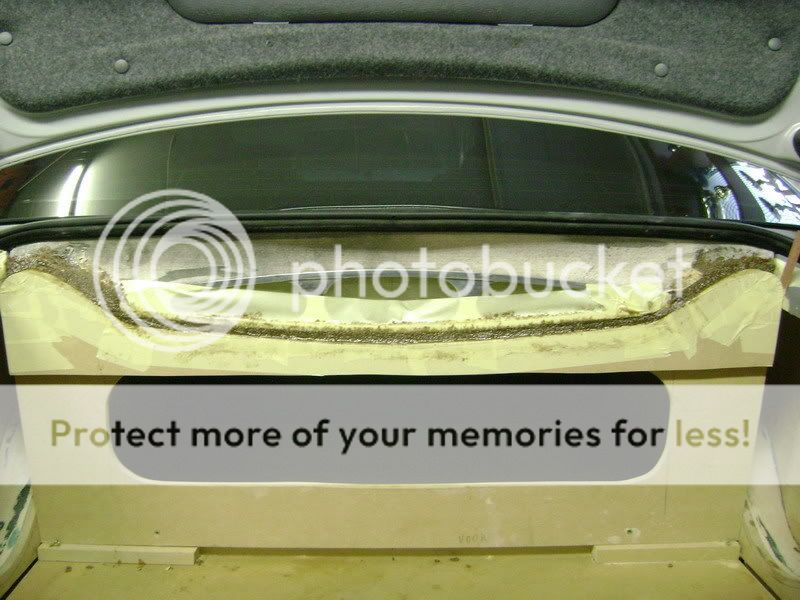
I needed to adjust the backside of the poly part. Now it fits nicely and is just the way i wanted it to be. 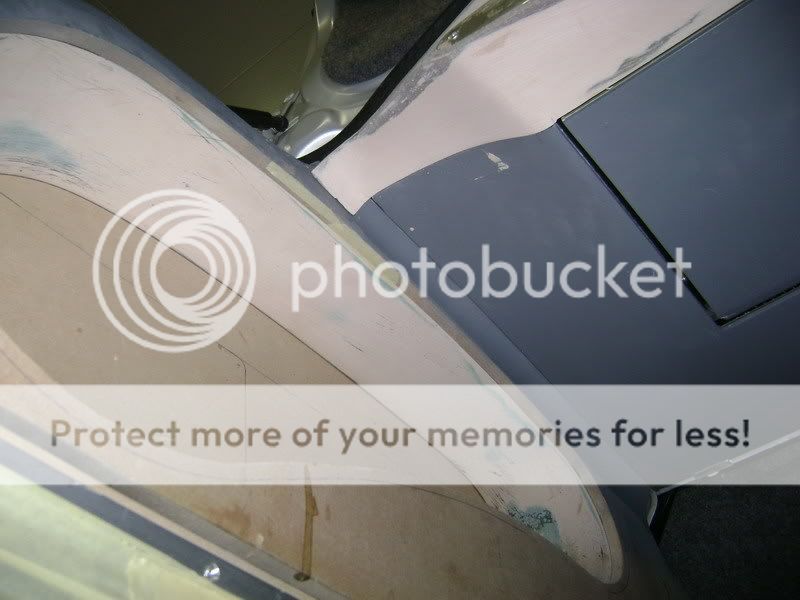
Here you can see the crossovertray while opening. 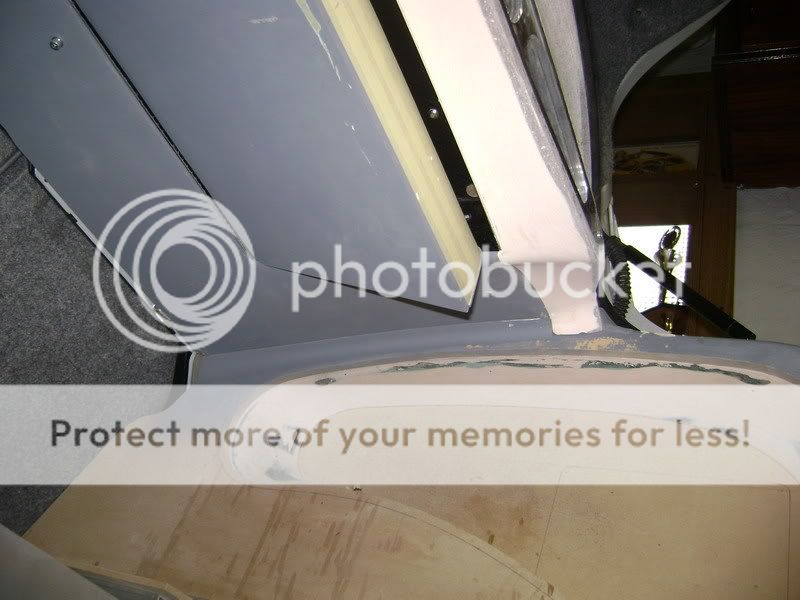
Picture of the inside of the place where the crossovertray will be mounted in. 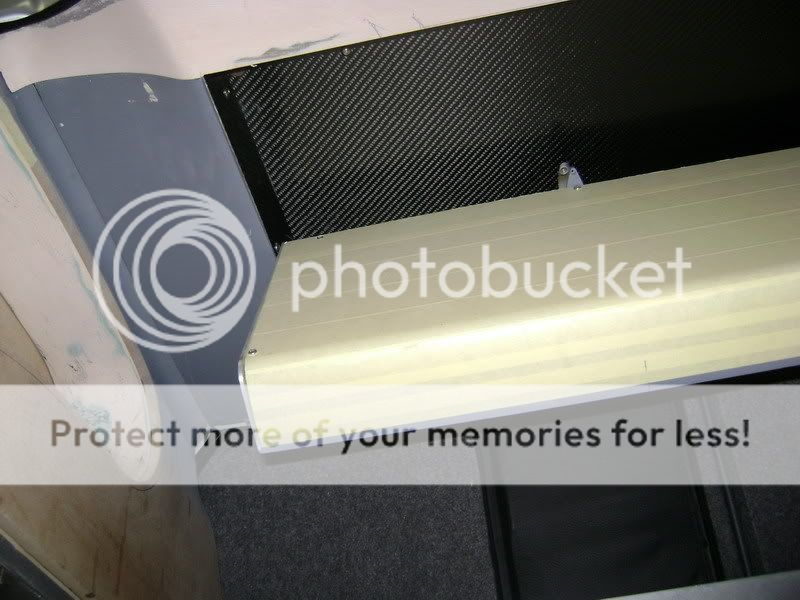
Next thing to do is shape the front of the tray so that is will fit for 100%.
Posted By: robolop
Date Posted: August 21, 2009 at 1:57 PM
It was pretty cold, but i found a way to keep me warm.
This is what my workshop lookes like after sanding on the tones of metallica's death magnetic.
 As you can see, i've used a can of spraypaint to sand the curves. 
Here's a picture of the finished part to fit on the front of the crossovertray. 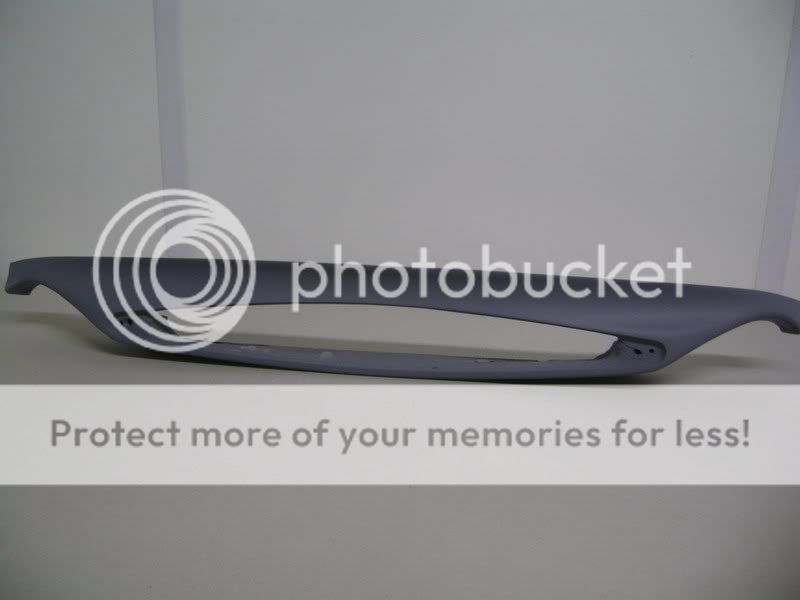

On this picture you can see that it fits perfectly. 
I've cut some glas to mount in the sidepanels.


Then i've sanded the carbon frames and prepared them to get painted. 
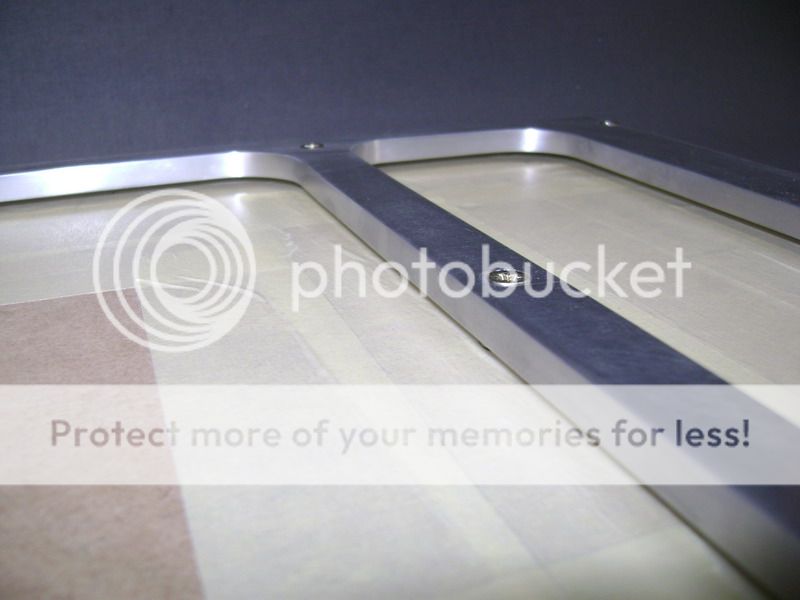
The inner rail is mounted a bit lower than the rest. I'm going to fix everything with TEC7.


The carbon on the frontside is sanded and ready to get clearcoated. 

Posted By: robolop
Date Posted: August 21, 2009 at 1:58 PM
The carbon part that will be mounted on the front of the tray is sanded and ready to be clearcoated.
In the meanwhile everything is removed from the car, so that it can get a final touch .
The carbon is already covered with epoxy. 
I've been looking at the crossovertray, and it misses something...
In the front you can see the lights that i will be mounting. 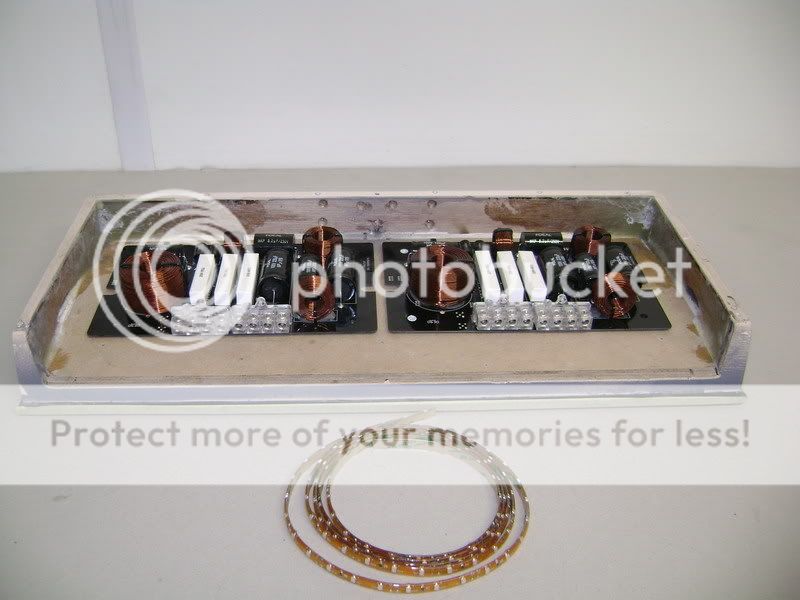
I've made some changes to the sidepanels.
The straight part looked rathed ugly, so i've changed its shape.
Here you can see that i've made the changes so that everything fits perfectly. 

Clearcoated.


Posted By: robolop
Date Posted: August 21, 2009 at 1:59 PM
This is what will be mounted inside of the crossovertray.
It will be covered with carbon. 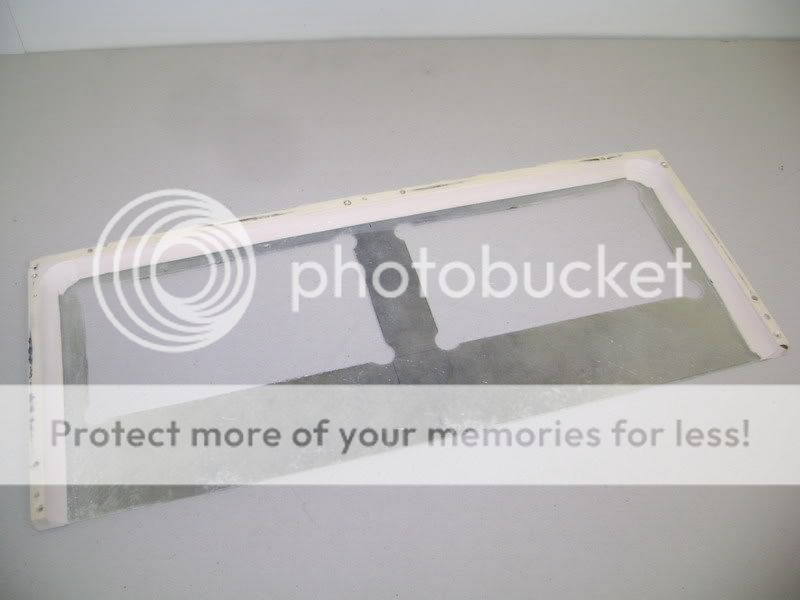

Some carbon parts are already clearcoated en ready to be installed . 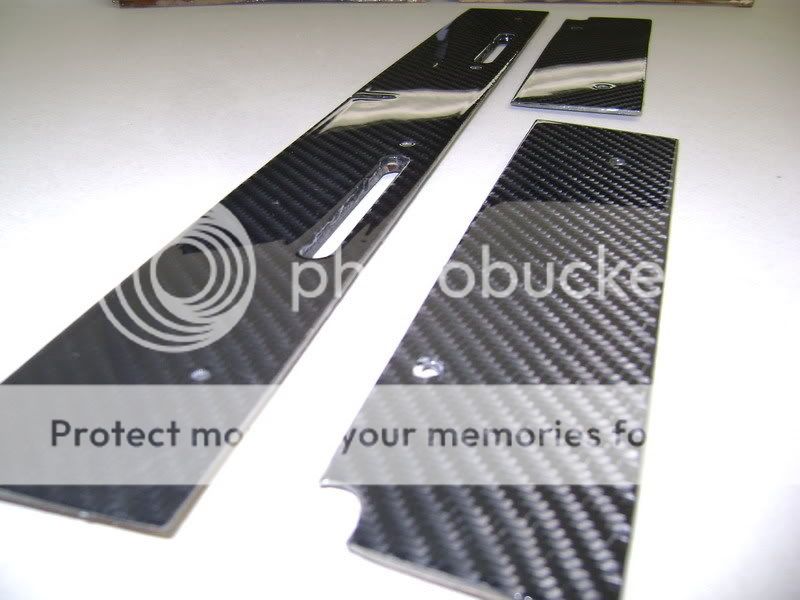


These 2 alulinium plates will be used to guide the connectors from the crossover.. 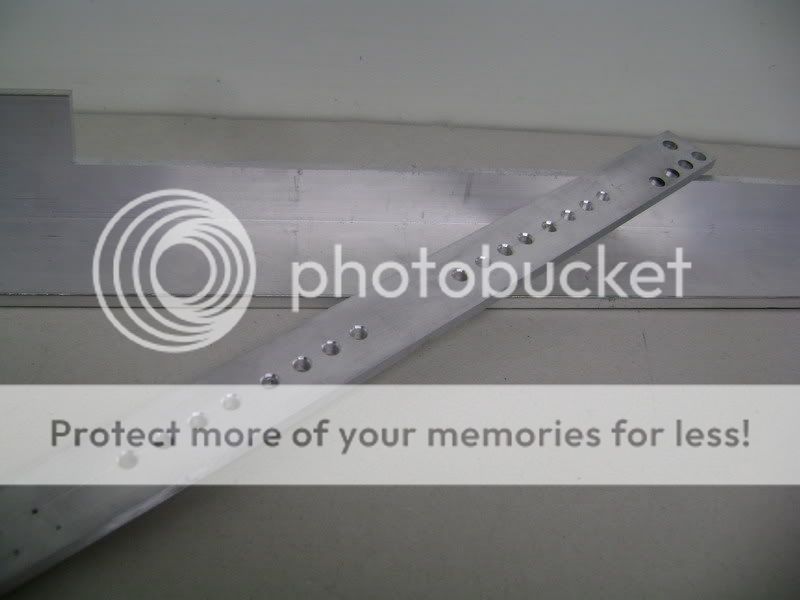

The inside of the crossovertray is also covered in carbon . 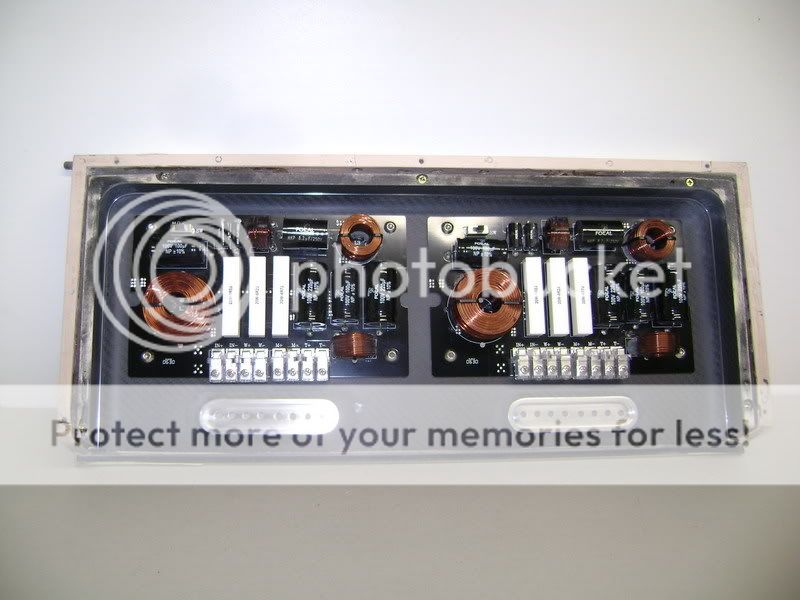
Posted By: robolop
Date Posted: August 21, 2009 at 2:03 PM
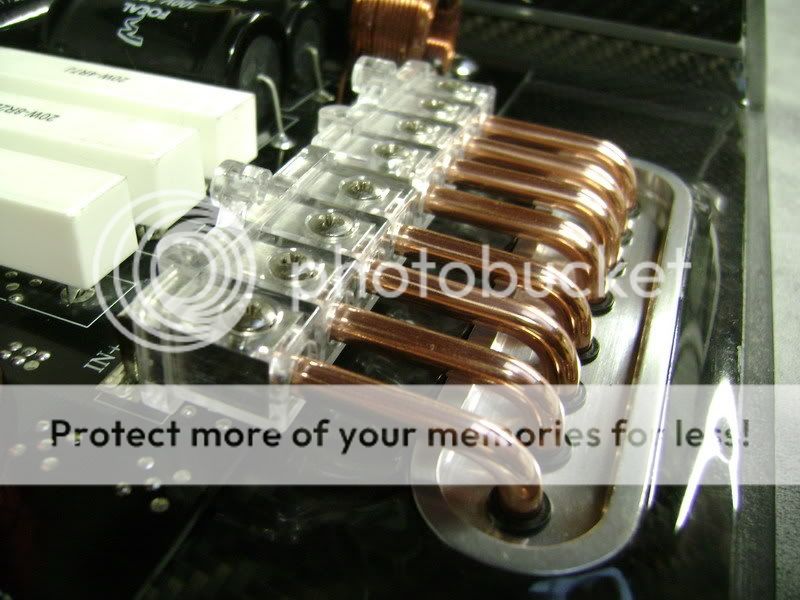
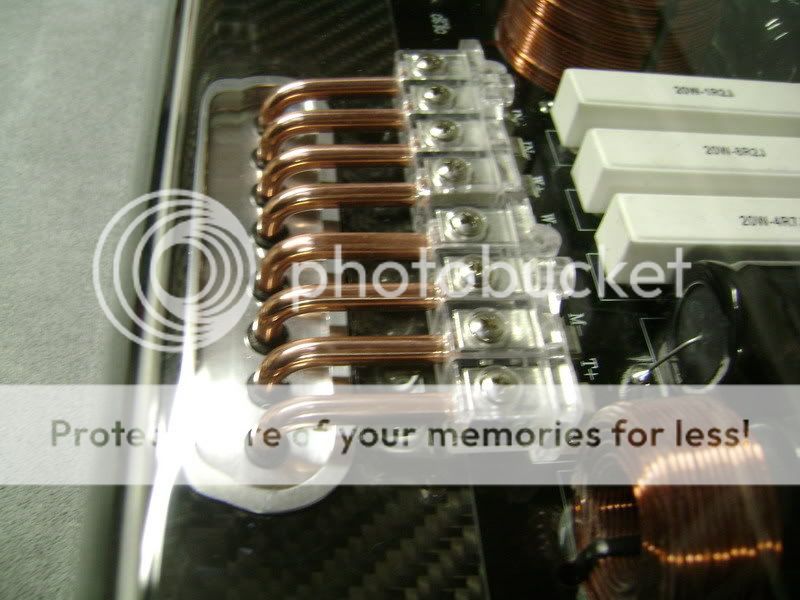
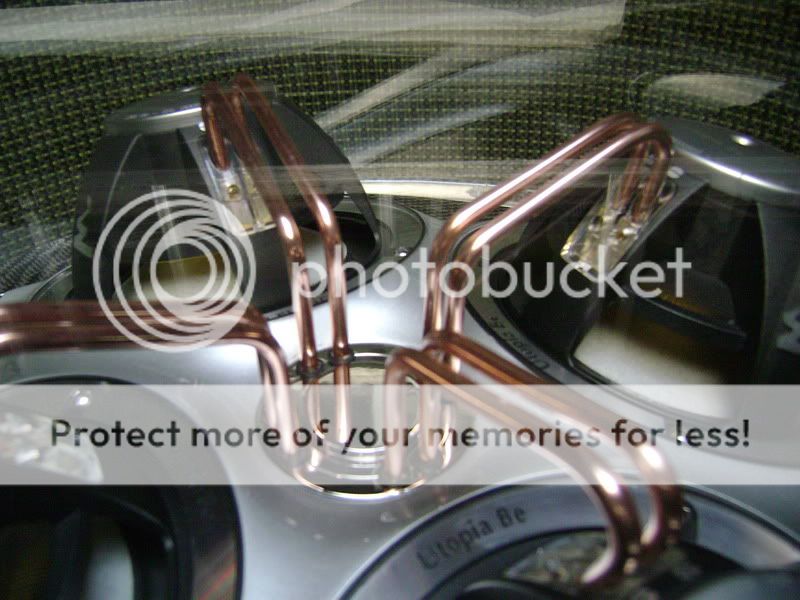
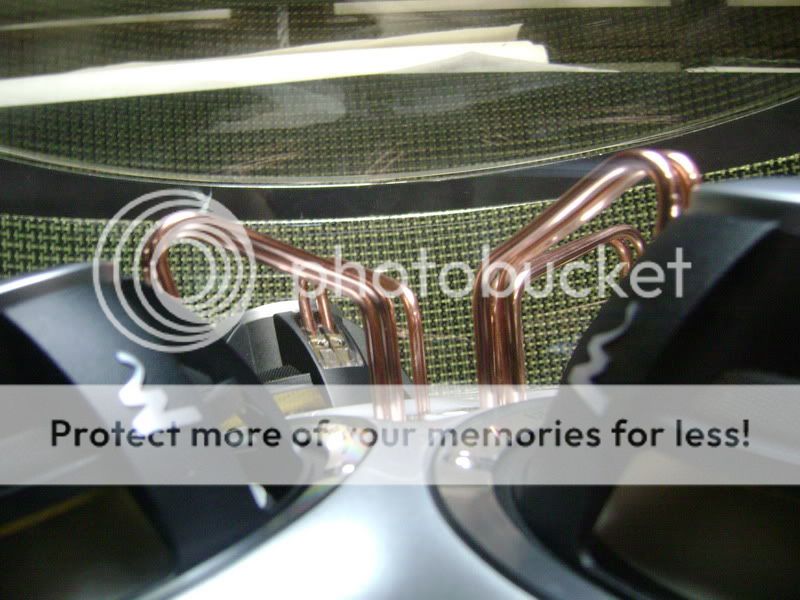
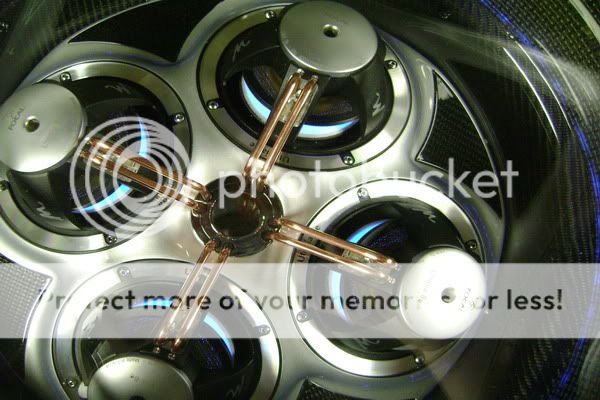
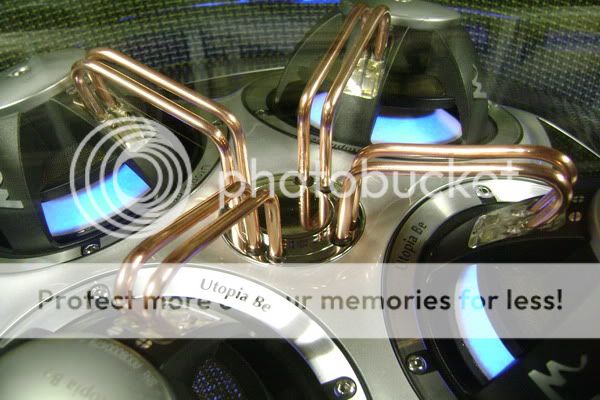
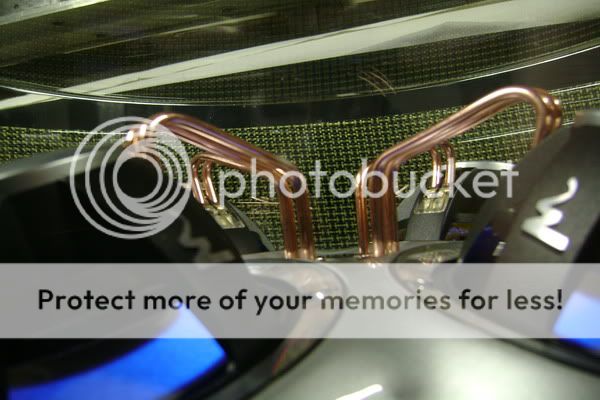
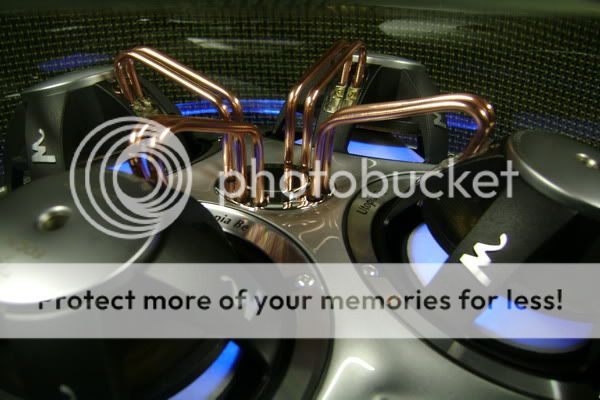
I've bent 16 massive kopper tubes to connect the focal crossovers.
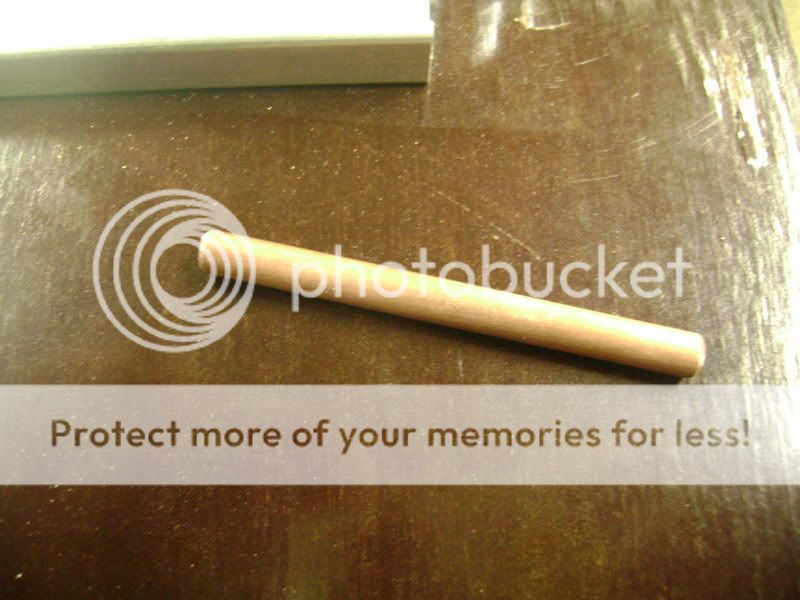 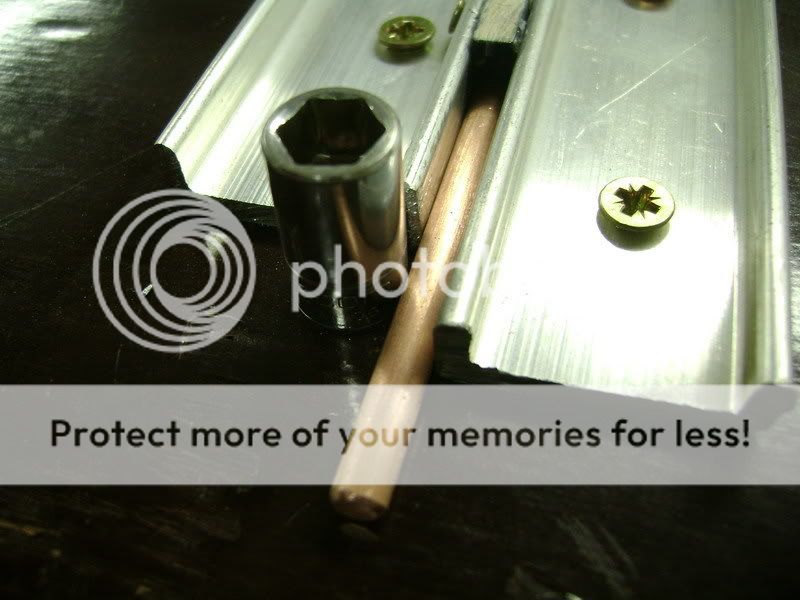
Then i made the screws shorter so that it all looks better. 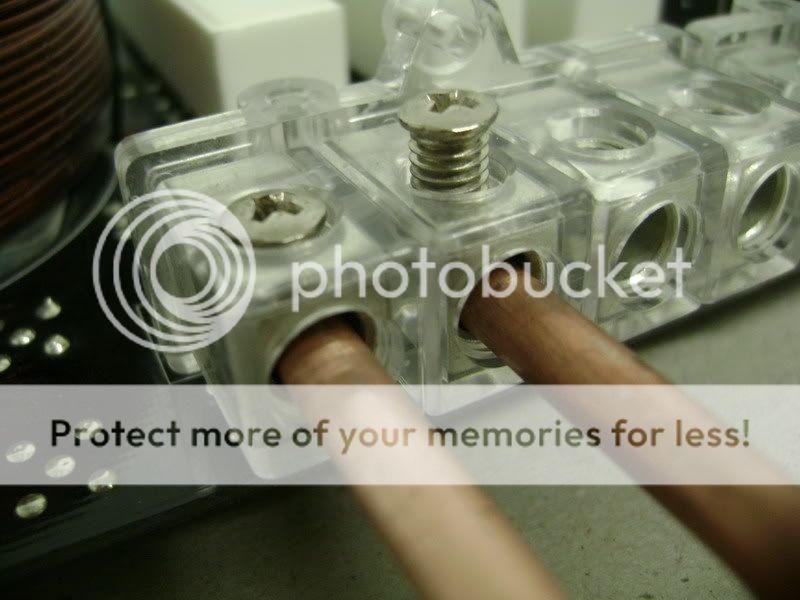
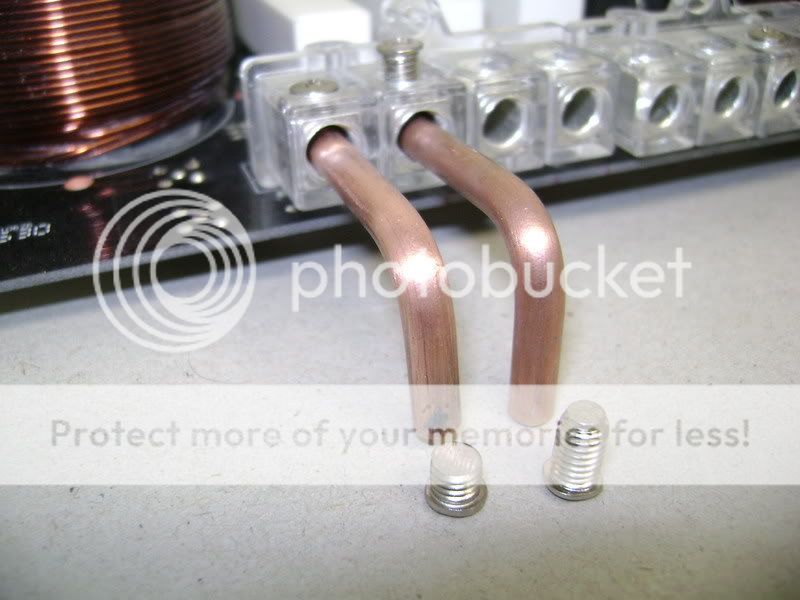
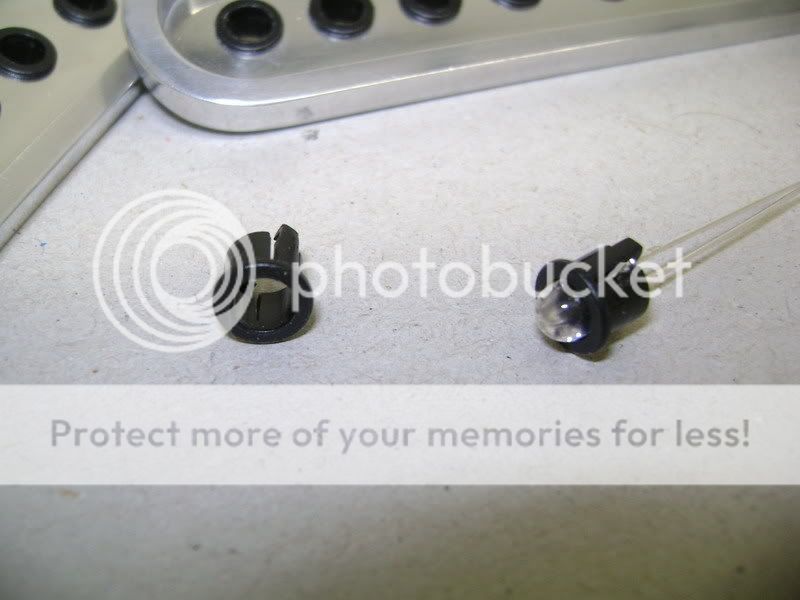
The holes in the aluminium are equiped with LED holders. Now i have a good isolation between the the kopper and the aluminium. 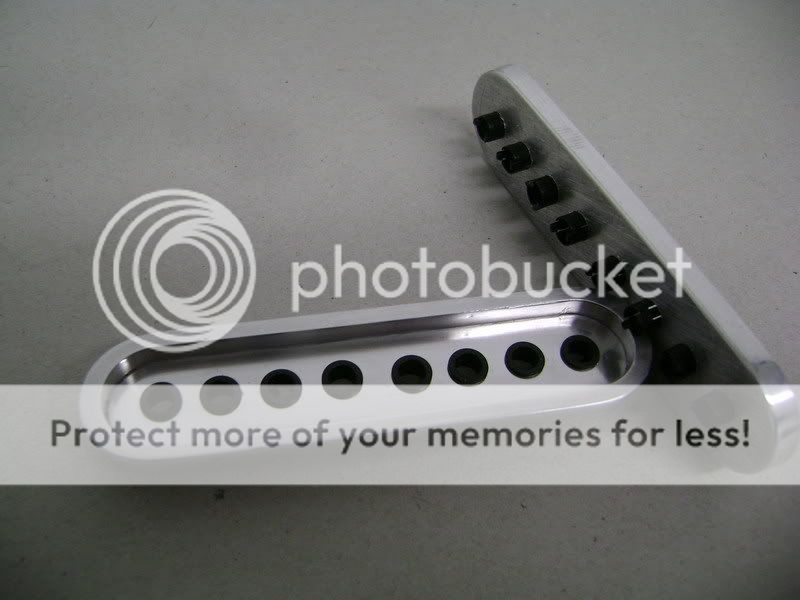

at the end of every kopper tube i'm going to fasten some speakercable. 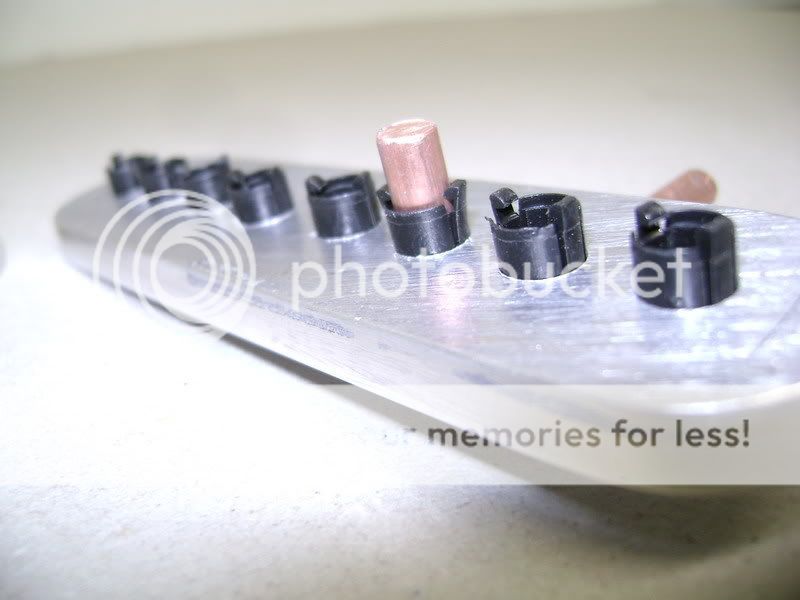
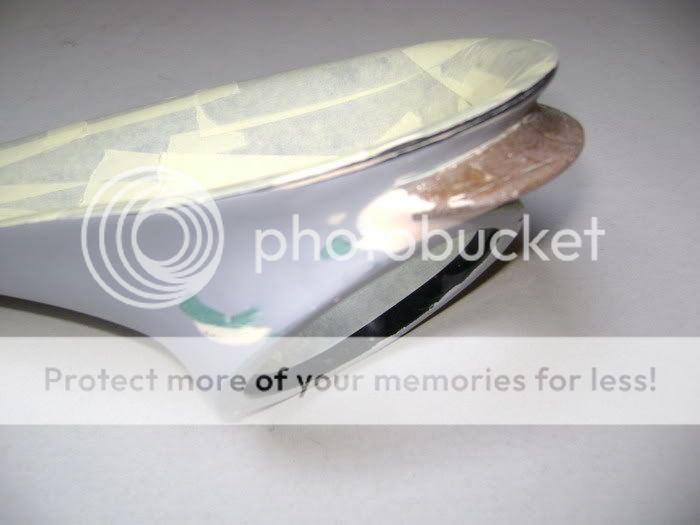
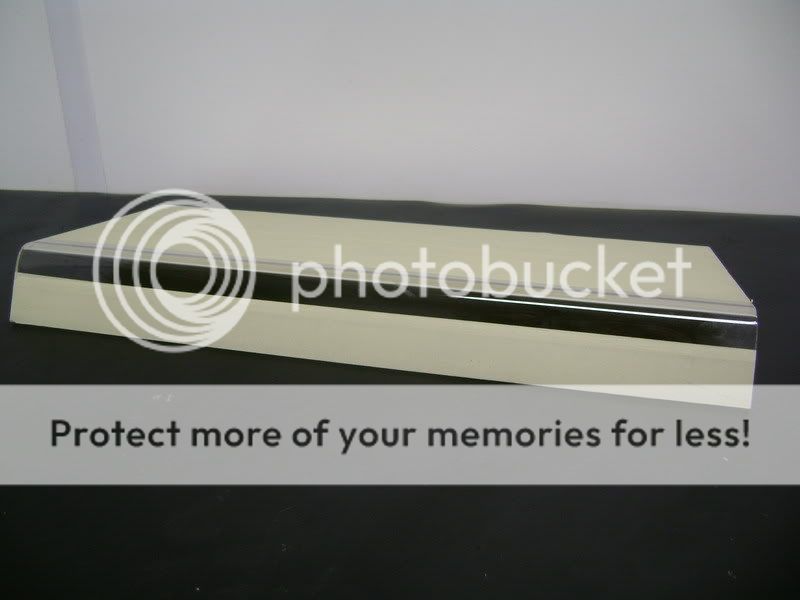
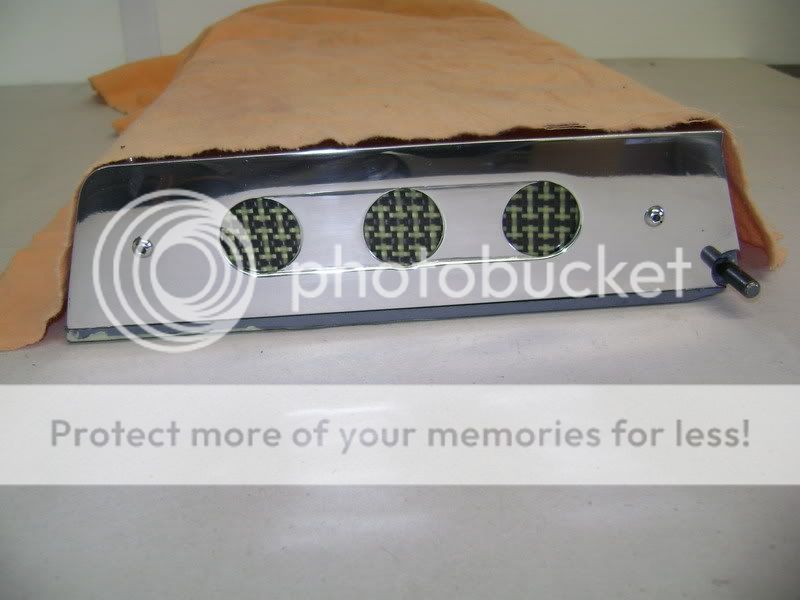
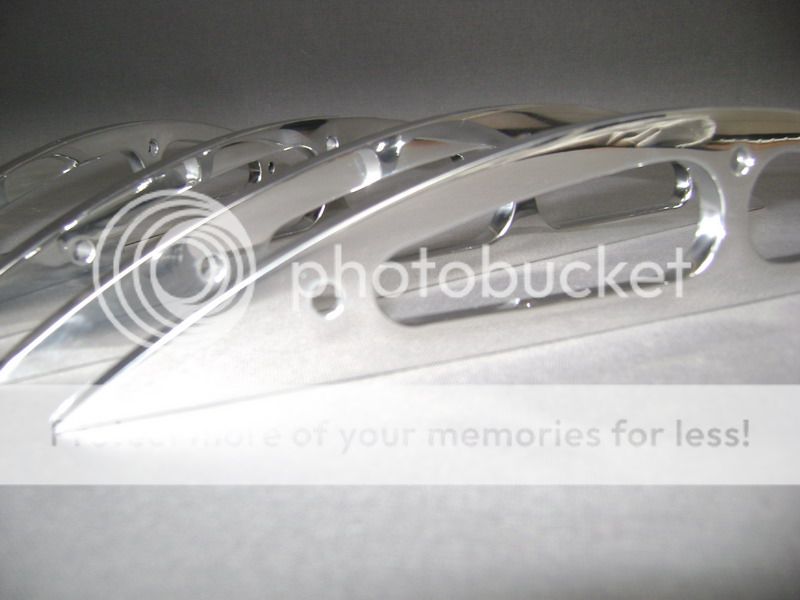
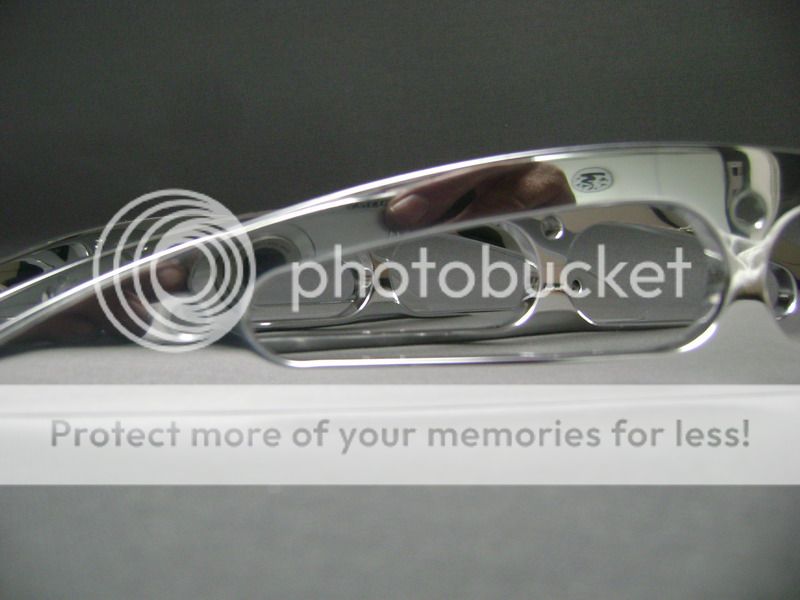
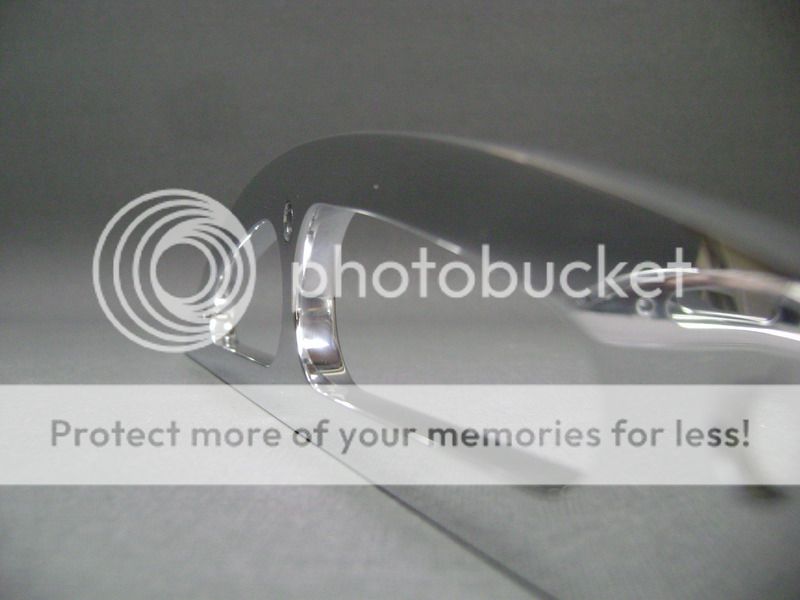
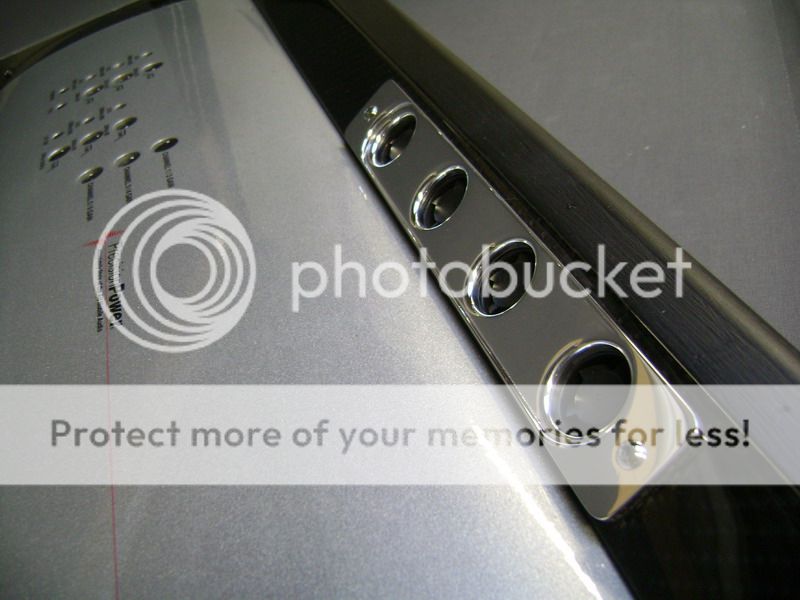
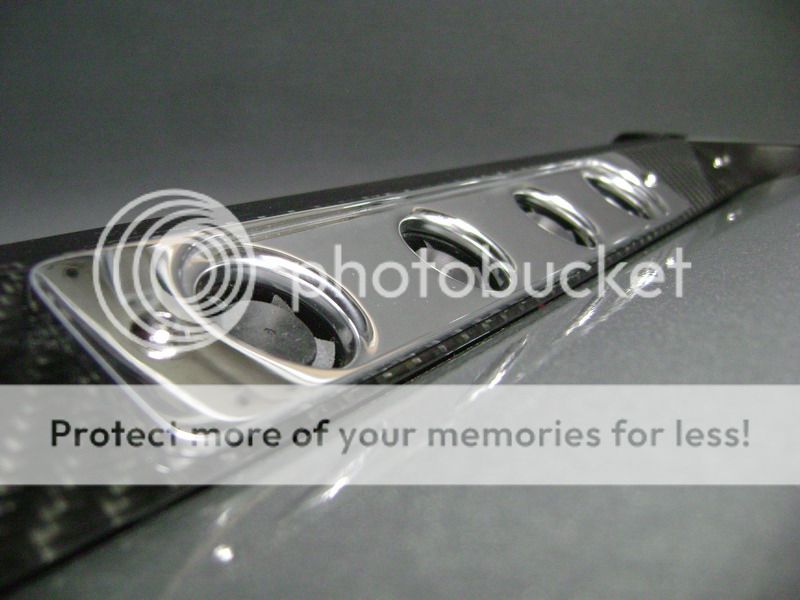
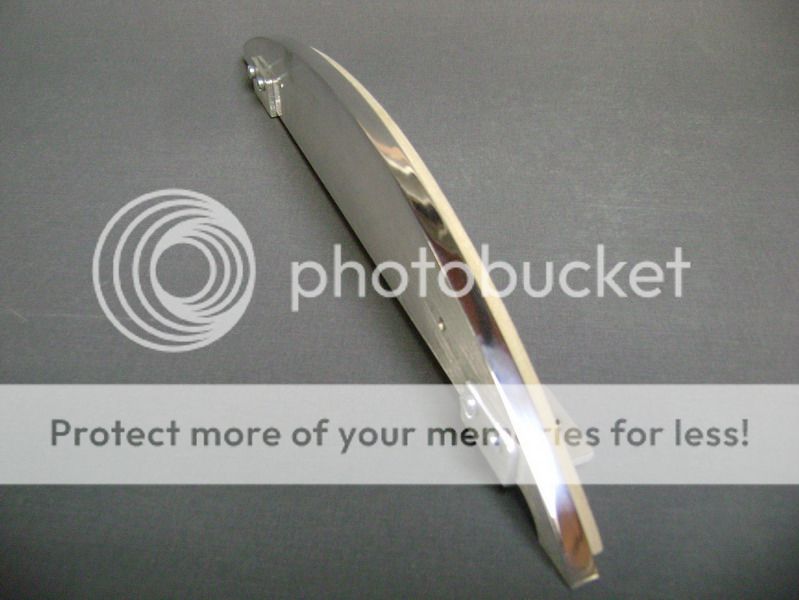
The aluminium part which will become the frontcover of the crossovertay has been chromed .

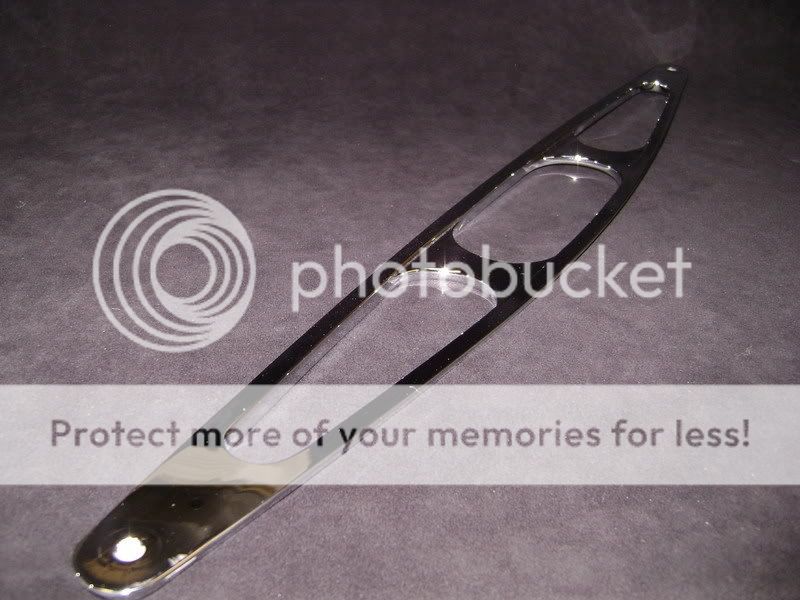
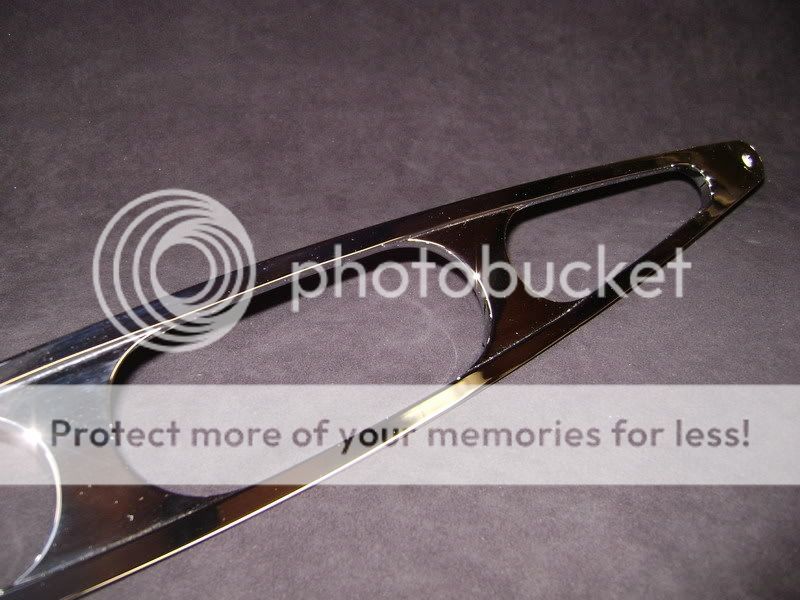 The aluminium parts which need to guide the kopper and the piece inbetween the carbon will also get chromed.
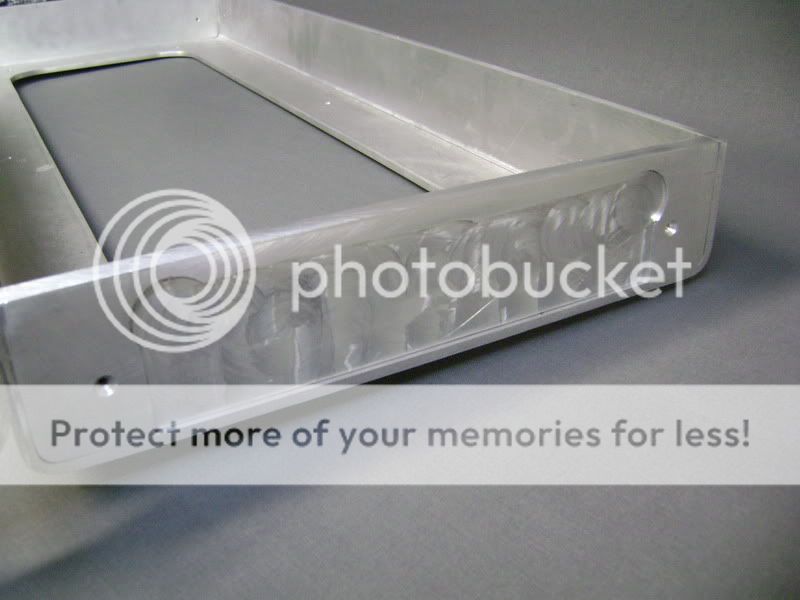
This will make it easier for me to keep everything clean in the future. These alumium plates are made to be mounted on the side of the crossovertray.
The previous ones have been removed because they didn't completely fit the rest of the design. 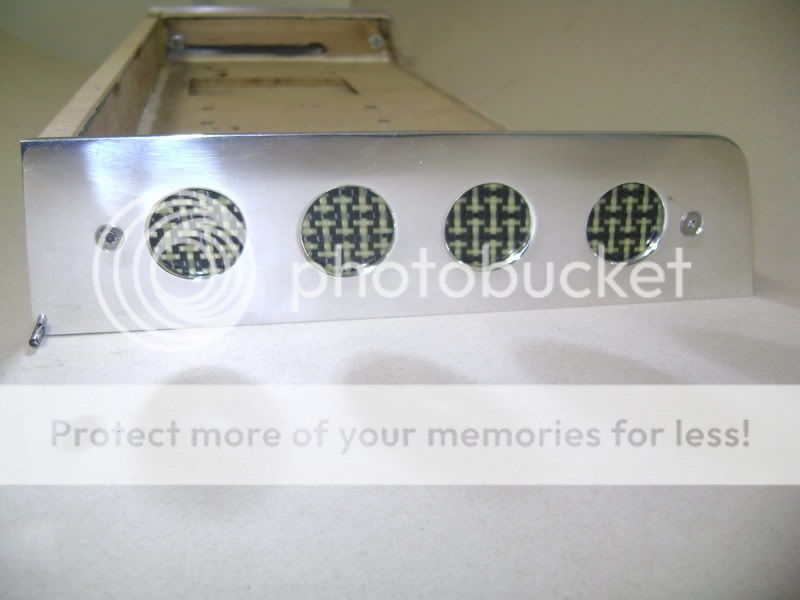
De aluminium parts on the side of the crossovertray have been replaced so the they have the same look.
Attention to detail... I've used the old router. 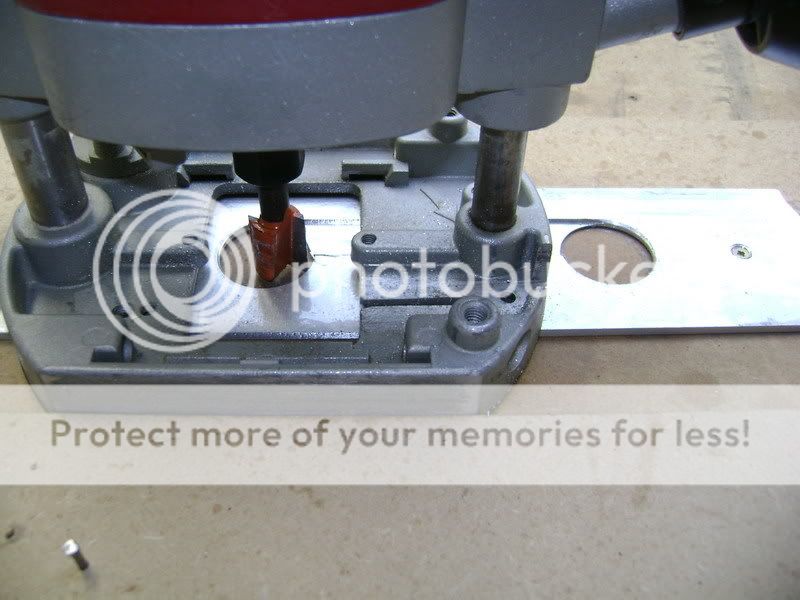
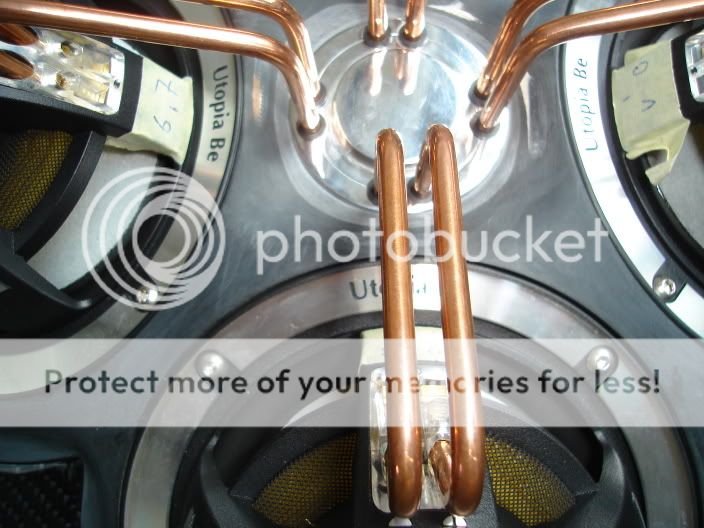
Afterwards it all got polished. 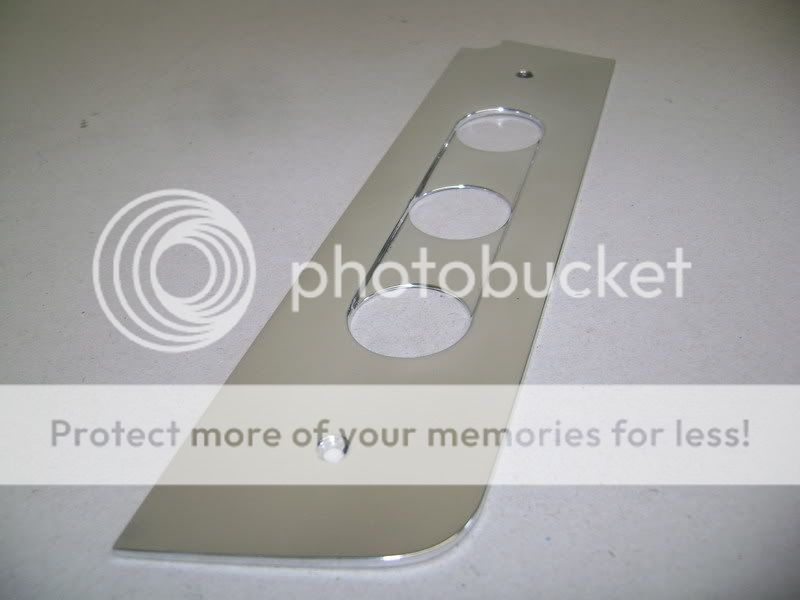
This is the complete set up, you can see that everything worked out pretty good.
It's not easy perfectly line up the 16 tubes, and the fact that the connectionpoints on the cross-over aren't even in a straight angle doens't make it easier.

The kopper connectors have been sanded and clearcoated


The aluminium parts which need to guide the kopper and the piece inbetween the carbon will also get chromed.
This will make it easier for me to keep everything clean in the future.
Posted By: robolop
Date Posted: August 21, 2009 at 2:08 PM
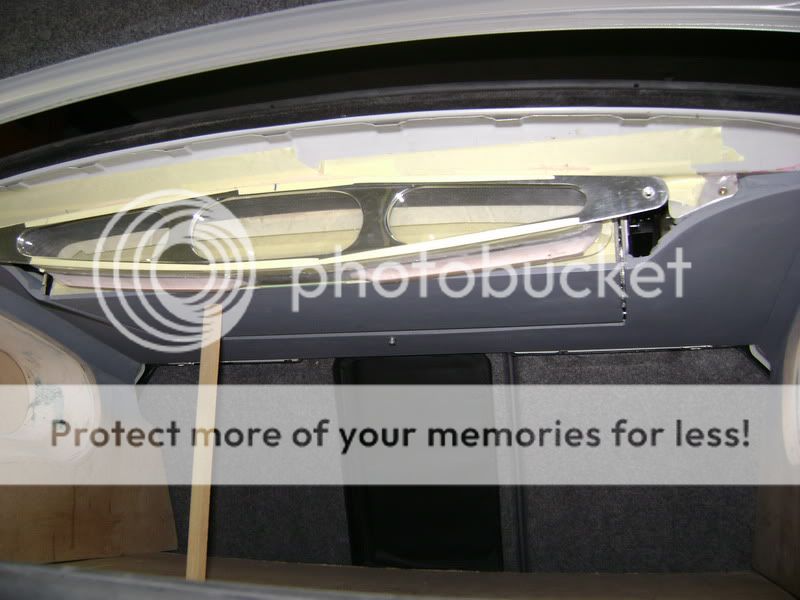
he you can see everything mounted in the car
this is the frontpiece of the crossovertray.
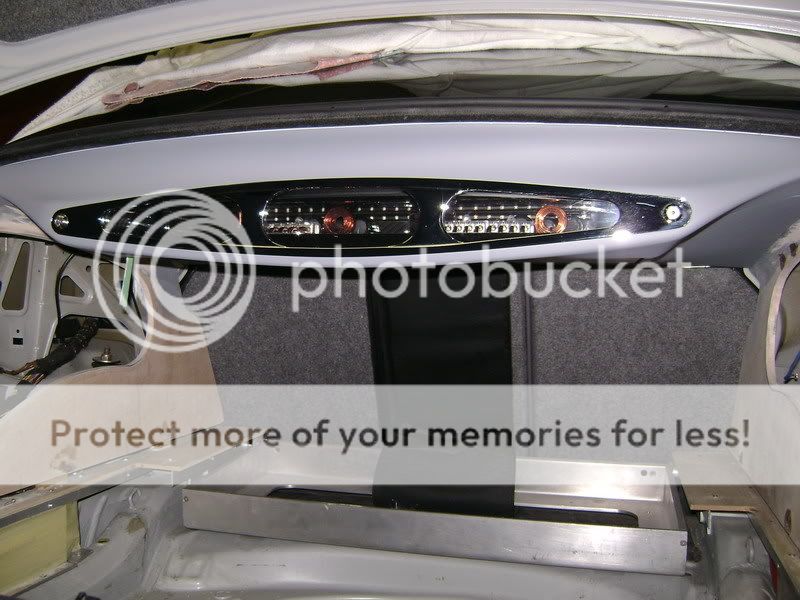 picture of everything opened. but i won't let ik open this much.
First i'll mount everything so that i can see what i'm going to do with it 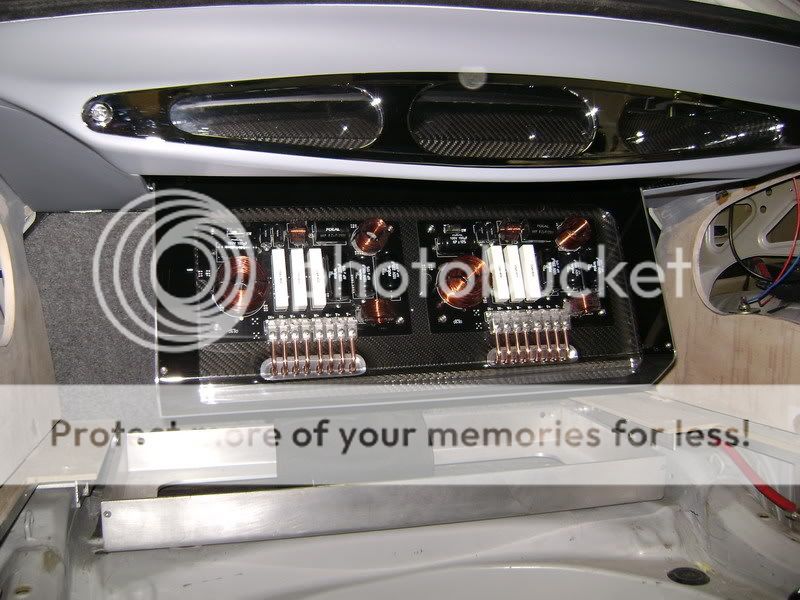
the carbonworks...
This is the kevlar piece which will be mounted behind the aluminium on the side of the tray 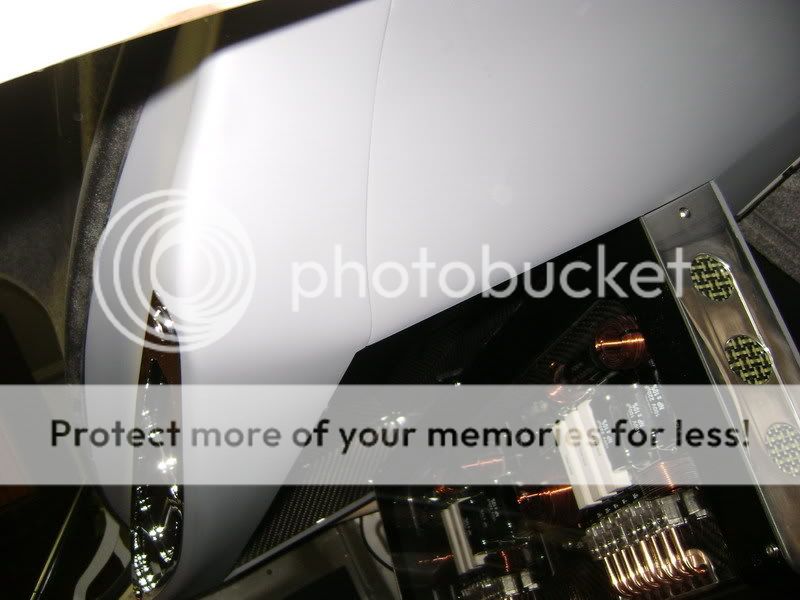


I've modified the part used to hold the motor in to place.
I've made everything stronger
here you can see how everything works 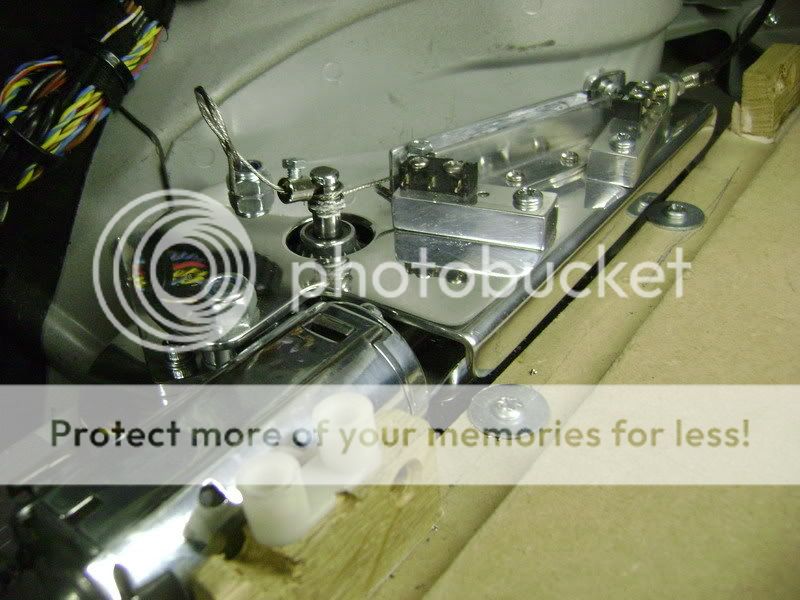
Posted By: robolop
Date Posted: August 21, 2009 at 2:13 PM
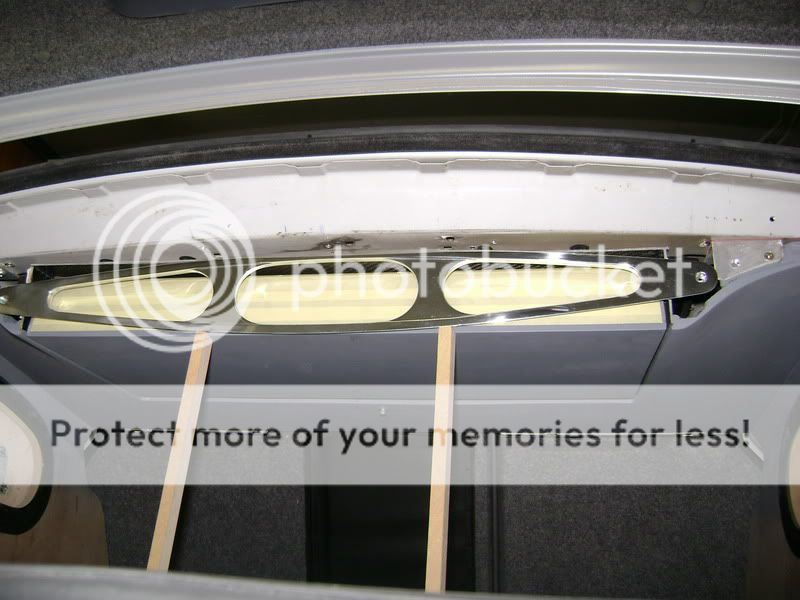
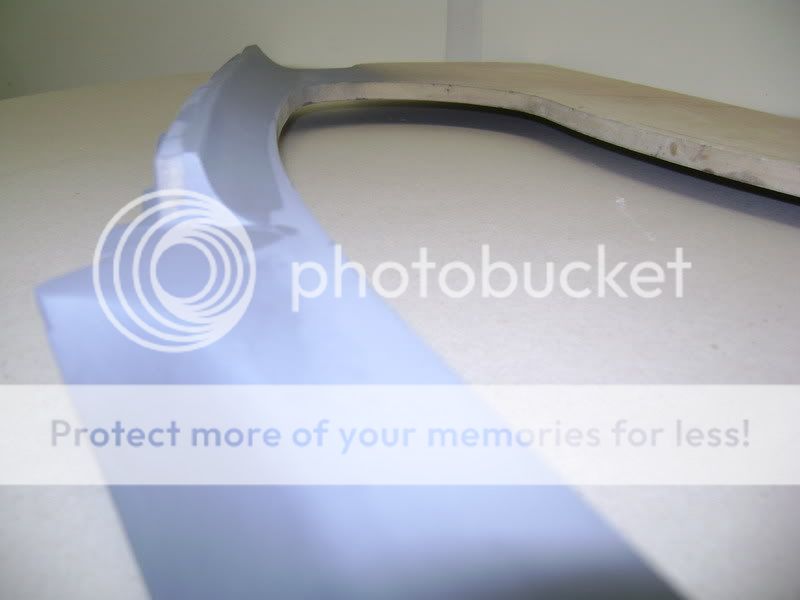
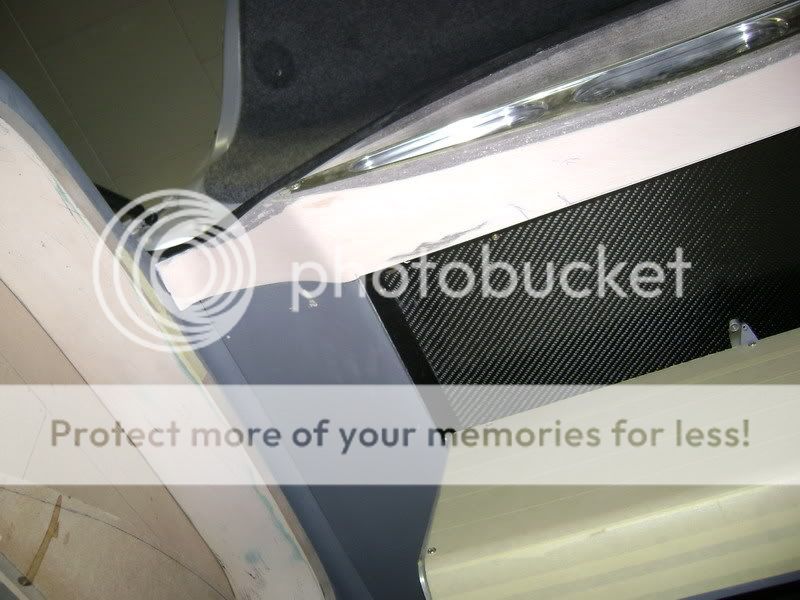
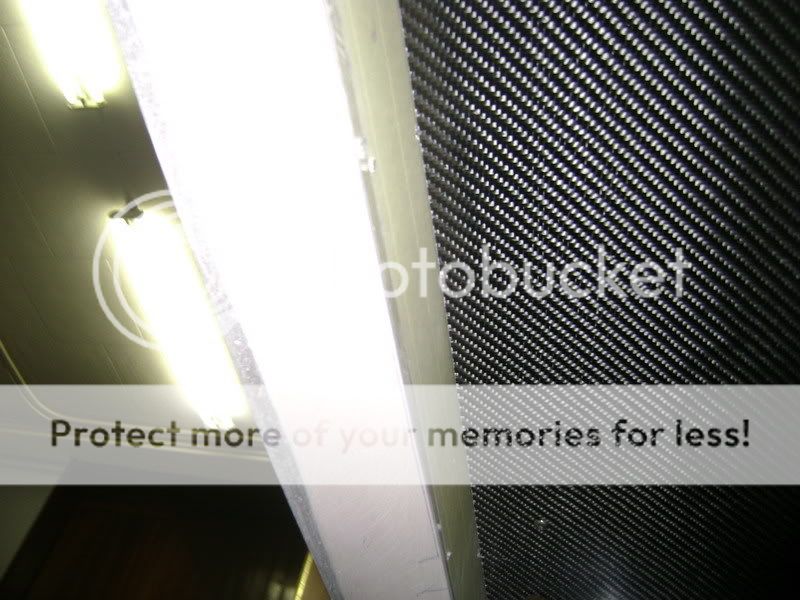
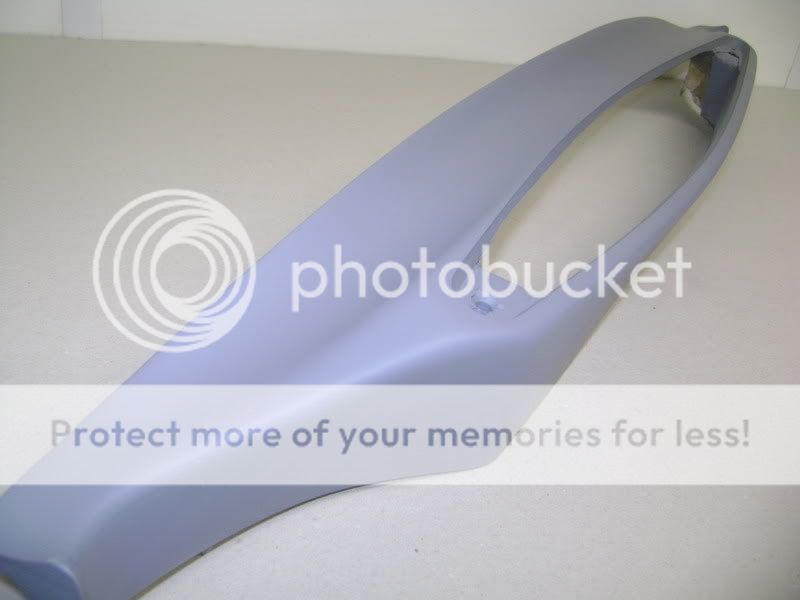
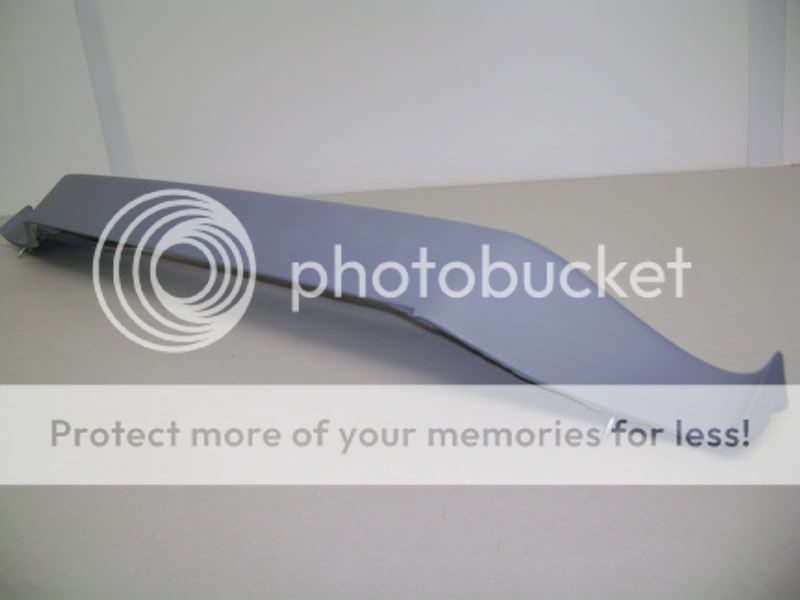
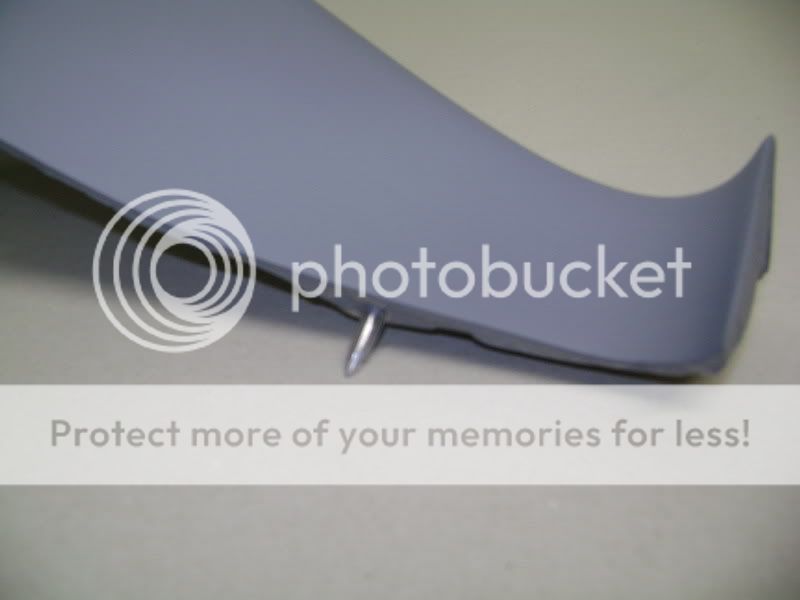
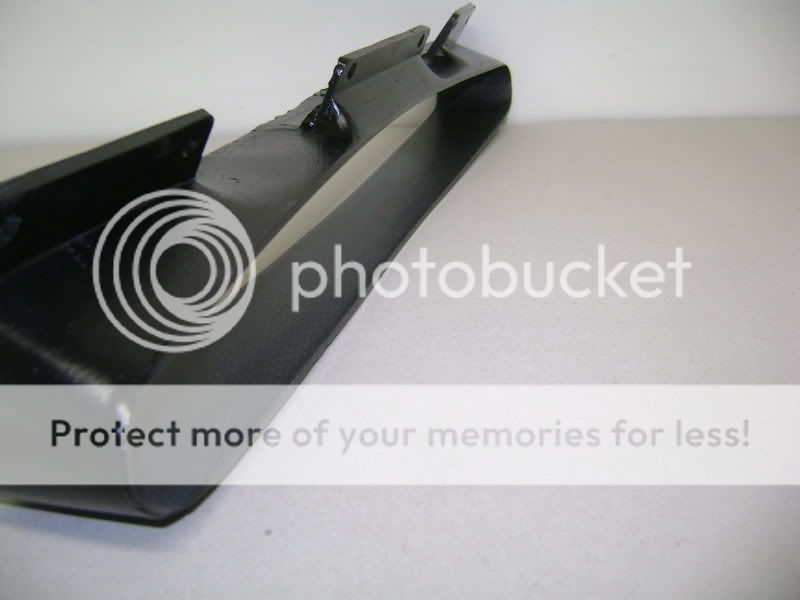
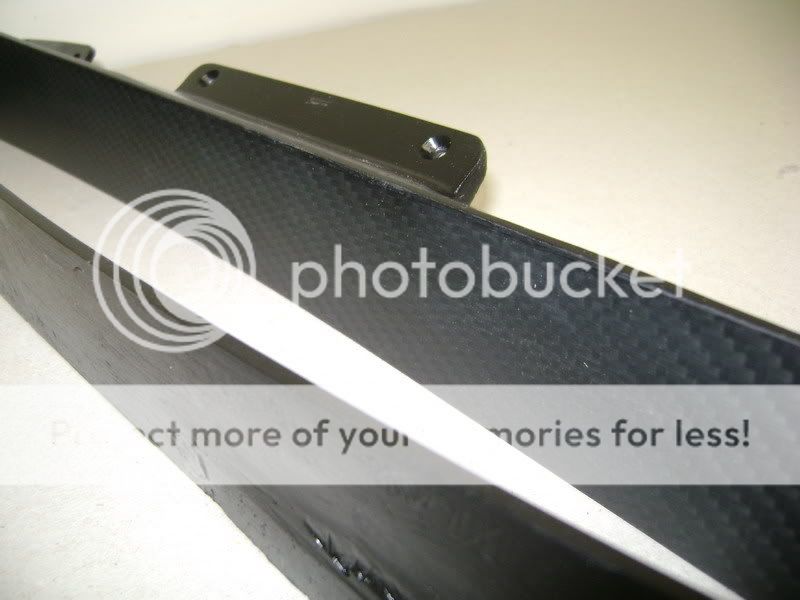
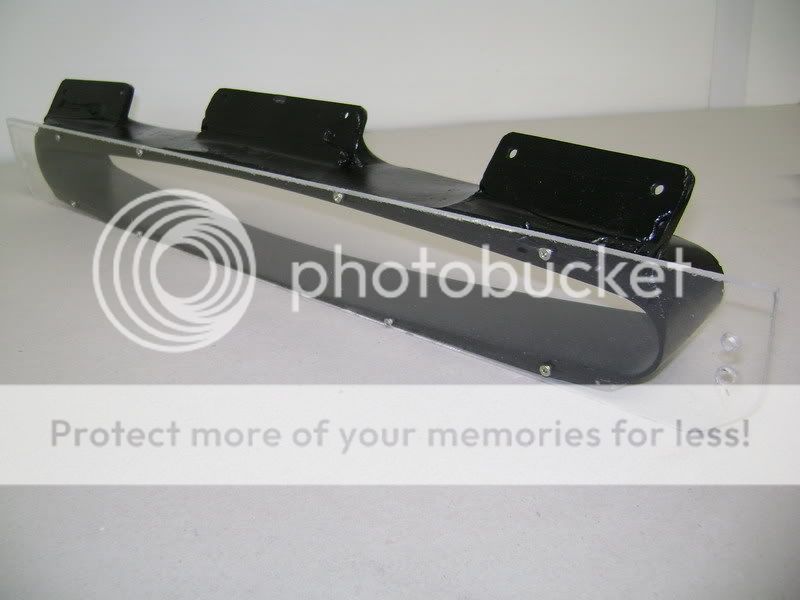
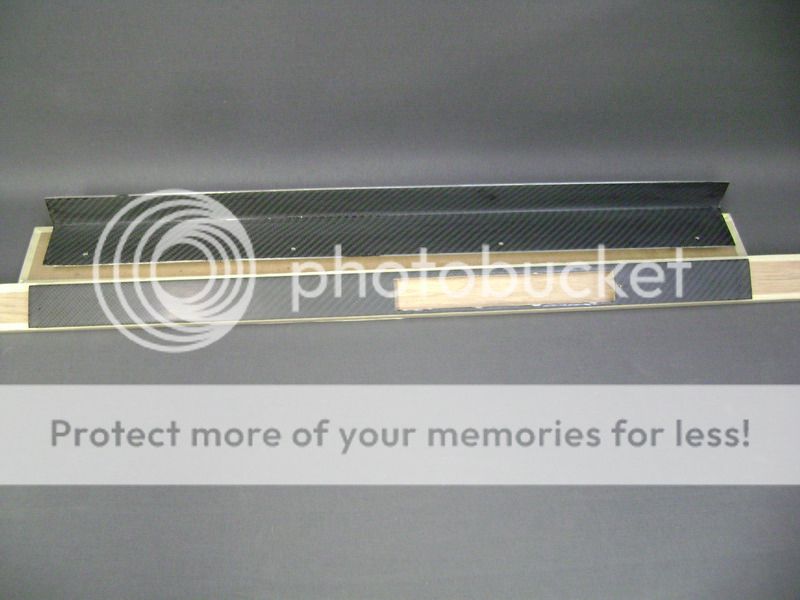
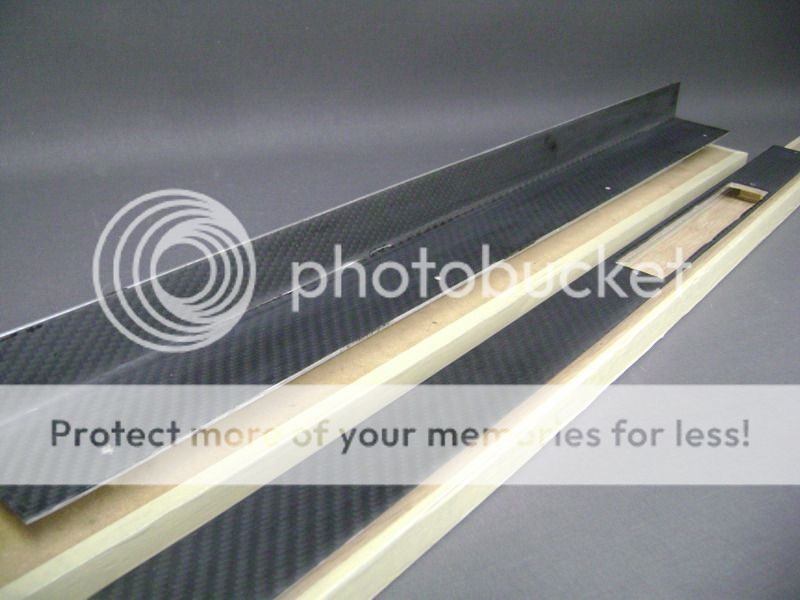
As you may know, I was working on the front bumper.
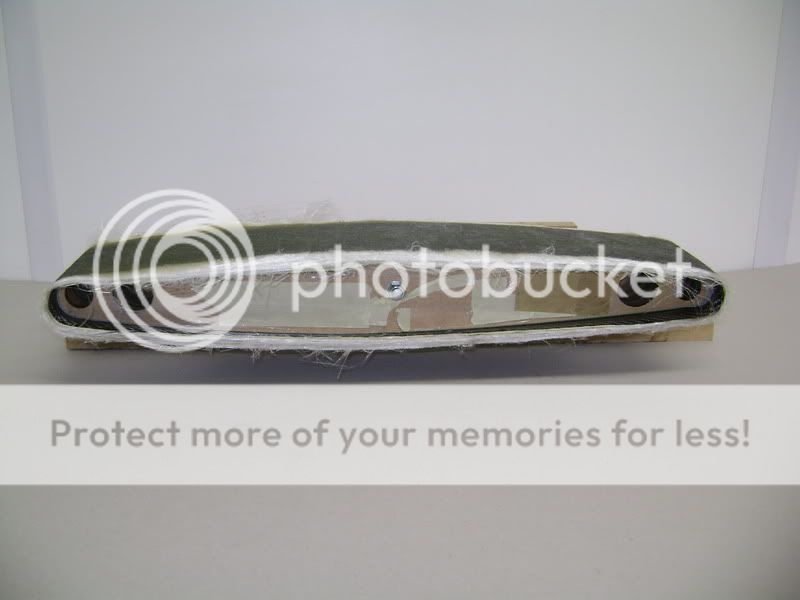
Meanwhile the bumper has been painted and Im really satisfied with the paintjob. I also took the opportunity to paint the sub-box.
So I had something to do while the paint on the bumper was drying.
First of all, I made all the copper shine, and put a layer of varnish over it.
Soldered the cables and put some shrinking tubes over them.
The alu plate where the copper gets through got chromed. So keeping it clean, wont be an issue any more
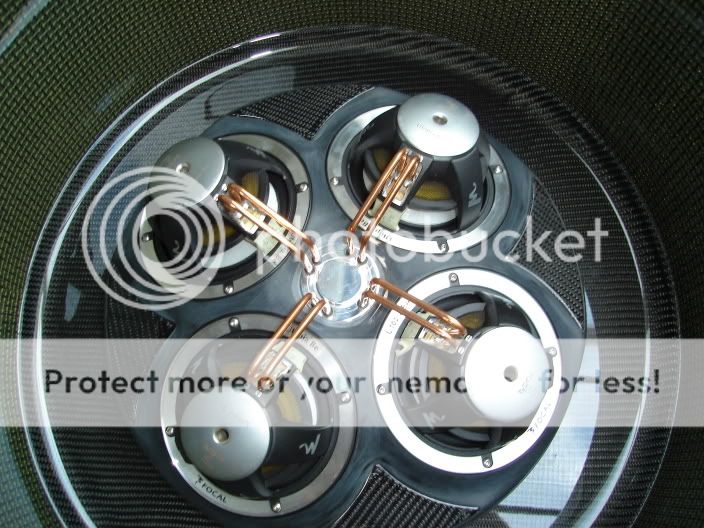
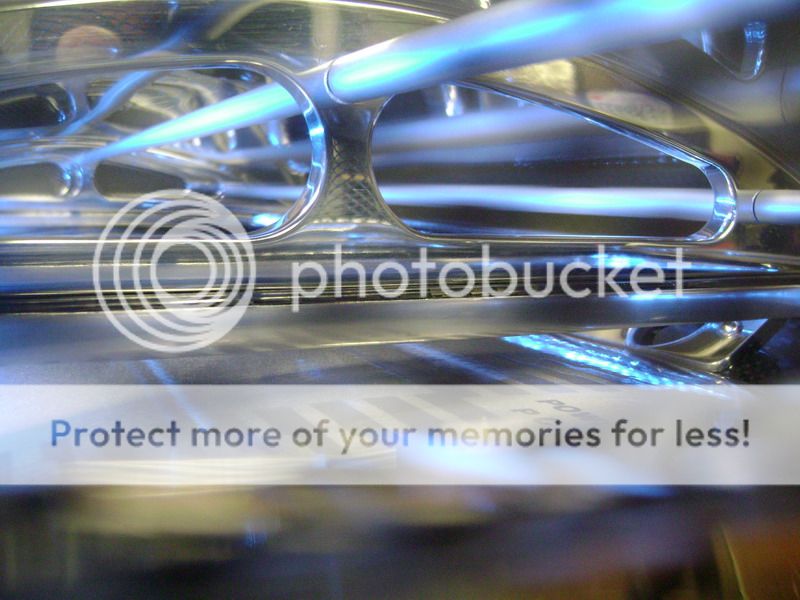
This is the result of lots of thinking.
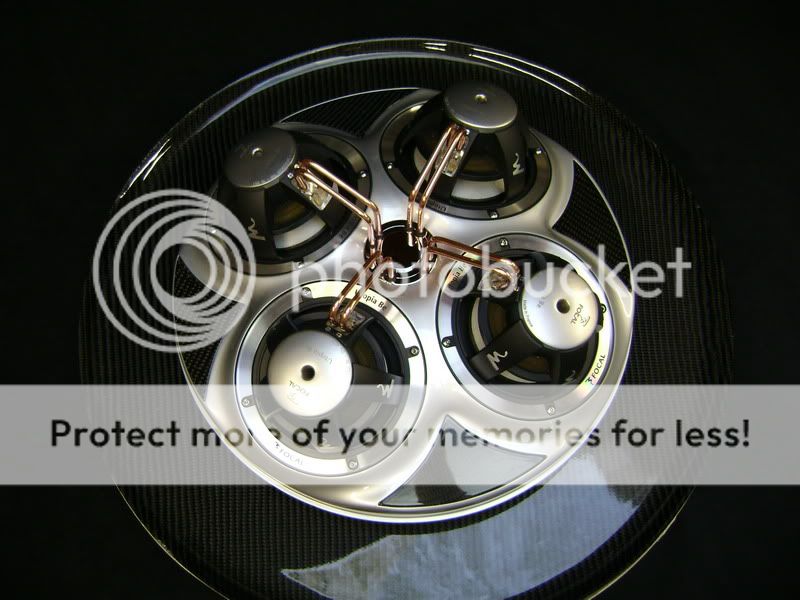
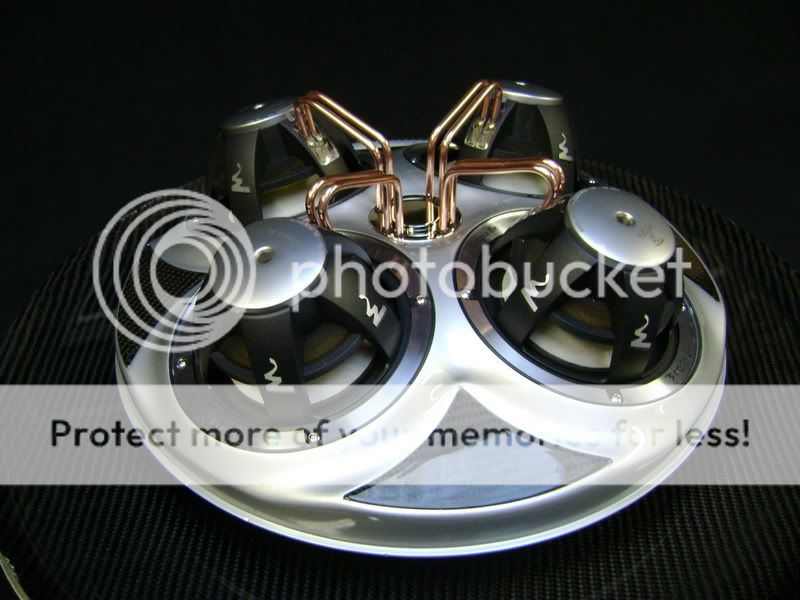
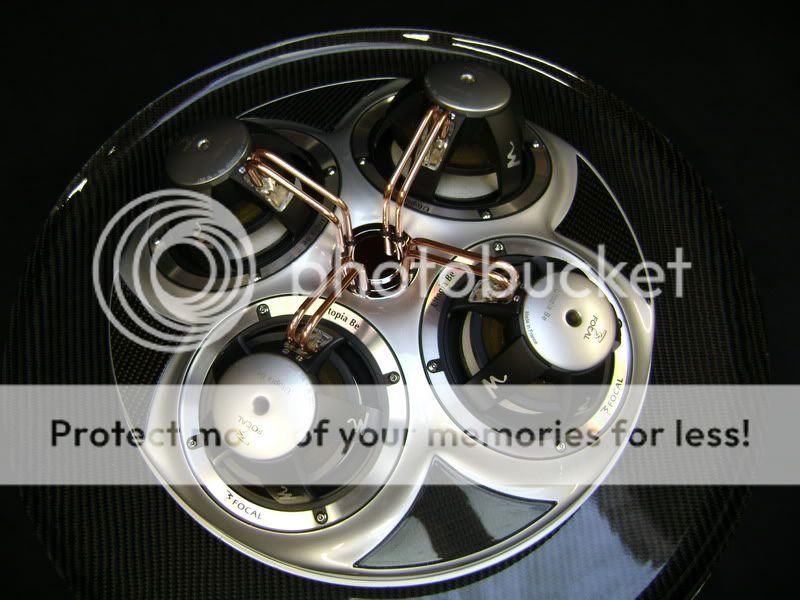
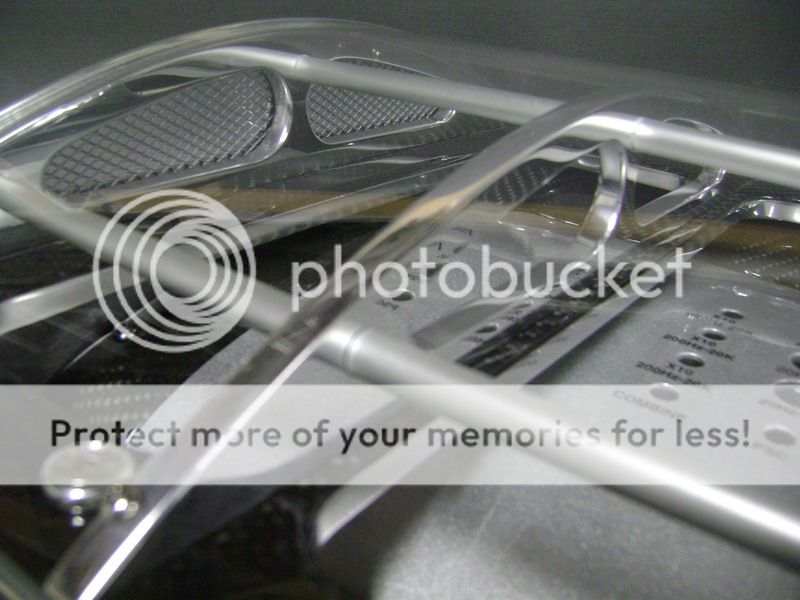
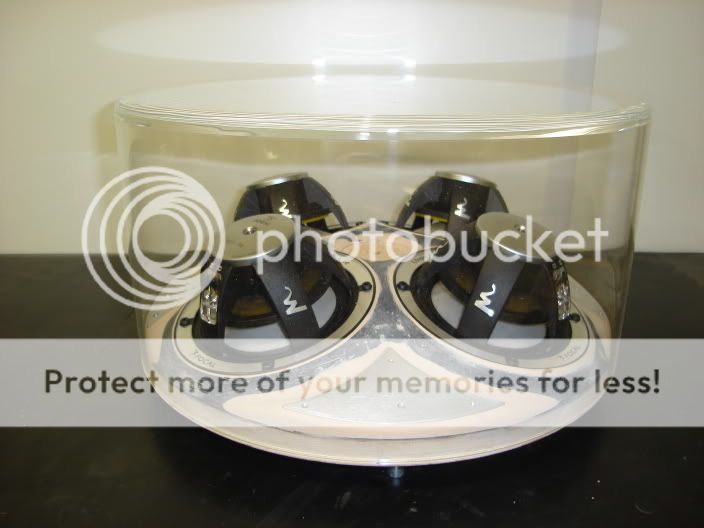
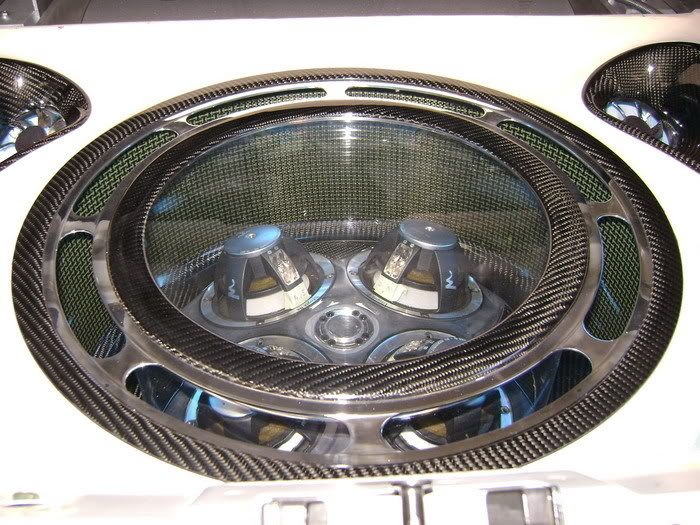
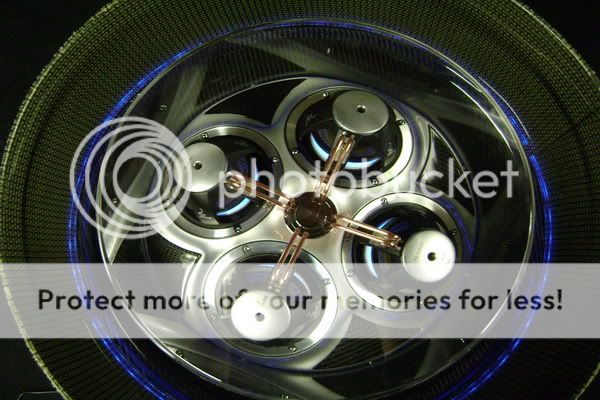
Here the carbonkevlar and the plexy cupola is on.
 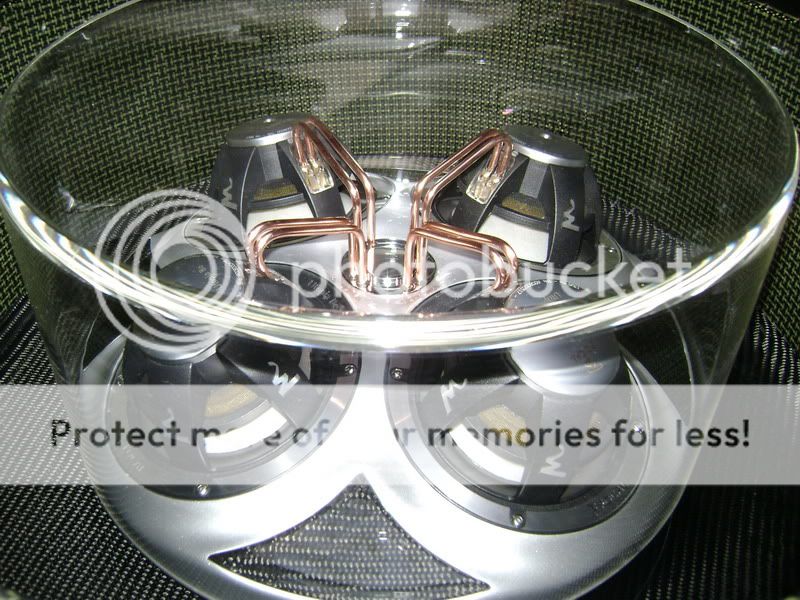
Almost like fishes in a goblet 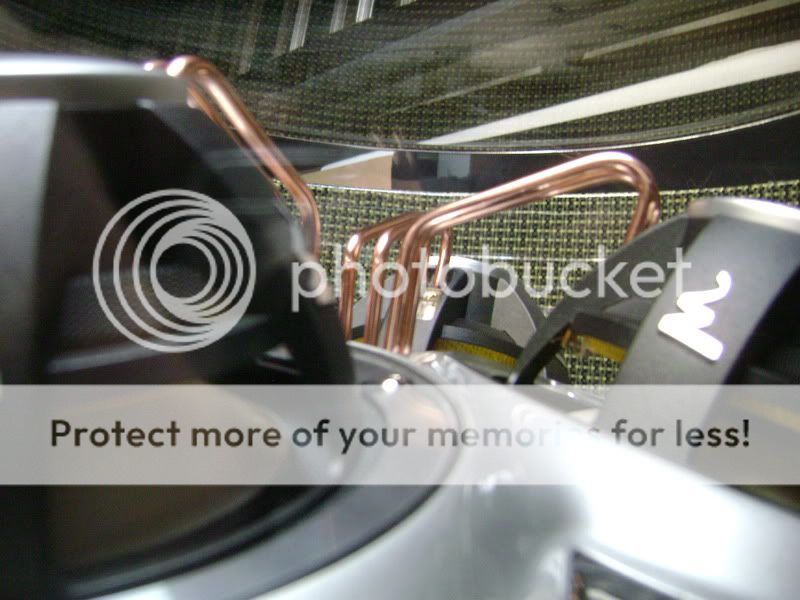
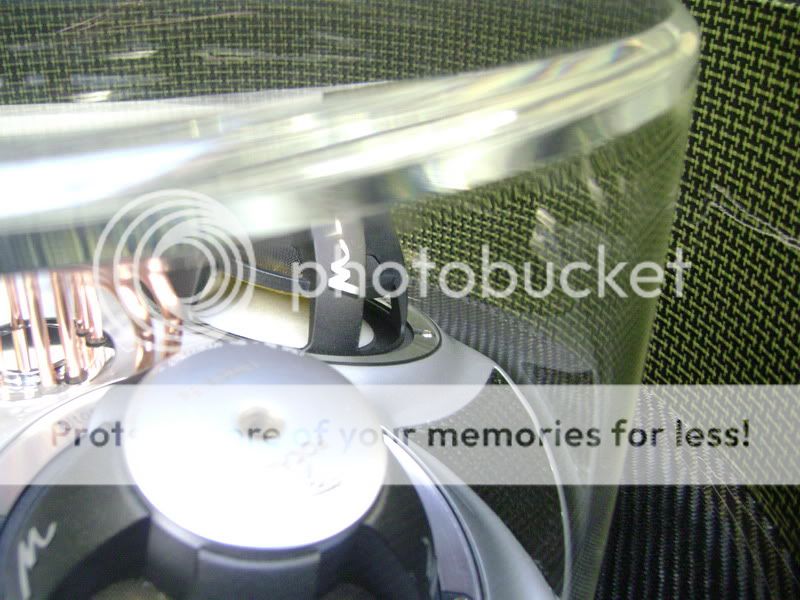
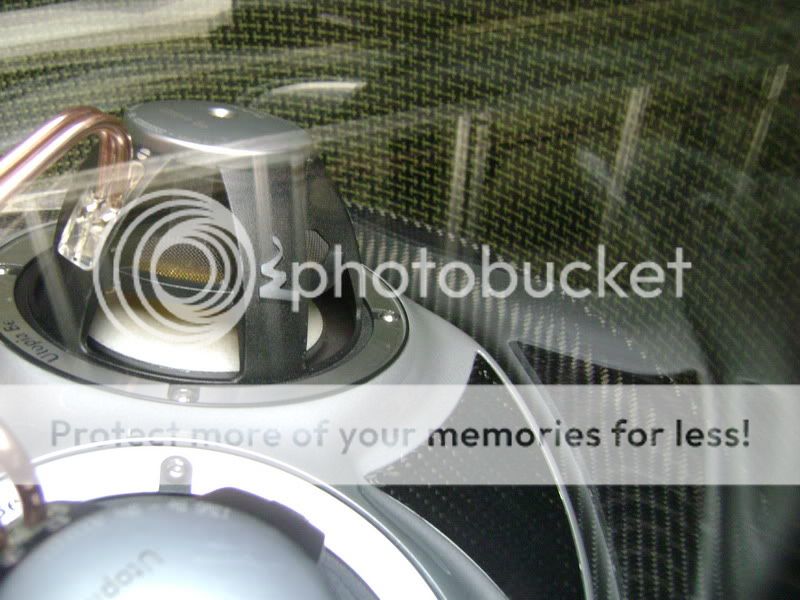
Im really satisfied with this in particular. Trying to get the copper right where it had to be, was a really big challenge.
Still a lot better then some ordinary cables, dont you think? 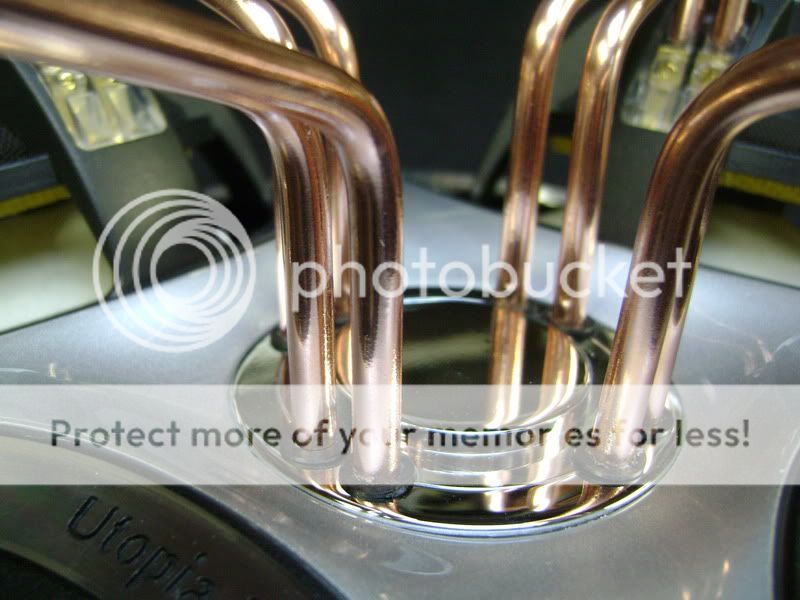
Posted By: robolop
Date Posted: August 21, 2009 at 2:17 PM
I fastened he plexi copula in the meanwhile. In the plate where the screws rest, I milled a groove of 1 centimeter and filled it up with polyester.
After that I wormed some screw-thread in, to turn the screws in.
I had some pictures of that, but cant seem to find them anymore. You can also see I pasted a selfsticking strip on there, so the copula stretched itself up, and makes it airtight. 

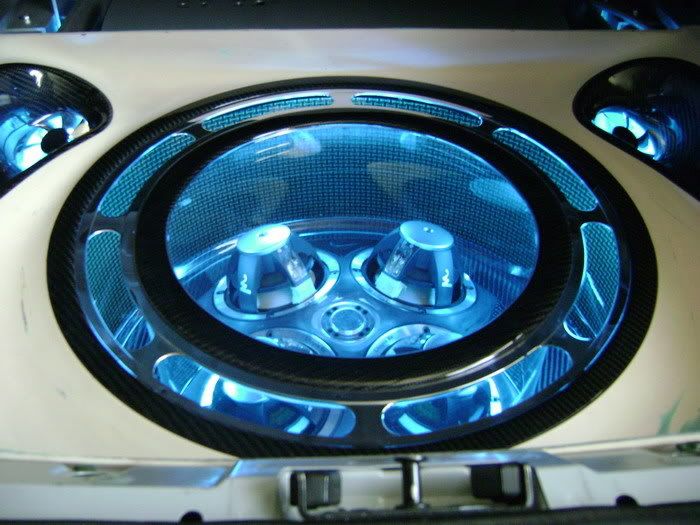
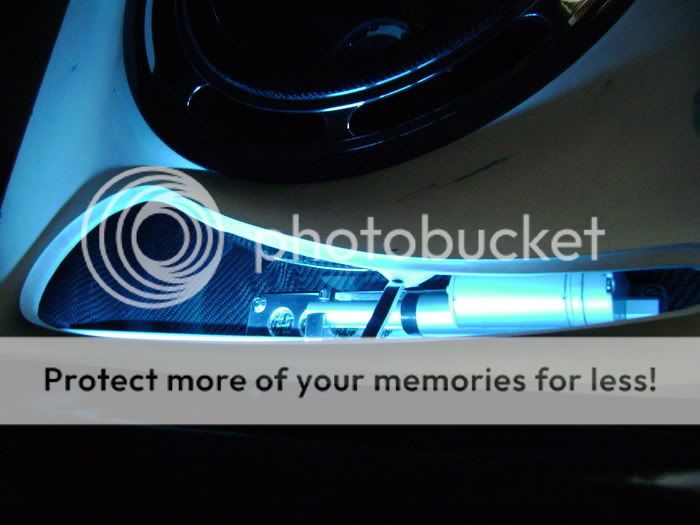
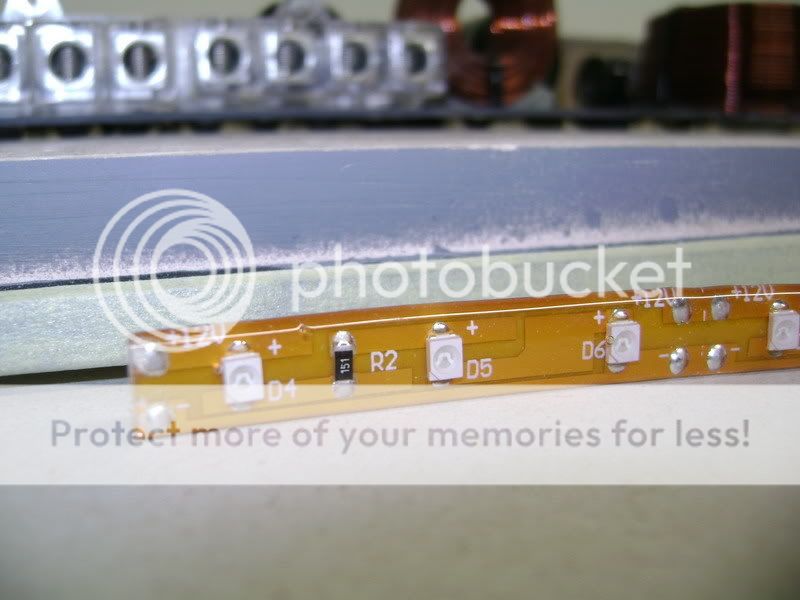
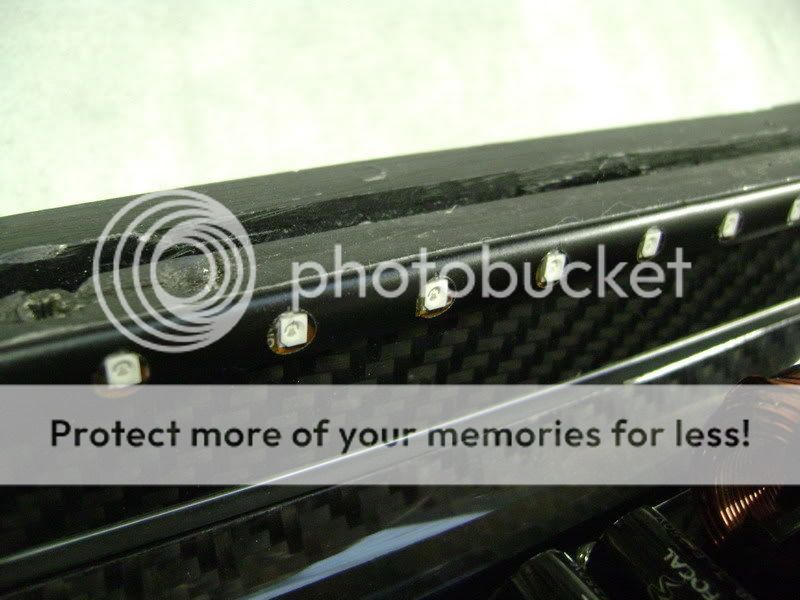
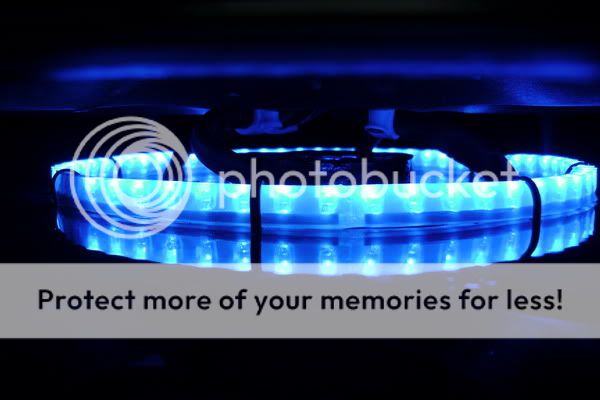
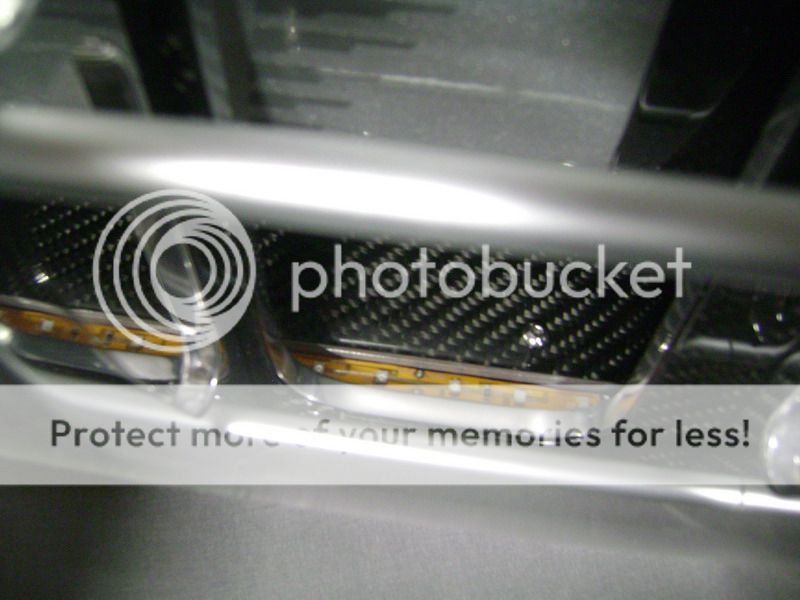
On the bottomside, I mounted a led-strip.
Its a strip where the leds are poured into some kind of silicone. I bought this specially because I didnt want it to snap from the pressure of the speakers 
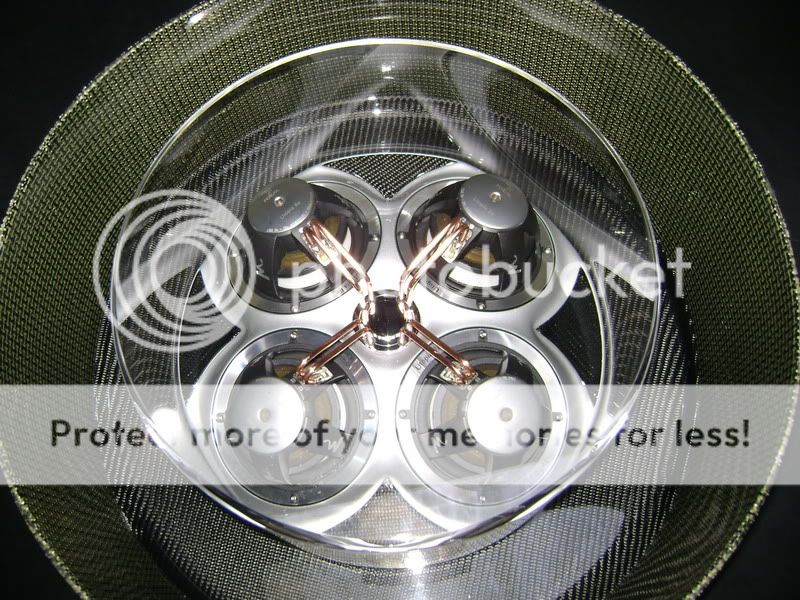
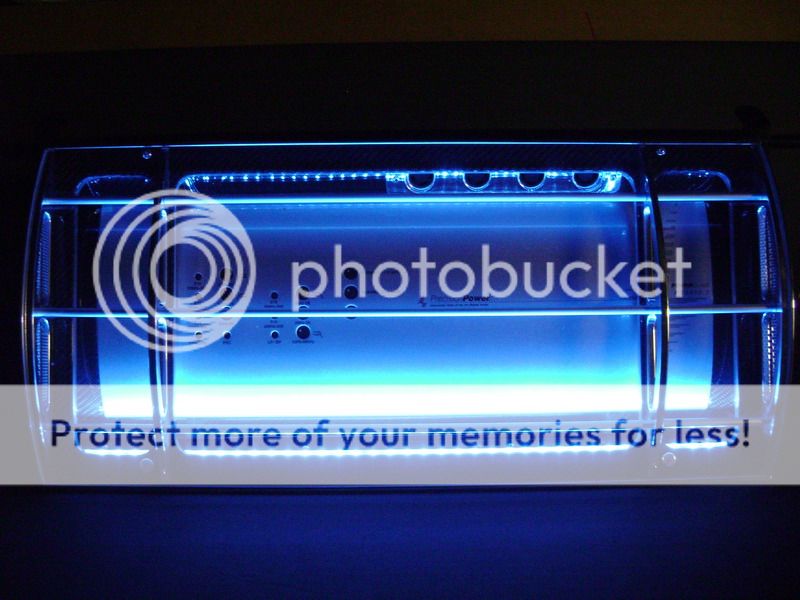
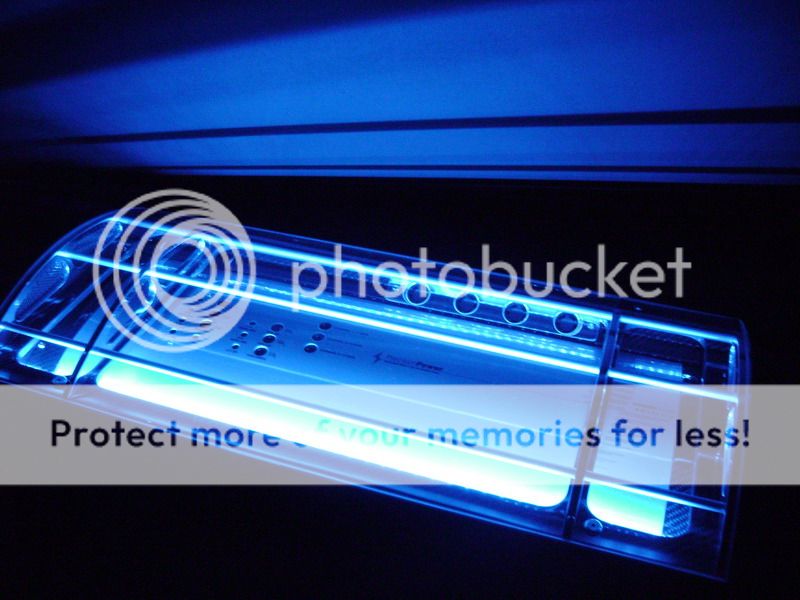
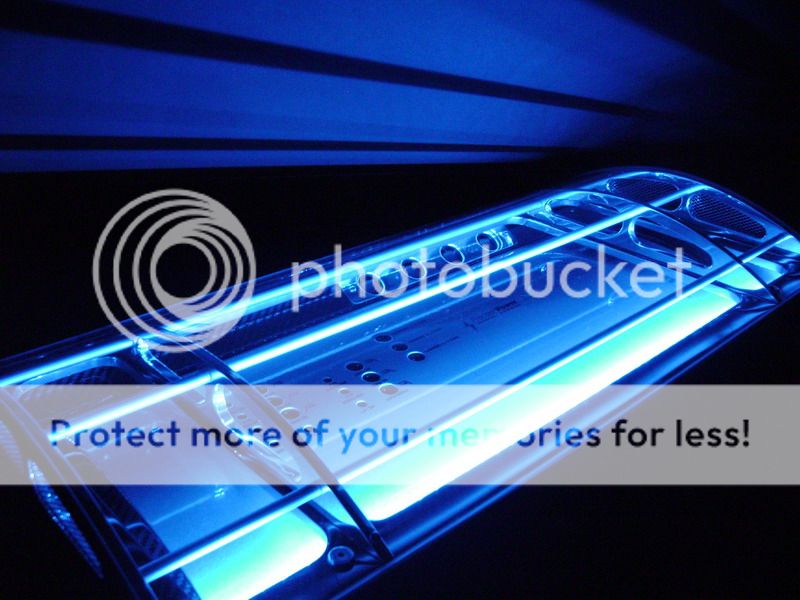
These are some pictures I took in daylight
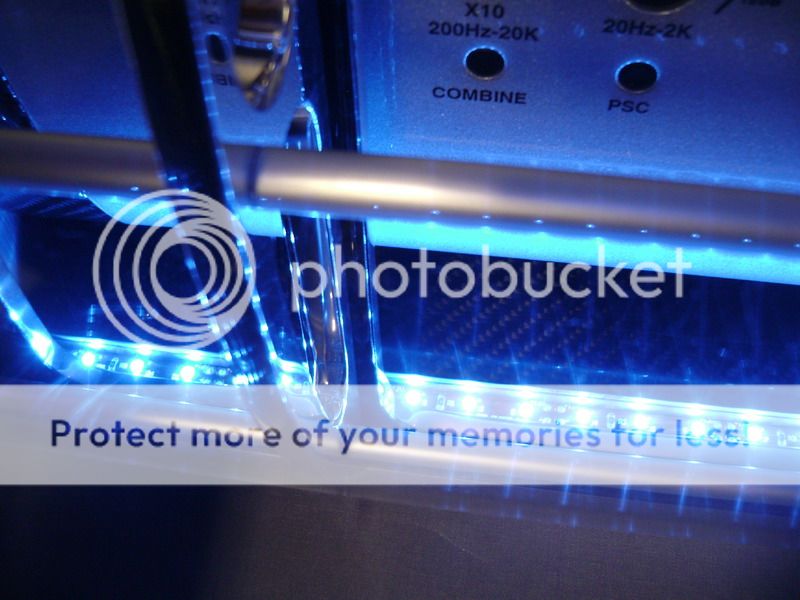
Here you can see the blue light, shining through the speakers, find it kinda cool 
Pictures in the dark. 
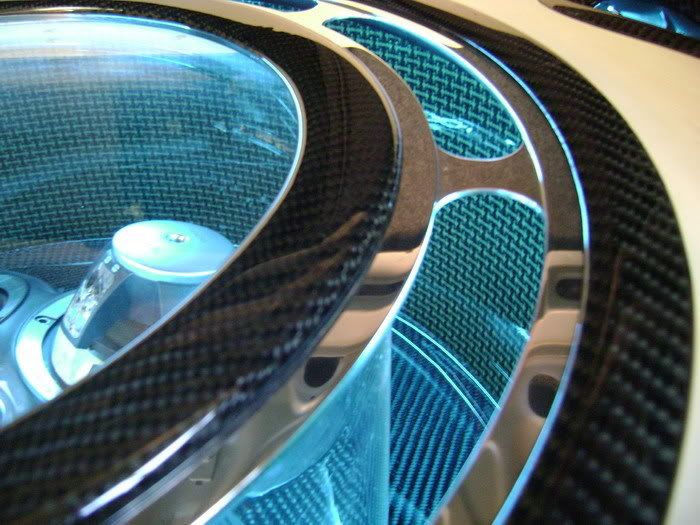
Look what a reflection I get with all that varnish 
These are some pictures where I put on some more light from above.
It will look like this when everything is mounted in the trunk. 


This is about it for the sub-box, yep, eventually, there has come and end to it
For myself, Im really satisfied with the result, it even looks better then I imagined.
All the hours of work it absorbed
well, I already forgot.
Posted By: robolop
Date Posted: August 21, 2009 at 2:21 PM
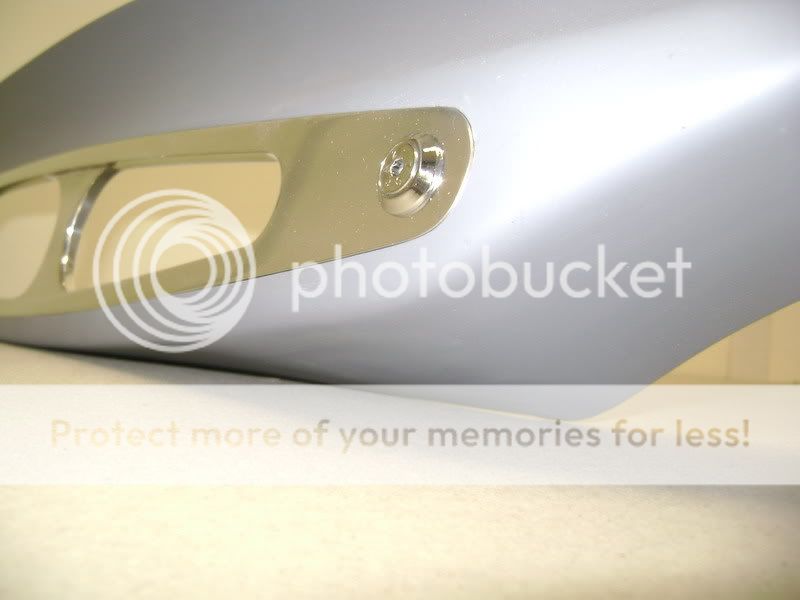
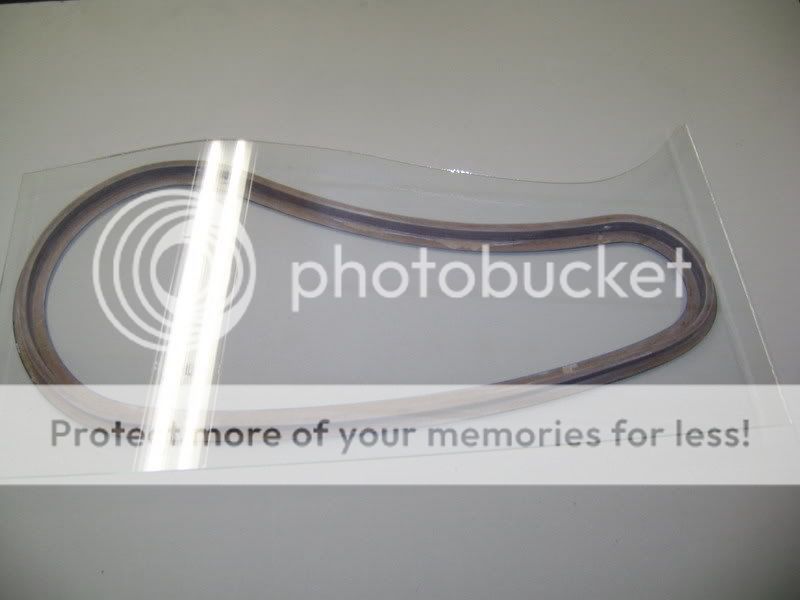
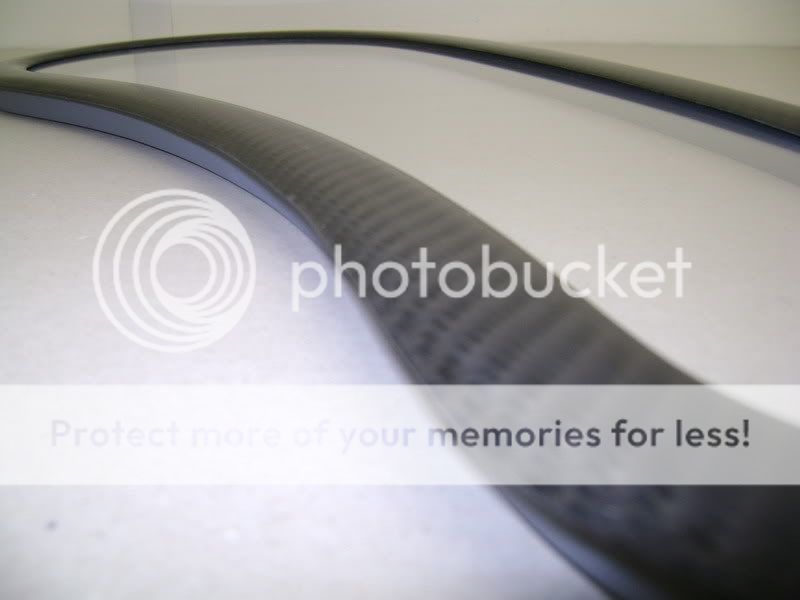
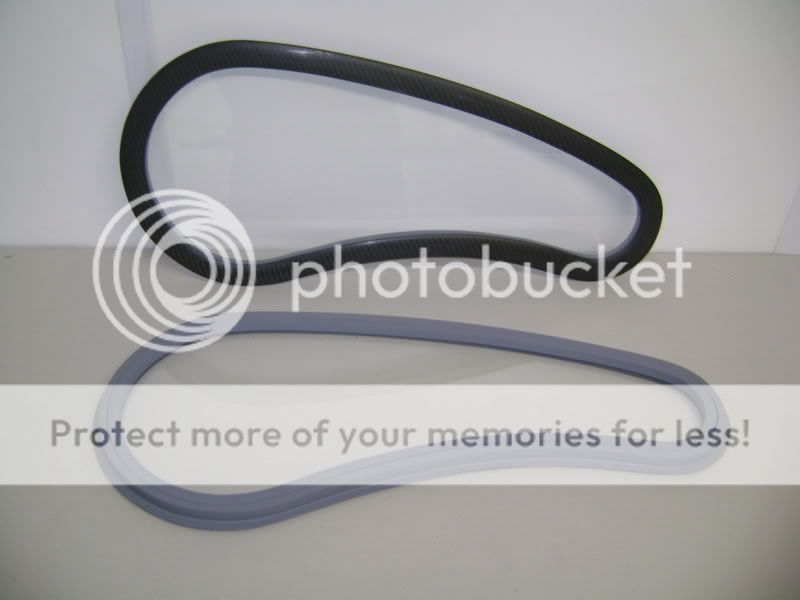
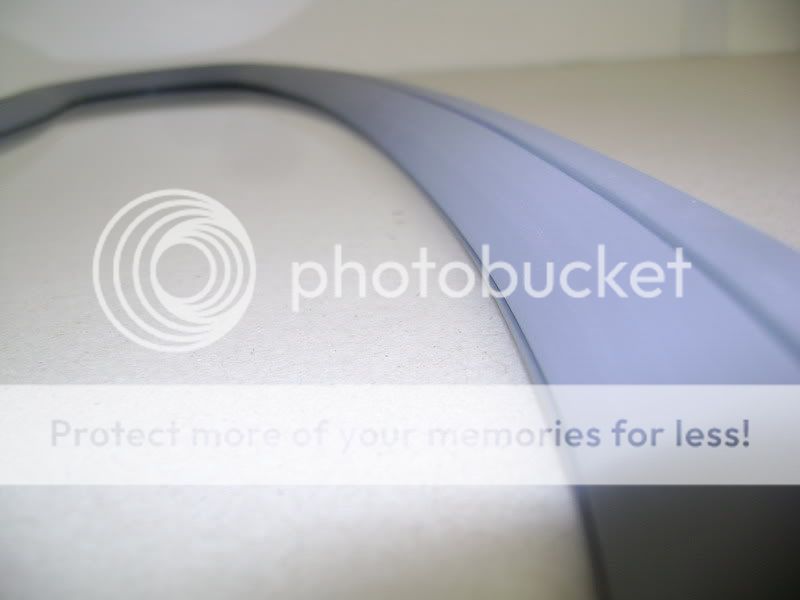
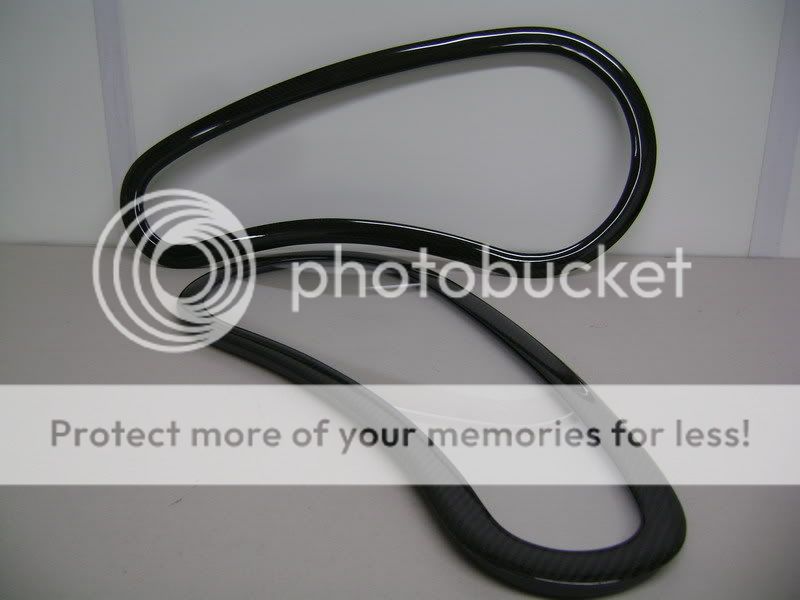
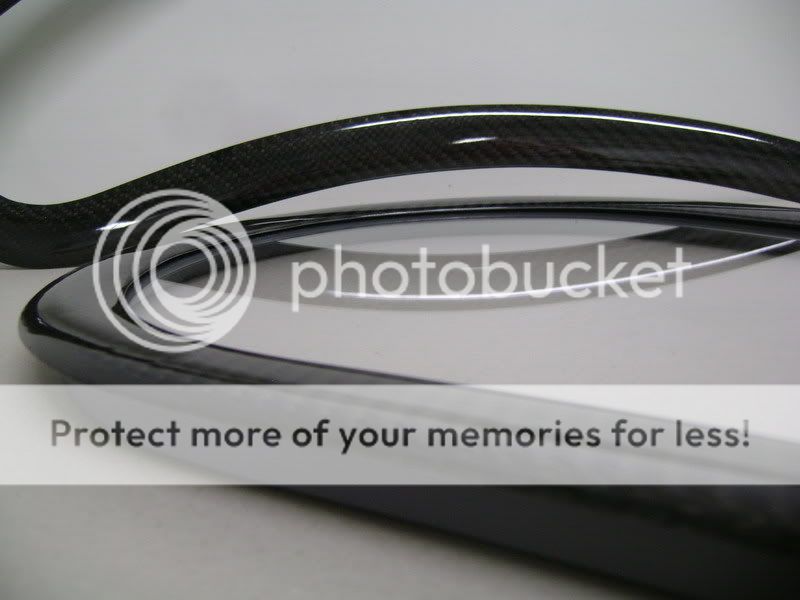
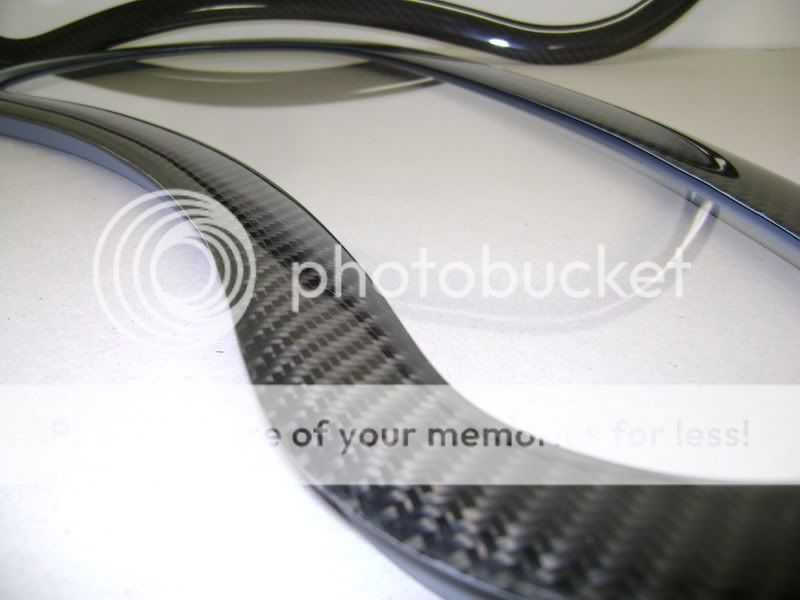
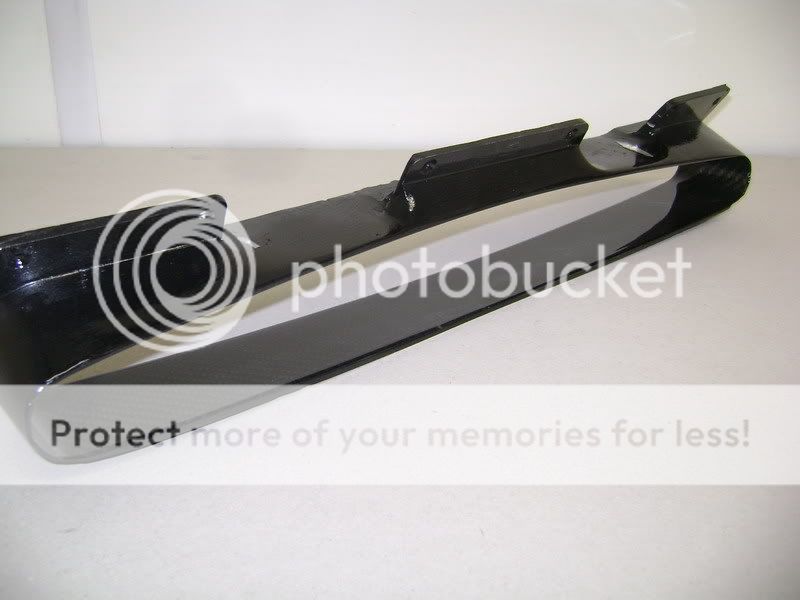
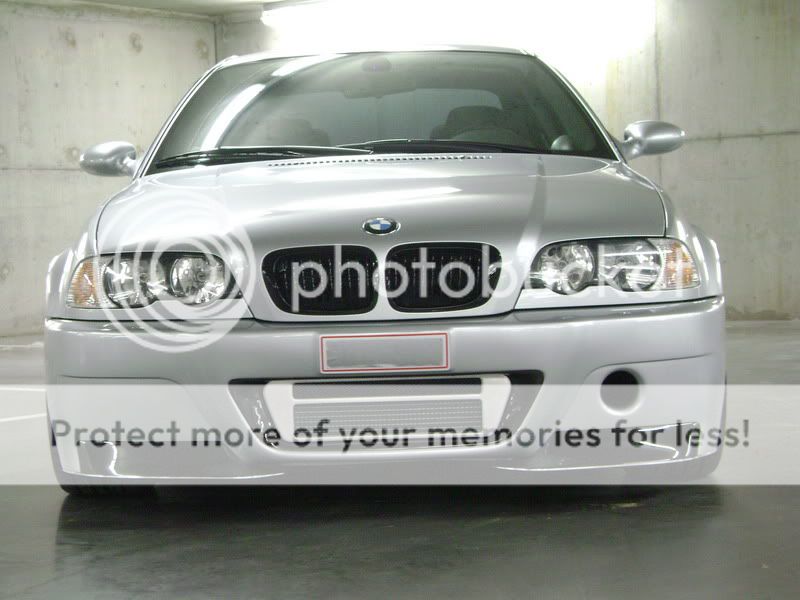
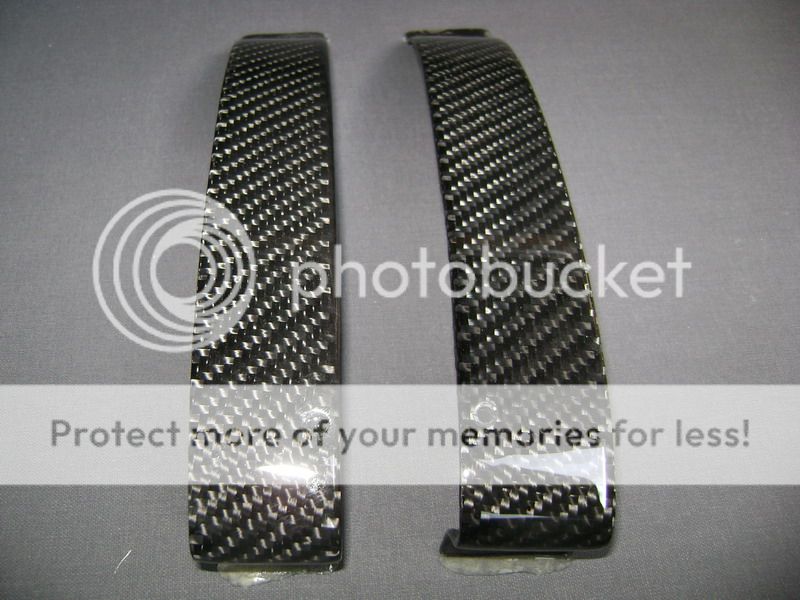
The kidneys and the windowsmoldings are painted deep gloss black and mounted back on.
It wont be everybodys taste, but it works for me. 
I dont find the front that busy anymore

The windowmoldings on the side please me also more that I tought.
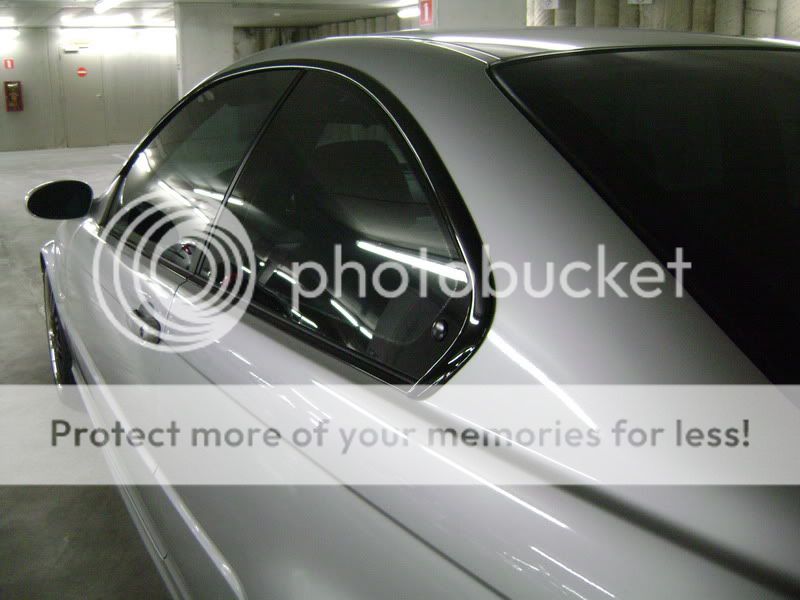 

Some buddys asked me if I had darkened my windows
lol
They just show more dark then before, cause of the dark moldings. 


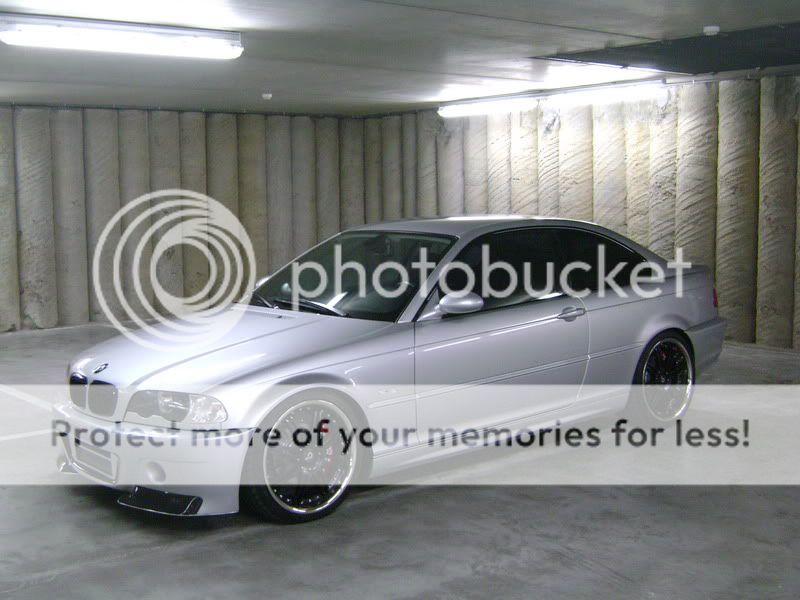
The car will stay like this , this season, it lookes fine for me.
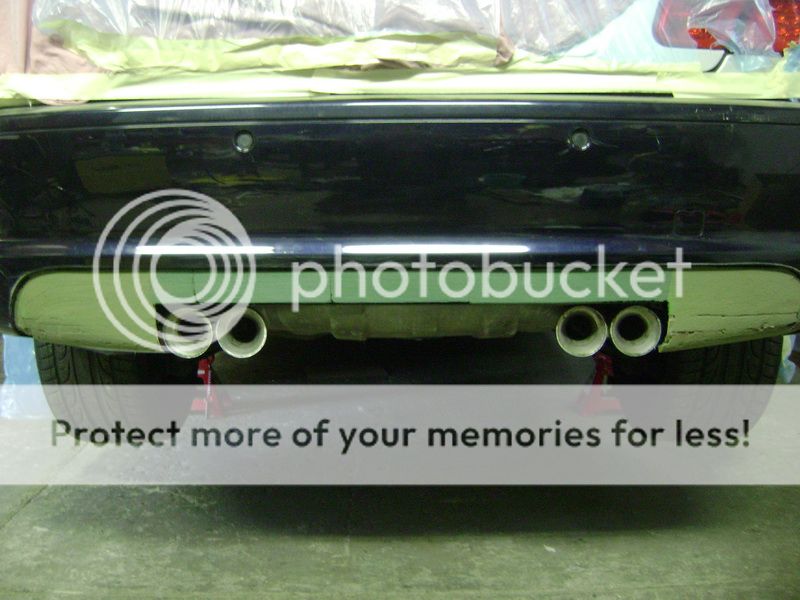
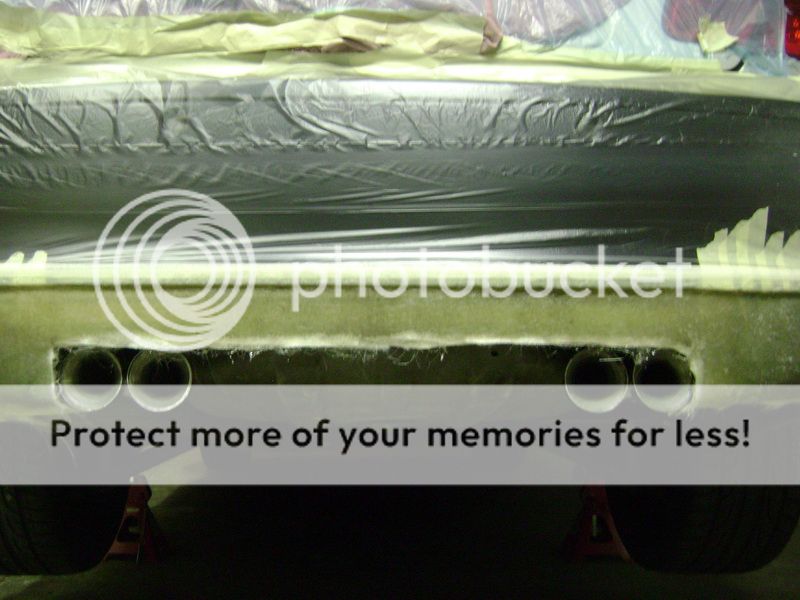
Next winter Im getting another rear bumper, with quad exhausts (like the M)
But now, Im focusing on the ICE again.
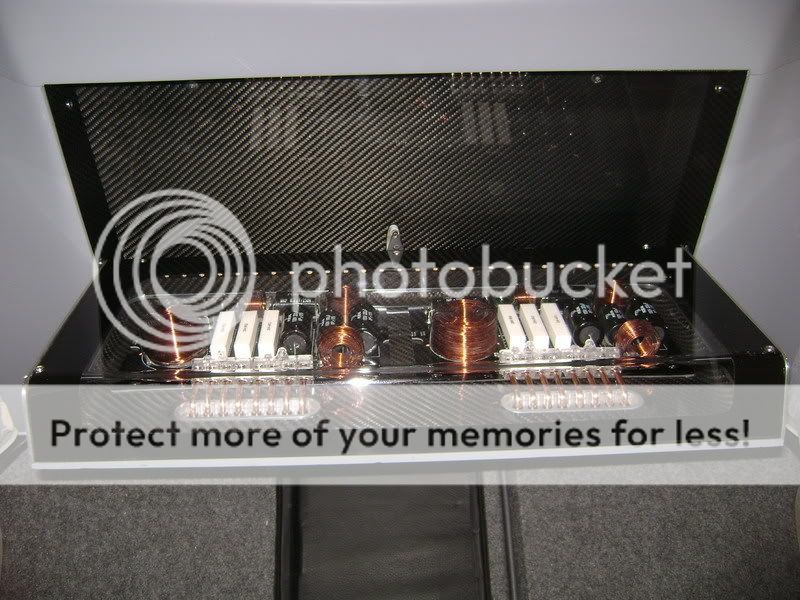
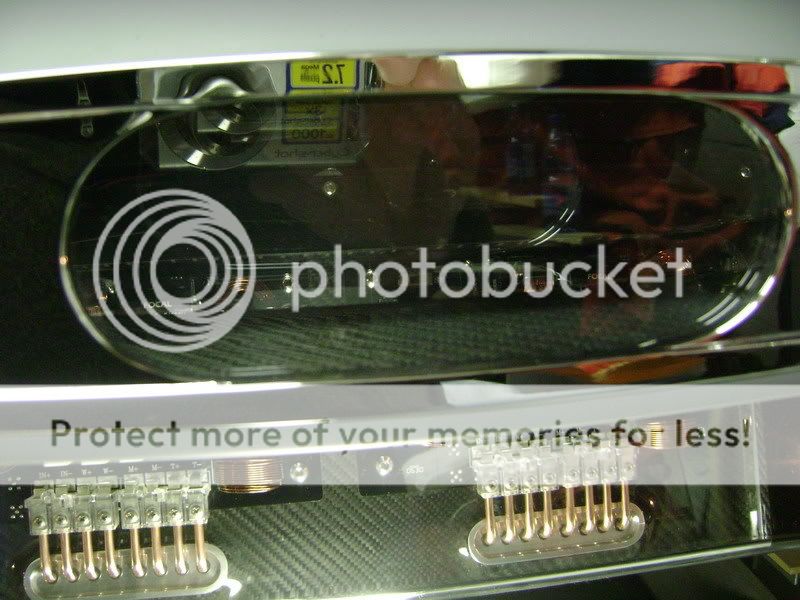
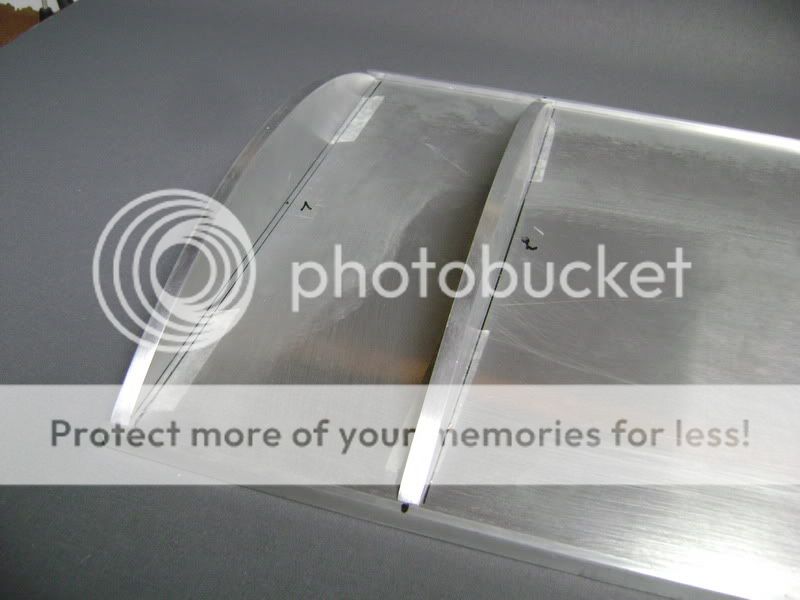
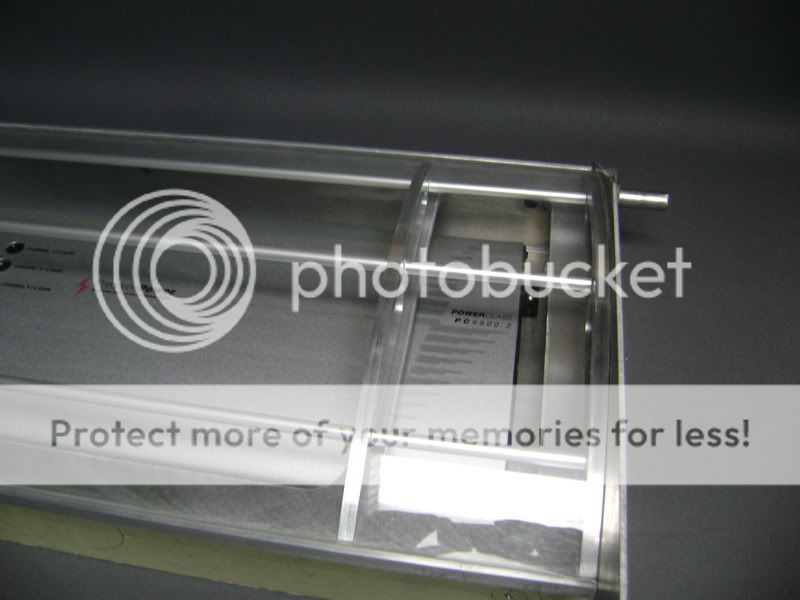
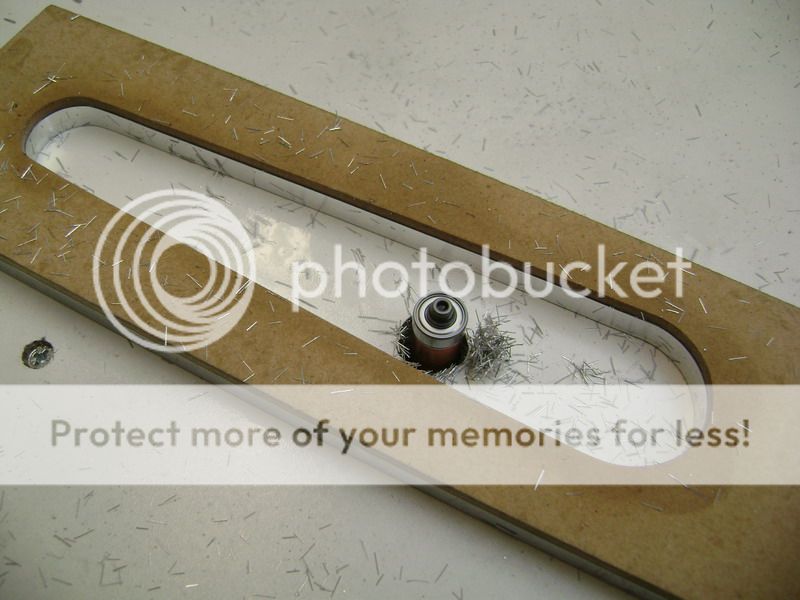
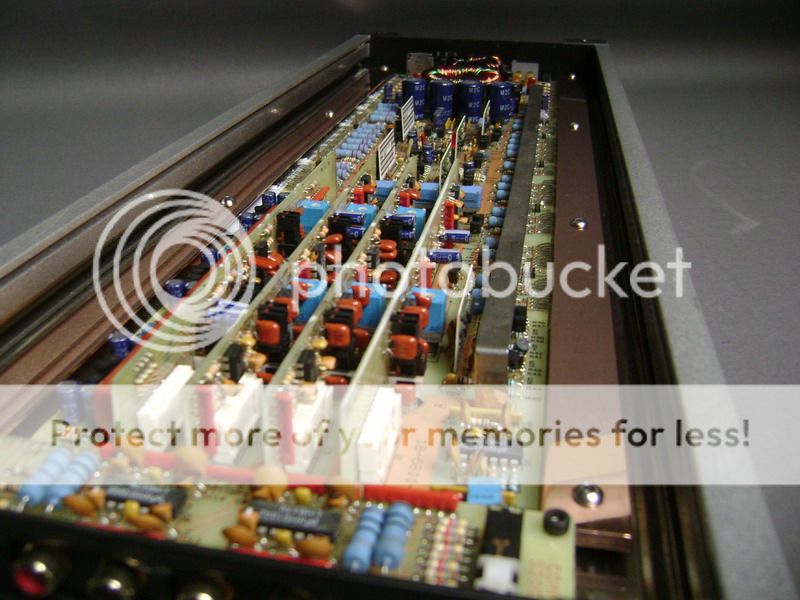
Got some ideas in my head, thatll involve lots of work. This is the plexi where its all about
I tightened this with 6 screws 
Turned it all over and drew out the whole.
Through this whole youll see the amplifier on the inner side. 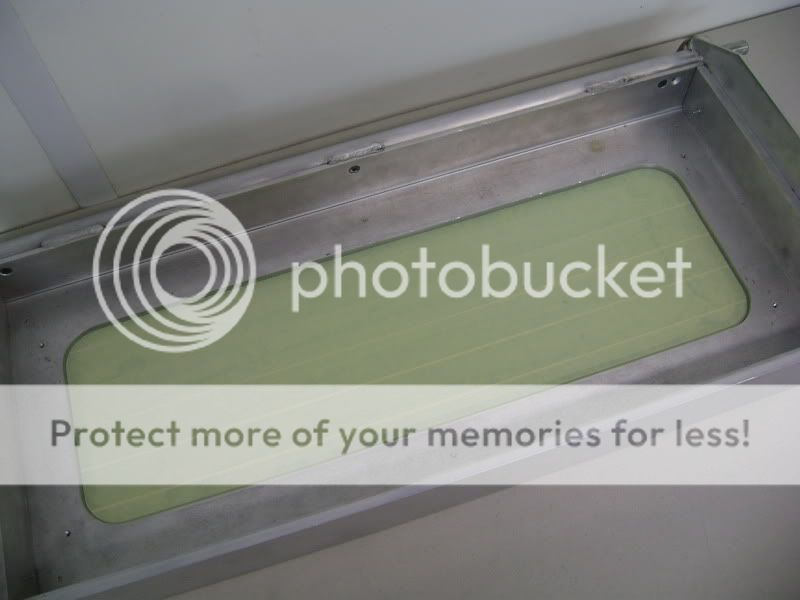
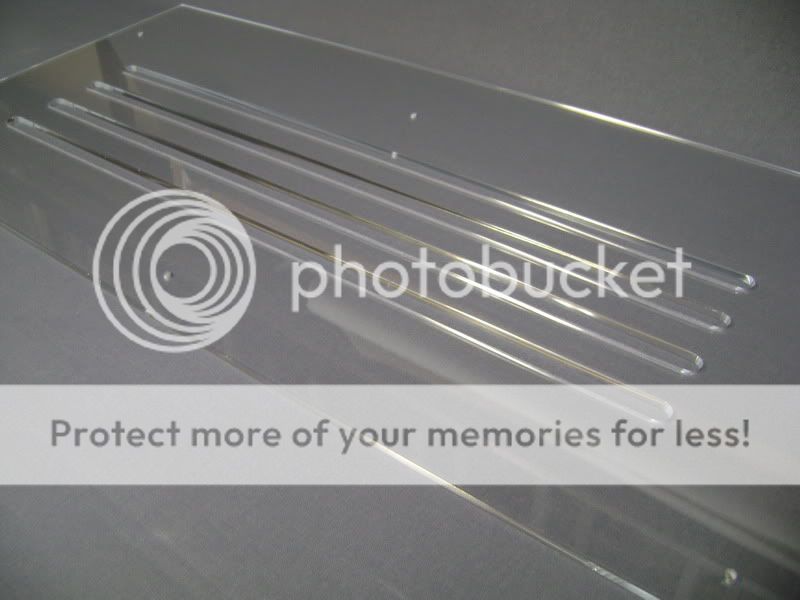
Drew out how I wanted the slots. 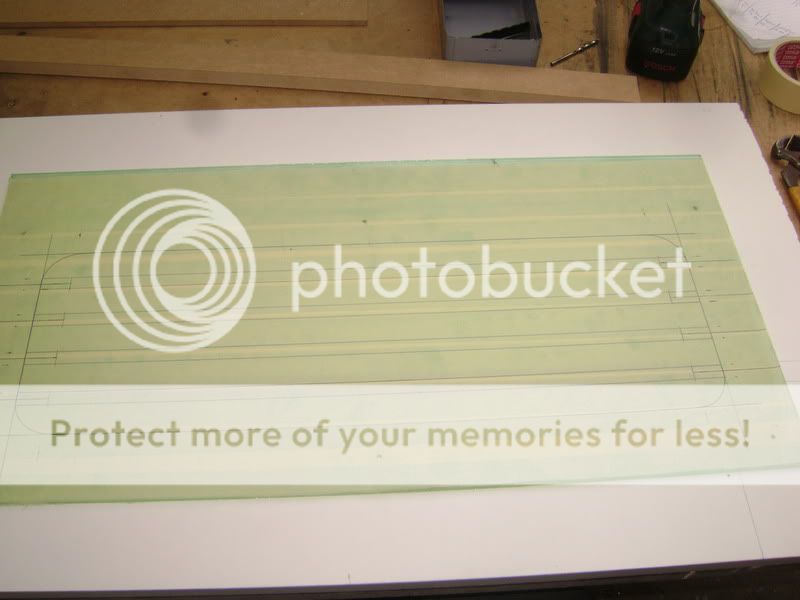
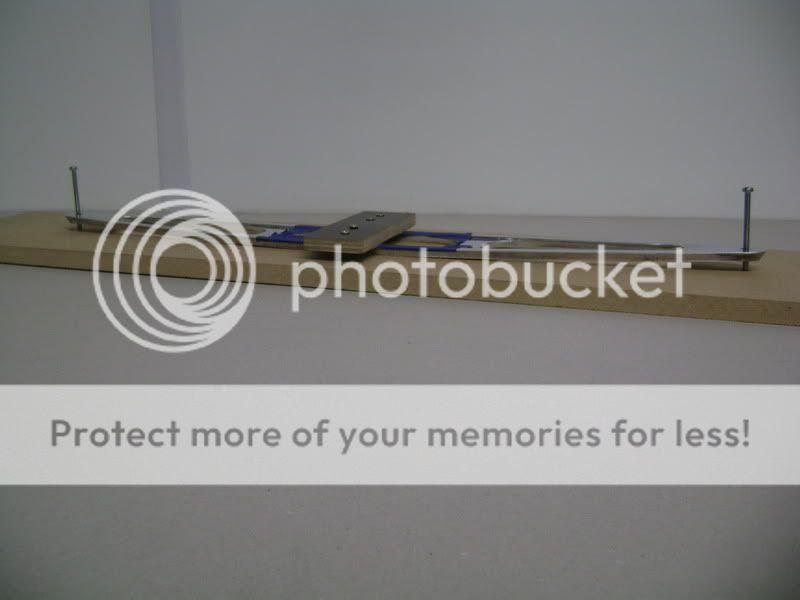
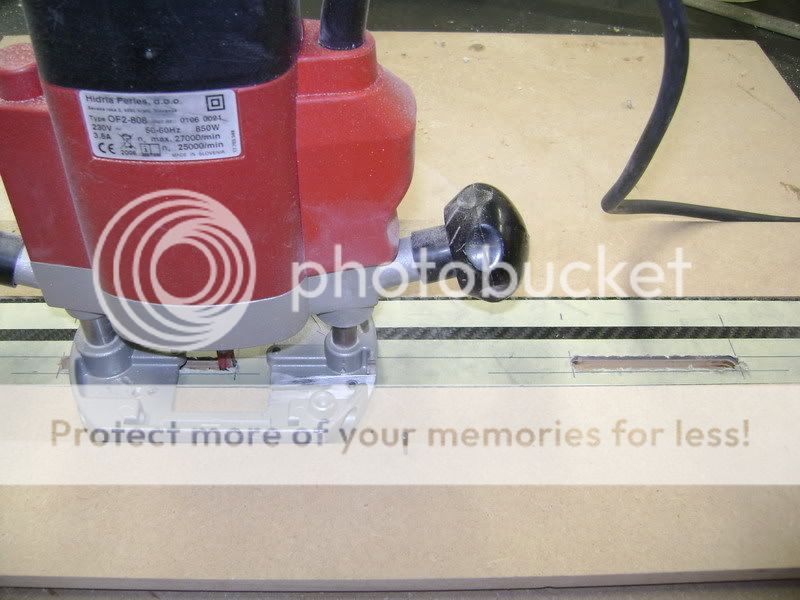
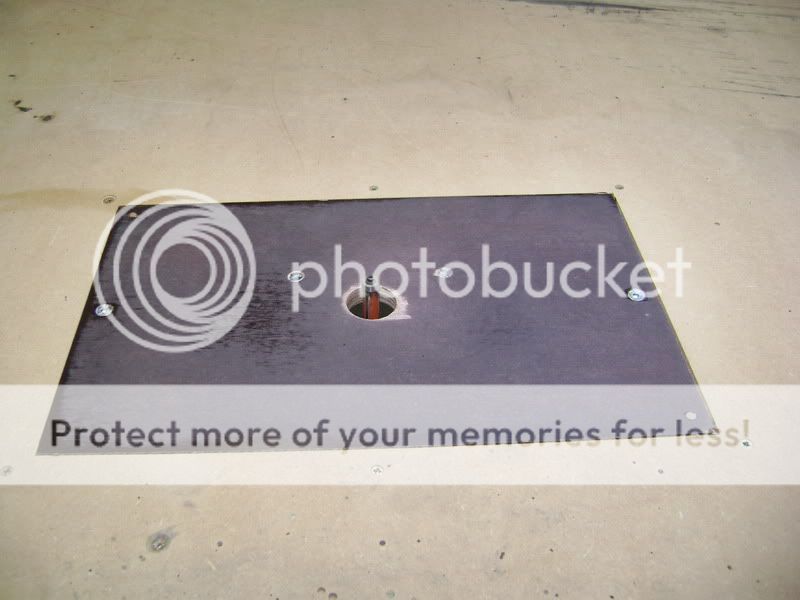
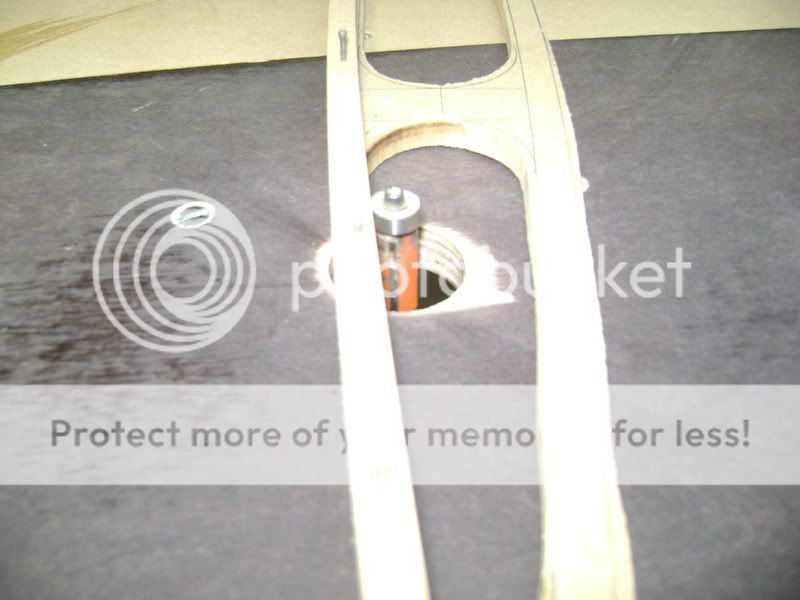
On this wooden plate Im going to mill the plexi. First I made a slot here and there, so the mill wont touch the wood. So I have a nice bottom to work on the plexi. 
Before I begun, I messured out how many mm I had to span/yoke the slath, to glide next to with the mill. 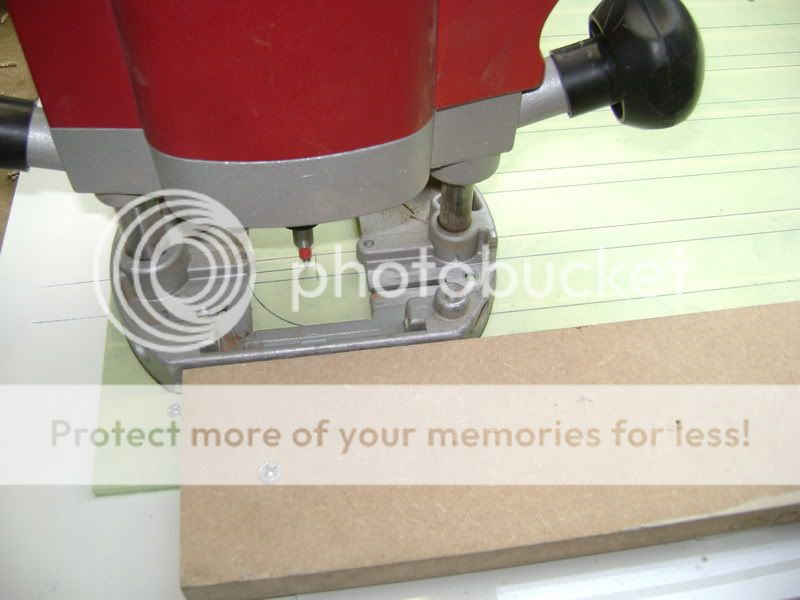
Once this was done, the muppet-show could begin 
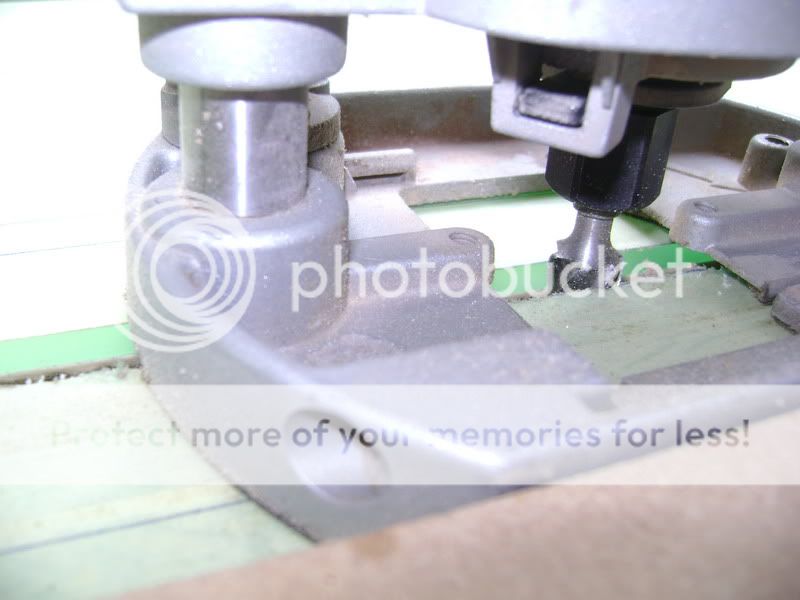
Nr1 is done, 3 more to go 
When you look closely, you see I hit a little slath in the 2nd slot on the bottom.
I did this each time, so my plexi was always straight up when I was making the whole. 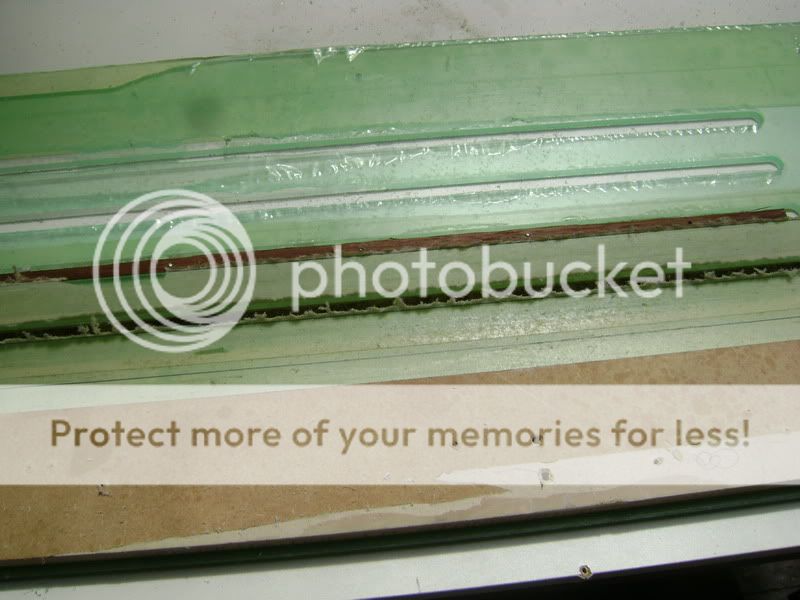
Done with milling, thank you lord I still have all my fingers. 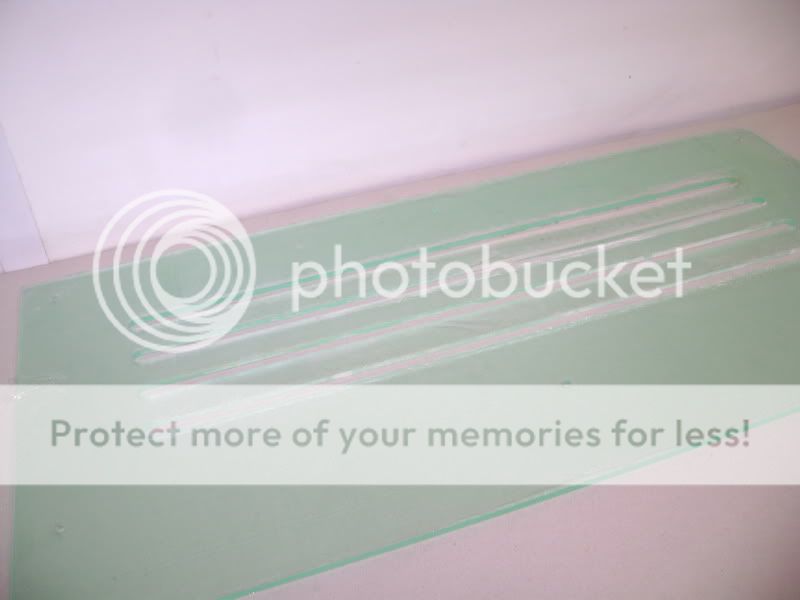
Now the time has come to rubb and polish all of this nice and equally.
Posted By: robolop
Date Posted: August 21, 2009 at 2:22 PM
Ive managed to continue on the plexi plate. Before I started rubbing, I tape it.
When you even LOOK wrong at plexiglass, youve got scratches, so being carefull is the question 
So I started searching around for a fine rubbing material, and this was the best tool I got
and the easiest.
On the left just a ordinary aluminum plate to do the straight sides and lines, on the right a thick pen with around it my rubbing paper, for the curvy parts. 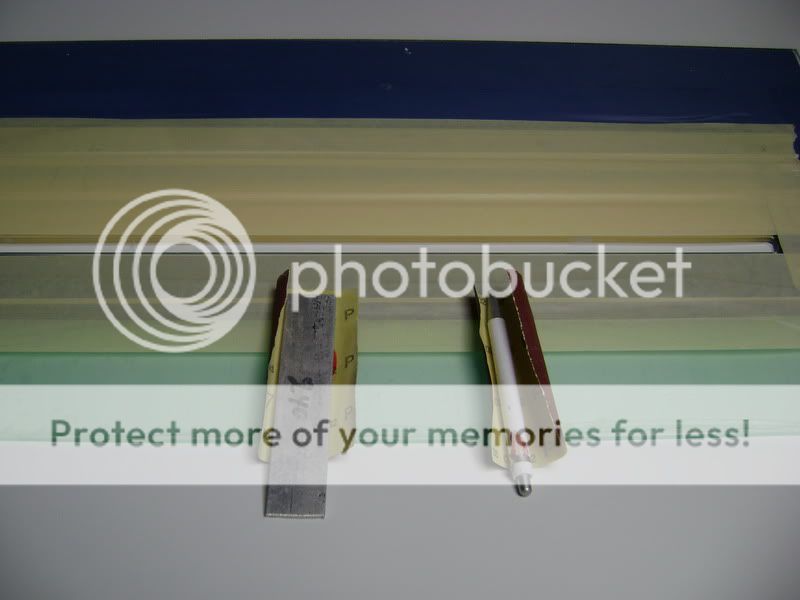
To do this, it took me 5 hours to polisch and rubb it all. 

The bottom where the plexi is screwed on to. The black you see is self-adheside vilt. I used this so I couldnt make any scratches. 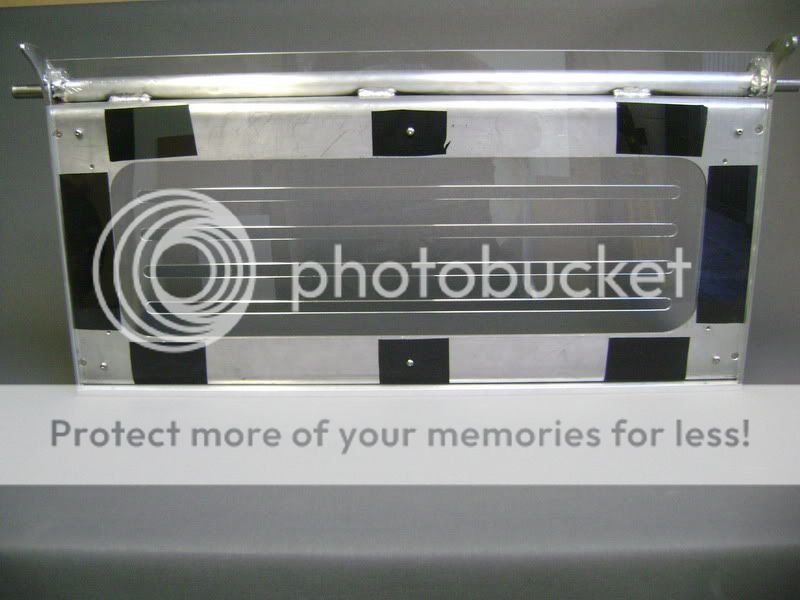
Inside of the
.tank box ? 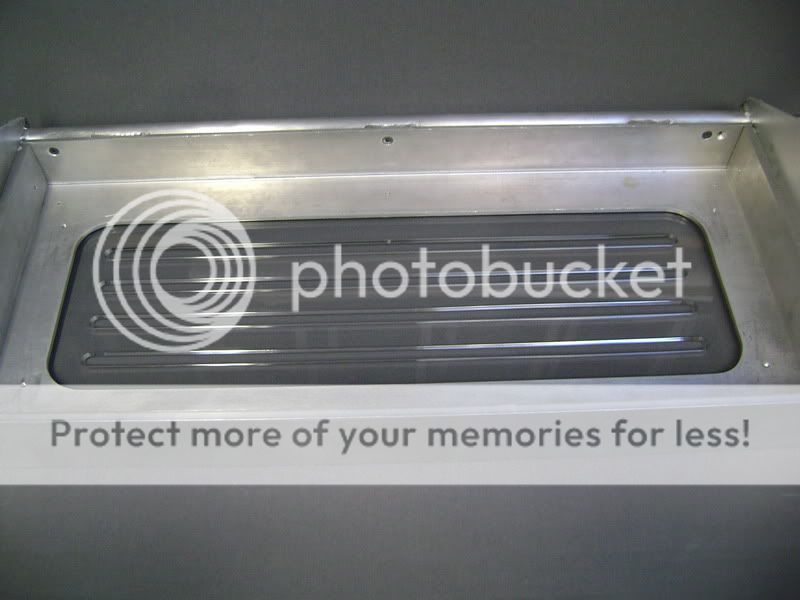
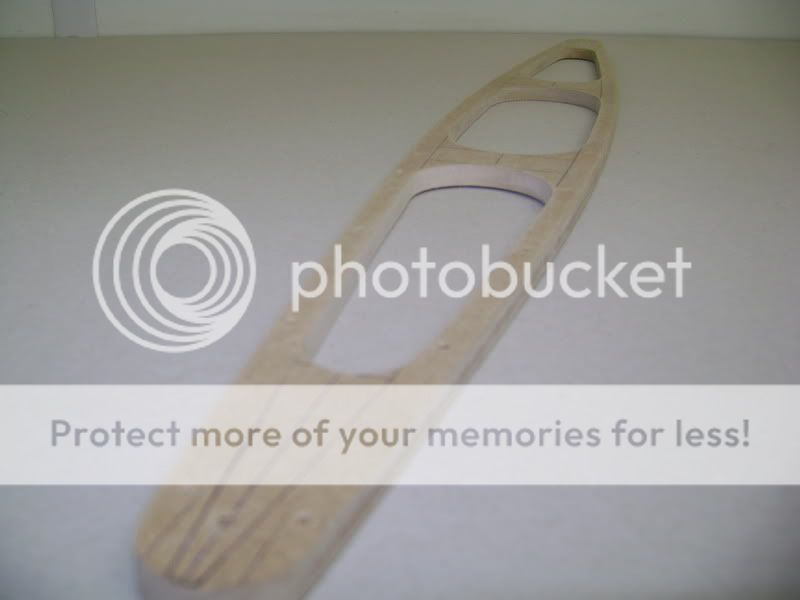
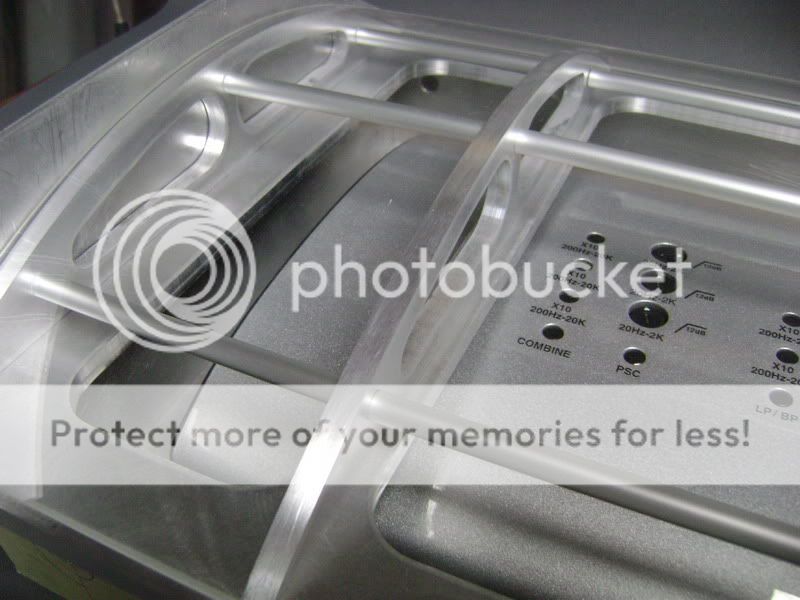
This thing will be my mold for bending the plexiglass. The cover, that comes onto the top of the amplifier, will be round, as you can see.
The MDF (wooden) chassis: 

I covered this with an aluminum plate of 0.5 mm thick, so I got a nice rounding.
Also, I made it more round as it finally has to come.
Once the plexi is cooled off, it always brends a bit more straight again.
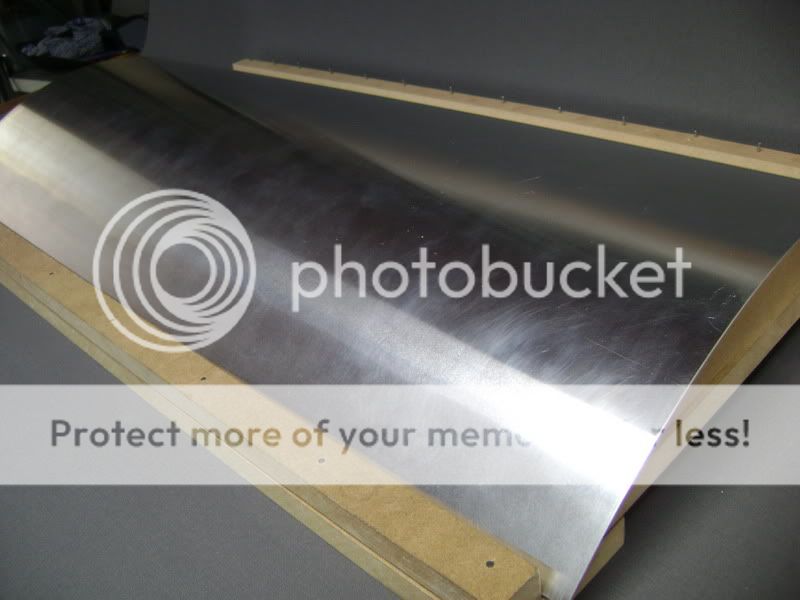
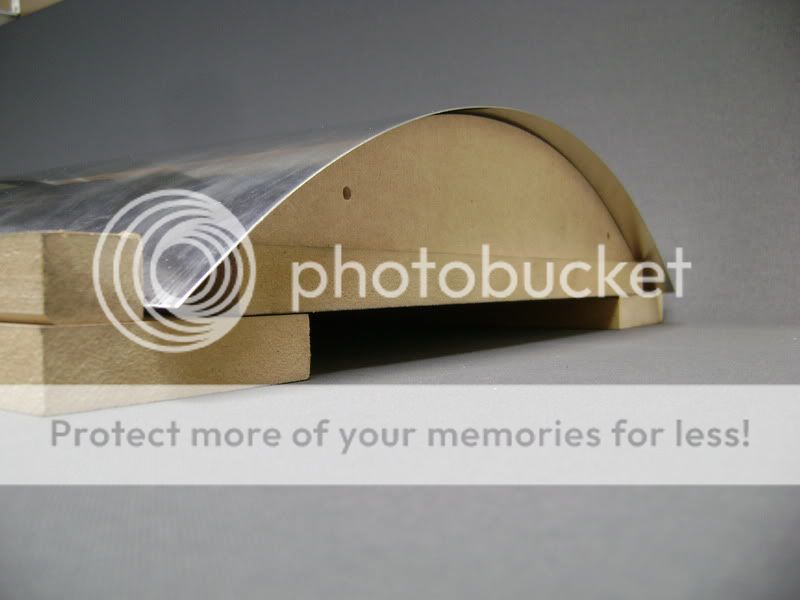
Hopefully this works, cause just on the mold, I had some reasonable work.
Posted By: robolop
Date Posted: August 21, 2009 at 2:24 PM
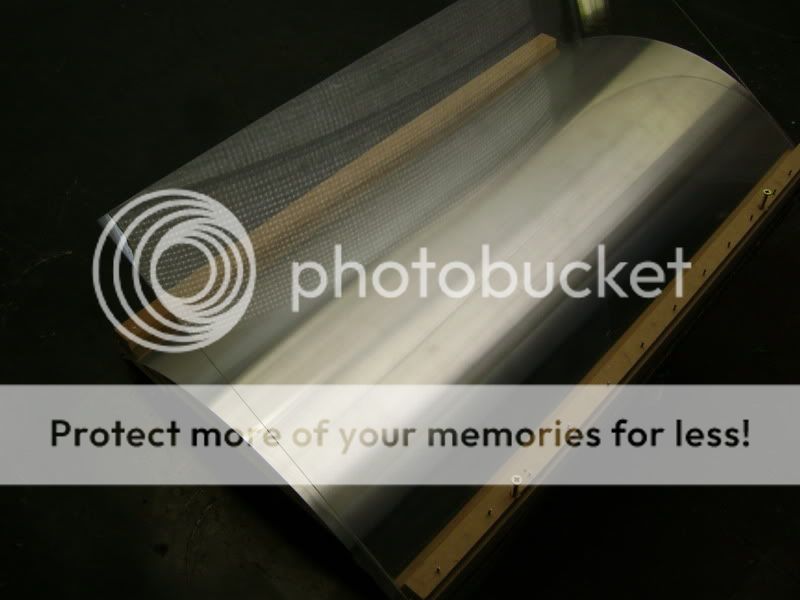
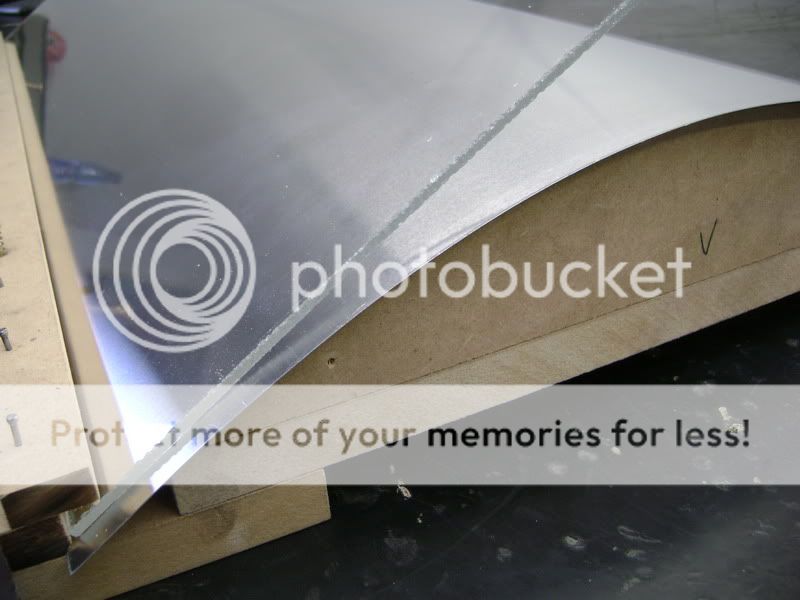
This is the plexi I folded/bended with the paintstripper. 


As you can see, I didnt go as well as planned.
The problem with the paint stripper is that I doenst heat everything at the same time.
This wasnt the case with the plexi of the filtercase.
Just needed one fold there, so just had to heaten only one line.
With this big piece, the plexi glass cools dont too fast, and the temperature isnt the same everywhere.
So actually, a piece like that, has be heated in an oven between 120 150 degrees Celcius.
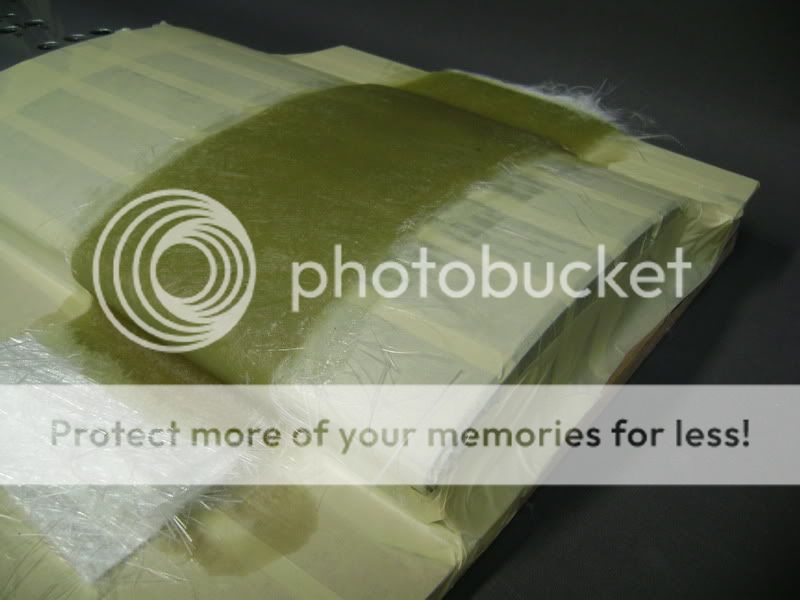
Since I didnt find an oven in that couple of days, I bought me a plexi plate.
You cant boggle for long now, do we
I think this looks mucht better already. 

These two pieces come on the sides. So youll get the idea its one big, entire piece. 


I worked some more on the two aluminum sides of the amplifier box, with the uppermill.
First tightened those thick plates. 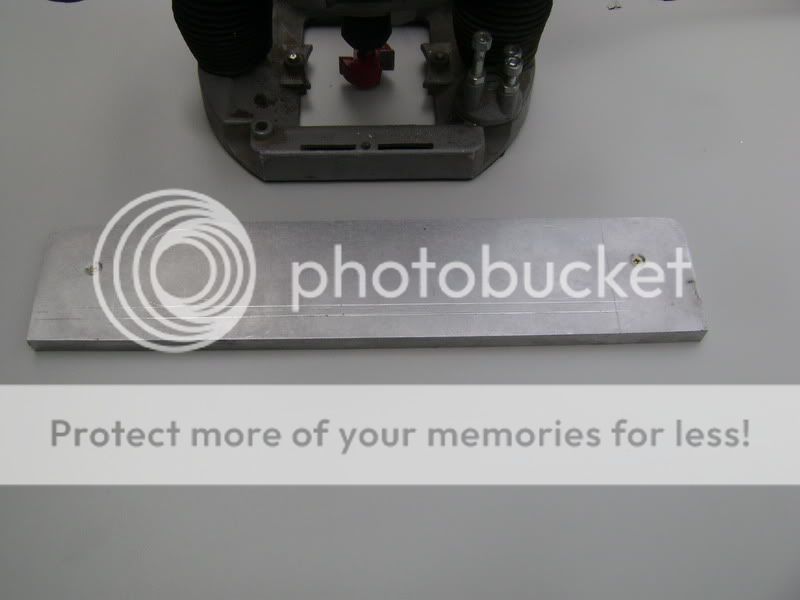
Planted the mill.
The meaning here was to remove some millimeters, cause there has to come a carbonkevlar plate.
These are the sides that come on the outerside, to service as coverplate. 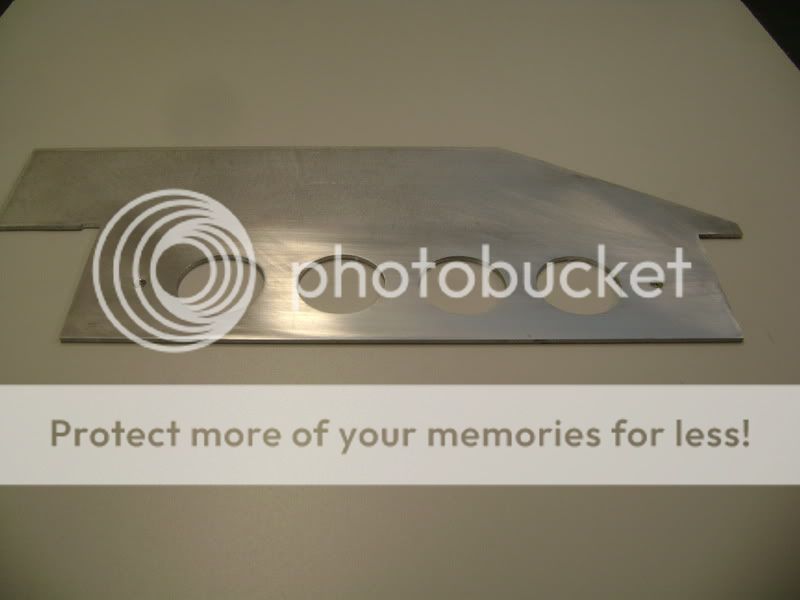
You can see on the holes, that the design here will be the same as the sides of the filtercase.I also milled away a couple of mms here. 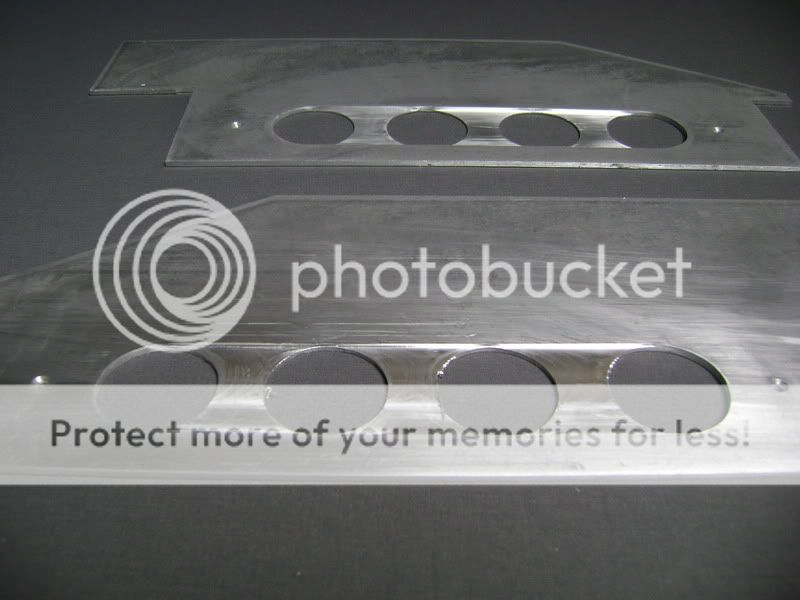

Abraded it all firmly so I could polish the aluminum. 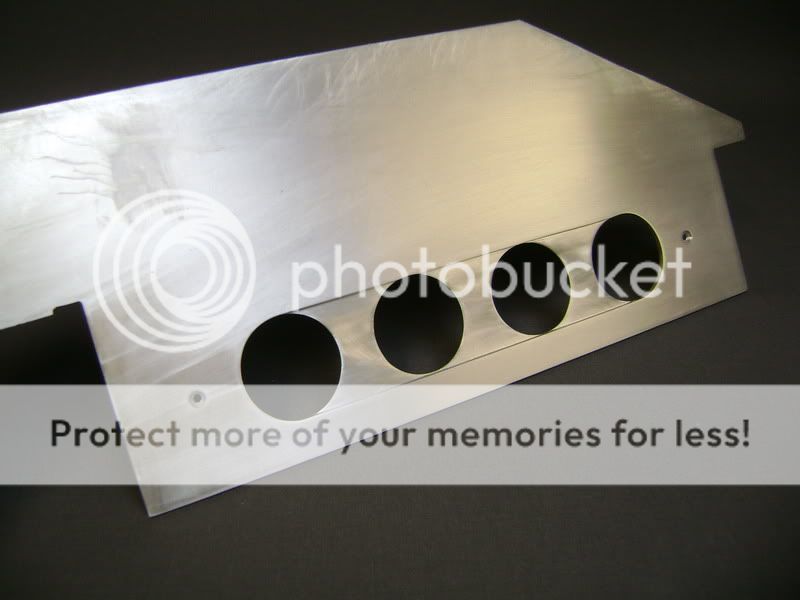
Here an example what it will look like 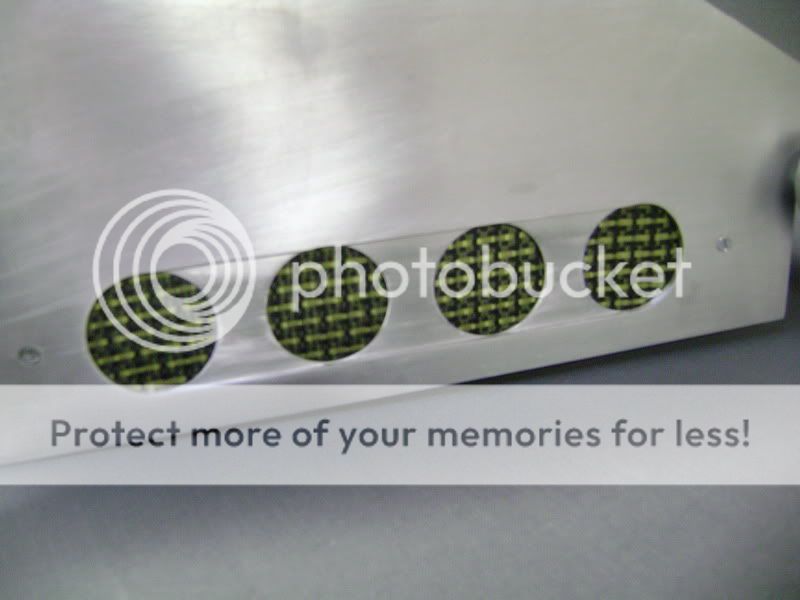
Have to give a rounding on these 2 plates, cause the plexi comes in between. Of these pieces of aluminum Im going to make a frame, where the plexi will rest in.
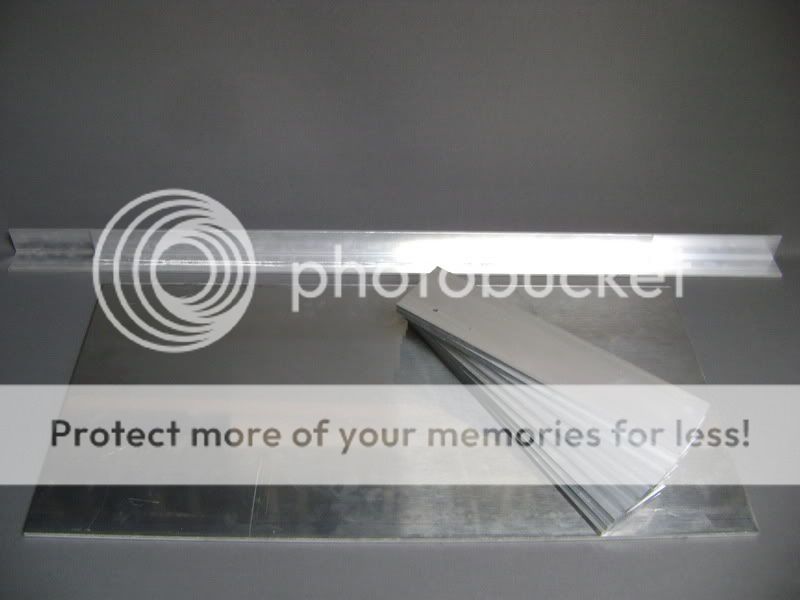 The big plate i 8mm thick The 8 other ones are 6mm thick 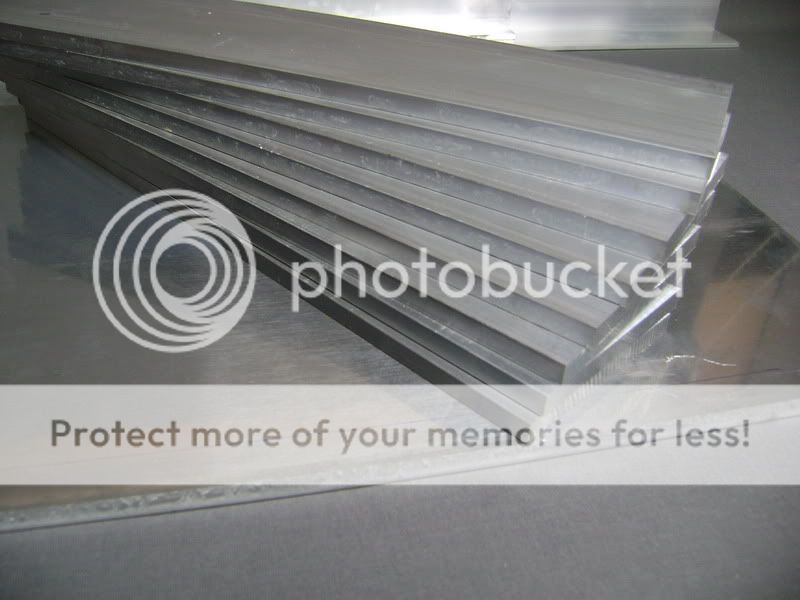
This isnt going to be all, Im going to use some other aluminum profiles also, but havent got the mesurement of those ones. Many and many hours of millwork will get into this, but when it all works out like I have it in my head, itll be pretty cool. Oh yeah, Ill use some carbon fibre here too, but thought you gus will guessed that already..
Posted By: robolop
Date Posted: August 21, 2009 at 2:25 PM
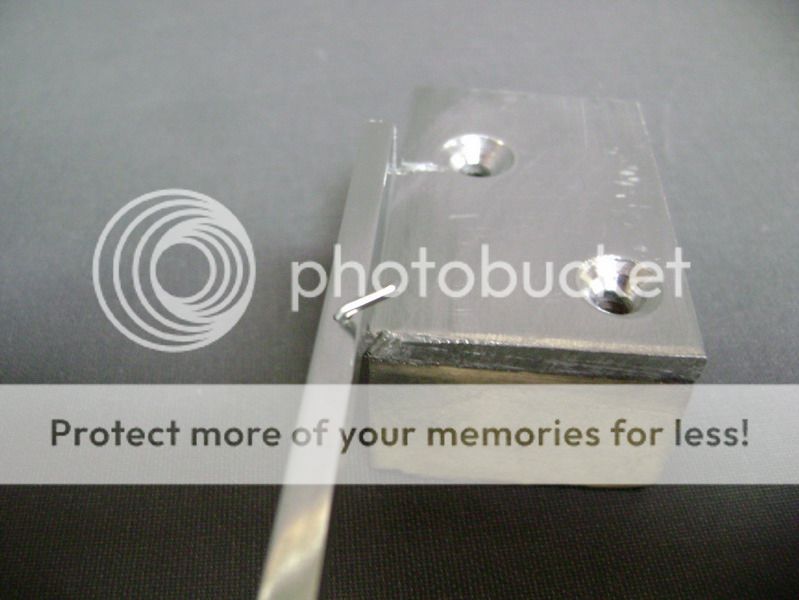
I made 4 aluminum supports of 8mm thick.
These have the same rounding as the plexi.
First, I made a mold out of mdf. After that, I drawed out the aluminum piece, and sawed it out.
after that, with double sided tape, I sticked it all together. 
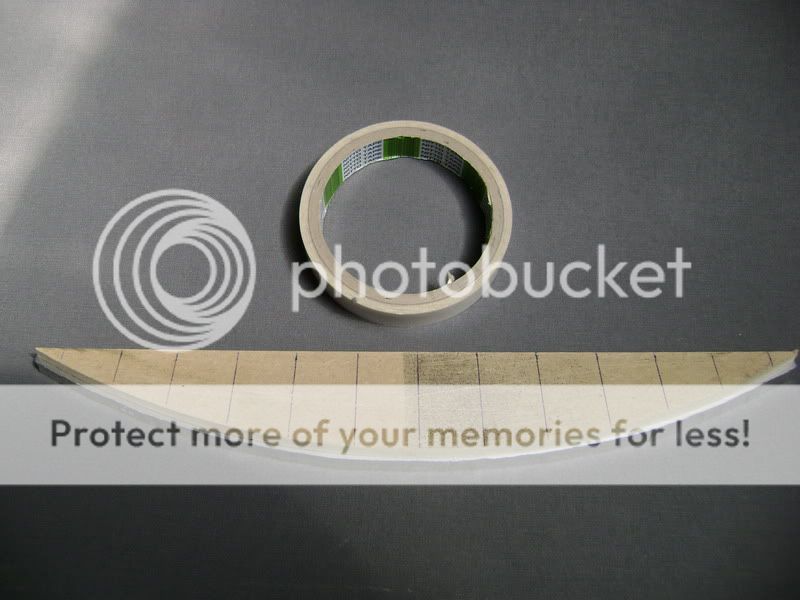
Once this was done, I held it all to the copy-mill 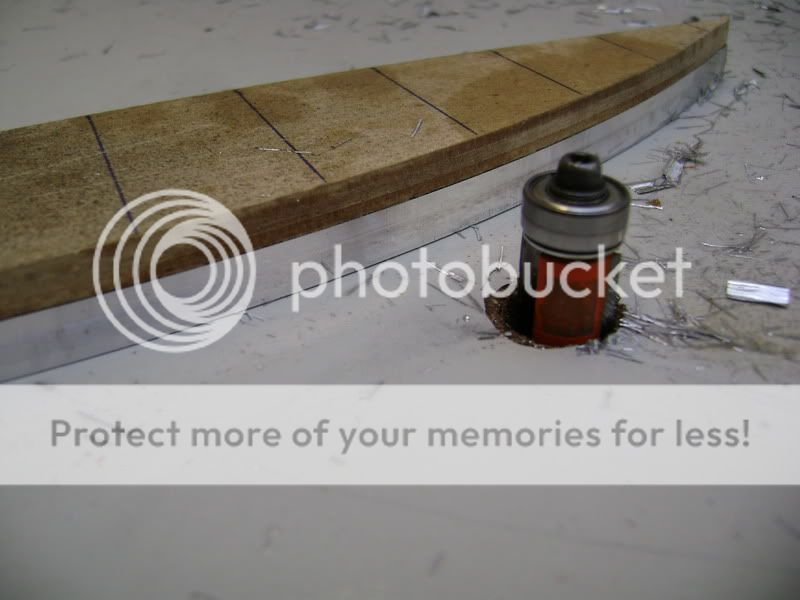
Here a picture of how it will look. 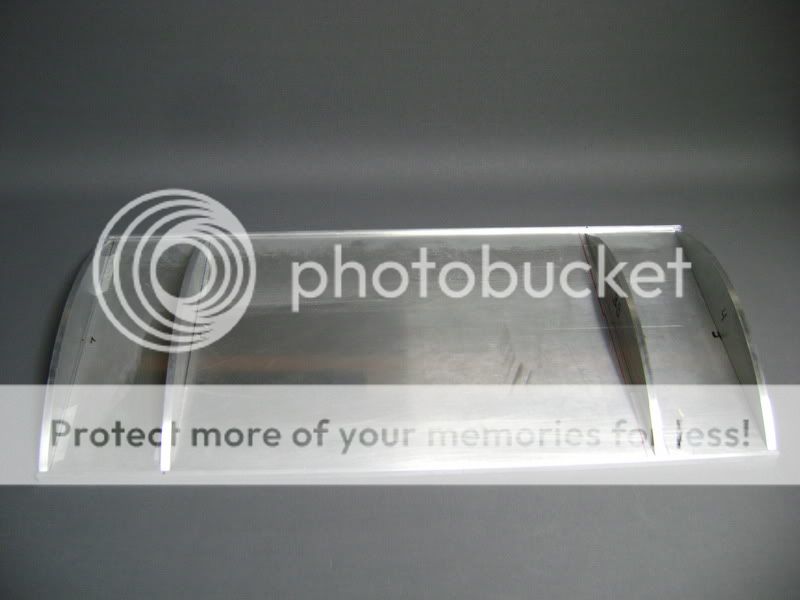
The next step was to modify the supports, cause it looks a bit simple like this.
The lower plate is the model I made.
Its only 4mm thick. 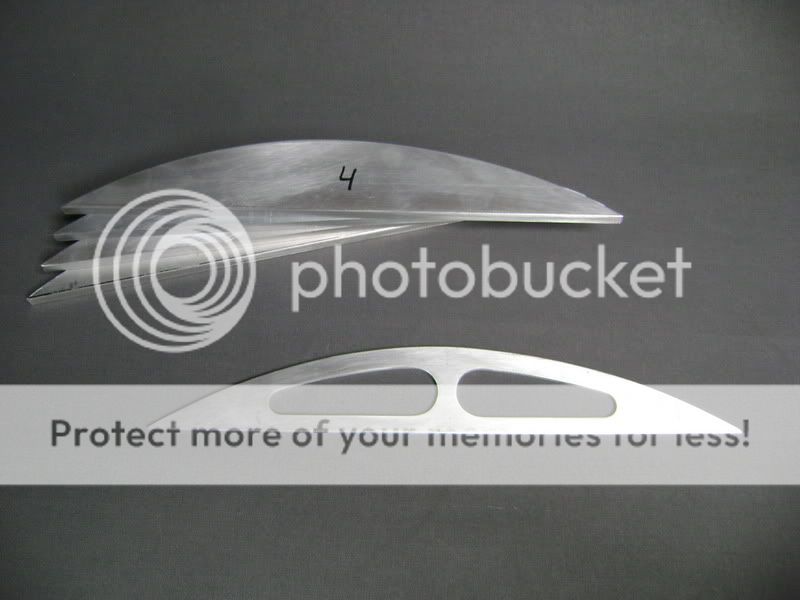
In the piece I needed, I got rid off the aluminum, and sticked it all together again, and then got the mill back in there. 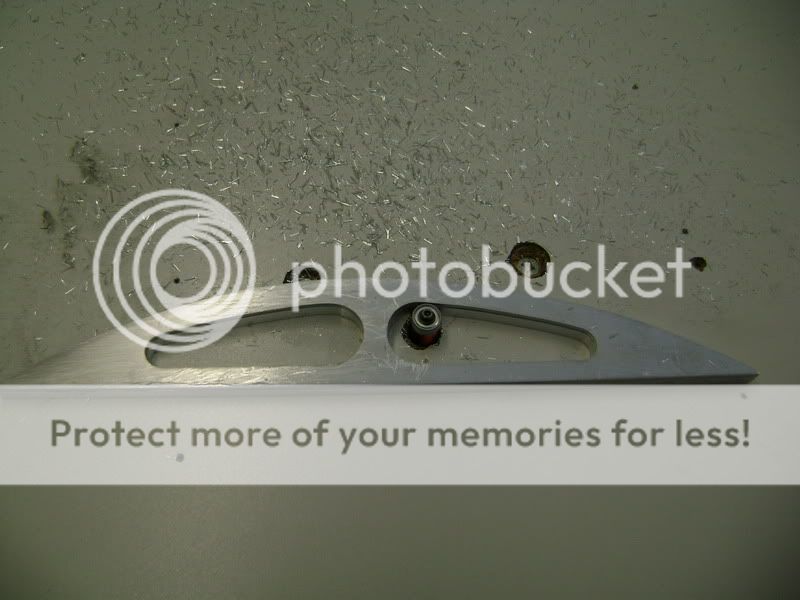
Looks way cooler according to me. 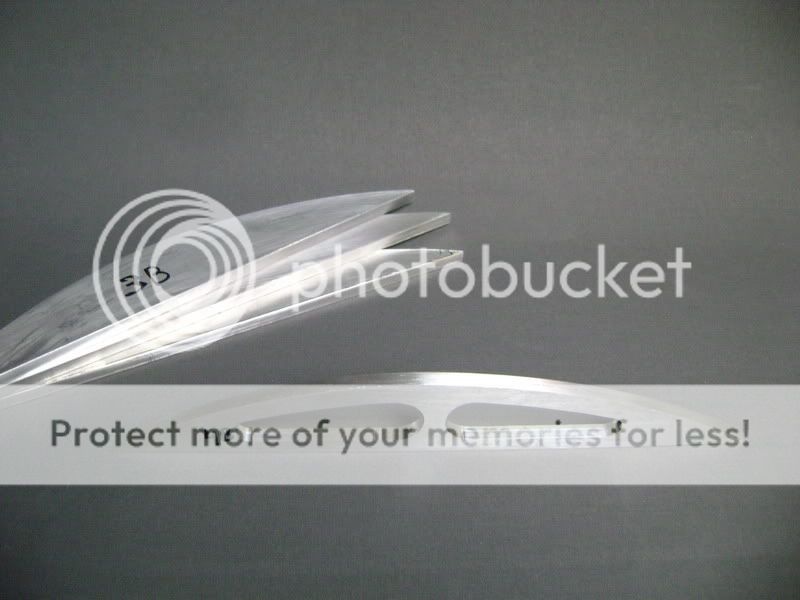
The other 3 will suffer the same cause.
The pattern looks good, but the support still doenst look the way I wanted too
So I guess Im going to modify this some more. Too some issues I didn't get the chance to do much on the ICE.
But now , a 'little' update.The 4 toggles where the plexi will lay on to are finished 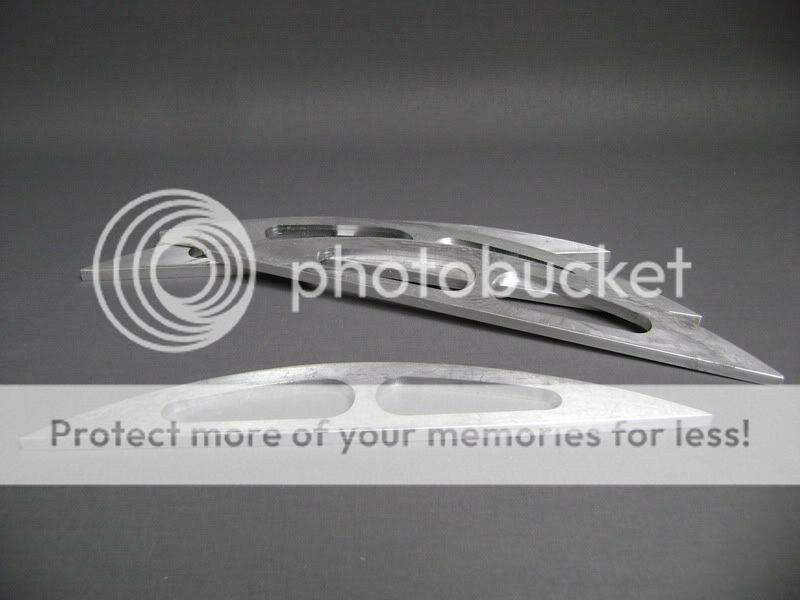
The alu-plate of 8mm where the toggles will get onto. 
Offcourse, some holes were needed here, otherwise you wouldn't be able to see the amplifier.This is the mold I made of 4mm thick MDF wood. 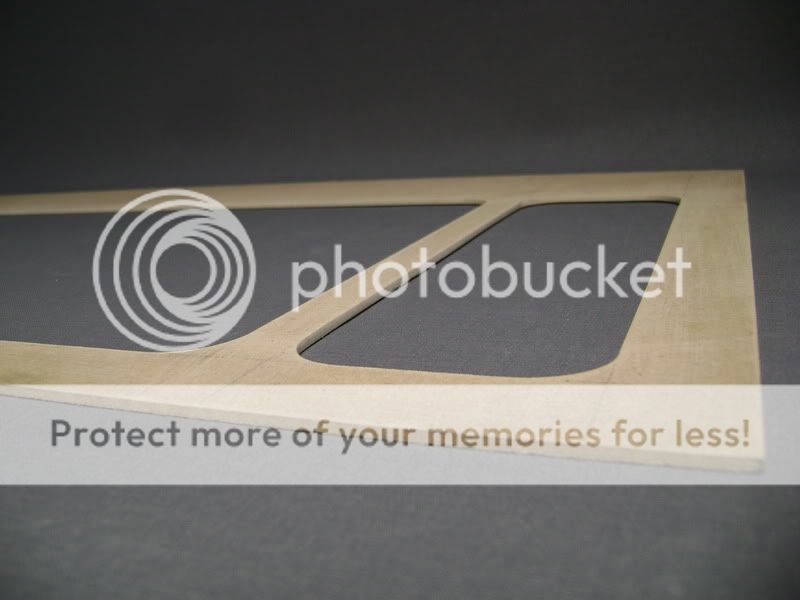
Layed this on the aluminum and drawed it out 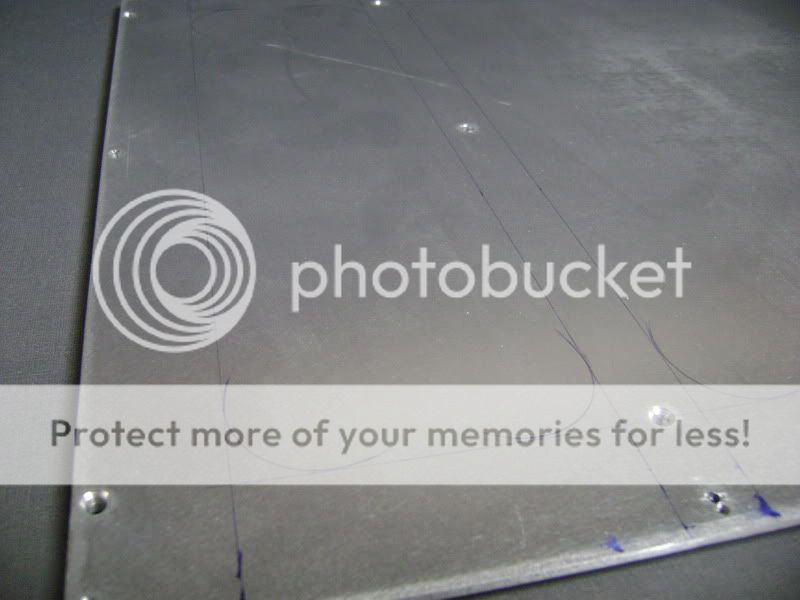
Then, I drilled some holes, and sawed it all out with the electric jigsaw 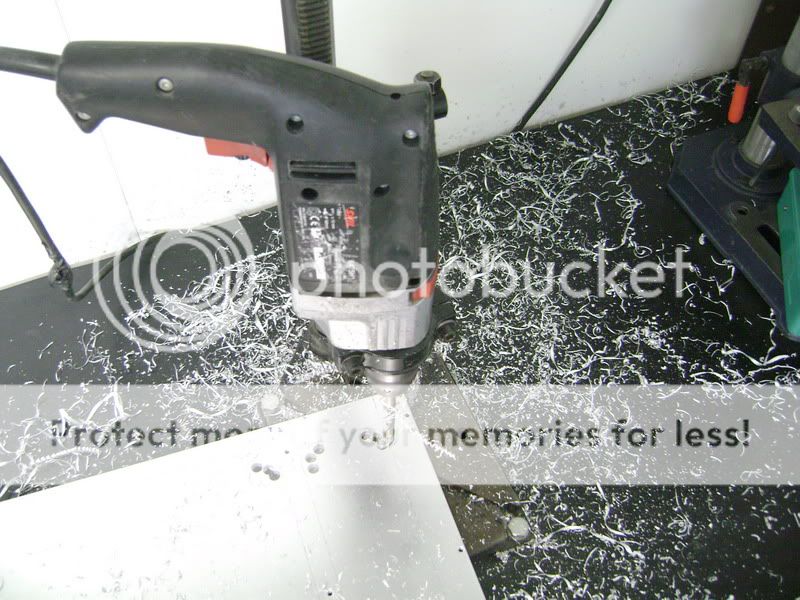
Pasted the MDF mold on to it. 
Then I mounted my upper-mill once again under the table to do some dangerous stuff :) 


Here the result 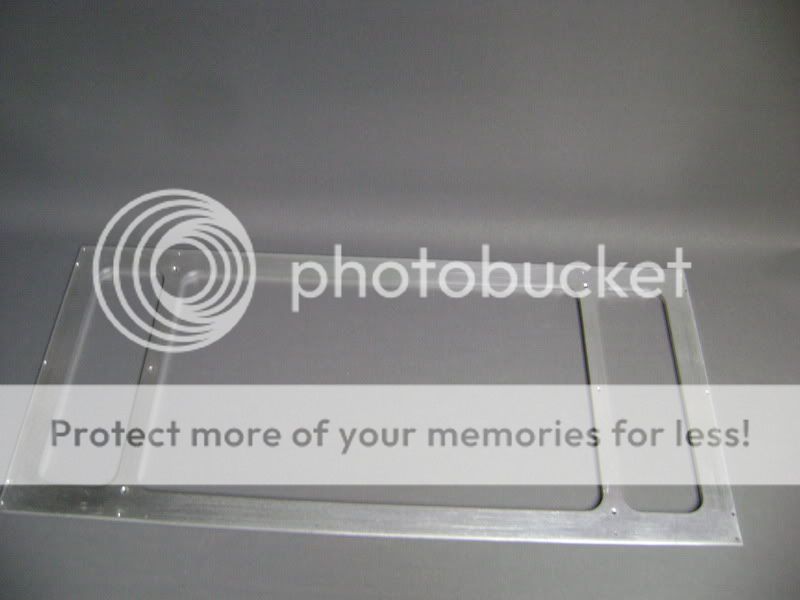

Then I 'modified' the outer toggles.
Because a M6 bar with screw-thread will get into this one, I had to drill the hole much bigger, so the nut is sunk into it all. 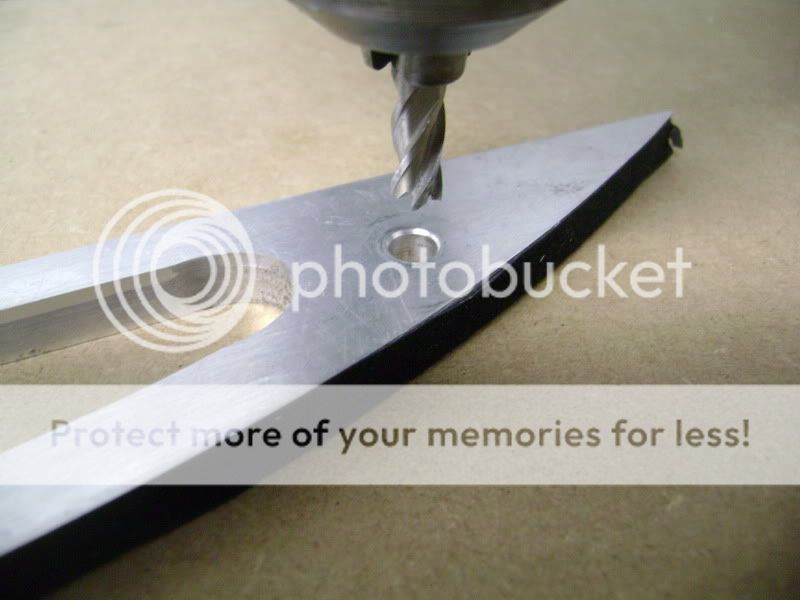
Made it big enough so it would be possible to get a 10 on there as well 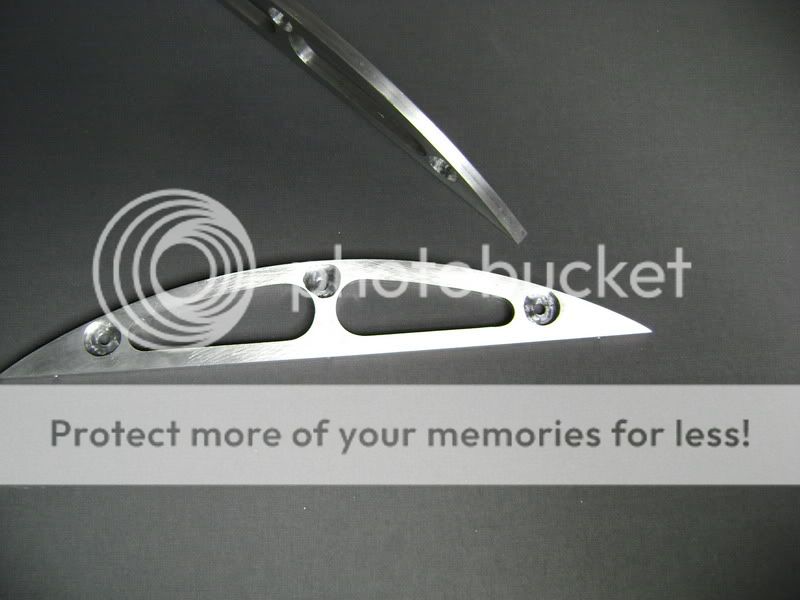

In all toggles I tapped a screw-thread of M5, to fasten them at the bottom 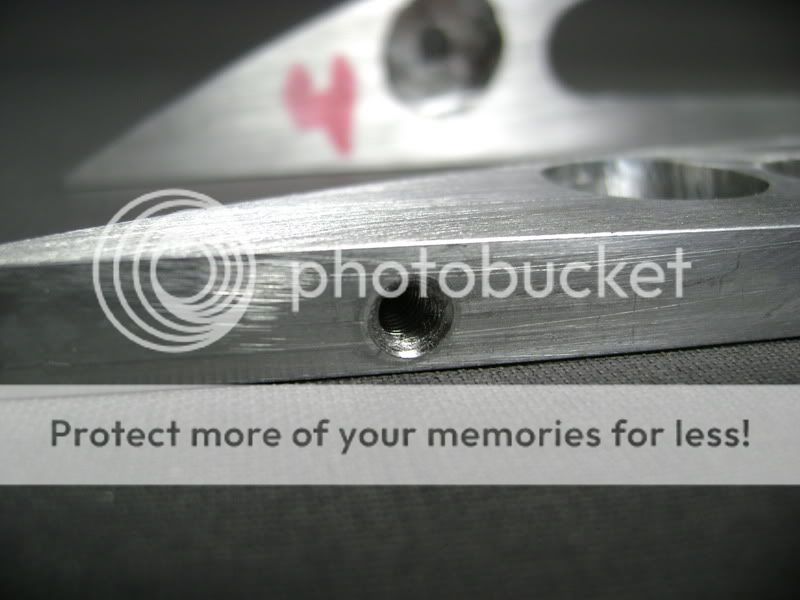
Once I had all of this, I could begin the mounting. 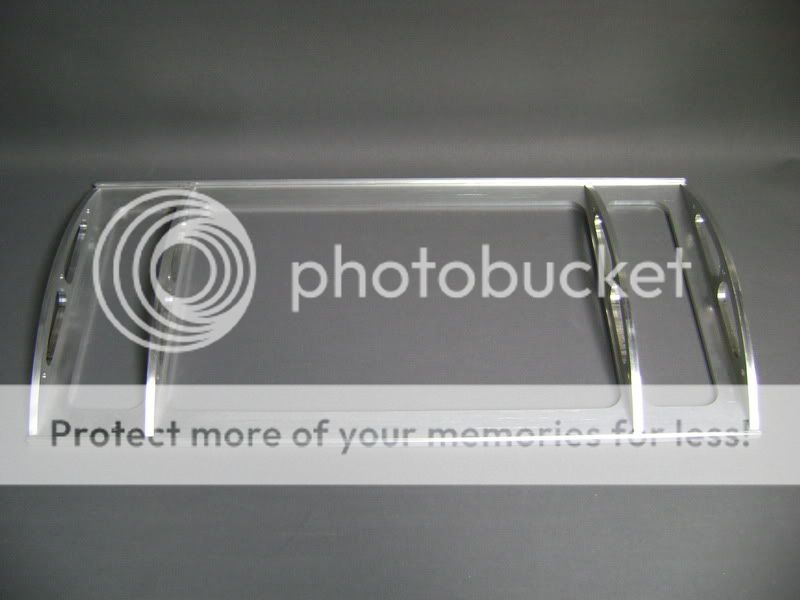
The front and back of the thick plate, I milled in a gap whereto I screwed a big L onto.SO I have a nice finishing touch, and the plexi is tense. 
Posted By: robolop
Date Posted: August 21, 2009 at 2:27 PM
Here are some aluminum parts I'm going to work with in the cover.
The 9 tubes you see on the fore-ground are from anodised aluminum.
On the backside you see 3 threadstaff of m6 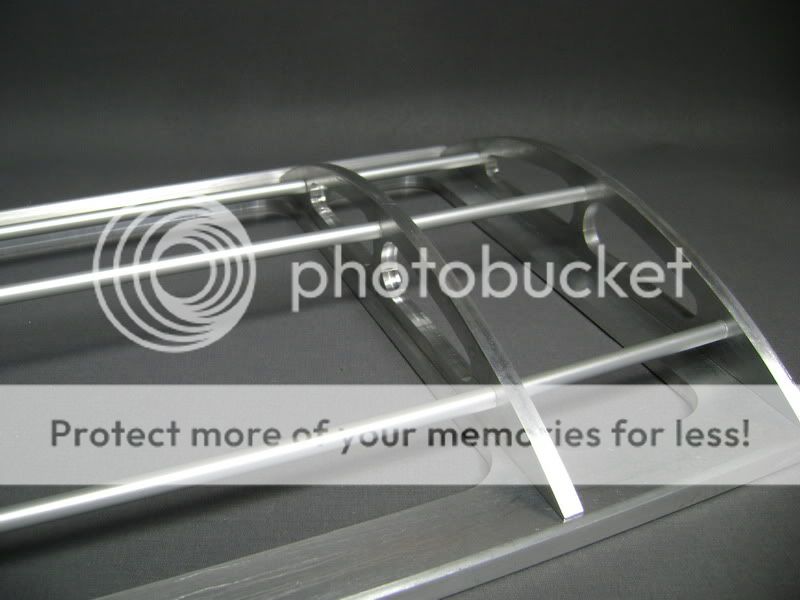
Here you see why I had to sink in the m6 screws. 
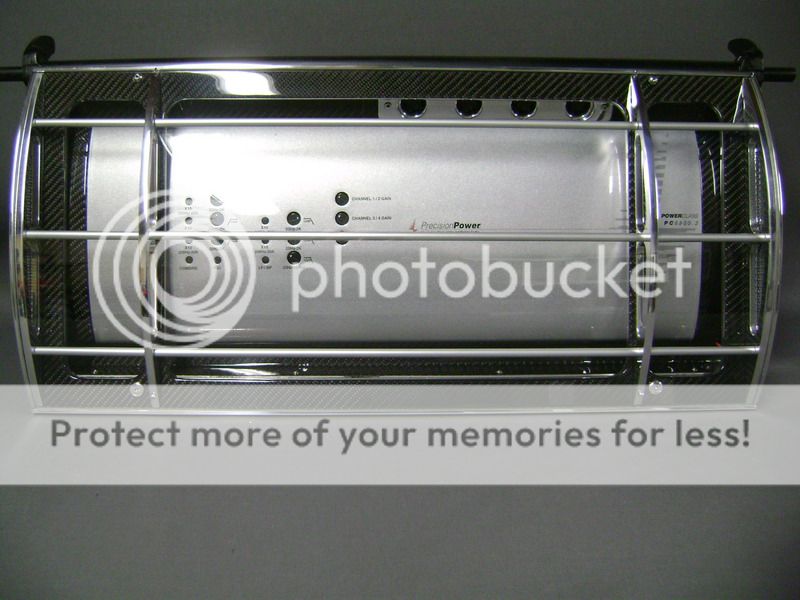
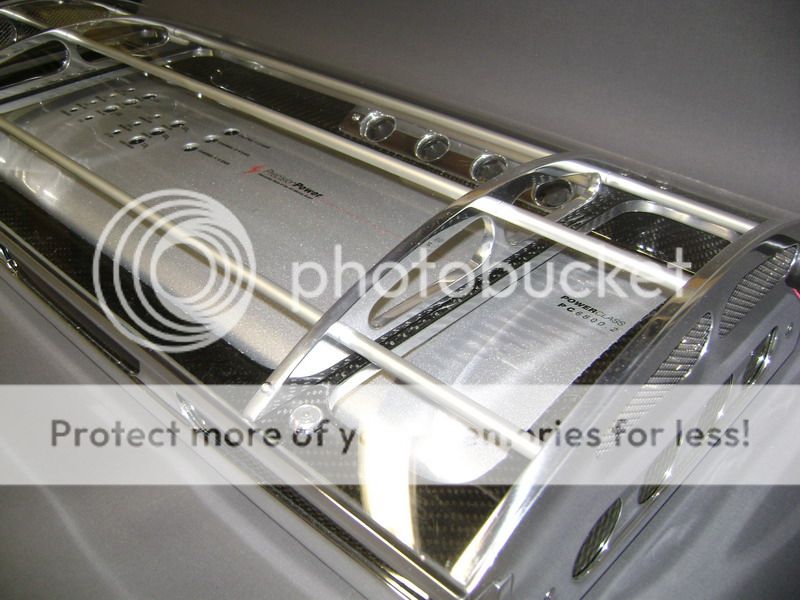
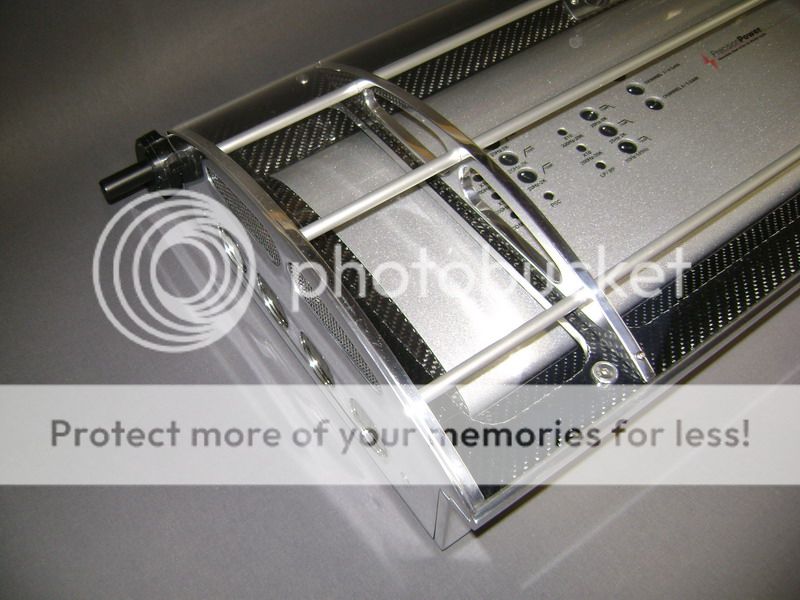
A picture here from the complete part, with the plexi on.I will have to screw this tight still, so I stays right where it needs to be. 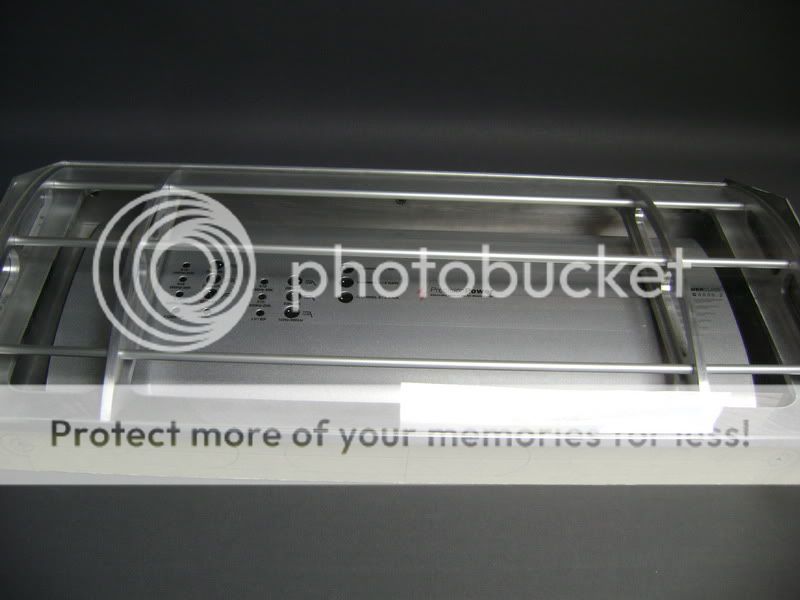
The whole part makes me feel that the amplifier is behind bars, in jail. 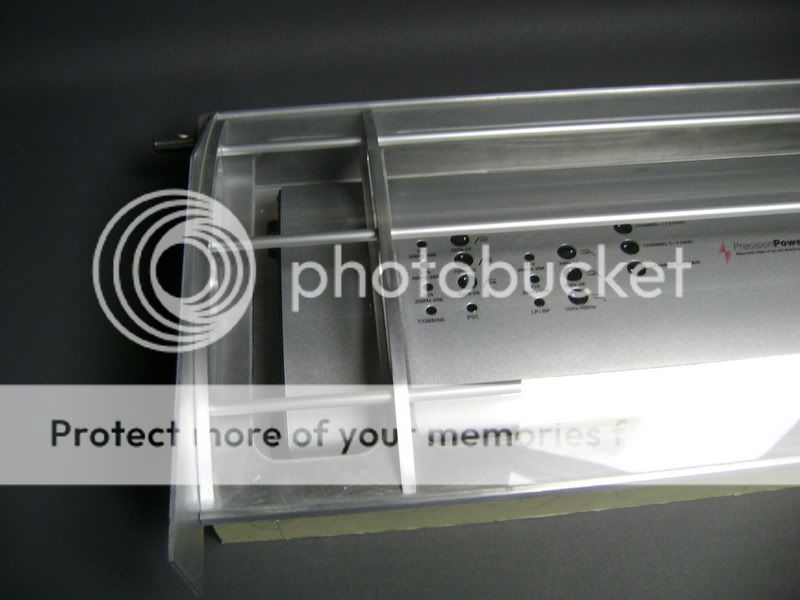
As you may see, on the left, and on the right, I have a gap of about 4cm for the cables (for the amp)
As you may know by now, I'm not a fan of cables in an install, so...
I made 2 pieces of carbon fibre for the sides, so the connections will not be visible.
First, I made a fiberglass mold of the amplifier. 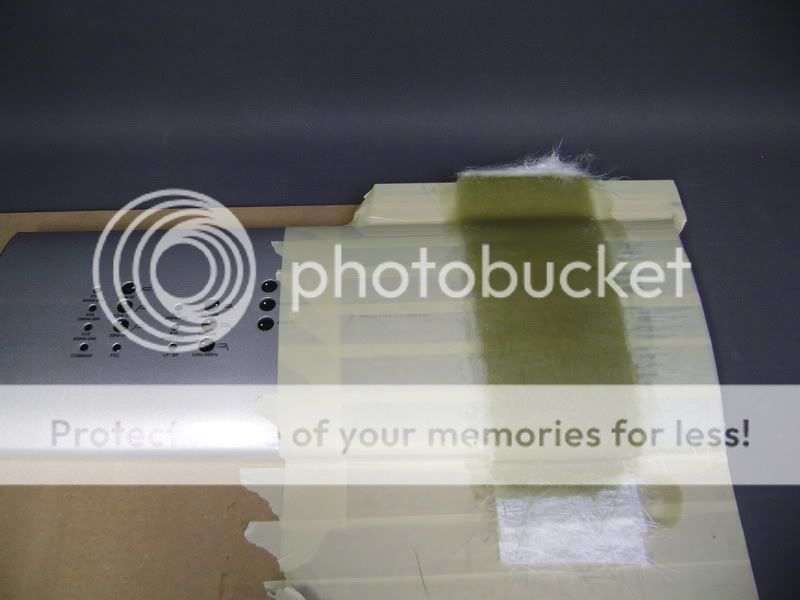
Once this was ready, I rubbed out the lines of the tape. 
finished, so put on a layer of carbon in there. 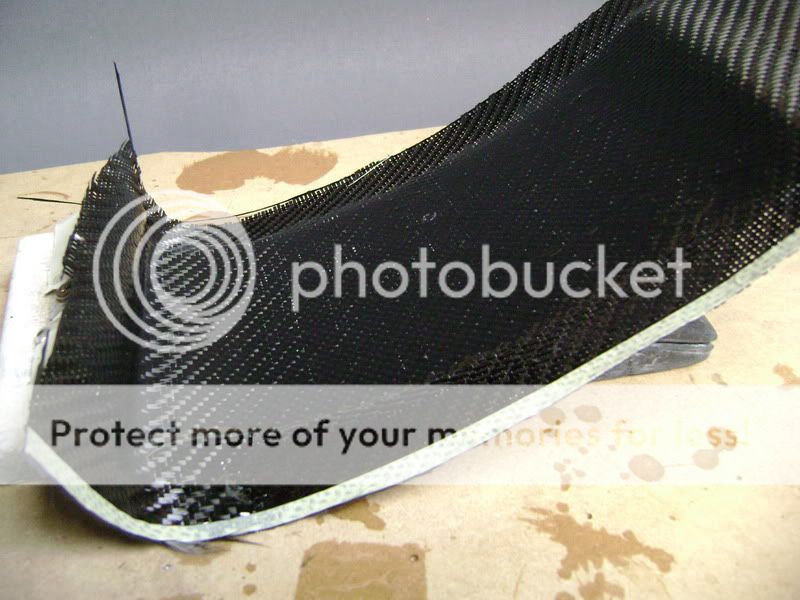
By doing this , I learned something really stupid. Because I never took a mold of thins I make, I don't have the necessary products here to do that.
So I solved this on a idiotic way, really.
I just bought some plastic tape of 50cm? 50mmwss wide.
Taped it in the mold, and rubbed it in with polishing wax.
here you see the tape. 
So you see, somethings will go with simple methods.
After this all, I put in the disc in the carbon fibre, and rubbed the piece nice and straight with my giant abrading block. 
This is what I needed! 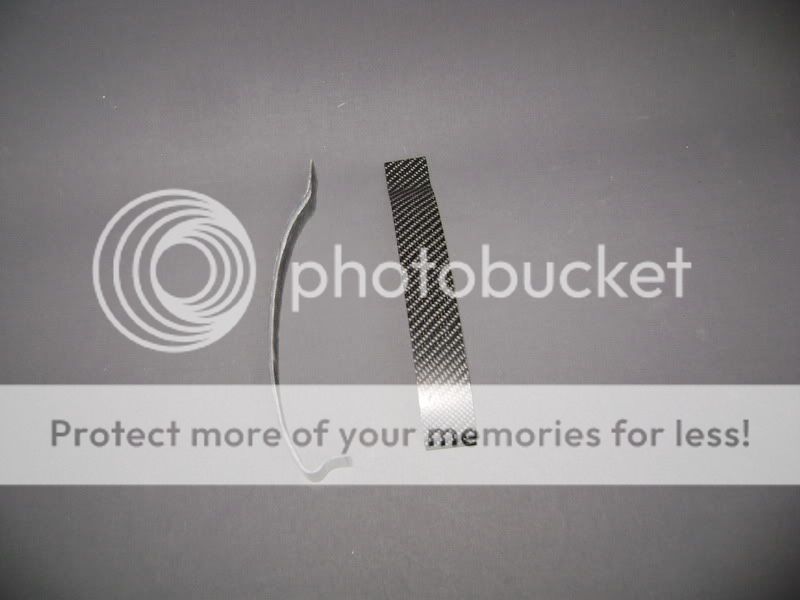
To tighten these 2 pieces, I have to make some aluminum toggles on the amplifier, so they connect with the rest nicely.
The carbon plates still need some layers of epoxy.
Posted By: robolop
Date Posted: August 21, 2009 at 2:28 PM
If made 2 toggles to tighten the carbon pieces onto the amlpifier. 
Here , everything is on the amplifier. 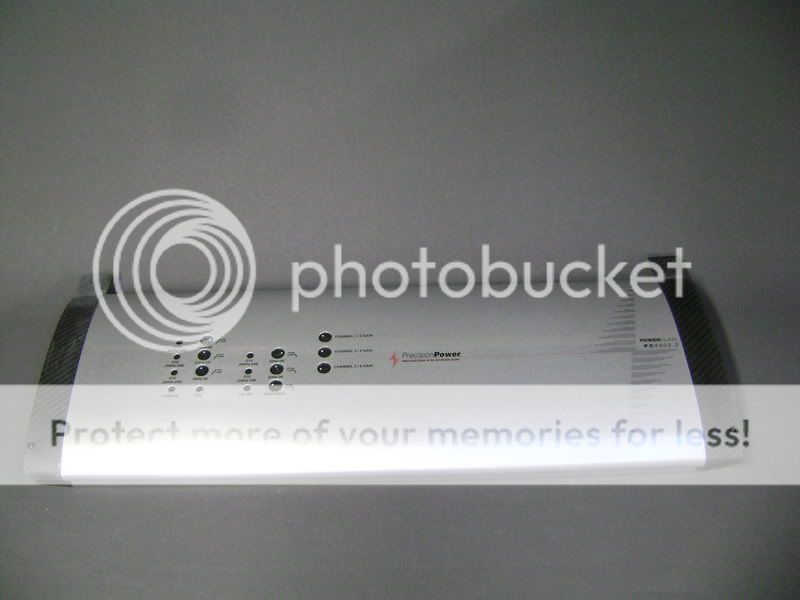
You can see I only put in 1 screw.
The carbon fibre sits in between the aluminum and the amplifier, tight as a rock. 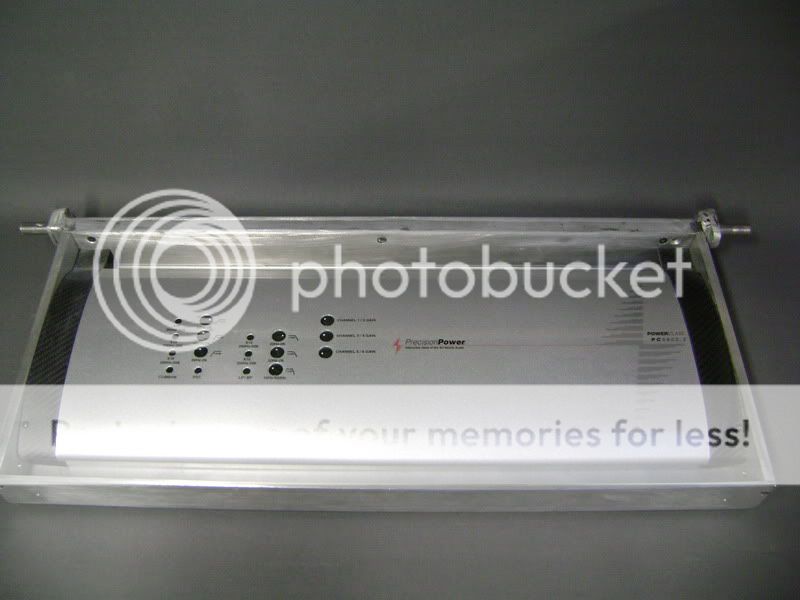
When the cover is on, you arent gonna see that miserable screw anymore. 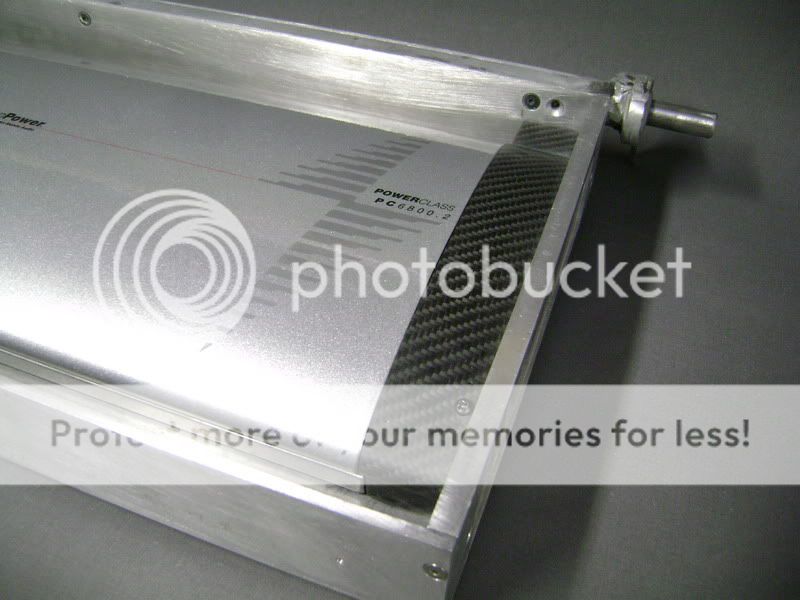
I also worked on the 2 sides of the amplifier-box.
I milled out as many aluminum as possible, where the cables will have to come.It will be tight, but we like it that way 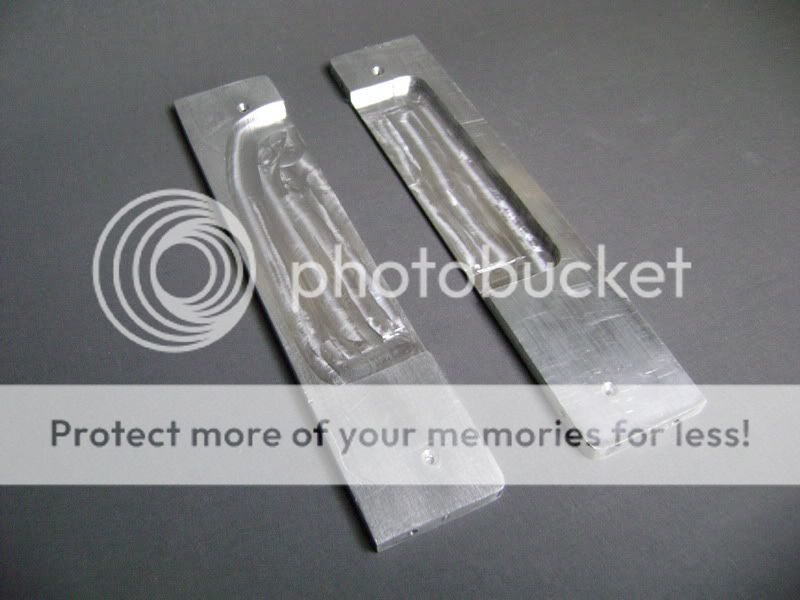
On this aluminum slat, I'm going to mount 4 little vents who gives some extra cooling on the PPI.Cause the "feed" part of the amplifier is on the right side, I also did it on that side.The aluminum plate is 4cm high and the vents are 2.8cm big.
These 4 wholes, I drilled with a "step"drill 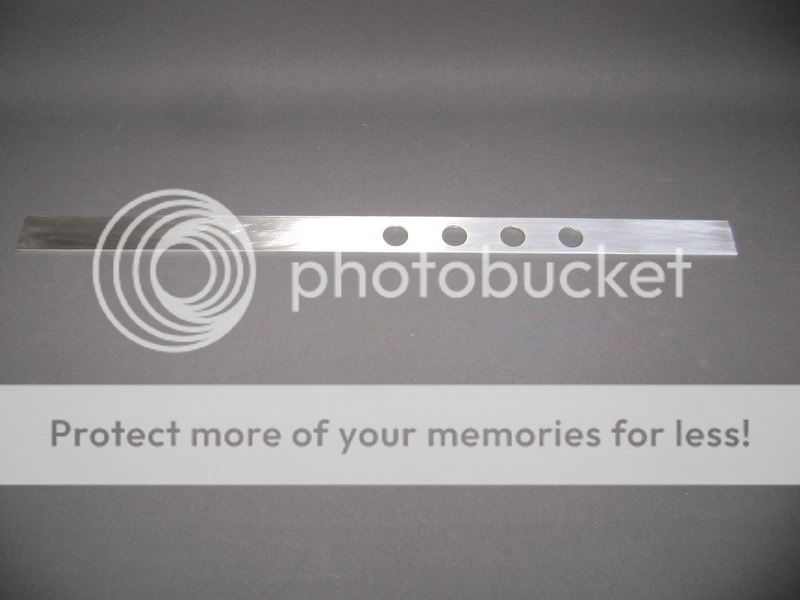
Then I glued the slat on a piece of mdf, and made the wholes as big as the aluminum with the uppermill 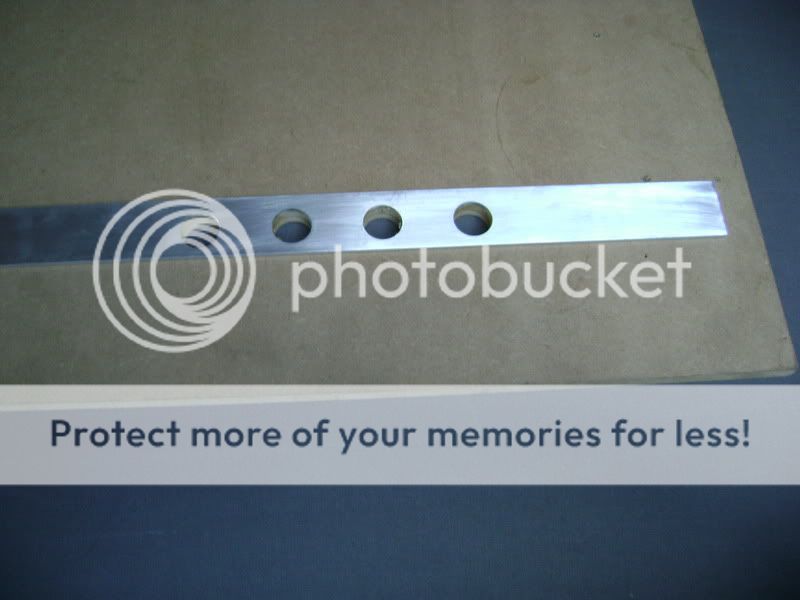
Then I took the mill, to round up the frontside of the aluminum, and so it's all milled nicely. 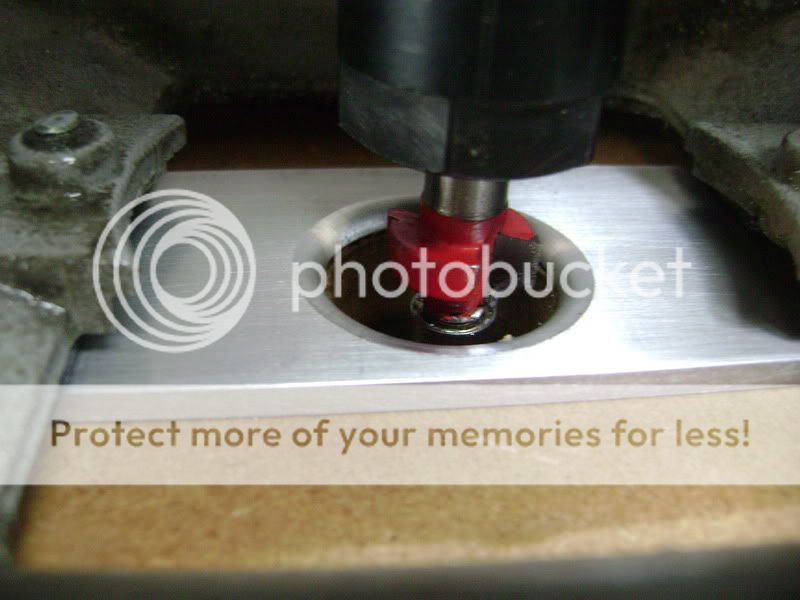
Then I milled the backside of the slat diagonal 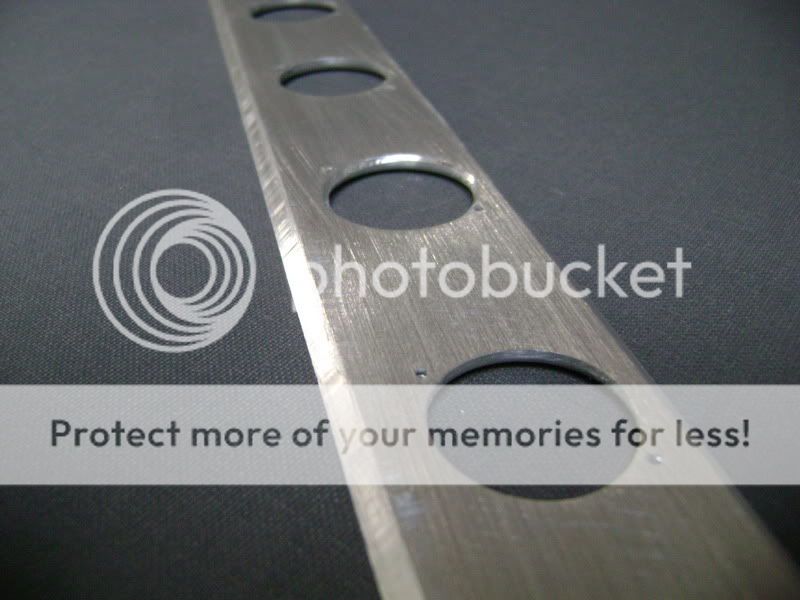
after that I, carefely, drilled the wholes, who will serve to tighten the vents.
I used some normal wood-screws fot that. 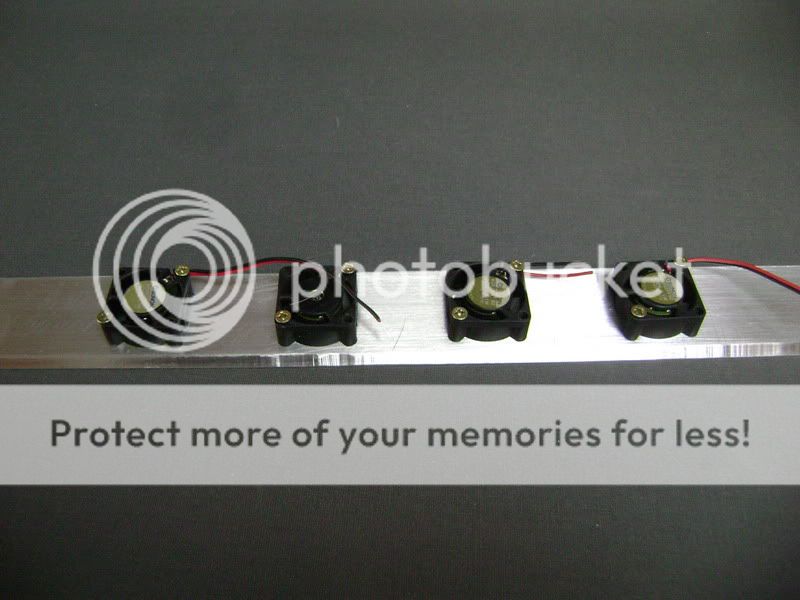
This is how it looks on the frontside. 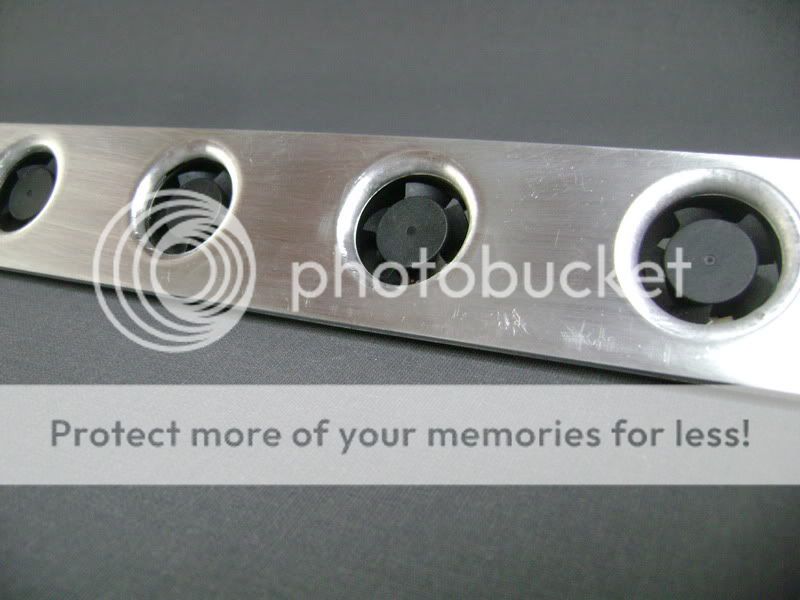
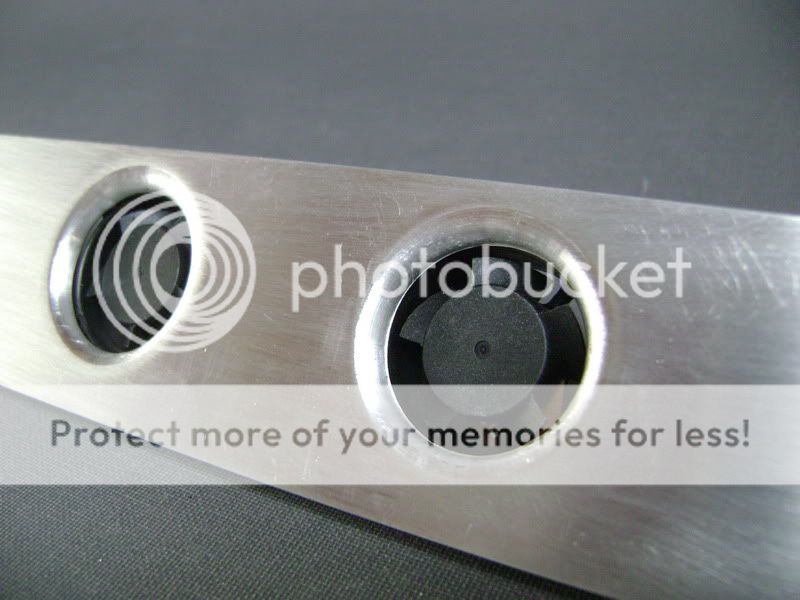
The meaning now is to polish that slat of aluminum, and put a layer of carbon fibre over that.Once this is all finished, I'm going to put in the uppermill again, to round up the frontside.
The meaning is that you'll see the aluminum that's rounded.
If this is possible, I'm not sure. HAven't done it myself either...but , there's a first time for everything!
Posted By: deeg money
Date Posted: August 23, 2009 at 12:08 PM
Robolop, Where did you learn to do all of this. I would love to create something like this for my truck or at least learn to use alu like you do. I am gonna take a wide guess but Im guessing your not from the states? I was wondering what kind of milling tool you used so I can look for one to start fooling around with on some projects. Oh and by the way your car is looking awesome. The work you do is pretty amazing. How many hours have you put into this?? Have a good one man! ------------- Deeg money
"If you cant be good, be good at it"
Posted By: yimke
Date Posted: August 25, 2009 at 11:15 AM
Posted By: robolop
Date Posted: August 27, 2009 at 3:17 AM
The aluminum slat where the vents are going into is firmly rubbed down.
Then I polished the roundings of the holes. 

This aluminum L-slat is to finish off the frontside of the amplifier..
Here you see I preserved it with a layer of carbon fibre. 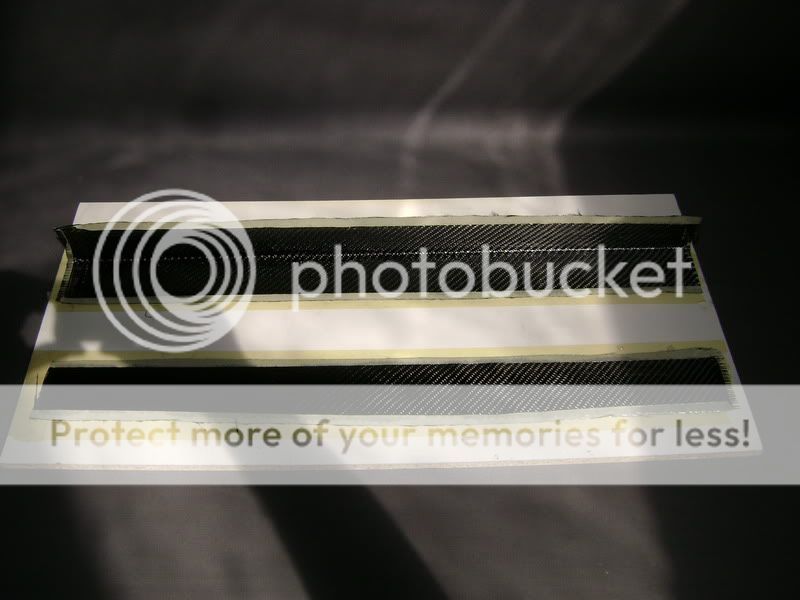
Posted By: robolop
Date Posted: August 27, 2009 at 3:18 AM
I put the uppermil on to the carbon slat, where the vents are coming in to.
First I rubbed the epoxy nice and straight, and stopped with a grain 2000.
Then I taped the slat, so I couldnt make any scratches with the mill.
To drain the wholes smoothly with the copy-mill, I put my MDF slat underneatch it, so I could mill the wholes nicely 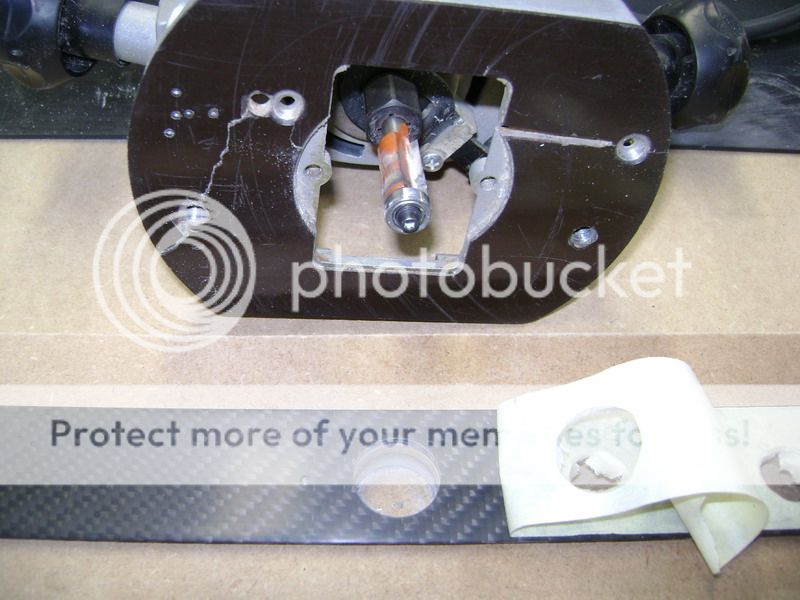
On the first view, this was done pretty well. I was a bit scared that the carbon fibre would be that straight, but that wasnt the case.
After that I used another mill, to make the roundings I needed.
After measuring this about 10 times, I did the job.
I went pretty well actually, till I saw that the MDF slat wasnt 100% centered.
Here you can see the obviously 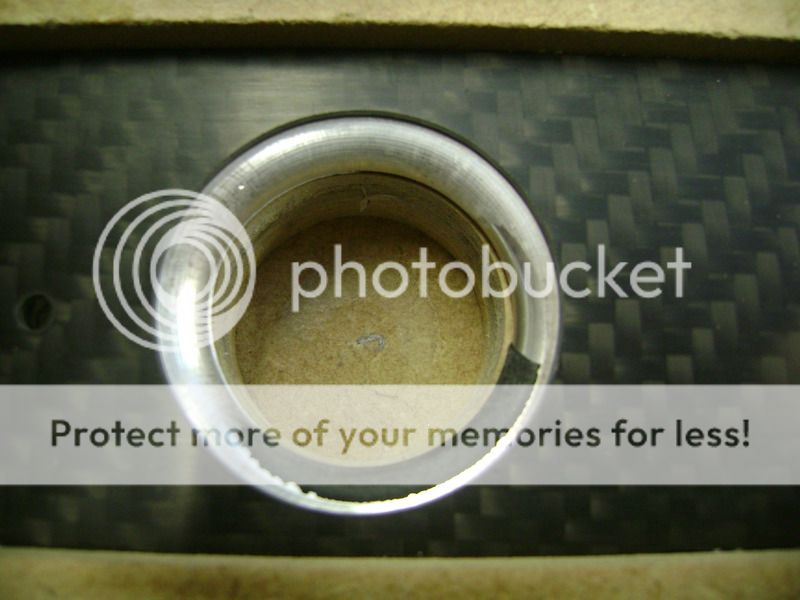
You see some carbon fibre hanging on the underside.
A little mistake I made, is that I didnt drawed out the aluminum slat on the mdf slat under it. A little dumb from me.
Here you see that what I milled out of the rounding isnt 100% centered. 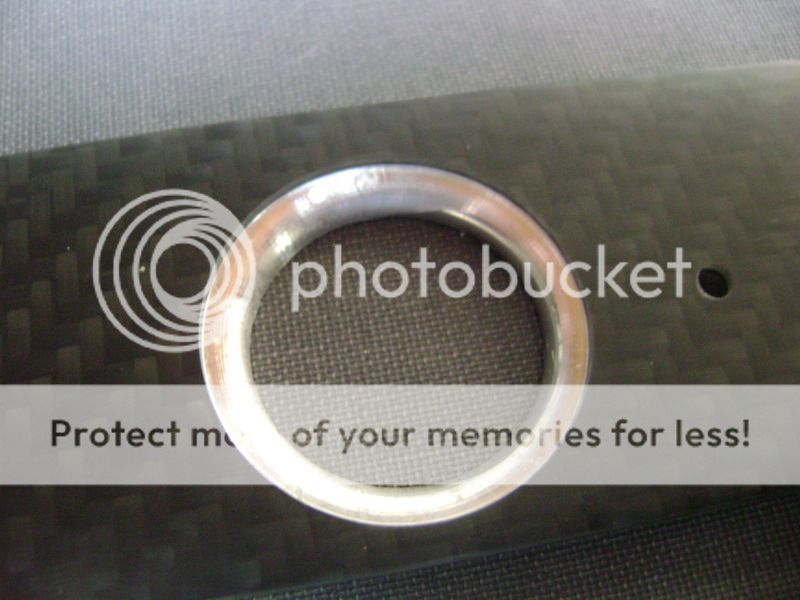
Tomorrow Im going to try to solve this all. If I dont get a solution, it all goes in the bin, and Ill make a new one.
The carbon side panelswhere the amplifier is going to be, are also finished already.Heres enough epoxy on, so now I just have to rub it all tight and varnish it all. 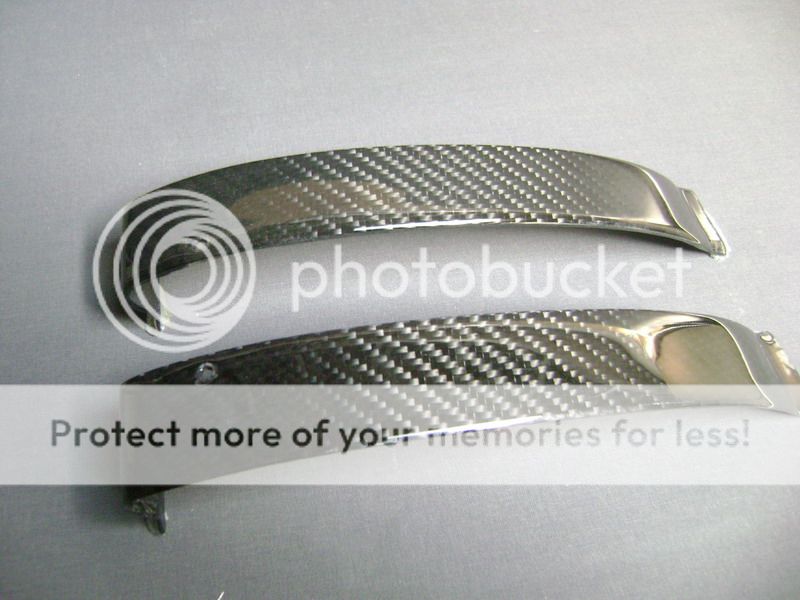
Posted By: fiberglasslvr
Date Posted: August 27, 2009 at 10:17 PM
Crazy skills Going on here. Pretty amazing what yuor doin in this car. all I can say is WOW!!!
-------------
in process of changing everything
Posted By: KarTuneMan
Date Posted: August 28, 2009 at 9:19 PM
I REALLY am totally impressed... amazing skills my friend!
Posted By: KarTuneMan
Date Posted: August 28, 2009 at 9:27 PM
I have to ask..... what's the total time on the install and fab work ?
Posted By: robolop
Date Posted: September 01, 2009 at 4:23 AM
The slath were the vents are coming into, just landed NEXT to the bin.
I did a great job in milling down the carbon fibre, but the things I polished, were ruined.
Looked for rubbing it down, but that wasnt possible without touching the carbon fibre.
I put it away for a couple of hours and did some thinking.
This is what it is now:
I took a piece of 8mm thick aluminum, and drilled 4 wholes into it. 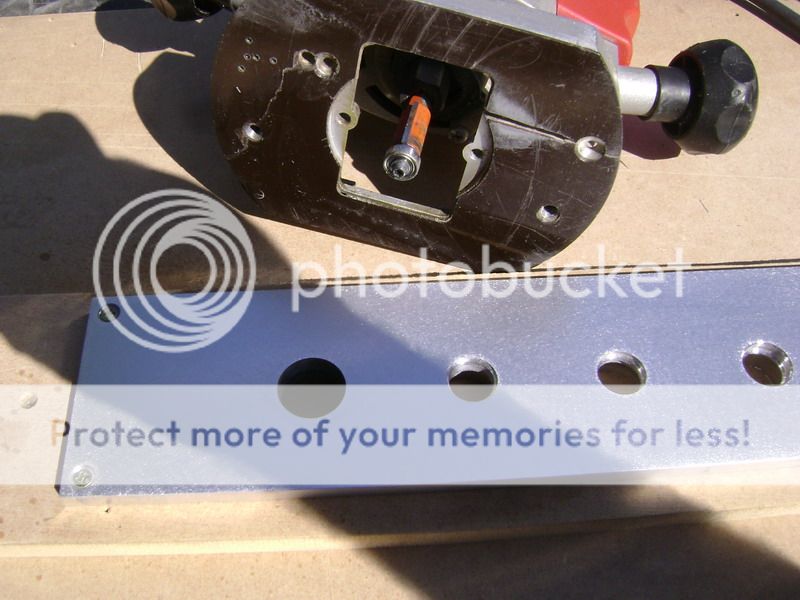
After that I rounded the edges 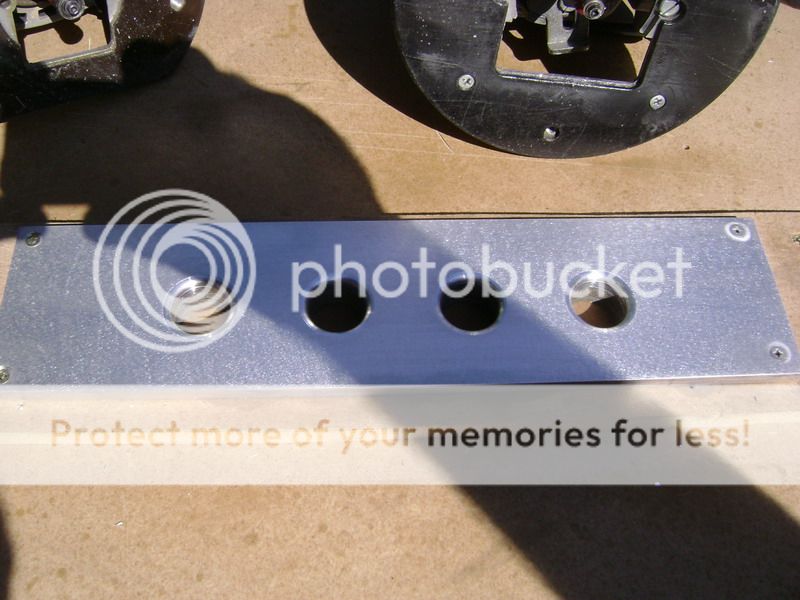
Here you can also see I went a couple of mms deeper. 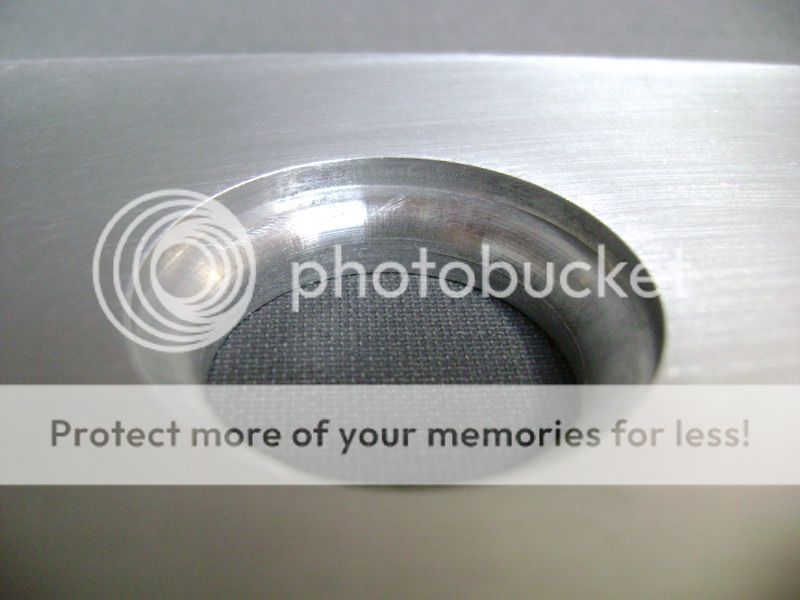
After that I removed all that was inside. 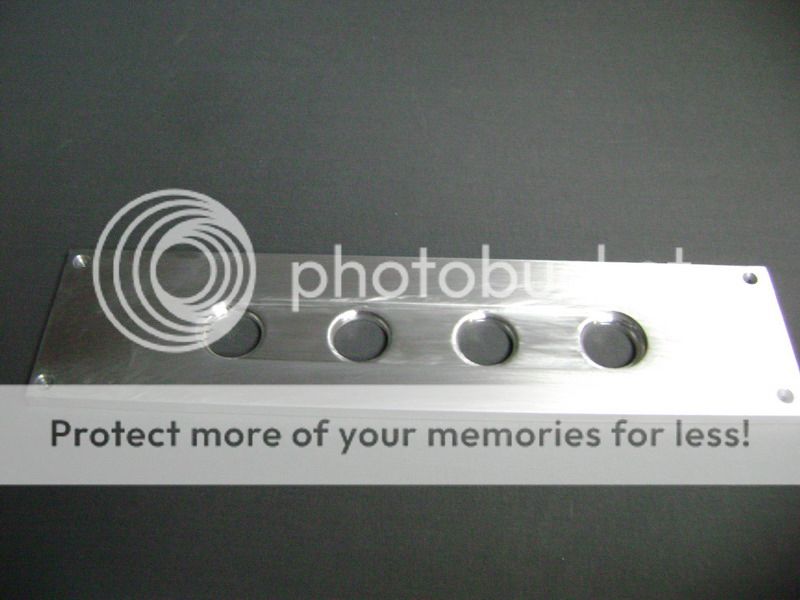
Where have we seen this again? 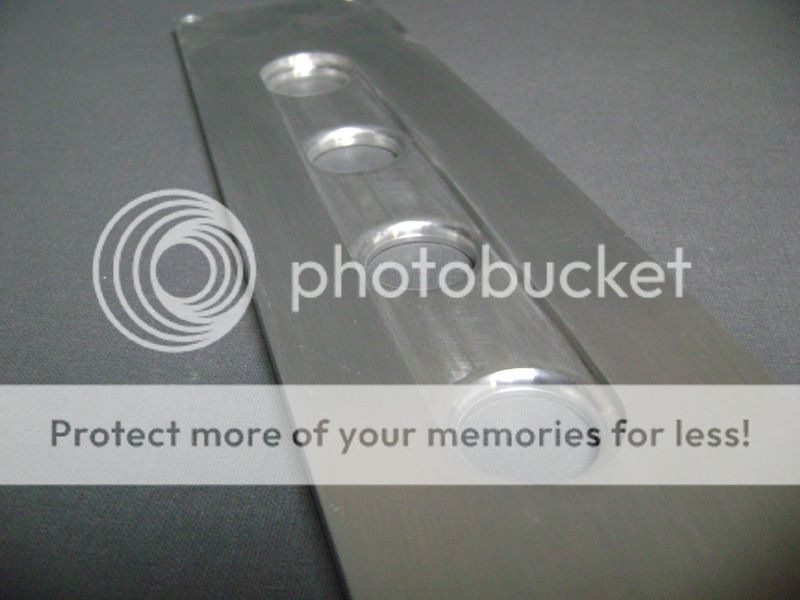
The custom made slat on the outside 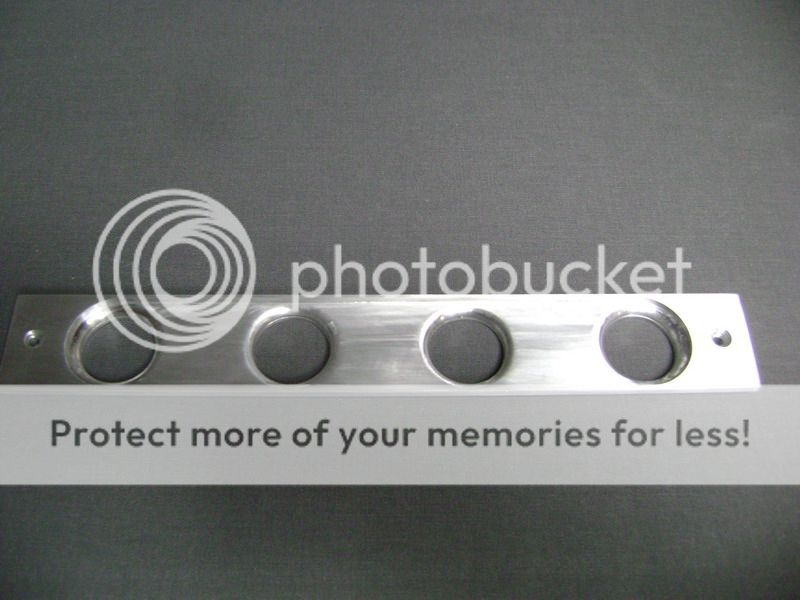
Then I worked on the backside, and touched it with the mill
Then I made a whole in the carbon slat.
This was the hardest thing to do today. 
Itll all look like this. 
On the aluminum piece will come a great deal of polishing, but
.were used to that.
Once its done, Im long forgotten about those hours of polishing.
Oh yeah, thank you Jeses for letting me have all my fingers today, dangerous day today
Posted By: KarTuneMan
Date Posted: September 03, 2009 at 1:13 AM
Would you care to reply my friend?
Posted By: robolop
Date Posted: September 10, 2009 at 1:03 PM
Occupied myself for about 8 hours with rubbing the aluminum parts who need to be polished.
It's a work that needs lots of, lots of time. And when you don't put an effort in this, you just won't get a good result.
First I rubbed it dry with a 120 and 240, after that I took a 600 wet, 800, 1200 and stopped with a 2000. 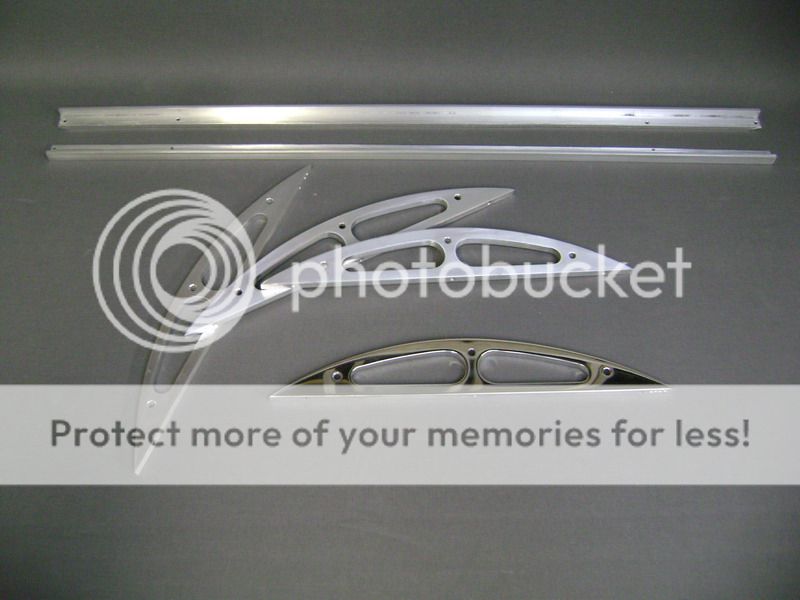
The trolley that lays on the foreground already got a kiss from the brush to see if the result was fine. 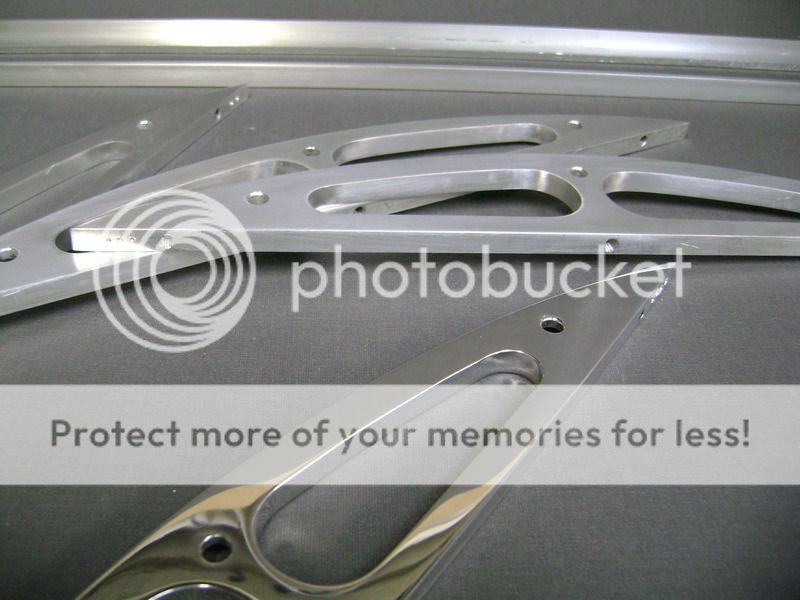
Of this piece, the topside will be covered in carbon fibre. 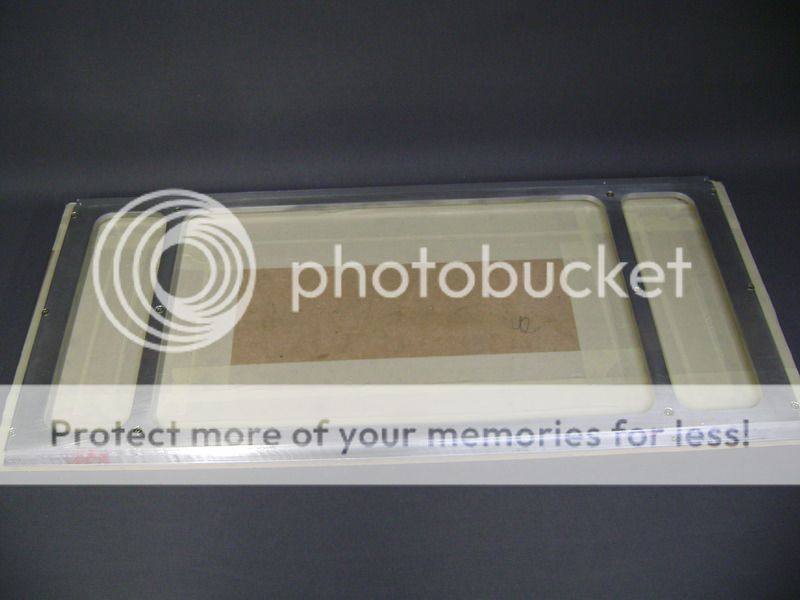
The CF parts that come next to the amp are also finished to get a final layer of varnish. 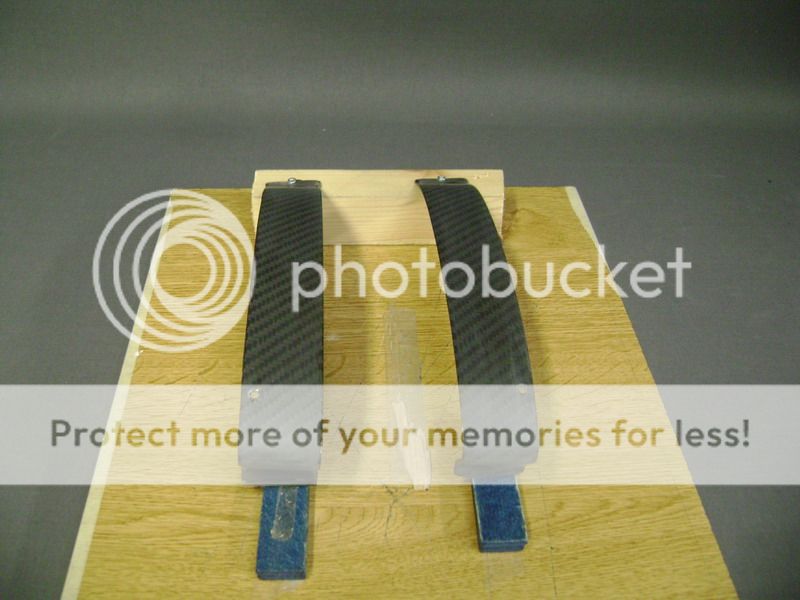
Posted By: robolop
Date Posted: September 14, 2009 at 12:45 PM
Ive been able to polish all the aluminum parts today, what wasnt that easy to do.
Don not underestimate this job, its not as easy as it looks. Its also dangerous, and very time-consuming.
And, when you finished it all, youre as black as working in the cole-mines for 14 days
but a shower afterwards can help a lot.
So, this was the most dangerous job to do.
Here I just needed to do the side. 
When I made up my mind about how to make this, I was planning to polish the upperside as well
But afterwards I decided to cover it with carbon fibre. 
The 4 toggles where the plexi will lay into. 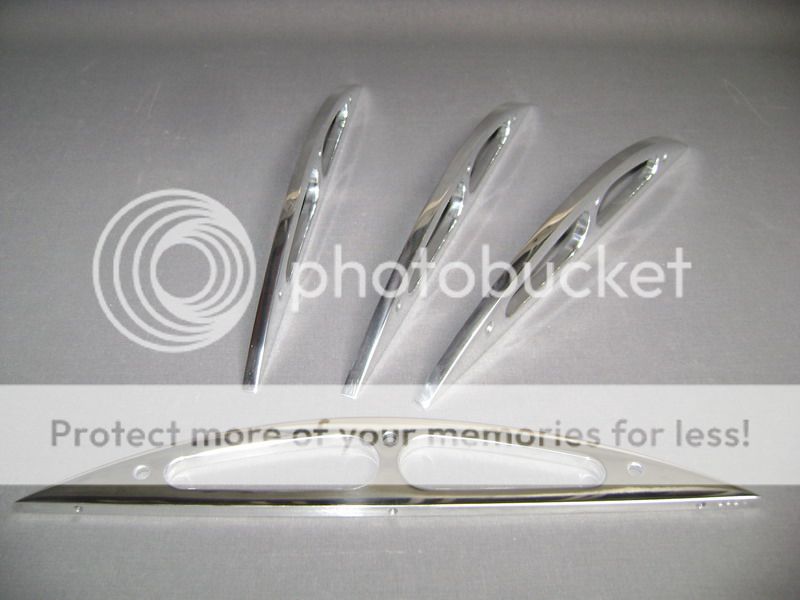
What do you mean, it doesnt shine? You can see whats hanging on my wall
The slots what come on the front and backside. 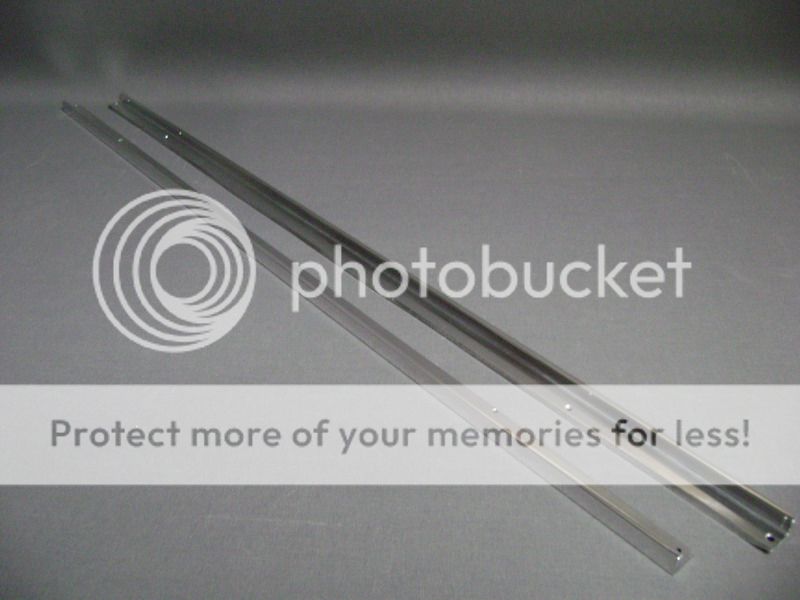

Mounted it all 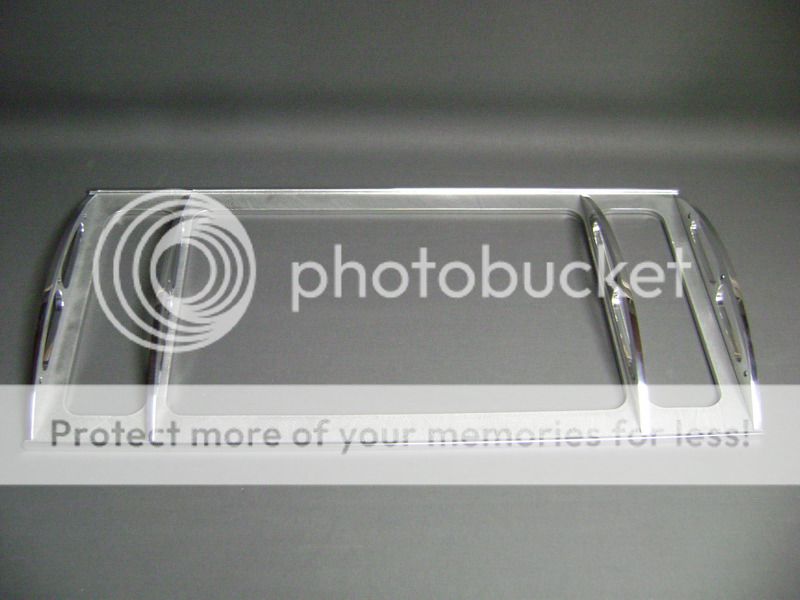


think, that when the upper side will be in carbon fibre, itll look DOPE
Posted By: robolop
Date Posted: September 14, 2009 at 1:14 PM
All the carbon parts that will get around the amplifier, are varnished. Here the result. 

About the parts from the sides, I was a bit afraid that I wont match the amplifier. This is the result, and Im very pleased wit hit.
Here you see the lath that comes on the front. I dont think youll be able to see anything ot it, but the finishing touch is there! 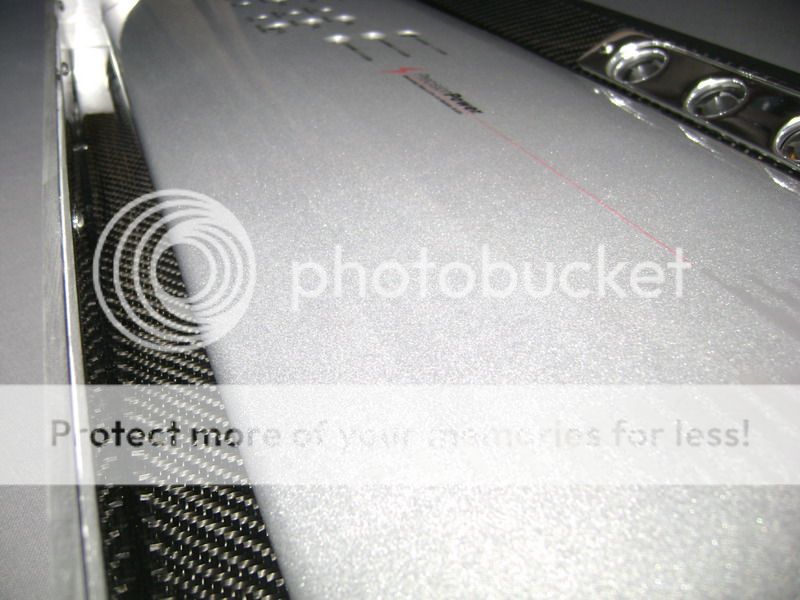
The polished aluminum plate blends in 10 times better on the black carbon. 
This is the upper part of the cover. I painted it black, so probably you can guess what Im planning of doing


So the inside of the amplifierbox is completely finished. In spite of all the work Ive done, Im superhappy with the result
Posted By: robolop
Date Posted: September 14, 2009 at 1:21 PM
The plate where the vents will get into, I brushed this also, with this as result ! 
Posted By: robolop
Date Posted: September 14, 2009 at 1:31 PM
This will be the front of the amplifierbox. First I made a model in 5mm thick MDF.
Drawed it out on the aluminum of 10mm, and saw into it. 
Taped the MDF plat onto it, and tomorrow, its mill-time
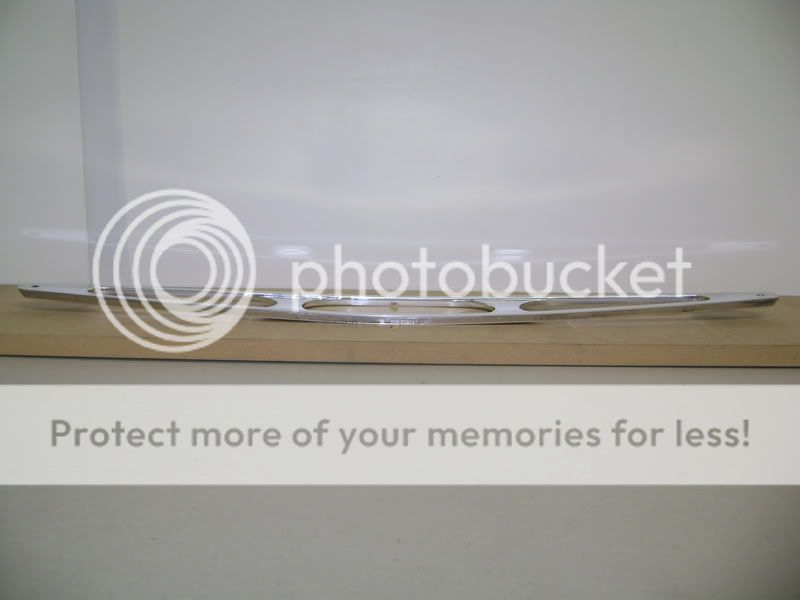
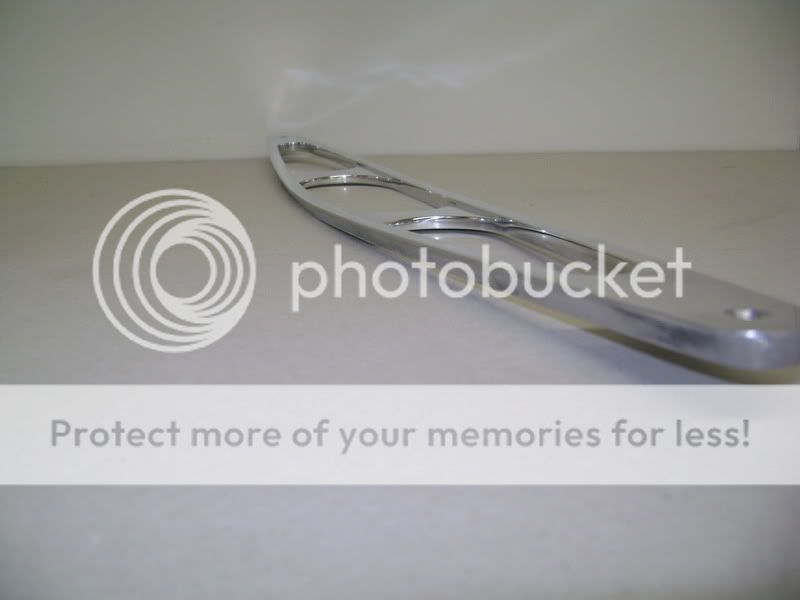
In the meanwhile Im baking some carbon cookies in the oven. The alu piece that will come onto the front of the box, is finished!
Cut out the wholes with the uppermill. 
This time I tried GT7 as lubricant, and I must say Im very satisfied about this product! 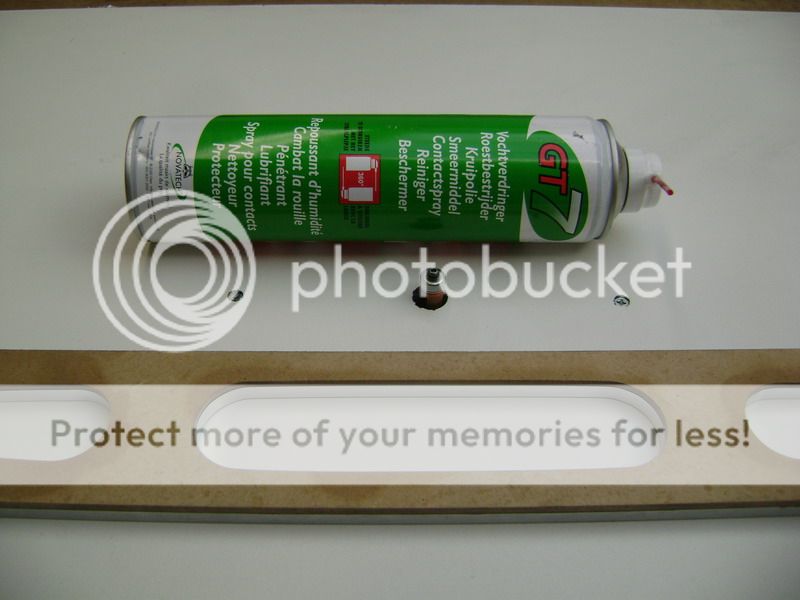
Here I grabbed out some more mms between the wholes 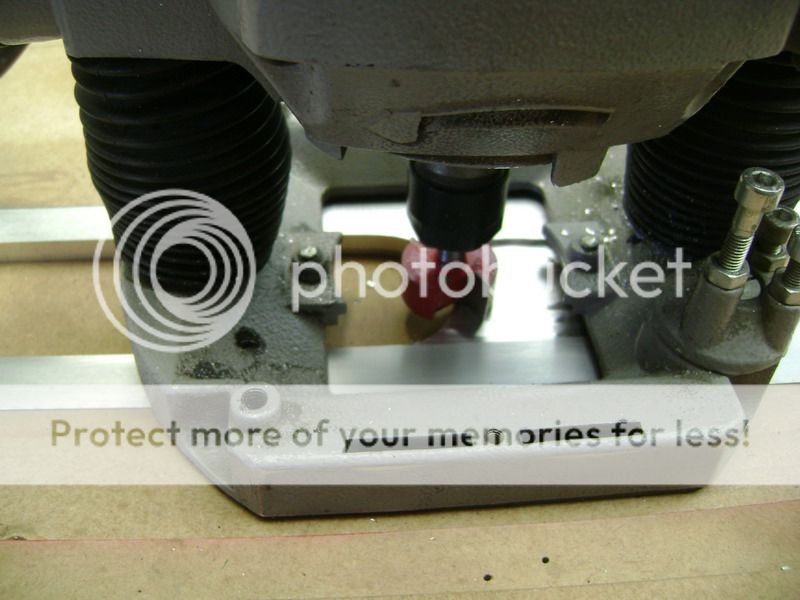
This is the back side. You can see I grabbed out some more mms over the entire surface. 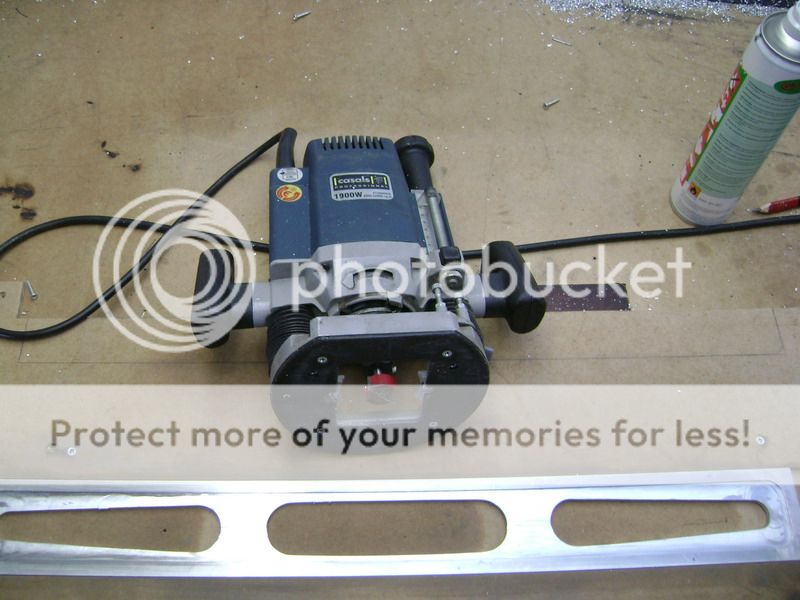
Here in will come a carbon piece, with my logo on it.
Once finished, I spent a big amount of time rubbing it all down. 
Afterwards, held the piece under the polish-brush so it shines a bit 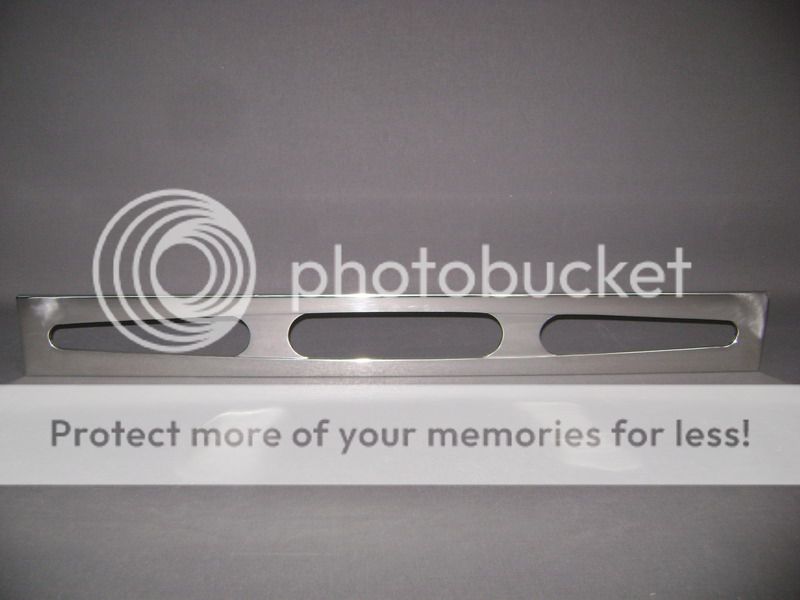

The small piece of carbon fibre, thatll come on the back, is baking as we speak.
Posted By: robolop
Date Posted: September 22, 2009 at 11:40 AM
The cover of the amplifier got a total of 6 layers of varnish. I also used new epoxy, wich I find not so good.
There came a lot of little holes in the carbon fiber.
Cause there is so much varnish, I had to rubb it all flat and equal with the
block.
Here you can see how much is really on there. 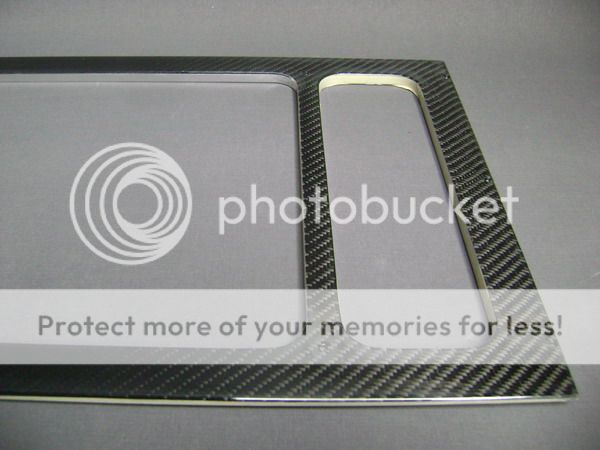
After some firmly rubbing with a 2000, I started on the aluminum.
Cause of the rubbing, it got mat here and there.
Had to do this by hand, and used some UNIPOL for this. 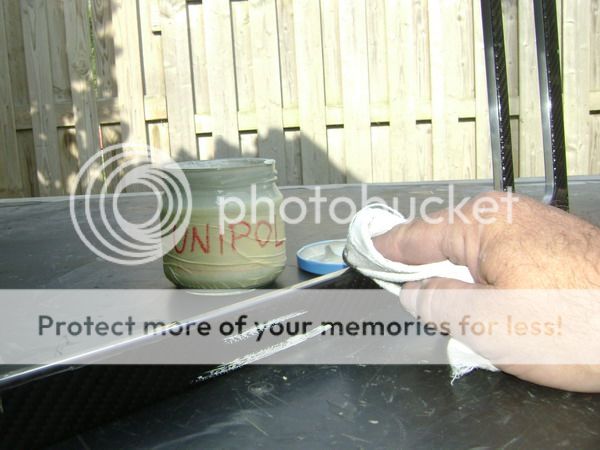
Offcourse, the result here is not what it was before.
Using a machine would made this 10 times better. After this I polished the carbon fibre. 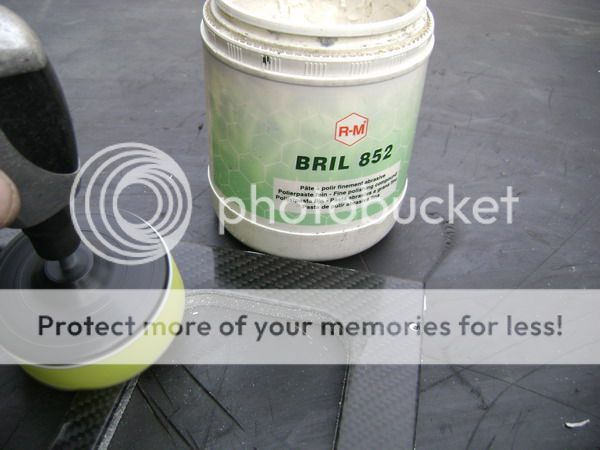
Finally, the final result of this piece. 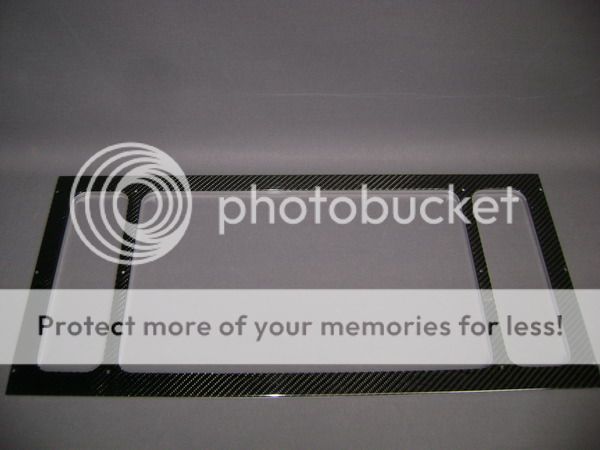
The hard part of this piece is that the transition needed to be descent, and it came out well. 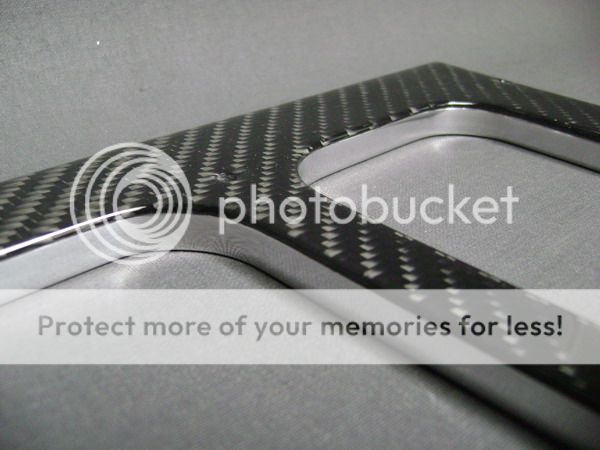
Mounted the rings again. 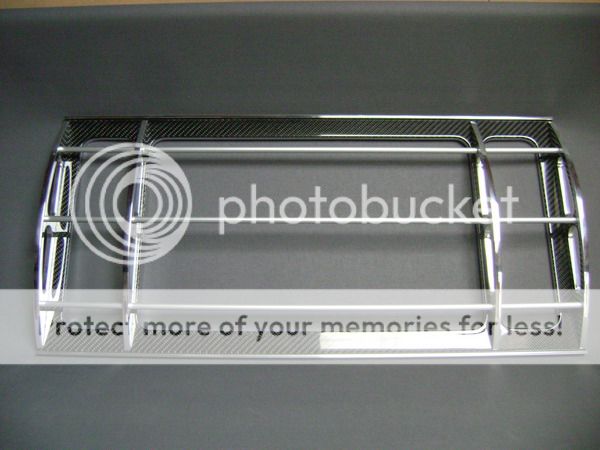


For those who think this is done
you can forget it.
Before I began covering the alu plate with carbon fibre, I mesured it.
The alu plate was 8.2mm thick. Now with the carbon layer on its 9.7mm thick.
That means that everything came up 1.5mm
So the plexi wont fit that nice anymore.So I have to shorten the rings/toggles about 1.5mm
Posted By: fabilichus
Date Posted: September 24, 2009 at 7:49 PM
I have to give u alot of credit. The work u have done looks amazing !
I wish im gonna get the skills to make something half as nice as u did.
Question,
How do you get carbonfiber so shiny ?
Could u maybe make alittle how to on that ?
-------------
My Porsche 944 im not making alof of monney so it take some time for me to build it up realy nice and gonna be a show car in the end.
Posted By: robolop
Date Posted: September 28, 2009 at 5:08 AM
I got the chance to finish the aluminum sides of the amplifier-box.
Youll see that I made the same wholes into the upperside, like there are in the toggles where the plexi is on. 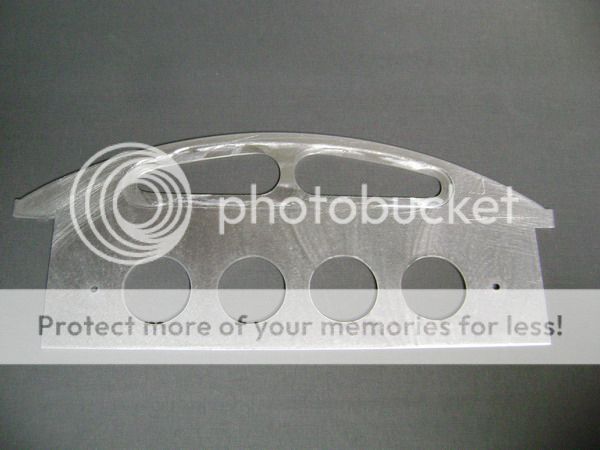
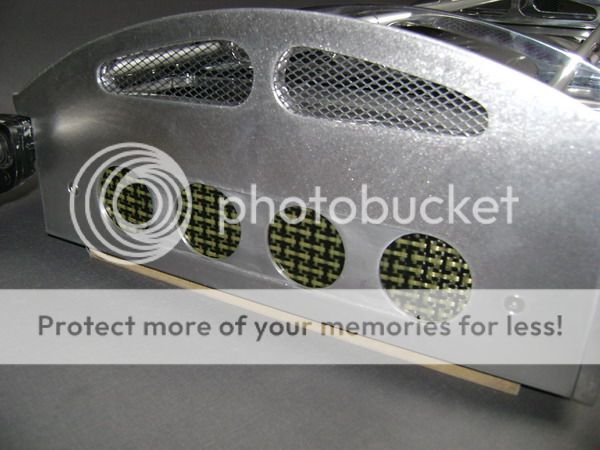
Itll look like this on the outerside. 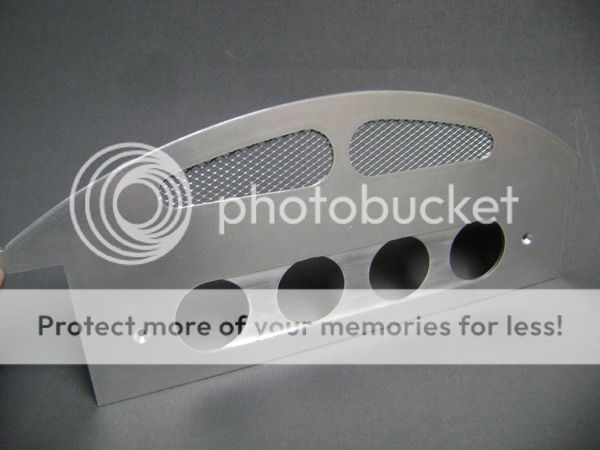
Here its mounted on to the box. You can see I put some fine gauze on the top. Later Ill explane why I did this.
Behind the 5 wholes in the bottom theres a piece of carbonkevlar. 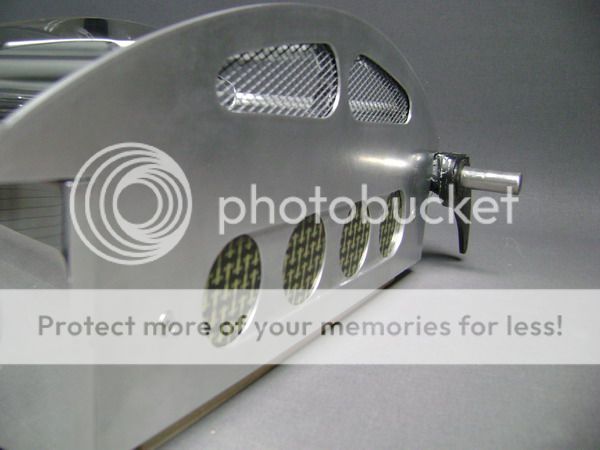
Posted By: robolop
Date Posted: October 15, 2009 at 12:54 PM
Here some pics of the aluminum toggles I made. These come on the Left en Right of the amplifier, and serve to tighten the plexi pieces on the sides. Remember this?
These two wont be visible.  
Of these, youll only see the upperside. You can also see I screwed a little piece of MDF on the inside. Thats were the plexi will lay on to. 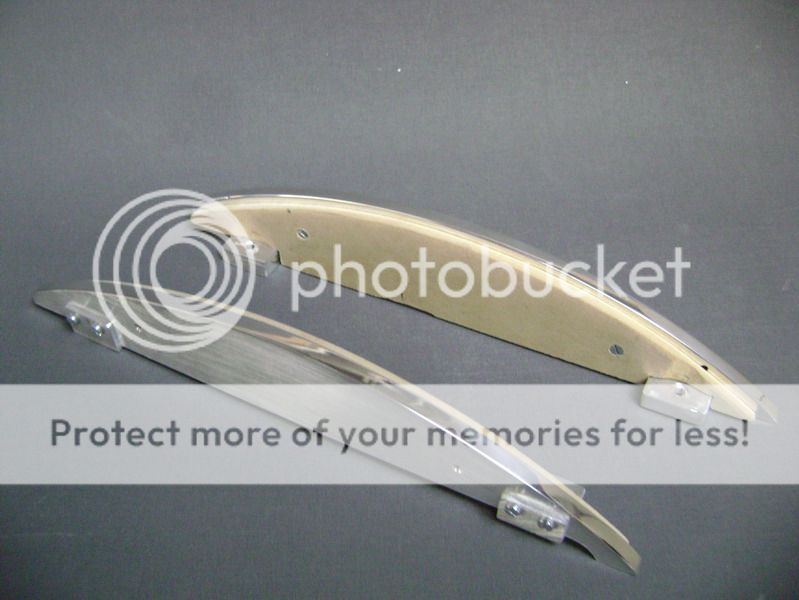

This will get into the back. Again, you will only see the upperside. Also you can see I knocked in an aluminum nail. This will come between the plexi, a little hard to explain really. But youll see what Im trying to say.
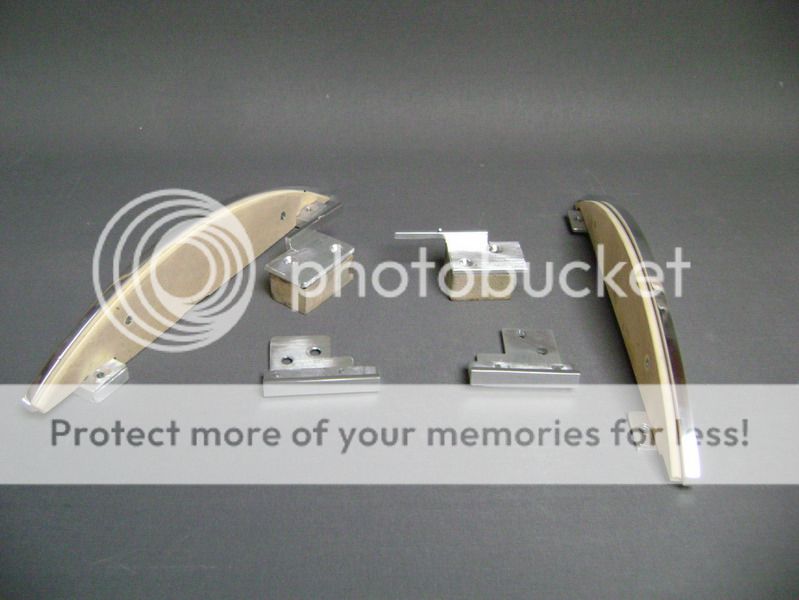
In total, I had a lot of work making this, specially trying to fit and finish it in a descent way. Getting into the trunk 20x a day, for messuring and trying. Im going to be so happy when the amplifierbox is finished.
Posted By: robolop
Date Posted: October 15, 2009 at 12:56 PM
This part will get underneath the amplifier. On the bottom theres a mirror of 4mm thick. The meaning is that you can look into the amplifier through the mirror, when the amplifier gets up. Dont forget Im going to open the amplifier so you can see all of its components. Here a picture of how I pictured it before
.
This is the plate, finished.

The sides will get on the same level/height as those from the amplifier. 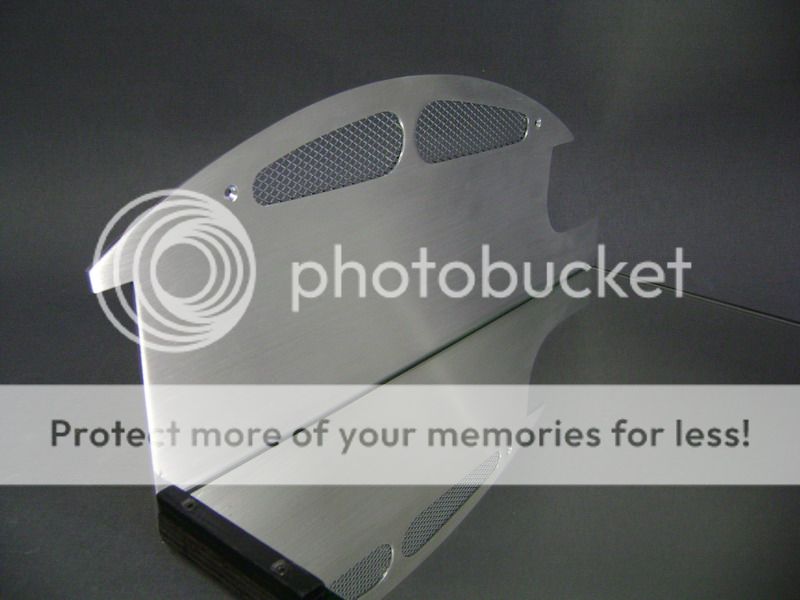

The upperside I polished, and the sides are brushed aluminum.
Here you can see I planned a little grill in there. This is the inside, where you wont see anything.
Posted By: asquarecan
Date Posted: October 20, 2009 at 10:22 PM
Hands down some if not the most impressive work I have ever seen!
If you are located anywhere on the west coast I would love to see this thing in person!
Great work!
Keith
Posted By: KarTuneMan
Date Posted: October 24, 2009 at 10:19 AM
fabilichus wrote:
I have to give u alot of credit. The work u have done looks amazing !
I wish im gonna get the skills to make something half as nice as u did.
Question,
How do you get carbonfiber so shiny ?
Could u maybe make alittle how to on that ?
You won't get any answer to your question.... I tried a page or so back to ask a question as well.... no reply. -------------
Posted By: j.reed
Date Posted: October 30, 2009 at 5:57 PM
KarTuneMan wrote:
fabilichus wrote:
I have to give u alot of credit. The work u have done looks amazing !
I wish im gonna get the skills to make something half as nice as u did.
Question,
How do you get carbonfiber so shiny ?
Could u maybe make alittle how to on that ?
You won't get any answer to your question.... I tried a page or so back to ask a question as well.... no reply.
From the looks of his 70+ posts all have been of posting pics with a little description and nothing more. I'm with you guys this is a simply amazing install. But i would not expect anything other than more posts of pics. Sucks too because there is a lot that could be learned from an installer of this level. ------------- 
Posted By: i am an idiot
Date Posted: October 30, 2009 at 6:52 PM
The bottom cover of that amplifier is a critical part. It is what holds the transistors firmly against the heat sink. If you are leaving the cover off of the amp, you need to somehow secure the transistors to the heat sink.
Posted By: robolop
Date Posted: October 31, 2009 at 2:48 PM
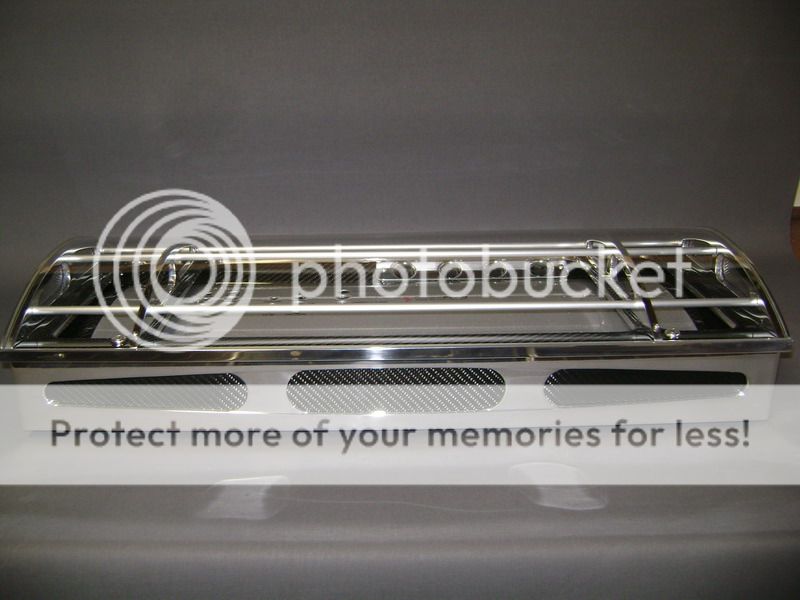
Ok guys, the amplifierbox is finished. Did some modifications here and there. Here and older picture of the side.
Its especially about the front of the the little L-slat.
On this picture, its stops on the side. Didnt look that good to me, and I had a join on the front.
Here you see it like I made it now. I made 2 new slats on the front and back, each 3mm langer . 
I have some more join on the side, but its better then before. Its much tighter on the front now. Pictures of the side. 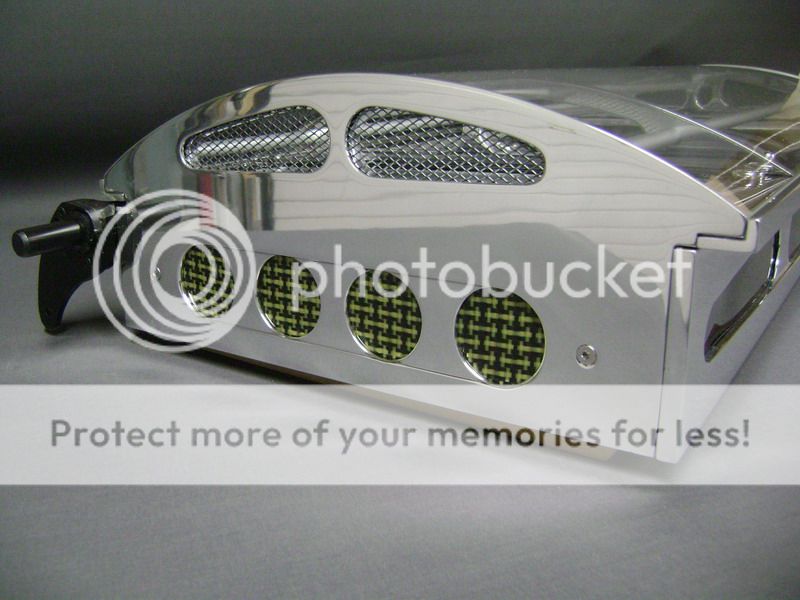
The grille on top, is the same I used in the front bumper. 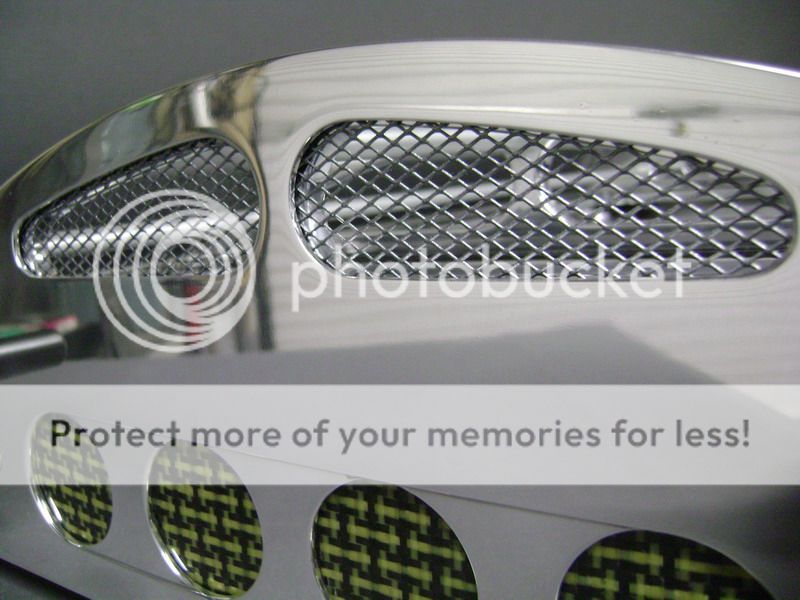
Now its looks like I wanted it to look. You wont see much of the sides directly, but you know there will come a lot of glass on the side
.
Here the sides of the box will reflect into, and I think that will give a nice effect.
Posted By: robolop
Date Posted: October 31, 2009 at 2:48 PM
Posted By: robolop
Date Posted: October 31, 2009 at 2:49 PM
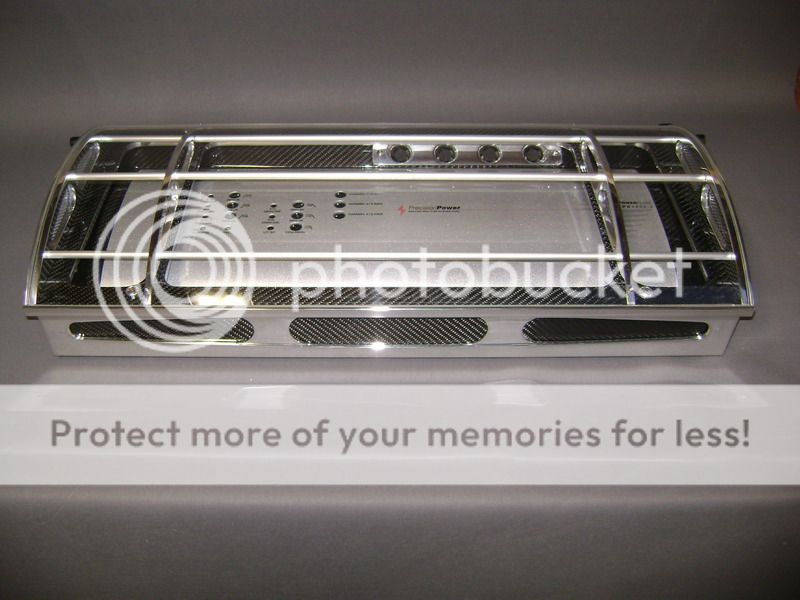
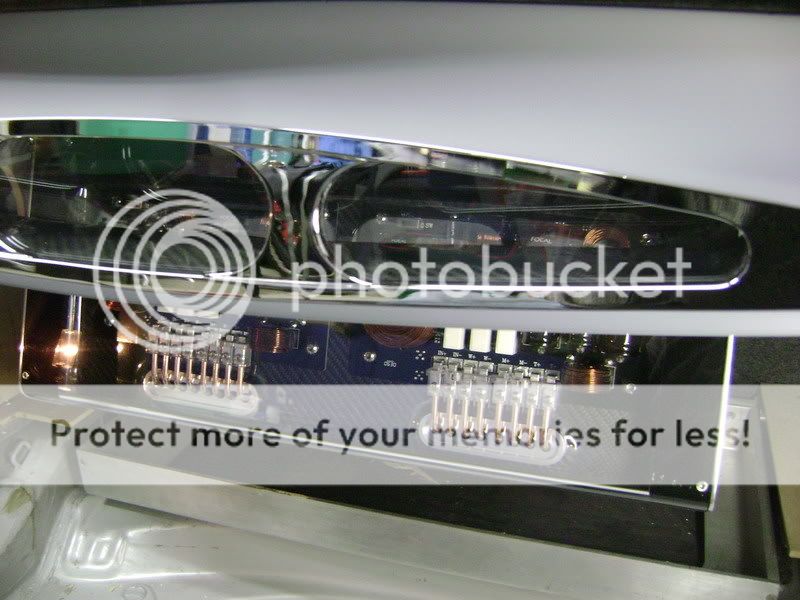
Here you see how I mounted the plexi. I did this in a really simple way.
In the back slat I hammered in 2 inox nails, knocked it down till the plexi came in between.So the backside couldnt budge any more. 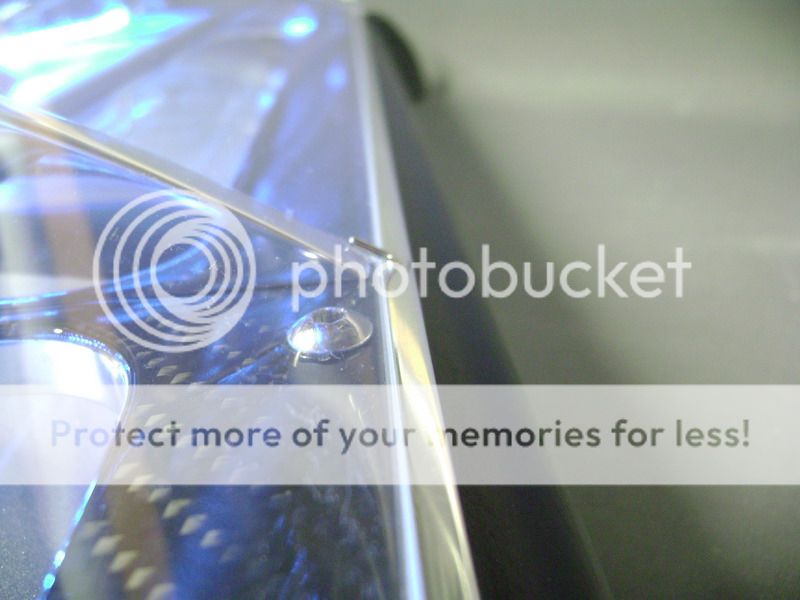

On the front I screwed the plexi tight with 2 little screws M3. This plexi must be able to be removed for cleaning or to adjust the amplifier. I also foresaw the illumination of this thing. I only could do this on the front. So i used a LEDSTRIP. This doesnt needs much space, so I managed to build it in quite nicely under the cover. 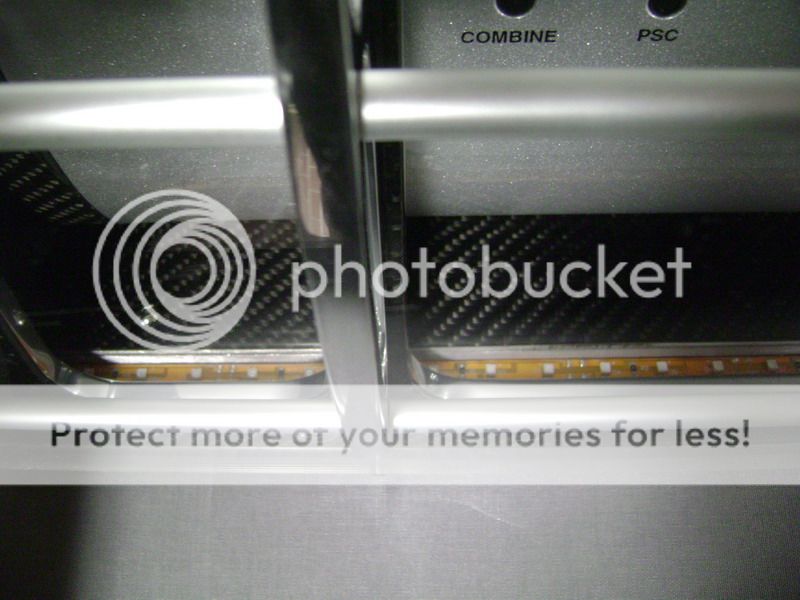

Posted By: robolop
Date Posted: October 31, 2009 at 2:50 PM
Posted By: robolop
Date Posted: October 31, 2009 at 2:50 PM
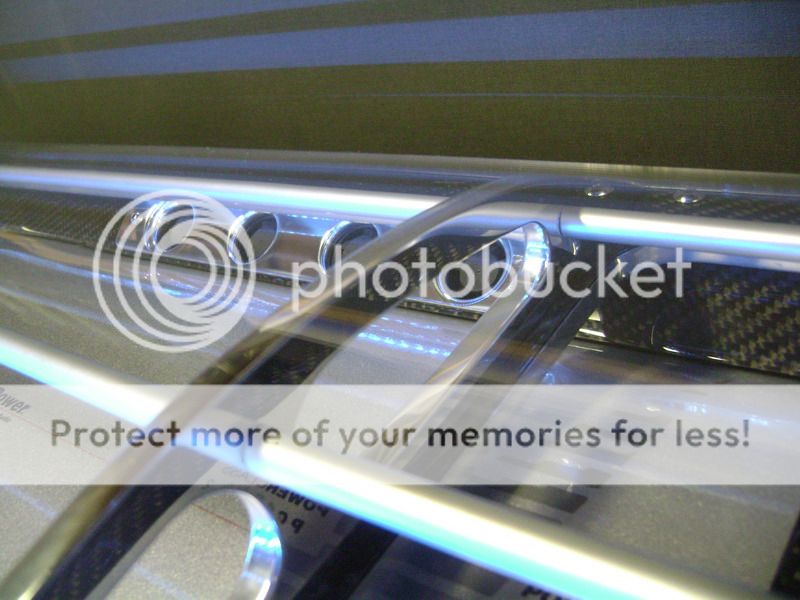
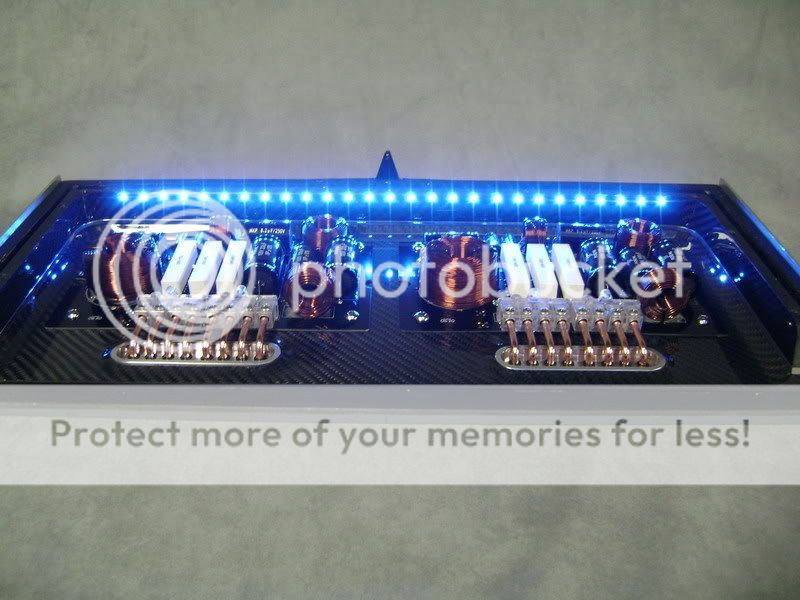
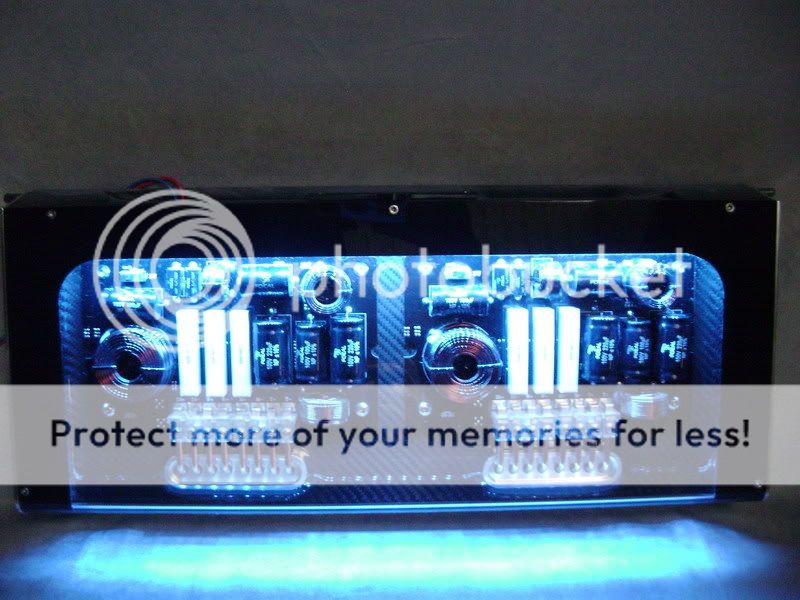
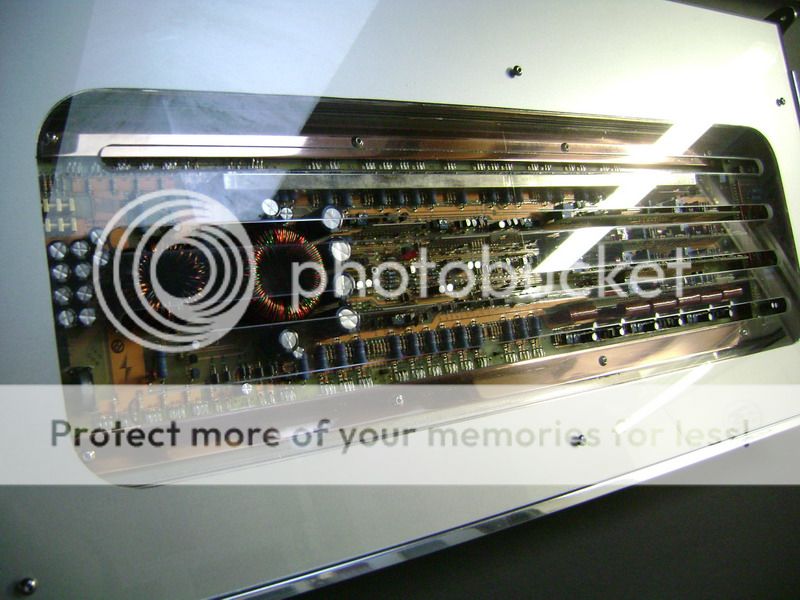
Here some shots with the blue lighting. These are made during the daylight. I think most people will see the install in daylight conditions.  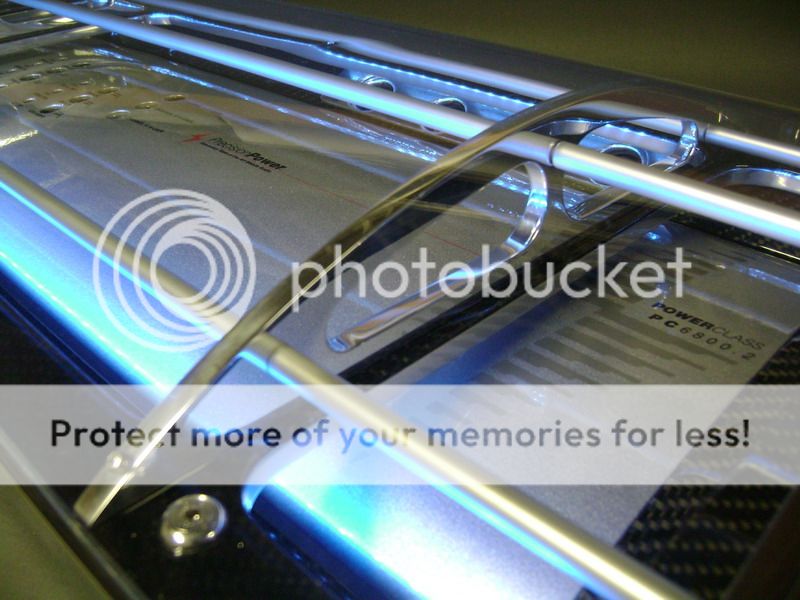
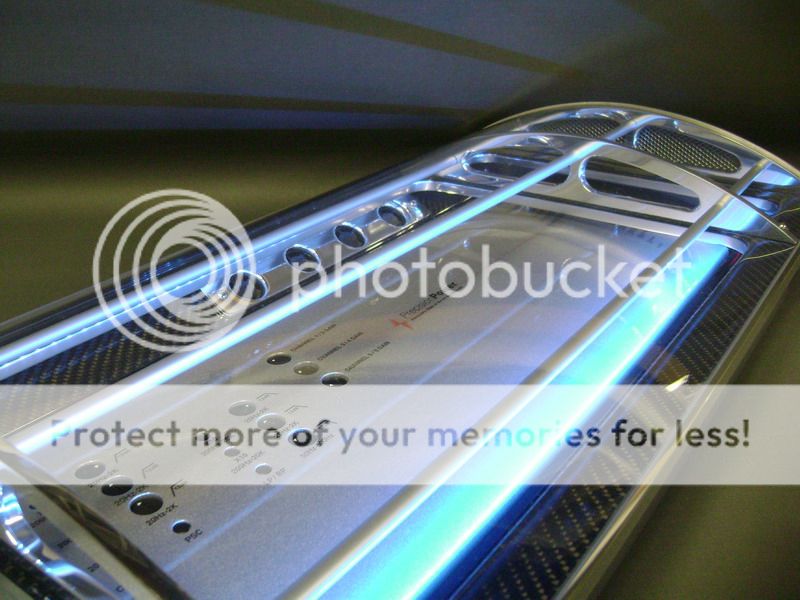
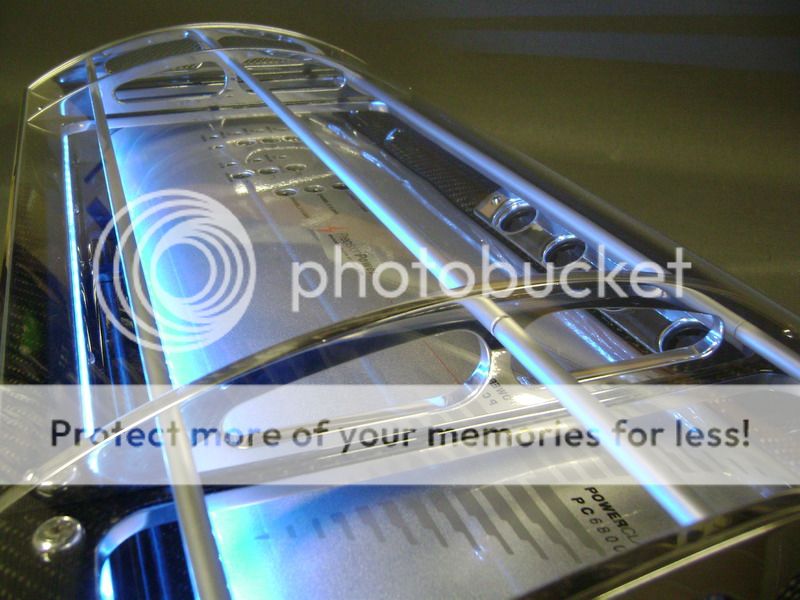
This pictures is made at night. 


Posted By: robolop
Date Posted: October 31, 2009 at 2:51 PM
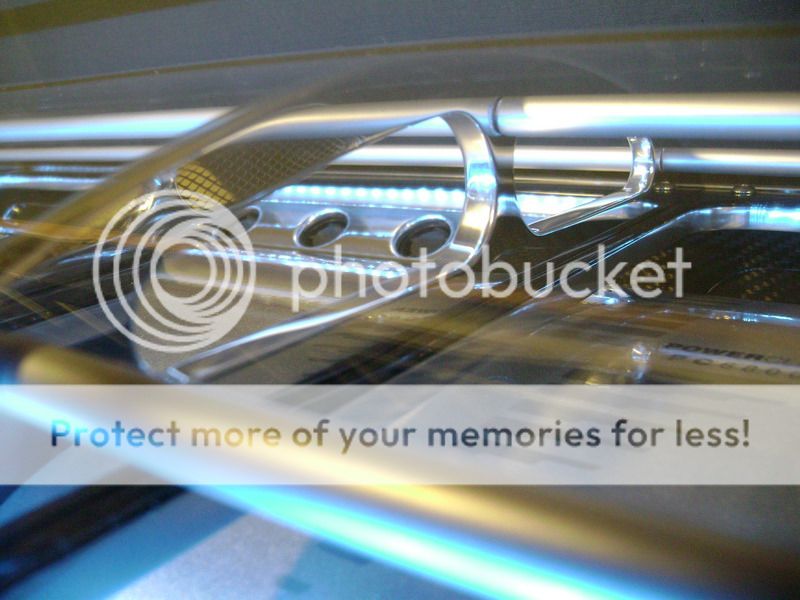
Pictures made through the side 

Posted By: robolop
Date Posted: October 31, 2009 at 2:53 PM
i am an idiot wrote:
The bottom cover of that amplifier is a critical part. It is what holds the transistors firmly against the heat sink. If you are leaving the cover off of the amp, you need to somehow secure the transistors to the heat sink.
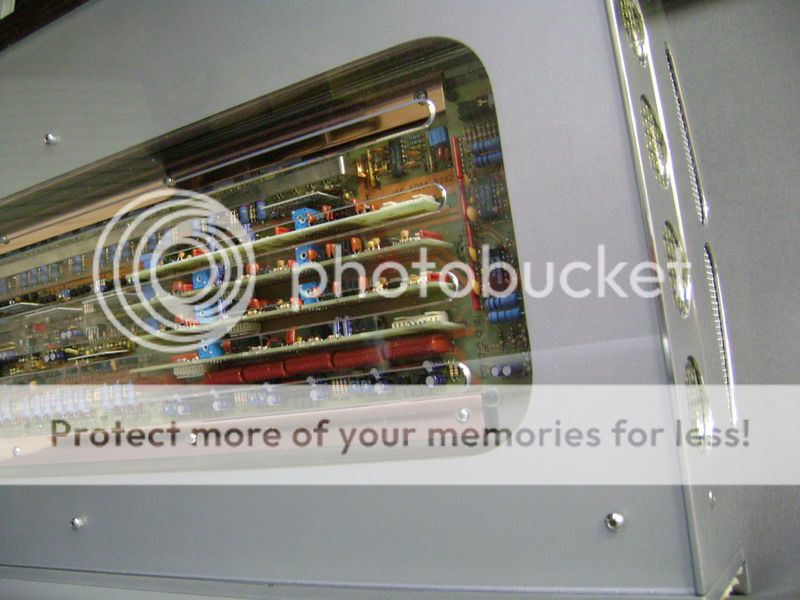
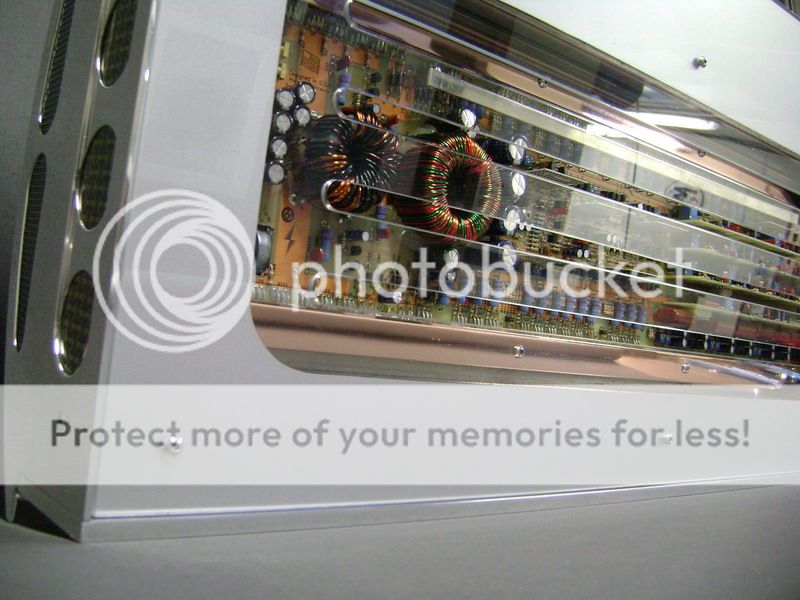
Because I want the people to see the inside of the PPI, I had to screw off the top.There was a little problem though. The cover held the power amps in the cool paste. I managed to make 2 new copper bars that do the same thing. 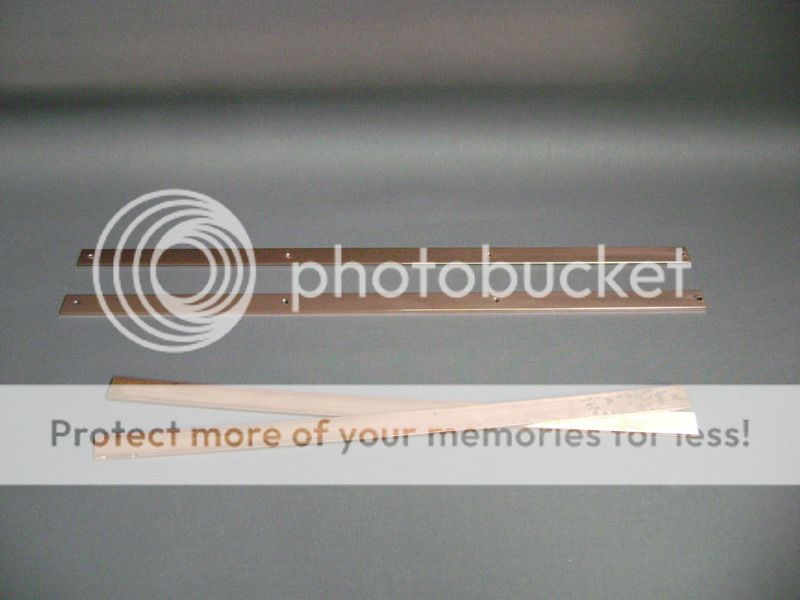
Milled a little diagonal side on the front. 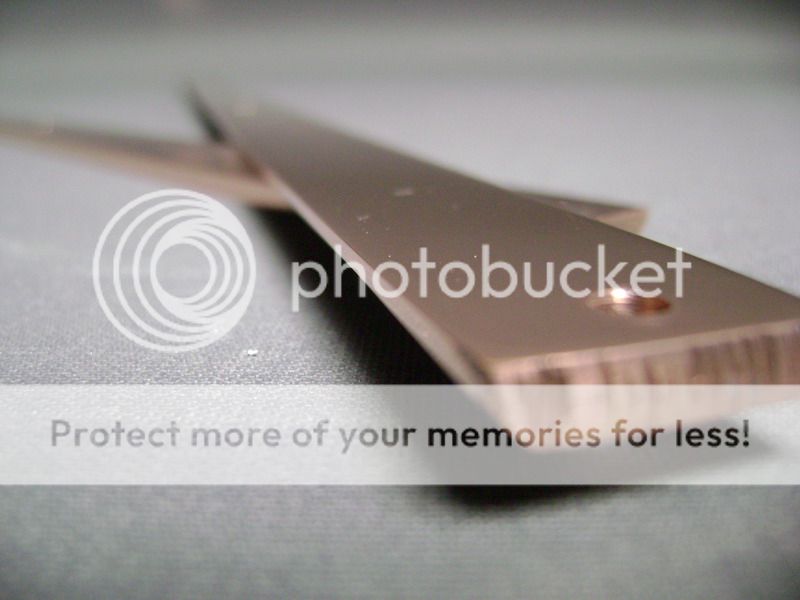
Here they are mounted. Each bar is tightened with 4 M4 screws. 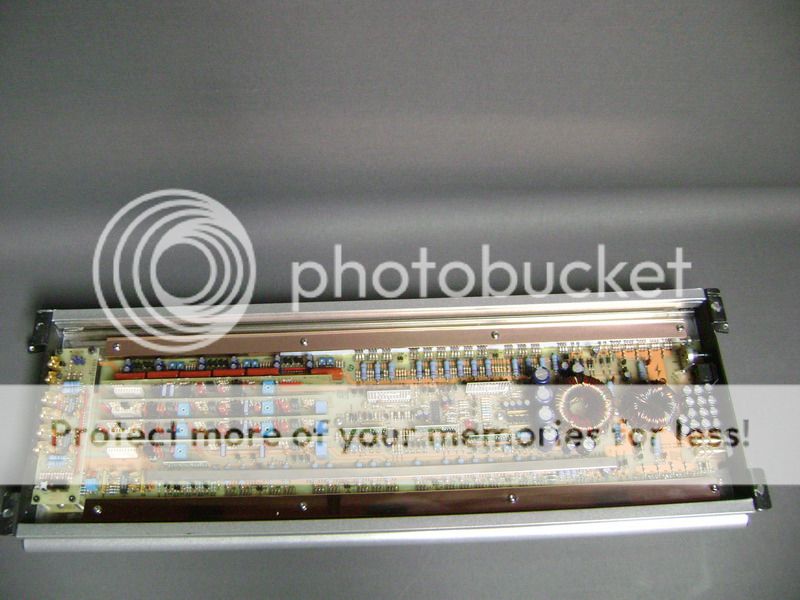
If you look closely you'll see why I made the side diagonal.
It was a little too short on the pins where the power amps are tightened with. 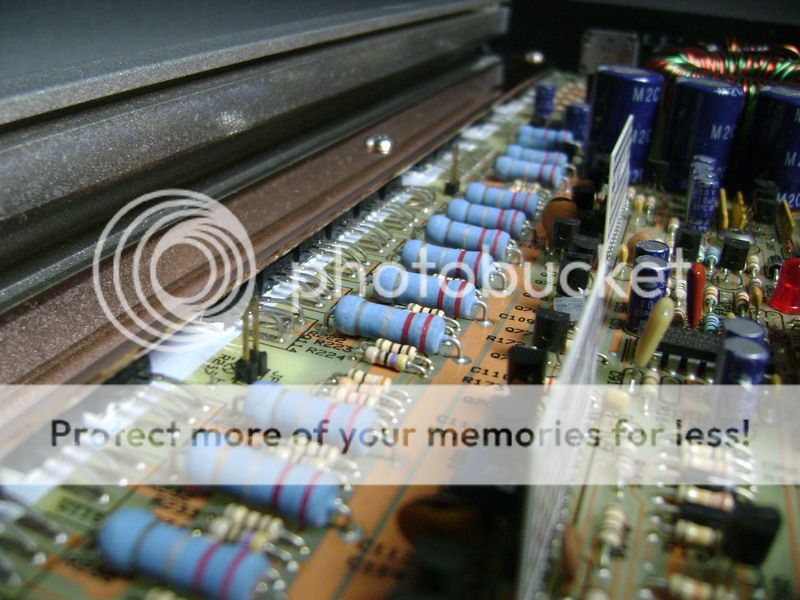
I glued a piece of self-adhesive vilt on the bottom. I did this to prevent scratches on the plexi and on the paint.
Once this was done, I screwed the plexi on. 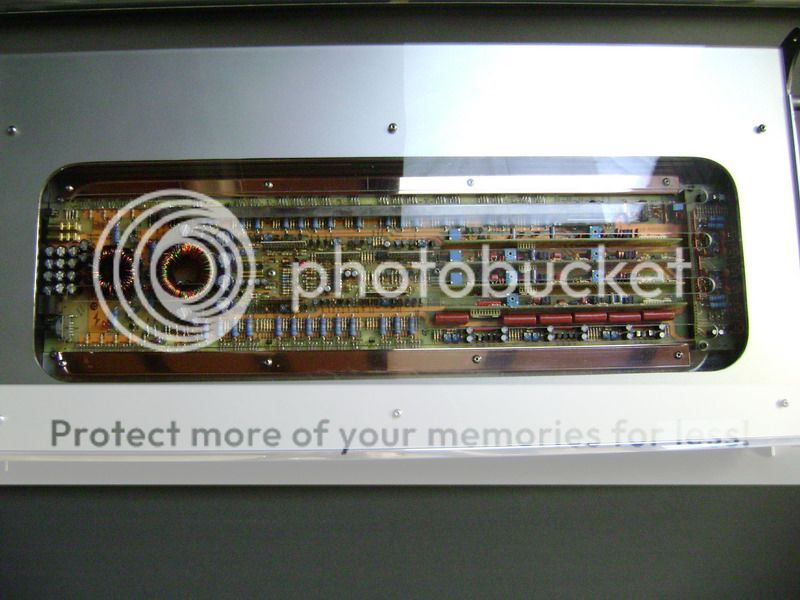
The plexi glass is painted in the same colour as the car. TITANSILVER 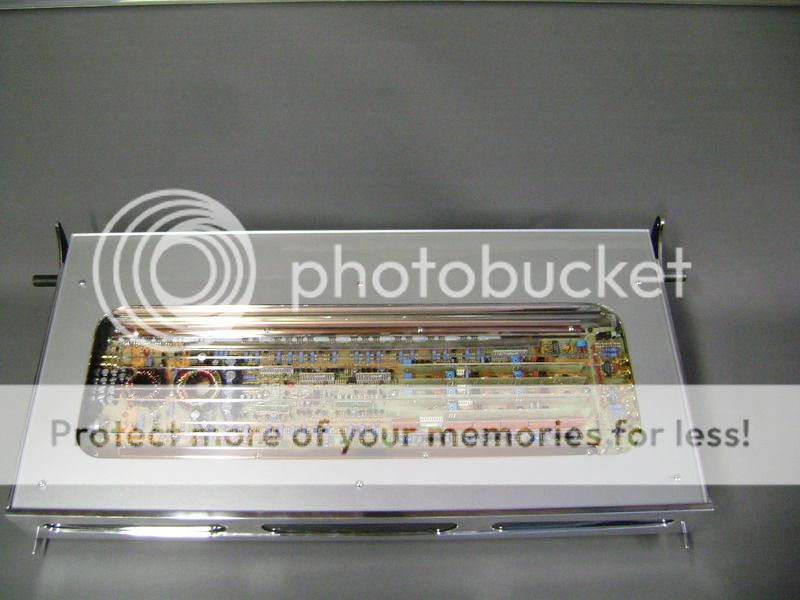
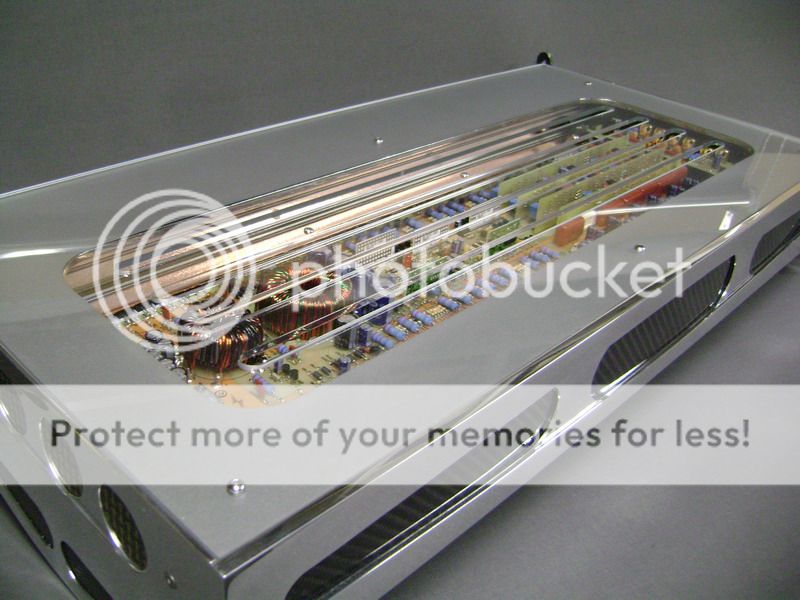
The slots I milled into the plexi, don't catch the eye like I planned it. But when the lights are on...that'll change. 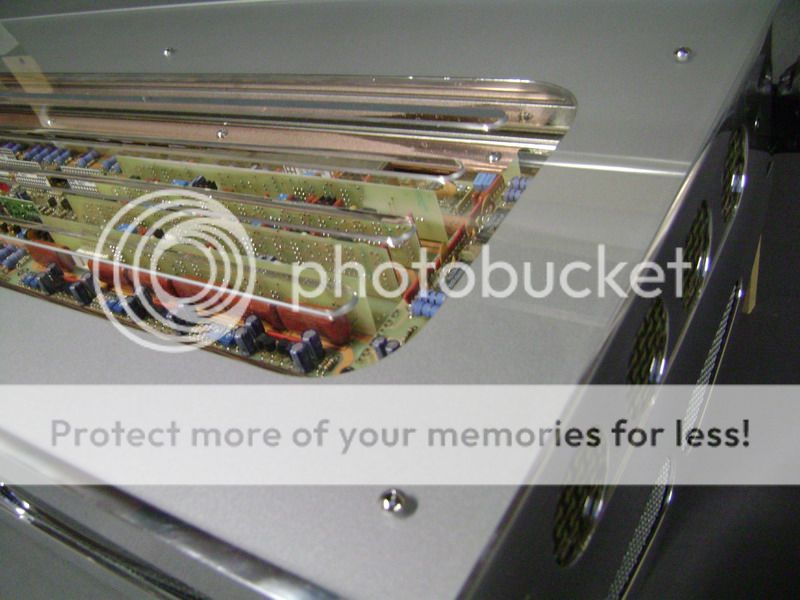
Posted By: i am an idiot
Date Posted: October 31, 2009 at 5:39 PM
Your copper bar is bowed, I can see the arch in it. It is holding the transistors just to the outside of the screws just fine. The ones next to them, not so much. Where the bar is high, it is not doing it's job. You really need a thicker bar, or an angle instead of a flat bar. Most amplifiers that use a bar type clamp system have one screw per every pair of transistors. That amp gets by with the screws that far apart because the metal tabs on the bottom cover are designed to bend a bit when the screws are torqued down. The flexing allows even pressure to be placed on each transistor.
Posted By: Melted Fabric
Date Posted: October 31, 2009 at 10:49 PM
Over 6 years I am have been coming to the12volt.
I have seen many inspiring projects, this is definitely one of them.
And I am thank for all the pictures detailing the steps of creation, this is the most pictures ever encountered on a forum thread  , but I am appreciative of it though !!
Great work, I assume you will answer questions of other members when time allows.
KarTuneMan, good to see you are still around  , I am just now getting back to being on here on a regular basis.
I am a Idiot, good to see you as well! ------------- I have not failed. I've just found 10,000 ways that won't work.
When you do not know what you are doing and what you are doing is the best -- that is inspiration.
Posted By: robolop
Date Posted: November 01, 2009 at 11:01 AM
Melted Fabric wrote:
Over 6 years I am have been coming to the12volt.
I have seen many inspiring projects, this is definitely one of them.
And I am thank for all the pictures detailing the steps of creation, this is the most pictures ever encountered on a forum thread , but I am appreciative of it though !!
Great work, I assume you will answer questions of other members when time allows.
KarTuneMan, good to see you are still around , I am just now getting back to being on here on a regular basis.
I am a Idiot, good to see you as well!
Thanks, I'm trying to explain everyting so good as I can, together wite some illustrated pictures.
Posted By: i am an idiot
Date Posted: November 02, 2009 at 6:24 AM
Glad to see you made it back, Melted.
Posted By: robolop
Date Posted: November 05, 2009 at 5:57 AM
I forgot to post these pictures. Theyre about the plexi sides who will get next to the amplifier. These are also sprayed in the silver of the car. 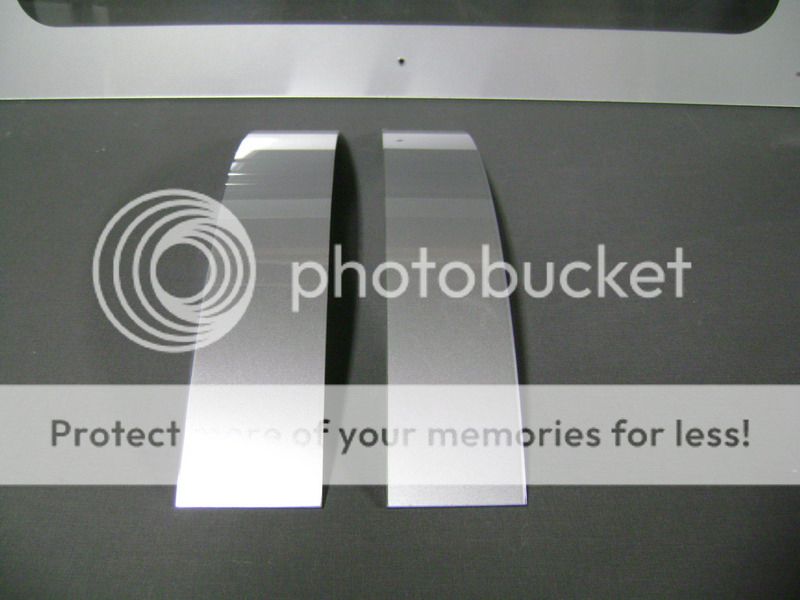


For the amplifier-part, everything is mounted into the car. Im going to wait some more before posting pictures.
Sorry dudes.
In the meanwhile, I didnt sat still. For about 10 years, I have something in my head, that I HAVE TO try sometime.
Well, now that stage1 is complete (and it all works perfectly), its time to do so. Here and there there are some things I need to improve, but part from that, stage 1 is finished.
So now the search is on for some nice and functional ways to work out the next stage
and surely, were going to add a little motor somewhere again J
I show my plans to some dudes, but they didnt understand that good lol
I think thats cool.......
Posted By: Melted Fabric
Date Posted: November 05, 2009 at 8:14 PM
Keep them coming, you do extreme work and have shown very nice techniques for accomplishing unique designs.
I have gathered much from this project.
-------------
I have not failed. I've just found 10,000 ways that won't work.
When you do not know what you are doing and what you are doing is the best -- that is inspiration.
Posted By: robolop
Date Posted: November 09, 2009 at 3:10 AM
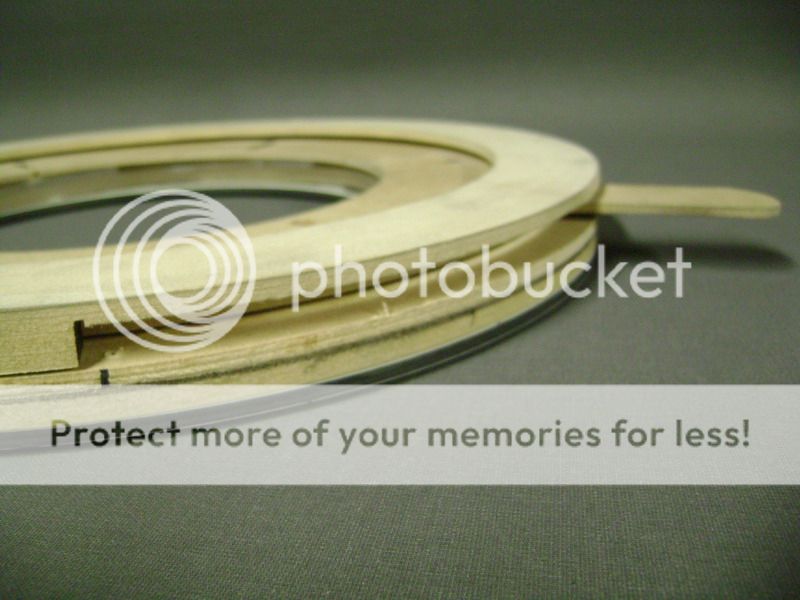
Here some pictures of the thing I made. First of all I made 6 of the same plexiglass boomerangs. I did this in plexi so you can see if something goes wrong. Made the model in MDF offcourse, then I pasted the 6 pieces on , and held it to the copy-mill 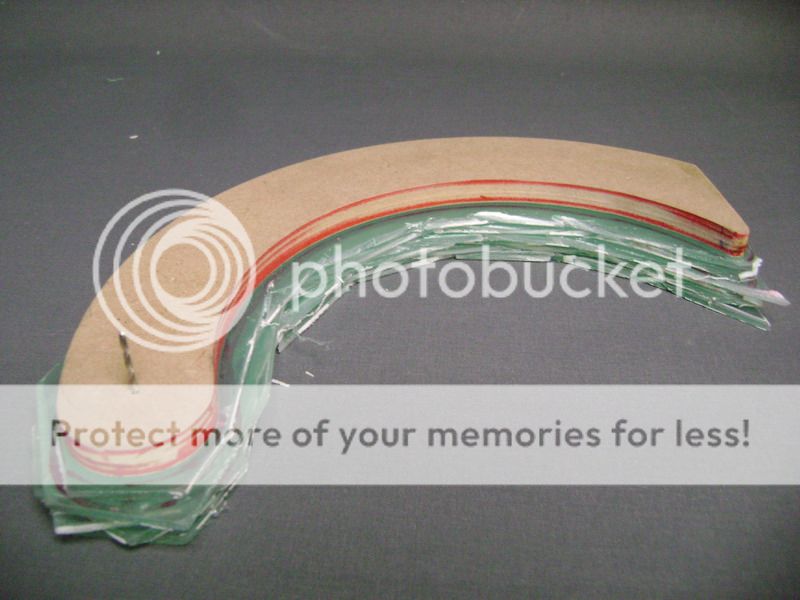

Only this is how you get everything 100% the same.
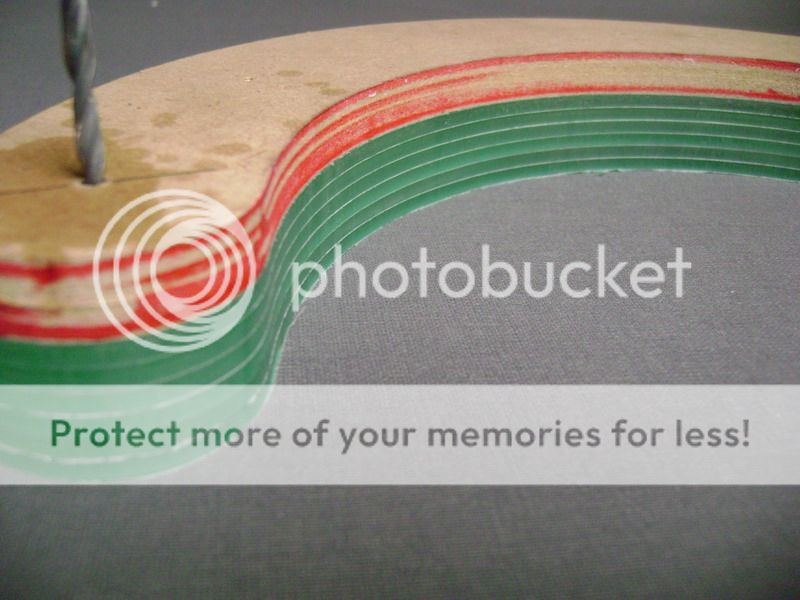 After that I milled the MDF rings.
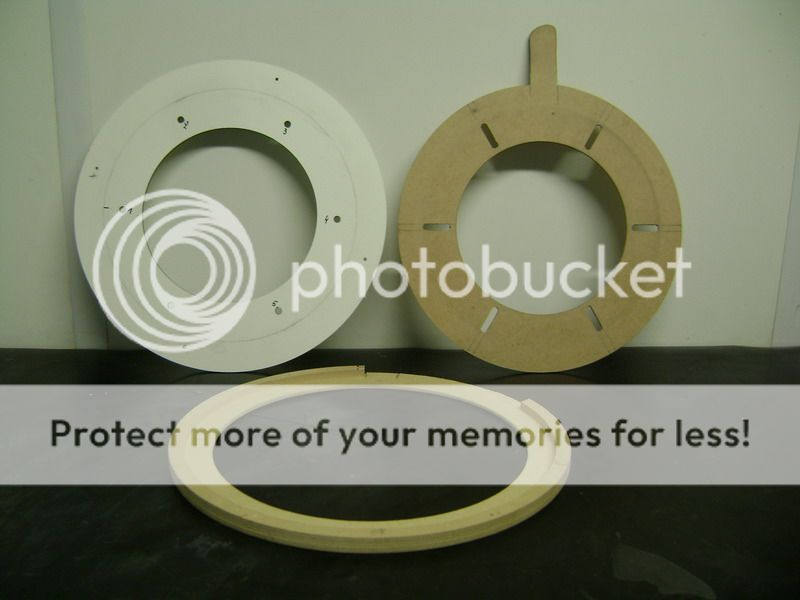 De linkse ring is van volkern. 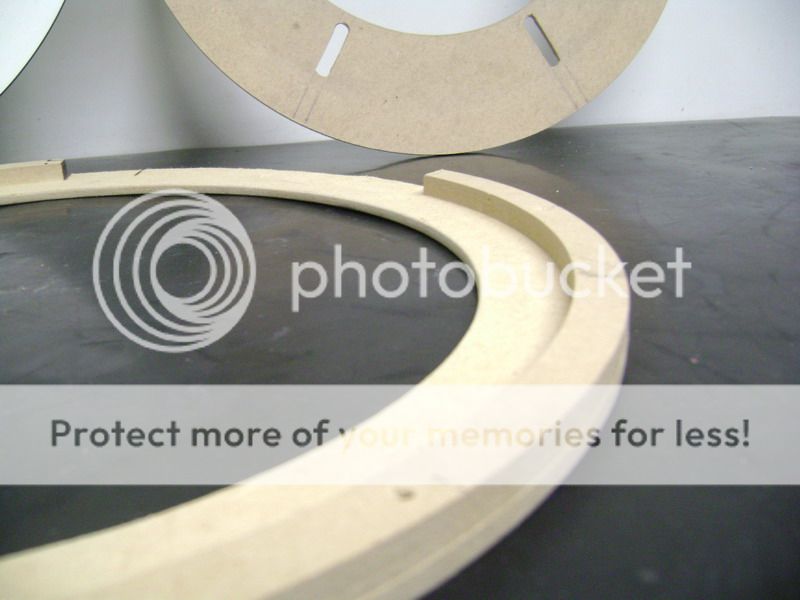
Some more rings, and the plexi 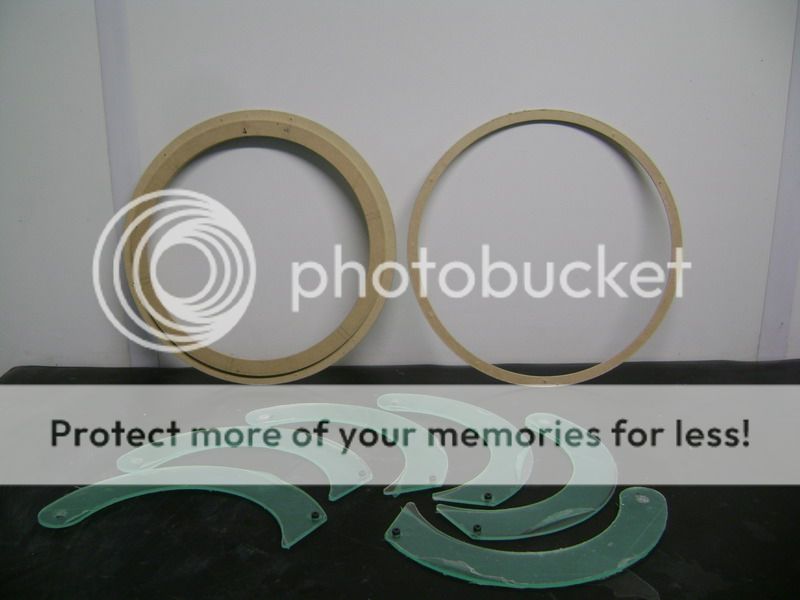
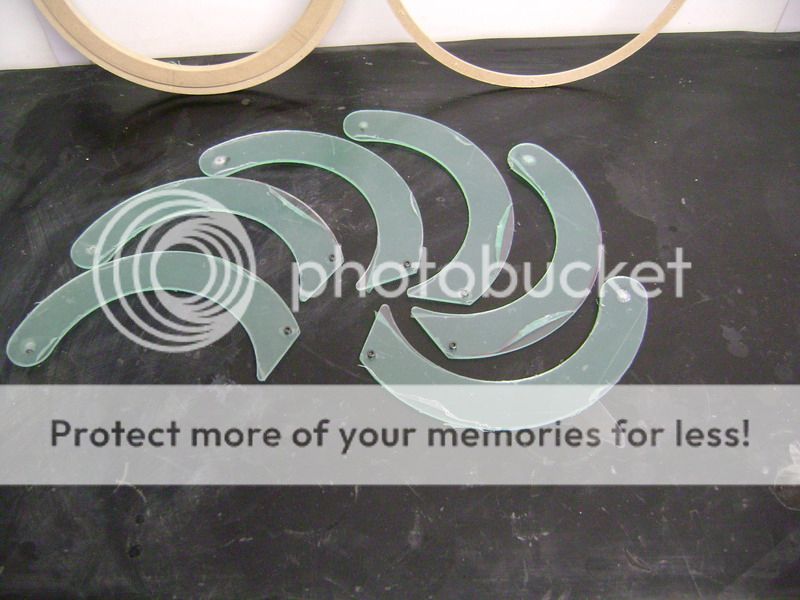
This needs to be put together now, and then its finished. Simple ! This thing I made, has a name
and Im curious for the guy/girl who can guess what its called. The first person may come over here to clean and dust my garage.
Posted By: FRANCO90
Date Posted: November 13, 2009 at 2:55 AM
wow nice build
Posted By: squires500
Date Posted: November 14, 2009 at 9:30 PM
im assuming you will make some form of diaphragm with the Plexiglas pieces sliding together and apart for to allow noise in and out???
Posted By: robolop
Date Posted: January 10, 2010 at 10:07 AM
A couple of words about the DIAFRAGMA. First I would like to say that I didnt know how this was called too
As I told before, I had it in my mind to make such a thing for years now. I never bothered to think how this was going to work exactly
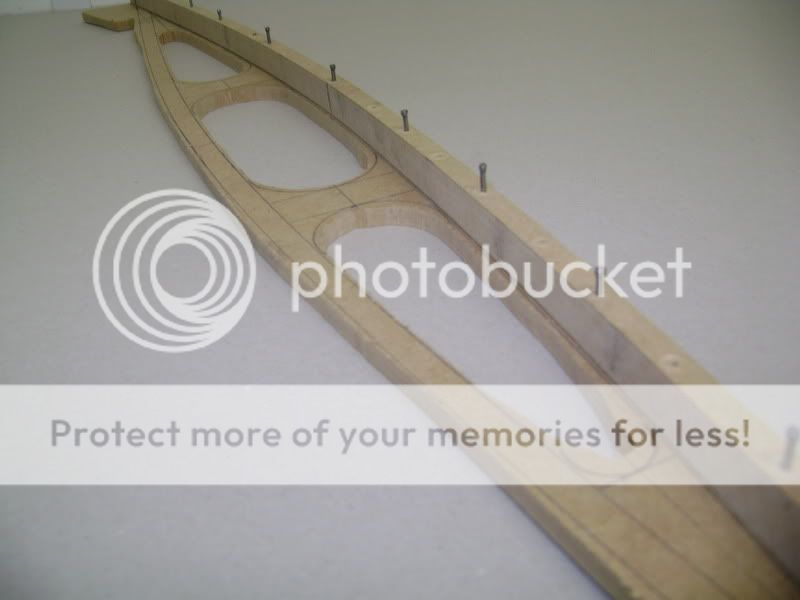
this was al about mathematiques, and even in school I hated that crap. But if you look at it know, its quite simple. To explain it a bit easier, I let the top part off. You can see 6 plexi boomerangs laying on top of each other. You can also see that on the tips there are some inbus-scews of M4, these are the hinge-points. 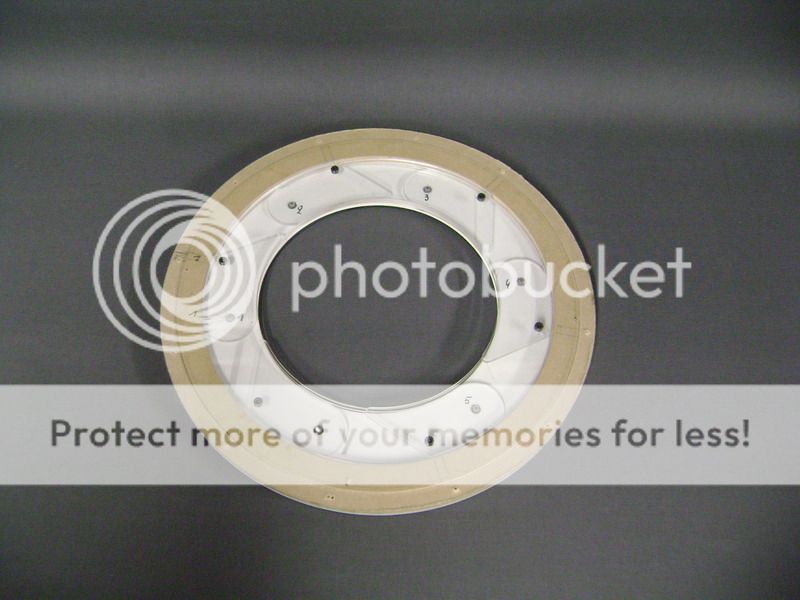
Here you can see him closed. 
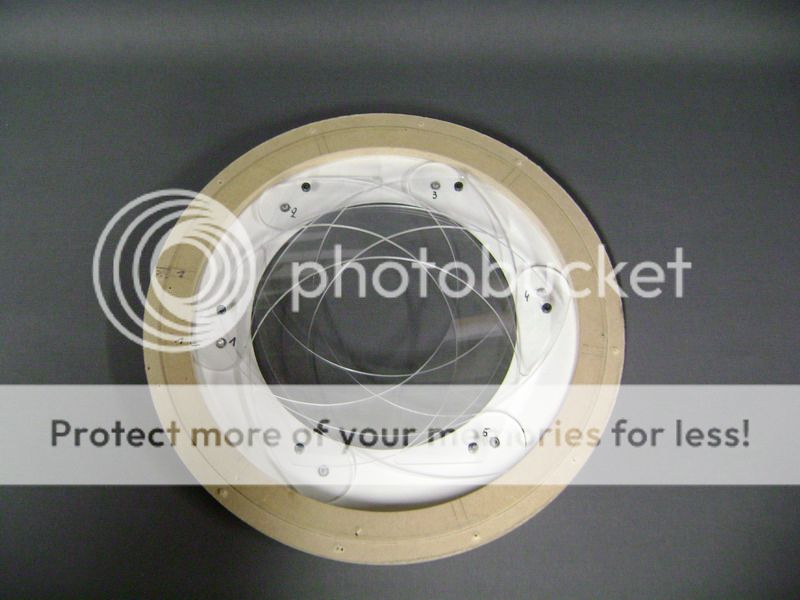
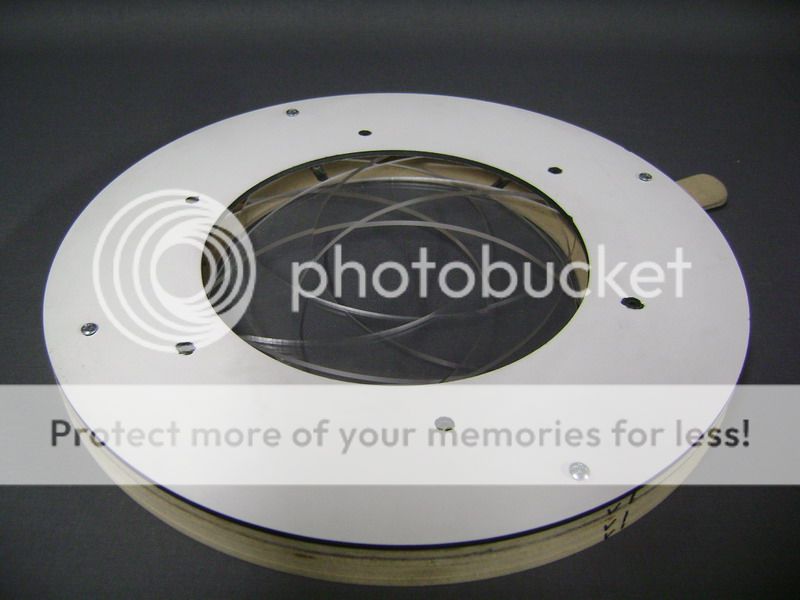
Here complete, with the cover on top.
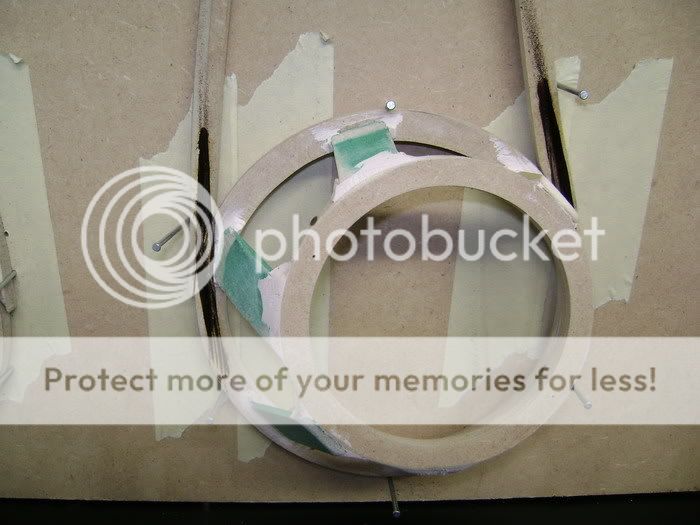
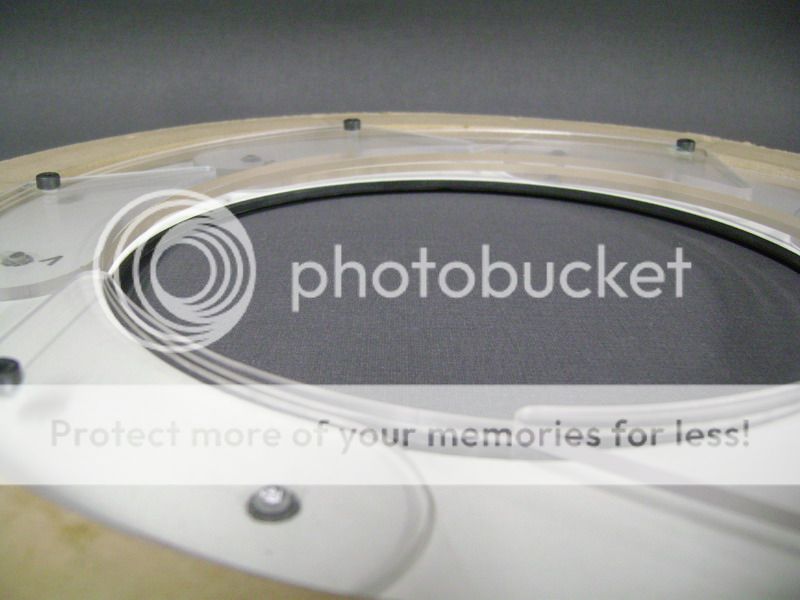
This is the slide, where you open and close this thing with.
In the 6 slots there are imbus-screws. You can also see these are on the outside of the slot. 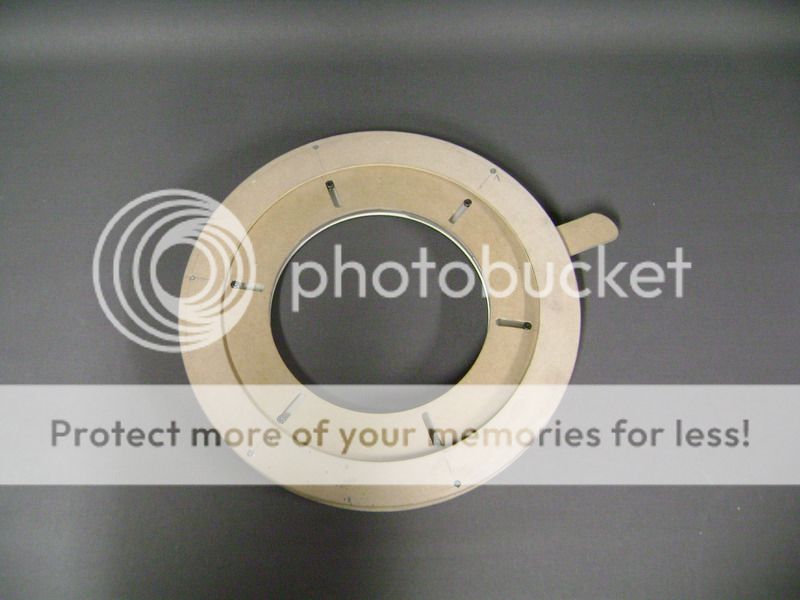
Now you see it close, and you see the screws go to the middle. 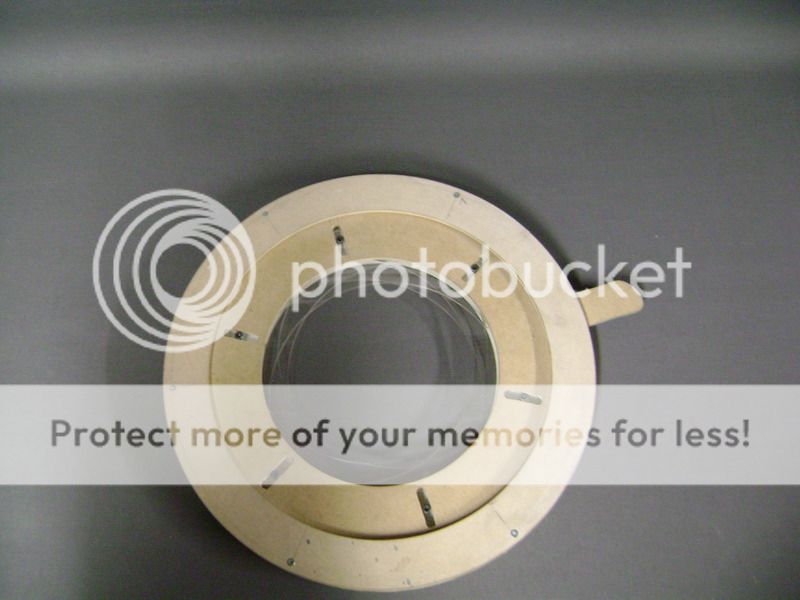
Now its closed. 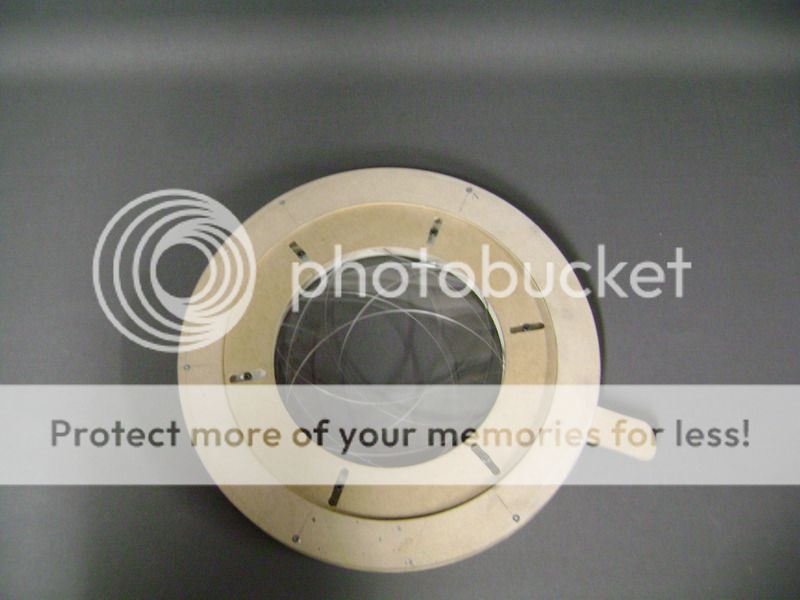
You can see there is a hole in the middle, but thats normal with this drawing. It never closes completely. 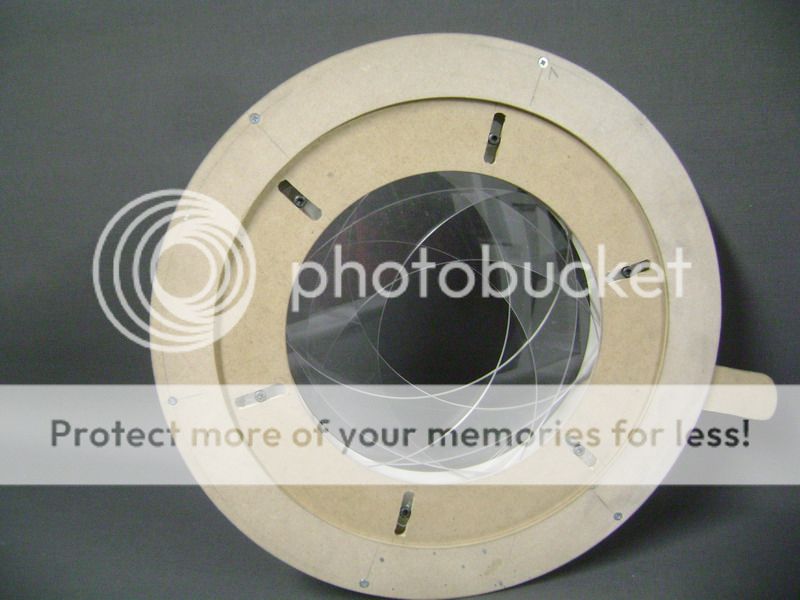

Some pictures from on the other side. 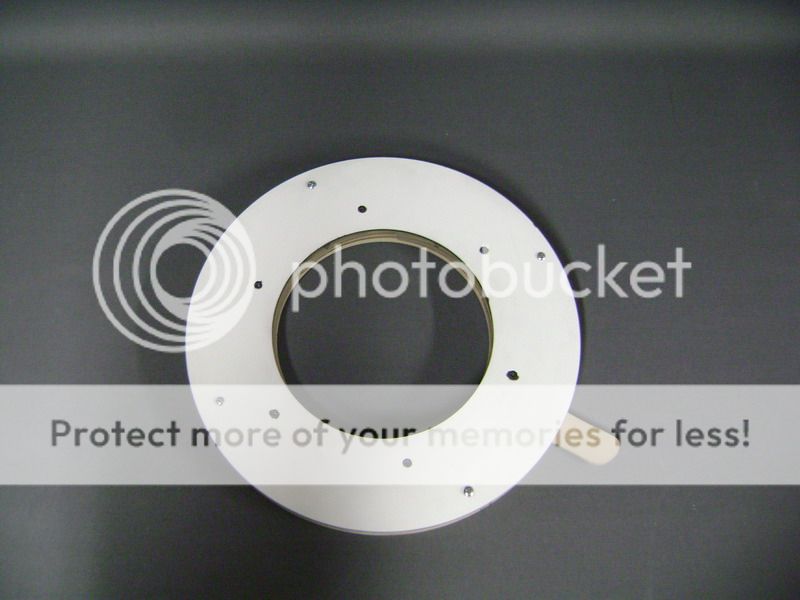
The meaning of this thing is, that I want it to stand behind the back of the rear seat. You may know that, in the beginning, I traded the normal rear seat for a rear seat with ski-hatch, to get the bass better into the interior. Because I found this hole kind of BORING, Im trying to put in a diafragma. Read again: TRYING !! You also know the amplifier comes before that when its open, so I need to check and measure if I still have enough place to put it all. Im going to make everything out of other materials, about 18mm thick
It also needs to open and close automatically, but thats easy to sort out. The biggest problem is to ensure it doesnt rattle while driving, but I may have a solution for that problem too
Now about the hole (when everything is close up)
I think Ive found a cool solution for that too. Im only hoping for one thing now
that I have enough place for this all
Posted By: robolop
Date Posted: January 10, 2010 at 10:17 AM
Posted By: robolop
Date Posted: January 10, 2010 at 10:19 AM
These will be the final boomerangs for the diaphragm. I used anodized aluminum of 1.5mm thick. This material is also used on the backside of the Focal Woofers. I taped 6 plates on each other, and held it to the copy-mill. The uppermill is now the best tool to fnish these things off
hope the disc doenst go in to tears now . 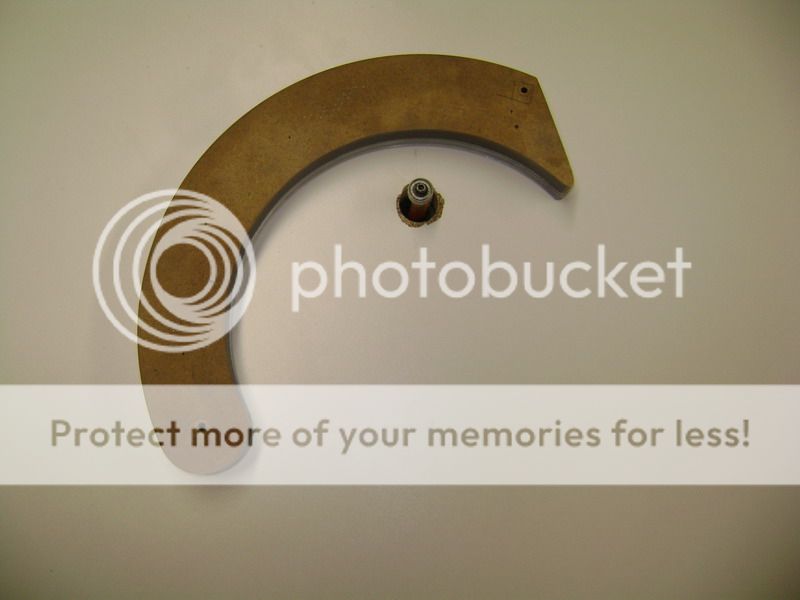
Here you can see the upperside of the boomerangs. 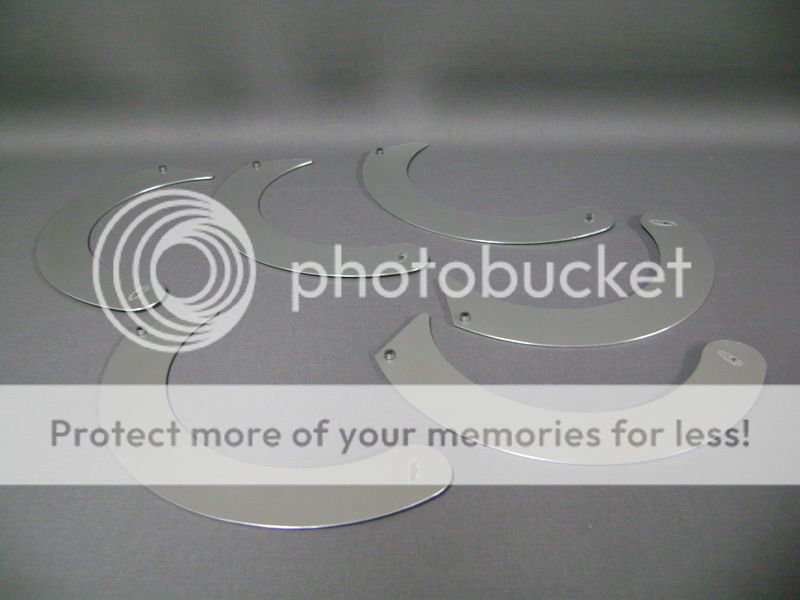
And this is how the backside looks. Youll see right-away that I taped some self-adhesive black vilt on it. 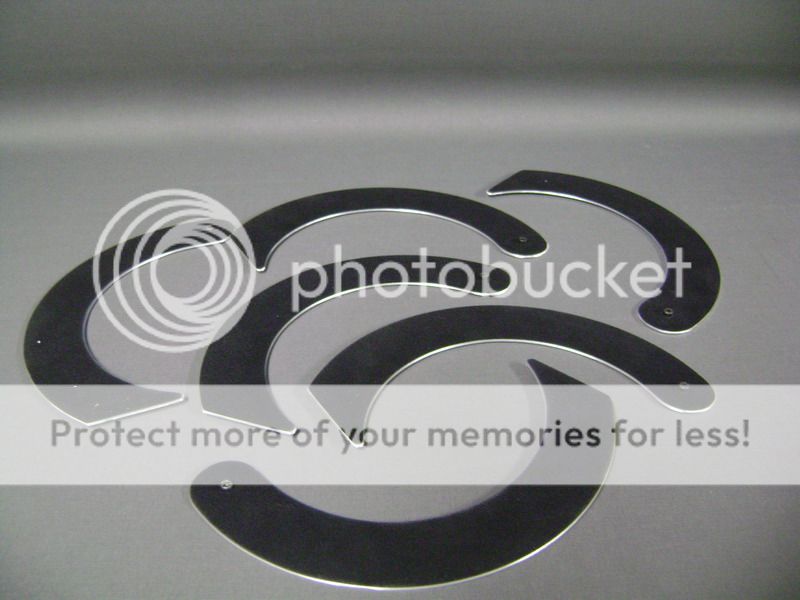
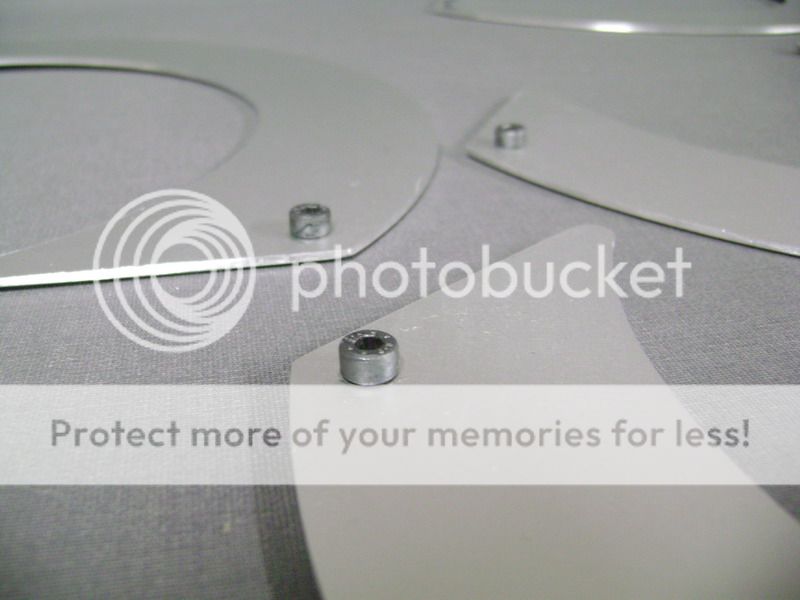
I had to do this, so I couldnt get any scratches on the aluminum when everything opens and closes. Secondly this will prevent vibrating when Im banging the install. Cause the aluminum is only 1.5mm thick, I screwed in some screws with a bit of loctite on it. That way Im sure it wont fall apart. 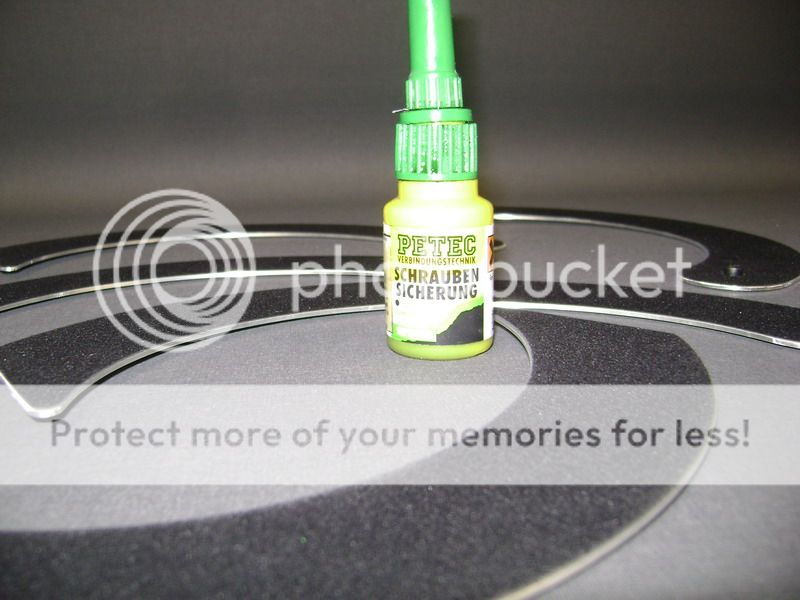
The plexi boomerangs I made at first, landed in the rubbish bin
but they always seem to come back. How is that possible ?
Posted By: robolop
Date Posted: January 10, 2010 at 10:21 AM
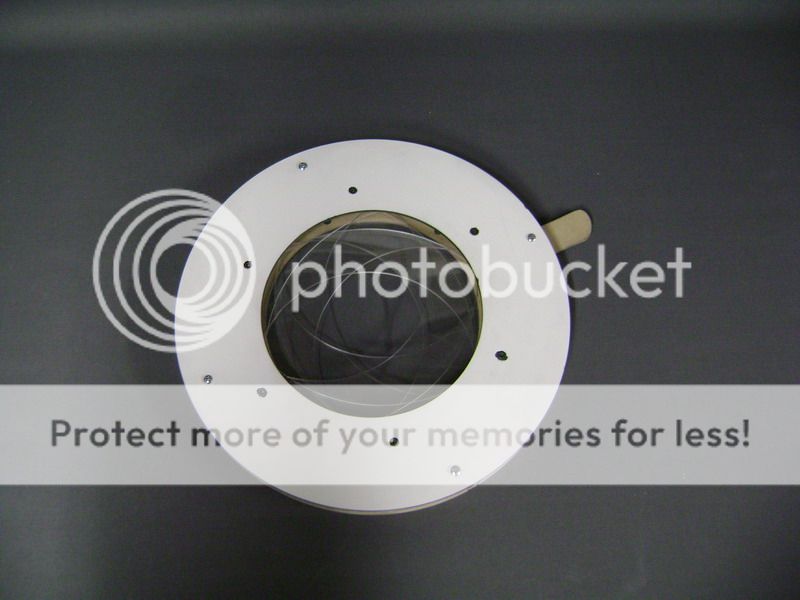
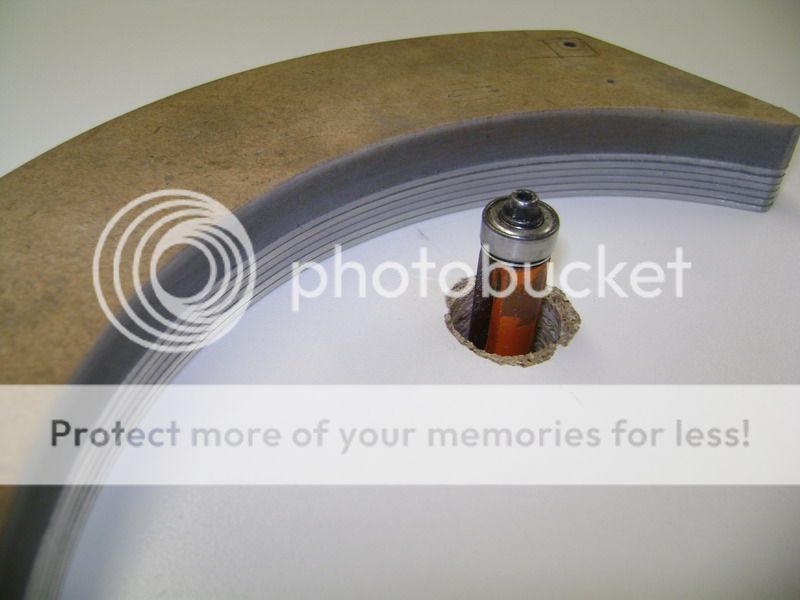
In the meanwhile I finished the diaphragm. This is the aluminum plate of 4mm thick where it'll get on to.
With the 6 little pads that stick out on the side, I can tighten it completely.
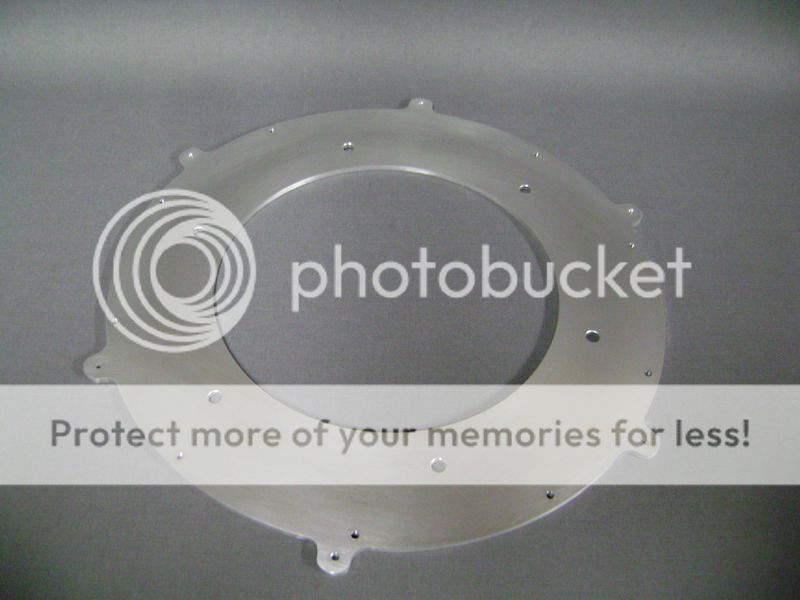
The black ring you can see here, is MDF I painted. The ring I used from the first diaphragm I made. 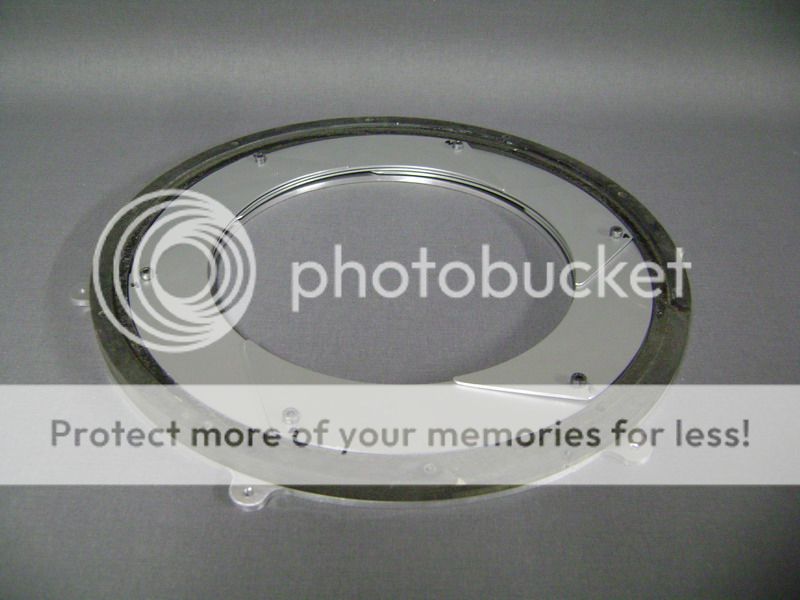 This plate is also 4mm thick, and I put some more work into adjusting the slots where the screws will rest into.  The piece on the right side, will serve for the transmittion. Later I can u on this, what I like, and what's good.
You can also see I glued on a piece of vilt against the vibration.
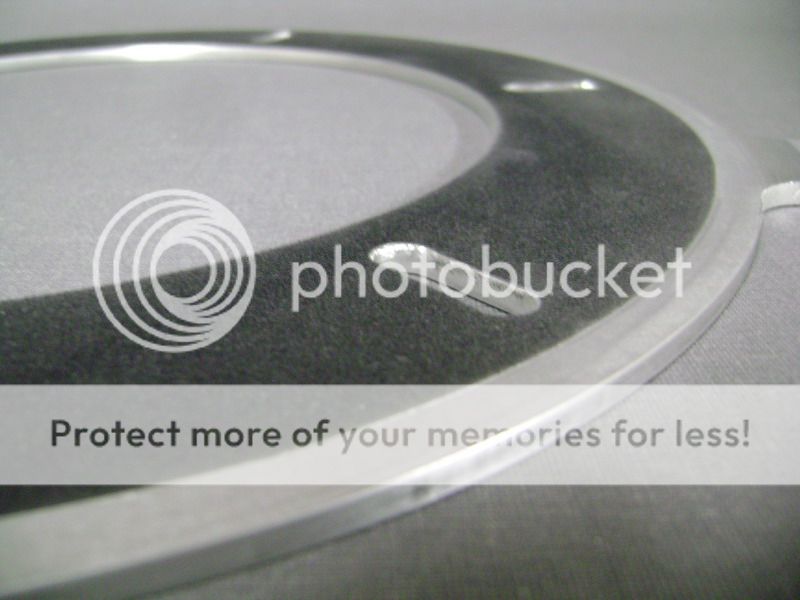
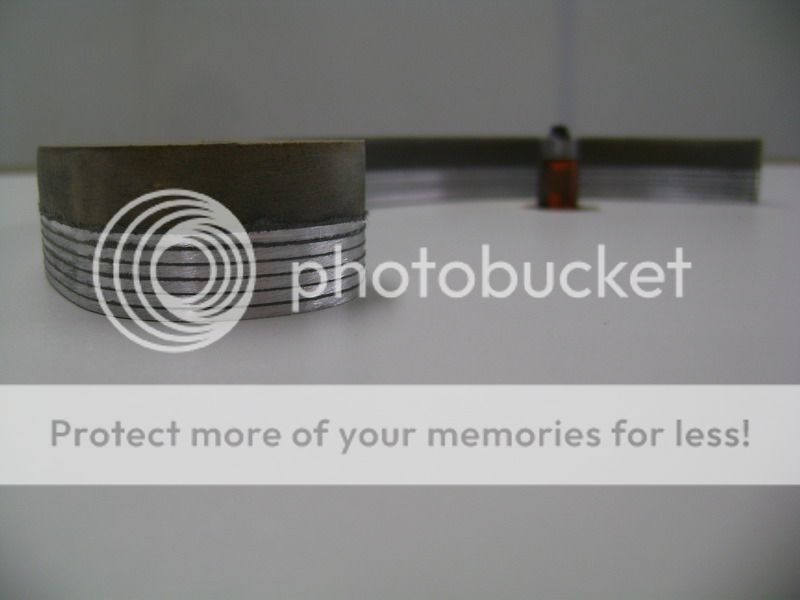
Here you see the boomerangs sliding over eacht-other when it closes. 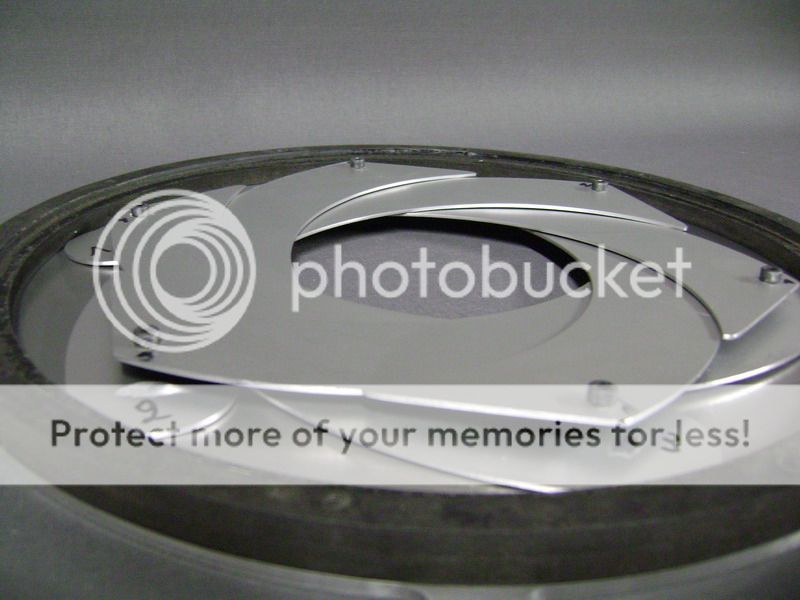
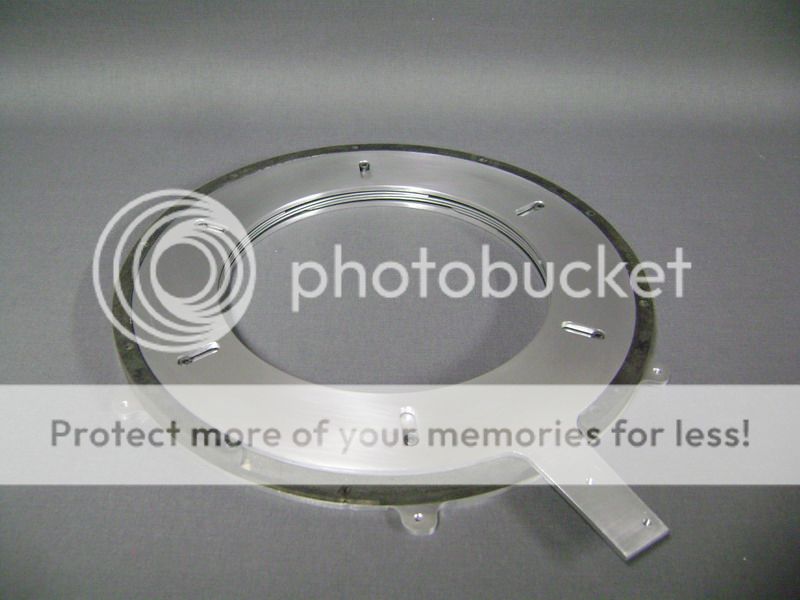
This is a cardboard ring of 2mm thick I cut out. Did this to catch the vibrations, and to adjust it all even better. 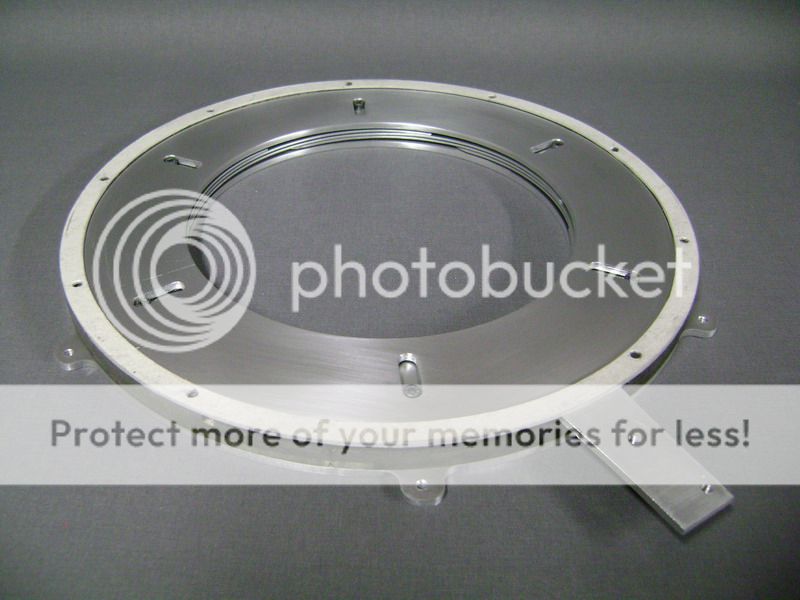 Here the upper ring of 4mm is mounted on. On the bottom of this ring, I also glued some vilt.
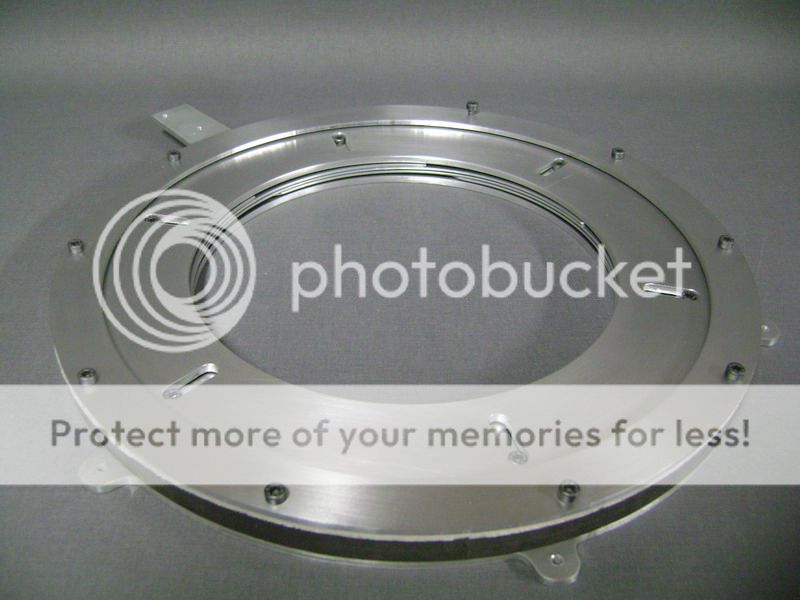 Here in close position. 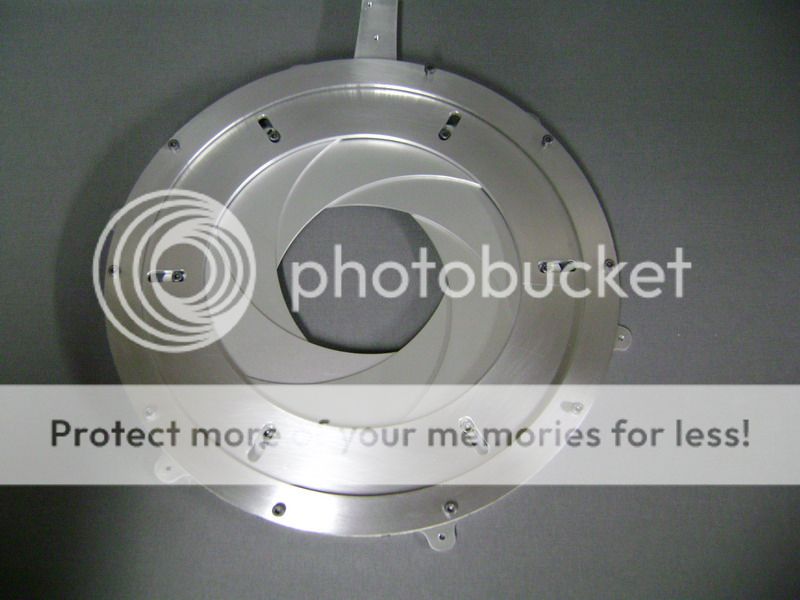
The anodised aluminum in the middle will look great in my opinion. Very satisfied I've chosen this material.
 This is the backside. 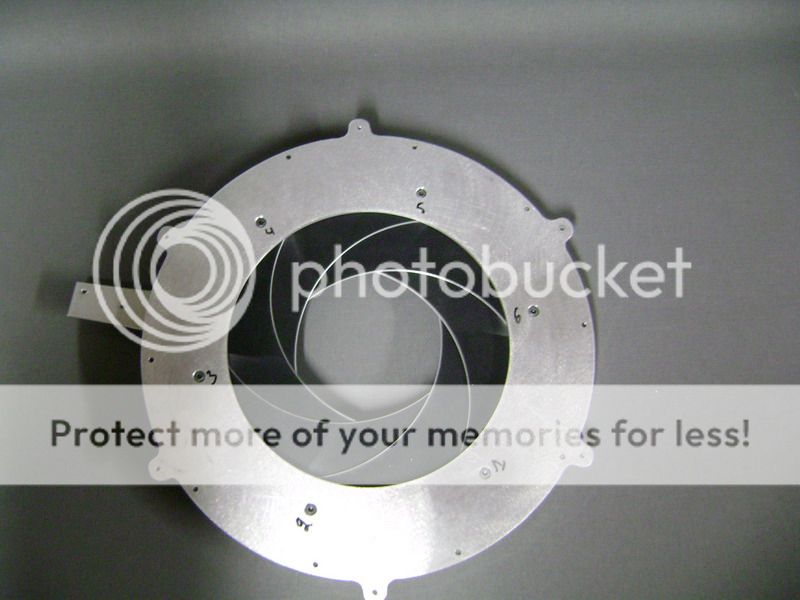

I must say this was easy for me to make.
The biggest problem was to make it tremble and vibration-free, and I did it.
When I open and close it all, you can feel the tention that's on it. I can adjust this delicately with the cardboard I used.
I screwed it all tight on a plate here on my table, and now I'm busy to adjust it subtle before adding the motor.
Posted By: robolop
Date Posted: January 10, 2010 at 10:23 AM
squires500 wrote:
im assuming you will make some form of diaphragm with the Plexiglas pieces sliding together and apart for to allow noise in and out???
yep, good guess!
Posted By: robolop
Date Posted: January 10, 2010 at 10:26 AM
Here the little test I did. When you check it out, it's quite simple really. The spring you see, pulls the diaphragm to close. On the lever, I put a bigger plate, so I can see how long I need to make my transmittion. The more I pull the cable out, the more slowly it close and opens, and the less force the motor needs. I really like the speed that it opens and close now. I just need to make a descent piece of aluminum that will stand onto the motor. Here a picture, I'm going to make a little movie, and post it offcourse. 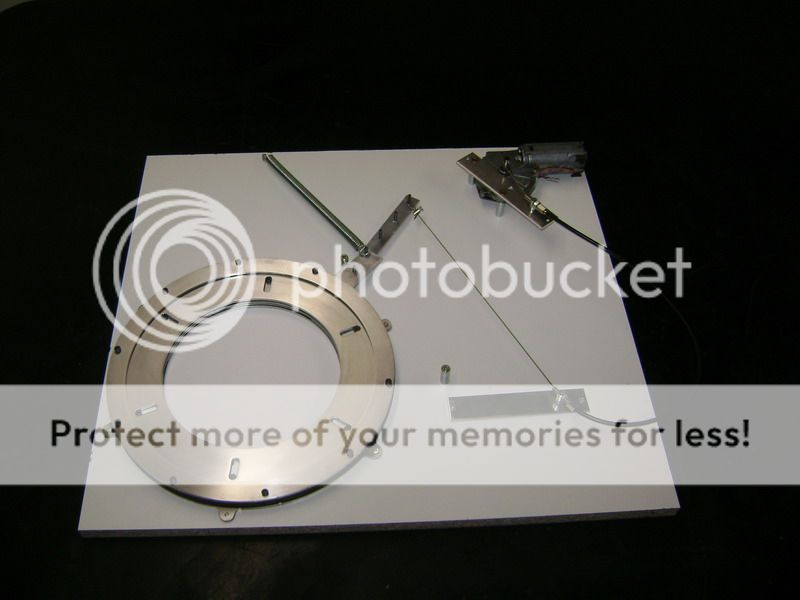
Posted By: robolop
Date Posted: January 10, 2010 at 10:26 AM
These things will end up in the hole of the diaphragm. First 3 aluminum bars of 10 mm thick.
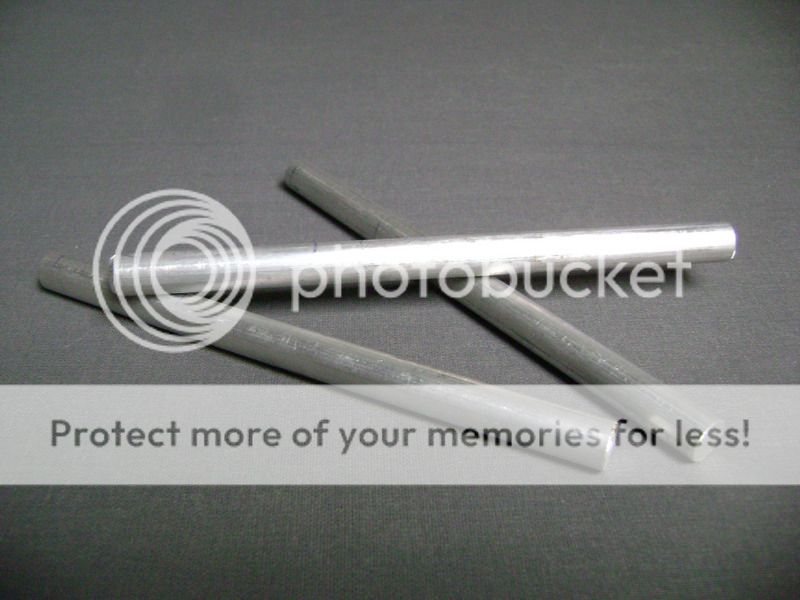 Here I had to have a clean flat side of 4 centimeters aprox.
I put them next to each other, screwed them tight(for safety), and stretched them out.
Then I planted in the uppermill, and milled a flat side. 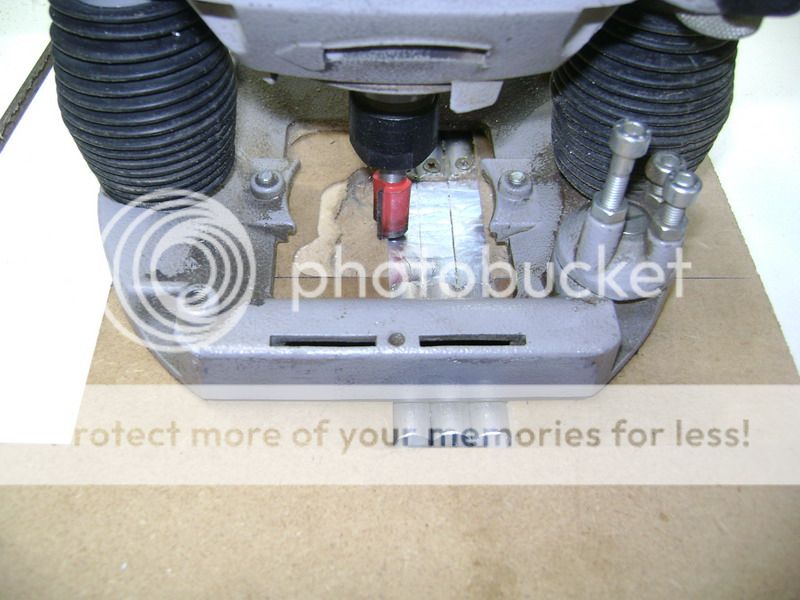
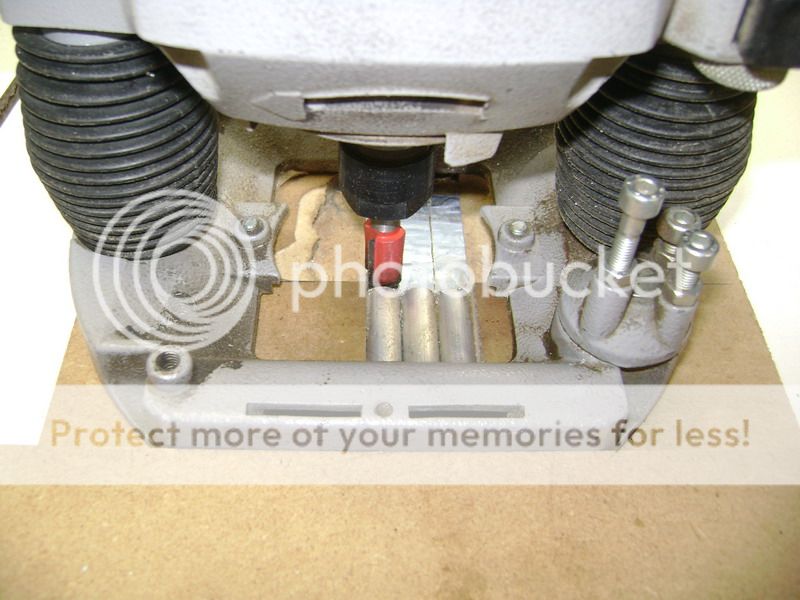
On the top of the bars you could see I screwed them, so afterwards...I disced this off.. 
I divided this equaly, and tightened this on the back. 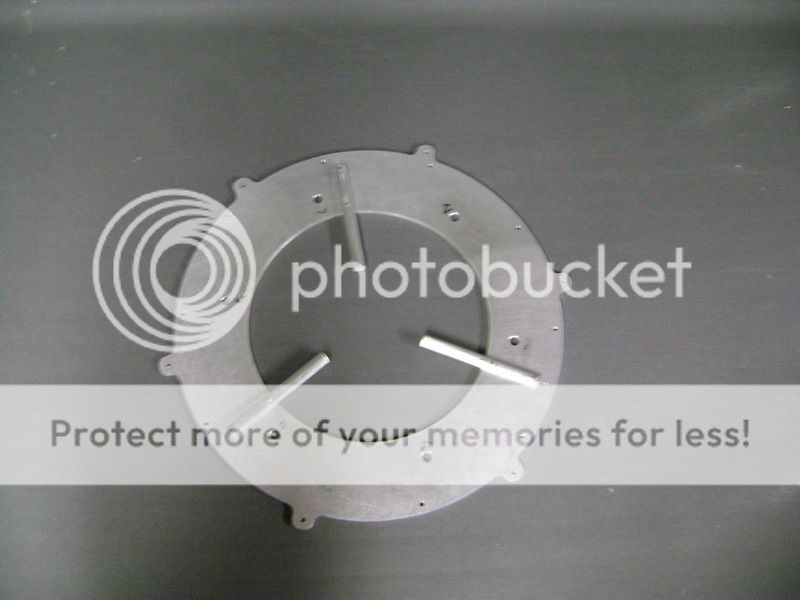
Now you can see why I needed a flat side 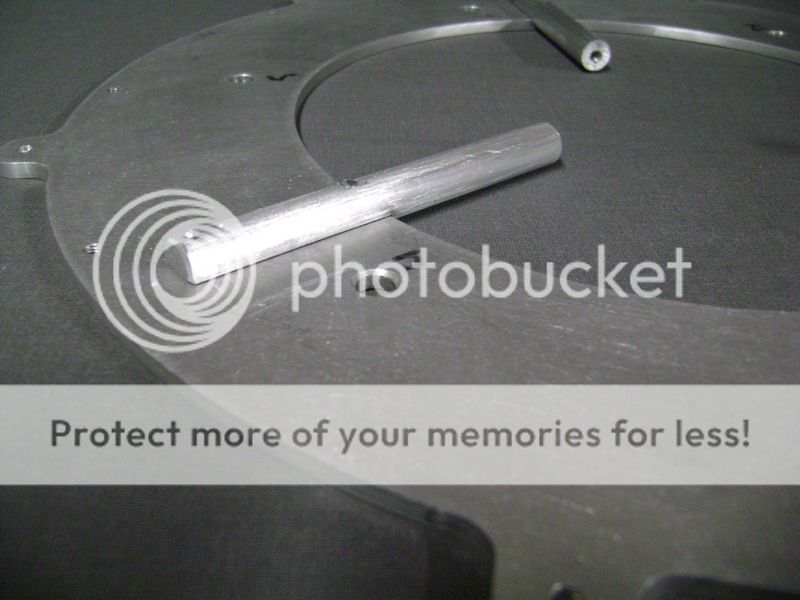
Once I had this, I screwed on a piece of aluminum tube of 10cm diameters.
This tube will get much shorter, but now, I don't know how much exactly... 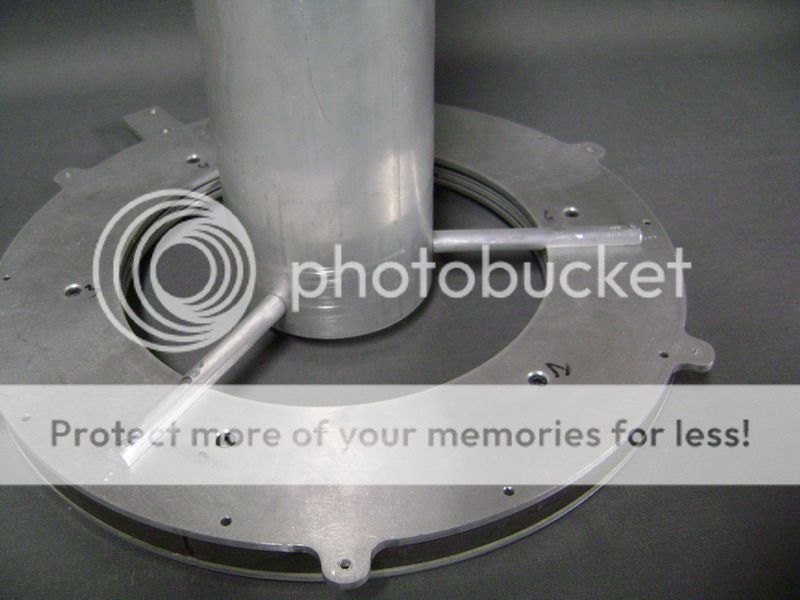
Here the frontview, looks a bit like a little nuclear reactor or so. 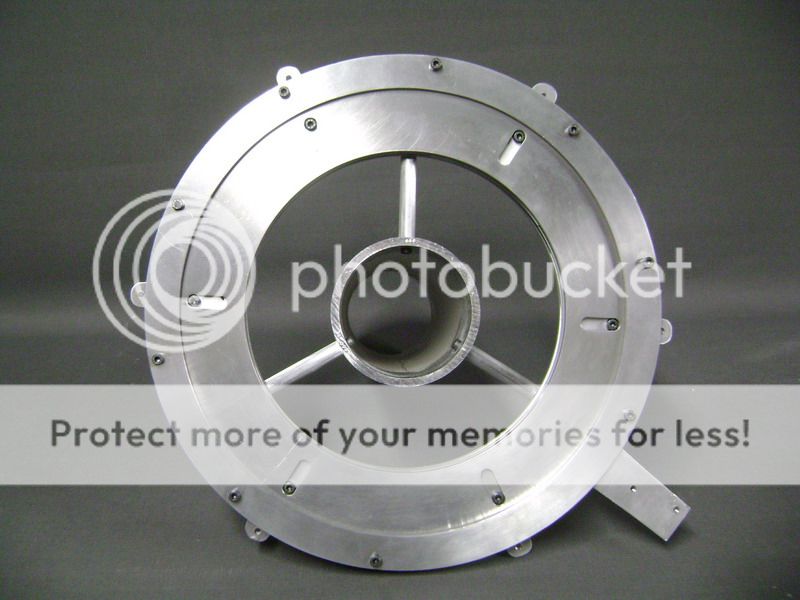
This was the easy part...and now I have to make something to get in that tube. And I think it's gonna be... COOL. (i hope)
Posted By: robolop
Date Posted: January 10, 2010 at 10:27 AM
Ive been busy milling some rings in aluminum for the diaphragm, and believe me, many hours have passed.
This is a ring of 8mm thick that will get into the middle, around the big tube.
How I make a ring, you all should know by know, but here you can see how I made a flange on it. 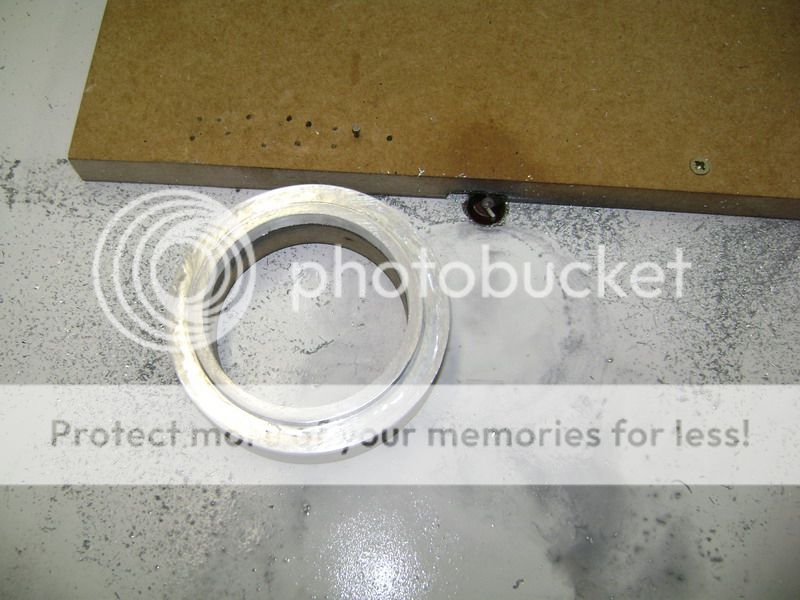
Its super easy to do so. You take a right mill, and take a little plank of mdf wood. 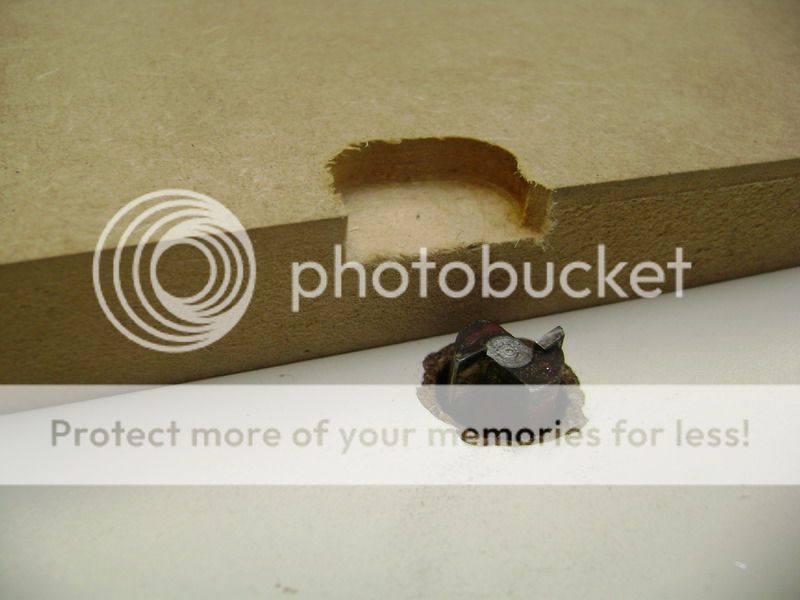
This plank you put on top of the mill. 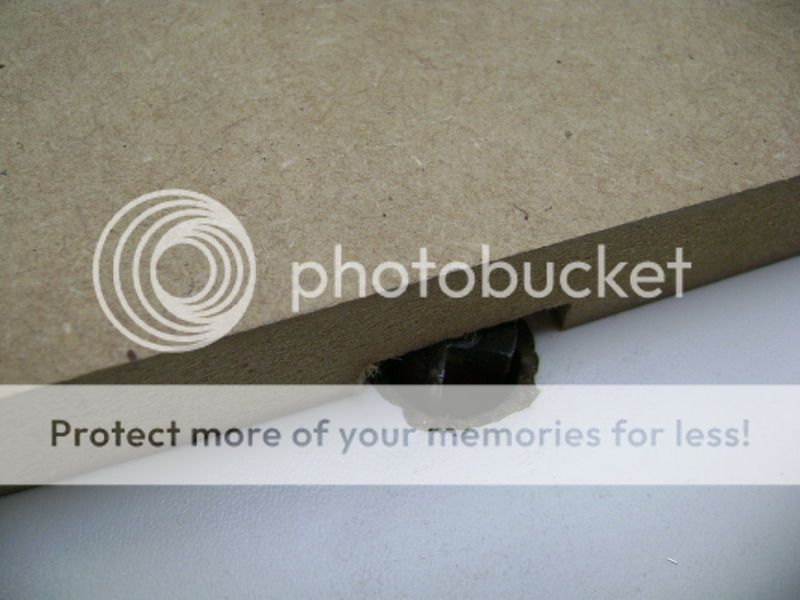
By pulling the plank away, the mill gets free on the front
and here you keep on the aluminum piece.
Its kind of a glider you have.
Here you can see the result, and you can see the MDF ring is still mounted on. This one stays on, so I can get a better grip on the part. 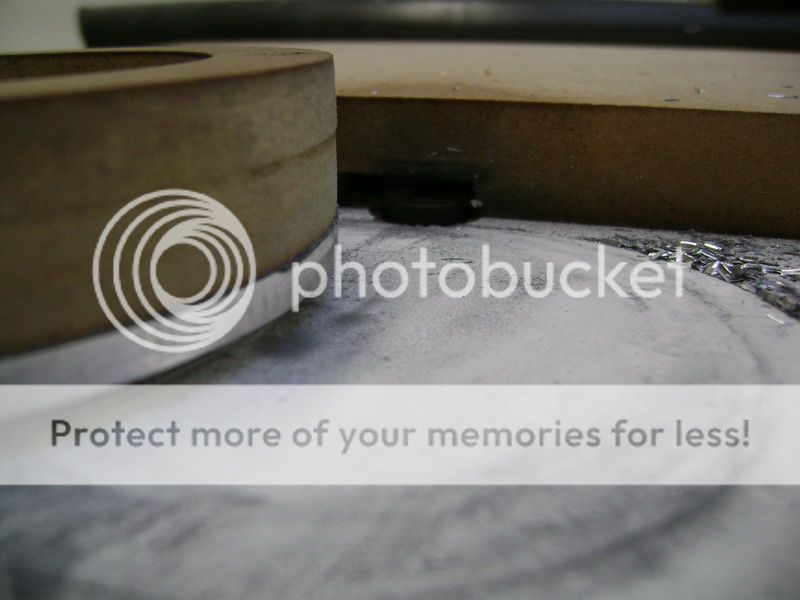
One ring finished
This little ring will get on the inside, and I made this of anodized material. Did this to have some contrast. 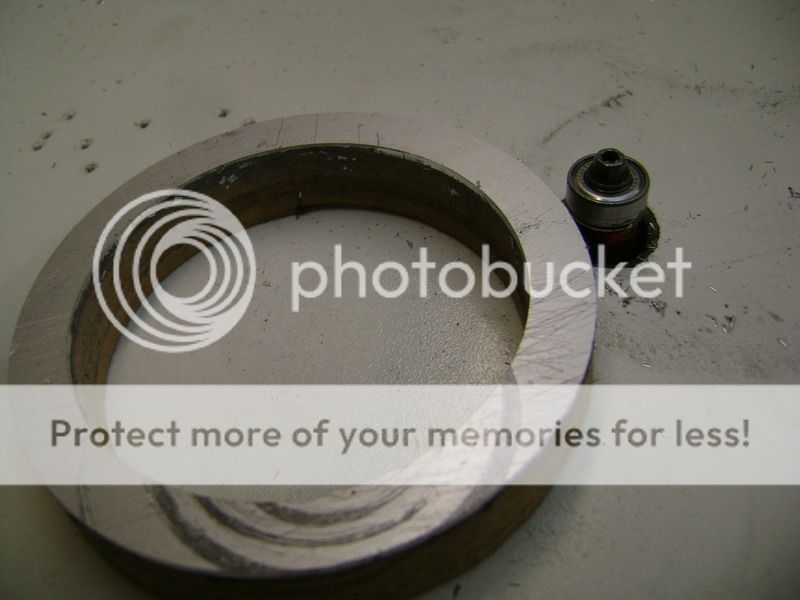
The upper ring needs to be abdraded firmly now, cause Im going to polish it. 
Here you can see how itll look. In the centre in the middle, a logo or so will be added, but still dont know what

Then I started again but making the middle ring.
Measured correctly, and made it with MDF at first. Drawed it out on 8mm aluminum, and sawed it out. Taped them on each other, and held it to the mill. 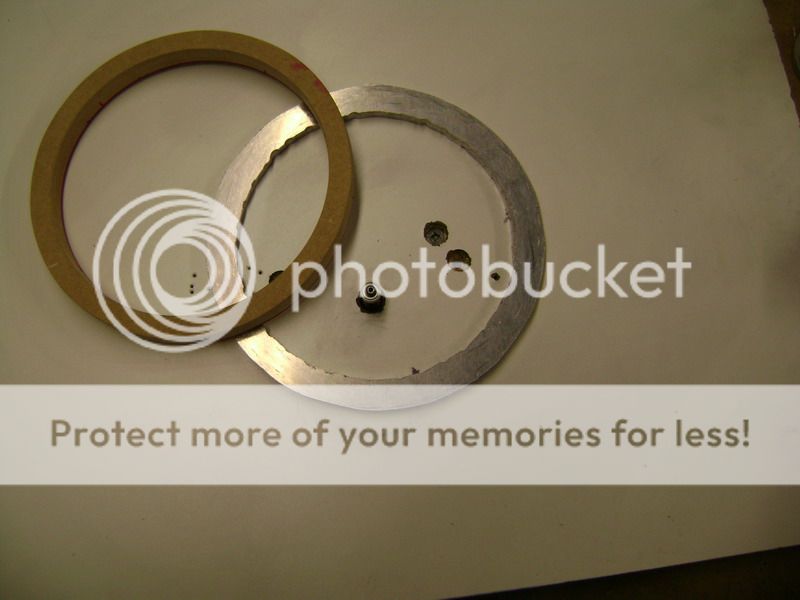
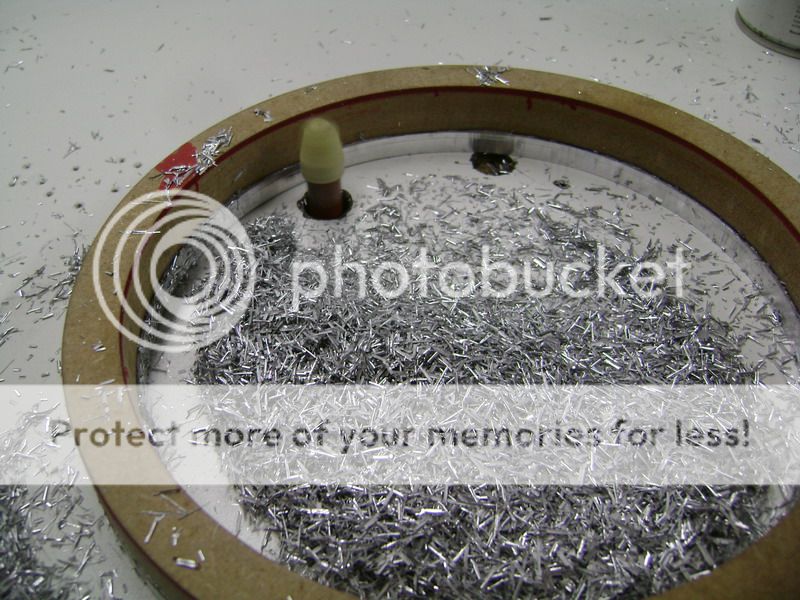
Posted By: robolop
Date Posted: January 10, 2010 at 10:27 AM
This was the result. 
Here you can see I made a double flange. 
Then I made another ring of anodised aluminum of 2mm thick. 
Here you can see this piece fits into the outer flange. 
Here you can see that this will all get mounted on the diaphragm 

Then I needed to make the outer and final ring.
This will be tightened, against all of my principles, with 6 screws. Had the opportunity to glue it, but doubted if that would look good 
Here you can see I made 2 more flanges. 
See this all mounted.on. 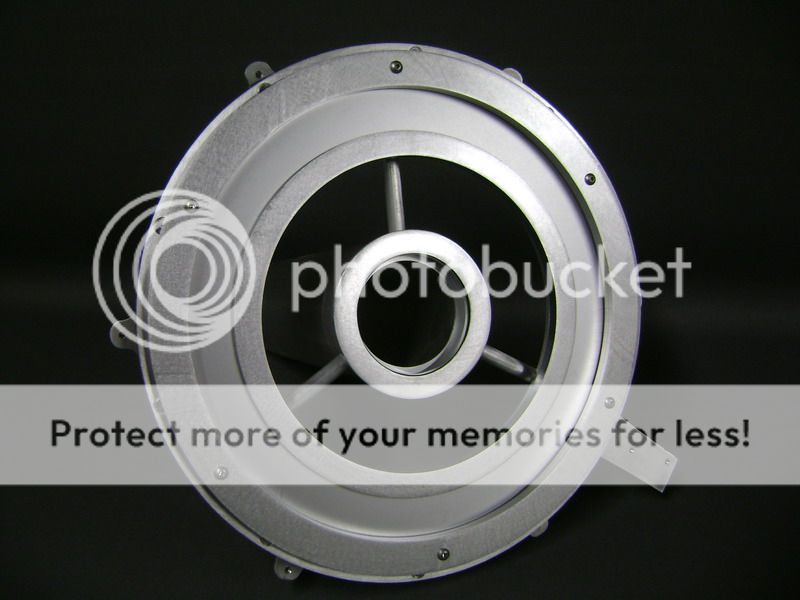

With a little cube of 5mm thick, I want to show you how I will tighten this Around the diaphragm will get a lot of carbon fibre, I can stop nicely on the aluminum, and I can roll the ring against it, for a perfect finish. 
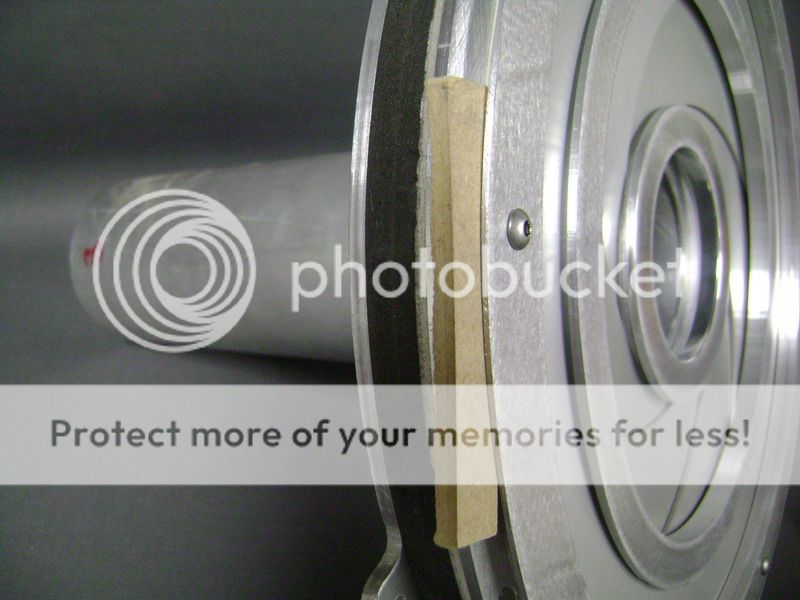
Im pretty satisfied about the mill-work. There has been a lot of work on this, but in the meanwhile thats long forgotton..
Whats next now you ask
Well the dull, boring jobs as usual. Rubbing, abrading,
.and holding everything to the polish-brush.
In the meanwhile a friend of mine, who has a big lathe (turning bench?) made me some axis, who will get placed onto the window-wiper-motor.
These are only 8mm diameter on the top, and so it will all open and close more slowly
and this was how I wanted it. 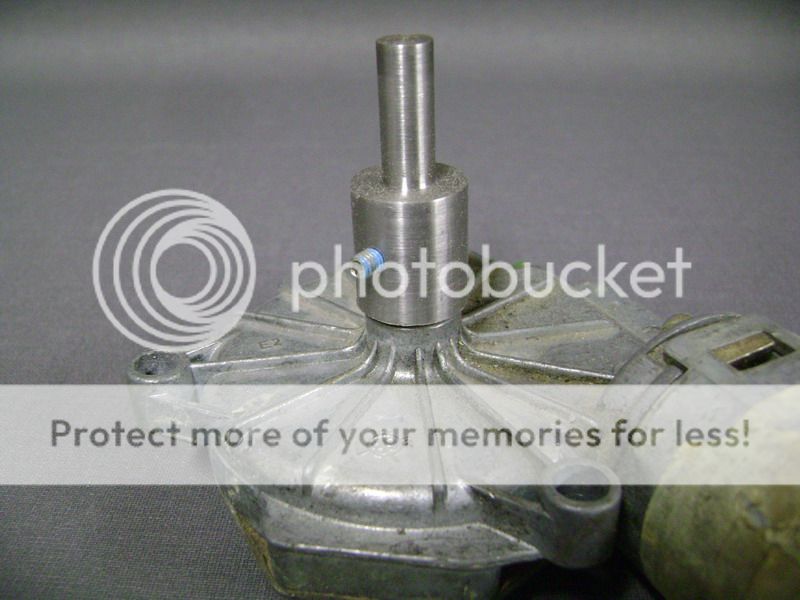
My last last problem with the opening and closing, I managed to solve.
The steel cable turned on nicely onto the axis, but when it need to go the other direction, it got loose cause the cable was to stiff, and the spring didnt have enoughtcounter balance.
A simple trick
I used nylon. The kind they use to catch silurus-fish, its has traction limit of 120kg, and is nicely supple / elastic.
Now itll rolls in sweet and all the problems are gone. 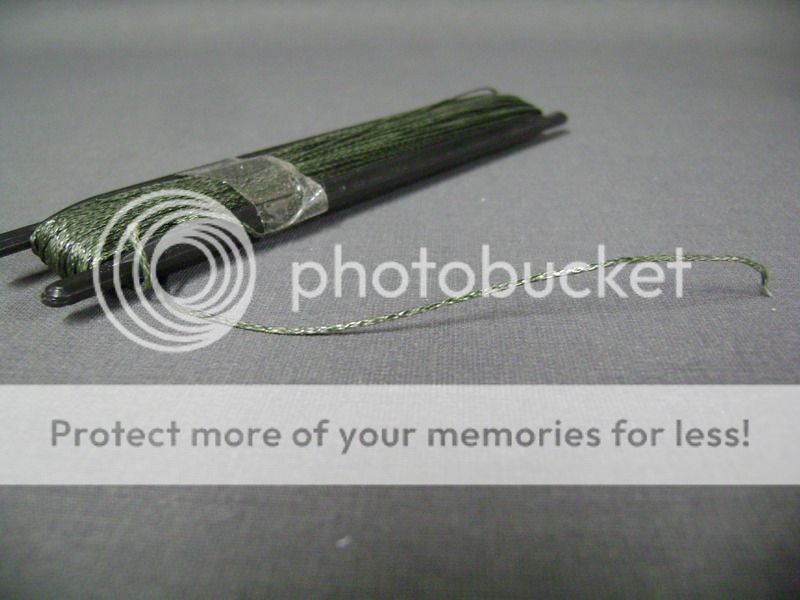
Posted By: robolop
Date Posted: January 10, 2010 at 10:28 AM
I was getting sick of loving in the trunk with a normal during lamp. I had about 3 of those, and throwed them all in the bin today. No more donut hole lamp in my trunk.
I got to the store, and got me some normal 20 watts lights, and a couple of meters of cable. Hanged it in the trunk in a descent way, so it didn't bother me.
It's a little update, but it's so luxurious now, really, and it gives me some warmth also. 
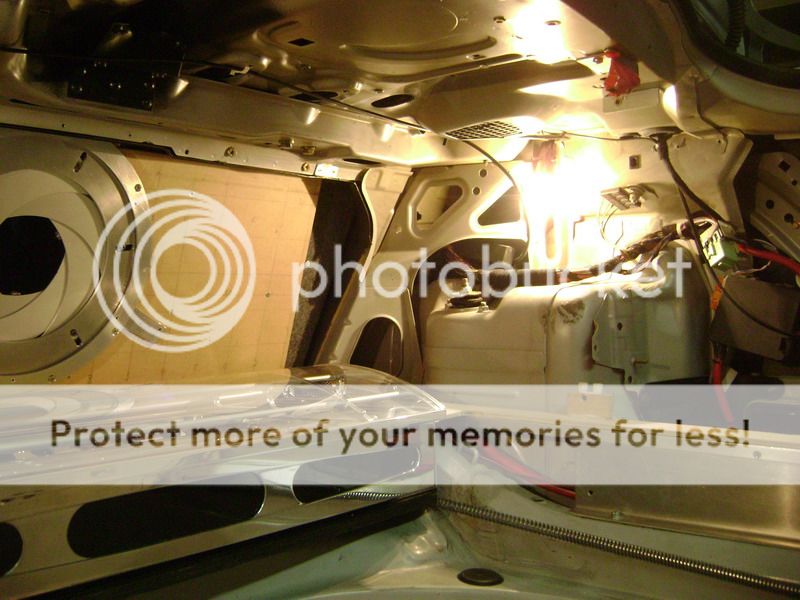
So the diaphragm will stay, like it sits now. As you can see, I raised it for a couple of centimeters.
I managed to do so by setting the backrest of the rearseat 3 cm more straight. The 2 toggles where the seat klicks into, I replaced. 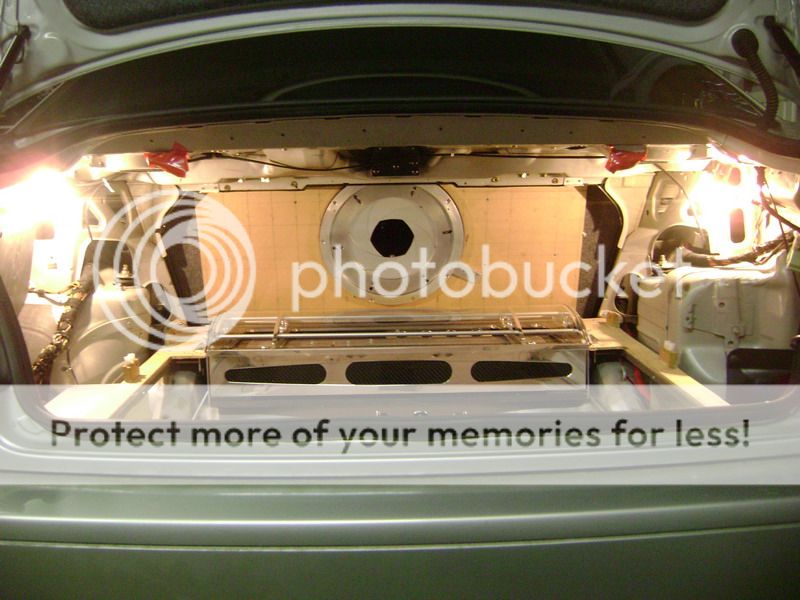

As long as I have the car, no one has ever sat in the back, so not going to let that bother me.
Now I have only one more problem, and that's the spring I need to place.
It'll get tight for that I think, but that problem I'm used to by now :)
Posted By: robolop
Date Posted: January 10, 2010 at 10:29 AM
I kept myself busy with improving the diaphragm. The biggest problems are gone, and I'm satisfied how it all works now.
The first thing I need to have, was a good slider/conductor where the nylon wire slides over when the diaphram opens and closes.
Cause a roller would be perfect for the job, I editted one with the disc.
The meaning of this was that I needed a sloth where the cable nicely stays in turn.I immediately put a screw in the roller with the propper roundels so it all was TIGHTEN. 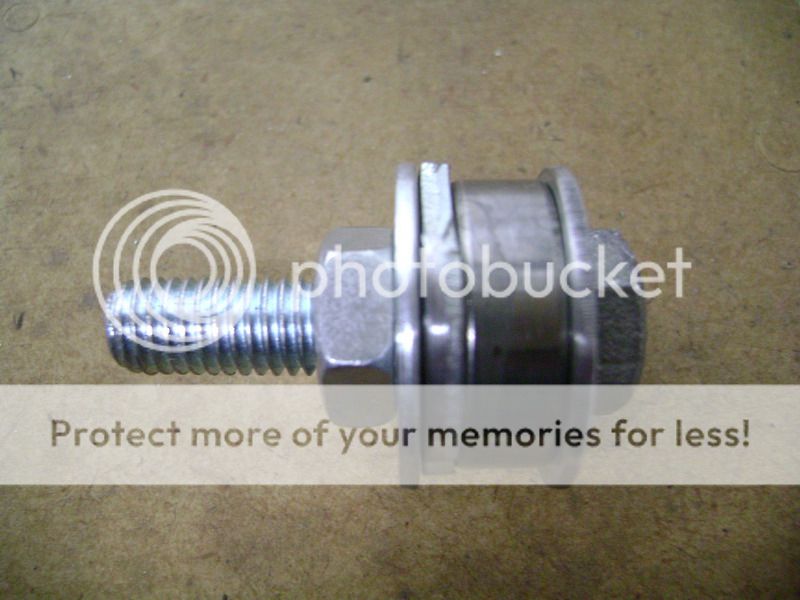
The I put it in my drilling machine, and put in the center of my mill. 
As you can see, fireworks were early this year :-) but it went perfect.
After that I just let it turn, and held a piece of sandpaper against it, to smoothen' it some more.
On the left you can see the roller, tuned by Robolop. 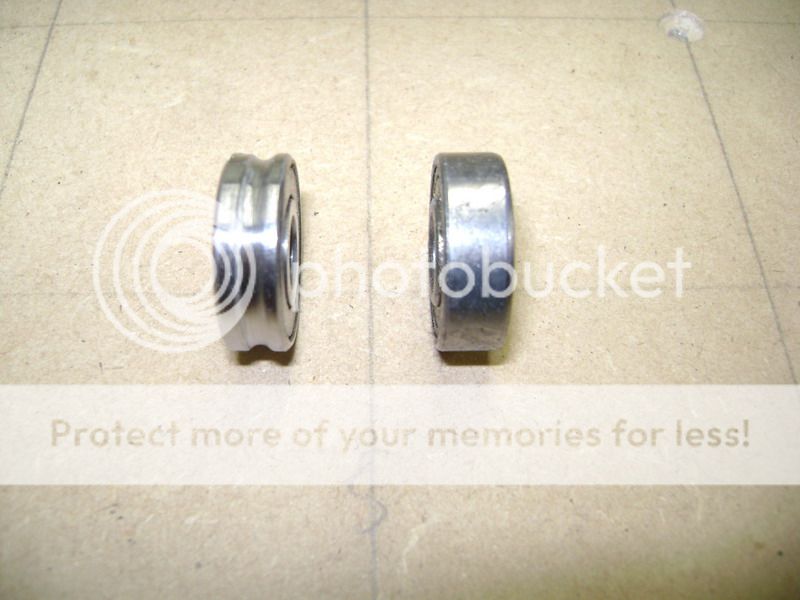
Here you can see the total picture of the MDF board as it'll come into the trunk.
My biggest concern is the spring. I really want to get this out of sight. Since I had some place between the seat I put it there.
I had to make a seperate piece of aluminum to mount it all on. To do this, I first had to tighten the MDF on the back of the rearseat, and after that I could screw on the aluminum.
I had to make this in 2 pieces, cause it all was to big to get in between. 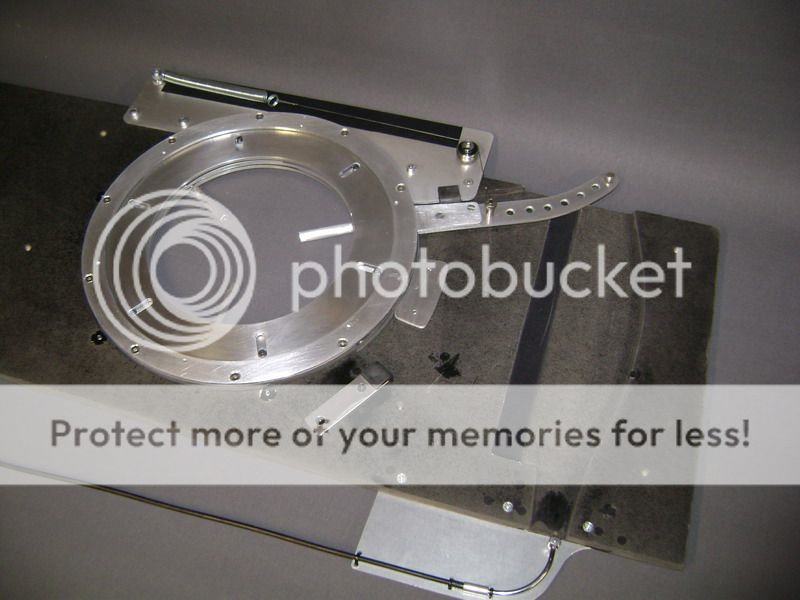
Underneath the spring, I taped a piece of vilt, so it can't make any noise. I'm planning of adding something around the spring to reduce vibration and noise towards zero. 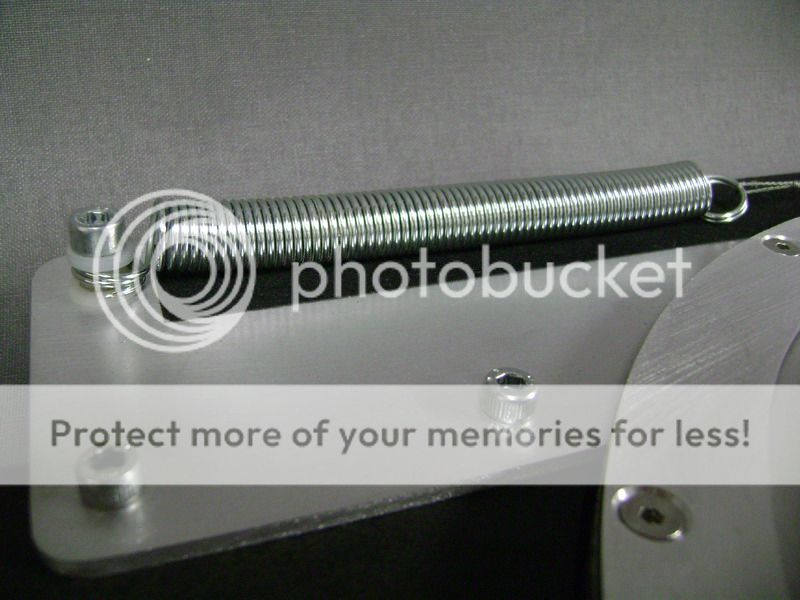
Here you can see the tuned roller, within the cable, that's in connection with the lever.
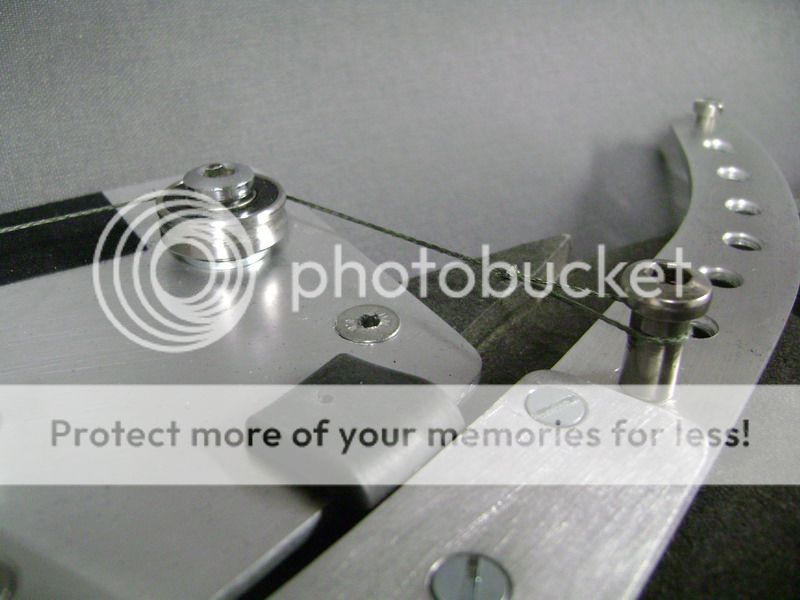
Here you can see it working when closed. 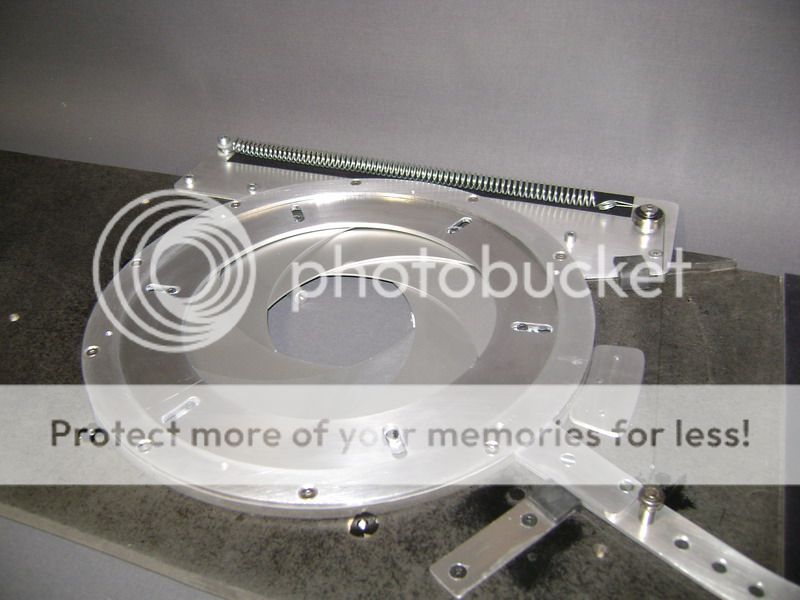 You can also see I added some rubbers, where the lever stops. 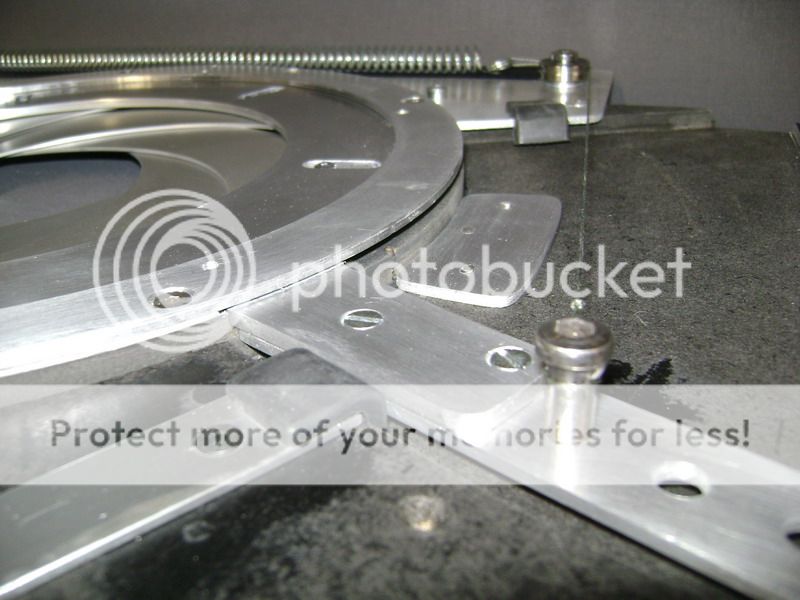
Here the inox-cable will lay into, witch stands in connection with the windowwipermotor. 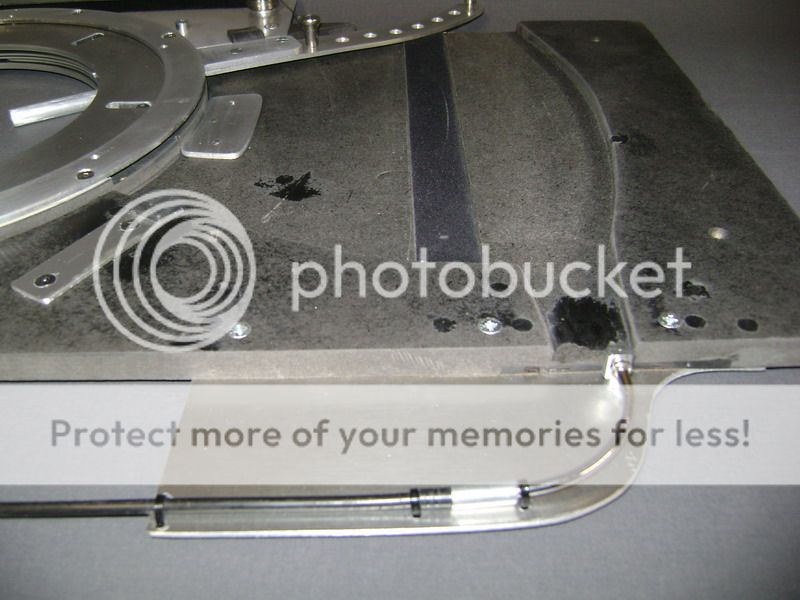
The motor is already firmly tightened in the trunk, besides the end loop contacts, it's all ready to mount in the bimmer.
As for now, I'm really satisfied with how it all works and looks. This I cannot say about Marilyn Manson his performance yesterday in the Lotto Arena here in Belgium.
The donut hole didn't feel like performing according to me, he stopped after an hour. the loser.
Posted By: robolop
Date Posted: January 10, 2010 at 10:31 AM
I did some improvements on the diaphragm. A lot of rings I made ended up in the bin. Sometimes these things happen. This time it was the outer ring. This one is tightened with 6 screws.
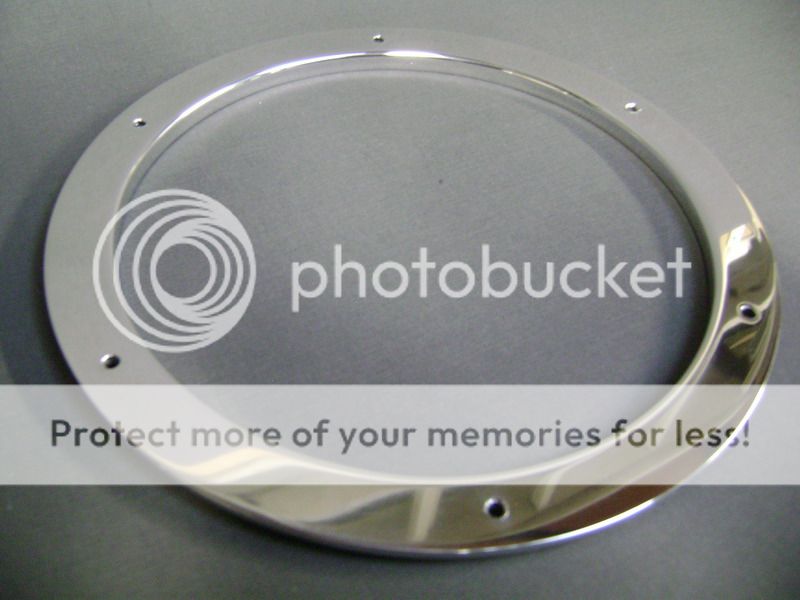
The inner ring stayed the same. 
This is what's left of the tube. You can see I made a aluminium little cover for it. Now it's nicely finished when the armrest is down.
 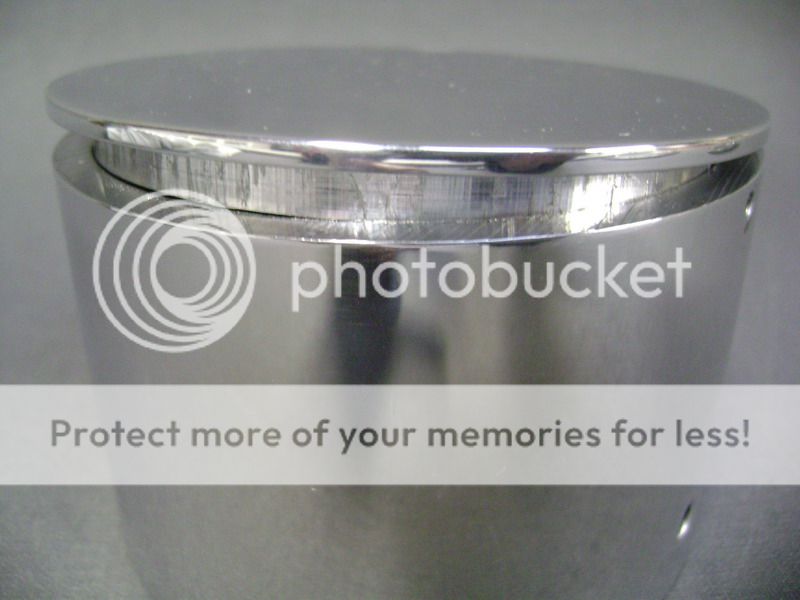
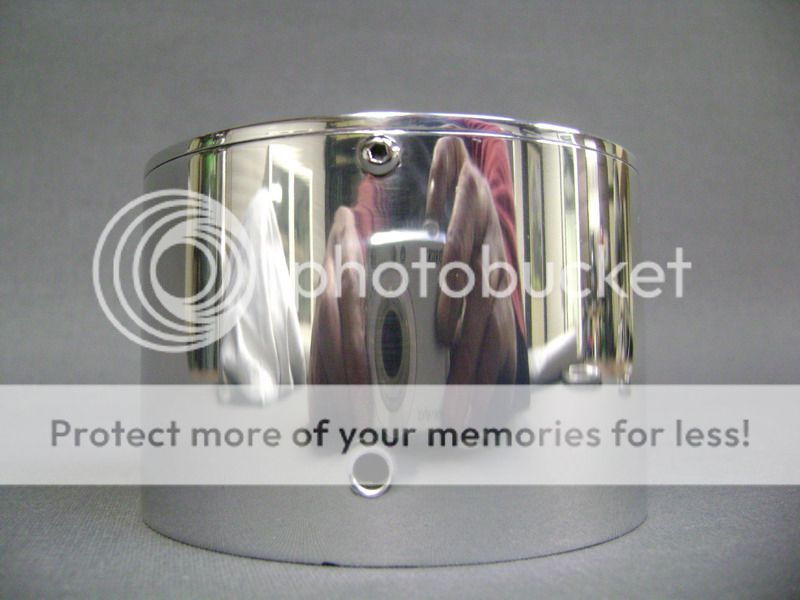
The 3 toggles where the little cup is tightened with, are now polished too. 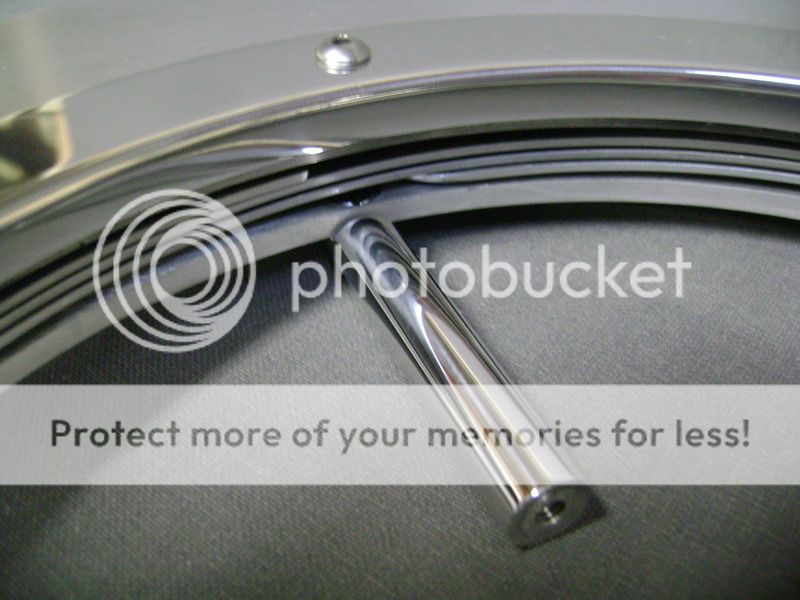
Here you can see the backside. 
This will be the frontside. 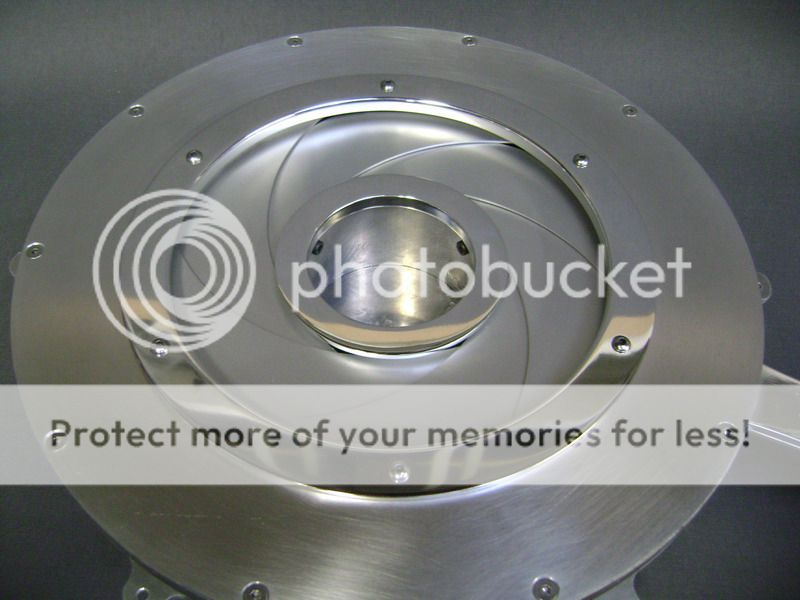
The meaning of all this is that I'm planning of working it all into one part towards the outer polished ring. Of the rest you won't see anything. I would like to do this in carbon fibre, so I'll get a nice contrast between the 2 materials. 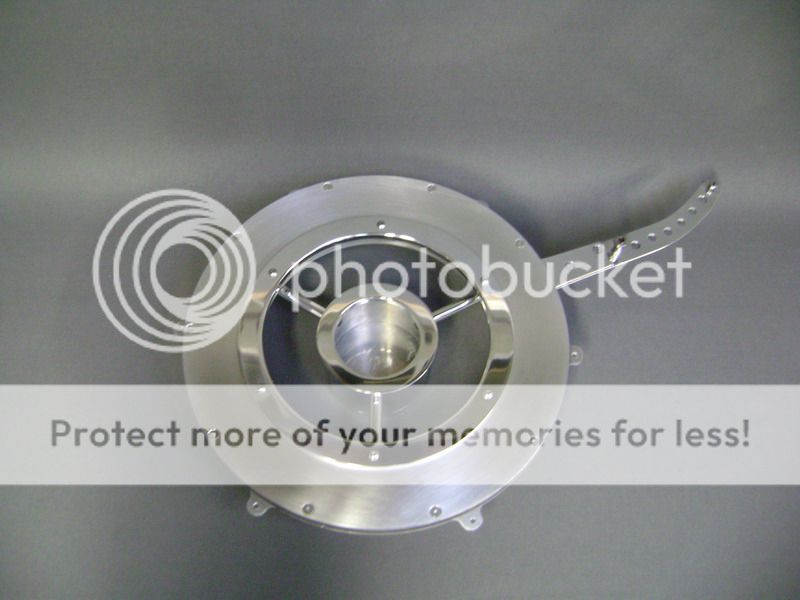
This is how it sits in the car, and I've got plenty of space up and down there. 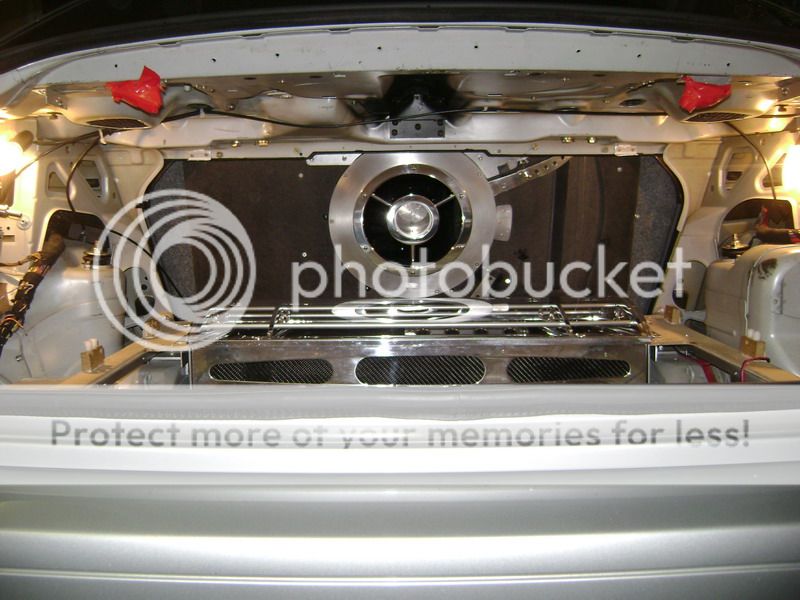
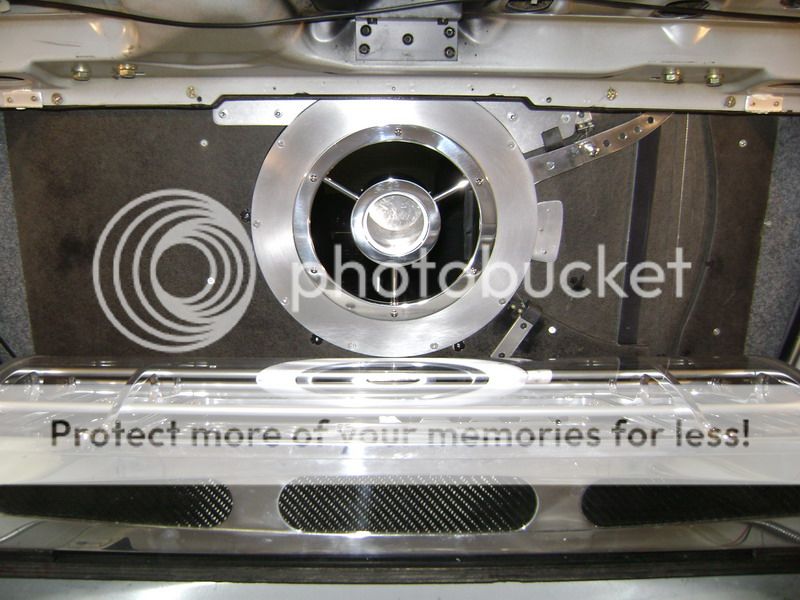
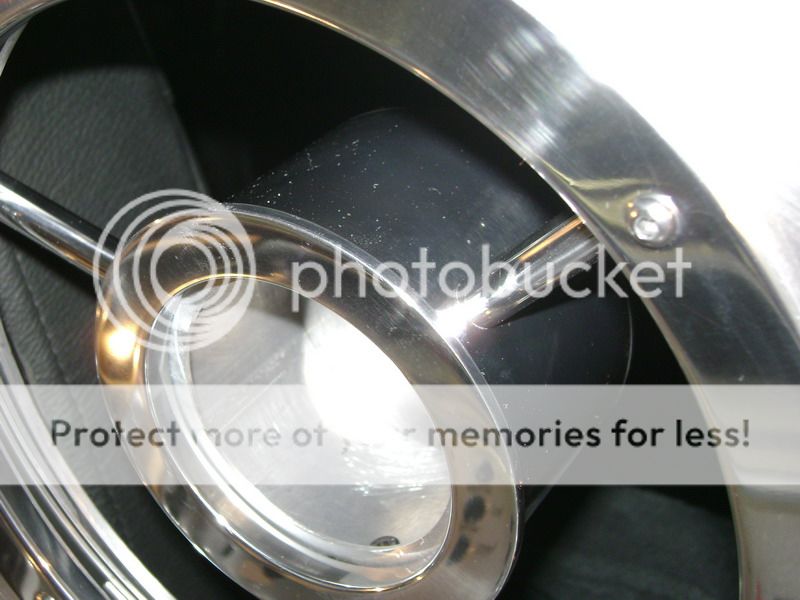
Here's the transmission with the steel cable. 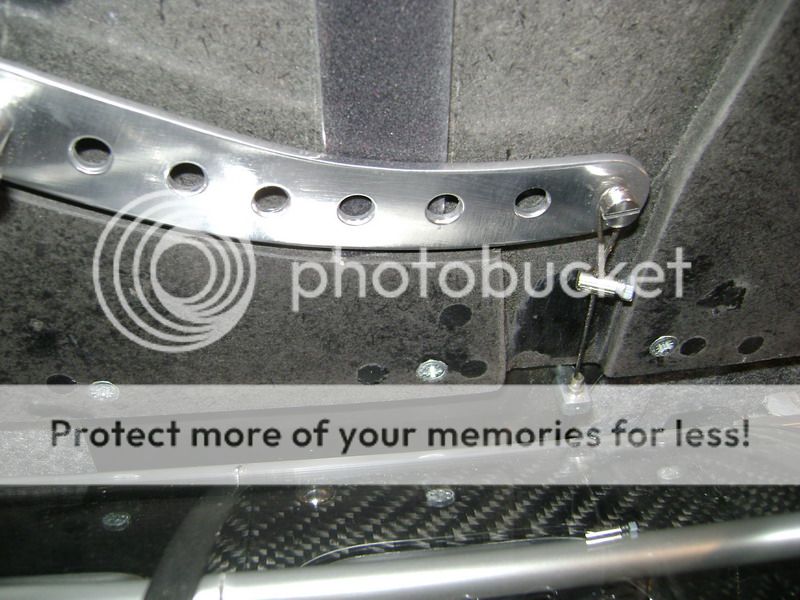
the "end-loop-contacts" 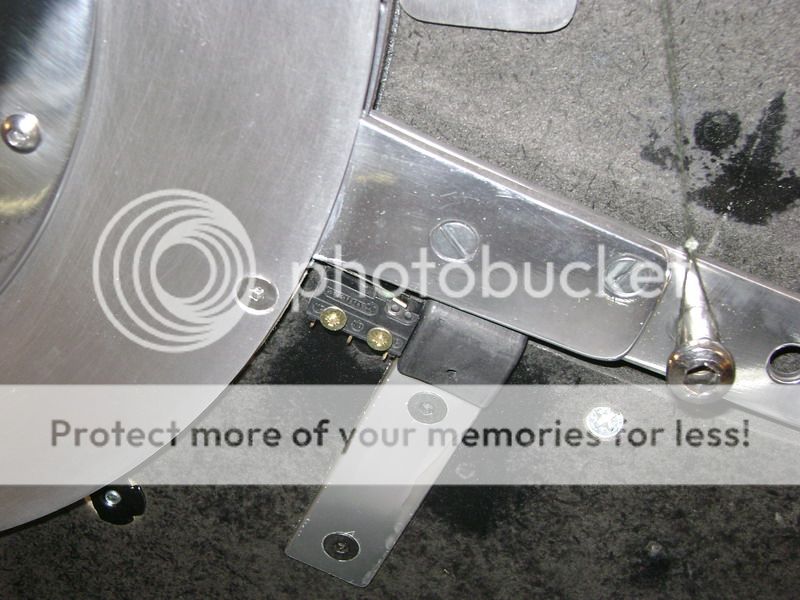
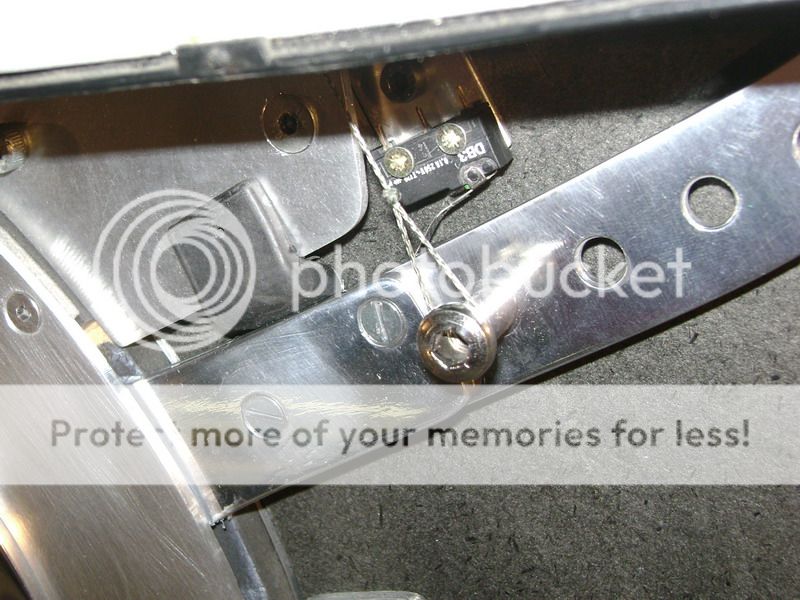
Here's the motor who brings movement in all of this. 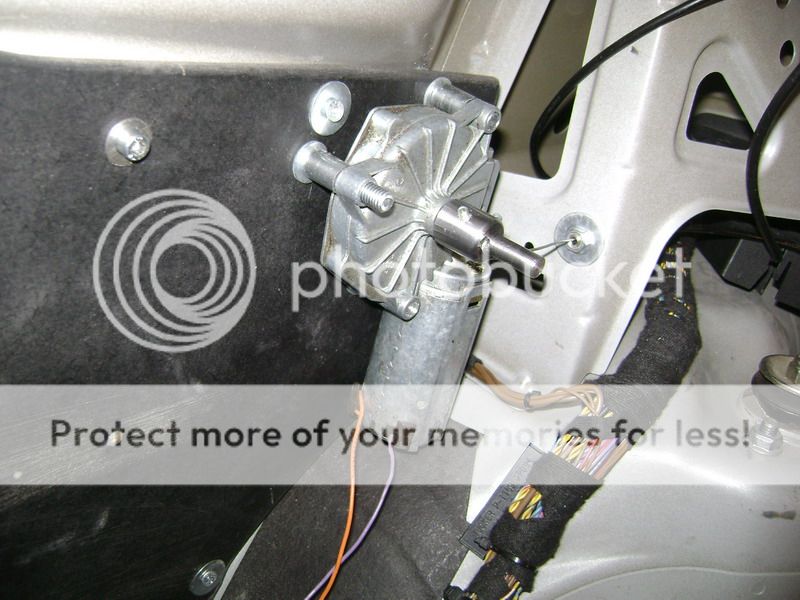
What I feared the most, is how the cable was going to roll itself on. I managed to solve this simply by putting the supply out of the centre, of the axis' motor. this works perfectly. and believe me, I tried this many times, never malfunctioned. 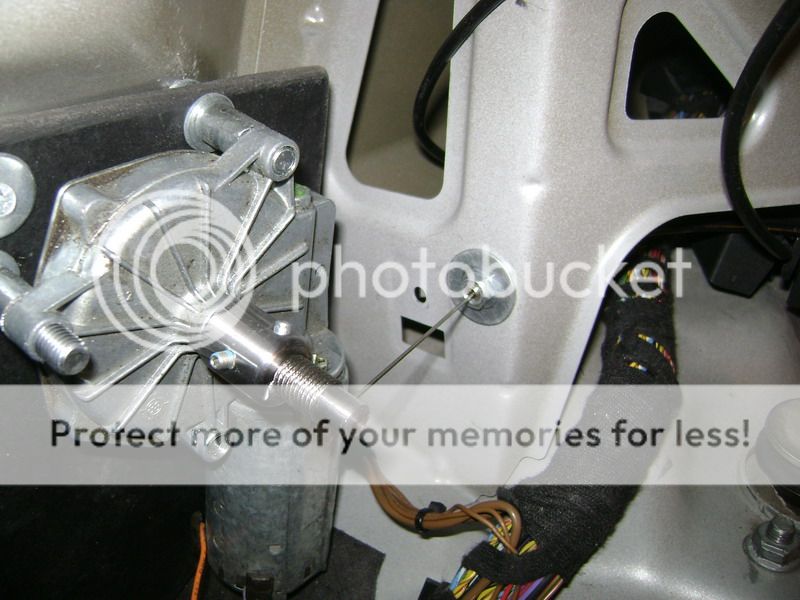
Posted By: robolop
Date Posted: January 10, 2010 at 10:31 AM
First of all I would like to wish everyone a good and healthy 2010. May your dreams come true, and have a lot of fun. In life only a few things count, and enjoying is one of them.
About me
Im satisfied with what Ive done and made, but on top of my list there are the 2 heavenly hours I heard Metallica playing in Werchter, although Fergie did a good job too.
About the Ice, the diaphragm I made was a bulls eye. I never thought Id make something like this. And whats more important, is that I managed to add something more into the trunk thats electric.
The counter is now on 3, and sure hope it will rise even more.
I took some pictures of the lighting and the amplifierbox. 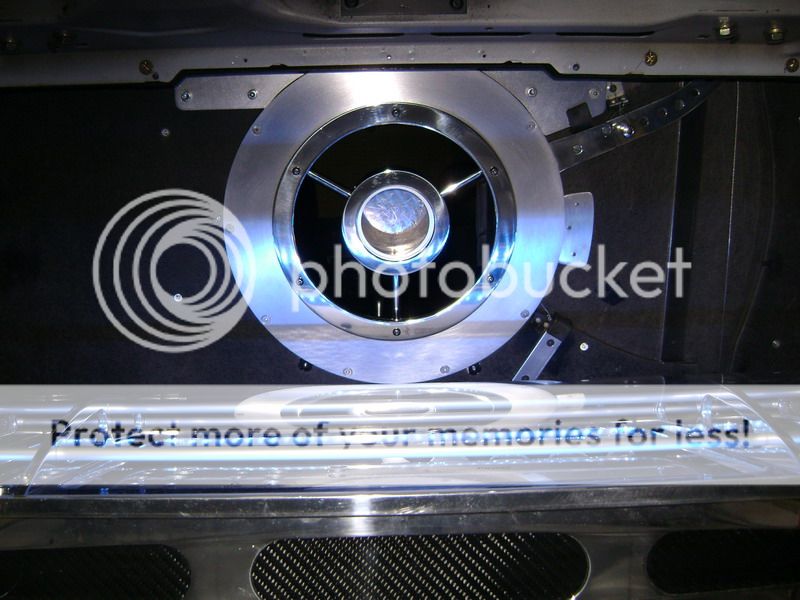


What Im going to do next is to remove the amplifierbox. When I made the aluminum box 2 years ago, I considered the fact that some changes may have come
Well, change is here
The Precision Power amp is going out, and will have to make way for the new 2 amplifiers. The big amount of work to get the PPI nicely covered is for the bin, but I know in the back of my head this could happen. Whats going to happen with the other amplifiers, will be (according to me) even nice looking and even have more power. Will sort it out.
Posted By: robolop
Date Posted: January 10, 2010 at 10:33 AM
Here you can see how the diaphragm looks, seen from the interior of the car. 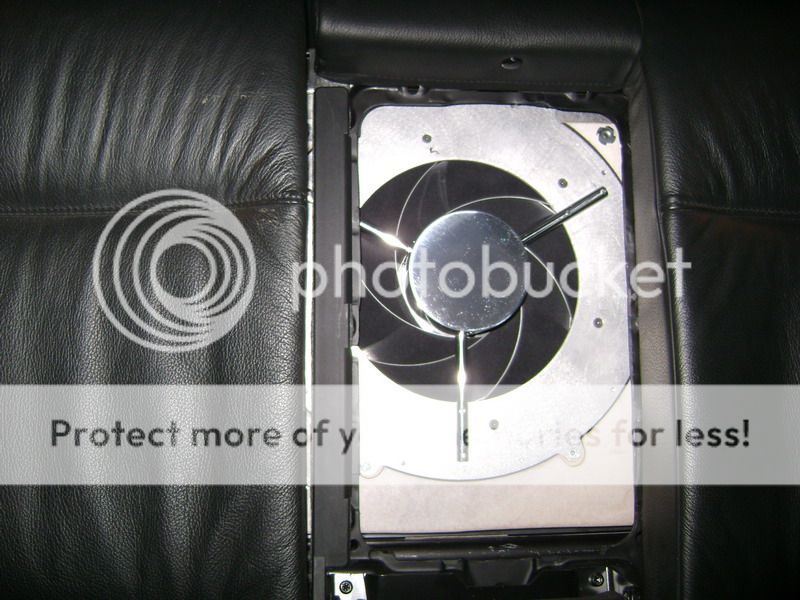
You can see that the diaphragm doesnt sit in the center of the armrest. What you see, wont stay this way. It all needs to get finished, like when the armrest is down, it will look nice and complety ready 
Posted By: robolop
Date Posted: January 10, 2010 at 10:34 AM
These will be the 2 new amplifiers that will recplace the PPI.
As you can see, they are from JL Audio. The reason why? Simple, all the topdesigners from PPI work now at JL Audio.
2 years ago Ive spoken with Jeff Scoon, the topdesigner of PPI. And I must say, from then on, it was in my mind of using JL amps someday.
The other option was the Focal Duo Monitor, but he has been for sale a couple of years now.
Cause this was only a 2-way amp, I had to buy one more to feed the subs.
A good friend of mine, Iwan Vinck (ARC deurne) has tested the JL edition, and was seriously impressed of what these things can do, and how they sound.
If someone like that is impressed, theres no need to doubt, and you just have to GO FOR IT.
The HD600/4 gives 4x150, but in my case, Im going to bridge it to 2x300 on the front speakers.
The HD750/1 gives 1x750 watt, and this will be used for the subs. 
In the meanwhile, Ive lifted the PPI from its case, and put it in nicely into my cupboard. Dont think Ill sell this, you wont get anything for that now a days. Then I rather mount it in my golf I drive daily.
Posted By: robolop
Date Posted: January 10, 2010 at 10:40 AM
Melted Fabric wrote:
Keep them coming, you do extreme work and have shown very nice techniques for accomplishing unique designs.
I have gathered much from this project.
THX MADE
Posted By: robolop
Date Posted: January 10, 2010 at 12:46 PM
deeg money wrote:
Robolop, Where did you learn to do all of this. I would love to create something like this for my truck or at least learn to use alu like you do. I am gonna take a wide guess but Im guessing your not from the states? I was wondering what kind of milling tool you used so I can look for one to start fooling around with on some projects. Oh and by the way your car is looking awesome. The work you do is pretty amazing. How many hours have you put into this?? Have a good one man!
The mills Ive used for the aluminum are nothing special really. Believe me, I dont even know what type it is. The orange mills, they cost a bit more. The red ones dont cost a penny. Thats just a box with dits and dats Ive bought sometime. But they mill very well. You just need to use enough of liquid to cool it down. Watch out, its still a dangereous job to do, especially when you want to try to do this for the first time. When you take little parts from the alu, its not so bad.
Posted By: squires500
Date Posted: January 10, 2010 at 6:20 PM
nice work, starting to look awesome cant wait for it to be finished :)
Posted By: robolop
Date Posted: January 13, 2010 at 5:30 AM
KarTuneMan wrote:
I have to ask..... what's the total time on the install and fab work ?
I don't keep track of the time dude. It's the result that counts, not the time that was needed.
Posted By: robolop
Date Posted: January 13, 2010 at 5:35 AM
KarTuneMan wrote:
fabilichus wrote:
I have to give u alot of credit. The work u have done looks amazing !
I wish im gonna get the skills to make something half as nice as u did.
Question,
How do you get carbonfiber so shiny ?
Could u maybe make alittle how to on that ?
You won't get any answer to your question.... I tried a page or so back to ask a question as well.... no reply.
Off course I want to answer...but till now, I didn't have any problems with that. I can understand and read the English language, but unfortunately I'm not able to write it. That's why I send everything to a friend, who translates it all in English. That I copy, and put this after the questions asked. On this forum, I couldn't do this...and I'm not much of a PC wonder too, so I asked it to a friend. He explained me what to do with the text, and now, it all works perfectly, and it's possible to answer the questions. sorry dude.
Posted By: robolop
Date Posted: January 13, 2010 at 5:37 AM
fabilichus wrote:
I have to give u alot of credit. The work u have done looks amazing !
I wish im gonna get the skills to make something half as nice as u did.
Question,
How do you get carbonfiber so shiny ? Could u maybe make alittle how to on that ?
On the carbon fibre, there are 3 or 4 layers of epoxy. The final layer is abraded very firmly. I start with a 600wet, then 800, 1200 and I stop with the 2000. Then I let someone put 3 layers of car-varnish on it. Once this process is done, it needs about 10 days to dry out completely, and I start to rubb it all again with a 2000. Now when this is done, I polish it with the machine. That's how you get a nice and deep glow.
Posted By: robolop
Date Posted: January 13, 2010 at 5:38 AM
asquarecan wrote:
Hands down some if not the most impressive work I have ever seen!
If you are located anywhere on the west coast I would love to see this thing in person!
Great work!
Keith
Sorry dude, I don't live near the west-coast.
Posted By: robolop
Date Posted: January 13, 2010 at 5:39 AM
KarTuneMan wrote:
fabilichus wrote:
I have to give u alot of credit. The work u have done looks amazing !
I wish im gonna get the skills to make something half as nice as u did.
Question,
How do you get carbonfiber so shiny ?
Could u maybe make alittle how to on that ?
You won't get any answer to your question.... I tried a page or so back to ask a question as well.... no reply.
Sorry dude, but know you know what my problem was to post here.
Posted By: robolop
Date Posted: January 13, 2010 at 5:40 AM
i am an idiot wrote:
The bottom cover of that amplifier is a critical part. It is what holds the transistors firmly against the heat sink. If you are leaving the cover off of the amp, you need to somehow secure the transistors to the heat sink.
I'm aware of that dude.
Posted By: robolop
Date Posted: January 13, 2010 at 5:42 AM
j.reed wrote:
KarTuneMan wrote:
fabilichus wrote:
I have to give u alot of credit. The work u have done looks amazing !
I wish im gonna get the skills to make something half as nice as u did.
Question,
How do you get carbonfiber so shiny ?
Could u maybe make alittle how to on that ?
You won't get any answer to your question.... I tried a page or so back to ask a question as well.... no reply.
From the looks of his 70+ posts all have been of posting pics with a little description and nothing more. I'm with you guys this is a simply amazing install. But i would not expect anything other than more posts of pics. Sucks too because there is a lot that could be learned from an installer of this level.
Thanks dude, I'm trying to explain and do it as good as possible
Posted By: robolop
Date Posted: January 15, 2010 at 1:07 PM
Here you see the JL Audio's lying in the aluminum box. As you can see, these are pretty small amps. 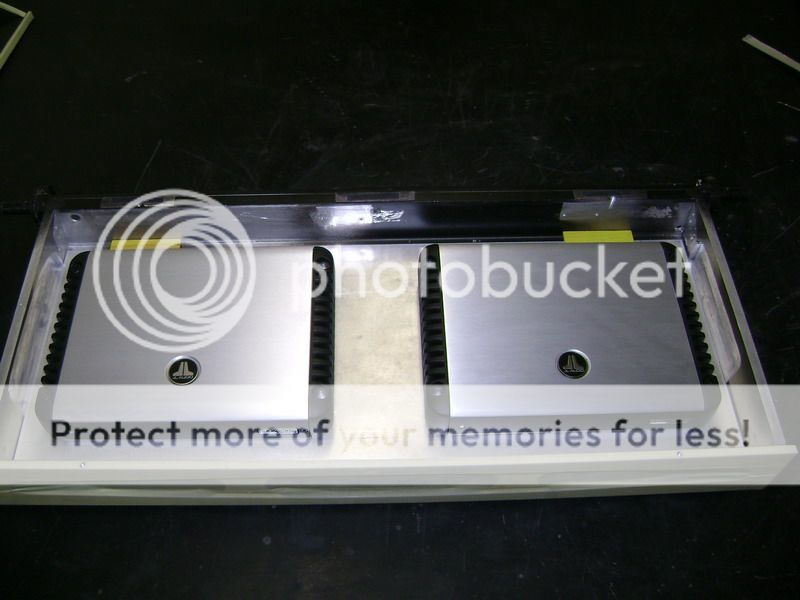
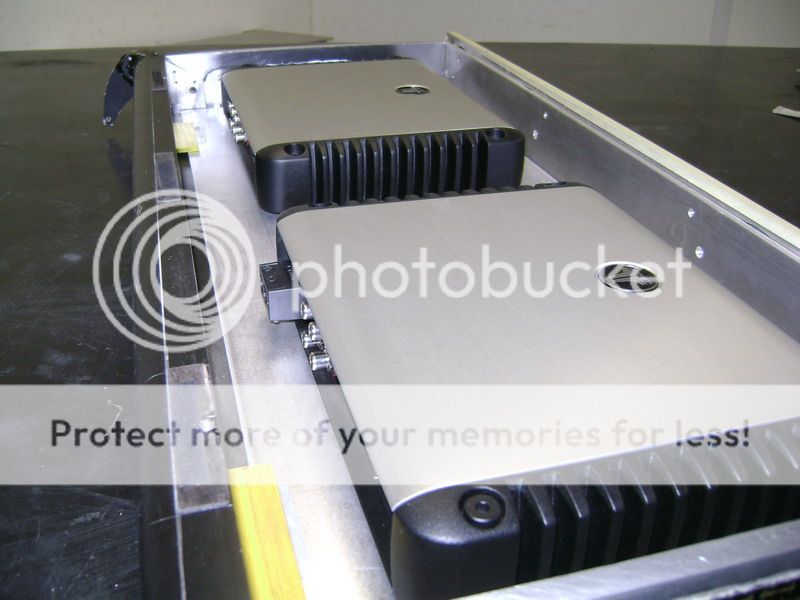
The job now is to flow them nice into the box. 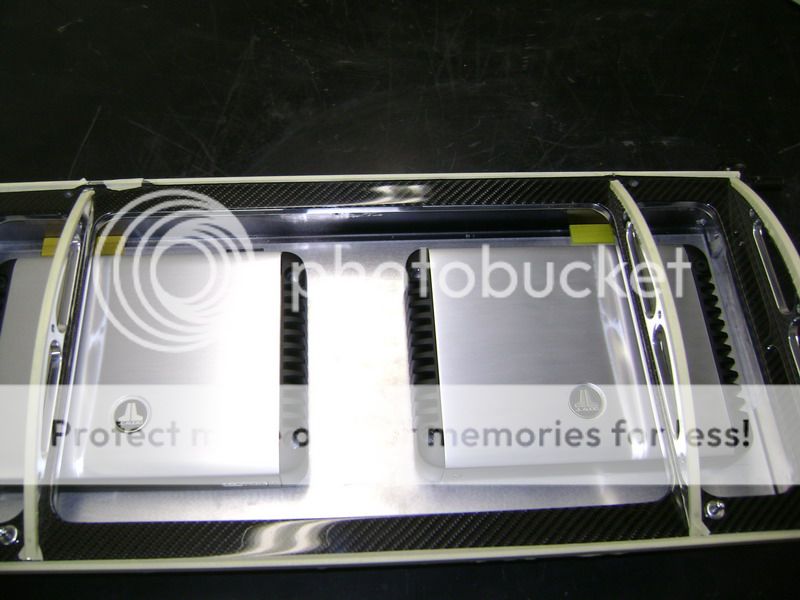
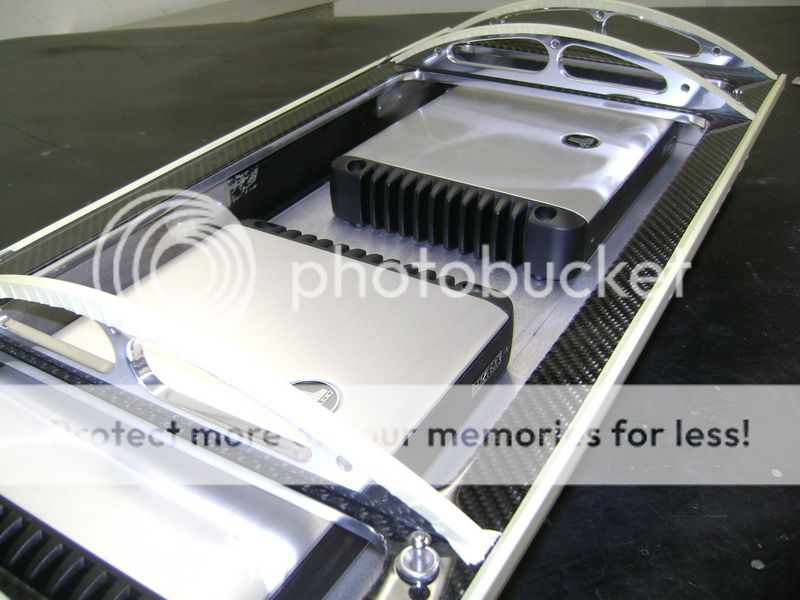
I find this logo of JL super beautiful, not sure if I'm going to use this anywhere... 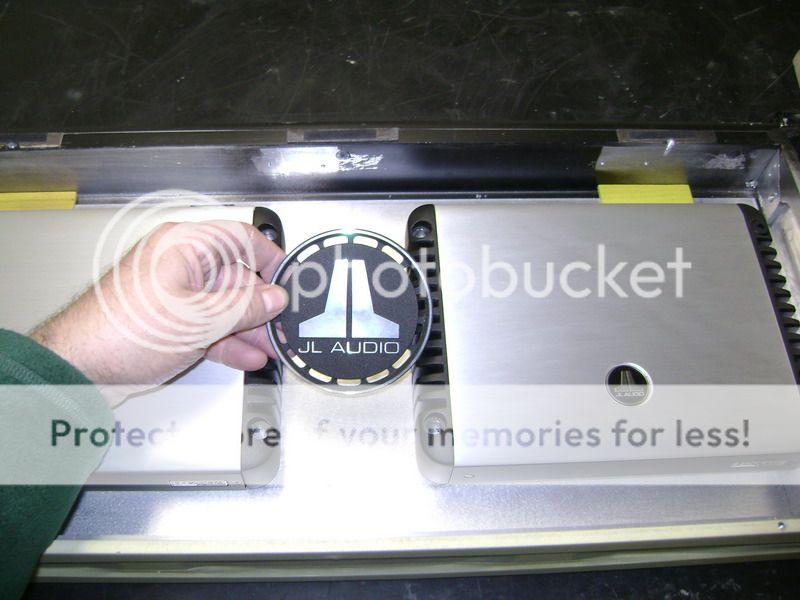
The design departement is doing over time at the moment, but still not finished their job. It has to be more cooler, more nice and more WOW then it was with the PPI. That's a job that will not be easy, it'll be hard, but I'm taking the challenge. I've got time to work something out.
Posted By: robolop
Date Posted: January 17, 2010 at 6:10 AM
The works on the new amplifierbox are on hold for the moment. Wich doesnt mean I didnt do anything this week, but now I have to wait for some stuff from over the water. Too bad this can take a couple of weeks, but thats the way it is now.
And because I cant sit still, I searched for something to keep me occupied. In fact, this has nothing to do with the ICE, but think some of you will find this cool.
Ive decided to make me my own set of aluminum pedals, cause Ive looked everywhere for some descent ones, but didnt find it.
First of all, I made some models in MDF wood. 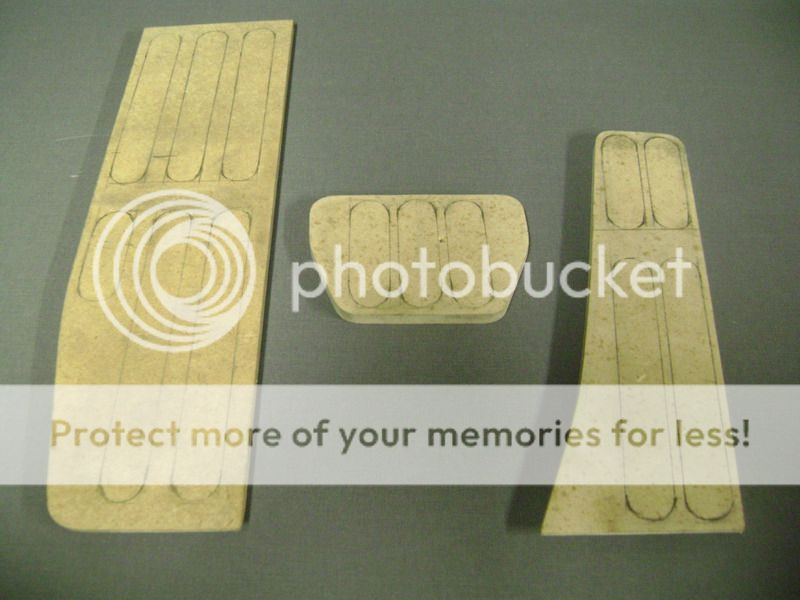
Once I had this, I copied this in 8mm thick aluminum.
Then I milled in some sloths of 20mm and 6mm deep.
This is the foot-rest on the left side. 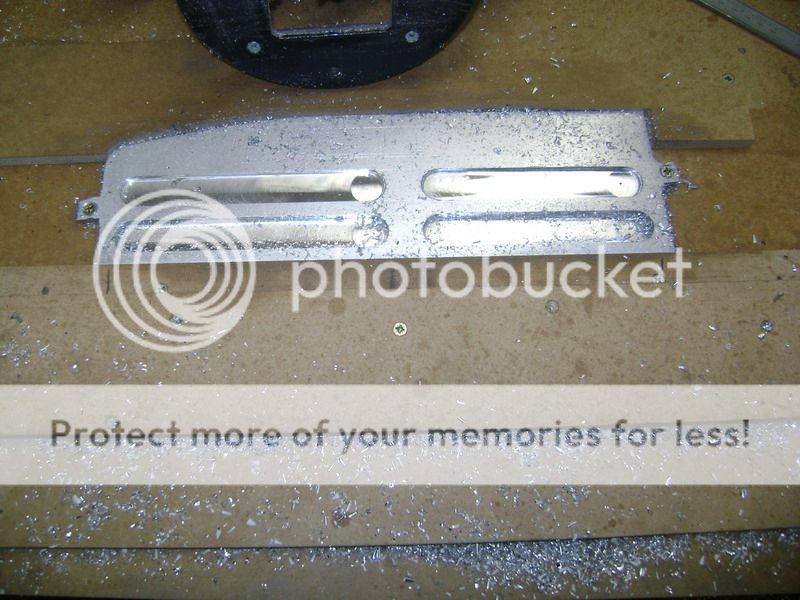
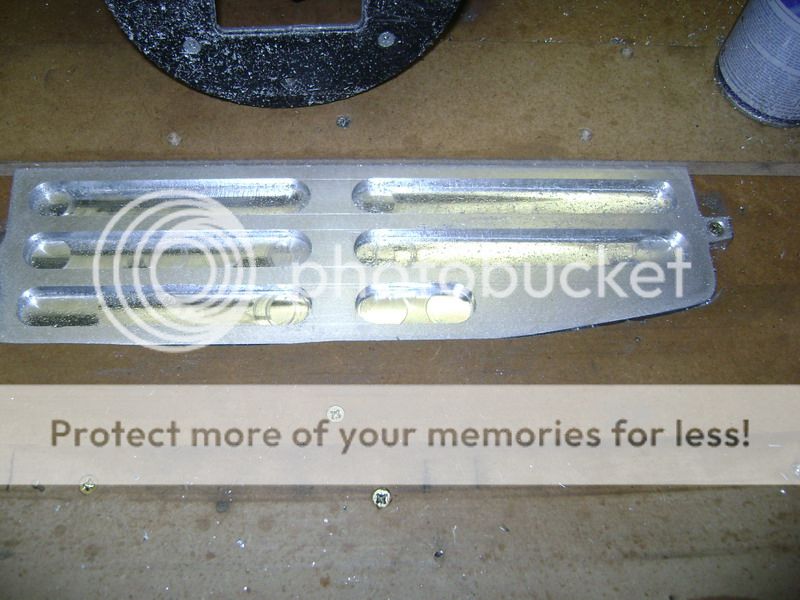
Since theres a rounding in the plastic where this comes against to, I had to make this on the backside of the aluminum too. So it connects lovely on the side. 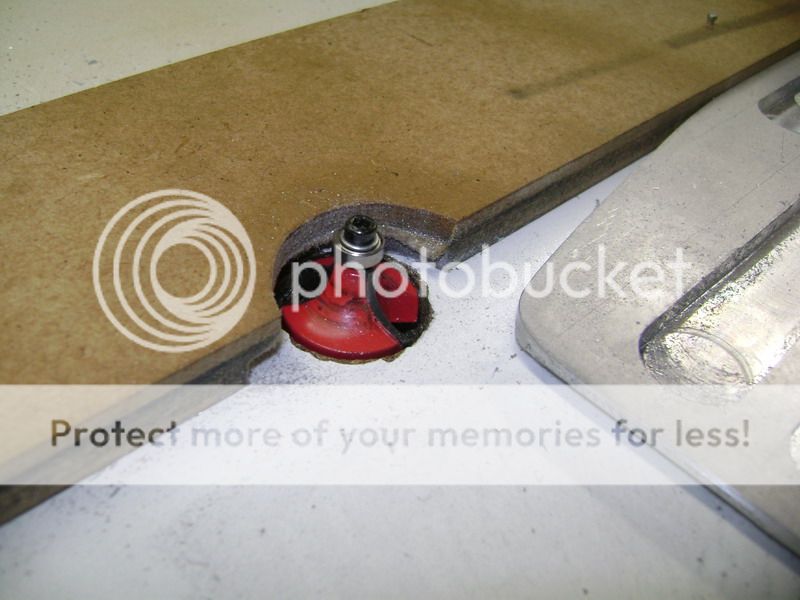
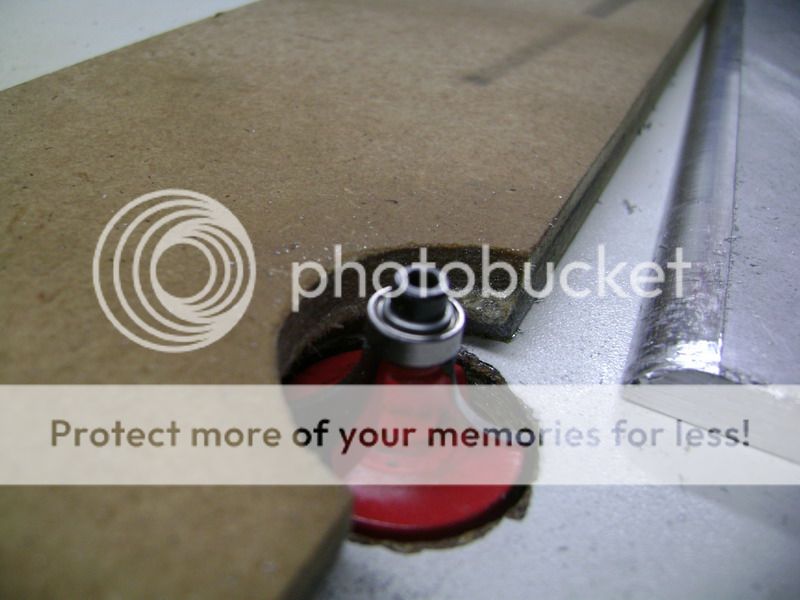
This will be the brake-pedal
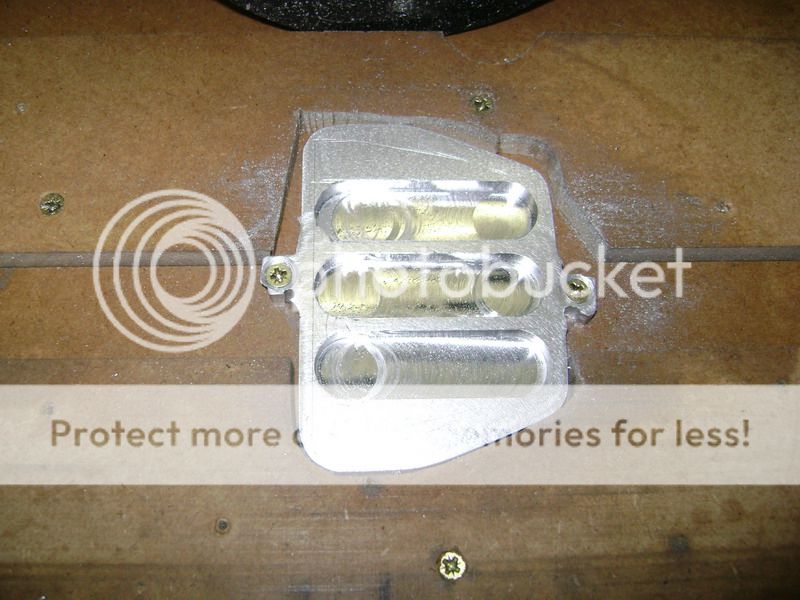 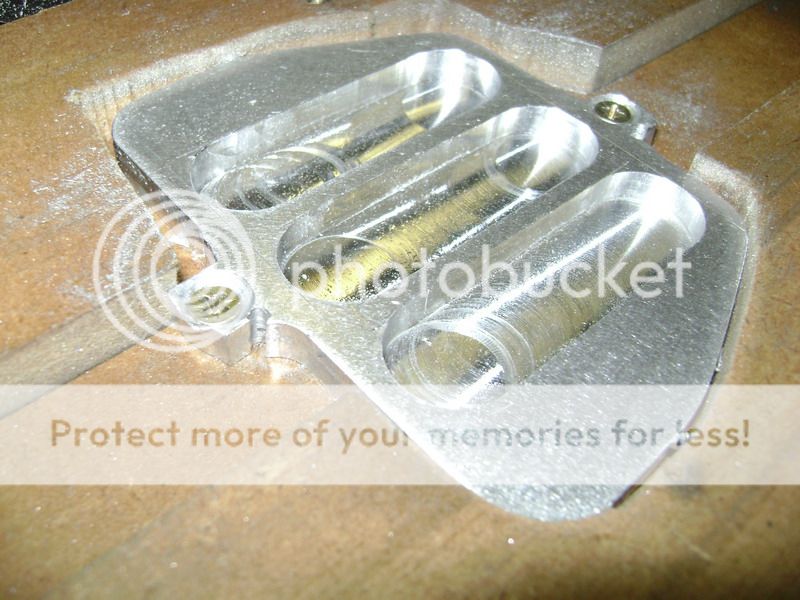
Gas 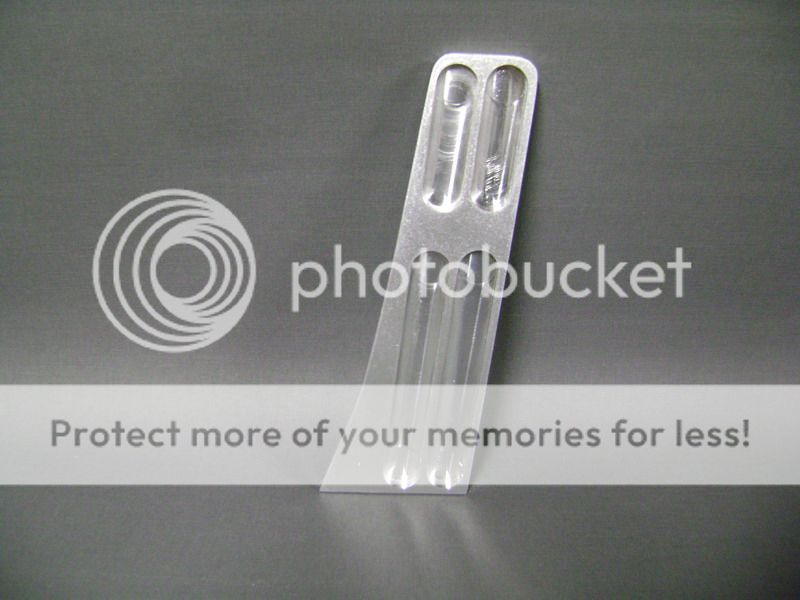
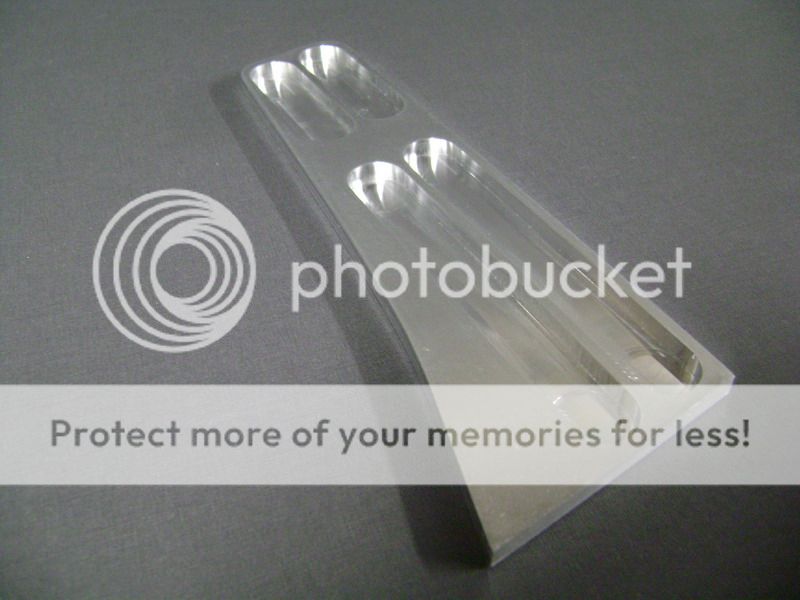
Brake 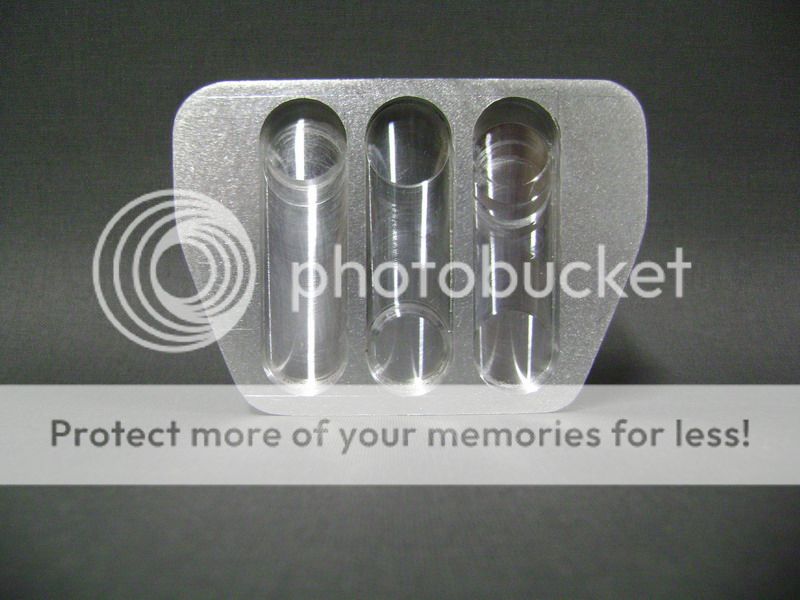
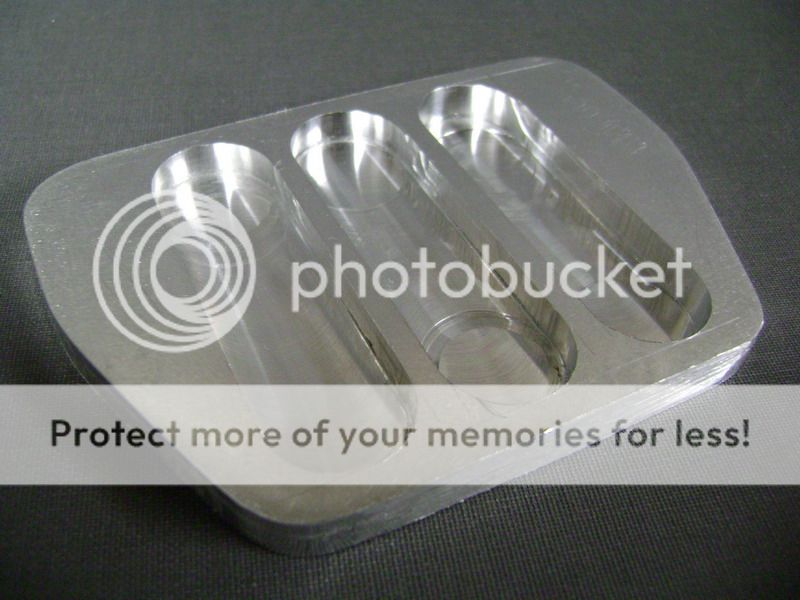
Foot-rest 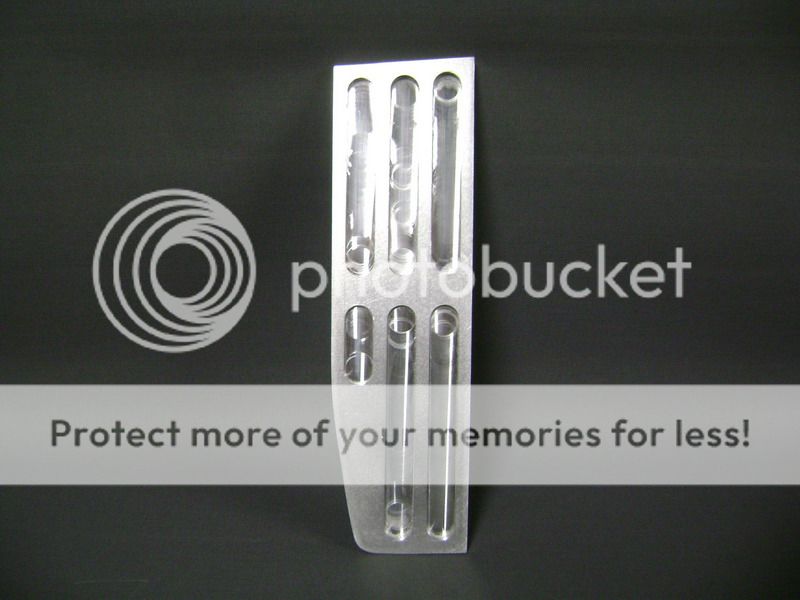

What you see here, are many hours of work. And it still not finished. I still have to do my magic trick still 
Posted By: robolop
Date Posted: January 19, 2010 at 1:57 PM
I bended my brake pedal a little bit rounder. I think that must have been the biggest problem I could have, concerning the pedals that is. I've managed to do this simple. On the front end I taped, on the top and the bottom, a little block of wood, with a little little plank on. On the backside I taped a little block in the middle, and after that, put it all between the benchscrew. Then I put a piece of barrel over the lever, so the lever gets bigger. Once I had this, it was simple to turn, and so bend the aluminum piece of 8mm. 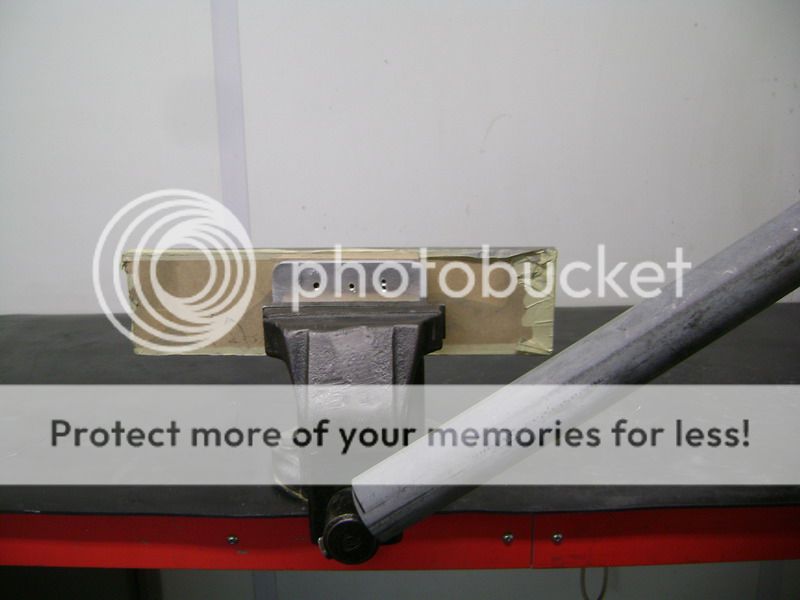
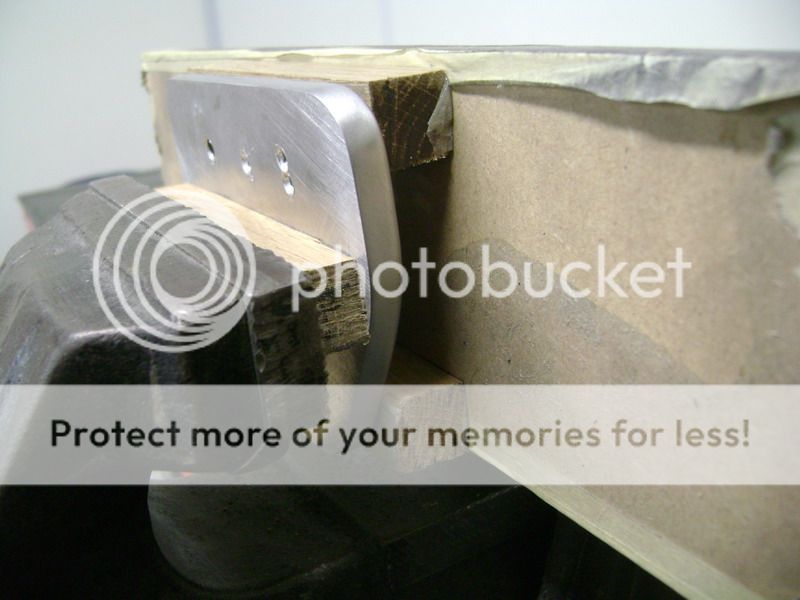
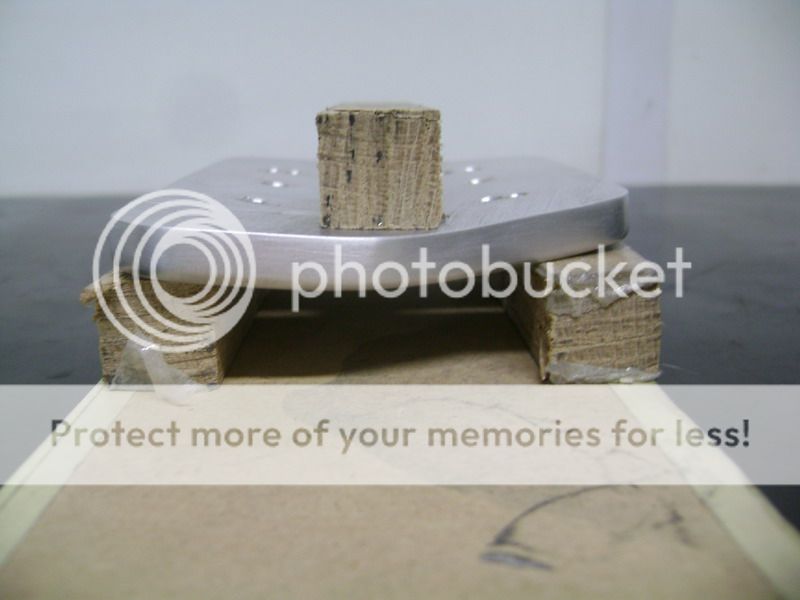
The rounding now is the same as the original pedal by bmw 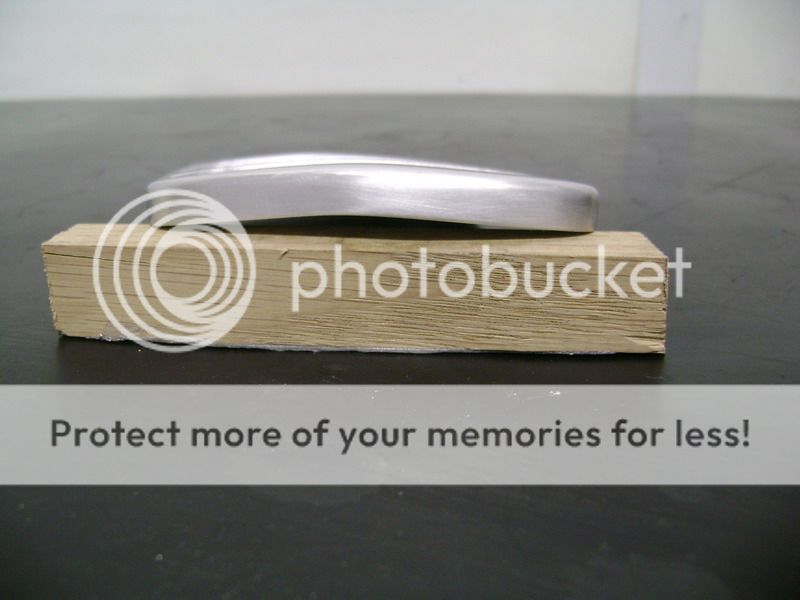
It took some time to grind it all firmly, and I stopped with a 1200 wet. 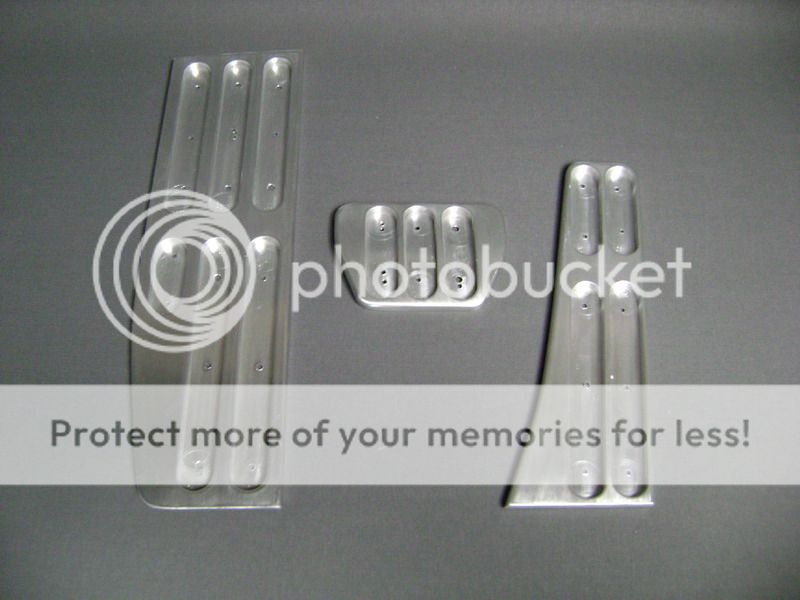
Now it was the time to make some inlay-pieces. First I taped the sloths with tape. 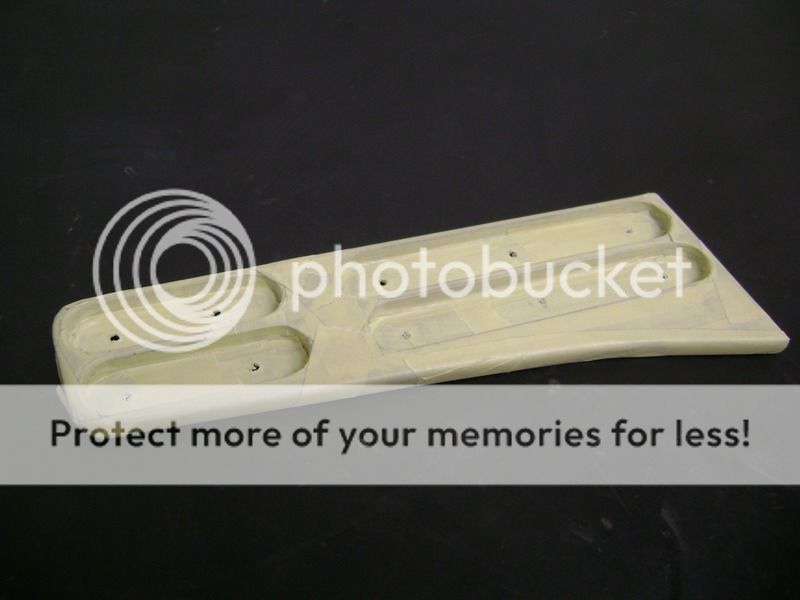
The I taped 2 roundels on each other, and placed in on the whole where screws come out. 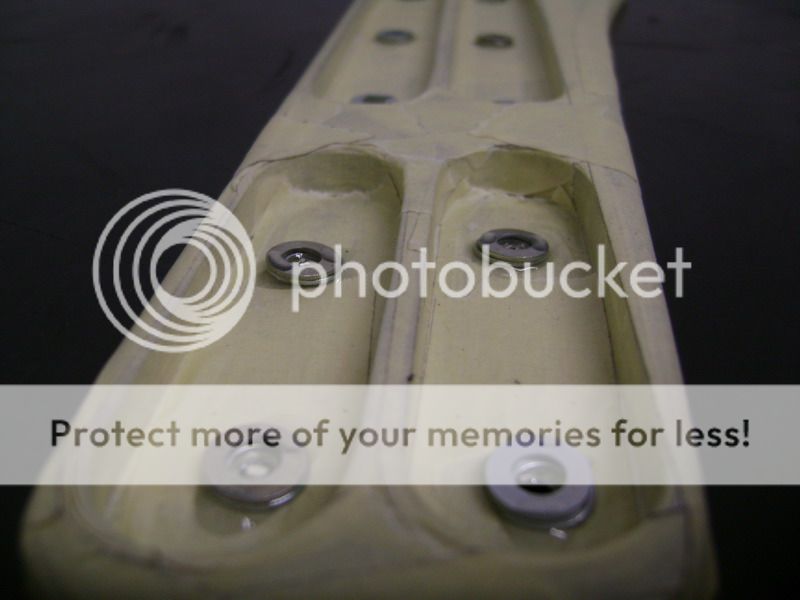
I the meanwhile I made some iron little plates of 3mm thick. I had to do this, so I could taped some screws in there, to tighten it all. 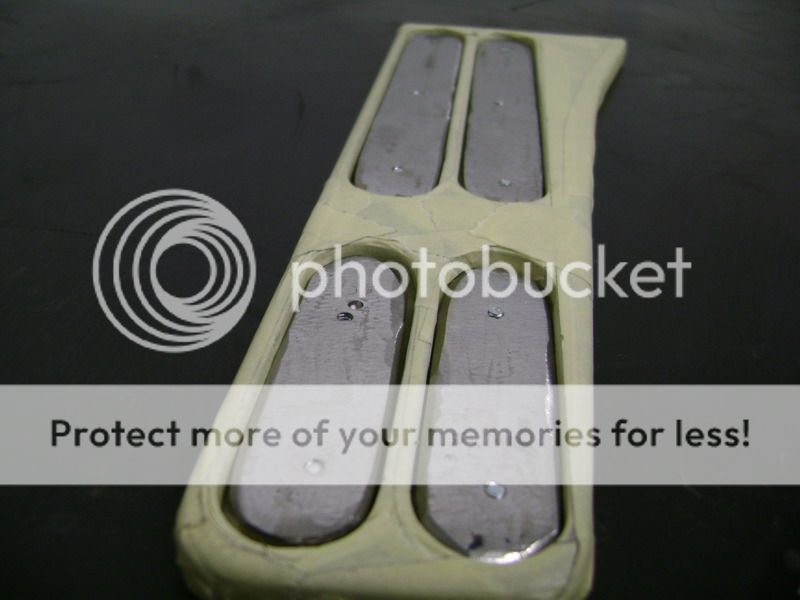
Then I filled it all up with epoxy. 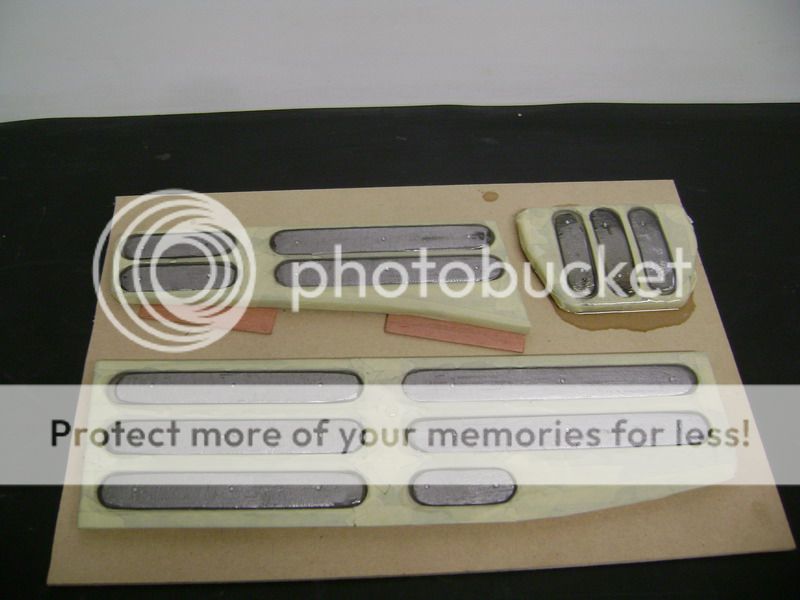
When it's all dry, I'll take out the plates, and they will have the same model als the sloths. buuuuuuuuuuuuuuuuuuut, they will be 2mm deeper then the alu. The 2mm I need for the carbon and epoxy who will get on there.
Posted By: robolop
Date Posted: January 27, 2010 at 4:54 AM
Ive baked some carbon cakes in my oven. 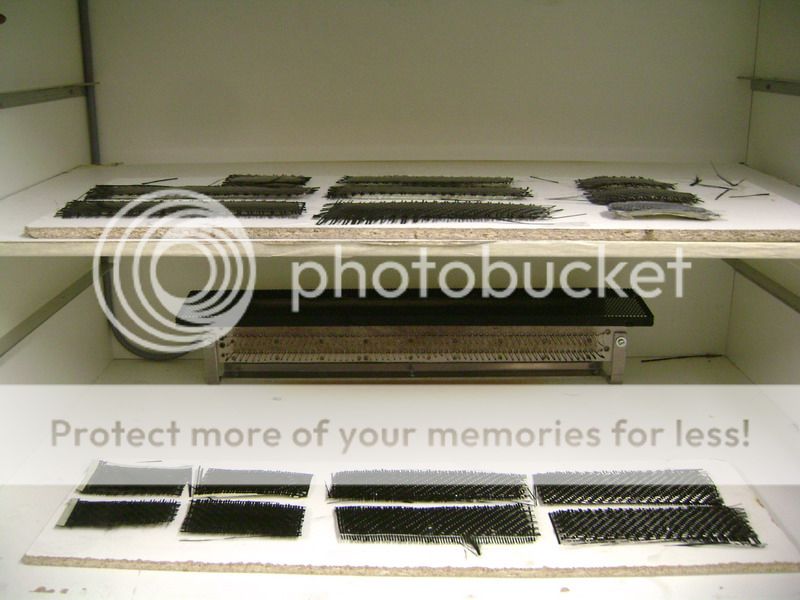
Offcourse, these need another set of epoxi-layers. The alu pedals go somewhere to get anodized, so they look exactly the same as the indoor moldings. Once I get them back, itll take some time to nicely cut out the little carbon pieces, and abrade them so they fit 100%. I also did some tests with carbon fibre.
Here you see one.
I had an original BMW logo laying here somewhere, so I covered it with carbon
Real stuff dude, no sticky sticker doodie.
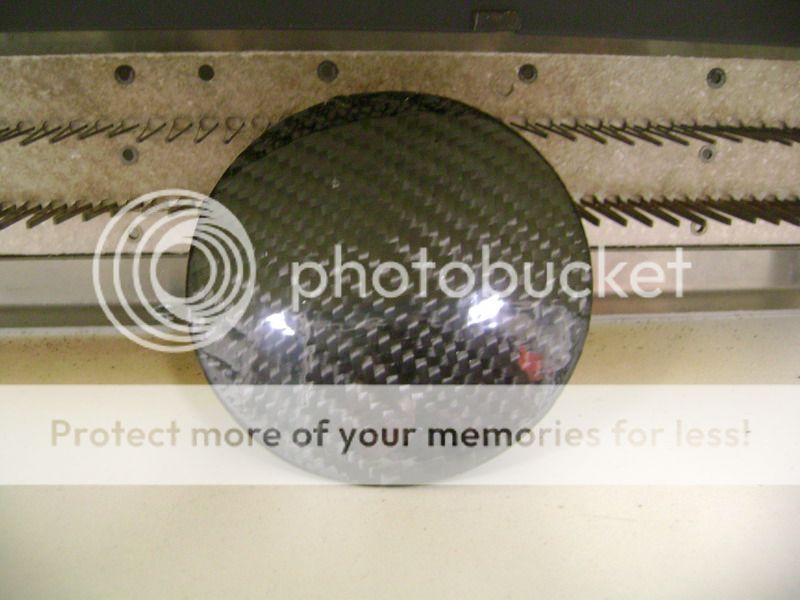 To do this right I had to use a Copperfield trick
and it worked out nicely. On the plate you see, theres only 1 layer of epoxy. And I rubb this over, one more layer will be added and its finished.
So not as many work then when you need to put 4-5 layers.
You can also see I got the side really smooth and fine. 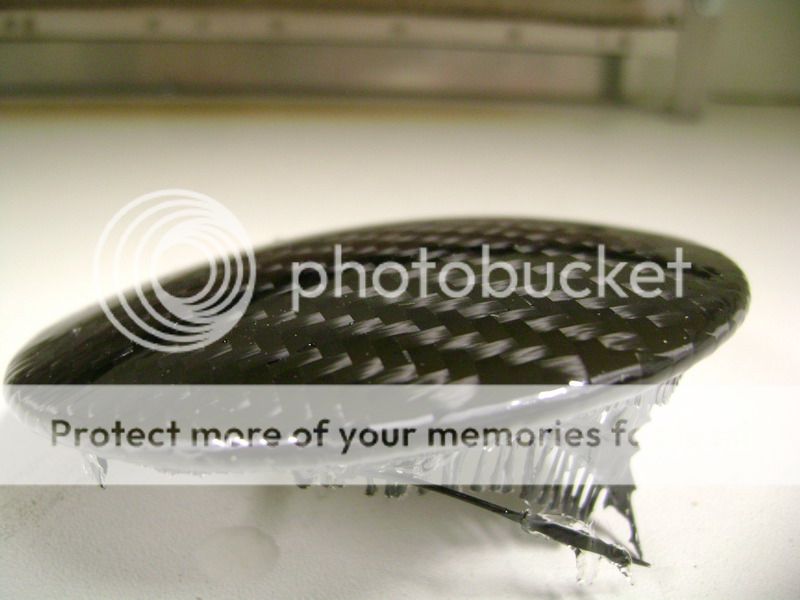
And who was it that said is was very hard to use carbon fibre on corners?
Posted By: robolop
Date Posted: January 30, 2010 at 11:49 AM
The things I ordered to finish off the amp-box, are currently hanging somewhere over the ocean.
I'd better ordered them a size bigger, cause it's about 30 degrees(Celcius) difference from there to here, and those things could shrimp from the cold.
But still, it's positive news they're on the way.
Dropped of the aluminium pedals too, and will get them back in two weeks normally. On the carbon lay-ins of the pedals I did some layers epoxy already, and there will be a lot of rabrading to get this tight, but we can do it.
I also kept myself warm by milling some things for around the carbon BMW emblems.
I first thought of making these completely out of carbon fibre, but that looked like sh* ...
So I started by making 2 aluminium rings who will come around the emblems.
First I made 2 MDF blocks's, and glued a piece of 4mm aluminium against it.
Then held it to the copy-mill, with this as result. 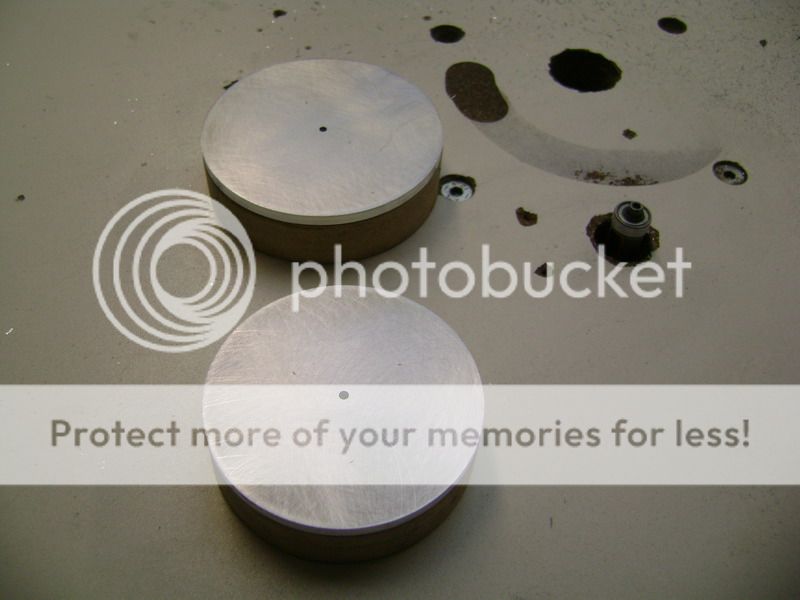
Then I put in another mill, and made a nice rounding on the upper side. 
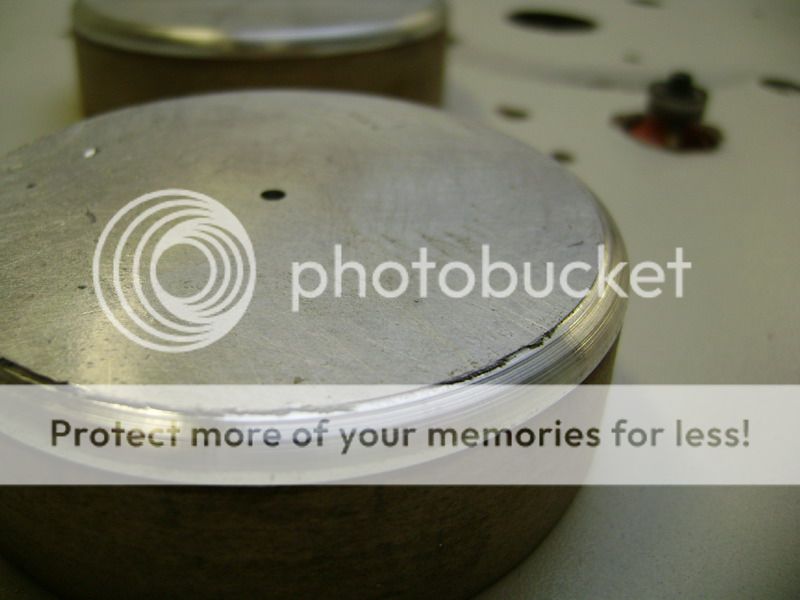
Then it was time for the professional work, and went about 4mm deeper with the right mill. 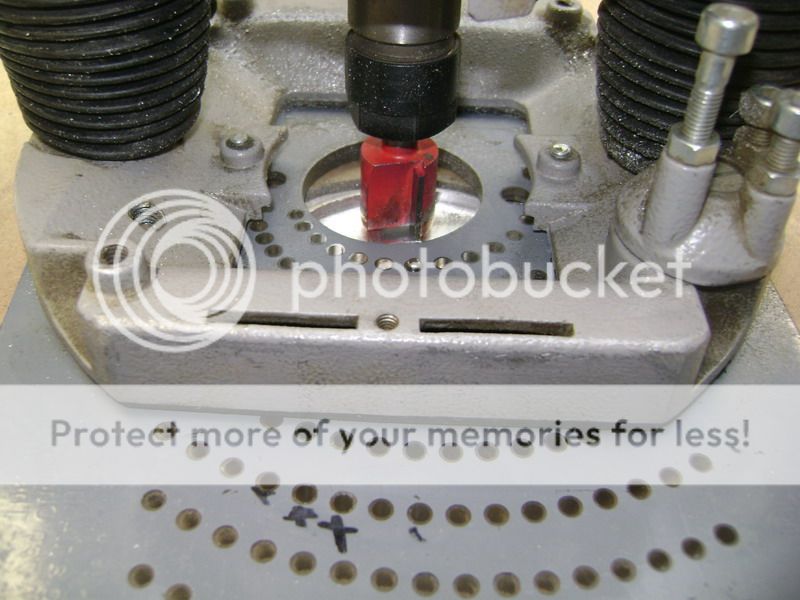
The grey disc with all the holes, I bought when I was in L.A. Here your mill onto, and knock on the attached pin, in the center of your piece. So you can chose with diamter you delete. It's something really really simlple, but just so practical, and I wasn't able to find it here in Belgium. 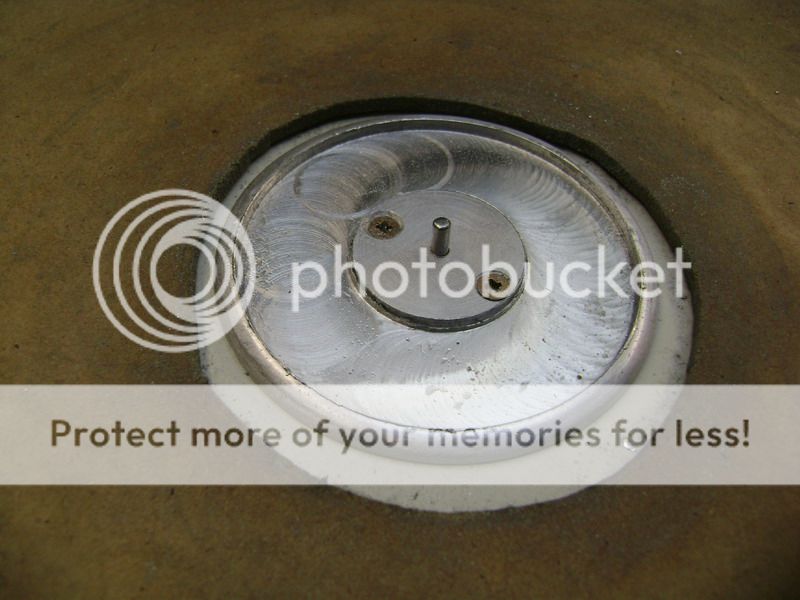
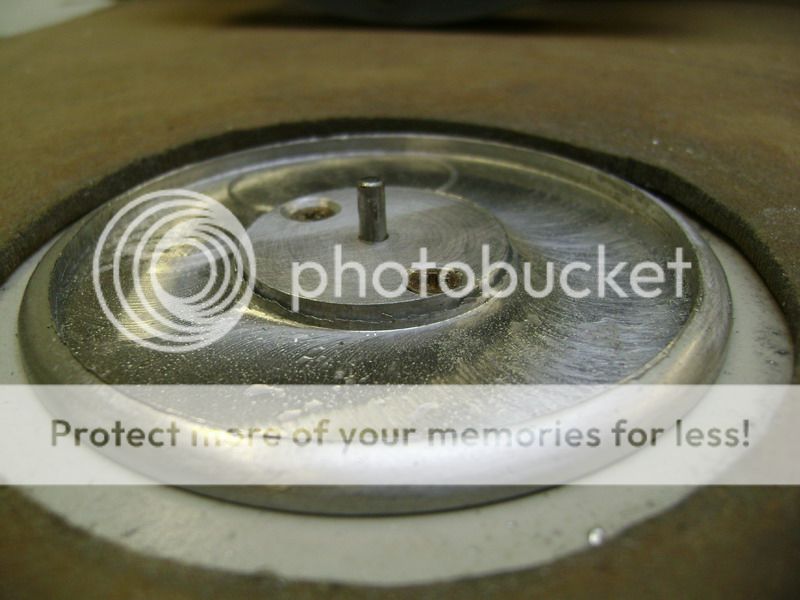
Here you see the little ring I need on the left side. 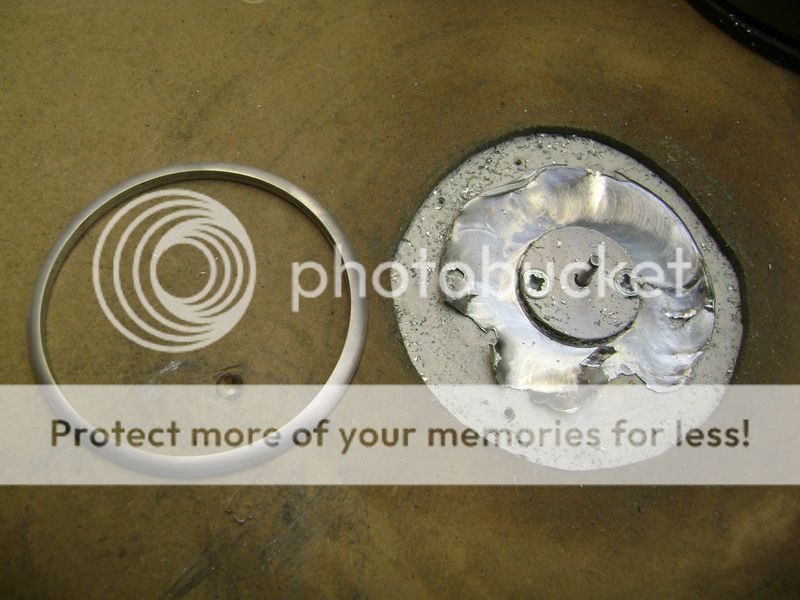
You can say....it looks much better then without the ring. 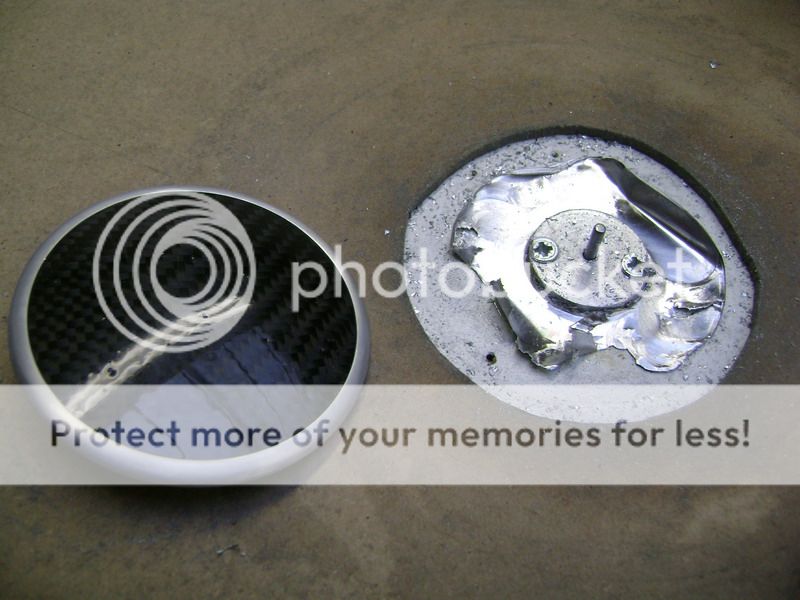
I did the same for the logo on the backside, just that's a bit smaller. 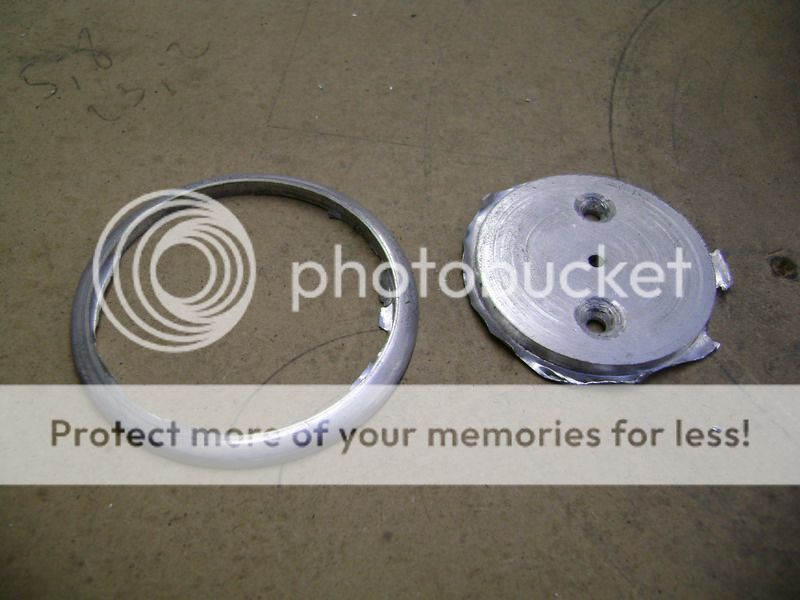
Here they are, Dumb & Dumber 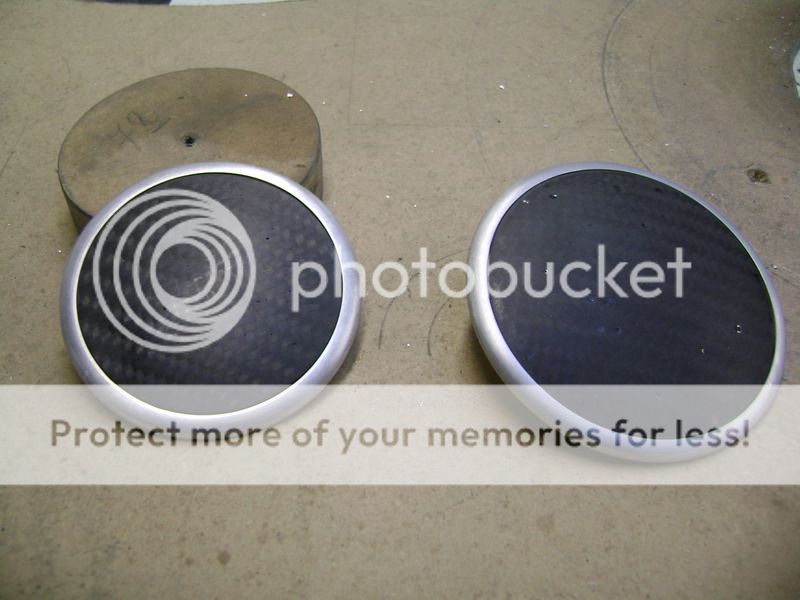
On the backside, I milled it all a bit diagonal, cause I'm going to glue the carbon into the aluminum with 2 components glue 
Posted By: robolop
Date Posted: February 02, 2010 at 3:59 AM
The carbon lay-ins are ready to get some layers of varnish. To become this result, Ive been abrading for several hours, and Im really pleased thats behind me now.
However, its nog finished yet. Im going to do somethings special with 1 plate, but Im not 100% sure what its going to be 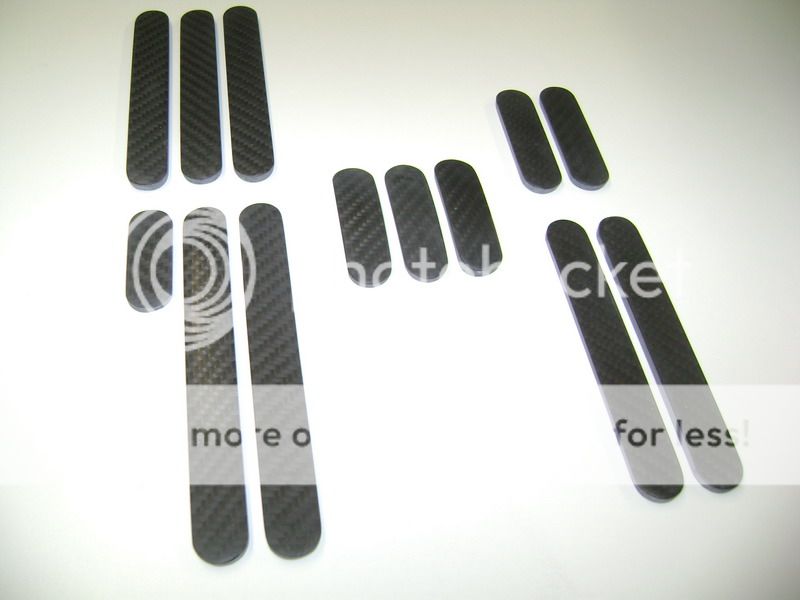
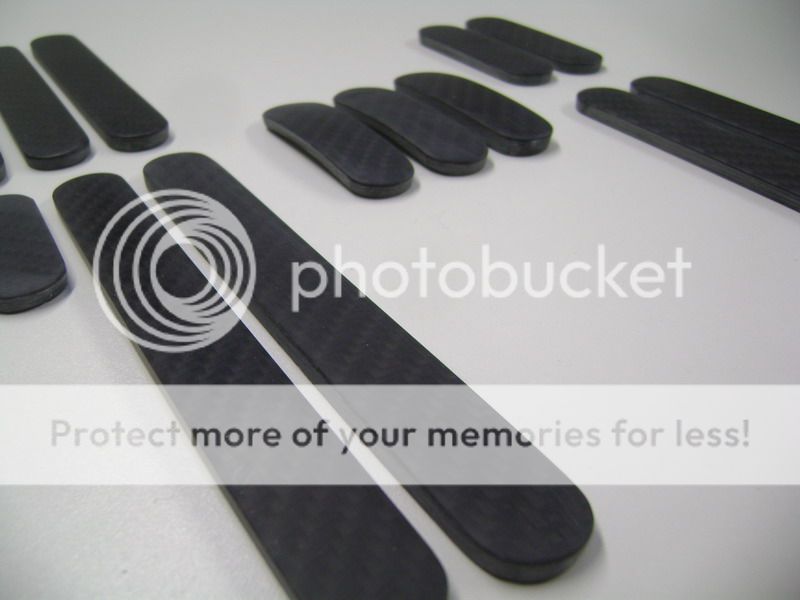
Once the varnish is on here, only then the carbon fibre will appear.
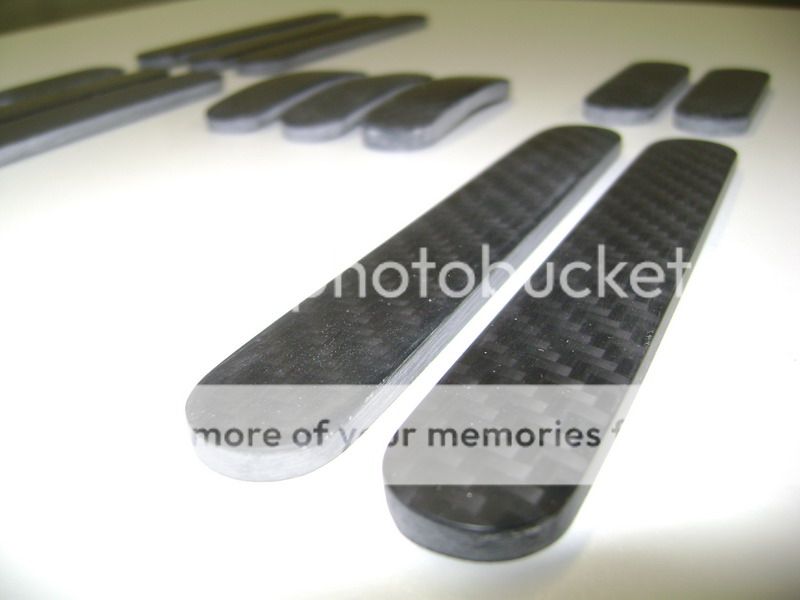
About the emblems, Im working on my own logo to add to that.
Posted By: norcalboris
Date Posted: February 20, 2010 at 12:20 AM
Im pretty much speechless, this is such a beautiful build. Thank you for sharing it with us and I cant wait to see the finished product.
Posted By: robolop
Date Posted: February 22, 2010 at 12:09 PM
As you can see, the pedals are ready to get mounted in the car.
I was pretty scared about the anodization, since thats something I didnt do myself. But they have done it just the way I wanted.
The silver colour is the same as the other interiorpieces of the car.
Here the foot-support. 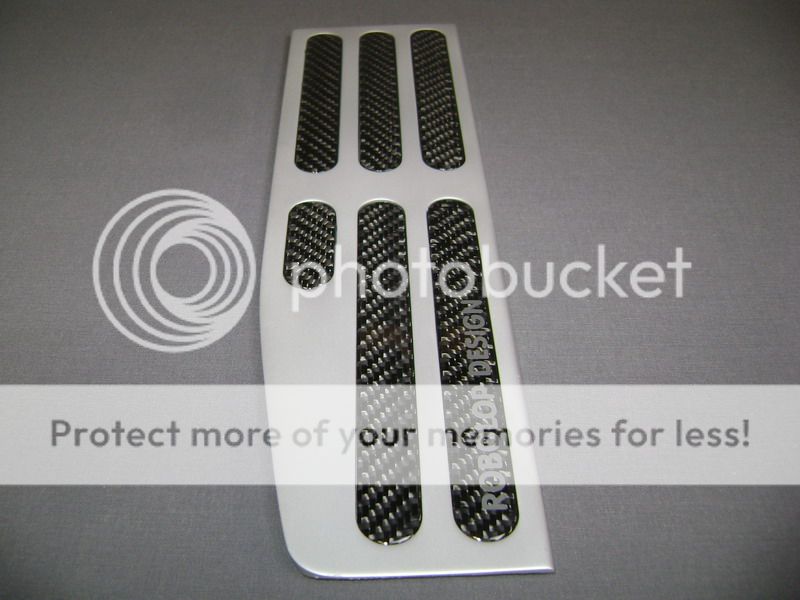
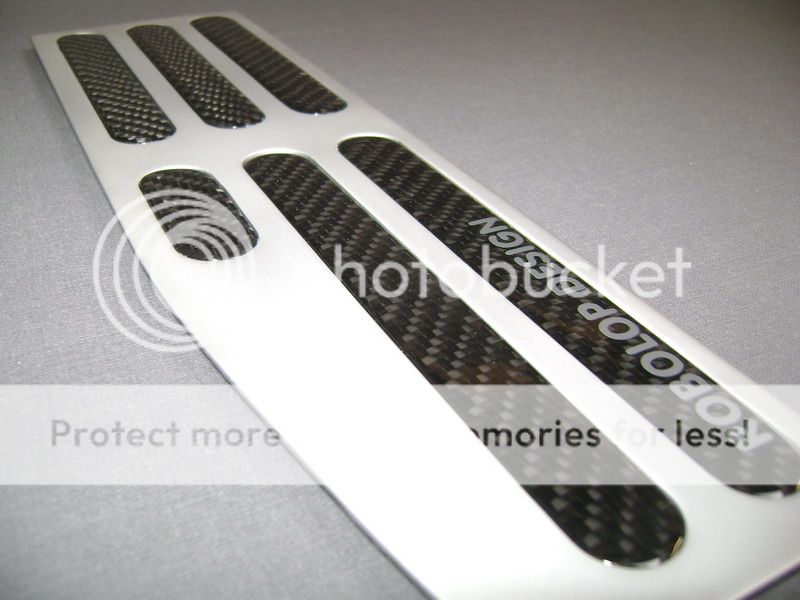
The little sticker-letters that I let someone make for me.
These are silver, and are underneath the varnish, so nothing can harm them there 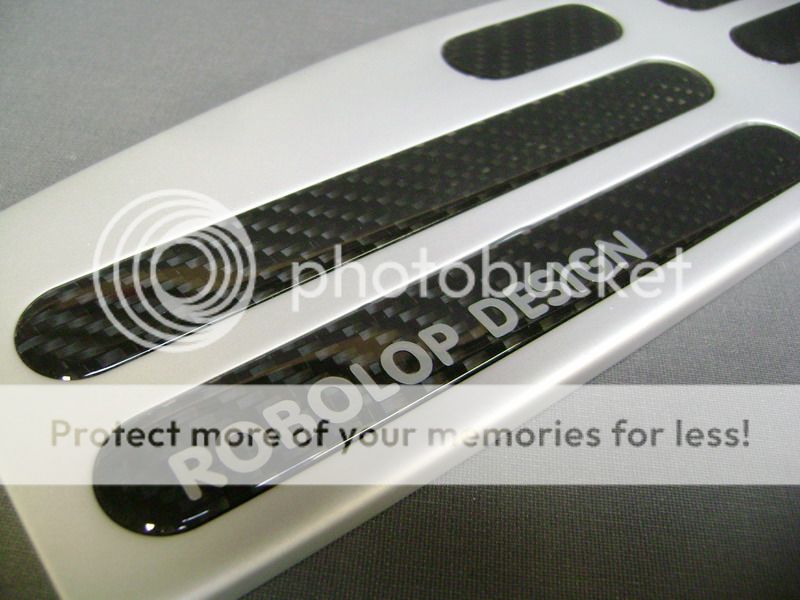
The brake.
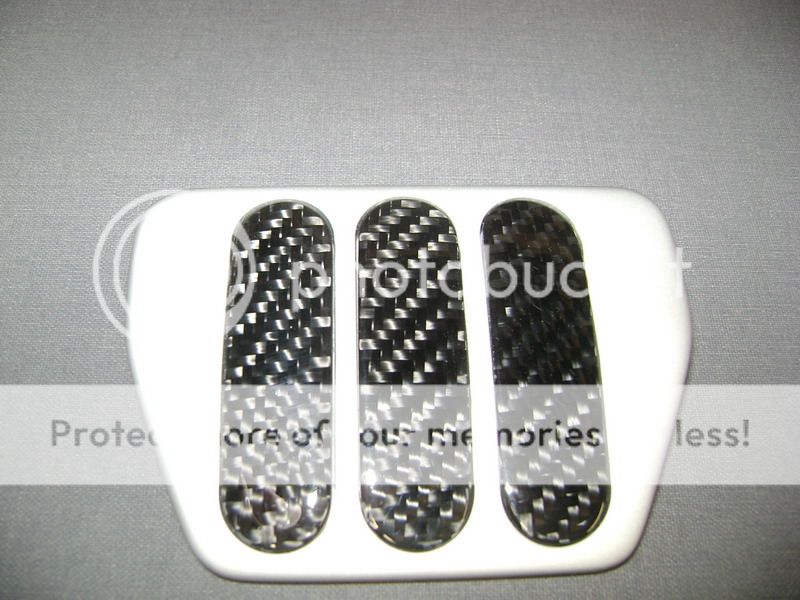 As you look closely on the bottomside of the carbon fibre, youll see theres a lot of varnisch on there. This varnisch is scratch-free, and is as solid as a rock. Time will tell
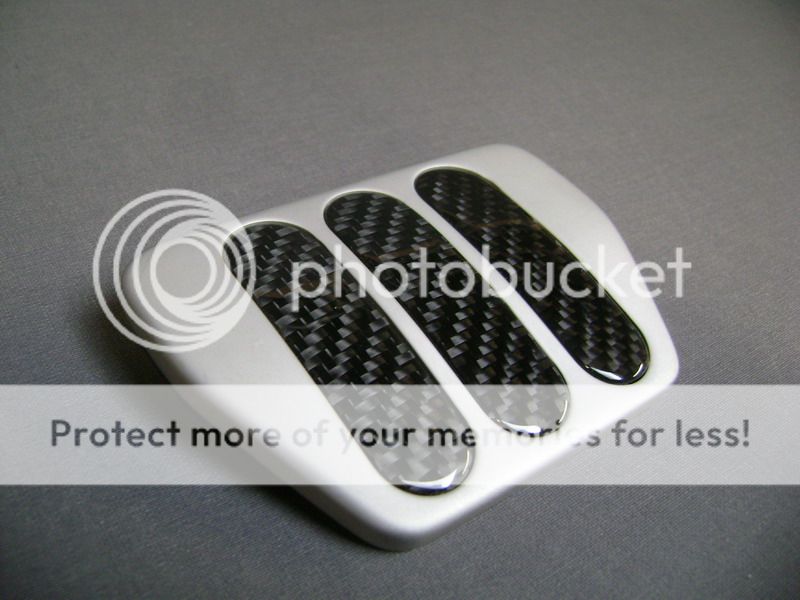
The gas pedal. 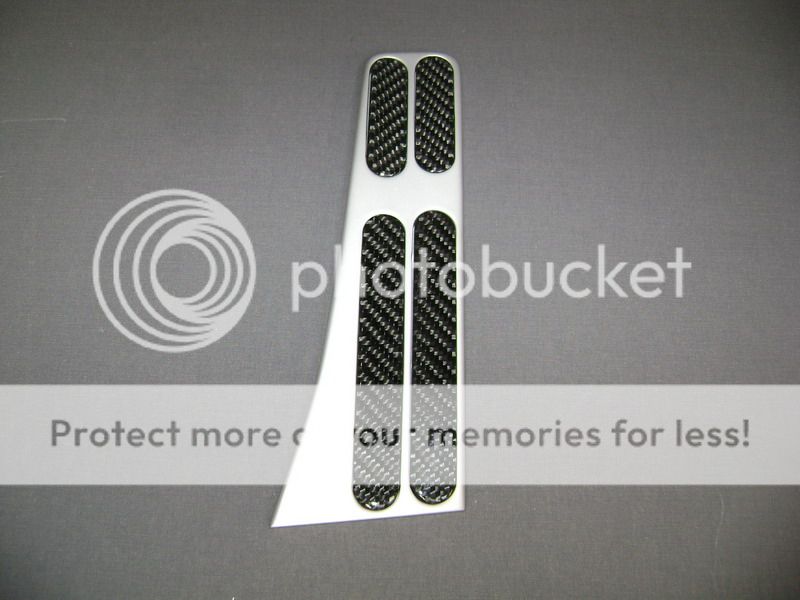
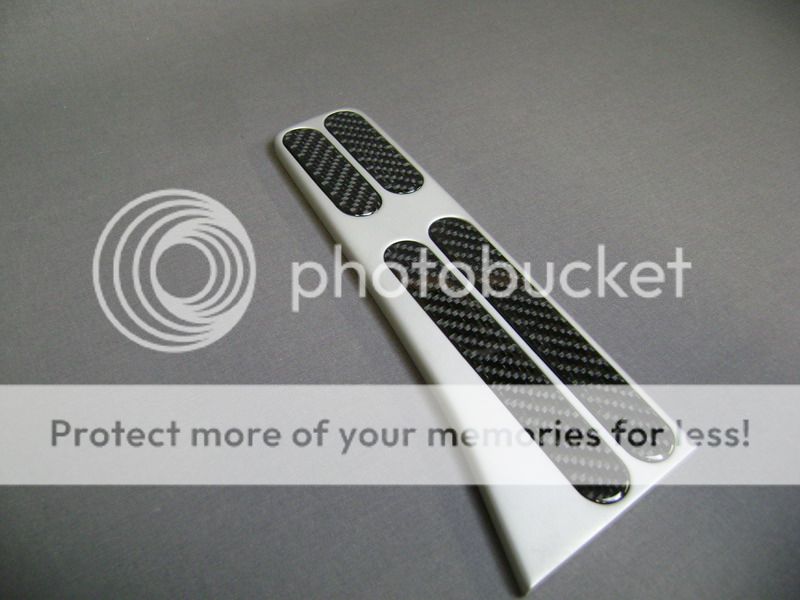
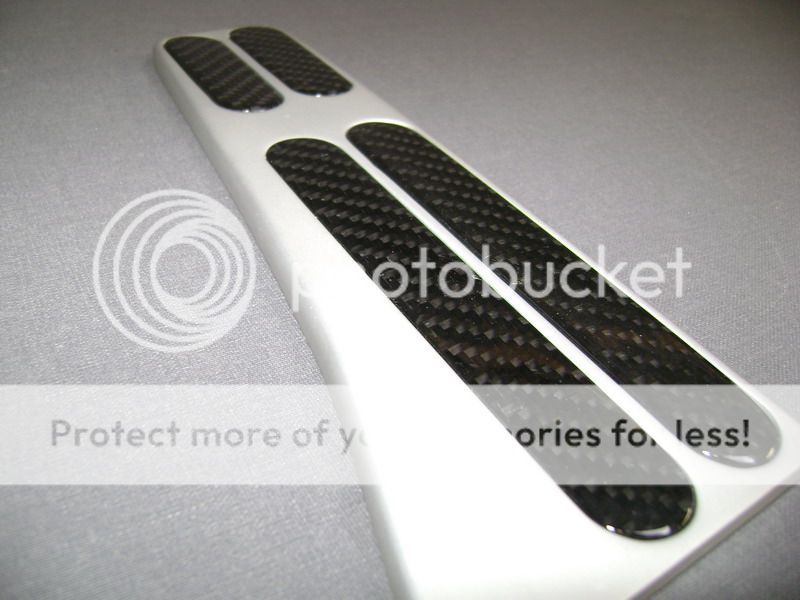
And finally, the complete set. 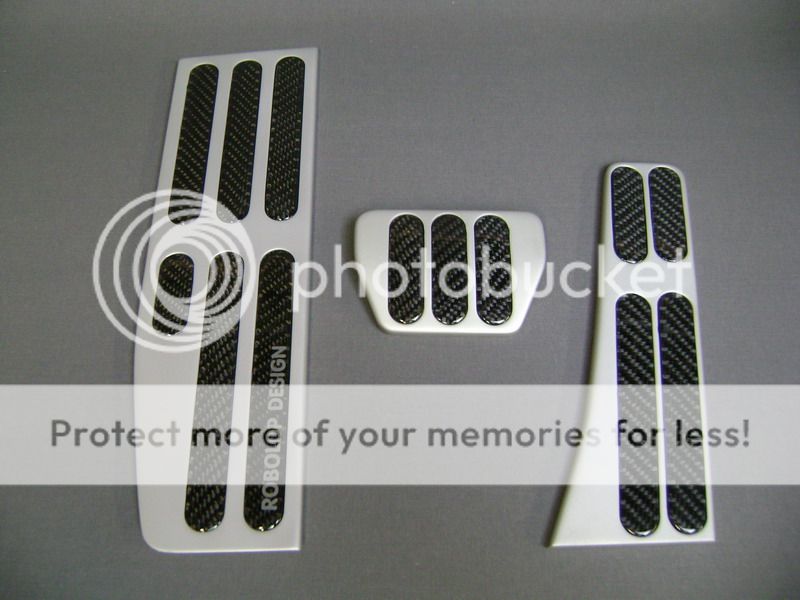
These set of pedals, I think, will need a yearly maintenance
I mean that in time, Ill have to take em off, screw the carbon plates loose, abrade them again, add another layer of varnish, and put it all together.
No pain no gain, they say;;;
now, when its finished, I realize I again finished something small that took a lot of work My carbon fibre stock is empty for the moment, but next week 10m² will be delivered
so up to the next!
Posted By: robolop
Date Posted: March 01, 2010 at 5:55 AM
Posted By: Melted Fabric
Date Posted: March 08, 2010 at 4:13 PM
You know...I get compliments all the time that I am a great teacher and mentor, but everytime I check on this thread of this forum, I become a student all over again and happy to be one. Robolop, this breakdown of the project is extremely appreciated.
The level at which you are fabricating those pieces is well... something to aspire to. I am sure all us of continue to be impressed and await more updates and pictures. Credit, where credit is due.
I am curious, what is your primary language? I also speak more than just english too. ------------- I have not failed. I've just found 10,000 ways that won't work.
When you do not know what you are doing and what you are doing is the best -- that is inspiration.
Posted By: afdanw
Date Posted: August 07, 2010 at 6:05 PM
Sir,
I am impressed. There is so much detail that i have to say, "you might be out of your damn mind." It is truly an amazing install. Wish i had that much patients and skill.
Posted By: robolop
Date Posted: August 08, 2010 at 8:04 AM
afdanw wrote:
Sir,
I am impressed. There is so much detail that i have to say, "you might be out of your damn mind." It is truly an amazing install. Wish i had that much patients and skill.
THX DUDE
Posted By: t&t tech
Date Posted: August 22, 2010 at 11:38 AM
Great stuff there man hope you enjoy every moment of pleasure you get from it! lol ------------- COMMIT YOUR WAY TO JEHOVAH AND HE WILL ACT IN YOUR BEHALF.
PSALMS 37:5
Posted By: radarcontact
Date Posted: September 13, 2010 at 11:10 AM
Truly unbelievable!! I stumbled across this install yesterday and have been glued to it like a Clancy novel...waiting to find out how it ends! I have literally found myself talking to myself, out loud, saying things like, "No way!", "That is frikin' awesome!", and yes (I apologize in advance), "This guy is CRAZY!"
Robolop, you honestly have an ingenious mind. If you aren't already an engineer, you need to become one. You've got serious engineering skills!
My hat is off to you, Sir! ------------- RadarContact
Posted By: robolop
Date Posted: October 02, 2010 at 12:27 PM
t&t tech wrote:
Great stuff there man hope you enjoy every moment of pleasure you get from it! lol
THX DUDE
Posted By: robolop
Date Posted: October 02, 2010 at 12:32 PM
I think you already know, I ordered some things for the amplifierbox. Cause these things still aren't delivered, I worked on some other things in the meanwhile.
Sitting still isn't my style :)
The next update has nothing to do with car-hifi.
When I bought the car 2 years ago, I already knew I was going to make this some day....Now I purchased a M-tech2 rear bumper with pdc.
This is an original bumper from BMW itself, because I didn't want to get the same doodie, that I had with the front bumper.
Once I received the bumper, I mounted it on, and it fitted perfectly!
So I could paint it, and mount it on...but you know that's not my style :)
I want the back of the car, look more like an M3. What the comments will be about this, I don't know, but I think it's the most beautiful rear of an E46.
This also means I'm going for quad exhausts in the rear. This won't be easy...but yet, another challenge.
The original M3 doens't have a spare wheel in the back, but instead is the exhaust system.
What maybe an even bigger challenge is that I'll try to make this work on the original exhaust.
Because in Belgium, we have to go to a technical control every year with the car, I drove to the control-station and asked if this would be a problem.
they told me that whatever goes behind the original exhaust is no problem, as long as they can messure the CO-output.
After a long search on ebay, I purchased these pipes.
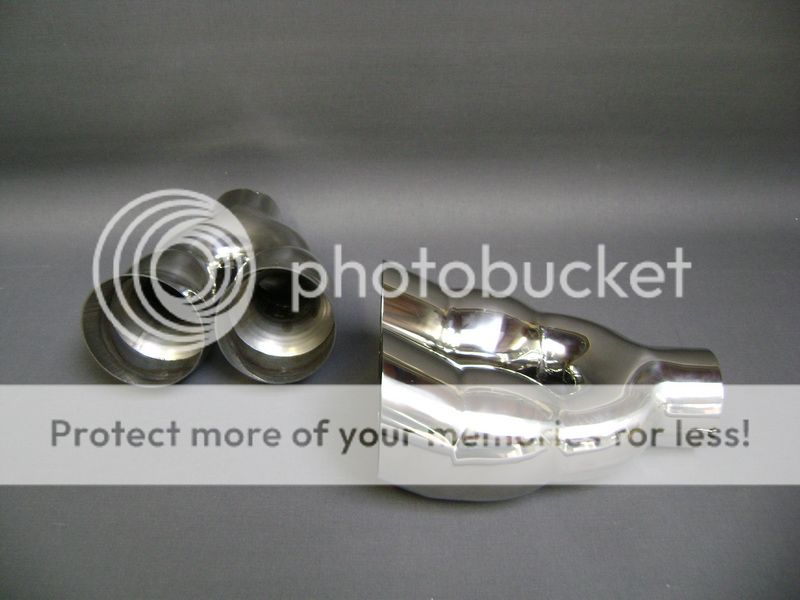
The end pipes didn't look like that when I ordered them on the internet.
The thing I'm pointing at, should have been straight.
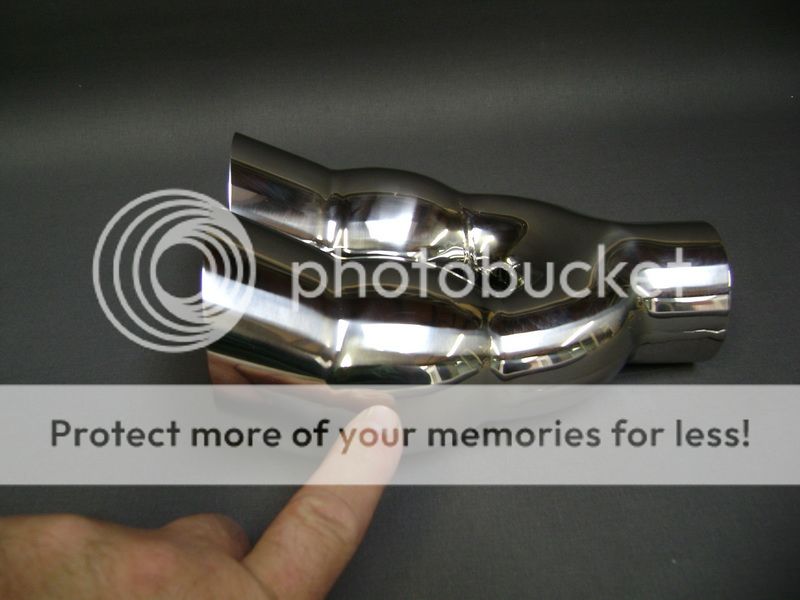
You can see on the picture, it looks a bit curved.
I could do 2 things: Send them back, or tune it myself.... I did the last one
I put in the disc an hour later after delivery .
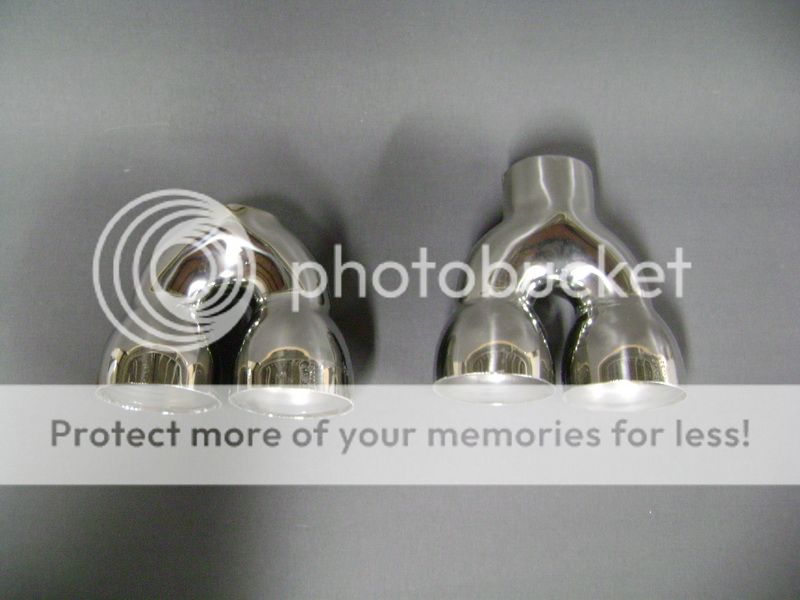
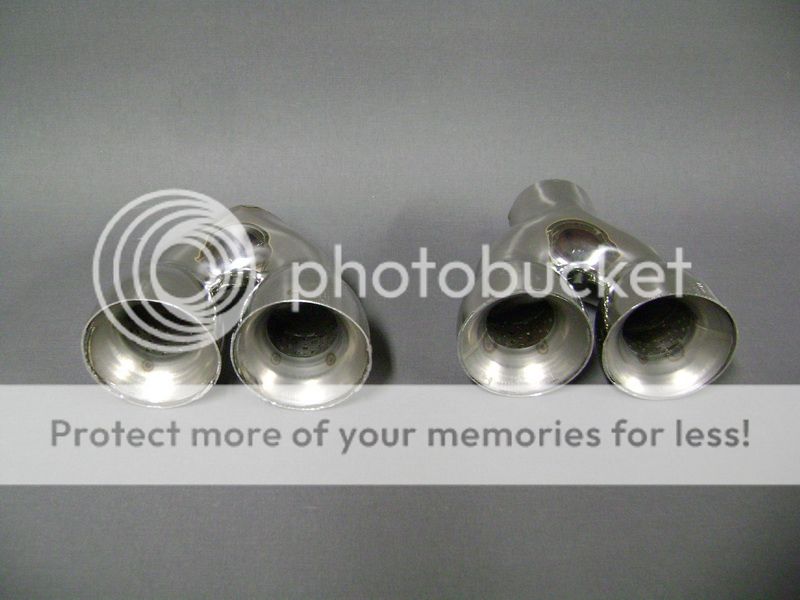


This looked much better according to me. Now it's the art of making these things fit descently onto the exhaust system.
Because I knew that things of the exhaust will get very close to the rear bumper, I need to do something to keep the heat out of there. This is special material to go around the pipes, and can resist a temperature of 1200 degrees. Heath wrapping.
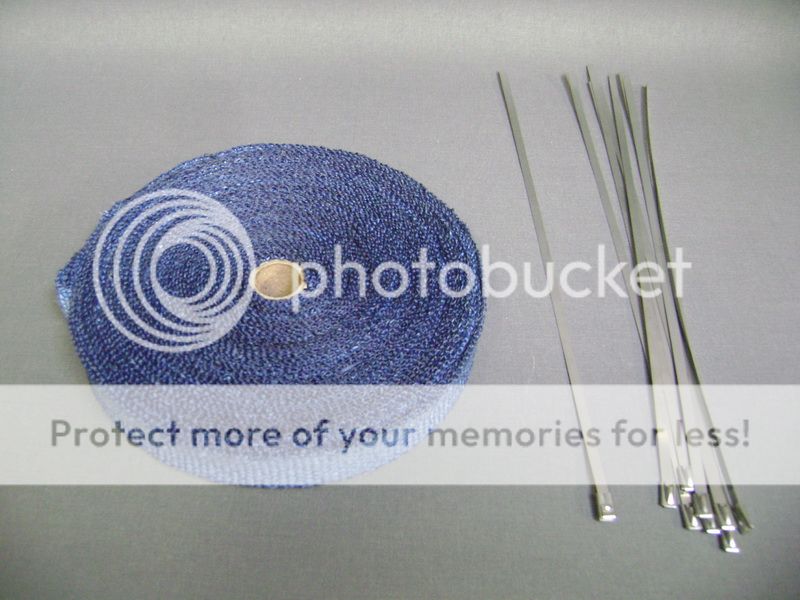
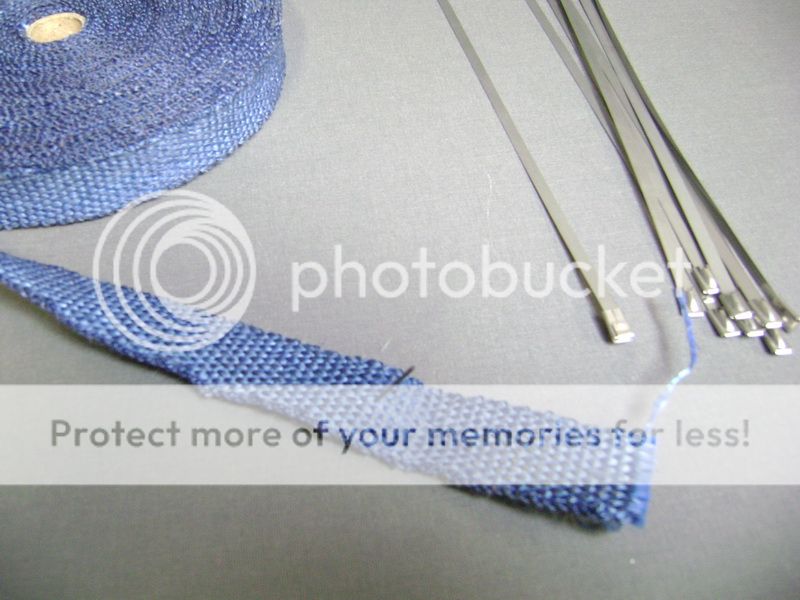
Then I also have a heat-shield to put on the back of the bumper.
Posted By: robolop
Date Posted: October 02, 2010 at 12:48 PM
Posted By: robolop
Date Posted: October 02, 2010 at 12:49 PM
Put some model into the polyester piece. Needs to be some more refining for the finishing off
Cause Im convinced that everything fits 100%, I discovered something.
If you look at this picture, it seems something is not 100% right somewhere.

You see that the inner muffles are a bit higher then the outer ones. I already noticed this on several other cars too.
This is one of my favourites, and I immediately noticed that the exhausts werent on 1 line.
I never saw the car IRL, but Im 200% sure that these are correctly placed too.

It just gives you a distorted image cause of the rounding of the bumper.
I for one, will think 2 times before I say that mufflers are placed awry.
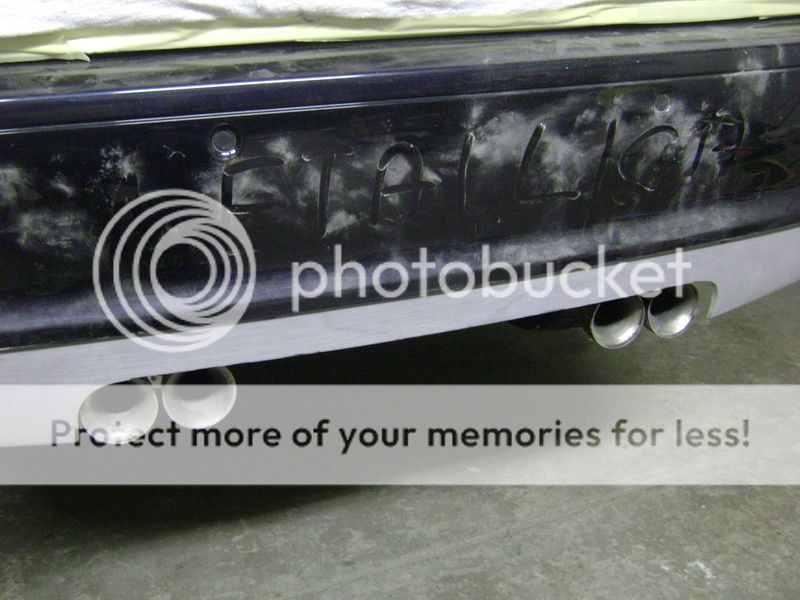
I also tried to make some pictures, exactly in the middle of the rear, but thats not so easy.
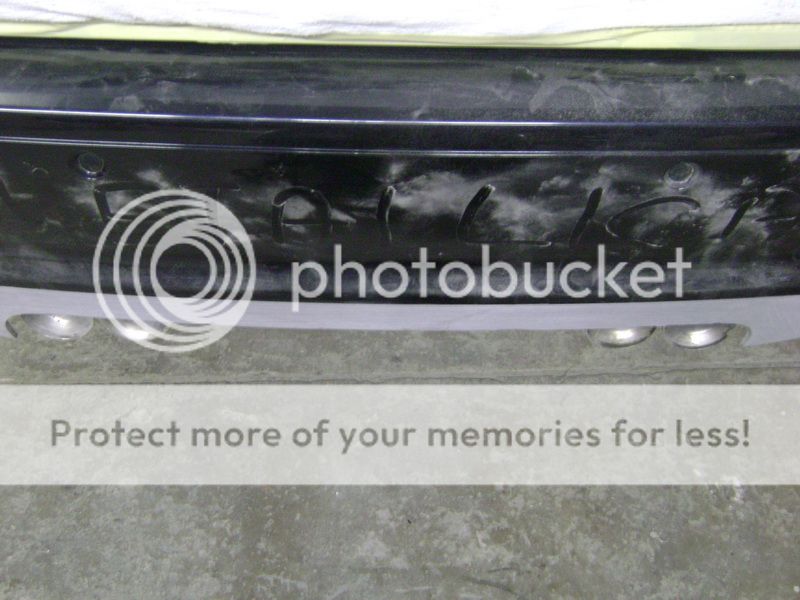
To make the polyester piece the same LEFT as RIGHT, I made a mold.
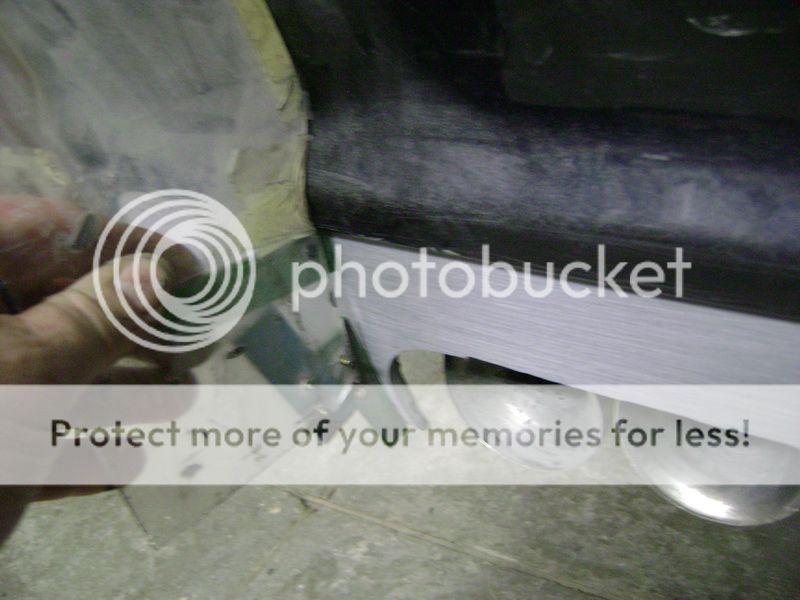
Sometimes its quite simple
.when you know it
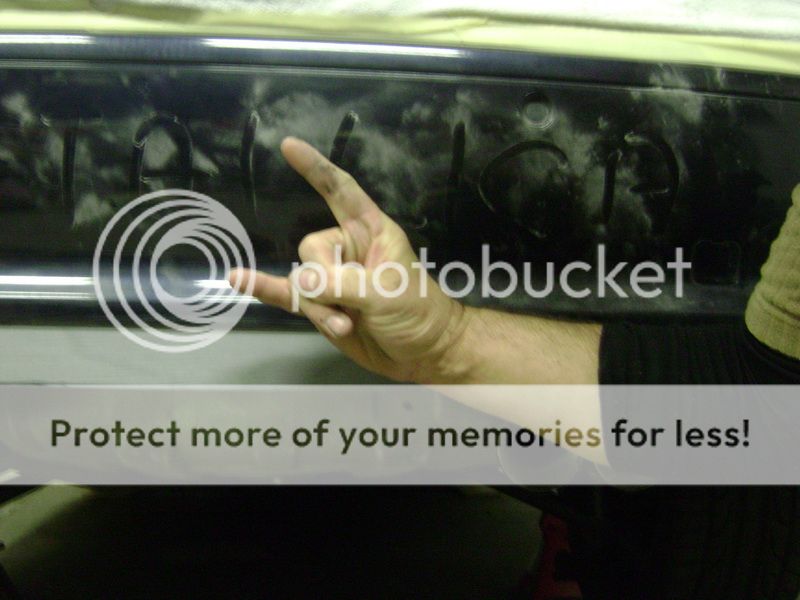
Posted By: robolop
Date Posted: October 02, 2010 at 12:56 PM
This piece will connect nicely onto the exhausts. First, I taped the bumper.

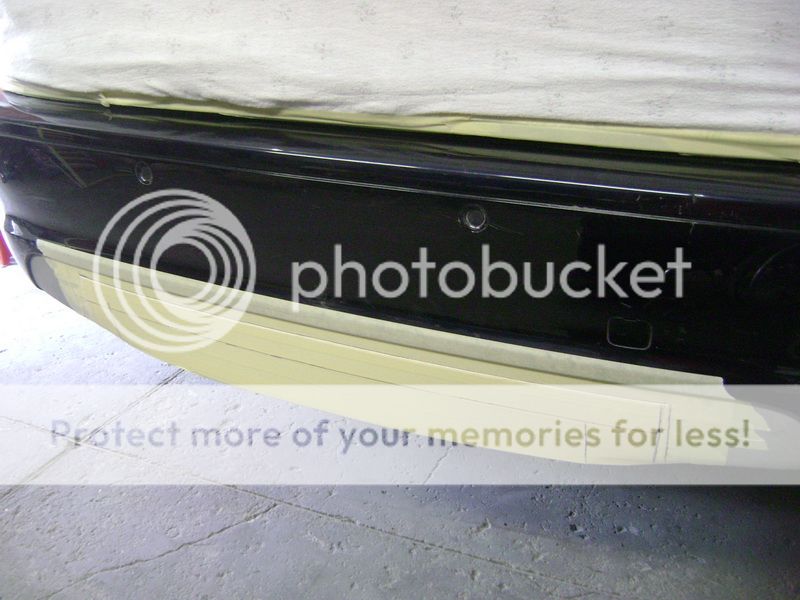
Put on 4 layers of fiberglass cloth.

This will be the foundation for the piece.
I glued some MDF against this, and put some model into it.
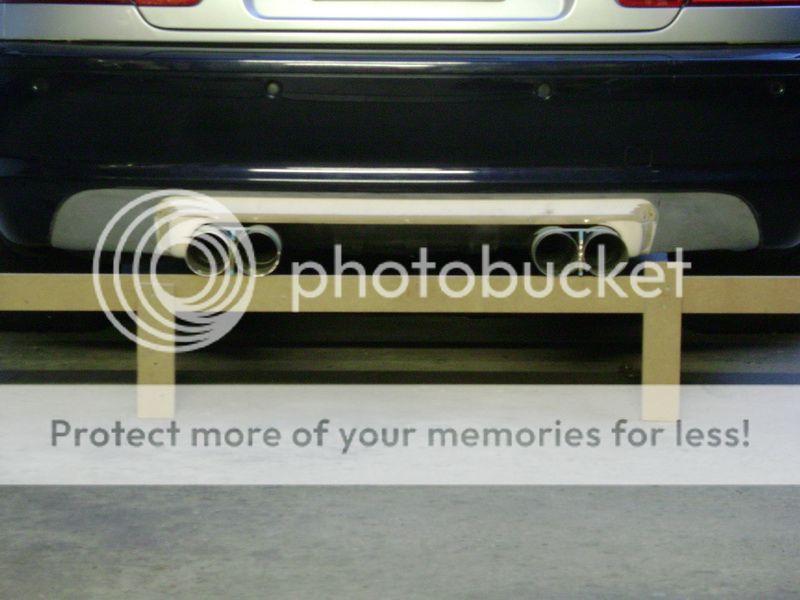
Then I mounted it on the car, and you can see I'm working with great accuracy.
The space between the tubes and the piece is not more then 2 or 3 mm.
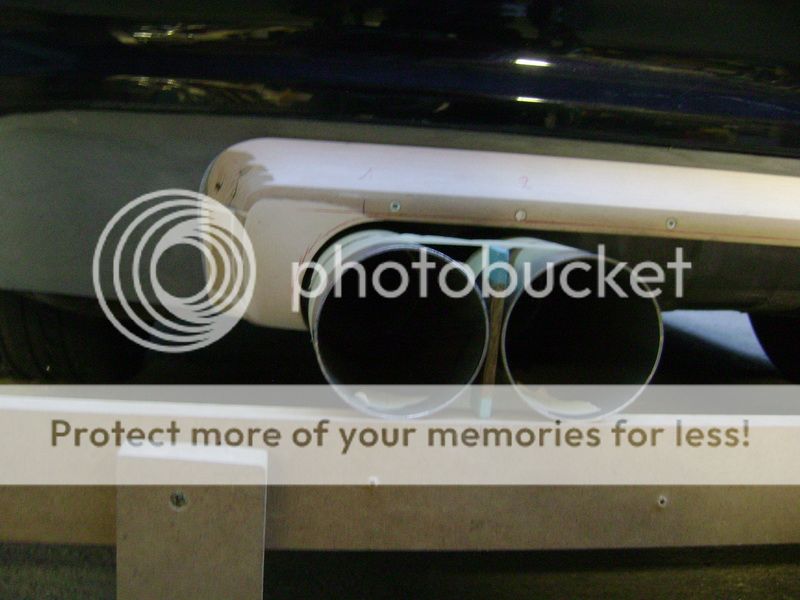
I want as little space as possible between there, but this is a bit TOO small. A child knows this will rattle after 5 kilometers.
So I took a little slath of 6 mm, and drew it out nicely onto the piece.
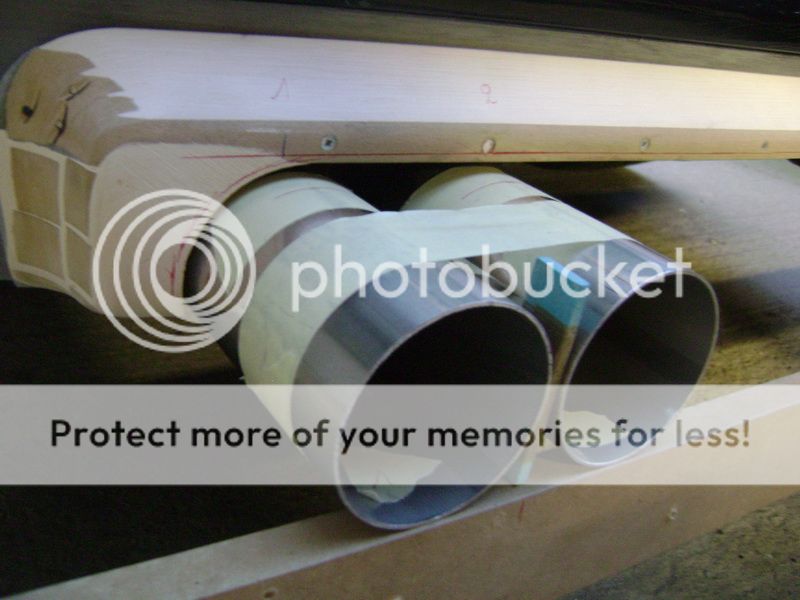
Then I defined the length of the tubes.
You can see the line, that they'll come out about 10mm. The outer mufflers will come out a bit more.
I determined this by the rounding of the bumper, when you look from above.
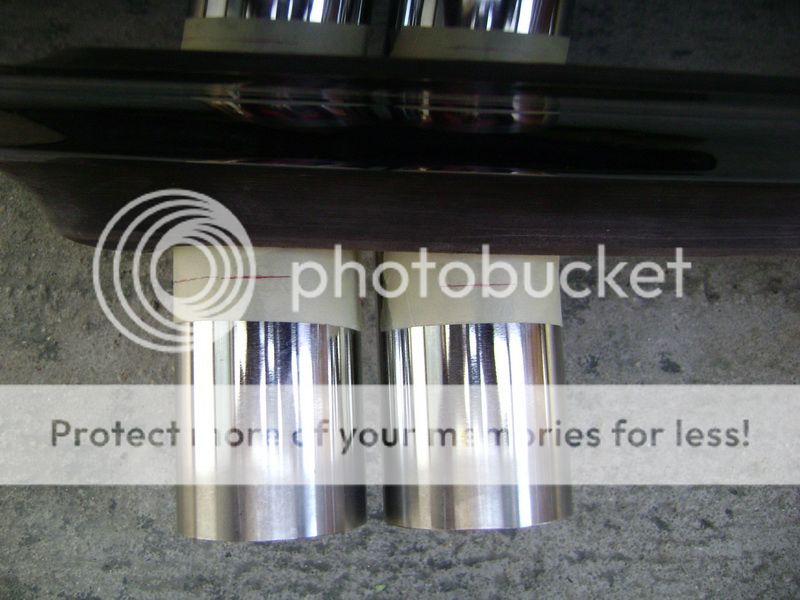
Then I looked with a sway-hook to get them diagonal aligned.
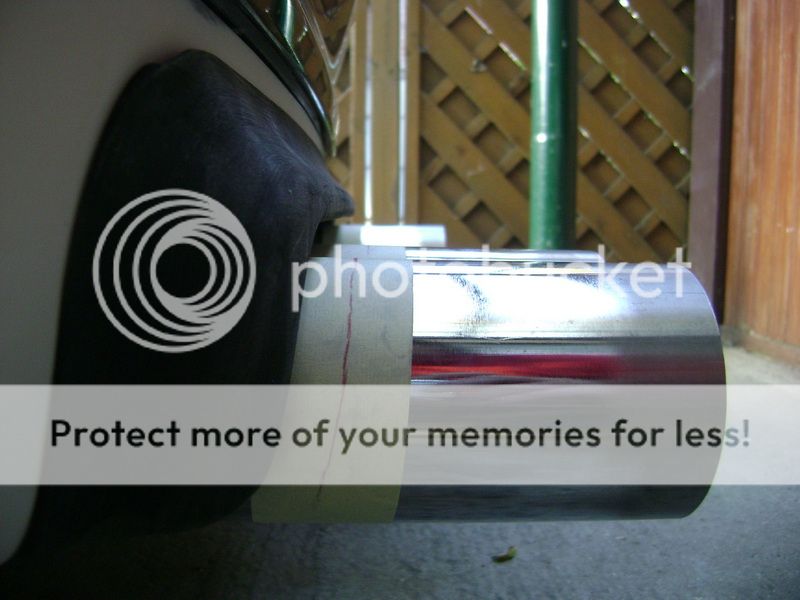
Here you can see how many space I have now. I sprayed the piece black to have a better view on it.
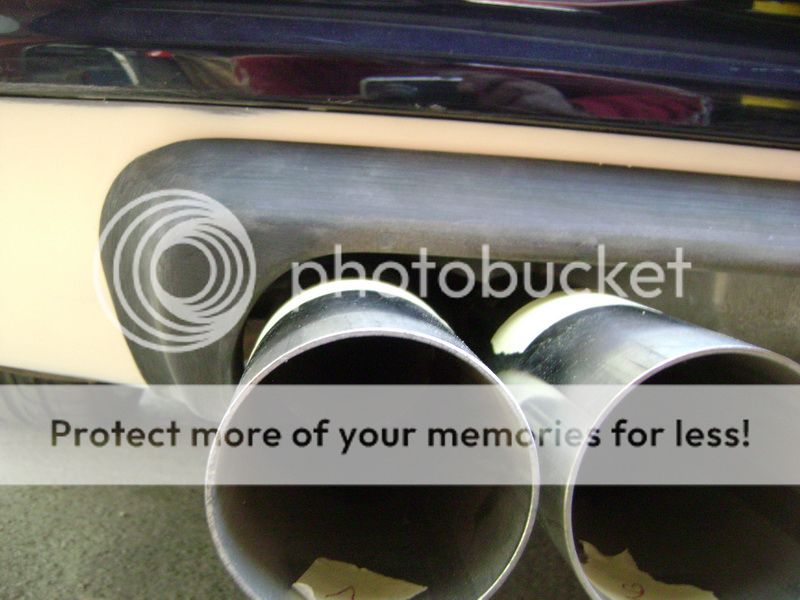
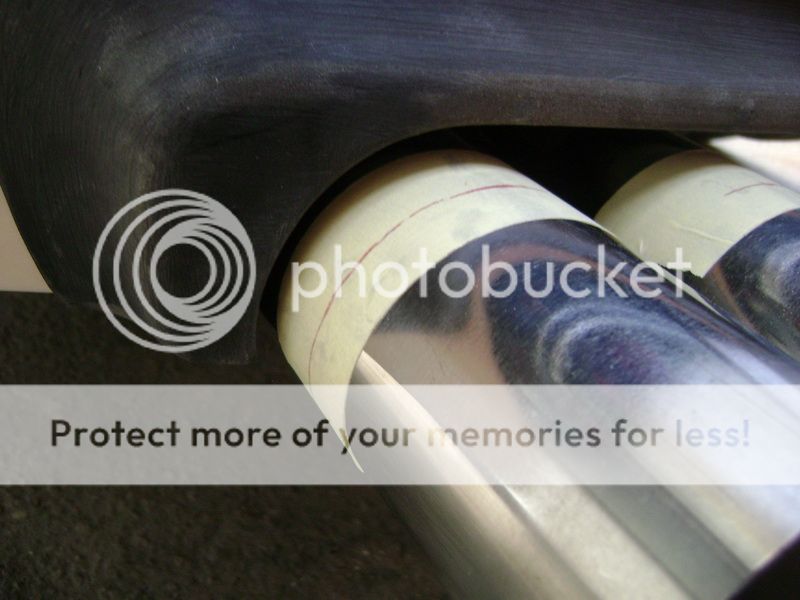
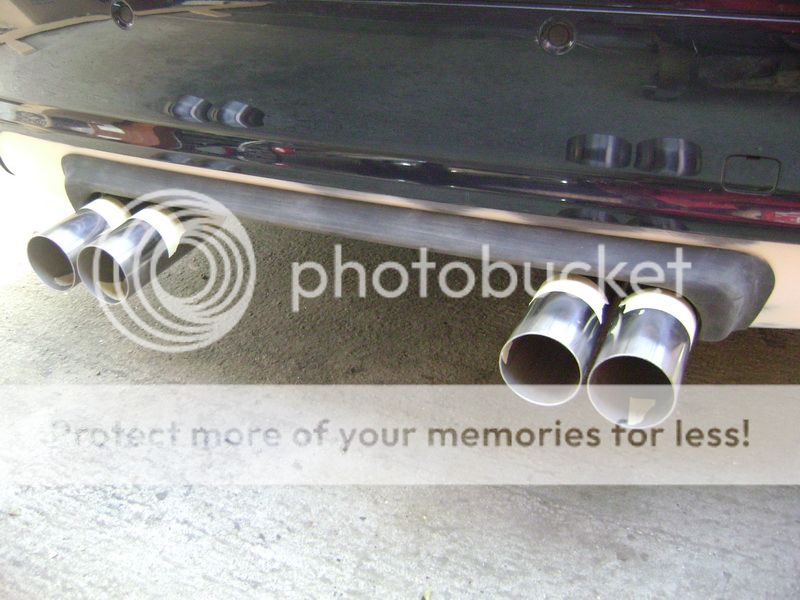
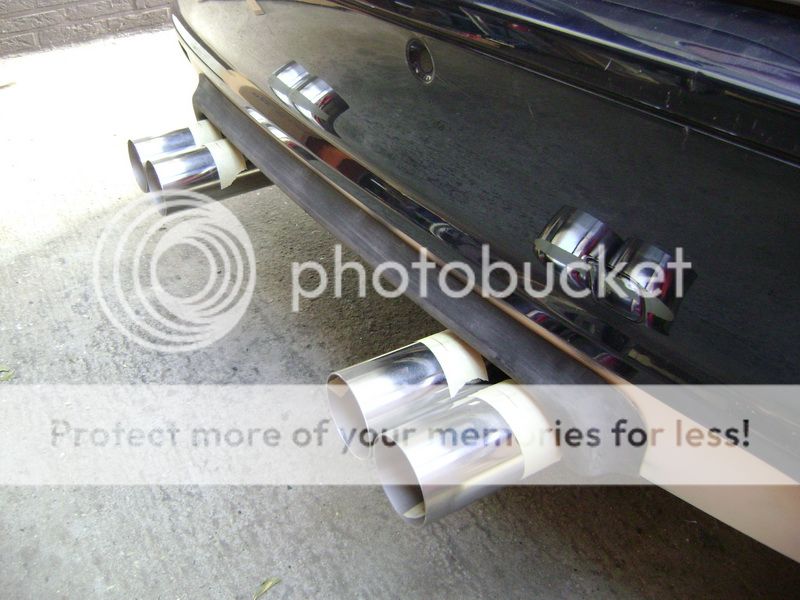
Now I'm about to saw the tubes on the good lenght, and spot-weld them on 4 places, then again, making sure they are still on the same line.
I made a mold of the black piece you see here. For the moment it is drying.
Once this piece is ready, I'm putting it back in the mold.
Posted By: robolop
Date Posted: October 02, 2010 at 12:57 PM
This is the polyester piece that came out of the mold. You can see I painted it black...and you know what happens next... :)
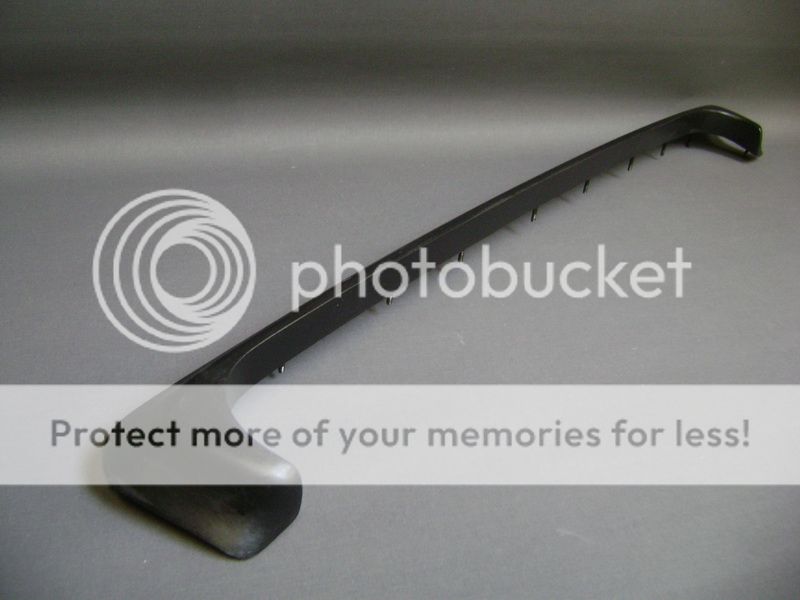
I can tighten this piece with screws on the backside. IF the epoxy or the varnish would fall in after a while, maybe from the heat, I can reel it off, and varnish it again.
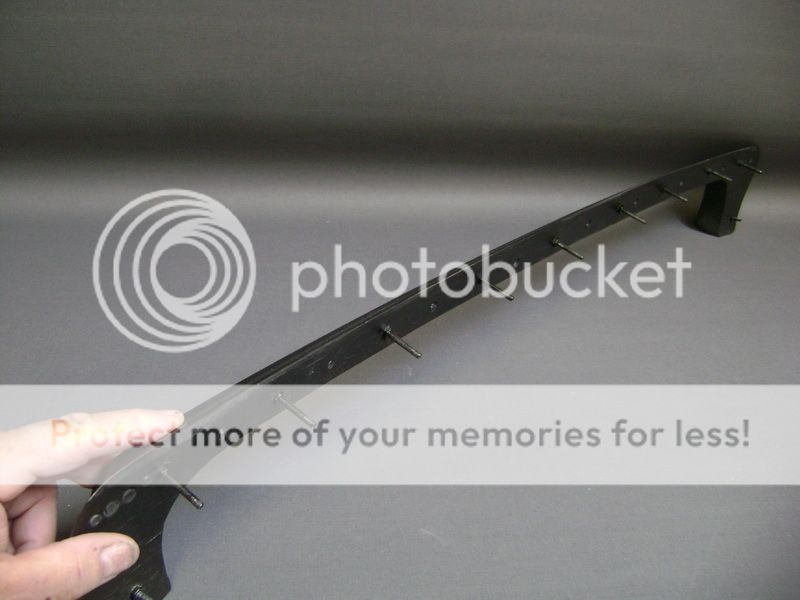
The tips are customized, and I point-welded them on.
On this picture you can see I sawed them af slantlng. I did this because it looks a bit more refined that way, but that's each for his own.
You can also see that I only let them come out about 10mm
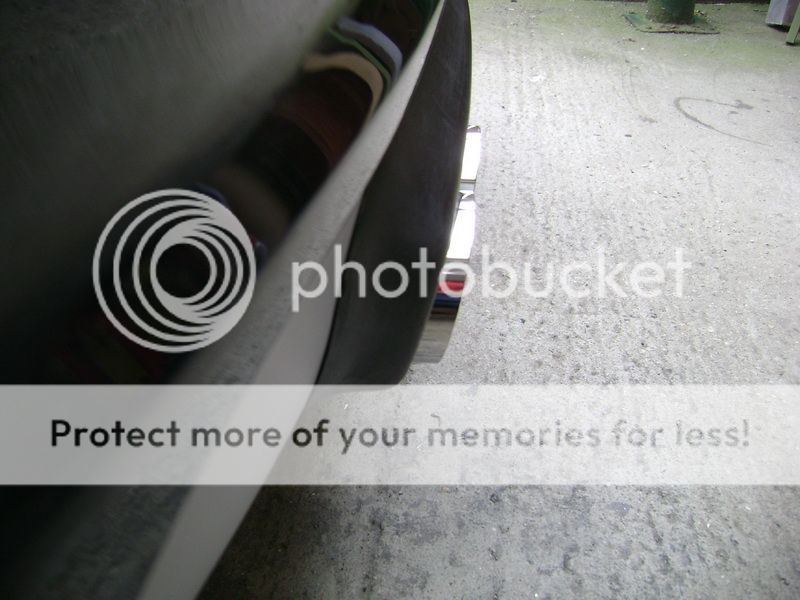
During a test-drive I noticed that the mufflers came against the sides a few times. I fixed this by adding a bit more space in between, it's now 8mm
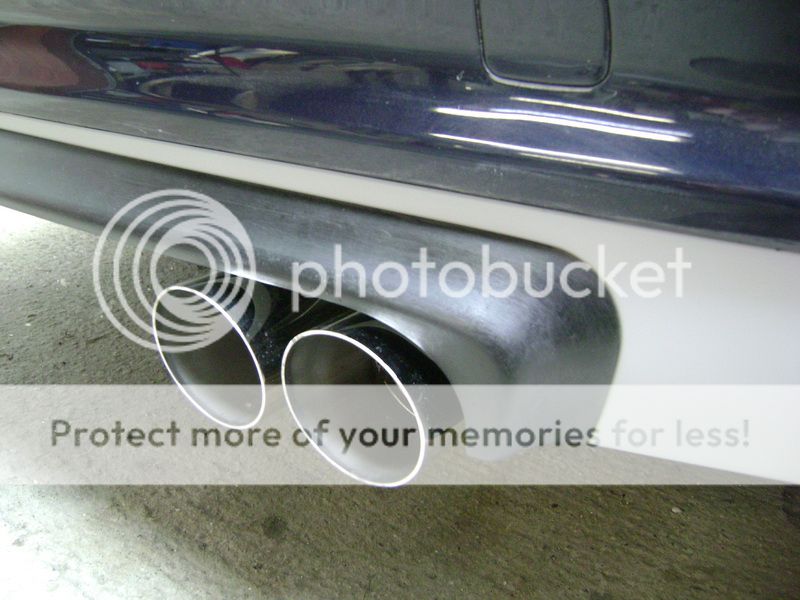

This is a picture that makes you say: "it's ok, or no, put it in the bin"
You be the judge, but I like it.
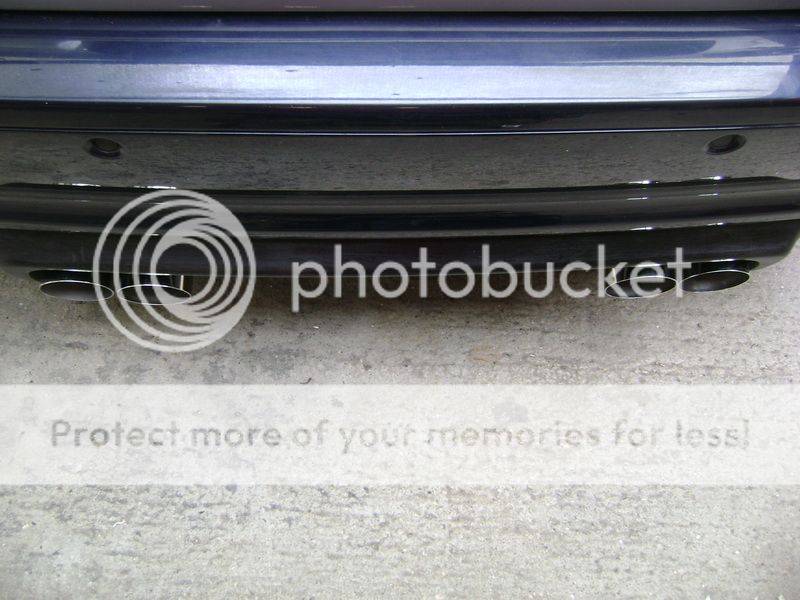
Once I had all of this, I dismantled it all, and welded the tips completely.
Afterwards, I mounted it all again, said some prayers that it didn't become awry from the welding.
For the moment it's all at the painters shop.
Because I don't have a line in the front bumper, I'm going to delete this with the rear bumper as well.
I also bought some M-Tech II sideskirts, so they are getting painted as well.
The end is coming near...and that's a good thing. I'm getting a bit sick working on that rear bumper, but already looking forward of messing with the ICE again.
When you do something different now and then...you stay sharp :)
Posted By: robolop
Date Posted: October 02, 2010 at 12:58 PM
This is the polyester piece I covered in carbon fibre. This was a f*king nasty piece to cover, but it worked out pretty well.
Here you see the front is abraded pretty smoothly.
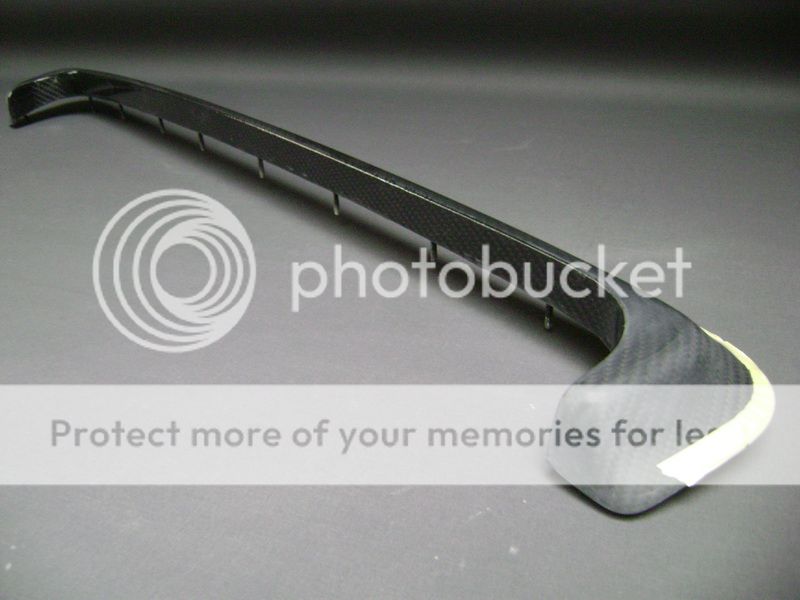

On the bottom I still need to begin the rubbing-process, and you can see how many epoxy is on there.
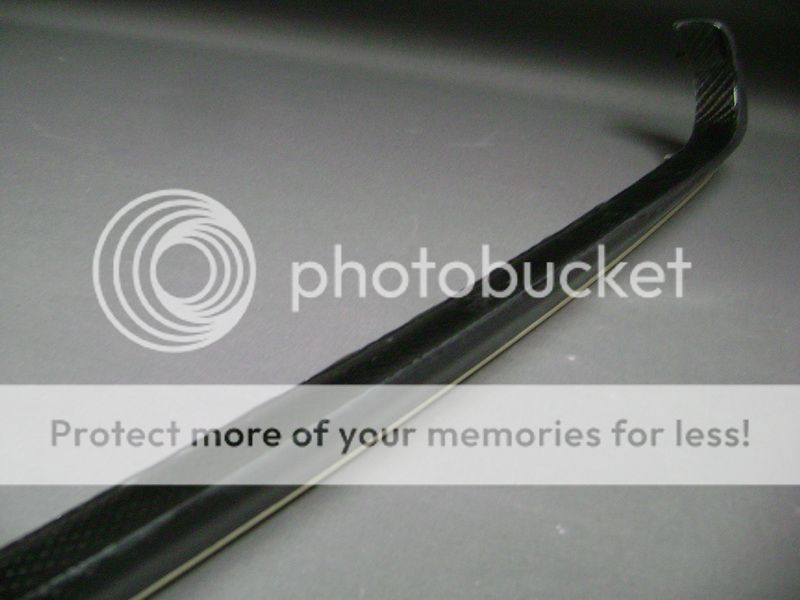
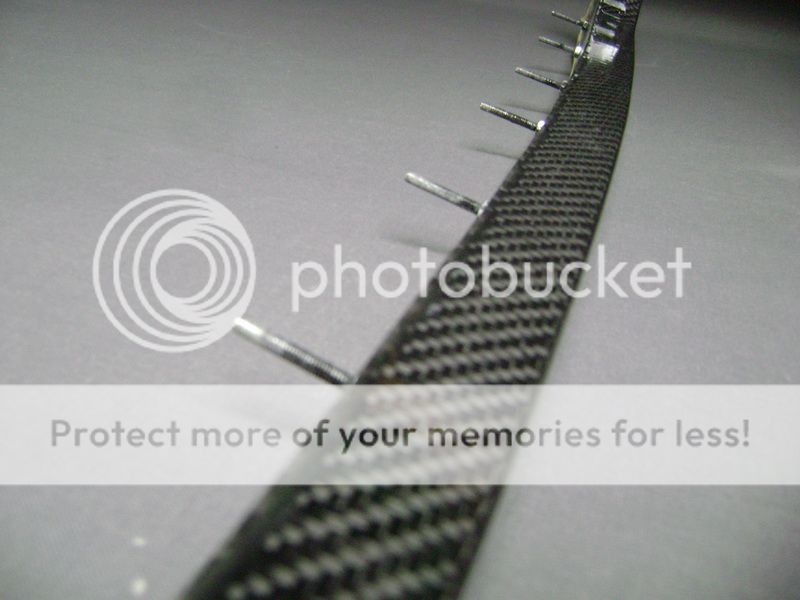
I timed how long I did for making this nice and tight, and before I knew it, it was 2.5 hours later.
Now it can be covered with varnish.
I'll get the bumper and the rest back tomorrow. This will rest for a couple of days, till I have the time to mount it calmly.
The exhausts I provided with a heat wrap, but I didn't get all the way with the 10m I had.
I ordered another 10m in England, and this will arrive tuesday or wednesday...
Posted By: robolop
Date Posted: October 02, 2010 at 12:59 PM
the backside of the polyester piece, I provided with a heat refractored material.
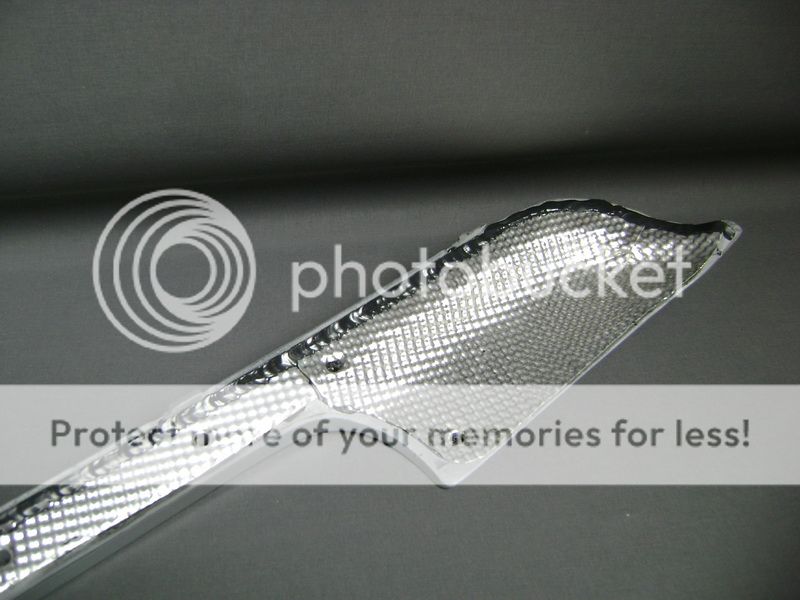
The carbon frame above the mufflers, I tuned some more. Here and there a little paint runner that needed to be fixed/
Started with a 1200, then 2000 and stop with a 3000.
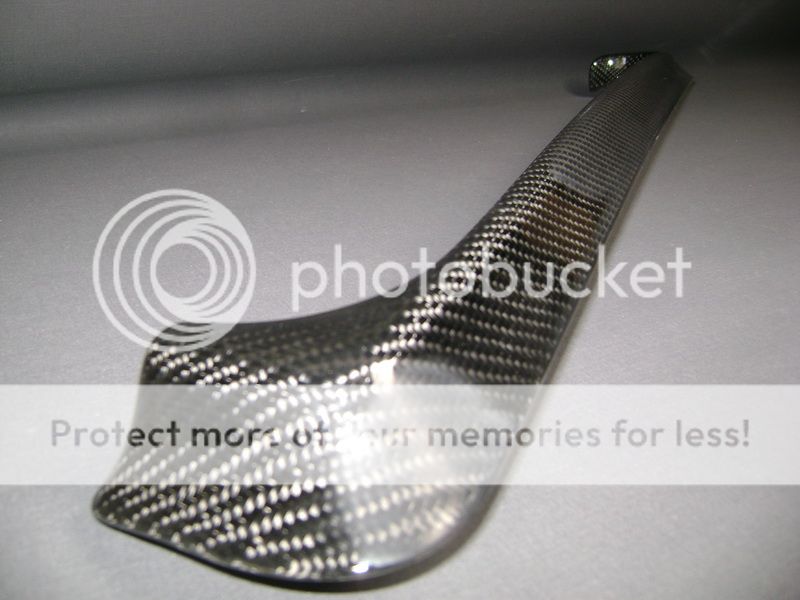
started with the polyshing...first with a hard pad.
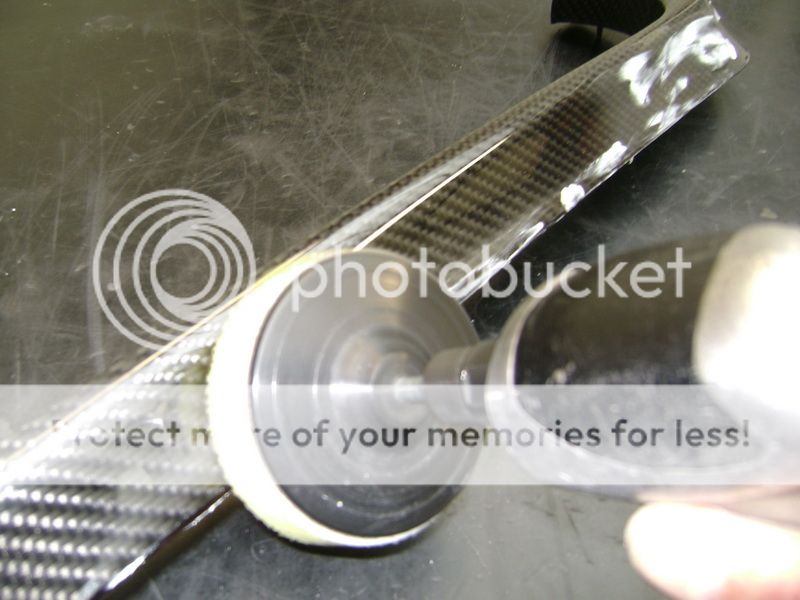
here the result.
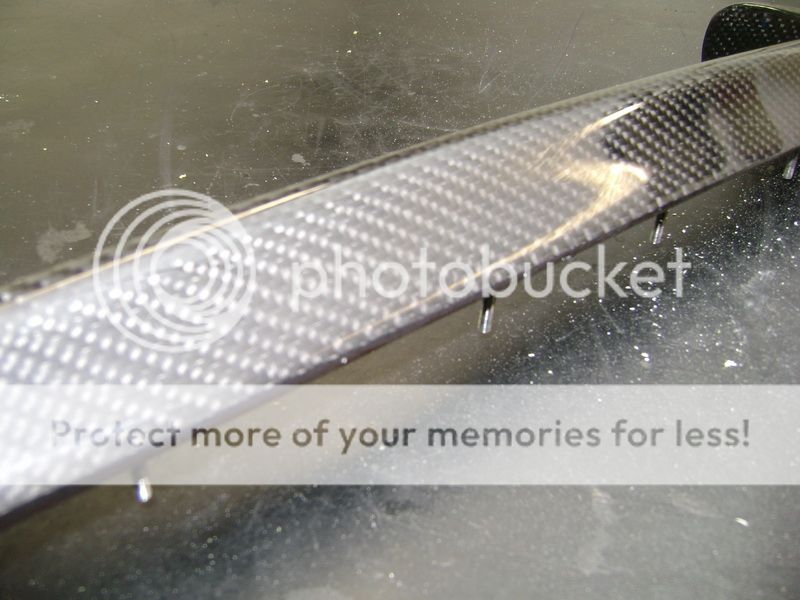
after this we used the fine pad, to get back the shine.
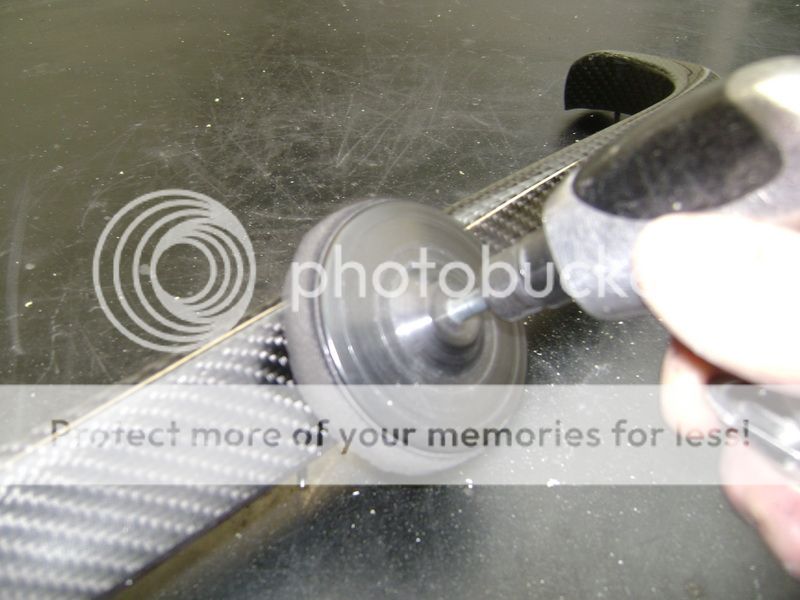
end-result
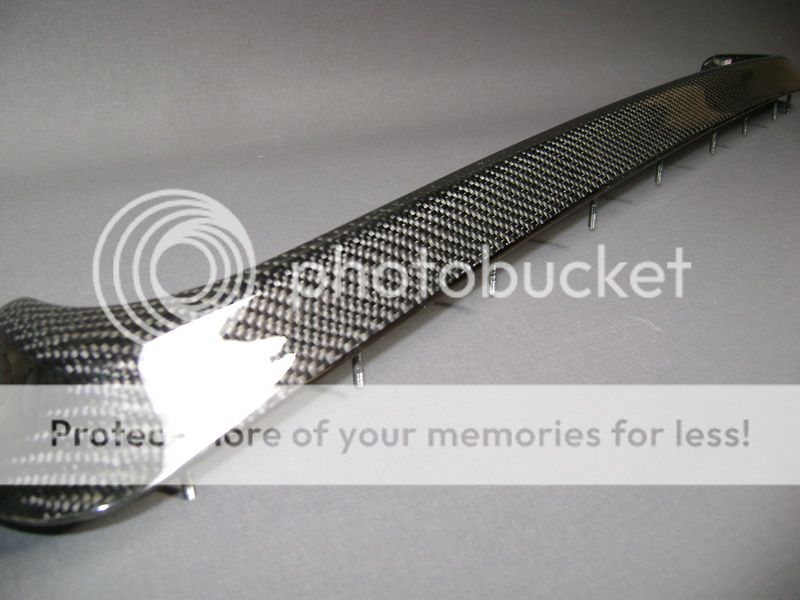
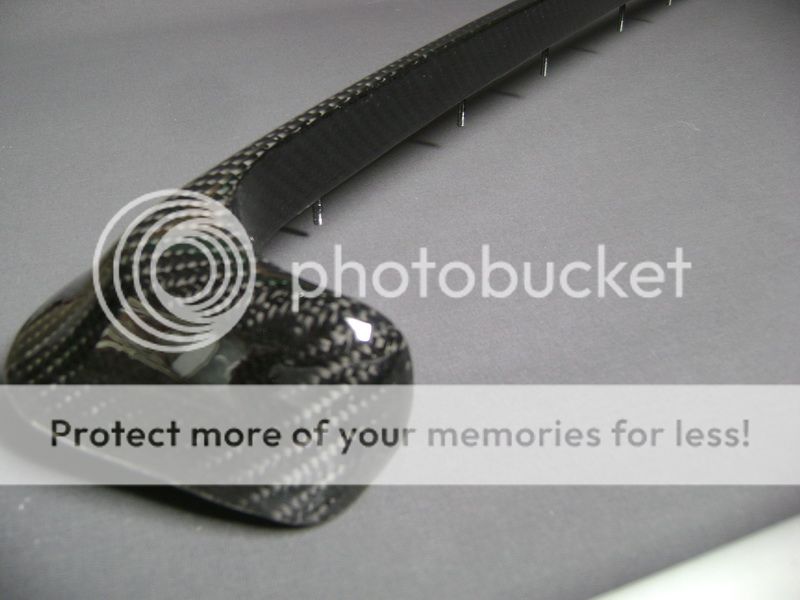
The I screwed the carbon piece tight onto the polyester piece.
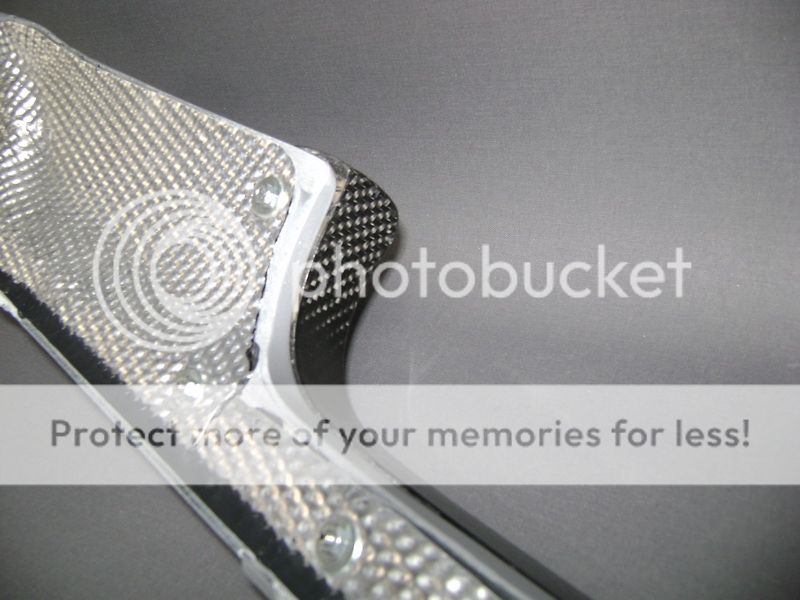

Most people would have glued this on, but I don't like that sort of work. So I think my way is a big asset to this.
If I needs to come of for some reason, I can just screw this loose.
Here is the front, like it'll come on to the car.
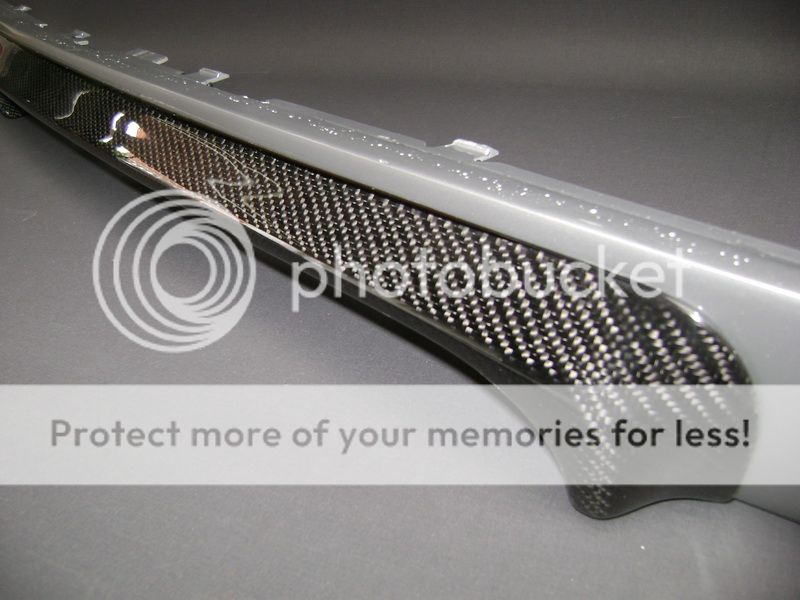
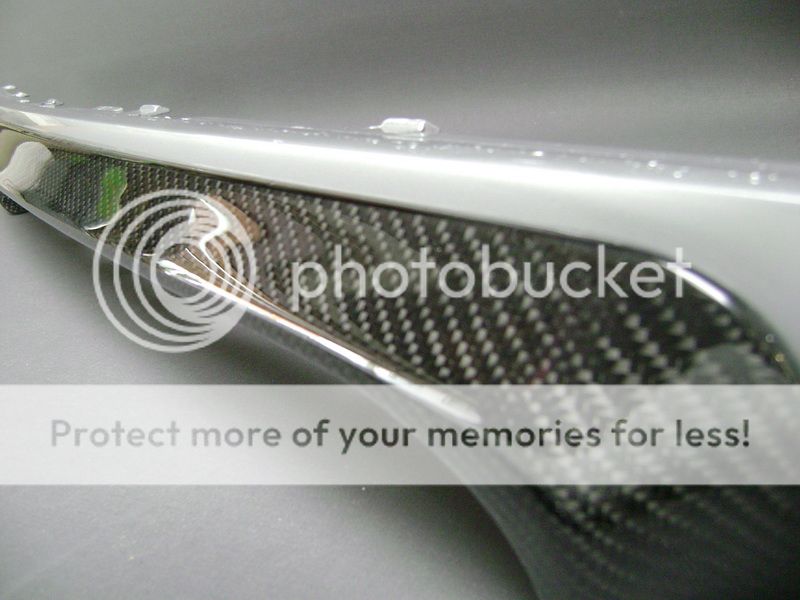
Everything is for 80% finished, and is installed on the car.
The design department did a fine job to draw out something to come in between the mufflers. Then there was some guy of the team here who started talkin' crap to make something that emerged electricly. I sacked his ass right away :)
Posted By: robolop
Date Posted: October 02, 2010 at 12:59 PM
This will be the piece that comes between the exhaust pipes.
First I made a model out of wood.
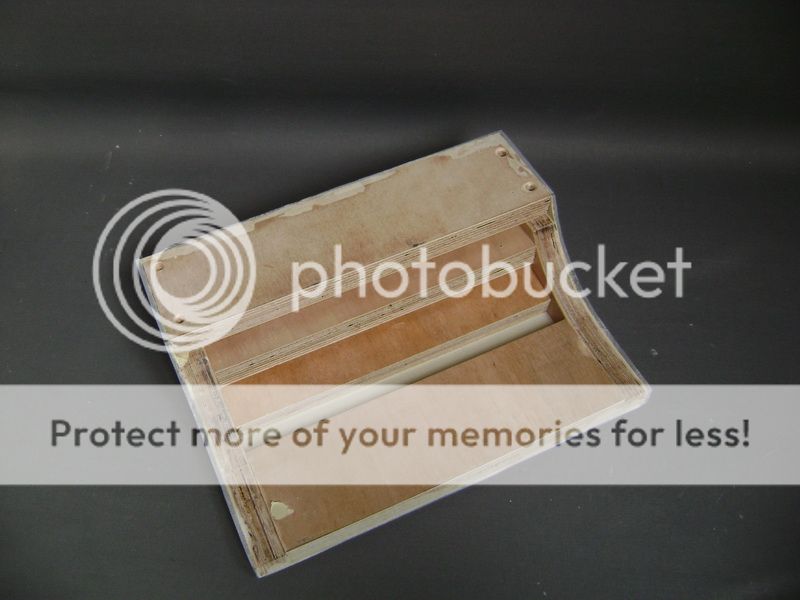
After that I covered it with a couple (4) of layers polystercloth. Once this was dry, I had a weird design.
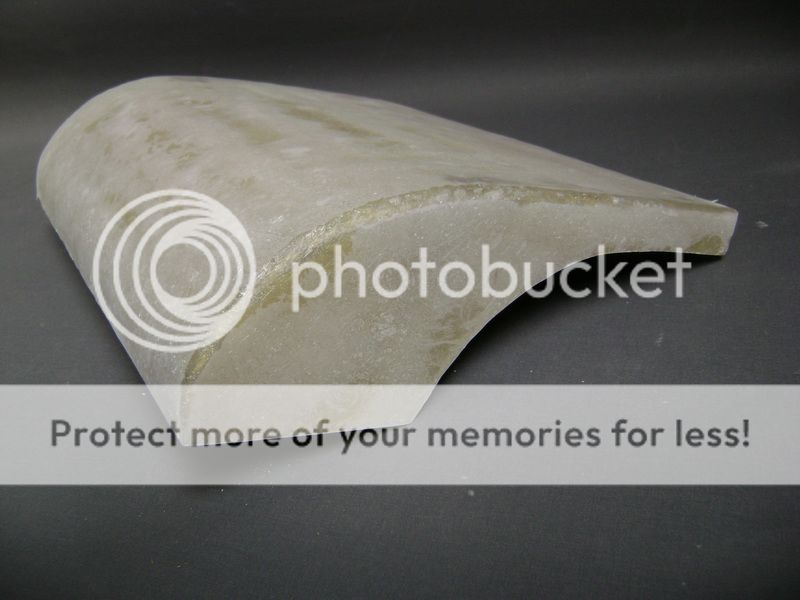
I managed to delude some friends by telling I was making a glove-compartment to hang under the rear bumper.
You must admit, it really looks like one
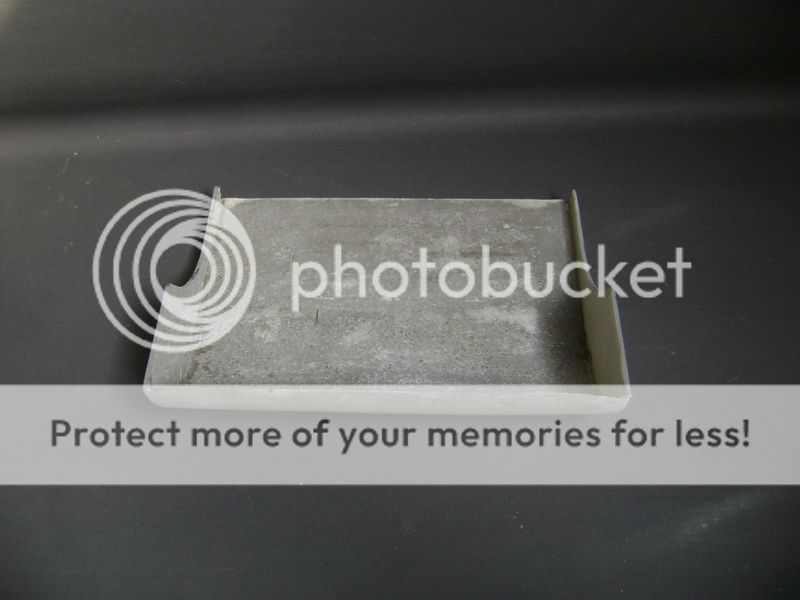

These are 2 hockeysticks I made out of MDF. If you can see whats underneath them, its not hard to figure out whats next
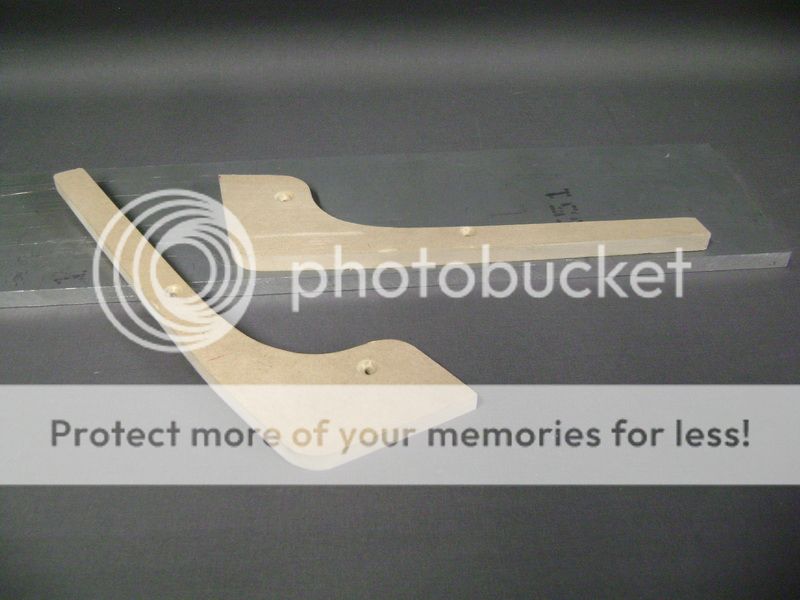
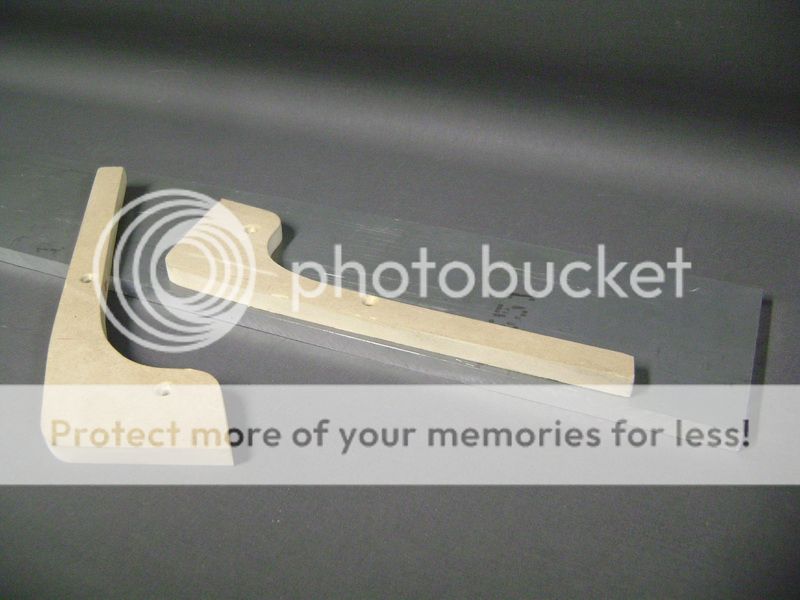
Posted By: robolop
Date Posted: October 02, 2010 at 1:00 PM
These are the 2 hockey-sticks I sawed out of 12mm thick aluminium.
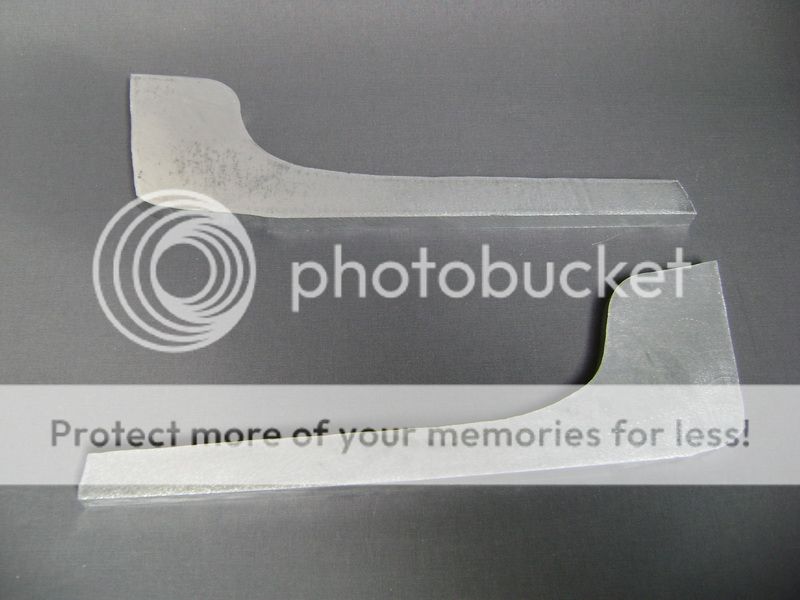
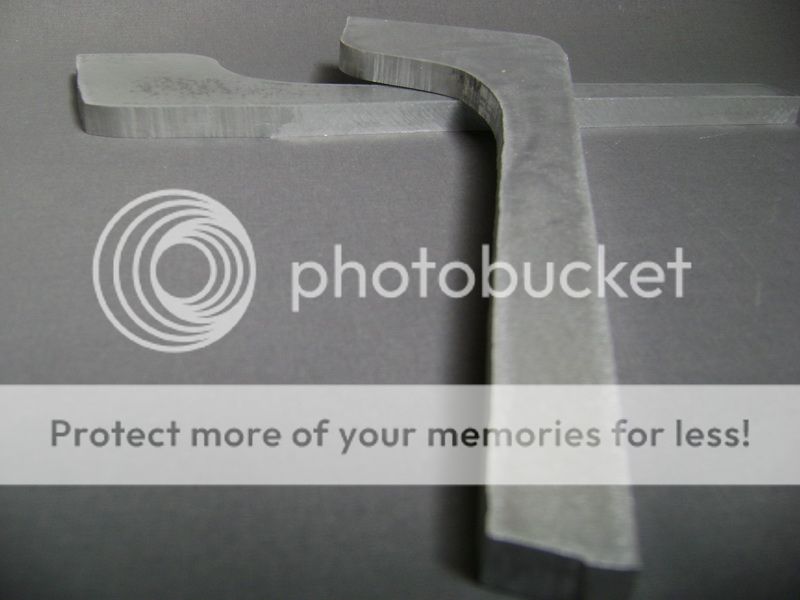
Afterwards I taped them on to the MDF model, and milled them out with the copy-mill.
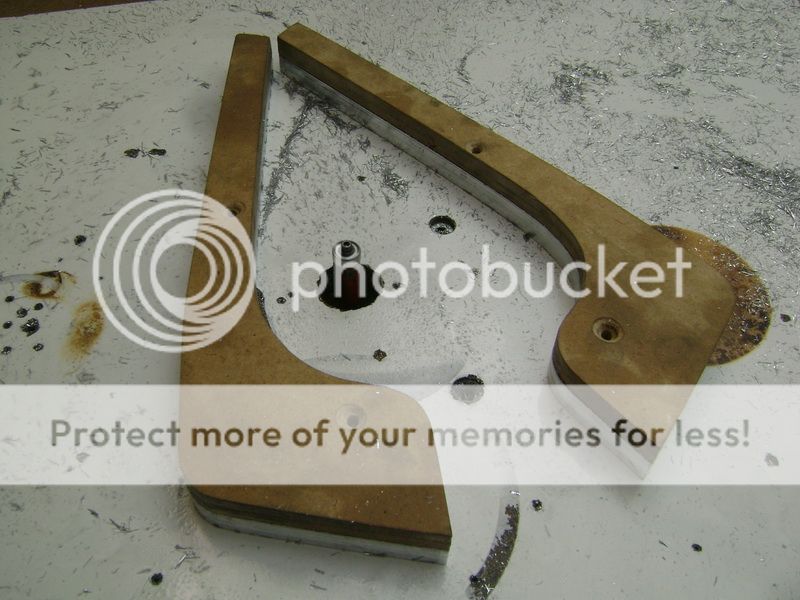
You can see the lines in the aluminium, which indicates that the mill has had it's best time.
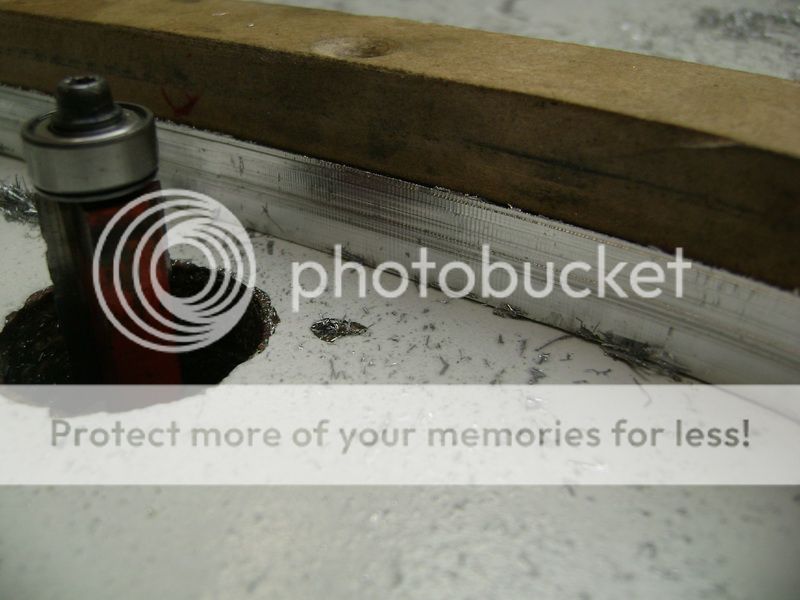
Mounted-in another mill, to round up the piece.
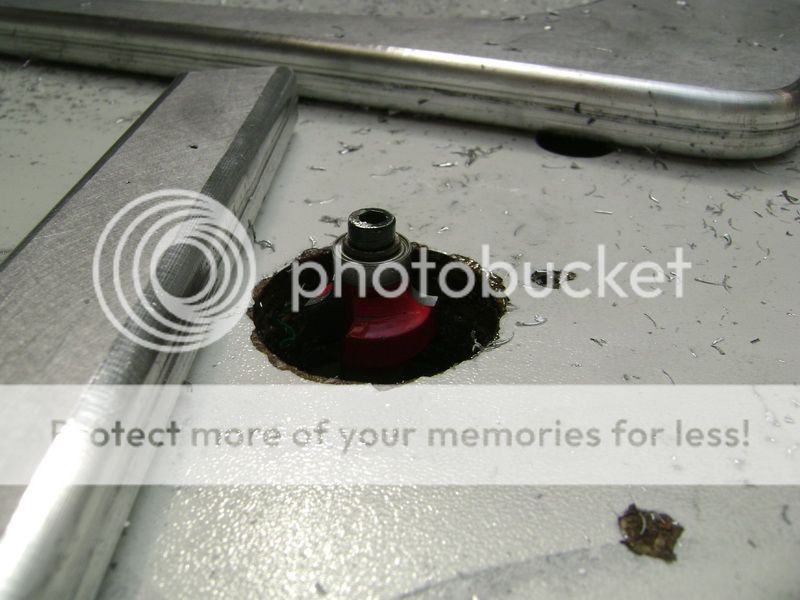
Once this was done, I polished it all with some sanding paper.
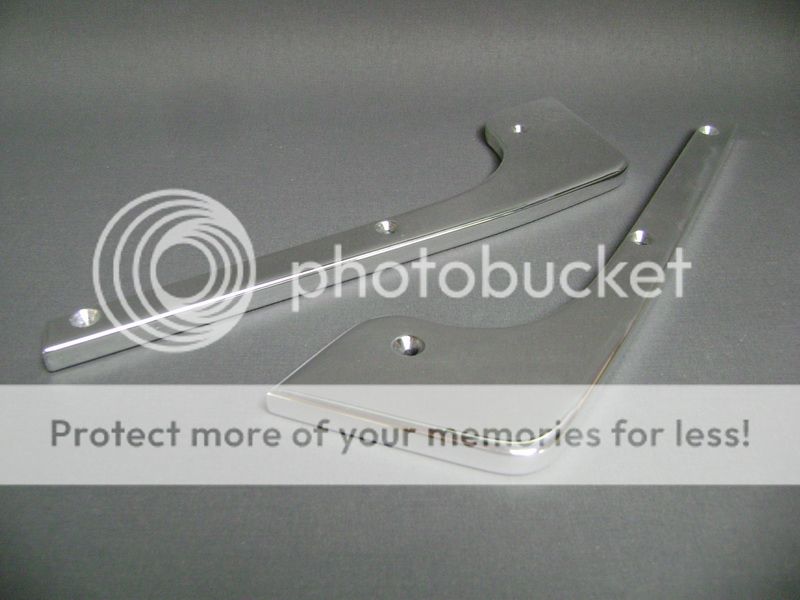
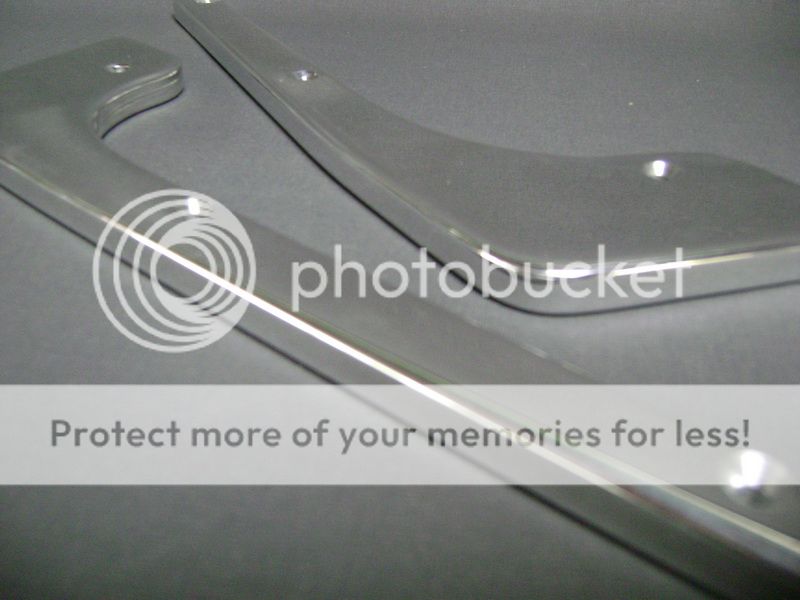
Posted By: robolop
Date Posted: October 02, 2010 at 1:01 PM
Then I started milling the other piece.
Stretched it all nicely, and let the mill do her job


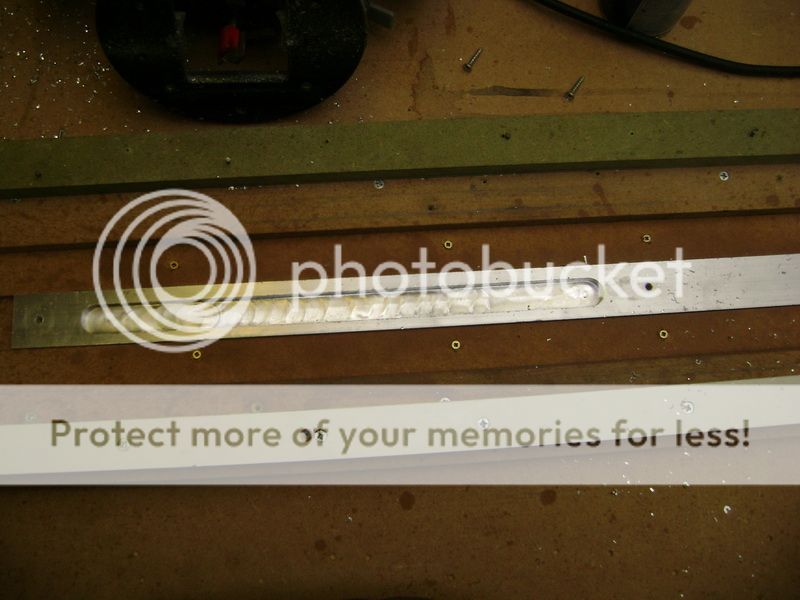
Here you see I left some of the aluminum there.
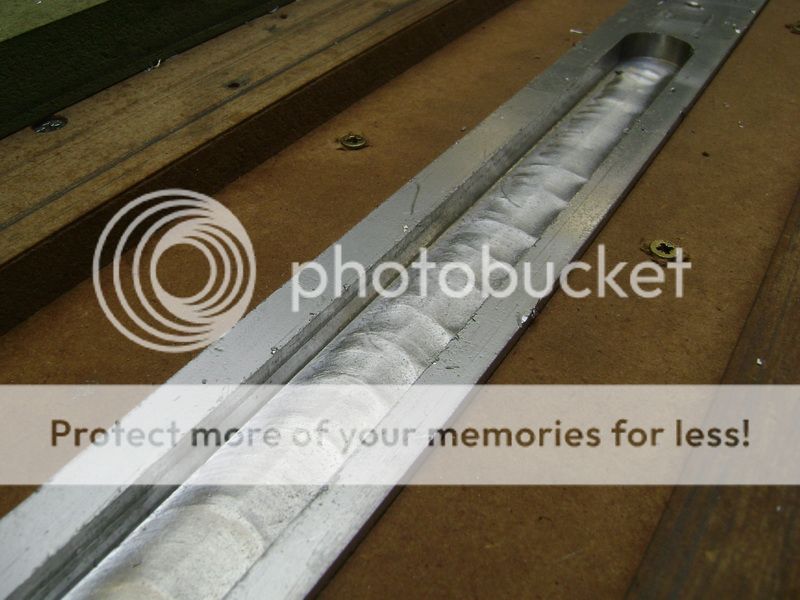
I did this on purpose, so that when the piece cools down, it won't bend. Once this was cooled of, I milled the rest away, and tucked the rest away with the wood graver.
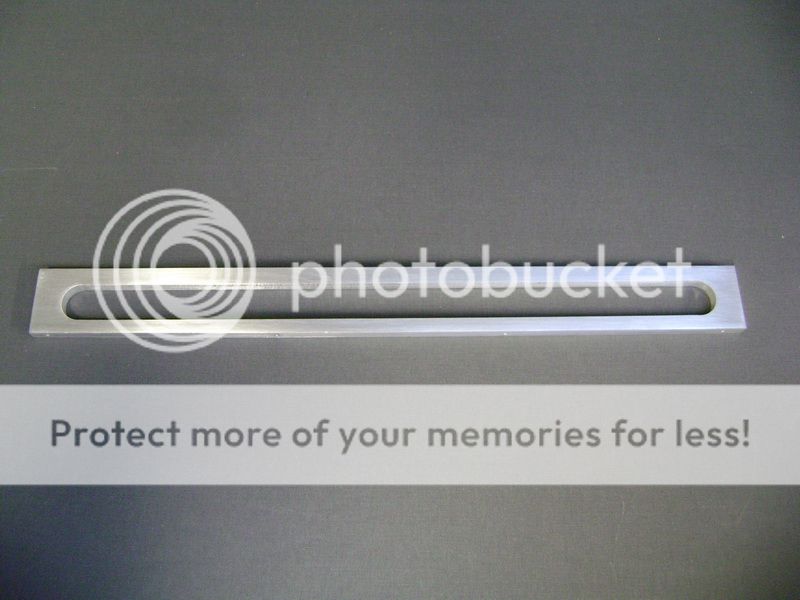
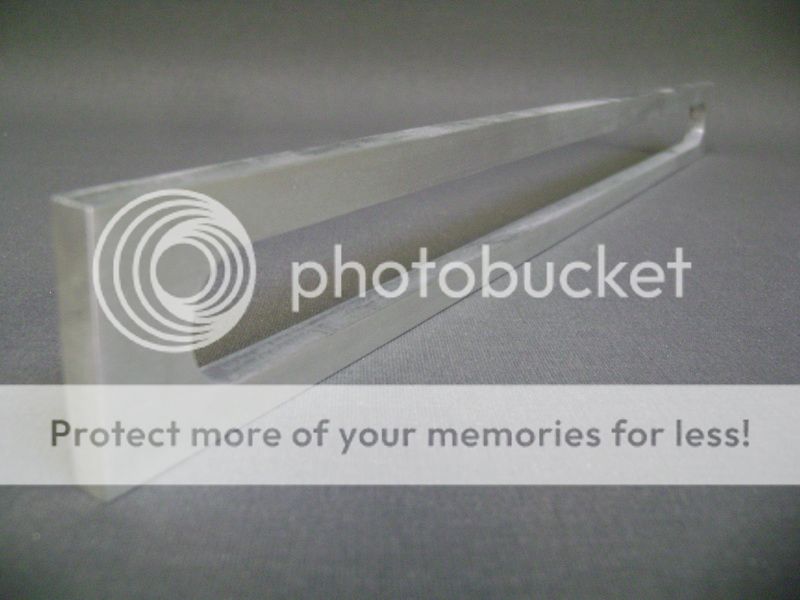
Then I sawed out an aluminium slat from 4mm, and gave it the same rounding of the bumper.
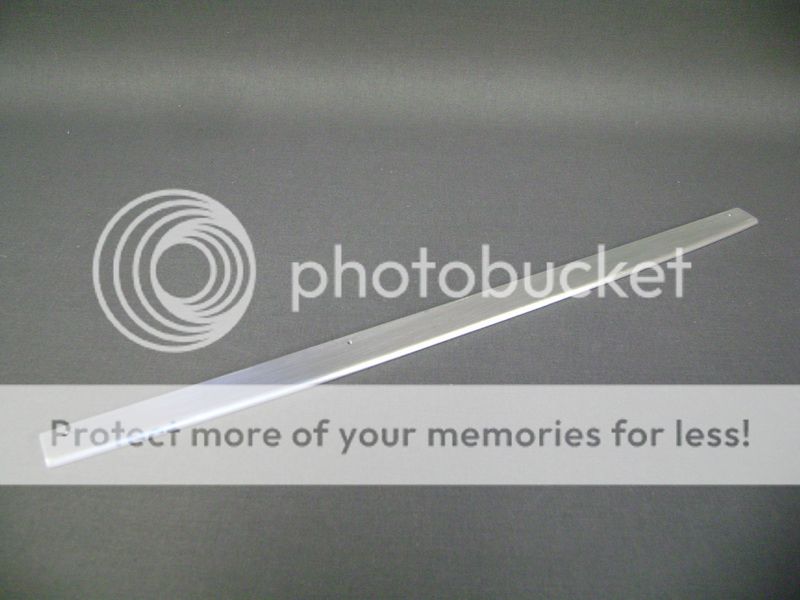
This slat will get underneath the frame.
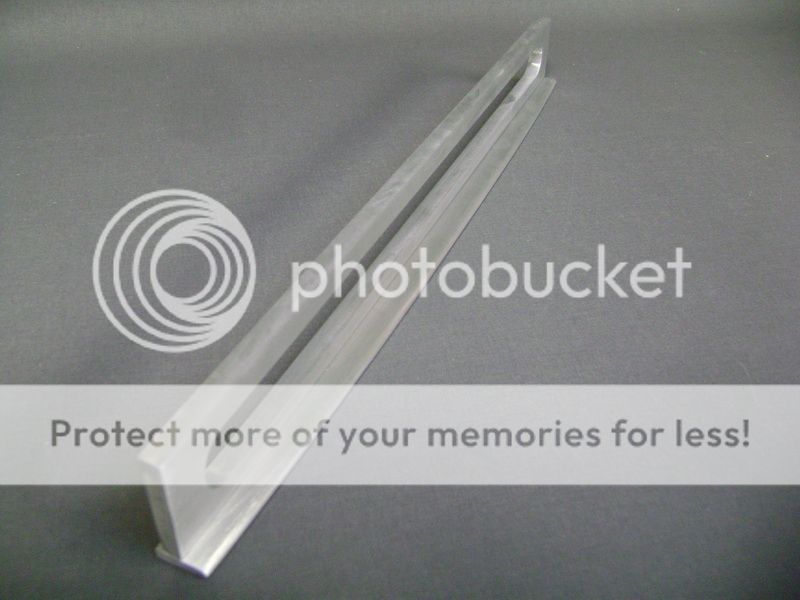
Posted By: robolop
Date Posted: October 02, 2010 at 1:01 PM
I took the bimmer to the technical control today. I was really curious about their reaction on the exhausts, you never know.
The CO-test, which I feared the most, was OK. After checking the lights, they checked the bottom of the car.
They were checking out the exhausts, with 3 people. 2 were looking at it from underneath the car, and one was looking at it from the back.
I kept myself quiet and cool, and moved myself to the background.
When I had to take the car outside again, I asked my questions. They told me that I got around the law perfectly since I mounted everything onto the original exhaust. So everything was OK, and my car got a green card! So I did a victory dance
Now whats left to do is to put back the dust covers on the wheels, and glue my front windows, and we are good for another year.
The piece that comes between the mufflers is aldready covered in carbon fibre, with the needed amount of epoxylayers.
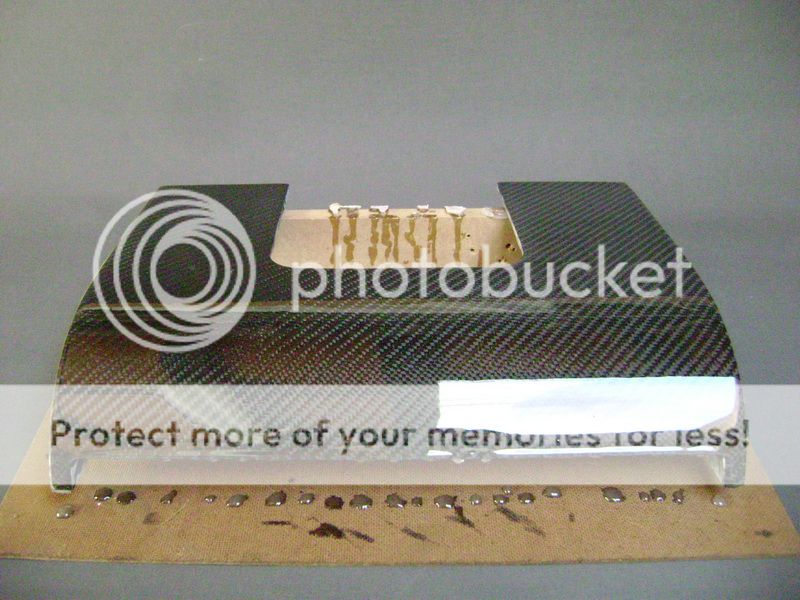
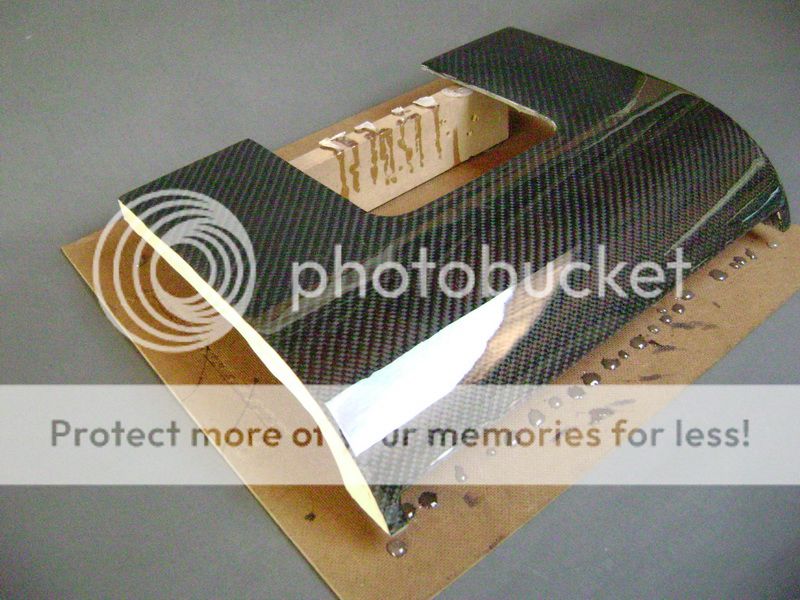
Now this should be abraded firmly, and then its ready to get some layers of clear coat;
The hockey-sticks, and the fine strip, are gone to get chromed. These parts will come back Friday !
The end is near
Posted By: robolop
Date Posted: October 02, 2010 at 1:02 PM
Here a peek behind the scenes about how the quads are mounted on the car. You see I took my time to isolate it all against the high temperatures of the exhausts.

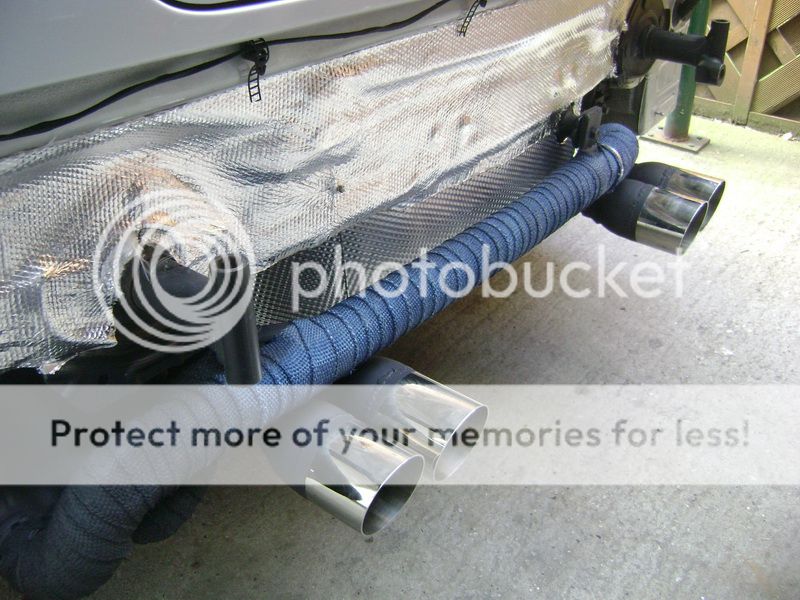
You see the tubes are mounted on the original exhaust. On the upperside, and underneath I fastened a little M6 screw.
Thats it, and its locked tight.
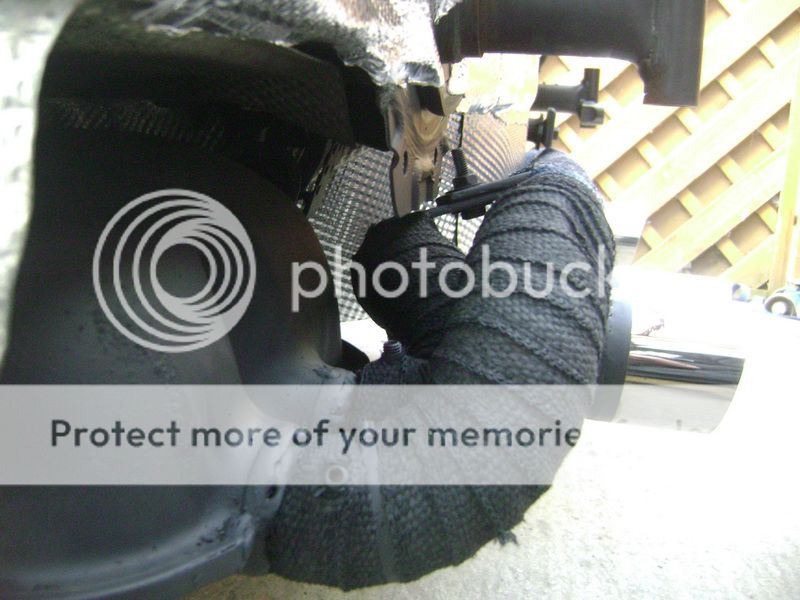

You can see that I sprayed the blue heat-wrap black on the exhausts.
So the left-side looks a bit more clean when youre looking from underneath it.
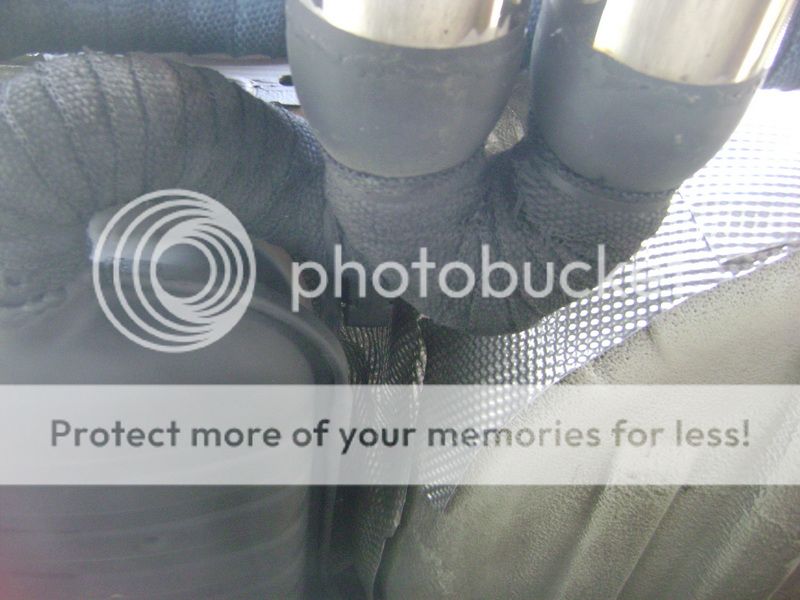
The tube on the foreground is the one that goes to the right.
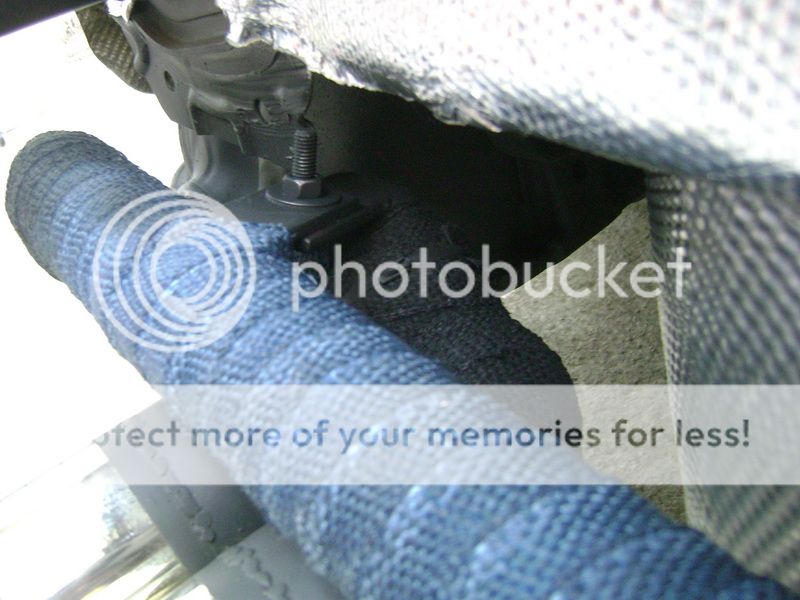
On the rightside, you can see I fixed a rubber where the exhaust hangs.
I made a sloth in there, so I can arrange the height when necessary.
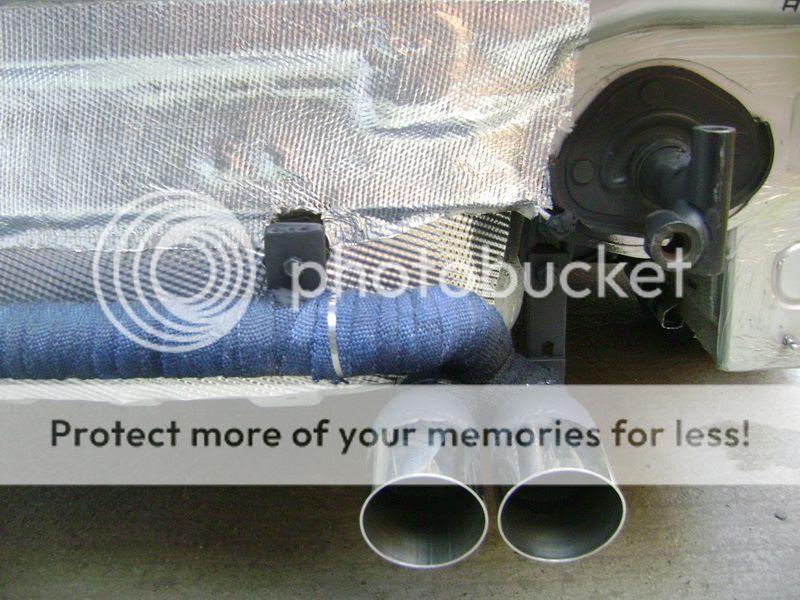
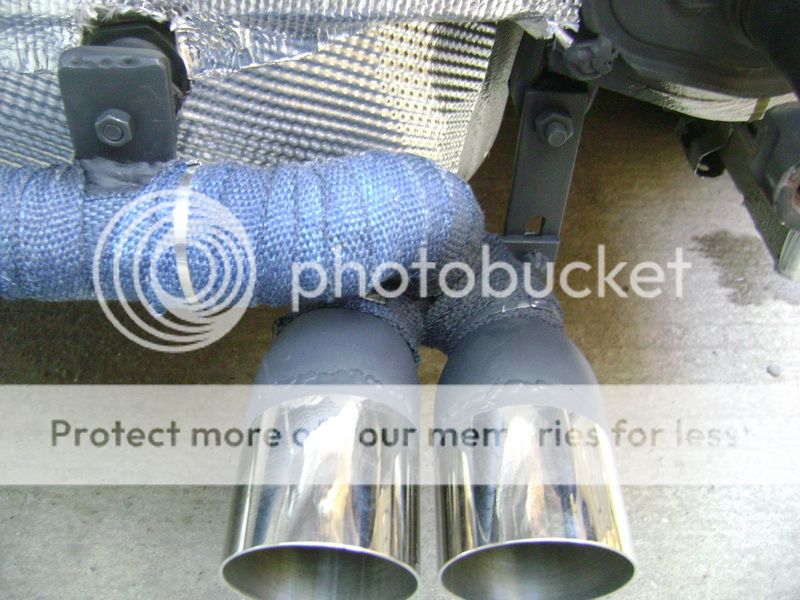
The is the inside of the bumper. I cleaned and degreased this properly.
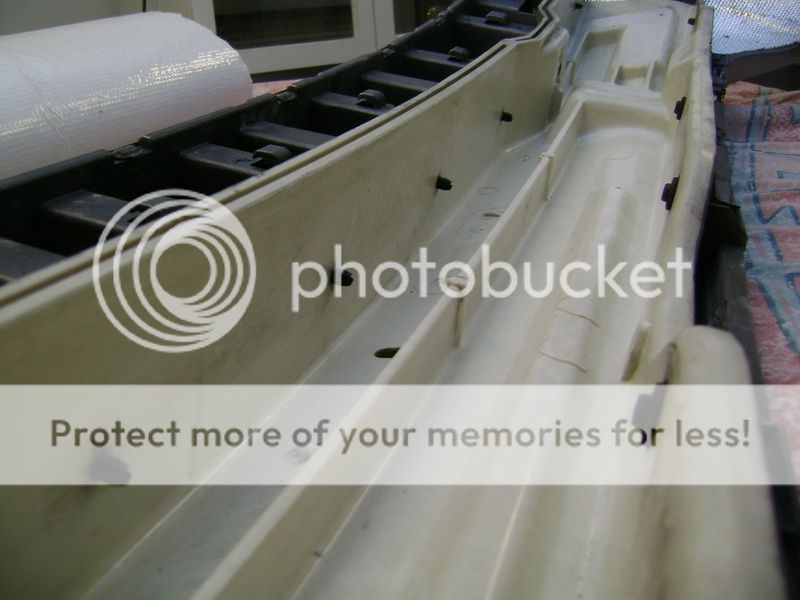
Then I glued in some heat-resisting cloth.
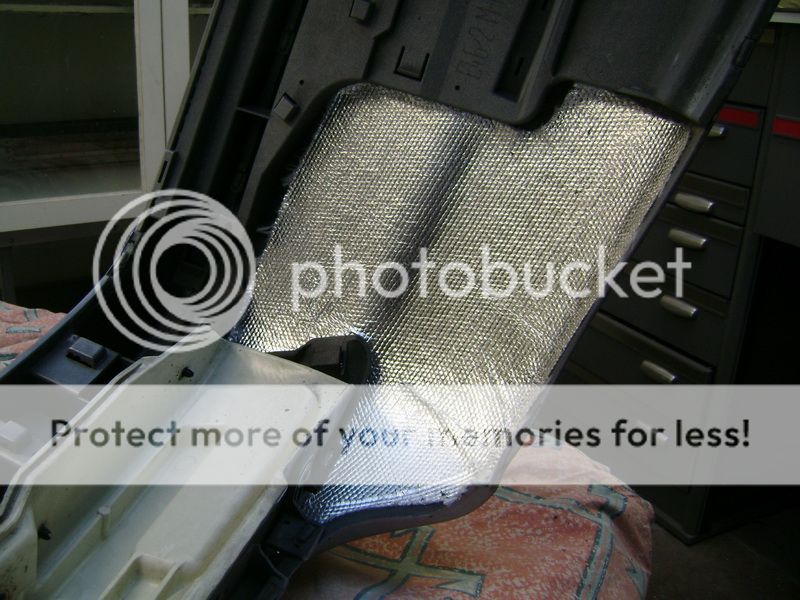
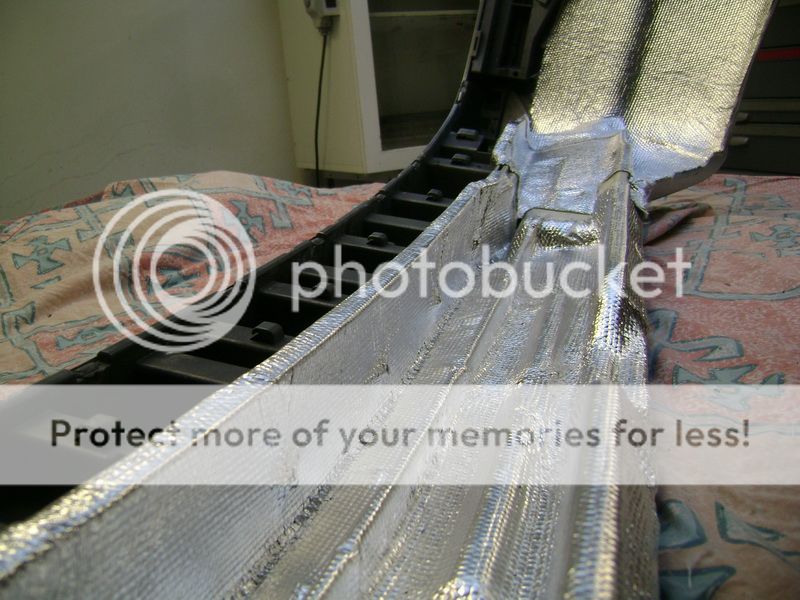
I tested this cloth First. I heated it till a temperature of 660 degrees (celcius) during 10 minutes, and you almost didnt see it.
Posted By: robolop
Date Posted: October 02, 2010 at 1:03 PM
Everything about the rear bumper and the exhausts is finished.
Here a little previeuw about how it looks now.
These are the aluminum parts which are chromed
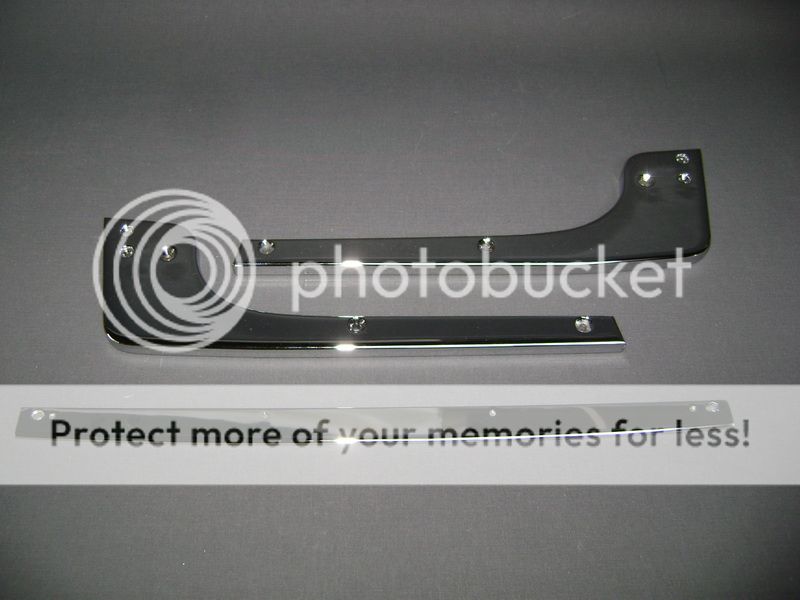
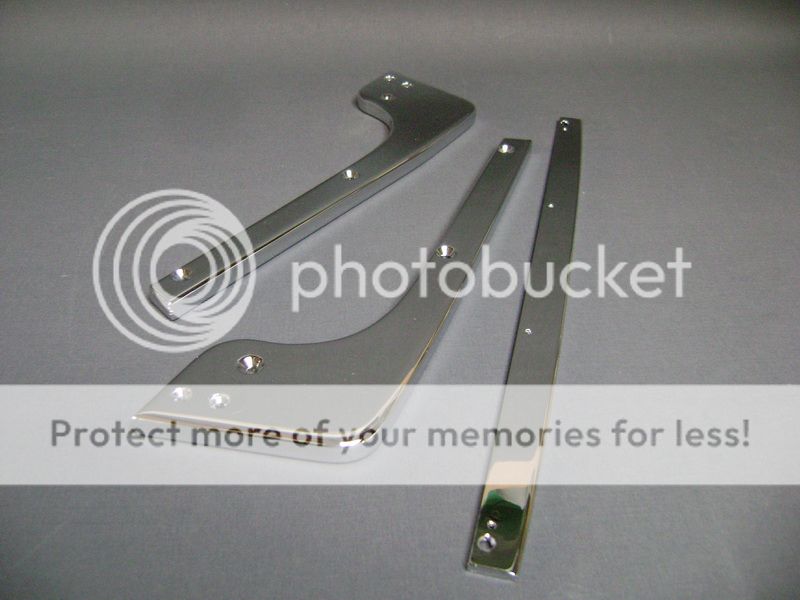
This is the little frame which comes between the chrome. I abraded it down and polished it afterwards, so you get a nice contrast of the aluminum parts and I looks the same way as the front bumper.
The gauze is some left over I found from the frontbumper.
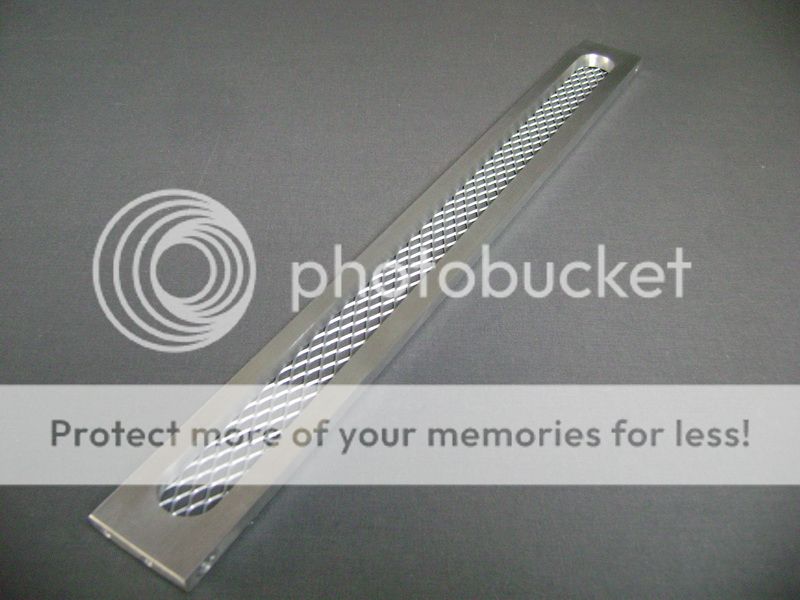
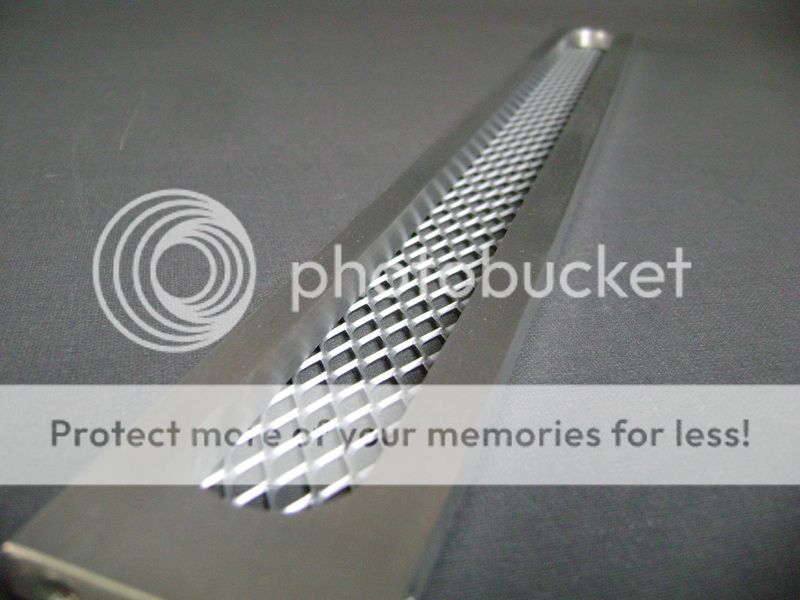
This is something weird I made. This object will come into the diffuser.
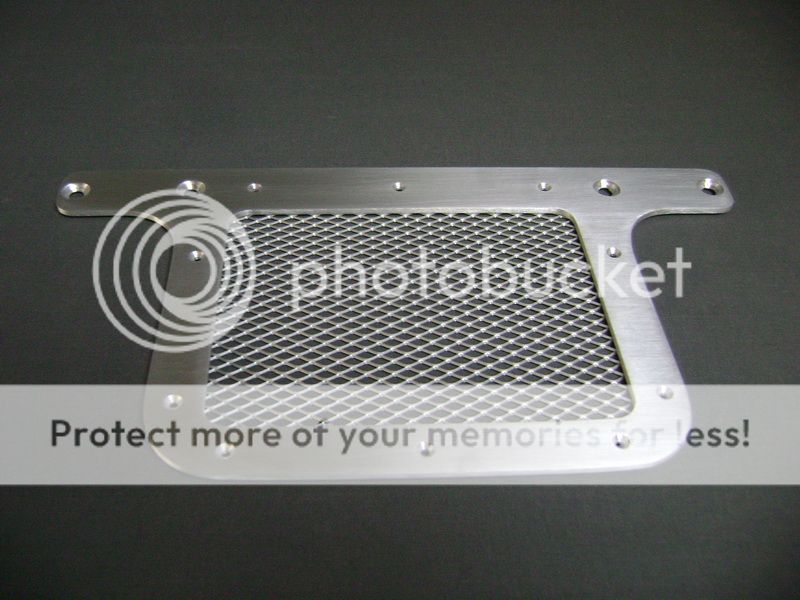
Here you can see the puzzle getting together.
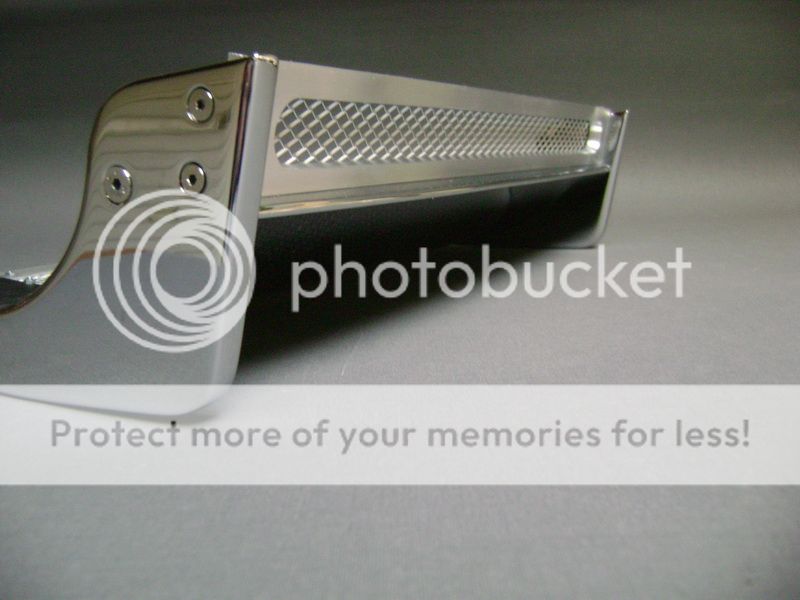

Bottomside.
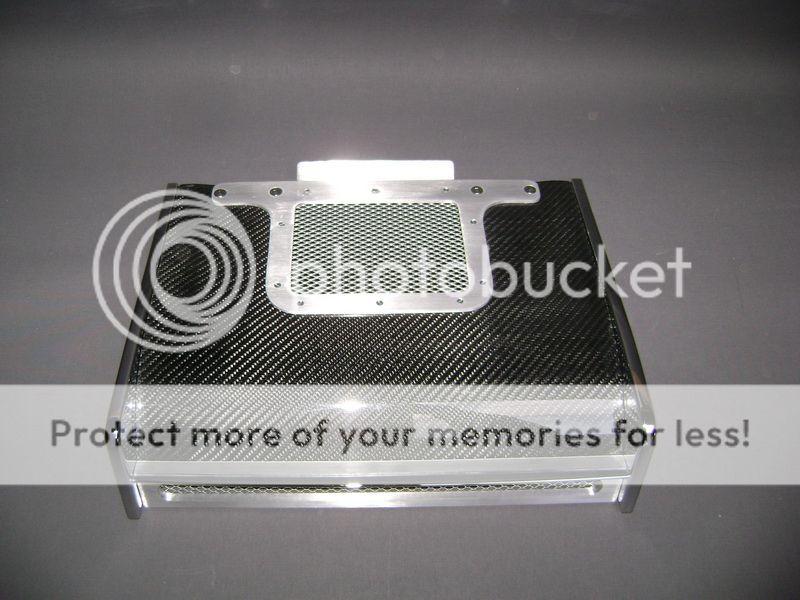
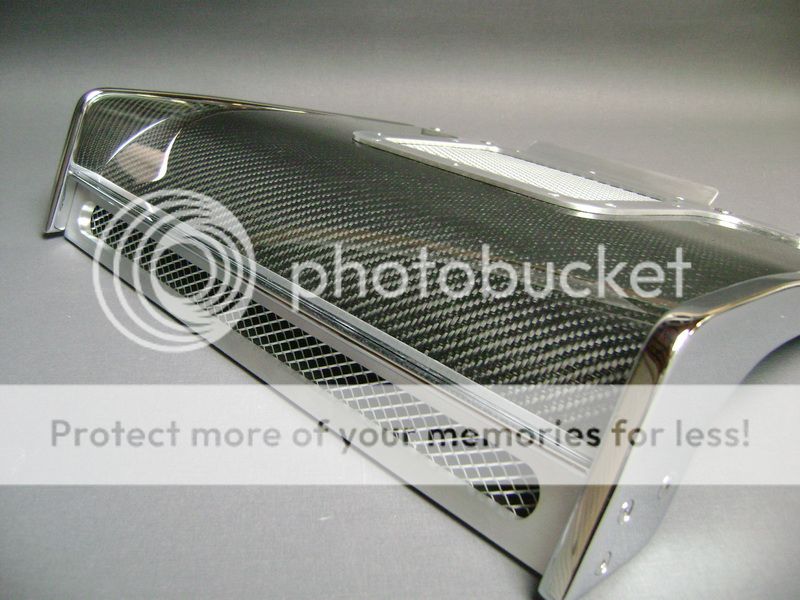
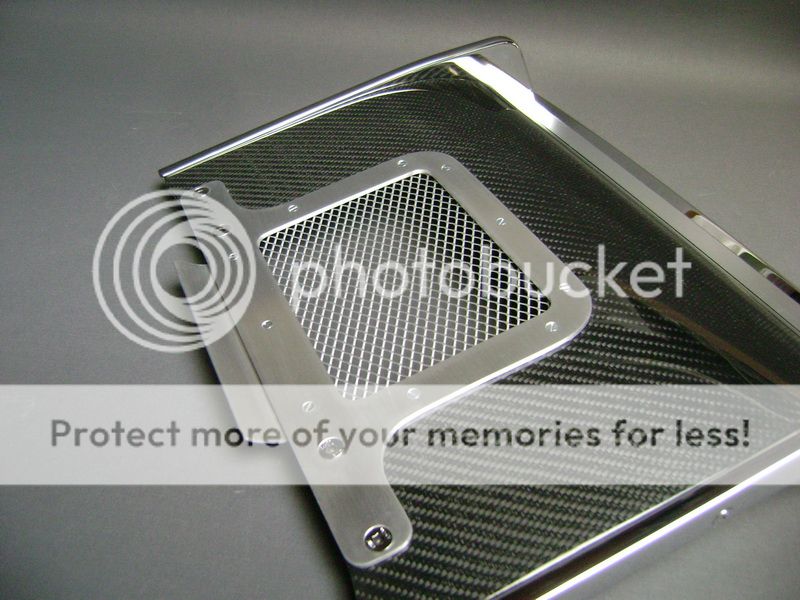
Here its all mounted on the car.
The meaning of this is that cool air gets in, and slips away again in the back.
So I try to create an air-cooling stream for the tube that runs behind the
bumper.
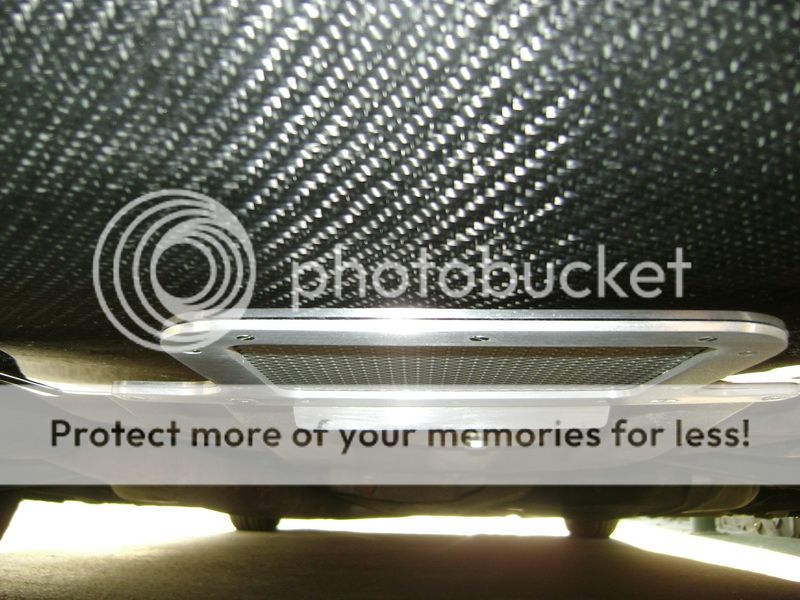
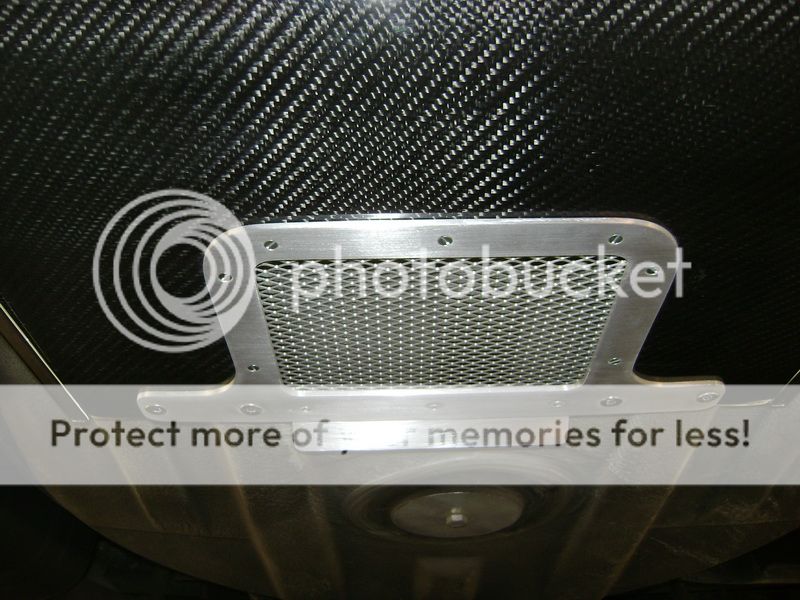
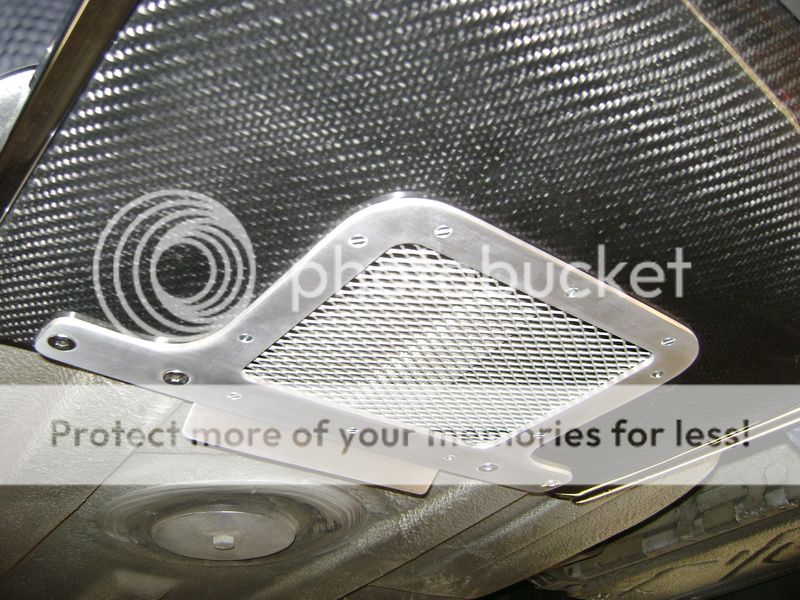
Posted By: robolop
Date Posted: October 02, 2010 at 1:04 PM
I found some time to clean the car firmly. The last time I cleaned the car, was before the winter, so I had to put some more time into it now.
From now on, I will clean the car every Saturday. Thats a promise.
And I snapped some new pictures of the new bumper and quad exhausts.
Here the Robolop design.

You can also see here that the line in the bumper, is disappeared. Also the Lines around the sensors are gone.


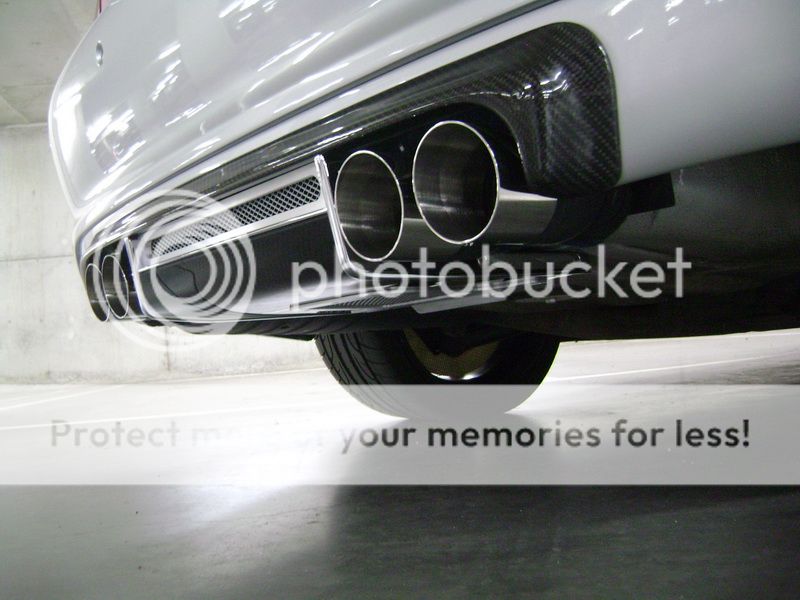
The piece between the exhausts had to become t be an eye-catcher. And with that I mean. This had to be a part wich people would say: what is that, who makes that, where can I buy that, ... Sorry dudes, but this is a one off

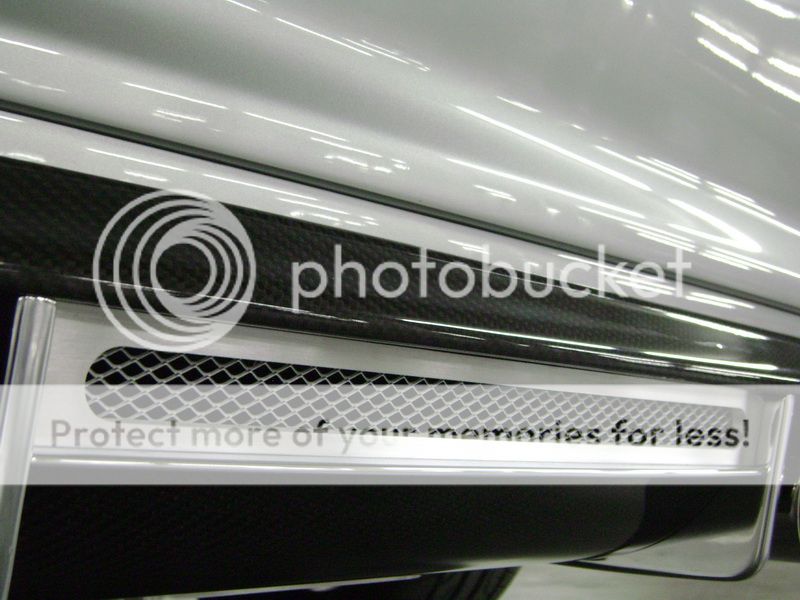


You can also see the inside of the mufflers that I brushed/polished.
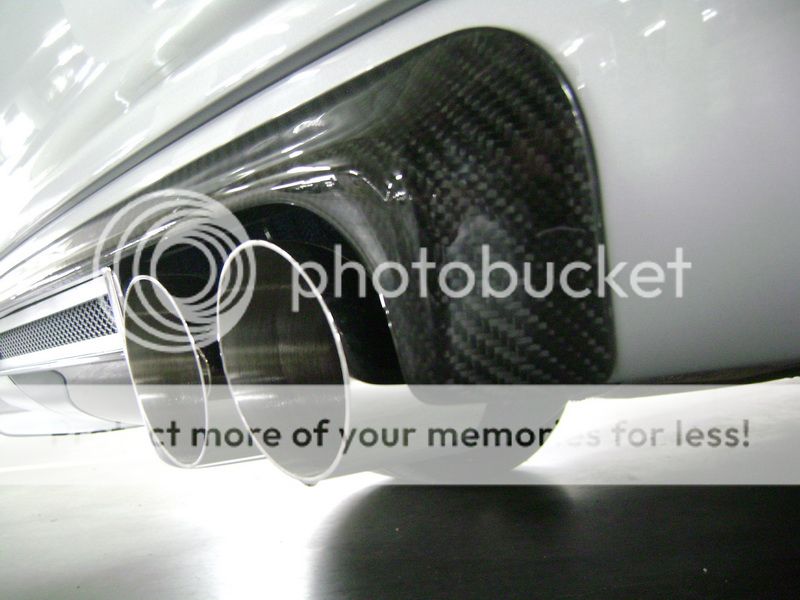
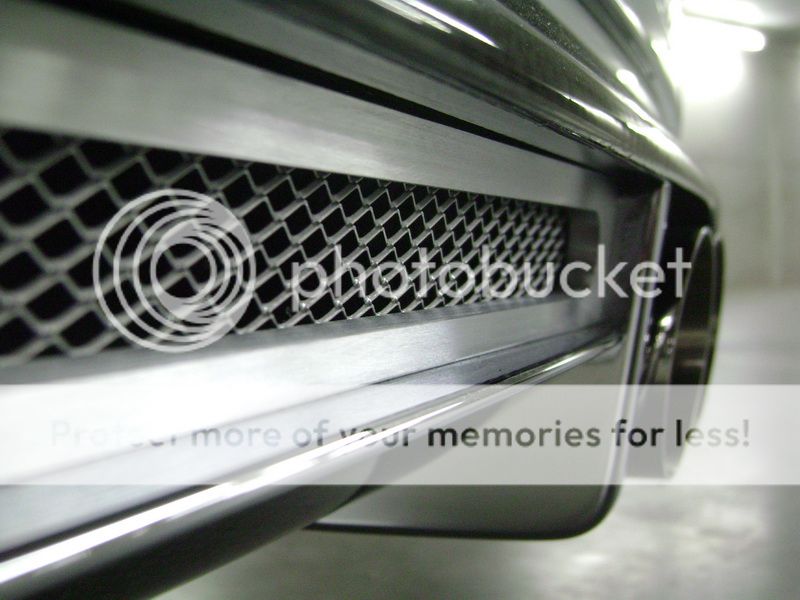
Here you can see the M-Tech 2 skirts
. Im not to sure about those
I think the original ones looked as good as these...mmm
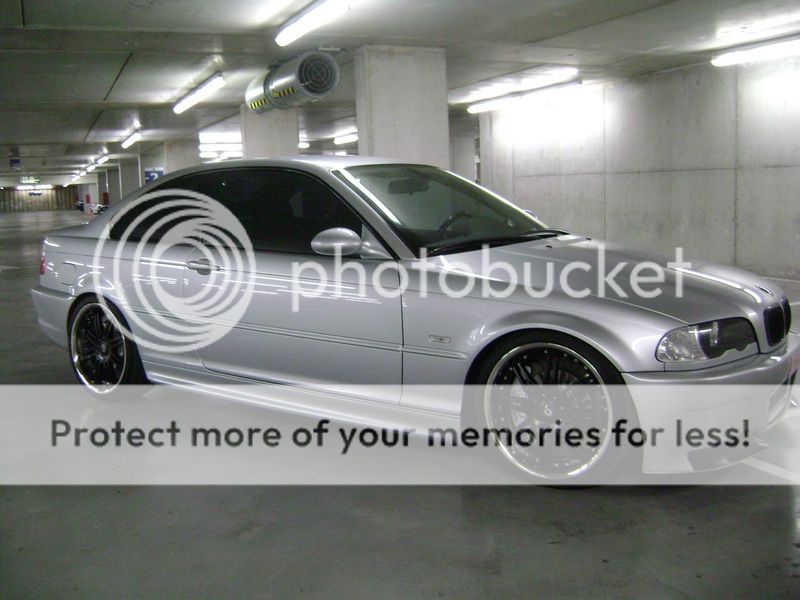
Here ends another chapter of the works needed to be done on the bimmer.
Personnaly Im very pleased about it, and then I mean, it all worked out nice and looks tight.
No exhaust pipes who hang too low, and stick out more then 5cm. Just smooth.
But hell, did I put in some hours of hard labour to make this on a descent way, and to do this on the original exhaust, wasnt a piece of cake.
Maybe that was the biggest challenge
.
The many hours that went into this, again, all already forgotton.
About the exterior, Im pleased, so she will remain like this for now.
I still have some ideas, but need to think some more on those, maybe for next winter..but if I do so, it will be very challenging again.
But then again, if its simple
everyone has it!
Posted By: foxracer
Date Posted: October 05, 2010 at 6:29 PM
i have just spent the last 2 hours of work time reading this thread. im amazed. looks awesome.
what is your trade ? is this just a hobby ?
Posted By: 83turbocoupe
Date Posted: October 30, 2010 at 8:07 PM
i know its a long shot for a reply but where did you buy that 5mm copper tube?
Posted By: jinstaller1
Date Posted: March 05, 2011 at 12:51 AM
Hey whats up... Mad skills man mad skills!!!!!!! i have seen some high dollar installs on some cars and some hella good custom stuff but this takes the cake... but then again this is your baby if i had the time and skills and patience hell i would try doin stuff to mine but for now she remains mostly stock nothin special... so is there an update to the ICE or any thing else with your ride?????????
-------------
Jayce
Posted By: Melted Fabric
Date Posted: March 10, 2011 at 1:02 AM
Hey Robo,
Sorry I have been off the forums for many months, the end product is a work of art to be remembered... I hope you know we appreciate the flood of pictures and commentary. I look forward to seeing your future projects, and thanks again for taking the time to reply.
-------------
I have not failed. I've just found 10,000 ways that won't work.
When you do not know what you are doing and what you are doing is the best -- that is inspiration.
Posted By: robolop
Date Posted: March 11, 2011 at 1:15 PM
A few pages before, you could see I was working on the backside of the front seat. I pumped that thing with some polyester and filler.
Now the time has come to finish this off
I covered that seatcover with a layer of carbon fibre. And cause I really dont like big things in carbon fibre, I styled the little net on the backside
I adjusted the frame onto the form of the carbon plate, and made it a bit wider.
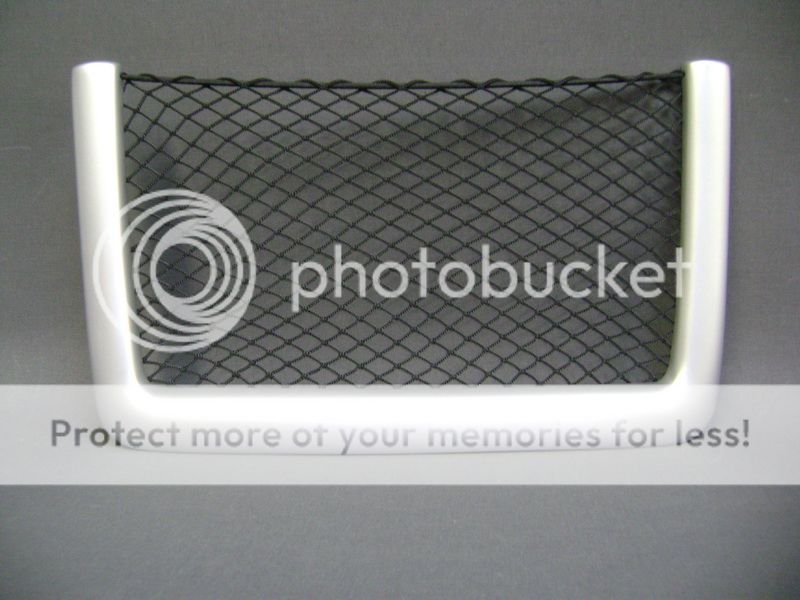
You can also see that I painted it silver, like the rest of the moldings inside the car. So it all takes part in one total package, and I get a nice contrast between the silver and the black carbon fibre.
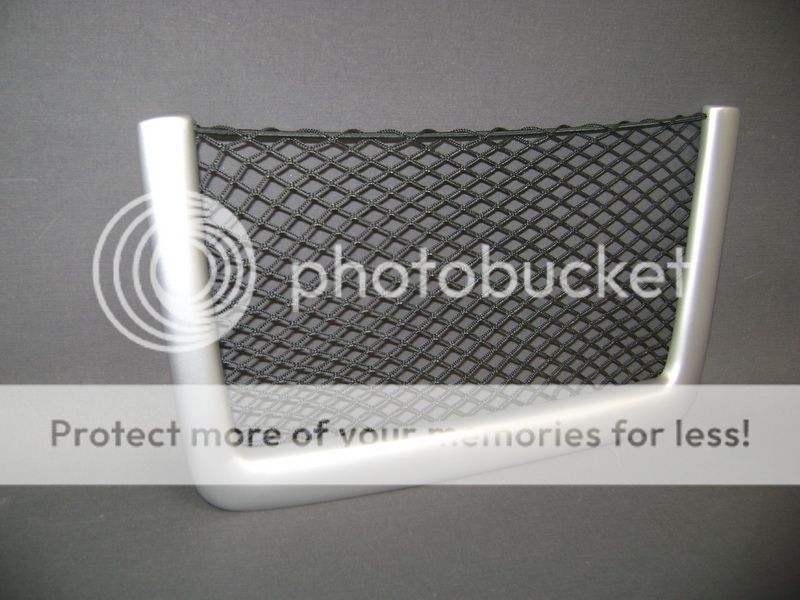
To screw this thing tight, I use a bit thicker hold-screws.
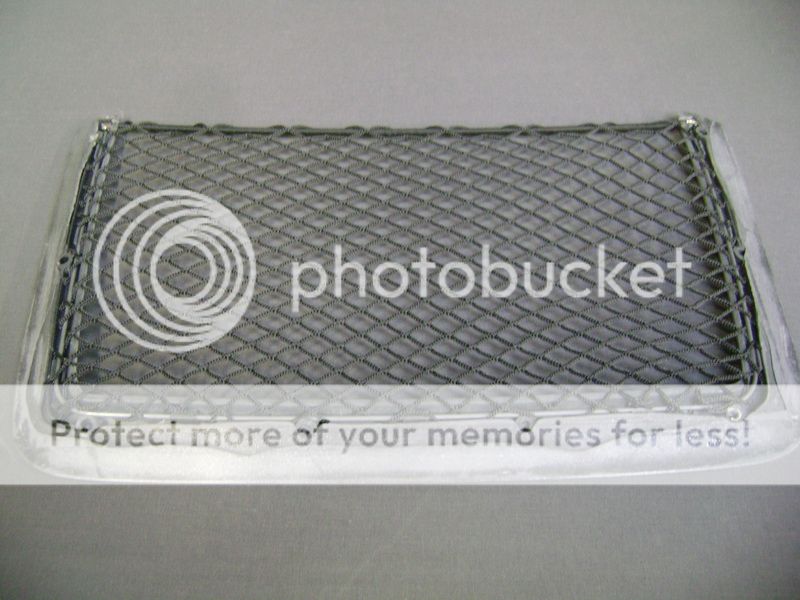
Another piece I made, and this will get on the top of the back-rest.

On the rear, I made a sloth, where a neon will be added. This is also the reason I painted it white.
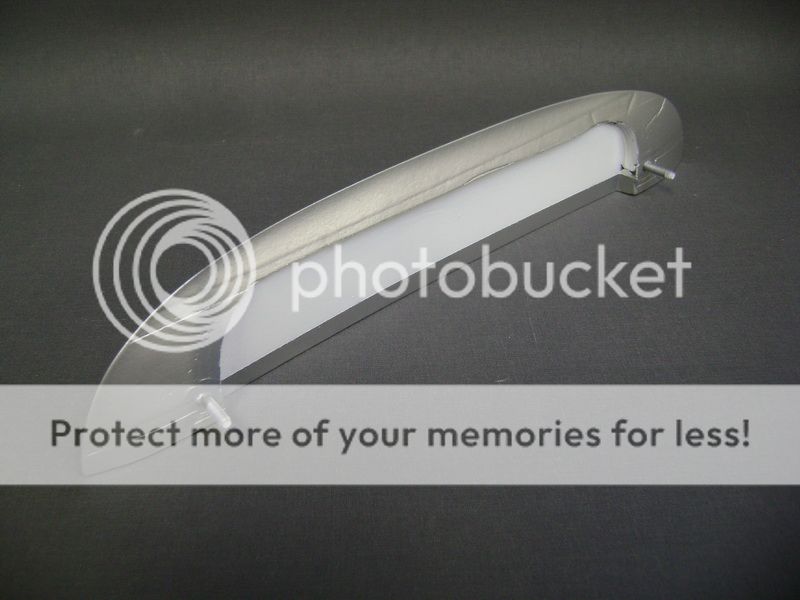
Here a picture of how itll look when mounted in the car.
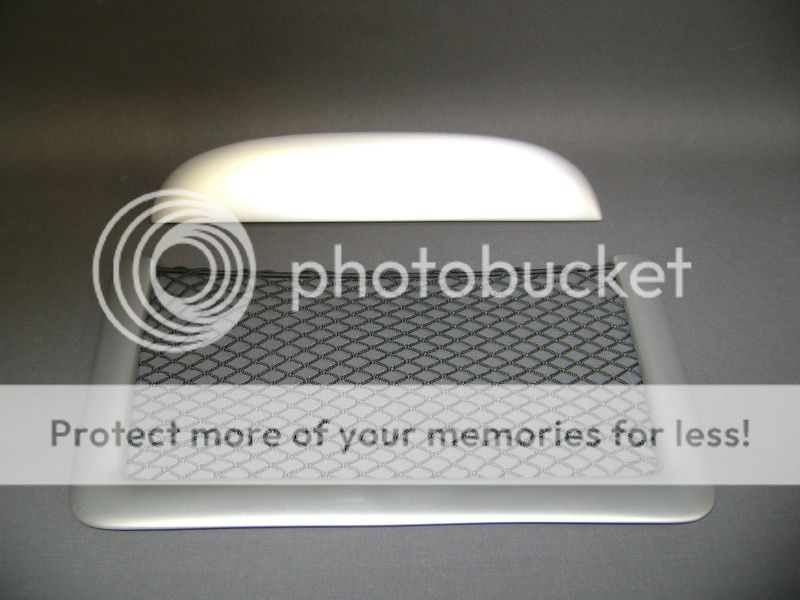
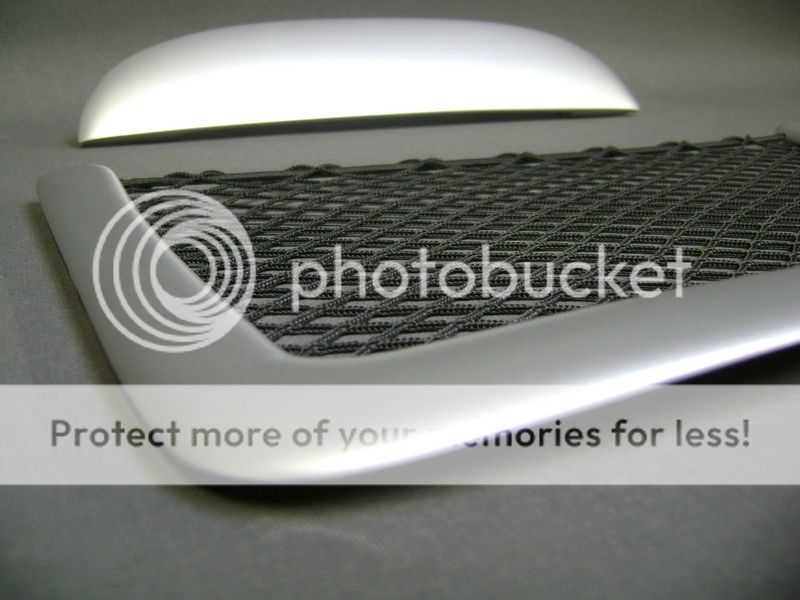
These polyester covers I made to cover up the pedals, so I cant damage them.
These are in primer, and must get to the painter soon, also they need to be provided with some rubber.

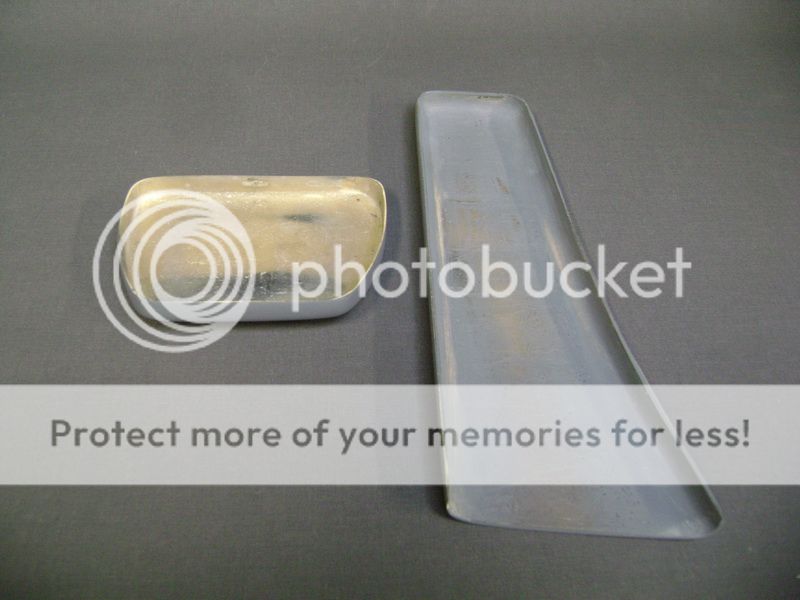
Posted By: robolop
Date Posted: March 13, 2011 at 11:07 AM
Posted By: robolop
Date Posted: March 13, 2011 at 11:08 AM
I had some rubbish laying around to make something out of. The carbon dustcovers who are behind the wheels, were never completely finished in my opinion. I mean, it was just plain and nothing special. Now I was able to put some more time and effort into it, and started milling some aluminum from 3mm thick. First I made a round disc of MDF, pasted the aluminum on it, and milled out the 4 plates.

Offcourse this was childsplay, but then we stepped up a level. The meaning is to make a little frame around the carbon, on the outerside from the disc.
This may not be too wide, so it wouldnt look to plumb.
Once this was all drawn out on the aluminum, we could get started.
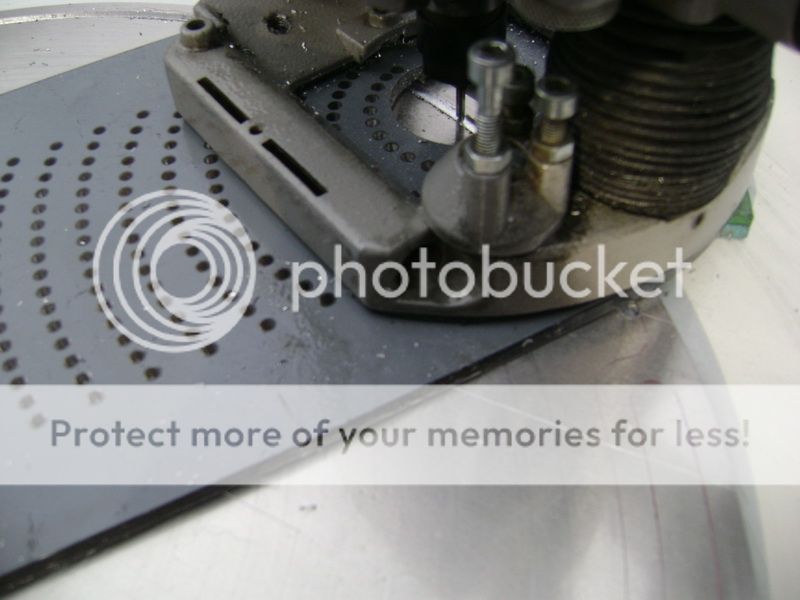
The outer border is 7mm thick. The dangereous part is, that it could bend from the heat, or that the mill would cut in. But I thought about this long, and used a lot of WD40, and also I milled away a half mm per time.


Here they are, and it all worked out very well, although some polishing will be necessary.
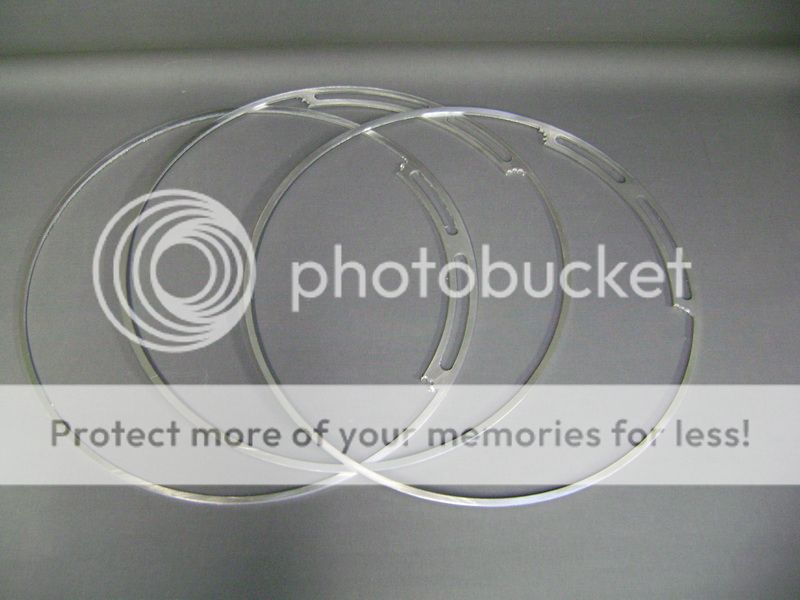
This one is already abraded and polished.

This time I didnt do the polishing by machine, just because I didnt think it would come to a good end. Much do dangereous so hold this to a brush.
So I did it by hand, but offcourse, you dont get the same result as by machine polishing.
But they shine a bit
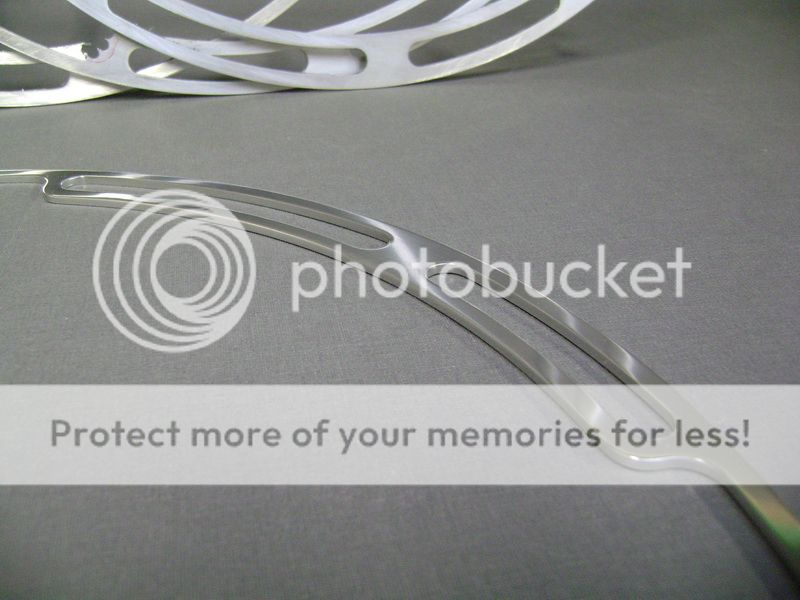
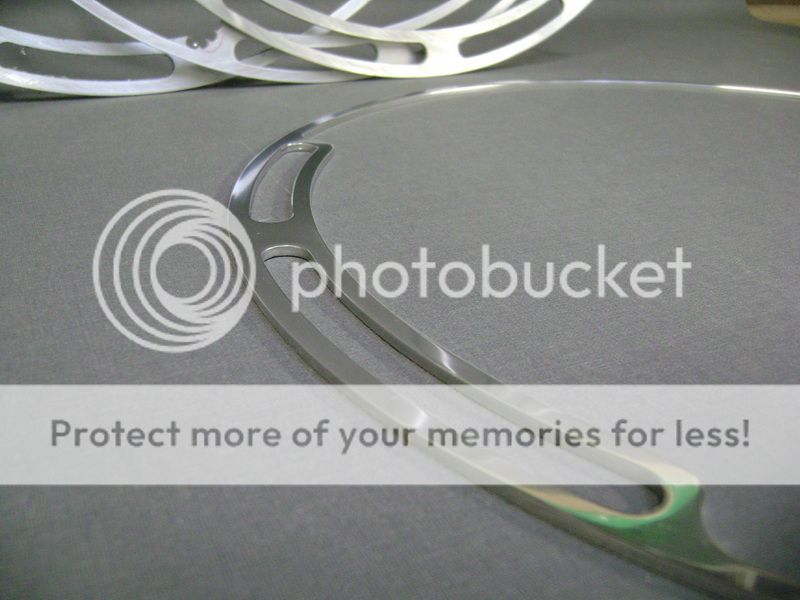
Posted By: robolop
Date Posted: March 13, 2011 at 11:09 AM
I managed to find a way to polish those tiny alu rings with the machine.
This is the little plank of MDF I used to mill them.
On the outside I screwed a little slat that sticks out a few mm's

Made some more little plates.
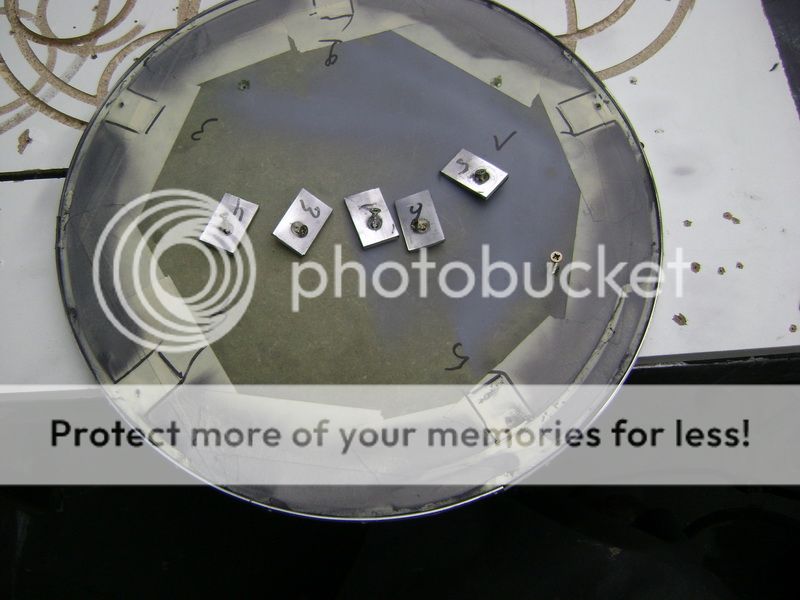
Here you can see how tight it is, and it can't slide or shift somewhere.
The 5 plates are holding the piece down.
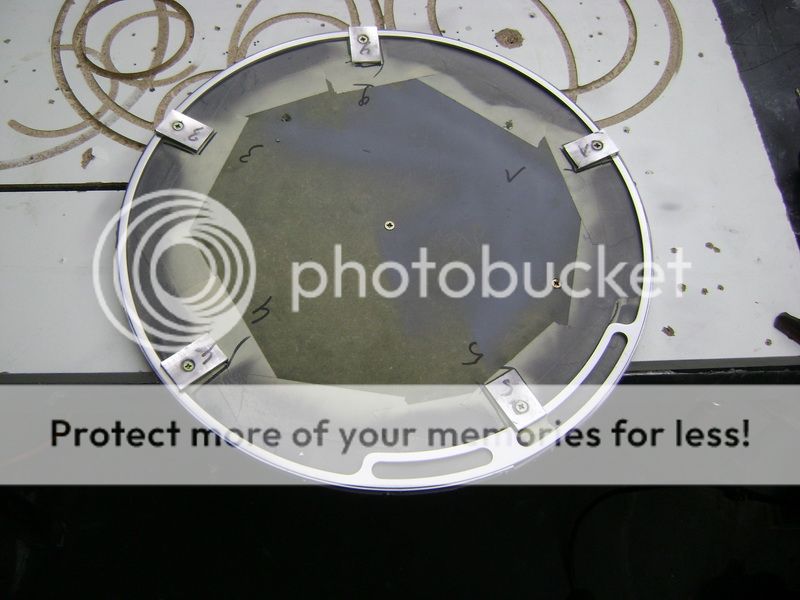
Offcourse I taped some "mush?" on the plates, so I didn't scratch the aluminum.
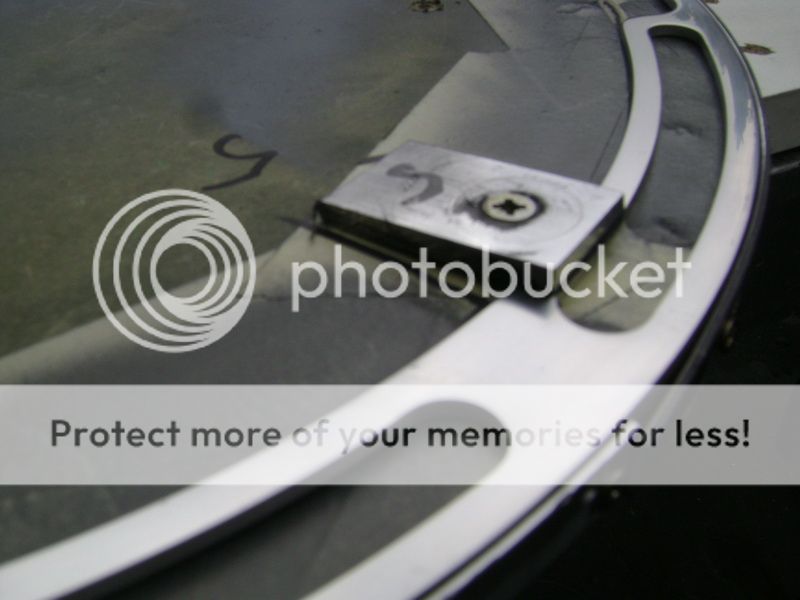
Instead of keeping it against the polishingmachine, I chose to do it with the drillingmachine, and this worked a little bit better as usual.
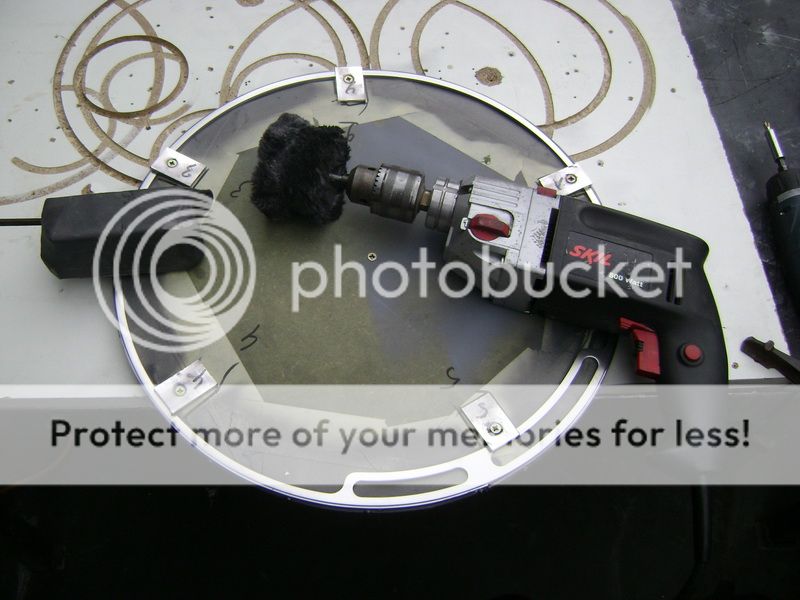
Once this was done, I had to screw the piece loose, and slide the piece a bit.
So I could reach the 5 places where the plates were, too.

This was the result, and you can never accomplish this by doing it by hand.
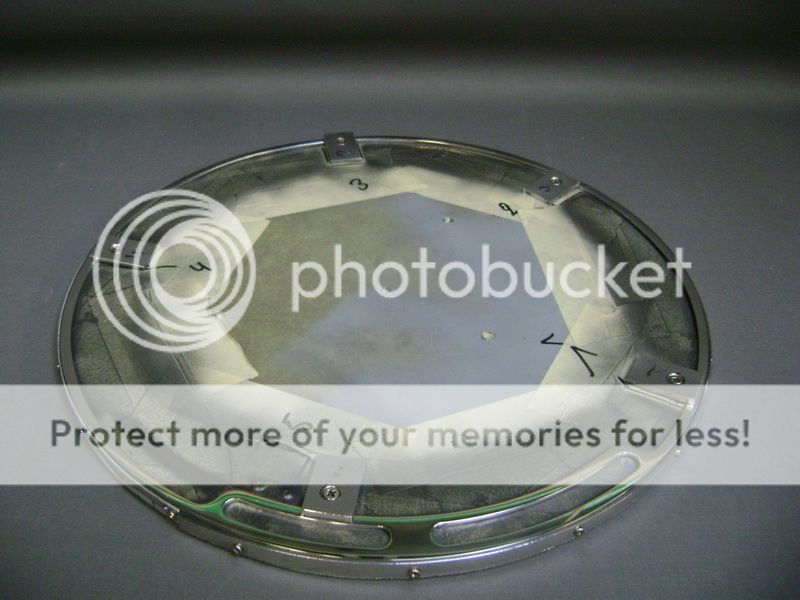
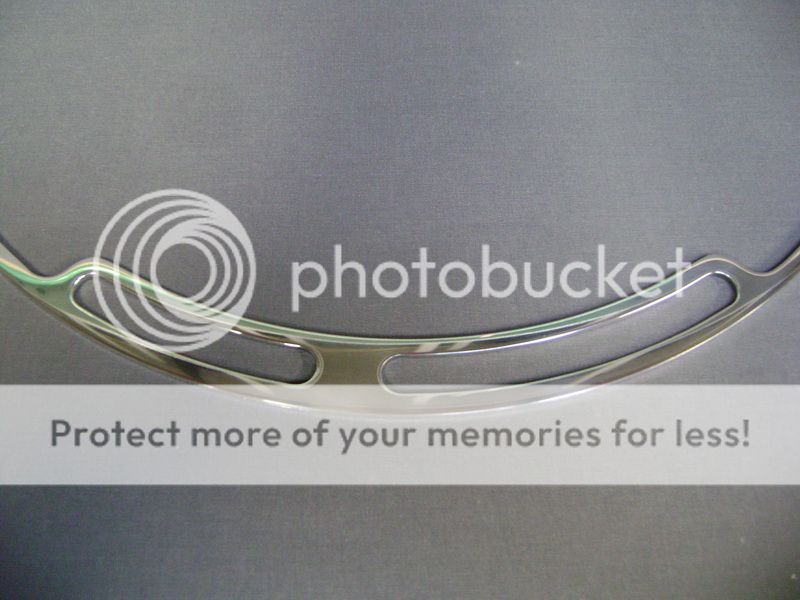
Here a familiy picture.
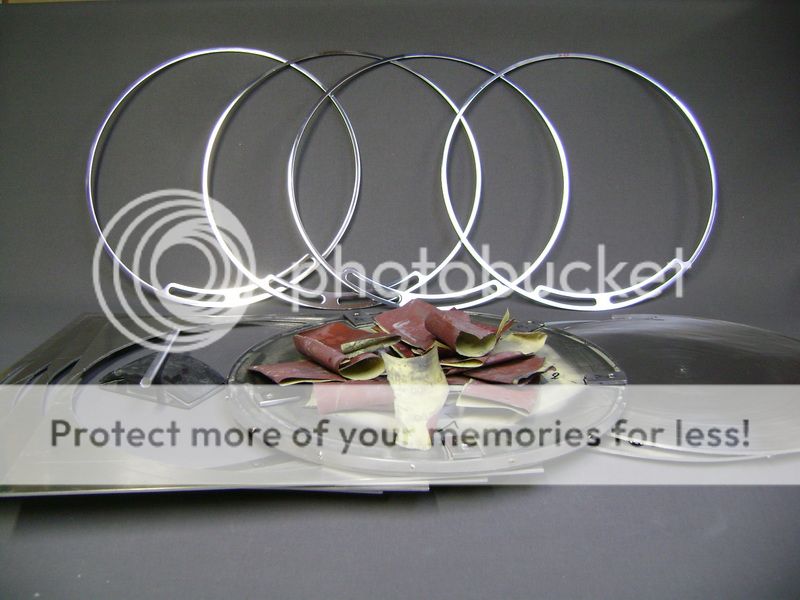
The aluminium bar that lays on the sanding block, I used to abrade the roundings on the inside. Just turned some sanding paper around it.
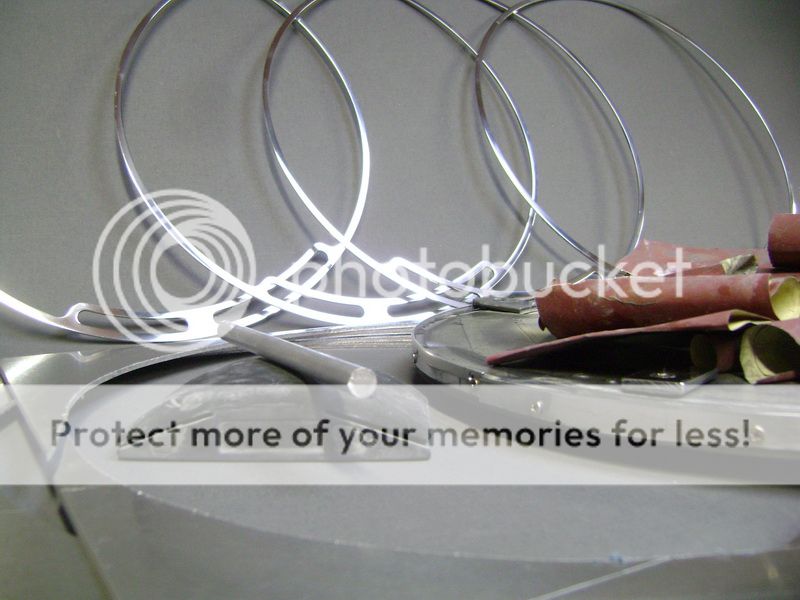
I get a lot of questions about how many time I put in to these things. Well, this is the first time I kept track of time.
I worked on these rings 26 hours.
and then I mean:
Drawing out
Mill the MDF
Saw out the aluminum, milling, and ...a lot of milling
a little bit of "filing"
abrading and a lot of abrading.
cleaning and polishing
quickly making a set of 4 rings, LOL
Posted By: robolop
Date Posted: March 16, 2011 at 5:44 AM
As you may have read, I replaced the PPI amplifier by 2 JL Audios. Heres a picture of how I worked-in the PPI in the aluminum box.

The alu cover and the plexi will stay like they were. The carbon fibre, and the aluminum with the vents will be replaced.
These are the JLs who traded places with the PPI.

You may also remember that I wanted to work-in a logo between the amp.
Well, now that the box is back on my working table, thats the next thing I will be working on this couple of weeks.
So you could say: were going back to the ICE age, o yeah!
I realised quickly that if I remade this box, it had to look more beautifull and way more cooler then how it was with the PPI.
I did some thinking , and thought on something I once made
A couple years back, I made CONES to put speakers in. Back then I found that so cool, that I said: these things Ill make again sometime;
So
PARTYTME !
The meaning of this is that Im going to work-in the JL logo between the amplifiers.
This is the first thing I made, so we call it EVO1.
First I made a little MDF ring where the logo should be, and I milled all the rest afterwards.
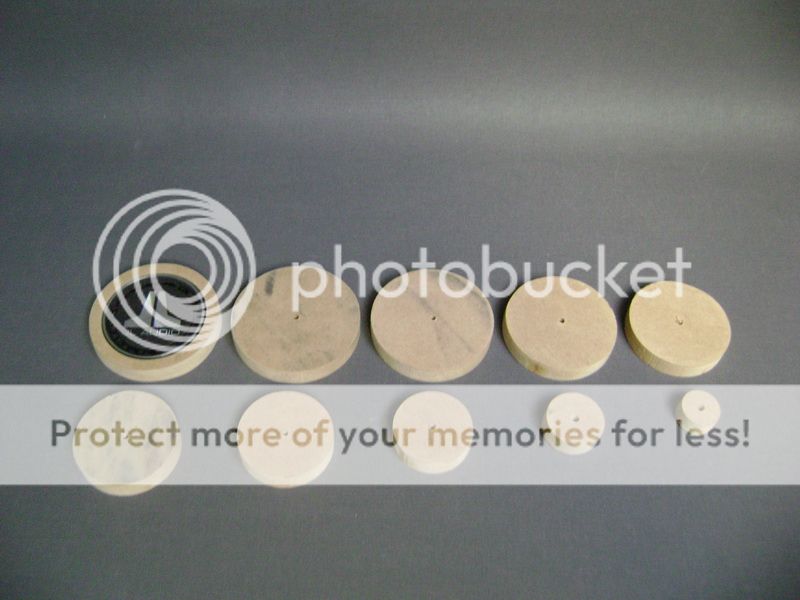
Once I had this, I glued it all on each other, and put a spar with an M4 through it, and screwed it all tight.
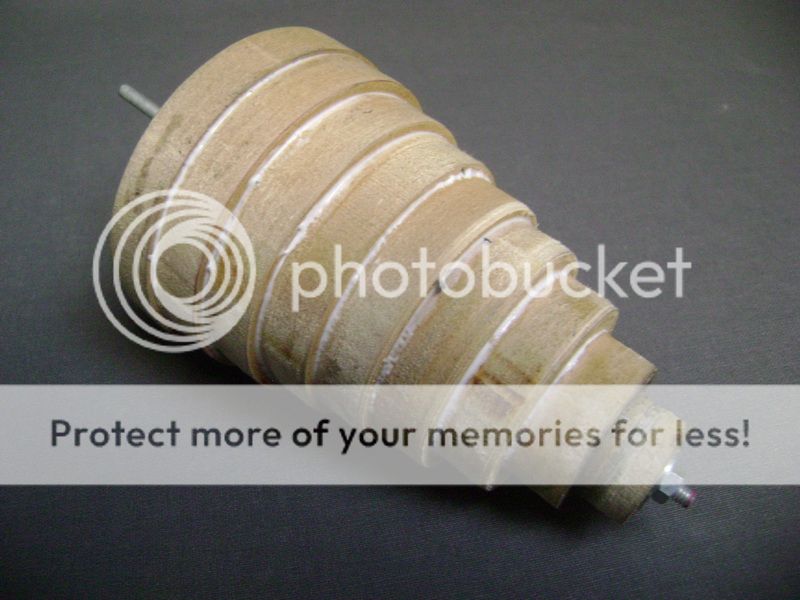
Put this in the drilling machine.
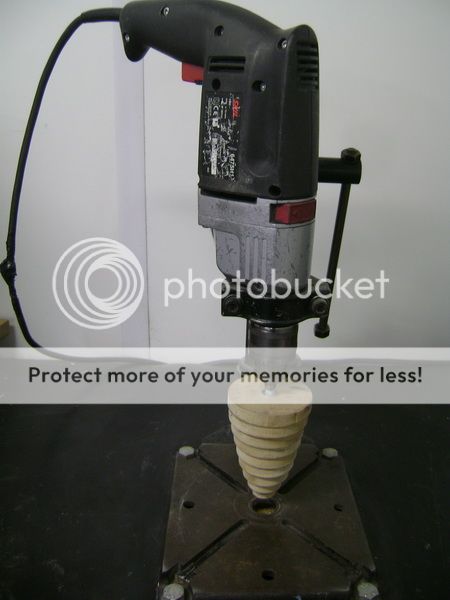
Let the drilling machine spin, and held a sanding Block against it.
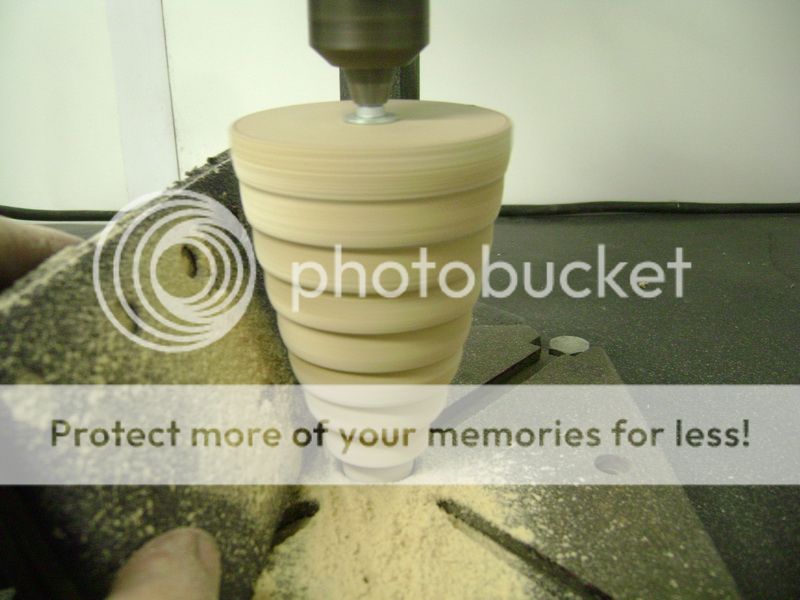
So I could abrade it all smoothly, and this was the result.

A cone, nothing more, nothing less. :worthless: :worthless: :worthless:
The model looked like doodie, and when I held the sanding Block against it, I pushed it all a bit out of center.
So the cone did end up in de bin.
EVO2 is coming up, with more shapes.
Posted By: robolop
Date Posted: March 16, 2011 at 5:47 AM
Time for EVO 2
First of all, I put everything on paper First. Drawed it all out how I wanted it, with some more pretty roundings in it.
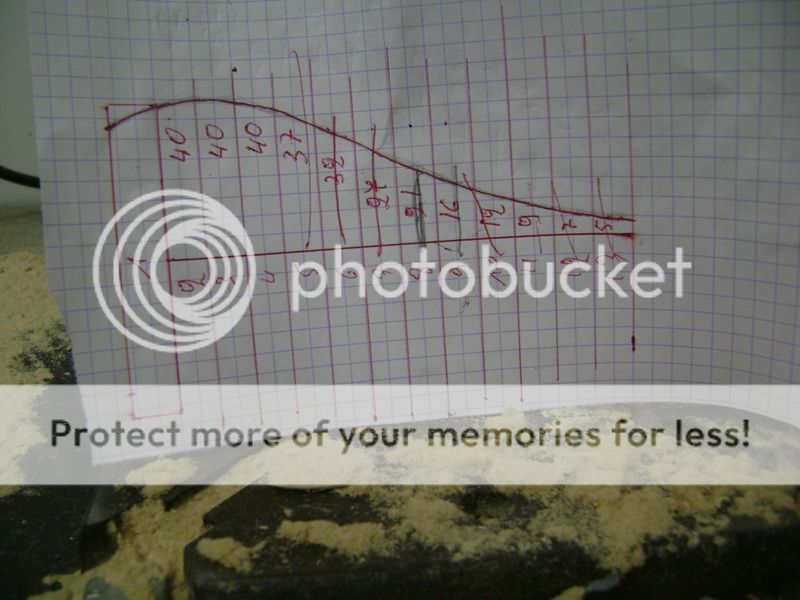
After that I milled some discs, and glued them on each other, and put in an M5 shaft.
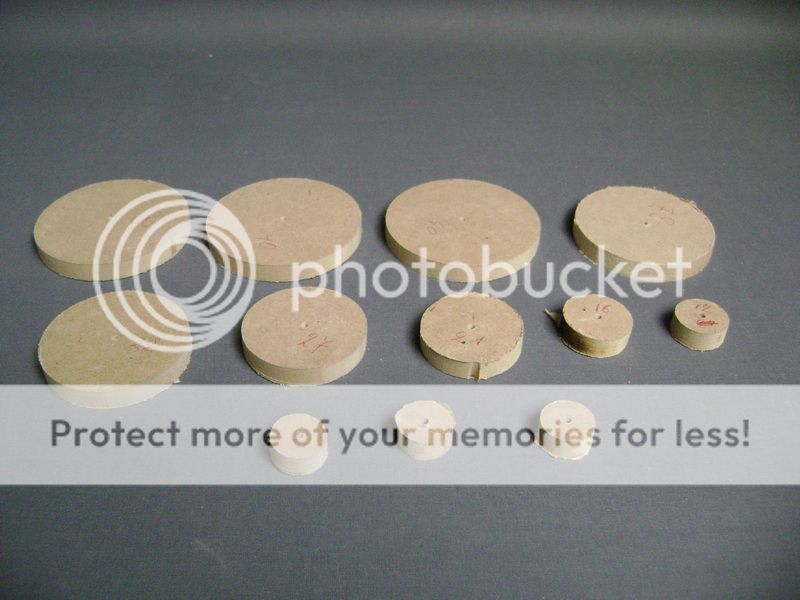
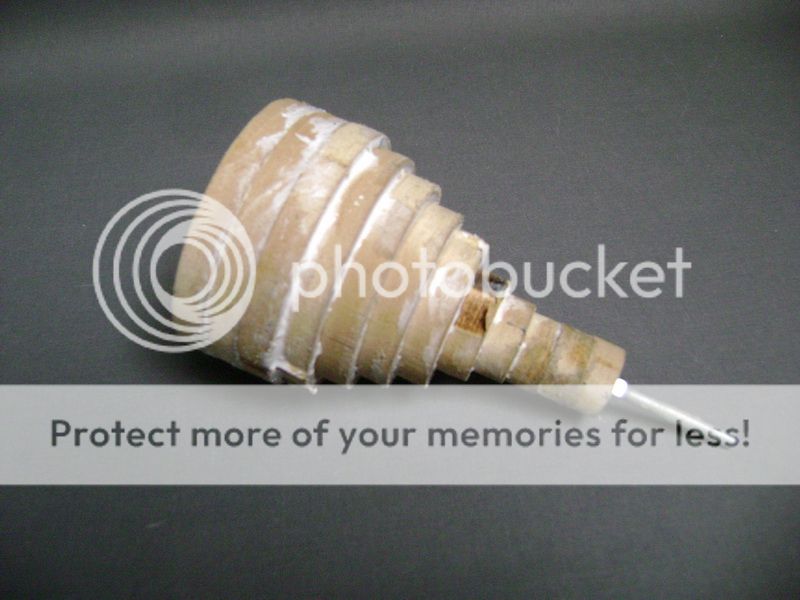
Placed it all in the drilling machine, and put a little plank underneath. If you look closely you see a hole of 5mm in the plank

Placed the drill below, and the little shaft is now in the hole. I did this so the MDF Block wont be able to swing out of its axis.
Once this was placed properly, I screwed the drill tight, so it couldnt get any higher or lower anymore.

Started with the abrading proces again, and this time I didnt use a sanding Block.
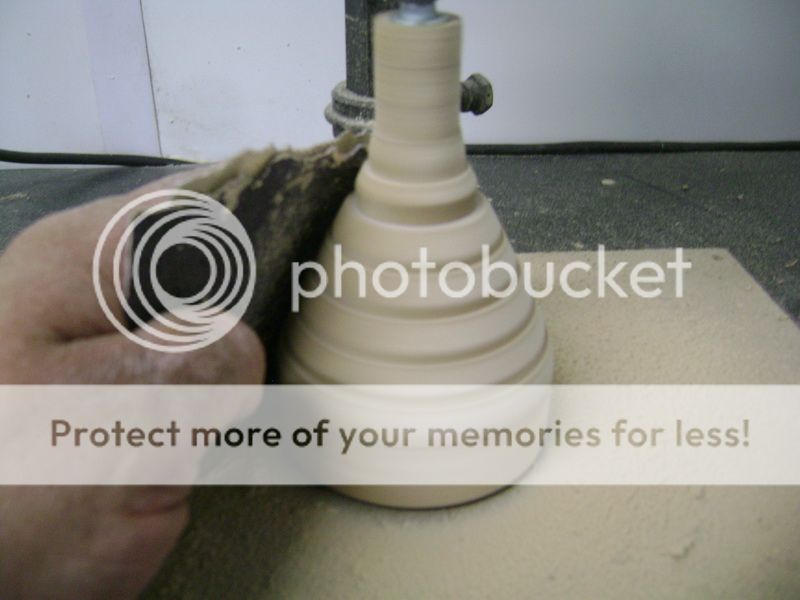
This model looks a lot better
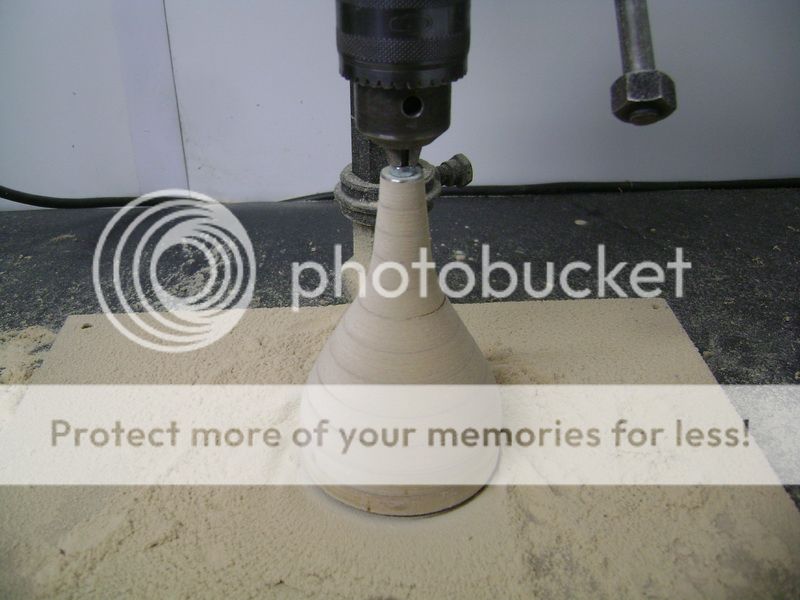
Then I knocked in the front little disc with 3 little nails. This little disc also has a small side where the logo falls in.
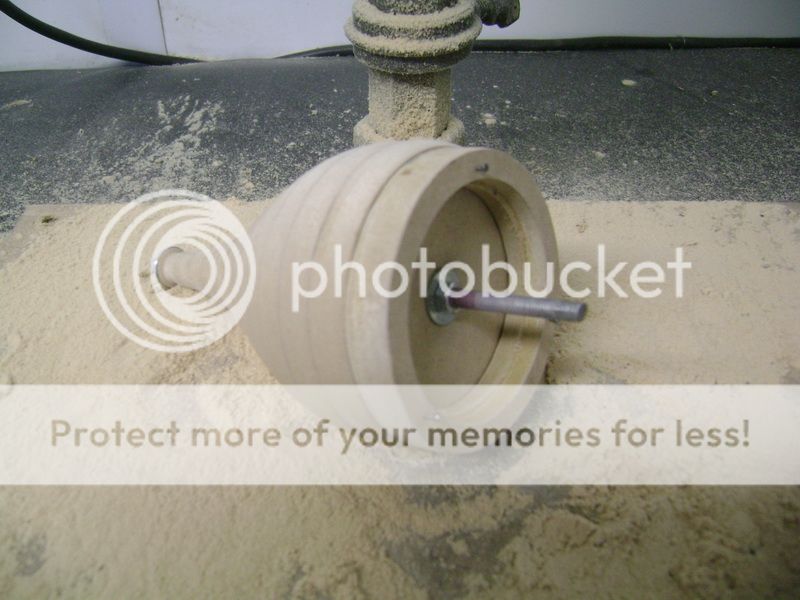
Abraded it all
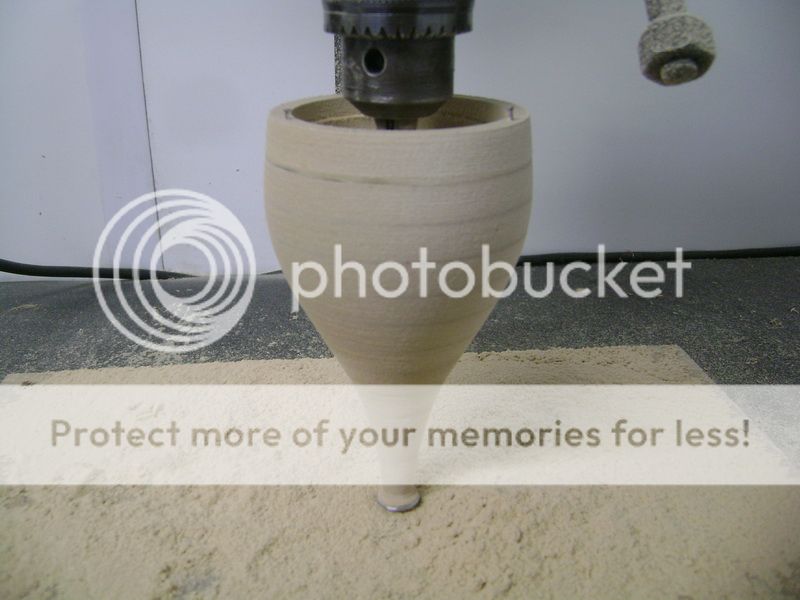
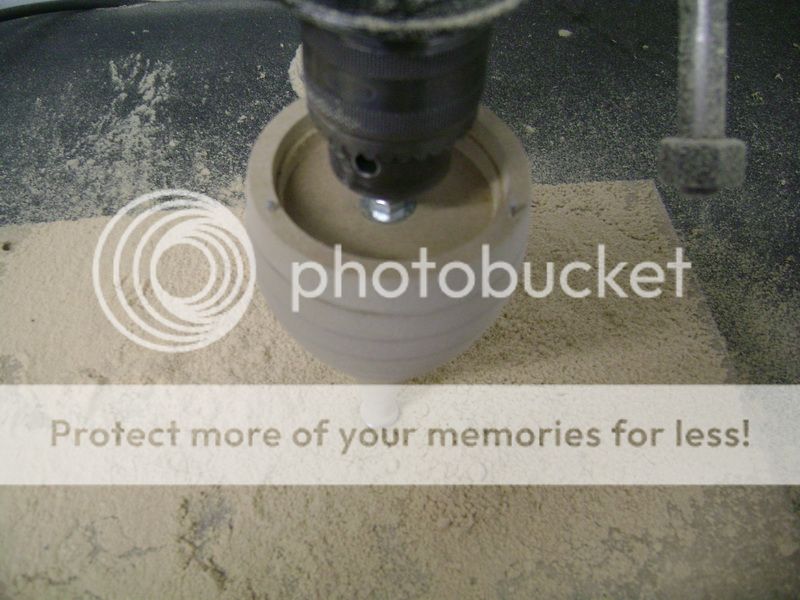
Then I took away the last ring, and used the klockdrill to empty the inside;
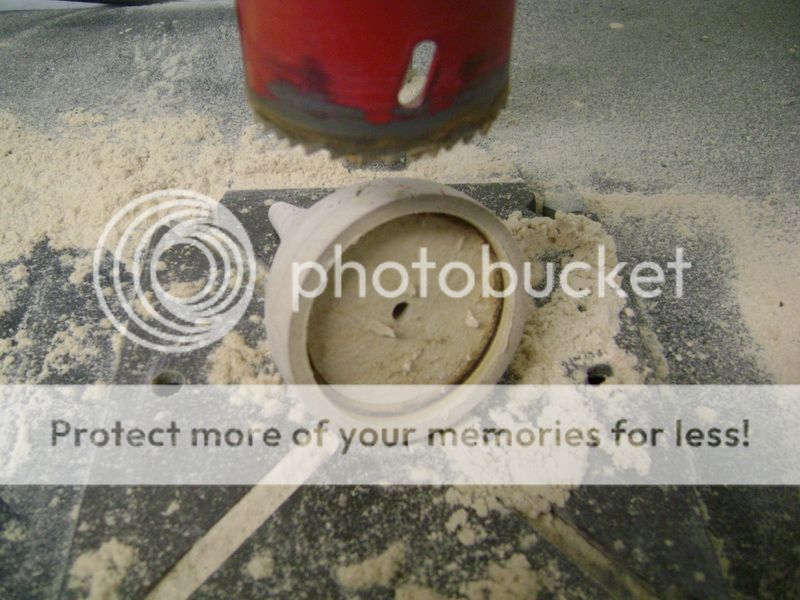
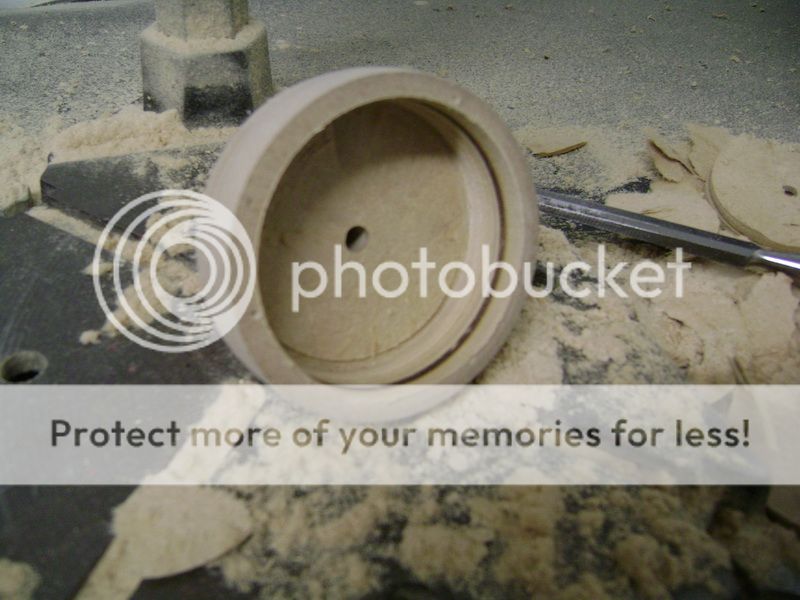
Once I saw I was almost at the limit, I glued the final ring back on there.
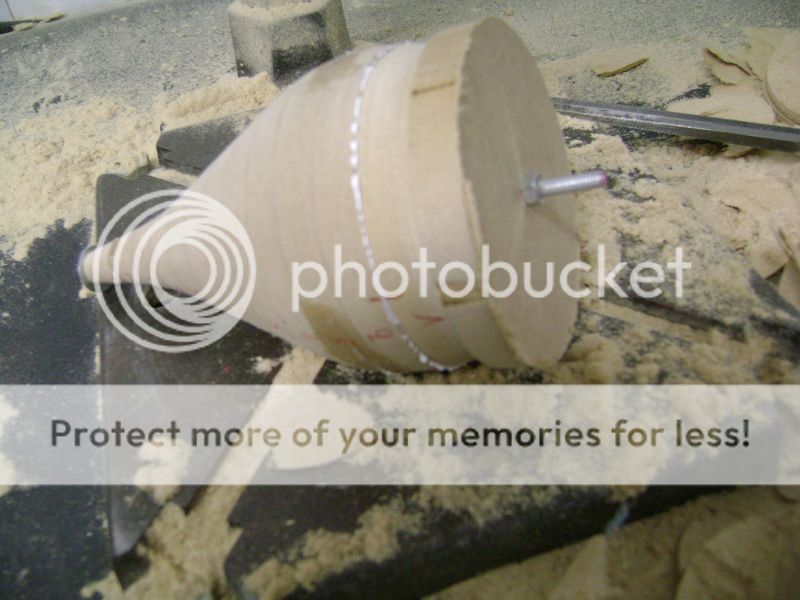
Every time I replaced the drill by a smaller one, and extracted layer by layer.
If you see how Ive done this, you must be sure you dont drill too far, or youll have a hole in your hand.
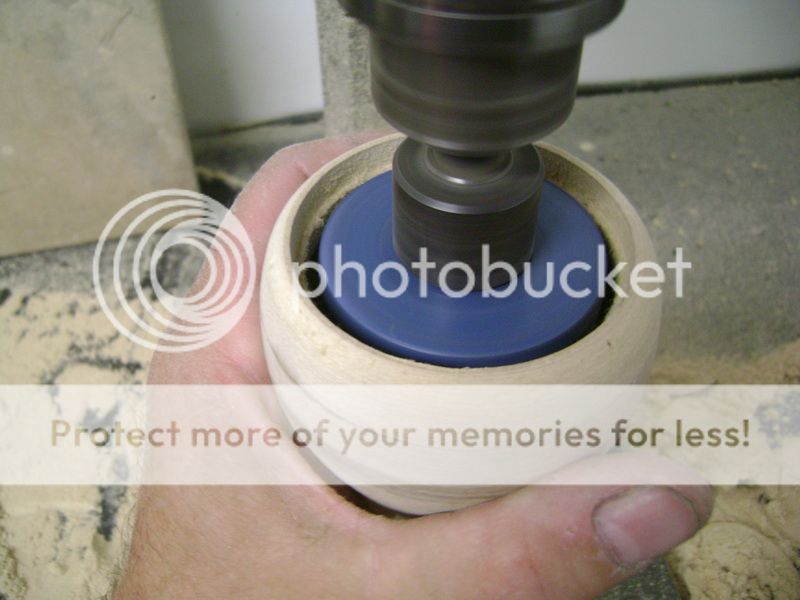
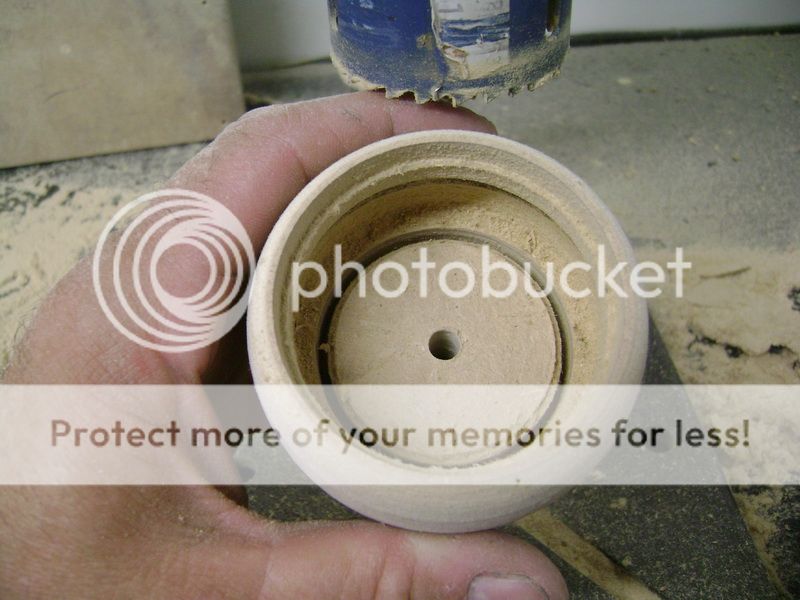
The whole family
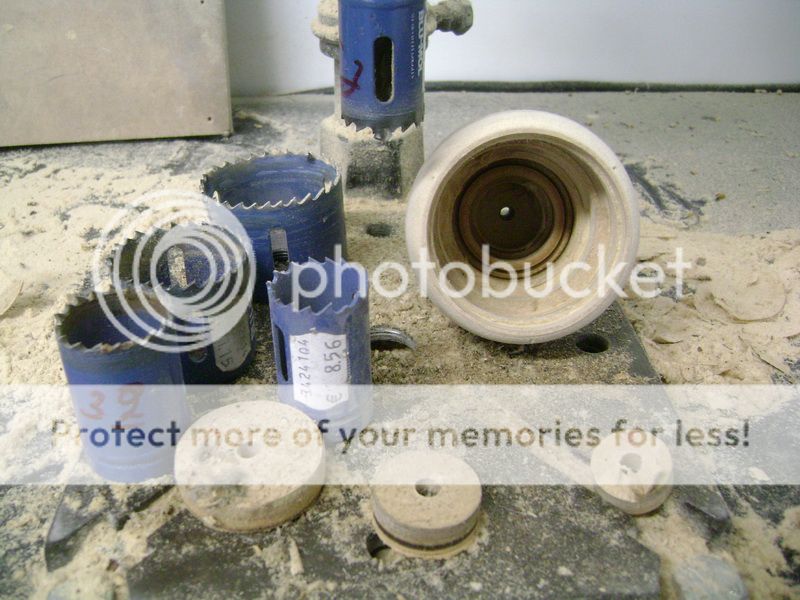
Posted By: robolop
Date Posted: March 16, 2011 at 5:49 AM
Now the cone worked perfectly for me, I just need to make some aluminium toggles to Mount it.
I drawed some models first, and then made one out of 10mm thick MDF.
I drawed it out on an aluminum plate of 6mm thick.
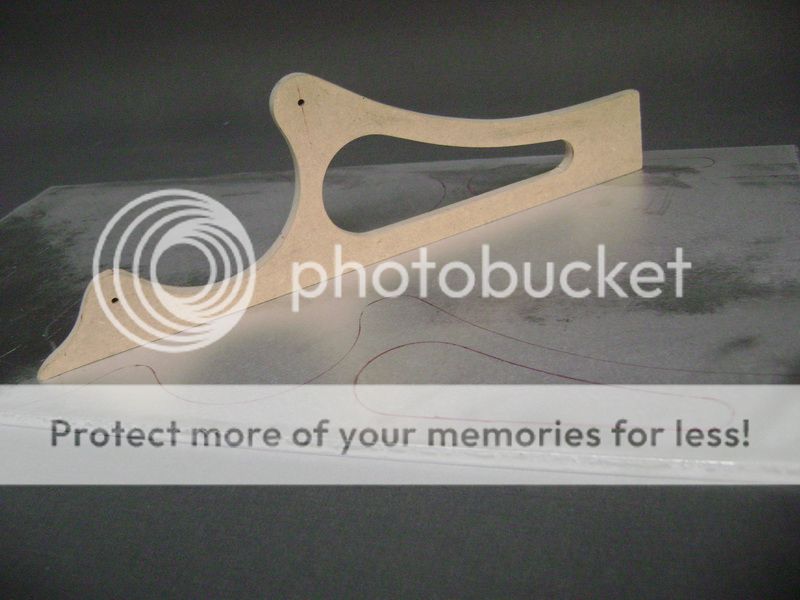
I sawed out the toggles, and pasted them on the MDF, and held them against the copy mill with this result.
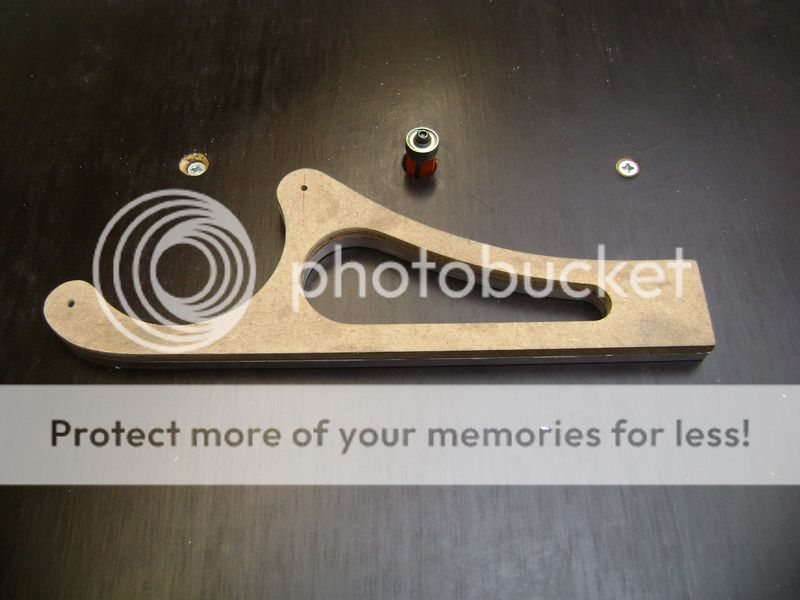
You can also see that I modified the model a bit, on the front. I made it rounder, so it looks a bit like a sled now.
What you can also see on the alu, is that I used a new mill. The sides are more smooth then usual, but some polishing will still be necessary.

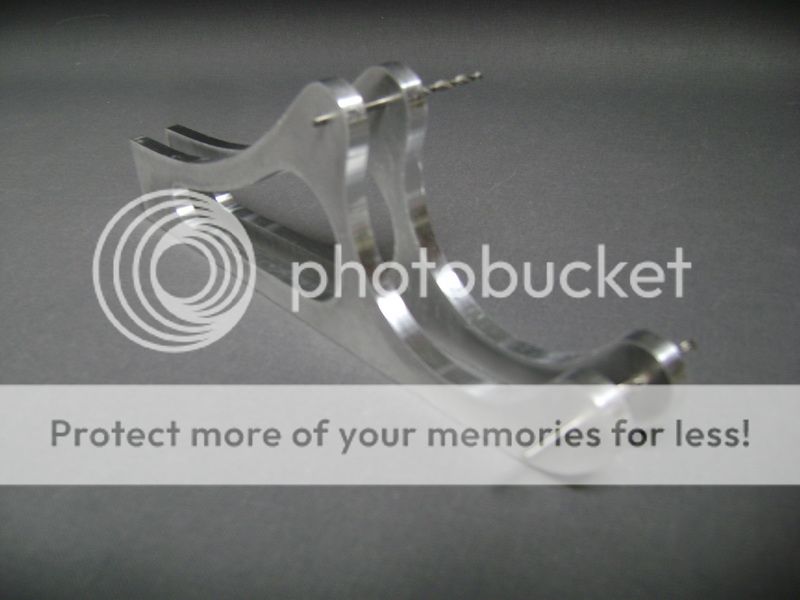
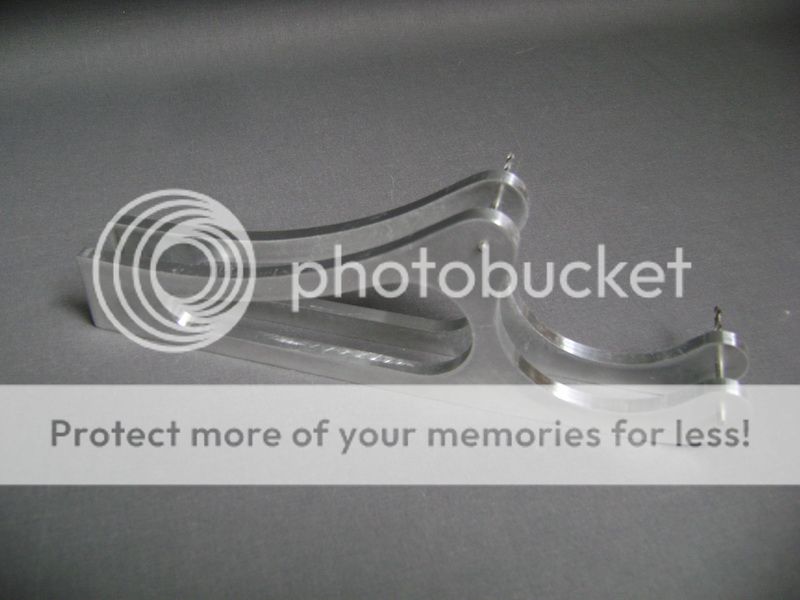
This aluminium plate I made for the PPI, I modified a bit, so I can still use it in the new set-up.

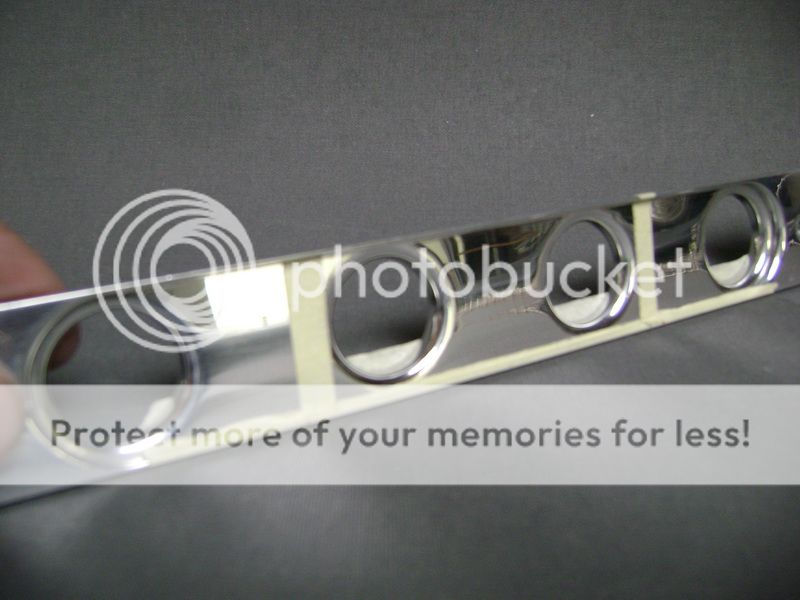
Posted By: sullivan91
Date Posted: August 05, 2011 at 1:32 AM
Wow. Jaw dropping.
Posted By: Melted Fabric
Date Posted: September 11, 2011 at 5:42 PM
Just when you thought he was out of ideas. Marvelous work mate.
-------------
I have not failed. I've just found 10,000 ways that won't work.
When you do not know what you are doing and what you are doing is the best -- that is inspiration.
Posted By: trae08
Date Posted: October 16, 2011 at 7:58 PM
This is the most amazing work i have ever seen. I cannot believe how amazing your work is. I just went through all 16 pages and expected it to be finished. But now i think this is a project that is never done. Keep up the great work.
Posted By: toy civic
Date Posted: November 16, 2011 at 7:22 PM
This is the kind of build that automotive engineers need to read up on before they design the crap that rolls off the assembly line. This is awe inspiring.
I am just starting out in this industry..........sort of. I've been a novice for about 17 years, but spent the past 20 years in the US Navy. Now that I am retired, I am going to a Mobile Electronics school so I can do this kind of stuff full time and have access to the right tools and facilities.
Posted By: fatgotti
Date Posted: January 05, 2012 at 10:30 PM
Unbelievable.... Standing Ovation....WOW...........
-------------
Fatgotti Yeah my name is John and I am FAT!! YEAH BABY
Posted By: ekgotskillzz
Date Posted: February 09, 2012 at 11:55 PM
Dude you are sick....incredible build..thanks for sharing
Posted By: robolop
Date Posted: October 21, 2012 at 4:04 AM
Here you can see what will happen to the cone and the aluminium toggles.
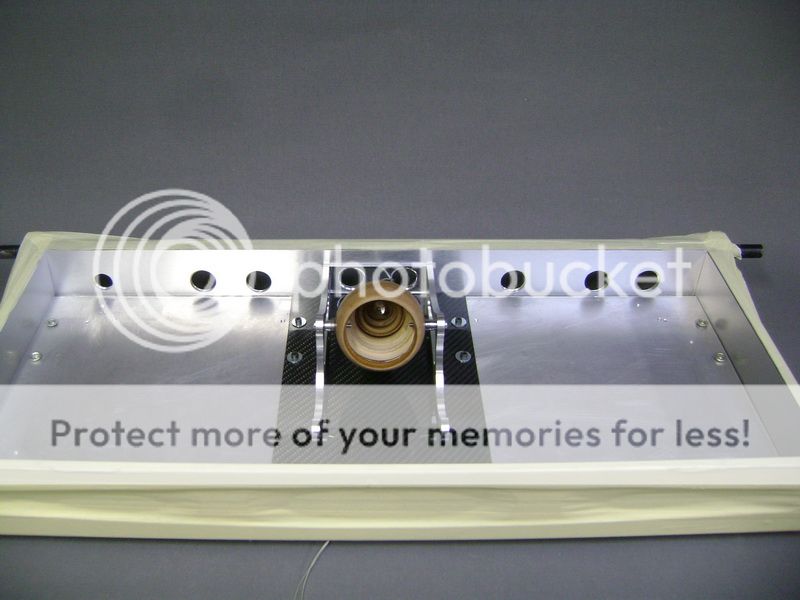
As you can see this stands in the centre of the amplifierbox. I also made a little carbon plate where it all is mounted on.

Through these holes, the amplifier-cabling will go.

For the moment, in the centre of the cone, there's a big blue led.

If this will remain, I'm not sure. I also have a white little neon that fits into there.
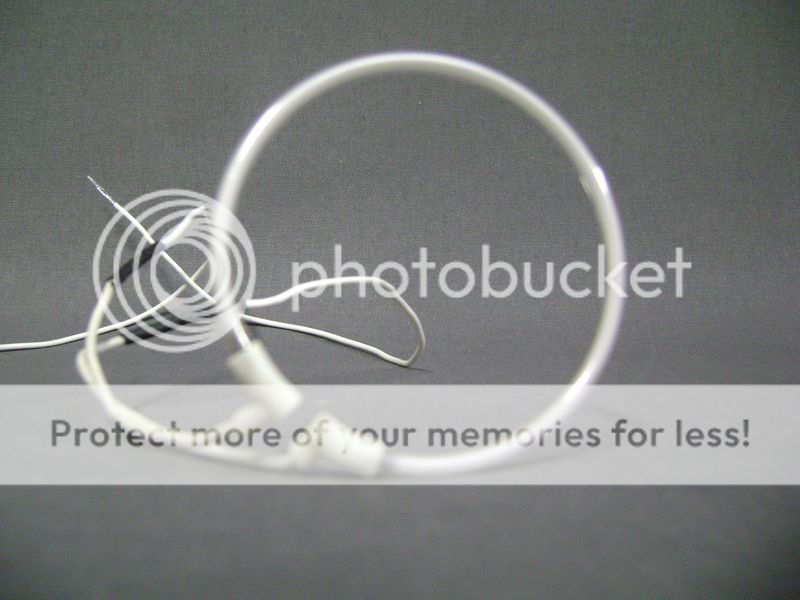
To divide the light a bit better, I milled a finer piece of plexi glass, and . This will come behind the JL Logo.

Here you can see the result with the blue led.
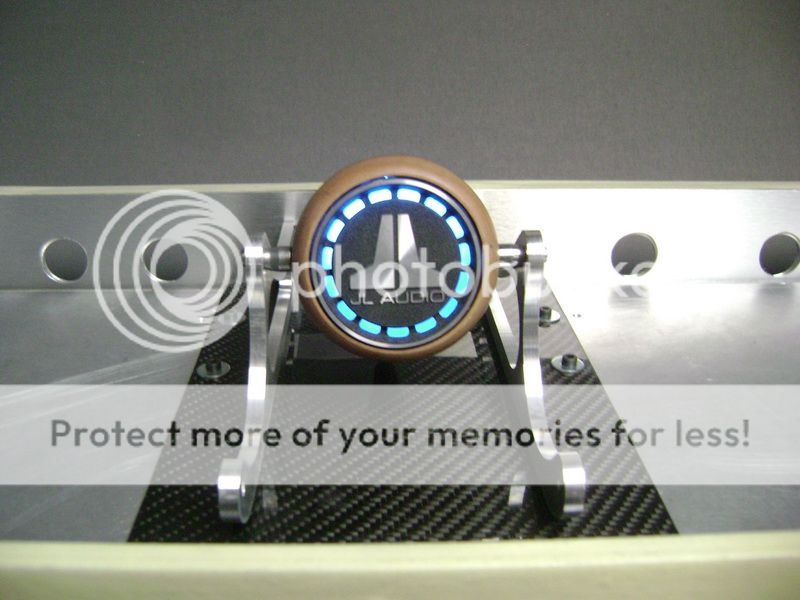
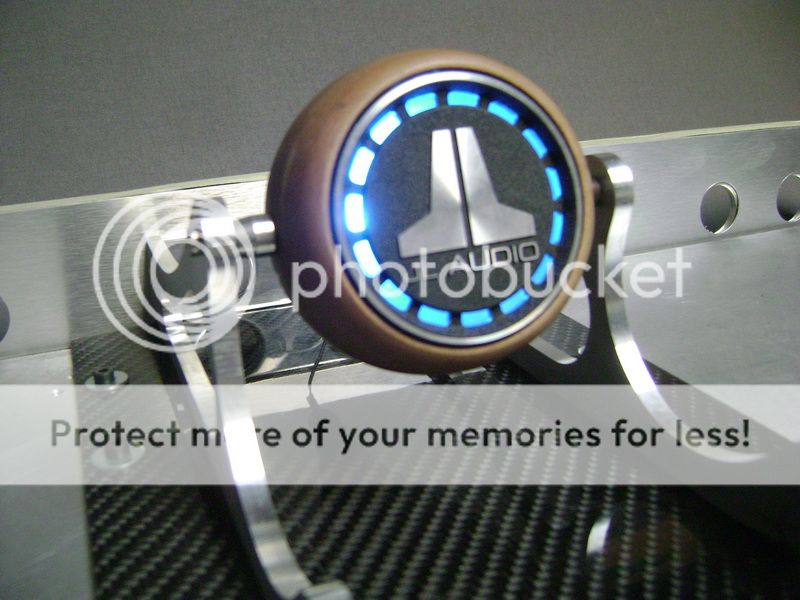
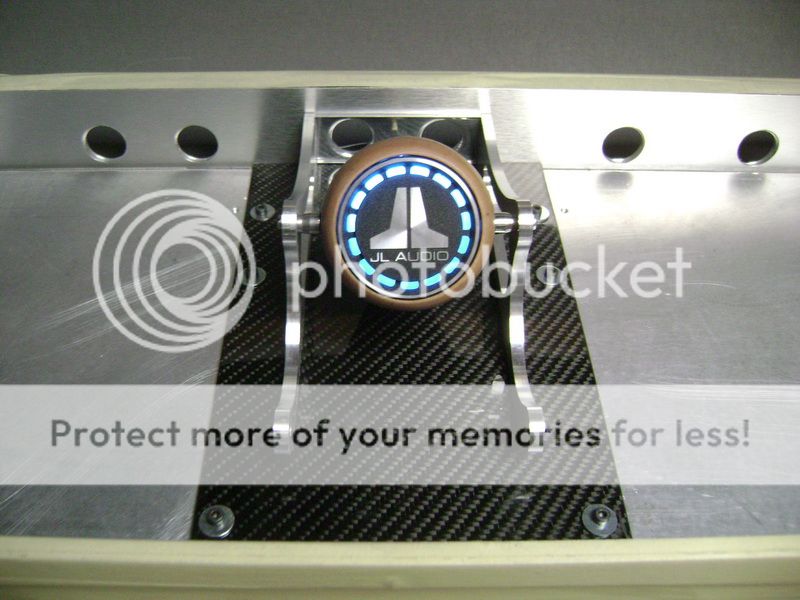
I think you can see that the cone is 10x more beautifully shaped. I call this is a female cone, a "conin"
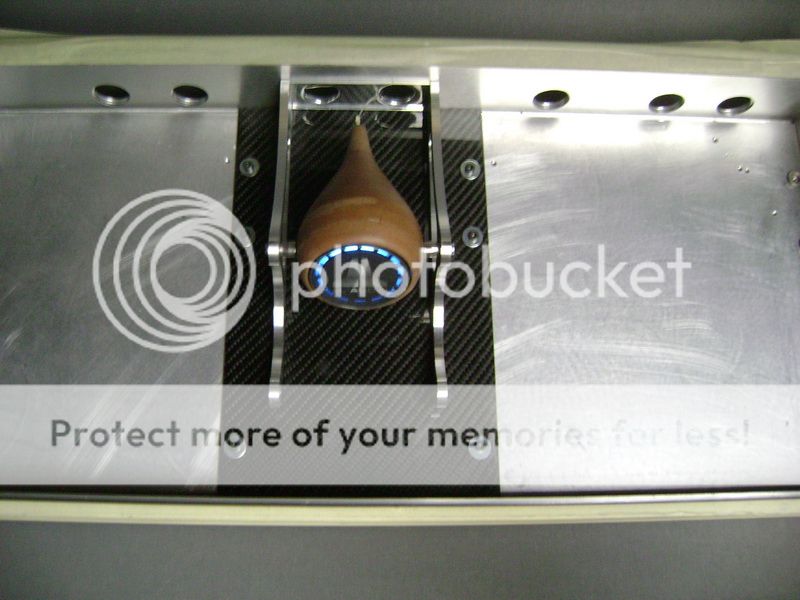
You can also see I re-used the aluminum plate from the PPI. This was a bit to nice to throw into the bin, so it's being re-used.
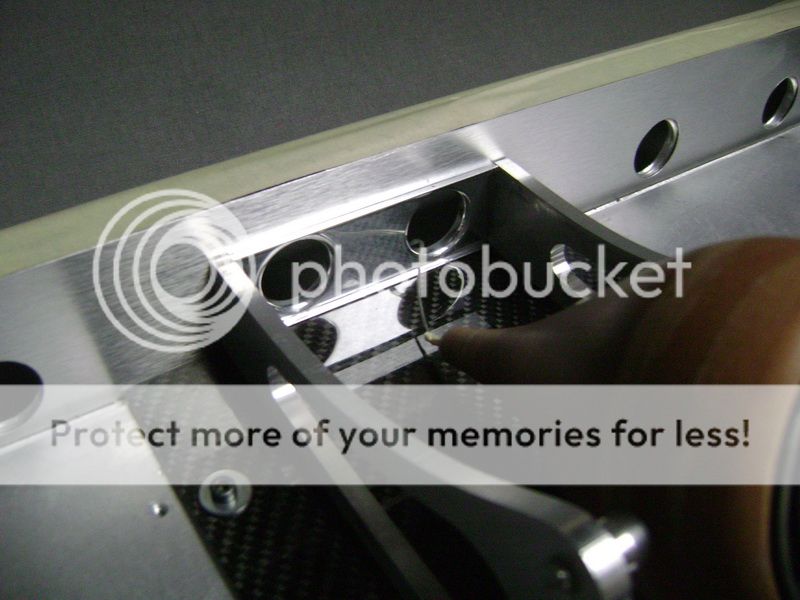
The first cone I made, the one that landed directly into the garbage, I recovered.
I used this one to cover with carbon fire. I didn't had any problems with this.
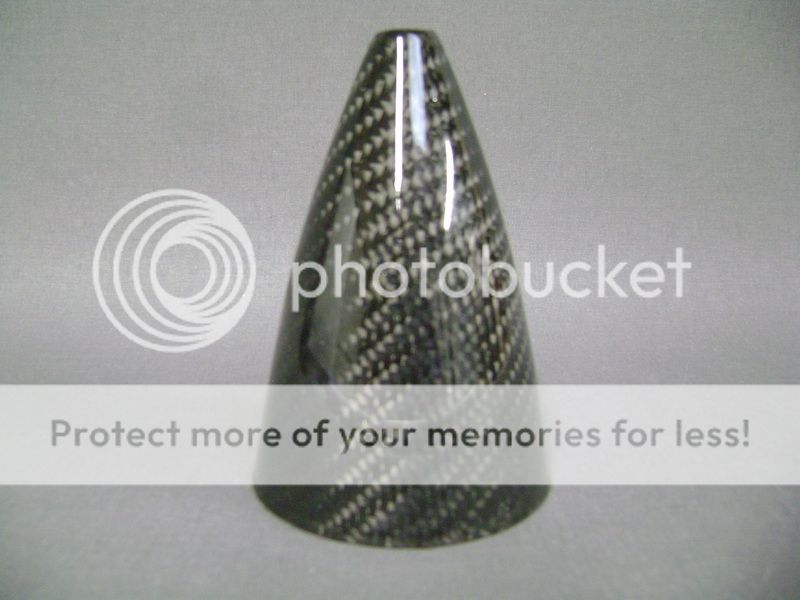
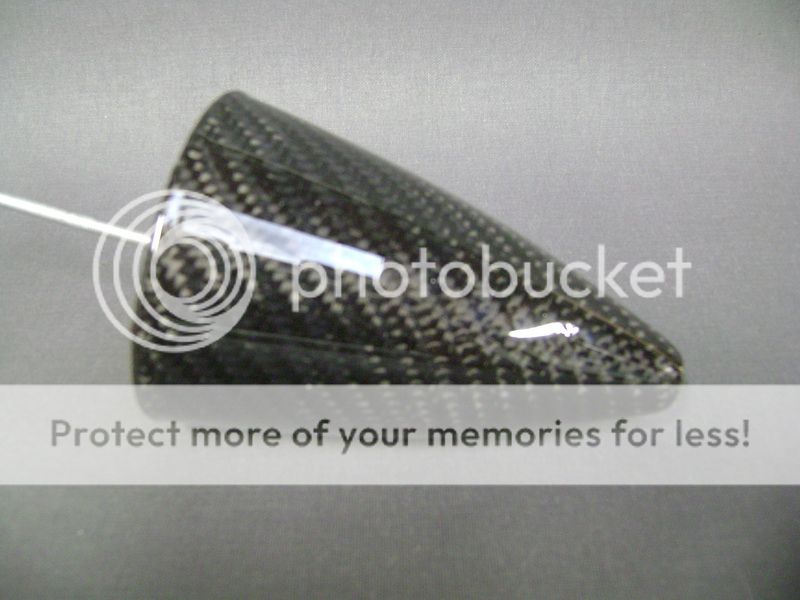
About Evo2, I'm still not sure how to do this. It'll stay a mistery, and I'll have to do some magic. I hope there's
Posted By: robolop
Date Posted: October 21, 2012 at 4:06 AM
Most of you may remember I bough 2 JL audio amplifiers.
Because they are too heavy (power), I did a little trick.
I first screwed them on a shelf.
[SIZE="5"]Do not try this at home :[/SIZE] :yahoo: :yahoo: :yahoo: :yahoo: :yahoo:
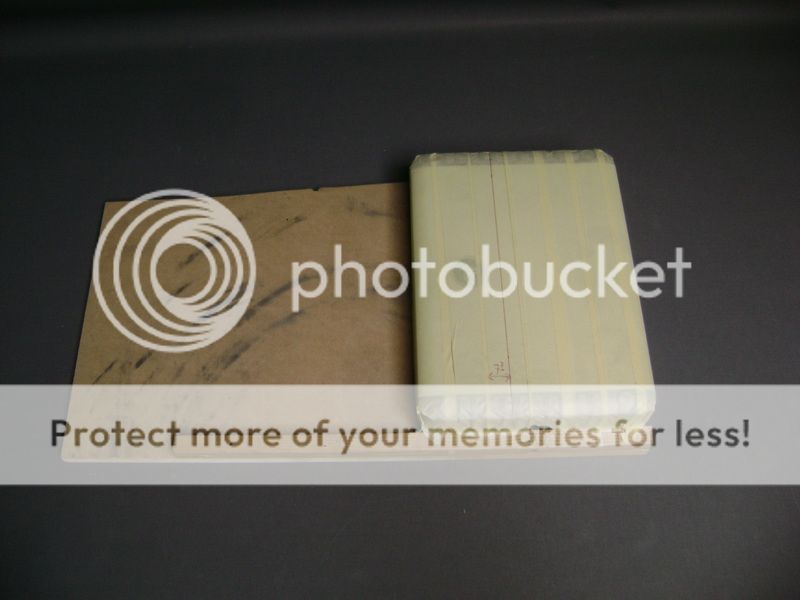
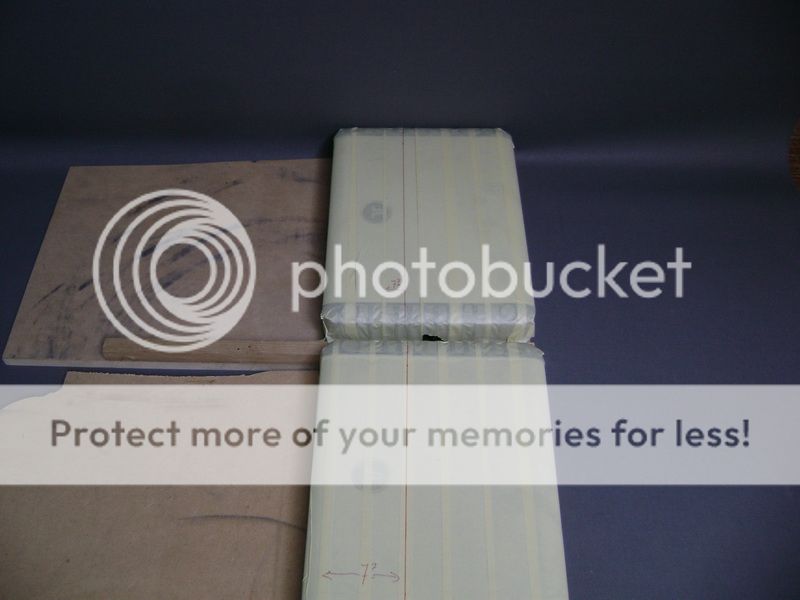
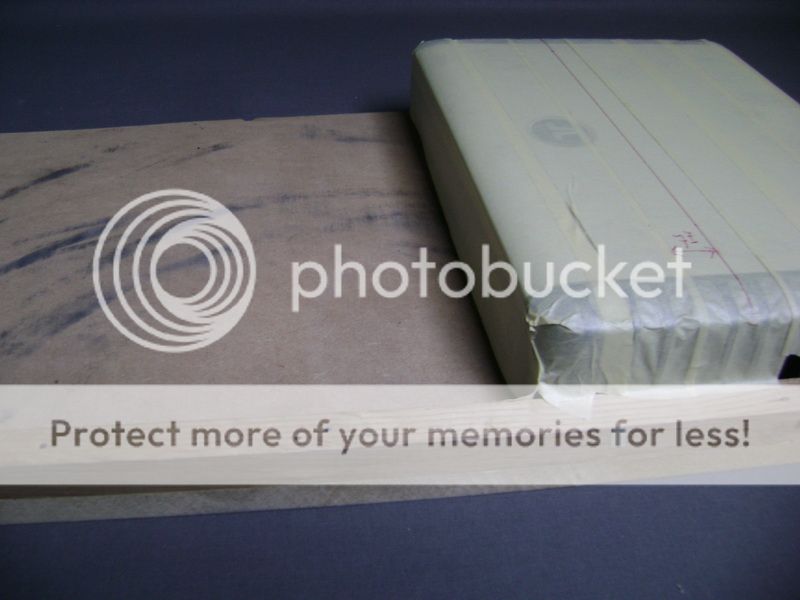
Then I put in the disc...
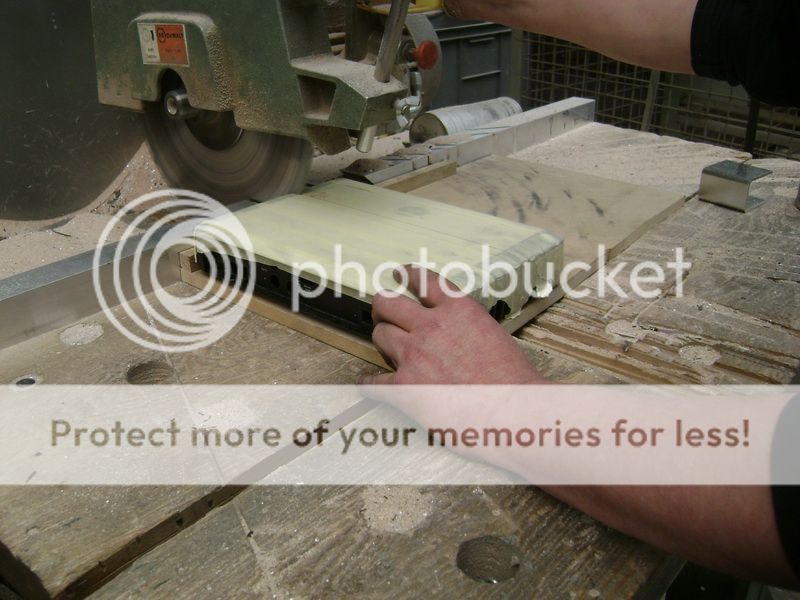

What I was thinkin' while cutting...." will the waranty expire now ?"
You never know these things go bad after some time...
LOL
Posted By: robolop
Date Posted: October 21, 2012 at 4:07 AM
After some serious thinking, I made an attempt to cover the little cone with carbon fibre.
The first attempt went wrong from the start, but sometimes you need these setbacks to get back on track, and to think about what youve done wrong.
The second attempt went better, but I must say that my hat of tricks
is empty again.
Today was the day to see if it was really good. After some abrading, I saw that I went perfectly.
The one thing that needed to be done is to bring on a set of epoxi-layers.
Since the cone is round, the epoxy would drip off the carbon fibre, so there would be more epoxi on the floor, then on the carbon fibre.
In my hat, I had another trick left.
So I put a stang through the cone, and made 2 aluminium bracelets. Then I mounted this with the stand on to a little motor.
I also added some adjustable feeding, to I could begin with my first layer of epoxy.
Here you can see how I did it.
lets roast the cone
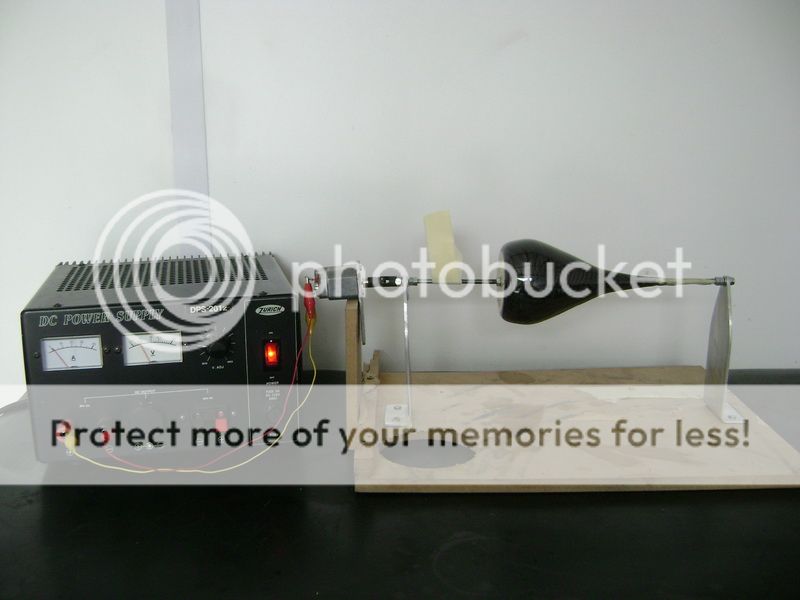
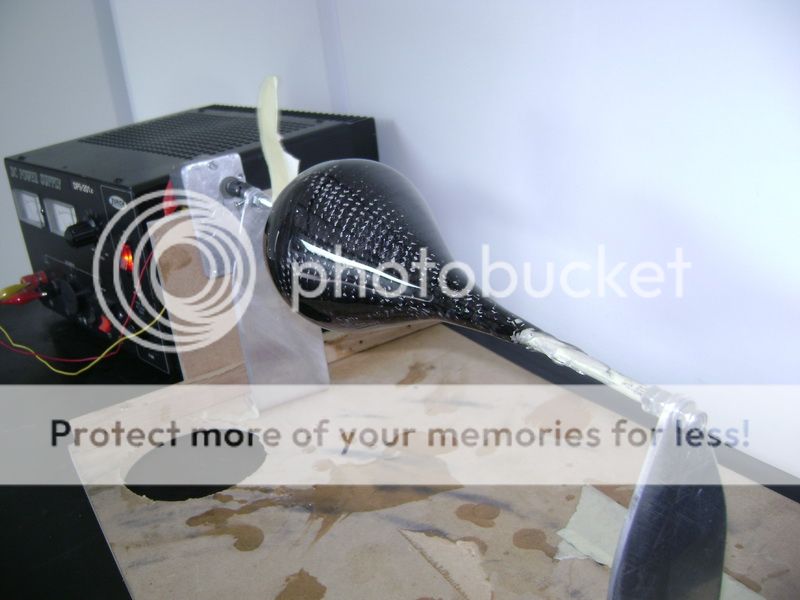
Cause the cone is turning now, the epoxi cant drip off.
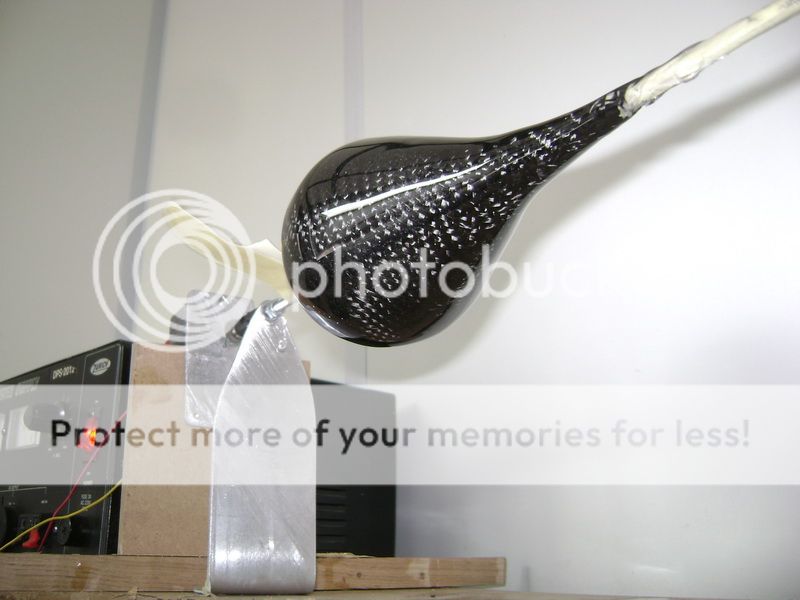
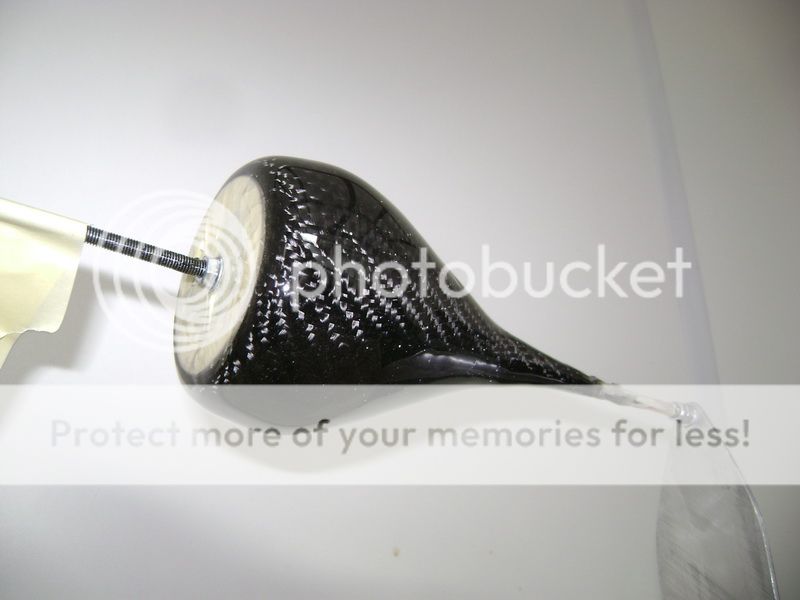
Here you can see theres a lot of epoxi on there, and its still nice and smooth after the first layer.
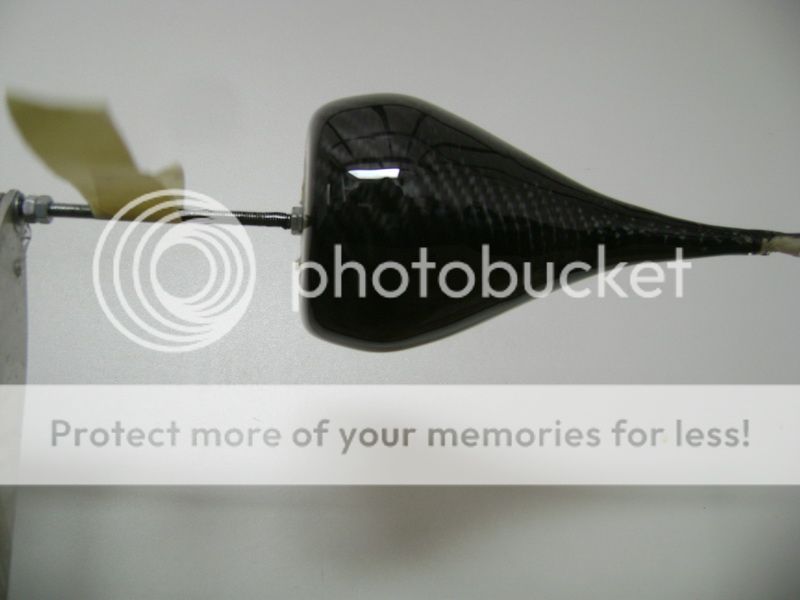
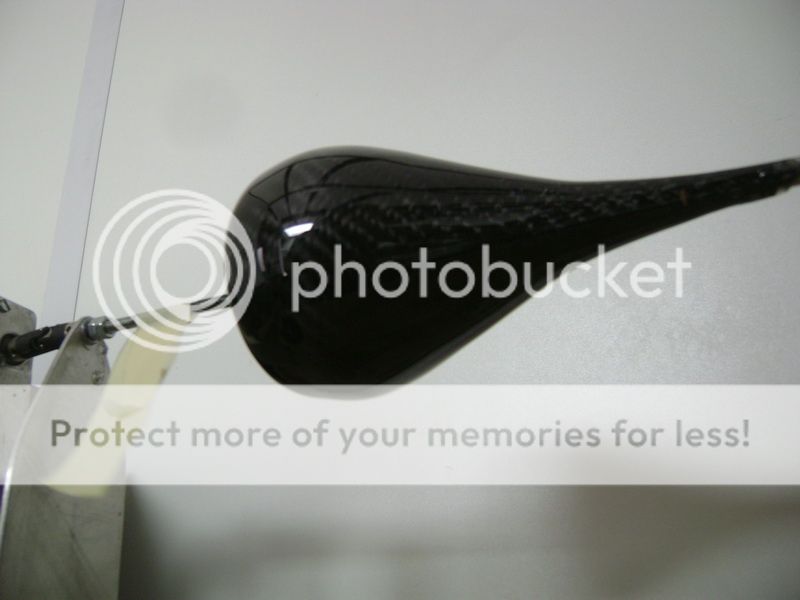
I let this turn for about 2 hours, untill the epoxi didnt stick anymore. After that I put it into the oven.
The next few days I can abrade it firmly, and give it another layer of epoxi.
At the end of the cone, Im going to make a little aluminium piece to finish it off.
Im really happy I managed to do this, because it was that could go terribly wrong, but it worked out fine.
Up to the next!
Posted By: robolop
Date Posted: October 21, 2012 at 4:08 AM
Here a FULL CARBON update...[SIZE="5"]OOO YEAHH[/SIZE]
This is how the cover of the front seat looks now
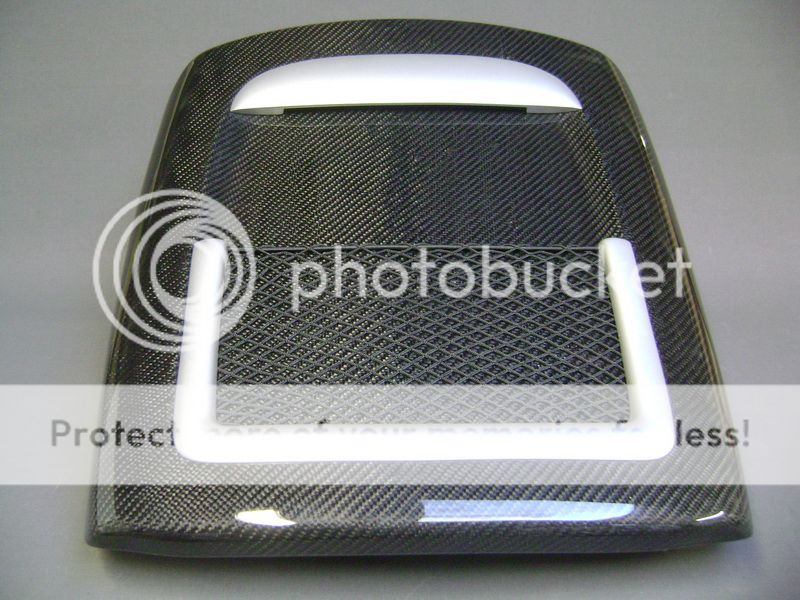
Because I dont like big surfaces of carbon fibre, I replaced the little net. That took a lot of work, cause I had to adjust it completely.

As you can see, I sprayed the sides of the net in silver, like the original moldings of the bimmer.
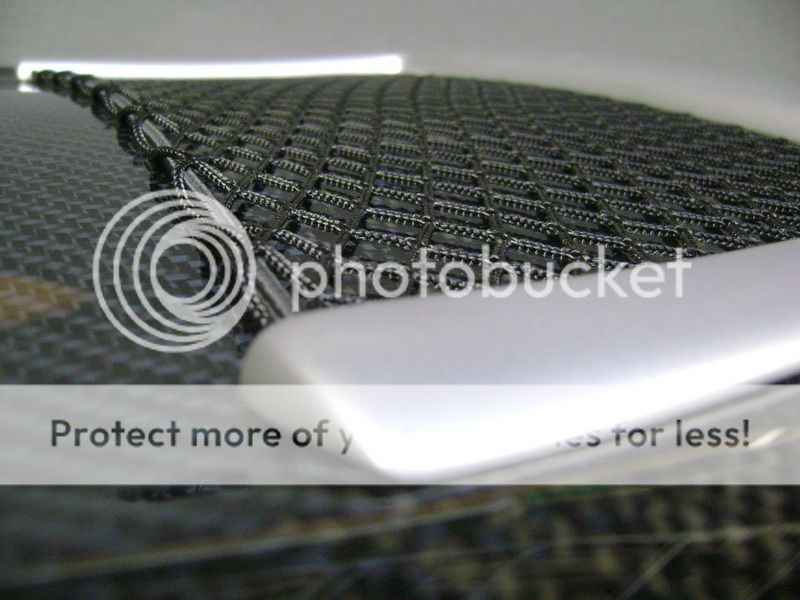
When you look at this picture, it looks almost like a carbon roof with a spoiler.
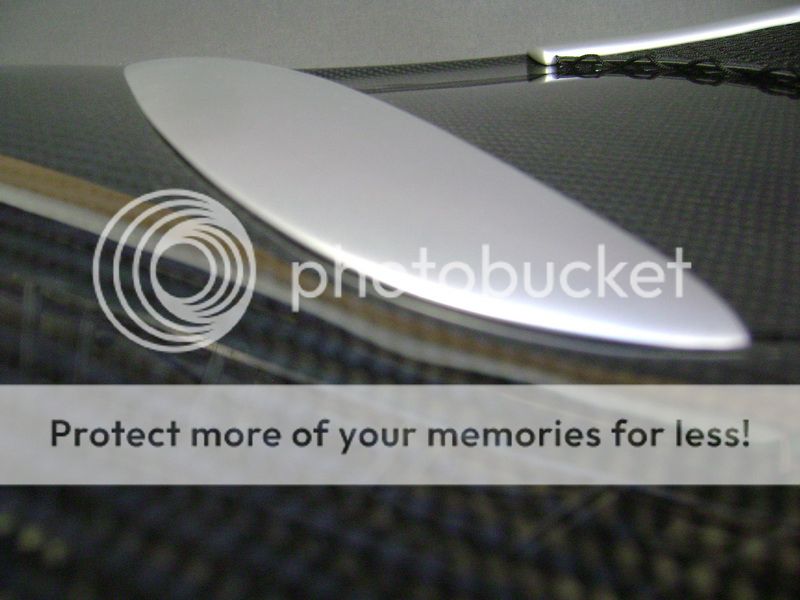
Under the little sloth you see, Im going to mount some leds who will function like the interiorlight.
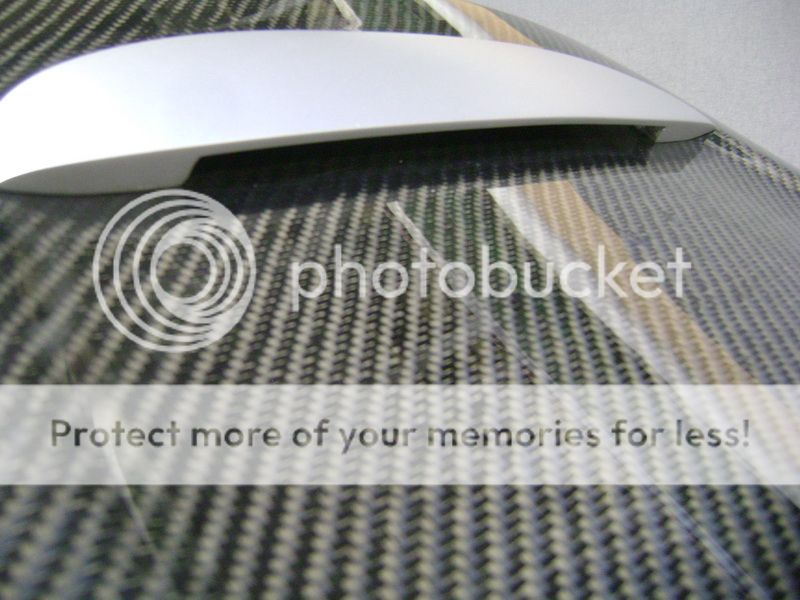
Here its all mounted in the car.


Posted By: robolop
Date Posted: January 05, 2013 at 2:11 AM
Posted By: rspect
Date Posted: February 22, 2013 at 8:14 PM
That was amazing!
-------------
Retired U.S. Navy - 2014 Mazda 6 - NovaFlex Ceramic Window Film, TBC
Posted By: neonx18
Date Posted: December 05, 2013 at 12:50 PM
no updates in almost a year.....  
Posted By: Himself
Date Posted: November 26, 2014 at 6:09 PM
He started in 2009 and I read it in 2014....Still amazing!
-------------
What?
Posted By: patineto
Date Posted: December 21, 2016 at 2:07 PM
Beyond words, fantastic in every little detail..
|