the12volt.com spacer
icon

2010 ford fusion, viper 5901


Post ReplyPost New Topic
< Prev Topic Next Topic >
monty862 
Copper - Posts: 116
Copper spaceThis member has made a donation to the12volt.com. Click here for more info.spacespace
Joined: December 10, 2009
Location: Kentucky, United States
Posted: March 21, 2010 at 10:33 PM / IP Logged  

Or, could I use the viper normally open hood pin?

monty862 
Copper - Posts: 116
Copper spaceThis member has made a donation to the12volt.com. Click here for more info.spacespace
Joined: December 10, 2009
Location: Kentucky, United States
Posted: March 22, 2010 at 12:58 AM / IP Logged  
Would it be possible to use BOTH the + pos violet H1/6 and the - neg green H1/8 door trigger inputs? They would be used for different things. I'm using a DTIMAZDA module on my 2010 Fusion door triggers which requires me to use the + pos violet H1/6 wire from the Viper. I want to add a tilt and glass sensor. Normally you'd tap into the trunk trigger wire to add these sensors.. My trunk trigger is the same set up as the doors (- Neg Norm Closed.) This gives me the same dilemma as the doors did. Even though you open one circuit (trunk, or tilt, or glass) the system still gets a ground from one of the others and no alarm is sounded. I guess I could use another DTIMAZDA module. But, if I can use the - neg green H1/8 wire, I can tap the tilt and glass sensor into that for my alarm input. The only drawback I see is the two way remote would probably show door trigger for the tilt and glass report. But it would have shown trunk trigger if wired normaly. Has anyone tried this before or know if it will or won't work?
monty862 
Copper - Posts: 116
Copper spaceThis member has made a donation to the12volt.com. Click here for more info.spacespace
Joined: December 10, 2009
Location: Kentucky, United States
Posted: March 29, 2010 at 1:17 AM / IP Logged  

If I could, I'd delete my last four posts. The simple solution for this, was to tap into the MUX port connection. I cut the blue alarm wire that goes to the MUX port from my proximity sensor. I put a diode on this cut wire with the band facing the proximity sensor. I also put a diode on the wire from the tilt sensor with the band facing the sensor. And a diode on the wire from the glass breakage sensor facing the sensor. Soldered all three dioded wires (prox, tilt, glass) to the blue wire I cut coming from the MUX connector.All sensors are now working properly. I also cut the black wire from the proximity sensor and ran it to the ground when armed wire. Now the proximity sensor only activates when the alarm is armed. The ground wire from the MUX connector is a constant ground and the proximity sensor was staying on whether the alarm was armed or not. All I have left to do is hook up the defroster wire and mount the antenna. I'd like to hook up the heated seats too, but I'm not too sure how to do that.

monty862 
Copper - Posts: 116
Copper spaceThis member has made a donation to the12volt.com. Click here for more info.spacespace
Joined: December 10, 2009
Location: Kentucky, United States
Posted: April 11, 2010 at 2:31 AM / IP Logged  
I have a PDF of the  center console removal guide for 2010 Fusion / Milan. Can't post it due to copyright. Be glad to send it to anyone who needs it. I also have a link to a Nav / Climate / Radio bezel removal video.
monty862 
Copper - Posts: 116
Copper spaceThis member has made a donation to the12volt.com. Click here for more info.spacespace
Joined: December 10, 2009
Location: Kentucky, United States
Posted: April 19, 2010 at 5:52 AM / IP Logged  
Fly in the ointment. Of course. Rear defroster latch; heated seats pulse. I wanted both to turn on automatically with the status wire. I guess I'll use the status wire for the defroster. It has a 10 minute time limit. The Fusion also has a timer on the defroster, but I'm not sure of the length. The seats have no timer. I'll use auxillary 1 for the heated seats and turn them on manually instead.
monty862 
Copper - Posts: 116
Copper spaceThis member has made a donation to the12volt.com. Click here for more info.spacespace
Joined: December 10, 2009
Location: Kentucky, United States
Posted: April 23, 2010 at 1:59 AM / IP Logged  
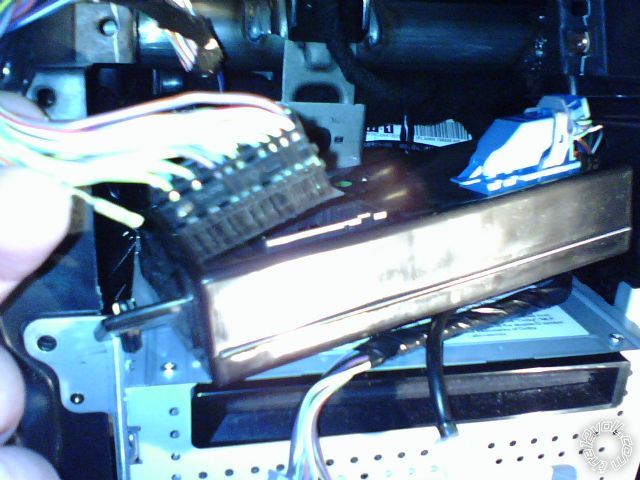
Rear defroster and heated seats wired up and working properly. The climate control module is located behind the Navagation screen, on cars so equipped. This is where you will find the 26 pin plug (A) to wire the seats and defroster. I would imagine it is located in the same place on non-navagation units. Again the seats are pulsed and the defroster latched.  Almost done! 
2010 ford fusion, viper 5901 - Page 5 - Last Post -- posted image.
monty862 
Copper - Posts: 116
Copper spaceThis member has made a donation to the12volt.com. Click here for more info.spacespace
Joined: December 10, 2009
Location: Kentucky, United States
Posted: April 30, 2010 at 12:47 AM / IP Logged  
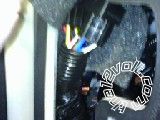
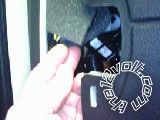
Here are some pics of where I installed two relays for the defroster and heated seats. I also have the DTIMAZDA module mounted here. Easily accessible through the side opening on the dashboard.2010 ford fusion, viper 5901 - Page 5 - Last Post -- posted image.2010 ford fusion, viper 5901 - Page 5 - Last Post -- posted image.2010 ford fusion, viper 5901 - Page 5 - Last Post -- posted image.                                Foam wrapped over relays to prevent rattle.   Sorry pics so small, used phone camera.
monty862 
Copper - Posts: 116
Copper spaceThis member has made a donation to the12volt.com. Click here for more info.spacespace
Joined: December 10, 2009
Location: Kentucky, United States
Posted: May 10, 2010 at 8:05 AM / IP Logged  
I finished up the install last night. Only took  4 months! LOL. I'm pleased with the results and I'm glad I did it myself. Thanks to all the great guys that posted and helped me out. If you are installing in a 2010 Fusion here is a quick summary.  Viper 5901 - DEI DTIMAZDA Module -  Two Relays and Sockets -  These are what I needed to install my unit. You can get by without the DTIMAZDA if you use the domelight circuit for your door trigger. Relays were for the seats and defroster connections. Remove the access panel on the side of the dashboard (drivers side), the headlight switch / info cluster pod, (these two are more easily removed by putting your hand under the dash and relasing the tabs with your finger), Dash panel below steering column (pops off) and lower steering column cover (two Philips, one Torx screw). Removing these four covers should give you access to nearly everything you need. The seats and defroster require you to remove the center dash facia around the radio / Nav unit. You do not need to remove the drivers kick panel. Disconnecting battery didn't cause me any problems on my Sport model. Glad to answer any questions about this install. I might try to add window and sunroof modules down the road. I also might post a video on you tube later. So, thanks again to everyone for your help!
Page of 5

Sorry, you can NOT post a reply.
This topic is closed.

  Printable version Printable version Post ReplyPost New Topic
You cannot post new topics in this forum
You cannot reply to topics in this forum
You cannot delete your posts in this forum
You cannot edit your posts in this forum
You cannot create polls in this forum
You cannot vote in polls in this forum

  •  
Search the12volt.com
Follow the12volt.com Follow the12volt.com on Facebook
Tuesday, April 23, 2024 • Copyright © 1999-2024 the12volt.com, All Rights Reserved Privacy Policy & Use of Cookies
Disclaimer: *All information on this site ( the12volt.com ) is provided "as is" without any warranty of any kind, either expressed or implied, including but not limited to fitness for a particular use. Any user assumes the entire risk as to the accuracy and use of this information. Please verify all wire colors and diagrams before applying any information.

Secured by Sectigo
the12volt.com spacer
Support the12volt.com
Top
the12volt.com spacer