the12volt.com spacer
icon

2001 lexus is300 viper 5704v


Post ReplyPost New Topic
< Prev Topic Next Topic >
ward1722 
Member - Posts: 10
Member spacespace
Joined: November 24, 2013
Location: North Carolina, United States
Posted: November 24, 2013 at 5:58 PM / IP Logged  
What is the best way to hook uo the door lock and unlock. I don't mind if all doors unlock at the same time.
triniforever 
Copper - Posts: 323
Copper spacespace
Joined: November 12, 2008
Location: New York, United States
Posted: November 24, 2013 at 6:17 PM / IP Logged  
On that car you need to look at DEI tech tip 1070 Toyota/Lexus door lock interface .A relay and two diodes are required. Bulldog security has the tech you need document you need and it's free to access.
triniforever
ward1722 
Member - Posts: 10
Member spacespace
Joined: November 24, 2013
Location: North Carolina, United States
Posted: November 24, 2013 at 6:24 PM / IP Logged  
I have that document and the relay and two diodes.
I'm not sure what wire it is saying to hook the second diode to in the door tha t goes to the door ecu in the diagram.
Thanks
triniforever 
Copper - Posts: 323
Copper spacespace
Joined: November 12, 2008
Location: New York, United States
Posted: November 24, 2013 at 7:25 PM / IP Logged  
To find those wires you need to go inside the drivers door panel it's on the master switch I believe , look at the document it should tell you what color wires you need for your car.the door ECU is also inside the drivers door if Im not mistaken
triniforever
yellow_cake 
Copper - Posts: 178
Copper spacespace
Joined: December 01, 2011
Location: Saskatchewan, Canada
Posted: November 26, 2013 at 8:55 PM / IP Logged  
As triniforever states, the 3 wires are all coming from the driver's door switch.
There is only one GREEN/ red (lock) and GREEN/ black (unlock) colored wires. However there are more than one blue/black colored wires so you need to test each to find the lock detection wire.
Test using the key in the door lock cylinder, make sure the door switch module is plugged as well.
The lock wire will show ground when the key is turned to the lock position; unlock wire will show ground in the unlock position; the lock detection wire will also show ground in the unlock position if I'm not mistaken.
It doesn't matter which side of the relay you attach the 2nd diode to for the lock detection wire. That relay will only interrupt that wire during locking, so it will get the pulse from the unlock no matter which side you connect to.
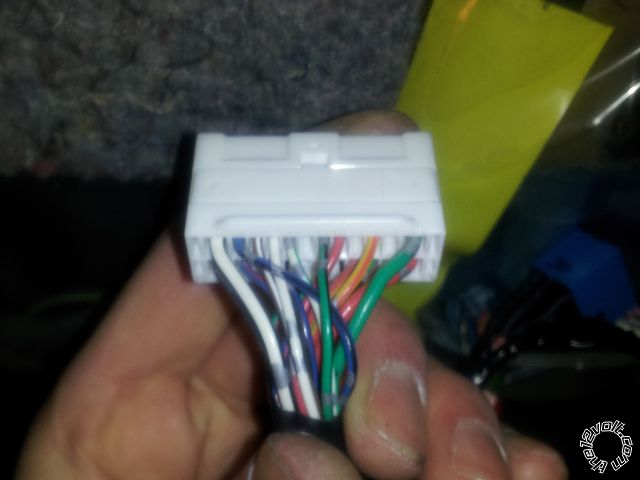
IS300 driver's door switch harness connector:
2001 lexus is300 viper 5704v -- posted image.
ward1722 
Member - Posts: 10
Member spacespace
Joined: November 24, 2013
Location: North Carolina, United States
Posted: November 28, 2013 at 8:02 AM / IP Logged  
I got them hooked up and works great and to figure out which blue black wire to use I looked at my door unlock and lock wires and they have two silver dots on them from factory so I looked at the blue black wires and one of them had two silver dots and that was it.
ward1722 
Member - Posts: 10
Member spacespace
Joined: November 24, 2013
Location: North Carolina, United States
Posted: November 29, 2013 at 7:50 PM / IP Logged  
Is there anything special with hooking up the remote start or anything extra you need for it to work.
How do you get the park lights to work I've tryed hooking it to the red wire going to the harness going to the switch but it doesn't work
yellow_cake 
Copper - Posts: 178
Copper spacespace
Joined: December 01, 2011
Location: Saskatchewan, Canada
Posted: November 30, 2013 at 1:56 PM / IP Logged  
Nothing extra, straight forward assuming it's an automatic.
The red wire at the headlight switch is a negative trigger. First make sure you have the right wire by testing with a digital multimeter. 2nd make sure you are using a (-) parking lights output from your remote starter.
You will need a bypass module such as an Xpresskit PKALL, Fortin KeyOverrideAll, etc.
You have 2 ignition wires so you will have to use a relay for the 2nd one if your remote starter doesn't have a 2nd ignition wire/flex relay.
You'll need to feed the key sense wire from the status output (ground while running) to disarm the alarm during remote start without unlocking the doors.
Aside from that it's very easy, tach wire it at the ignitor on the driver's strut tower, hood switch you can wire into the factory switch...
ward1722 
Member - Posts: 10
Member spacespace
Joined: November 24, 2013
Location: North Carolina, United States
Posted: November 30, 2013 at 4:51 PM / IP Logged  
do I cut tye ignition two wire and connect the pink/white ign2/flex relay output and the pink/black flex relay input 87a key side (if required) of flex relay
yellow_cake 
Copper - Posts: 178
Copper spacespace
Joined: December 01, 2011
Location: Saskatchewan, Canada
Posted: November 30, 2013 at 6:06 PM / IP Logged  
Do not cut the ignition 2 wire..
H3/1 Pink -- to ignition 1 (BLACK/ red)
H3/2 RED / White -- to +12v constant (white or WHITE/ red)
H3/3 Orange -- to accessory (red)
H3/4 Violet -- to starter (BLACK/ white)
H3/5 Red -- to +12v constant (white or WHITE/ red)
H3/6 Pink/White -- to ignition 2 (blue/red)
H3/7 Pink/Black -- Not connected
H3/8 RED / Black -- to +12v constant (white or WHITE/ red)
Also if you don't want the autolights to come on during remote start, the wire color is GREEN/ YELLOW in the headlight switch harness you can interrupt this wire during remote start.
Page of 2

  Printable version Printable version Post ReplyPost New Topic
You cannot post new topics in this forum
You cannot reply to topics in this forum
You cannot delete your posts in this forum
You cannot edit your posts in this forum
You cannot create polls in this forum
You cannot vote in polls in this forum

  •  
Search the12volt.com
Follow the12volt.com Follow the12volt.com on Facebook
Thursday, April 18, 2024 • Copyright © 1999-2024 the12volt.com, All Rights Reserved Privacy Policy & Use of Cookies
Disclaimer: *All information on this site ( the12volt.com ) is provided "as is" without any warranty of any kind, either expressed or implied, including but not limited to fitness for a particular use. Any user assumes the entire risk as to the accuracy and use of this information. Please verify all wire colors and diagrams before applying any information.

Secured by Sectigo
the12volt.com spacer
Support the12volt.com
Top
the12volt.com spacer