Modifying a remote control.
Printed From: the12volt.com
Forum Name: General Discussion
Forum Discription: General Mobile Electronics Questions and Answers
URL: https://www.the12volt.com/installbay/forum_posts.asp?tid=86737
Printed Date: May 14, 2026 at 12:03 PM
Topic: Modifying a remote control.
Posted By: tonestor
Subject: Modifying a remote control.
Date Posted: December 06, 2006 at 5:02 PM
I am new to this site. I signed up to find out how to modify my car stereo remote. I have a Jeep with a soft top. I built a center console and have the stereo mounted inside of it to help prevent theft. There is a small door that I can open to only expose the stereo. What I would like to do Is install buttons on the outside of this door so that i can keep it closed and still operate the stereo. The head unit came with a remote and I was thiking that there must be a way to tie in these exterior buttons into the remote and have the remote mounted inside of there stereo cabinet. But I can't figure out a way to do it. Hopefully someone can tell me if it will work or not. And if it can be done can anyone give me step by step instructions. Thank you
Replies:
Posted By: i am an idiot
Date Posted: December 06, 2006 at 7:27 PM
Posted By: tonestor
Date Posted: December 06, 2006 at 11:17 PM
Thanks for the link. I might end up doing something like that. But I would like to have my own custom buttons on top of the center console.
Posted By: Custom_Jim
Date Posted: December 07, 2006 at 10:50 AM
tonestor wrote:
I would like to have my own custom buttons on top of the center console.
You can take the remote control or the radio aparts and solder wires off of the push button contacts wiring points and add your own momentary switches. Below is how I did it on my 73 Nova. I took an old Alpine faceplate to get the square buttons out of it, used some tack switches from work, made my own fiberglass housings for the backside of the steering wheel and then used some electrical parts to be able to remove the battery in the original remote control (housed under the horn button) to where I don't have to feed it batteries. https://rides.webshots.com/photo/1091561589049730488BZcWqw Jim ------------- 1968 Chevy II Nova Garage Find 2012
1973 Nova Custom
1974 Spirit of America Nova
1973 Nova Pro-Street
Posted By: tonestor
Date Posted: December 07, 2006 at 3:50 PM
Thanks Jim, nice work.
Posted By: Custom_Jim
Date Posted: December 07, 2006 at 4:30 PM
tonestor wrote:
Thanks Jim, nice work.
No problem and thanks for the compliment. You now have some options to do what you want, it's just how much you want. Thinking about this too if you are using buttons and they are on top (or even on the sides of the center console) I would also think about water resistant style switches or keyboards. I had an old Alpine alarm keyboard in my 73 Nova and accidentally spilled a soda on it and the liquid got inside and shorted out things. I did some work with a customer's 33 Dodge truck and I installed the Pioneer remote keypad/display in the overhead console and while designed for a boat it is water resistant. Jeeps with hardtops and soft tops I've heard have more problems with the interior getting wet than other types of vehicles. Good luck on your design and project. Post back with the final work. Jim ------------- 1968 Chevy II Nova Garage Find 2012
1973 Nova Custom
1974 Spirit of America Nova
1973 Nova Pro-Street
Posted By: geepherder
Date Posted: December 07, 2006 at 8:54 PM
If you don't want to disassemble your remote, another option would be to use a universal steering wheel interface such as the PAC SWI-X. You can mount your buttons where you want, and use different resistors for each function.
-------------
My ex once told me I have a perfect face for radio.
Posted By: tonestor
Date Posted: December 13, 2006 at 5:22 PM
Thanks for the resposes you guys. I hope my project turn out good.
Posted By: gus1
Date Posted: December 14, 2006 at 5:07 PM
Could always do the faceplate in one of the sunvisors...... most are only 14 pins or so, some slight soldering, an old printer cable....... voila!
-------------
Wherever I go, that is where I end up......
Posted By: philaf
Date Posted: December 14, 2006 at 9:53 PM
crack remote in half (along the seam, not as in breaking it) and remove the guts from it... take the empty top piece and set it where you want it to go on the center console.. trace around the piece and then cut that shape out of the center console... epoxy the remote piece into the spot you just cut out, making sure not to get any epoxy under piece.. gotta make sure the thing will go back together again... bondo the edges of the piece, to make it look like one smooth piece (but with the holes for the buttons still in it)... paint it with a textured paint, trying to match factory pieces.. on remote pcb, solder leads onto the power points (where the battery goes) and adapt it for 12v power using a resistor / regulator setup, kinda like the led thing in the download section of this site... also on pcb, desolder the infrared led and extend the lines so you can put it on the front of the console, where it can see the deck... snap remote back together under console, and run lines to power.. enjoy custom remote sexiness!
Posted By: philaf
Date Posted: December 15, 2006 at 4:41 PM
so i got bored at work last night, and i decided to rip apart an extra alpine remote that was laying around and flush mount it into a sheet of abs. put maybe an hour into it and it came out pretty decent.. took a few pics along the way, so when i get home tonight i'll post some pics. all in all it was a pretty easy job.. now i just gotta figure out what to do with the biggest car remote in the world.. hahaha (the abs piece is 12" x 12")
Posted By: philaf
Date Posted: December 16, 2006 at 3:09 AM
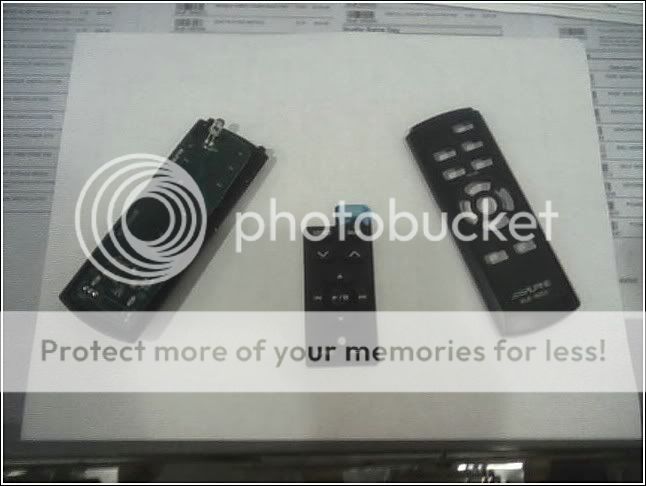
not sure if anyone cares, but here's the pics i promised..
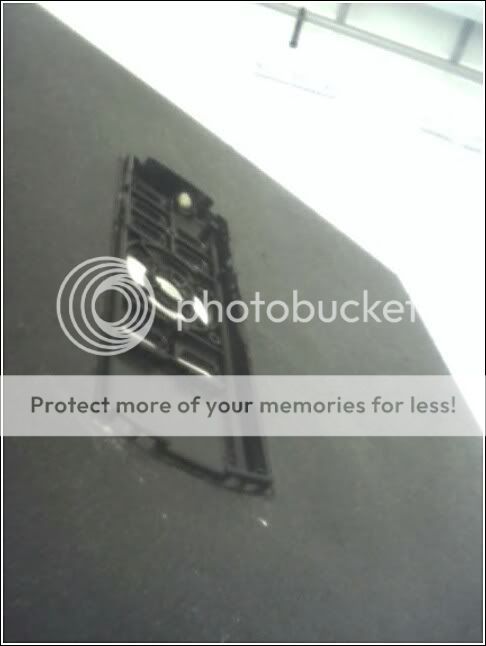
step 1.. take the remote apart
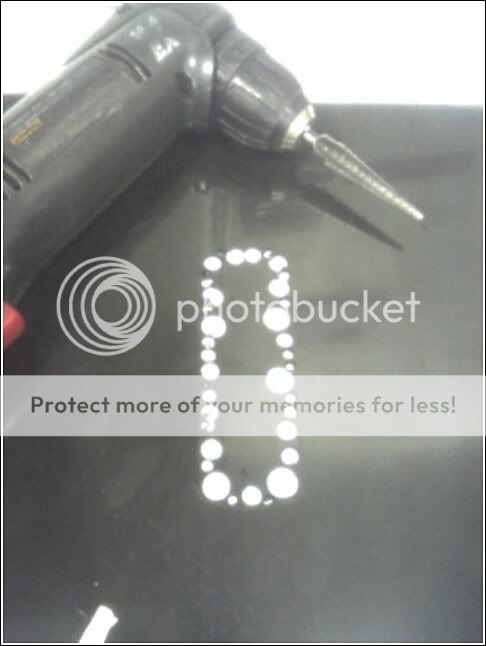
step 2.. trace upper shell onto desired location

step 3.. start removing material (sucks when you leave your dremel at home)
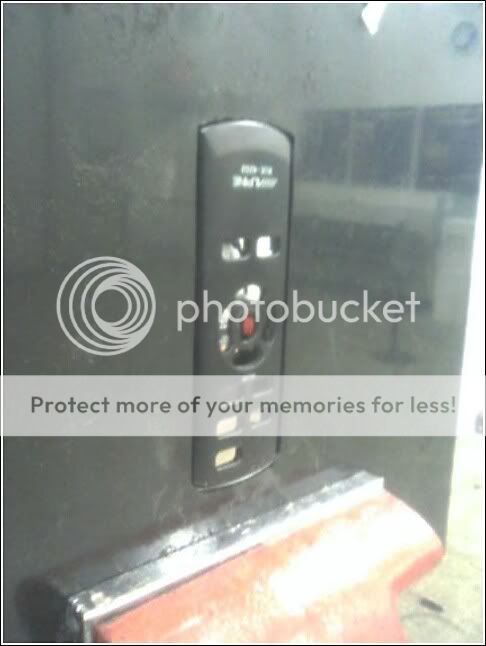
step 4.. test fit the piece. needs to be nice and snug
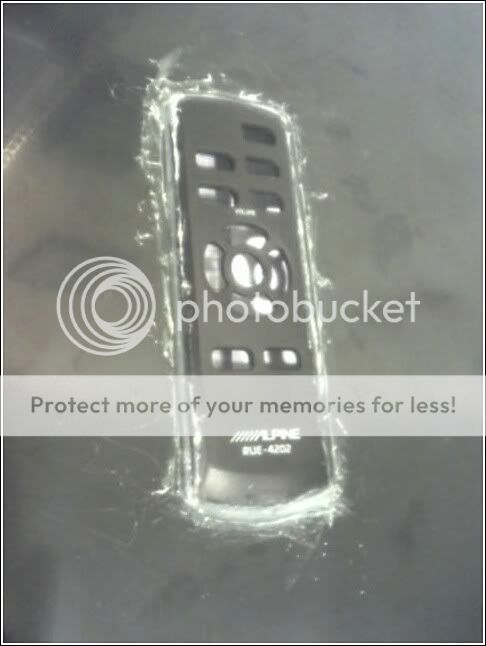
step 5.. epoxy the pieces together, making sure to keep all epoxy on the front
here's a shot from the back, showing the mounting rail sitting above the surface
step 6.. slap on some bondo. i kinda over-did it, but oh well, that's what electric sanders are for
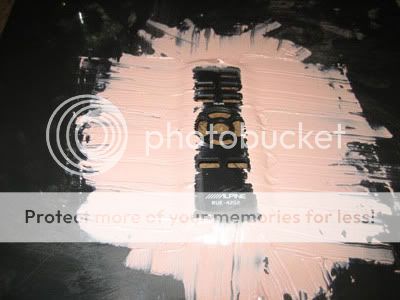
step 7.. sand her nice and smooth, trying to get the pieces to blend together
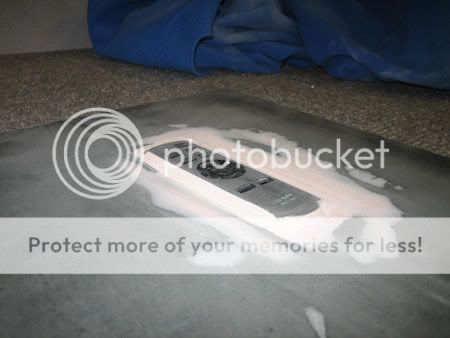
step 8.. paint surface and test fit the button pad to get an idea what the finished product will look like. i used some cool dashboard texture paint i had laying around
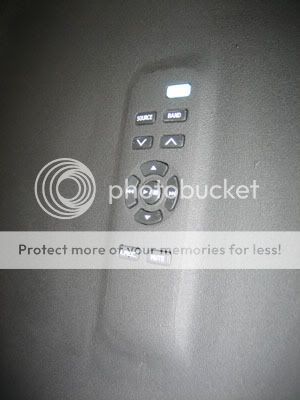
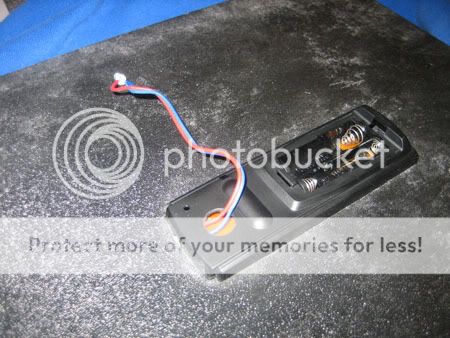
step 9.. snap the remote back together again after extending the led outside the case. i just drilled a simple hole and ran the lines right thru. the same method could be used to extend the battery contacts, i just didn't care to in this project
well that's it.. pretty simple, only took about 30 minutes to do (excluding the misc drying times of course) had this been for an actual car i woulda took a bit more time getting the final product a little smoother
anyways, hope this gives someone some useful ideas
|