Fiberglass Door Panel Pictures
Printed From: the12volt.comForum Name: Fiberglass, Fabrication, and Interiors
Forum Discription: Fiberglass Kick Panels, Subwoofer Enclosures, Plexiglas, Fabrics, Materials, Finishes, etc.
URL: https://www.the12volt.com/installbay/forum_posts.asp?tid=107248
Printed Date: March 22, 2026 at 6:34 AM
Topic: Fiberglass Door Panel Pictures
Posted By: silentblackhat
Subject: Fiberglass Door Panel Pictures
Date Posted: September 05, 2008 at 11:08 PM
Hey guys, i am well into(but not close to being finished with) my door speaker pod piece. I know it would be better to make kick panels but with where my clutch is and the way i drive with my feet when its not on the clutch, my foot would be bound to mess it up down there.
I have a 1999 Honda Civic EX Sedan that I am doing this in.
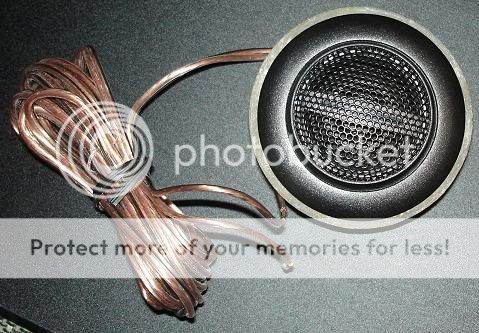
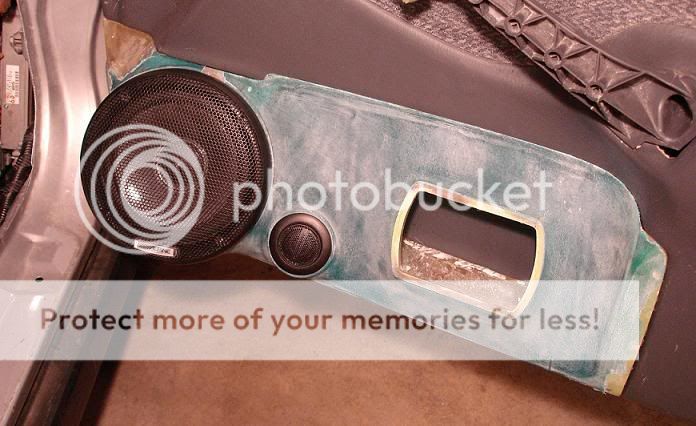
I have 6.5 " Alpine Type-R Components for the front powered by an alpine MRV-T320 amp.
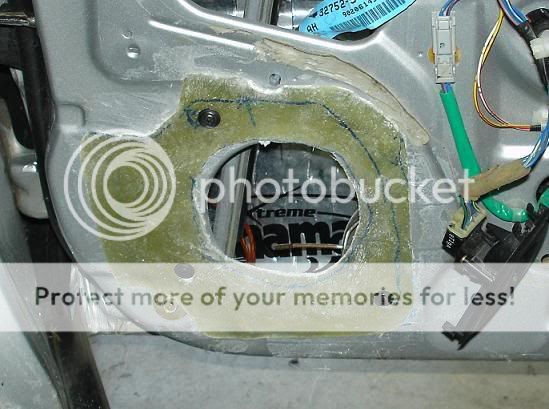
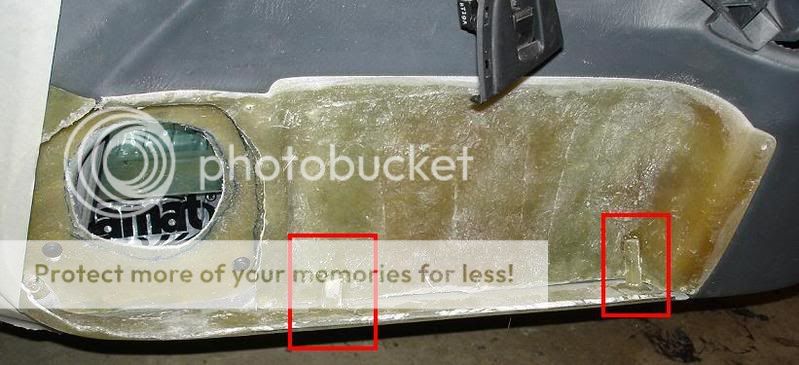
This following picture is of the inside of a 1999 civic but its not my color. THe box in red is what I am replacing: 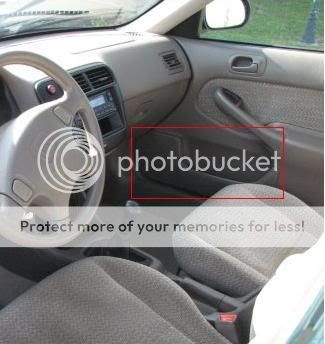
The way I am doing this is that i made the base for it by coating the door panel in mold release wax and fiberglassing straight on it; it released very nicely from the door...it didnt stick at all when pulling it off. I used many coats of mold wax though. next i made a mold out of fiberglass and urethane rubber. THis mold is the outside part of the factory speaker pod/door-pocket so when i make my door piece, it will have the factory "trim" on the outer edge of the piece so it mixes in well with the existing door.
This is the door waxed and masked off: 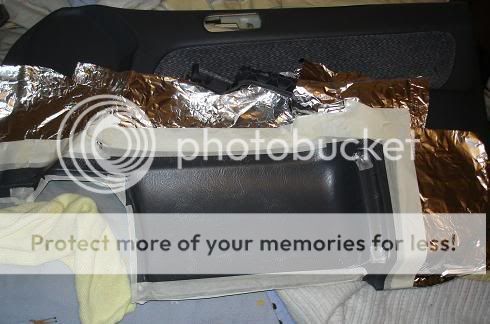
Now here is how I made the mold so i can make a copy of the outer edge of the door panel piece.
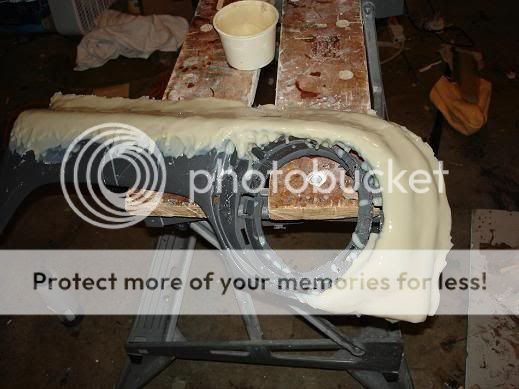
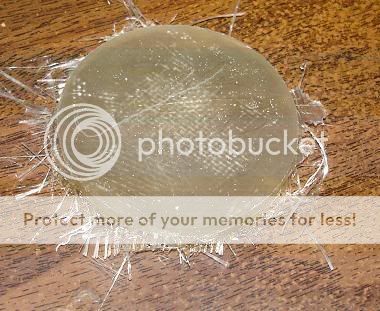
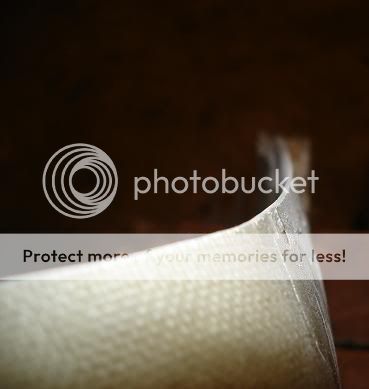
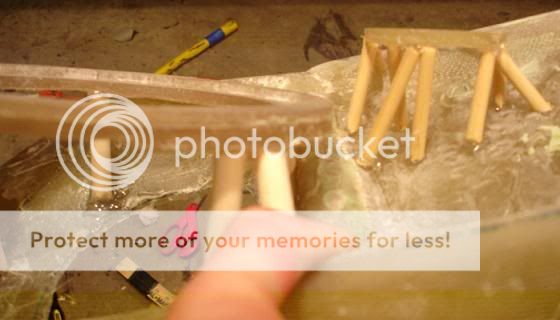
First coated the piece in mold release wax and brushed on Poly40 Urethane rubber. I wish it would have been thicker because i had to keep brushing back on the runoff rubber. After i worked with it in one small batch, i let it sit for a while so it woulds tart to thicken up: 
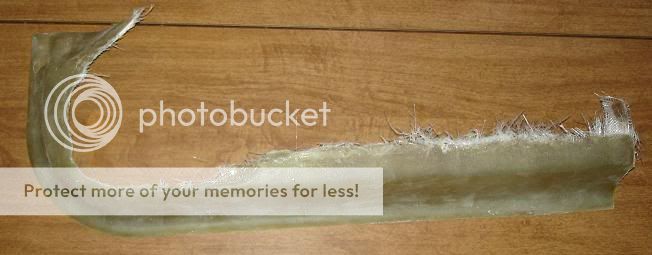
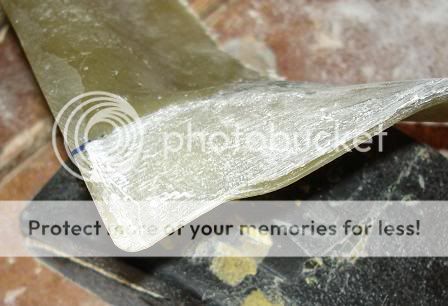
This is jumping ahead a little but this is the rubber trimmed and i am about to make the "mother mold" which is the backing for the floppy rubber: 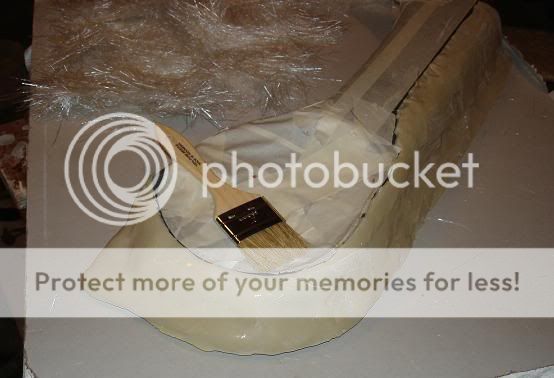
I wish i would have taken more pictures but here is the jump ahead to the fiberglass piece being trimmed; both the fiberglass and rubber is sitting next to eachother: 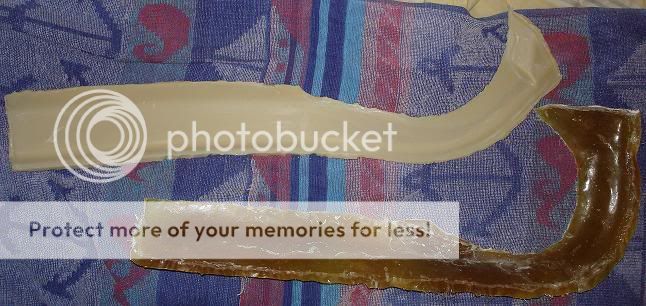
....and this is the mold and rubber together: 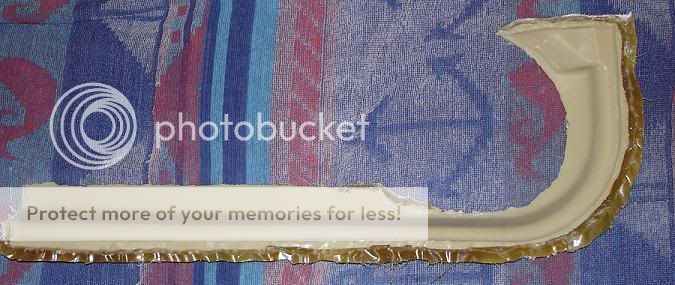
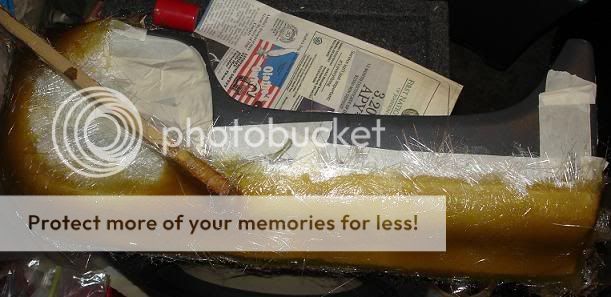
Tonight I fiberglassed the inside of that. Again, i applied mold release wax to the rubber and then fiberglassed it; its curing right now as i type this: 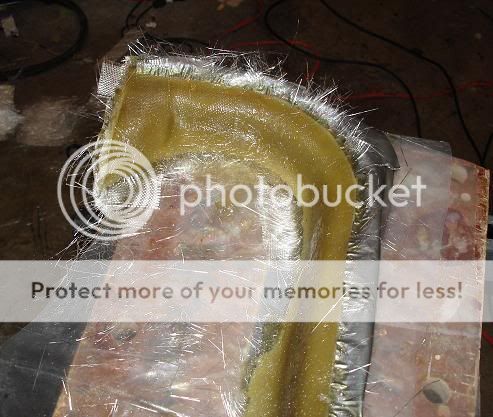
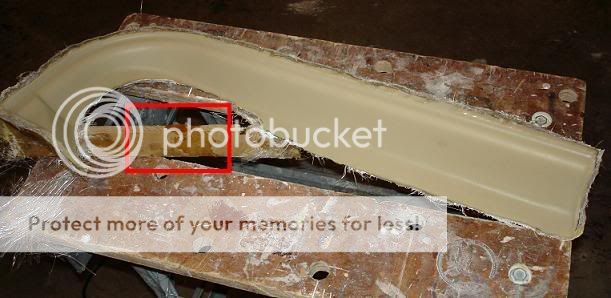
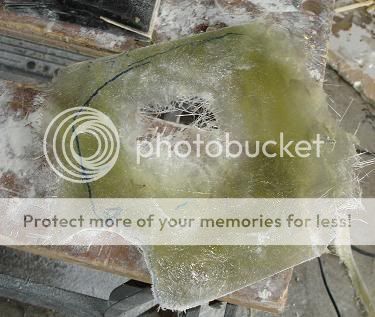
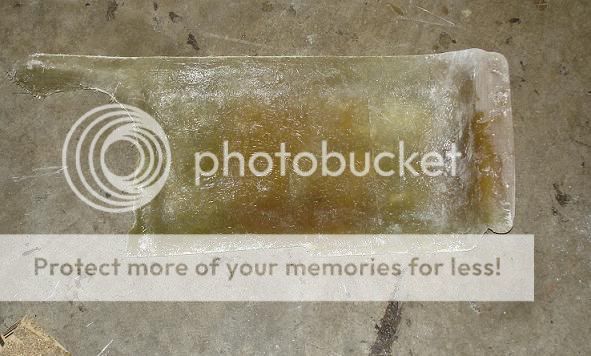
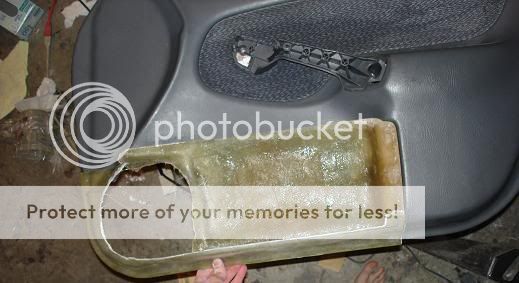
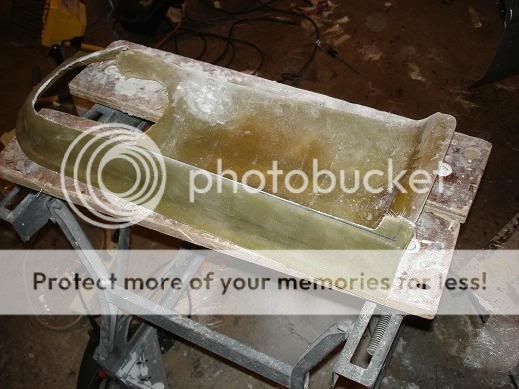
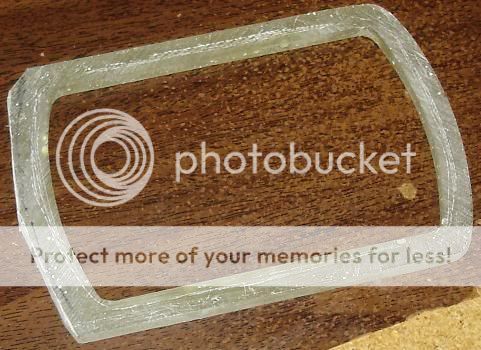
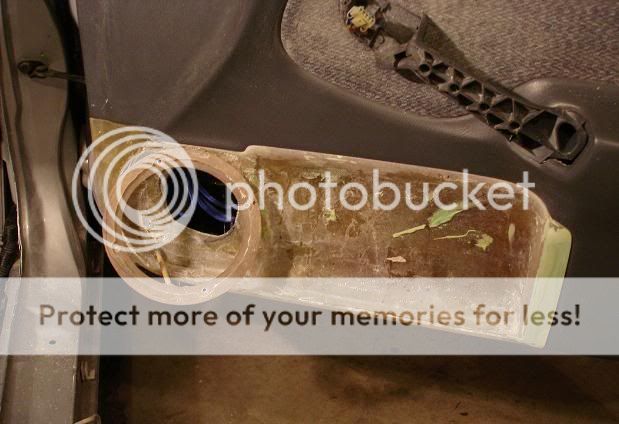
Here is the piece pulled from the mold. Other than having to trim everything, its a near perfect copy of the original's outer edge...i say near because there are a few spots that have a pin hole or 2 but thats fixed with bodyfiller when im finishing the piece up: 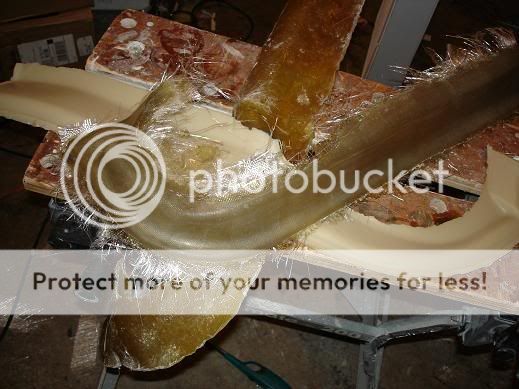
UPDATE 09/08/08
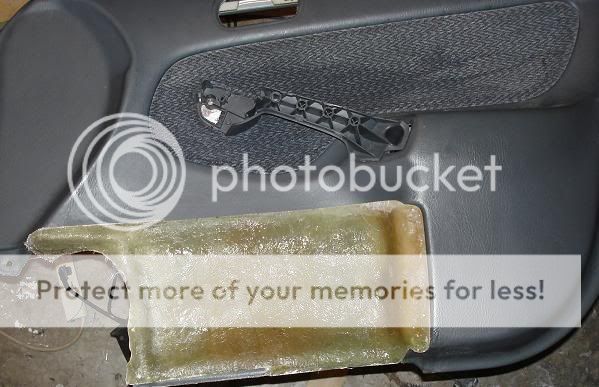
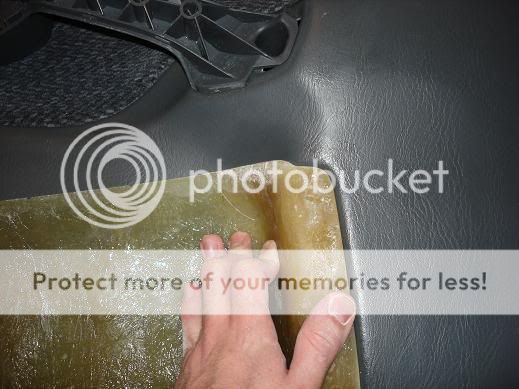
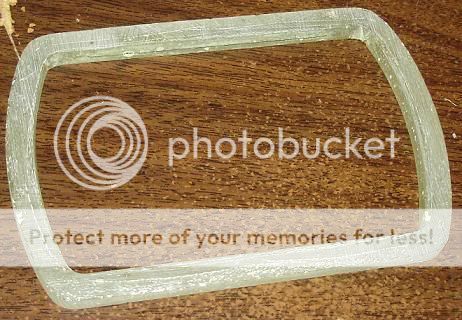
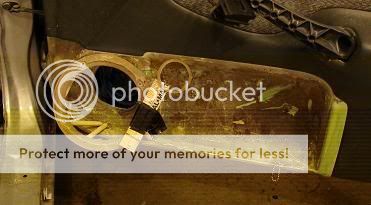
Tonight I trimmed the outer edge of the piece. There is a ittle more to do but, its good enough for a picture. This part has turned out rather well. When I get a chance, i am going to trim the inside portion of this; the bottom straight part ill have to cut exactly about halfway up where it starts to curve because thats edge of where the cloth will stretch over the piece. if its cut too much, there will be a line shown; i want to make it smooth.
.....more pictures to come!
Replies:
Posted By: black97mirage
Date Posted: September 13, 2008 at 10:10 PM
Where do you get the liquid rubber? and the mold release wax?
-------------
I drive a 1997 Mitsubishi Mirage LS Coupe. I love it and I've got a knack for the 12volt stuff.
Posted By: silentblackhat
Date Posted: September 14, 2008 at 2:42 AM
If the local hardware store fiberglass resin(most likely bondo brand) works for everyone, then great. Its just that the hardware store has this wax in it when it cures, the stuff from USComposites comes without wax. Also its easier to work with when laying the glass down; its a little thinner so it flows more. I got the Standard 435 Layup Resin. The pieces feel a lot more rigid when made with the 435 resin.
I got the Polygel 40 rubber that, if you have a stiff mother mold like i made, will work really well. I would recommend when applying this rubber to wait till it starts to thicken up before applying it..it creates less run off that you will have to catch with the brush and reapply back on....unless you are rich and want to let it just run off and spend more money on RTV rubber! lol.
I applied a few coats at different points of the piece because of the different curves it has.
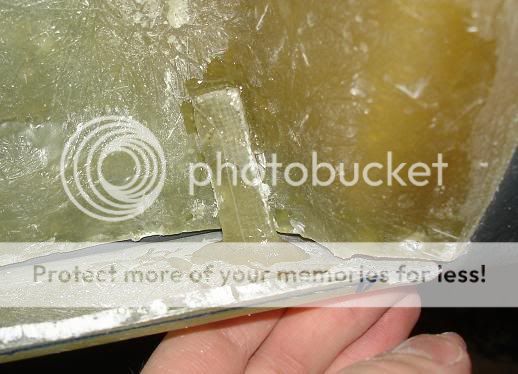
I re-made the mother mold(the piece that holds the rubber in the correct position) because when i tried to test-fit the copied fiberglass piece, it was out of alignment. so i tried to fit my original door piece into the mold and i saw that the first mother mold that i made (shown right now above) bent around the "C" part where it wraps around on the left side. This time i made a MDF support and fiberglassed that to the new mother mold so it cant shrink or whatever it did. I should have pictures up soon but for now, this is the making of the new mother mold; this needs to be trimmed:

Update 9/18/08:
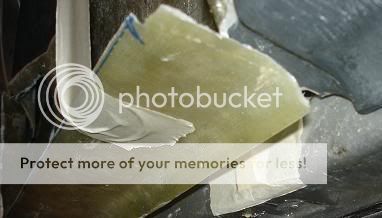
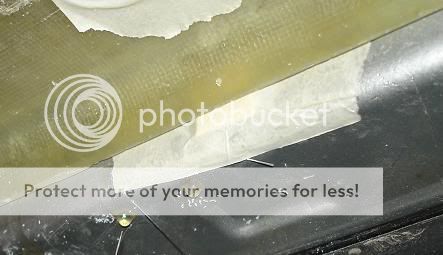
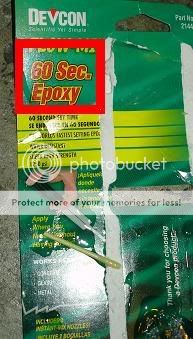
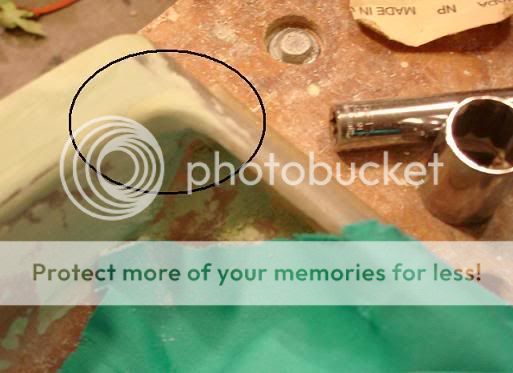
Well I tried to fit the original piece back into the mold after it cured and it didnt fit exactly right again!!...except for that it was only a little out of alignment this time. So what i did was break the "bar" support, put the original piece in the mold, put epoxy inside the broken bar joint and then pulled/twisted the 2 pieces(the parts on each end of the break) until all parts aligned perfectly with the original. I can tell you this is where you will want the "60 second" epoxy if this happens to you. I could not sit there for 15 minutes holding that perfectly in place. The epoxied part of the joint is shown in the red box:
I am writing this as the following picture cures. I see no air bubbles so I expect this to turn out nearly perfect:
Update 9/19/08:
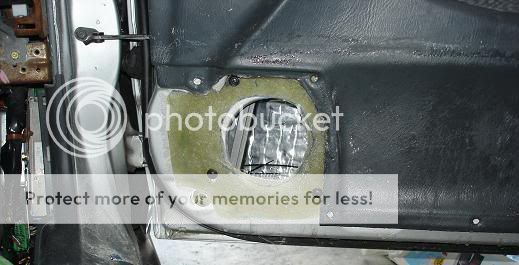
Tonight I took the mold piece out of the mold and i couldnt be happier with how it turned out. I put it up to the door to see how it fit(in this picture it still needs to be fine-trimmed) and it fit perfectly:
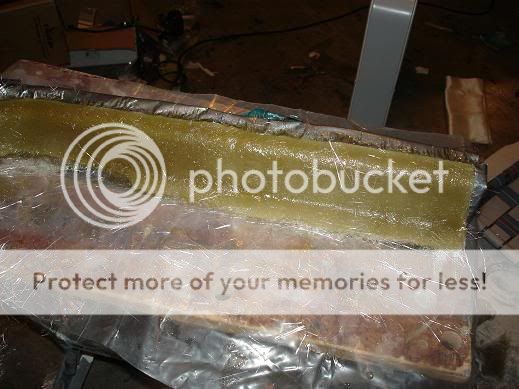
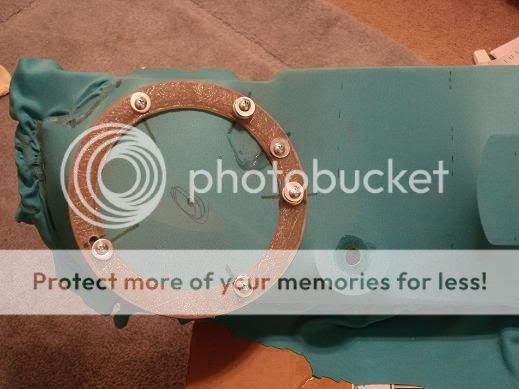
Next I needed to make a "ring" that will be the piece that screws into the door (where the factory screws screwed into the door to hold the factory speaker part). These two pictures show 1. the door taped up and 2. the door with fiberglass curing:
Update 9/20/08:
This weekend i started off getting all the basic parts ready to be bonded together.
Here is the ring that goes ove the speaker hole in the door right when its taken off of the tape and when its trimmed and screwed to the door. I marked what direction is up on the piece so i wont have to guess and try to fit it:
Last night I started on glassing the "base" of the project on the door. This morning I pulled it off the door and started to shape it:
To finish shaping the piece, i needed to clean my door off so i could see the lines of the door perfectly. I can tell you it was a BI##H to do. I had to use GoofOff2 because the Goo Gone and others contain petroleum based solvents that may harm the vinyl....I sure figured that out on my center console when I fiber glassed the hole where the cup holders are; the gray piece is faded where i used goo gone. With this stuff(its water based) you may have to use it a few times but it will come off. Got it at Home Depot:

Here is the background part with a rough cut laid on the door:
This is the part I am working on which is fitting the right side of the piece perfectly to the door panel. where it turns from the right side "bar" around to the top of the piece is a little difficult to get exactly right:
Here is a rough look of waht it will look like when some of the pieces are joined. Still needs to be trimmed but its a look...i gues all i have to imagine is the outer rim of a factory door panel though lol:

Posted By: silentblackhat
Date Posted: September 21, 2008 at 3:56 AM
Posted By: deegz97
Date Posted: September 25, 2008 at 11:13 PM
Posted By: silentblackhat
Date Posted: October 03, 2008 at 12:09 AM
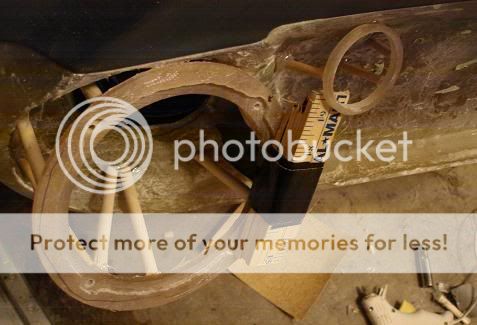
Its been a while, been very busy. The way i want the tweeters to look i will have to cut the MDF really thin(the amount of material between the inside hole and the outside) so i wanted to get something stronger. I had extra rubber material left over so i first made the size of circle i wanted for the tweeter mount, used mold release wax on it and then poured rubber over it. i let it harden/dry for a day, trimmed the sides and then fiberglassed the top of the rubber to make the mother mold. Now i can make as many pieces i want but ill only really need to make 2; one for the passenger side and one for the drivers side.
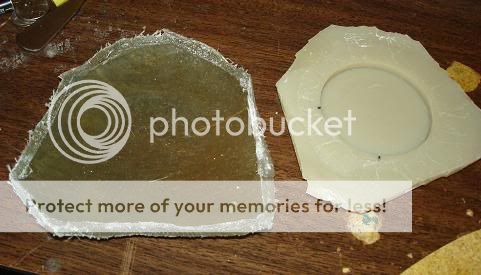
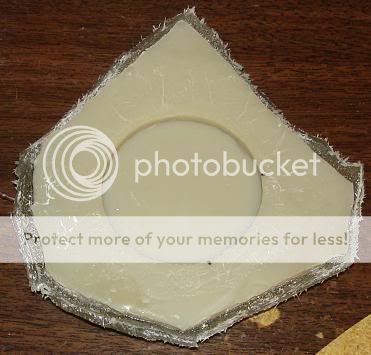

Here i trimmed the top part to match the factory door piece where it is flat and wraps around the side:
Here is where you see the piece fit against the door:
Update 10/04/08:
Last time i left off making sure the main outer edge piece that will be visible was aligned properly. Now it is time to start putting the pieces together.
This may be a 2 person job but i rigged up a set of 2 extra hands(cheap $1 vicegrip knock off and tape around the door attached to the fiberglass) that you can see below. I used a small piece of a wooden stick for cushion between the fiberglass and the grips:
Even though people wont really look at this very easily or too much, i still wanted to align the piece as well as i could. I wrapped a piece of tape around itself enough times to make a thick flat piece. I made it the same thickness as the space between the door panel and the metal of the door. I did this so i can get the exact same spacing without having to look; all i had to do was press the piece against the tape and knew it was the correct spacing:
Now since i was able to align everything (i also had to trim the thickness of the fiberglass piece in some spots to make it fit around some curves/bumps in the factory door panel) its time to start putting the pieces together.
I wanted to make a "tack" hold (like a tack weld i think its called) so i could have it strong enough to stay and then later i would come back and reinforce it with fiberglass resin and mat. For this I used 60 second epoxy. i didnt want to sit there all night holding it. Dont expect to get 60 seconds of working time, this epoxy i had set within 15 seconds:
I used a piece of scrap fiberglass from trimming some pieces to join the 2 pieces together until I go back and fiberglass the 2 pieces together. I first epoxied it to the base part against the door, let it harden and then pressed the molded edge part against it and epoxied it together.
These are the two points at which i epoxied 2 pieces of scrap fiberglass to hold it in place for now
Posted By: silentblackhat
Date Posted: October 19, 2008 at 2:11 AM
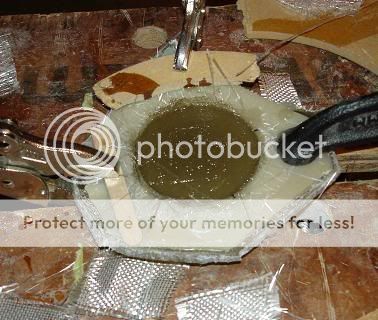
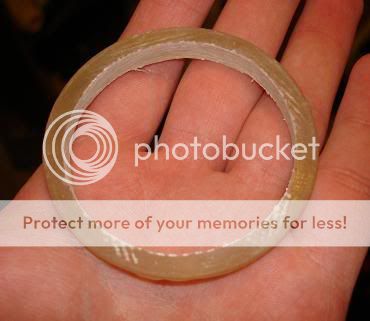
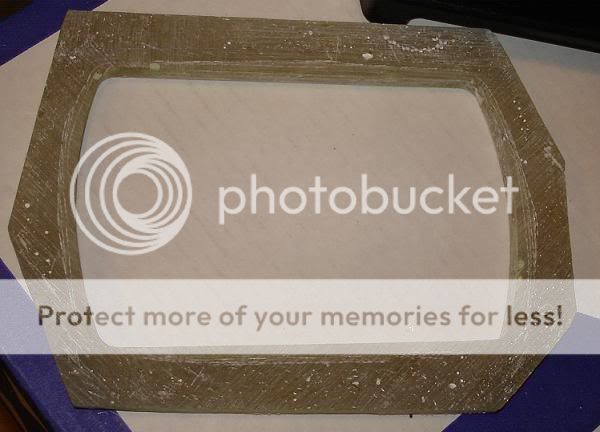
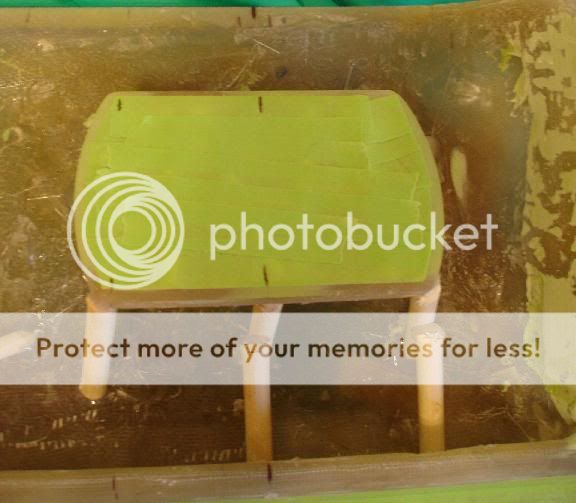
Here is the ring I made for the tweeter. I am not sure if I am going to remake this or not. Im contemplating this because idk if there should be the "lip" that is barely out farther than the tweeter's rim or if it should go on like this:
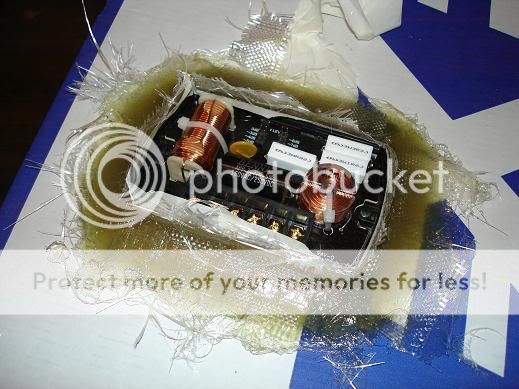
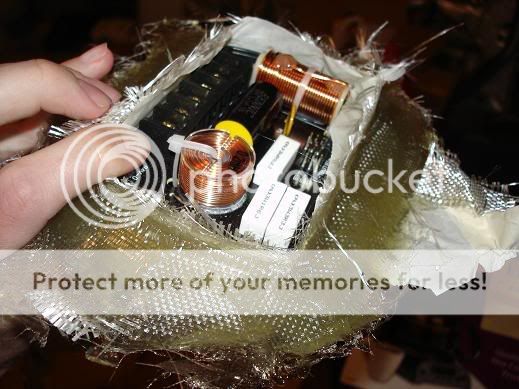
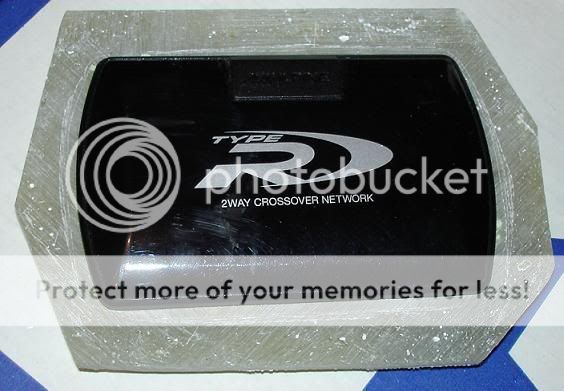
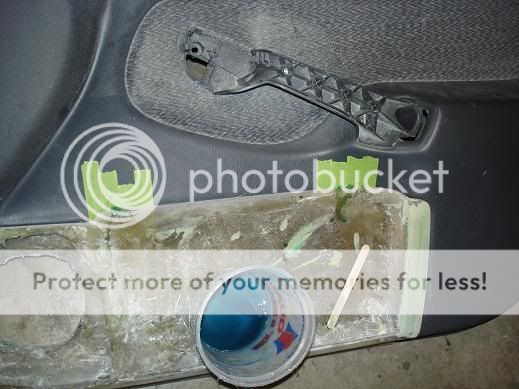
Its been a while. I am waiting for more resin/glass to come in the mail. WHile I have a little resin left, I decided to make the mounting ring for the crossover. The way I did this was, pop off the top of the crossover, wrap a small piece of masking tape around the edge of the crossover so it will be smooth around the perimeter, then used the wide masking tape to cover the rest of the crossover so no resin will get on the electrical components inside the crossover. These pictures are with the tape taken off of the top of the crossover.
After this hardens all the way, I will pop the crossover out and then start sanding it all. This looks like a mess and its hard to explain exactly what im doing but future pics will show what im doing.
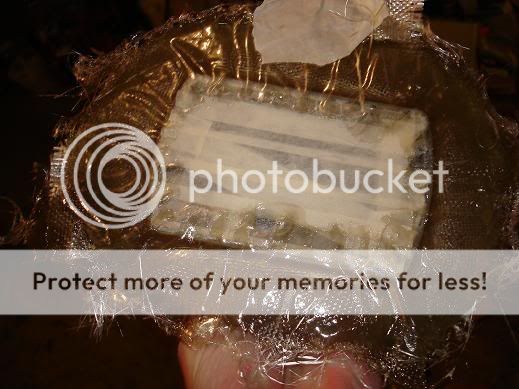
Bottom....which after sanded smooth will actually be the "top"
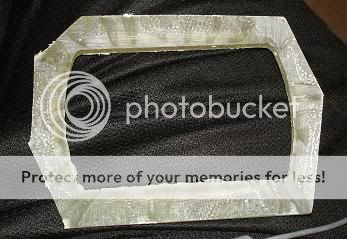
This is the piece starting to be shaped and sanded down
Posted By: mkzilla
Date Posted: October 19, 2008 at 12:46 PM
Looks like your project is coming along nicely.
I am making some kick panels for some Type R components, and I have pics posted on the thread "How to keep resin from sticking?". Right now im finishing up one of the two kick panels, 2nd one still needs to be sanded down, primed, painted, and clear coated :(
Good job on your project though, keep up the good work.
Posted By: schizophrenic
Date Posted: October 24, 2008 at 10:33 PM
Nice work.
Posted By: silentblackhat
Date Posted: October 25, 2008 at 1:03 AM
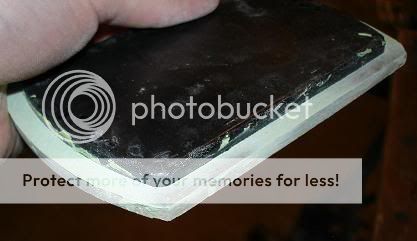
The crossover has a few surface scratches on it :-( but, i guess that might happen anyways through normal wear and tear when it will b open on display...cant really notice them in regular light but with the camera's flash you can.
Here is the crossover piece half done:
Modified by imadigitalgod at 10:00 PM 10/24/2008
Posted By: schizophrenic
Date Posted: October 25, 2008 at 4:07 PM
Nice work. What's drying time on the mold material?
Posted By: silentblackhat
Date Posted: October 25, 2008 at 4:13 PM
also when mixing, do it slow and don't make any air bubbles in the rubber mixture. i just used a popsicle stick and moved it side to side not taking it out of the mixture at all. also i scraped the sides of the container to make sure everything was mixed
Posted By: joyrydn
Date Posted: October 25, 2008 at 9:36 PM
-------------
Make it Euro'n!!!
Posted By: schizophrenic
Date Posted: October 26, 2008 at 10:58 AM
Please post plenty of pictureswhen you;re all done thanks.
Posted By: silentblackhat
Date Posted: October 26, 2008 at 2:15 PM
I think i am going to make this a little thinner but here is what it looks like right now

Thinner, but not rounded yet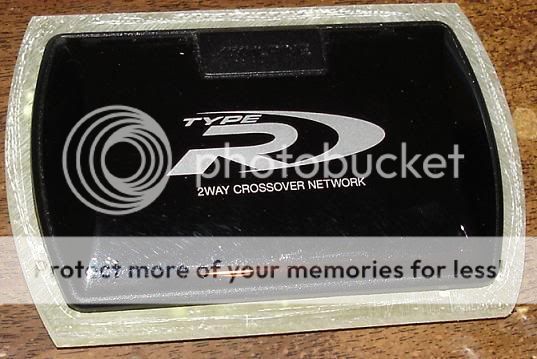
Posted By: schizophrenic
Date Posted: October 26, 2008 at 5:27 PM
Posted By: silentblackhat
Date Posted: October 26, 2008 at 6:39 PM
Posted By: silentblackhat
Date Posted: April 29, 2009 at 4:54 PM
Hey guys, here is a huge Update:
I have the speaker ring made, they look good. I am using my old grills with my new alpine speakers so i had to modify the speaker ring due to the different way the new speaker fits. If i just mounted it regularly, the speaker grill would hover over the speaker ring, it would look terrible. THe way i made this ring is that i made 2: one is to be where the speaker screws into and the other is to fill the gap that wold be there if i just put the grill directly on top of the speaker.
The grill goes over this but i have that part put away right now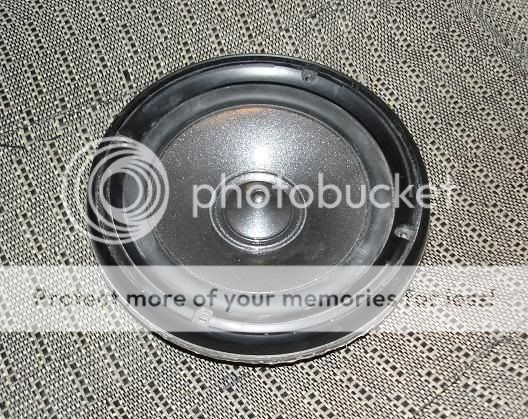
UPDATE:
Well its been a while, too long, but I am back on this project. Now i can finally start mounting the speaker ring, tweeter ring and the crossover mount.
A few adjustments to the piece have been made before I started mounting everything:
I made the edge of this as thin as possible so it will have less of a ledge when its all done:
All edges have been straightened or shaped. The hardest part for me was to shape the part on the right side at the top of the piece where the door dips 90 degrees but also curves around at the top. To make it look good i had to 'freehand' 2 curves on the piece to make it wrap around. I am horrible at free handing things so i took extra time in doin this. This picture is of what it looks like now. IT doesn't look ready in the picture but, i have a crappy camera, and im not photographer, but it is ready. any final adjustments along the edge can be made later after its wrapped; nothing major though: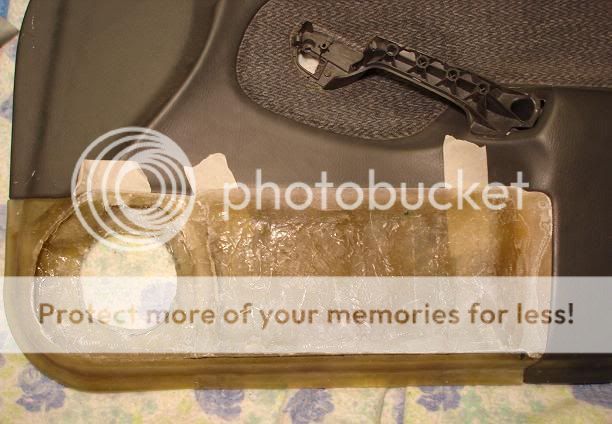
Update:
In this picture, I am fixing some imperfections on the edge of the piece; there were little notches that would make a small wave/crease in the piece that i would have to fix. I just put tape on the door, screwed the piece to the door and put a little dab of resin in each place:

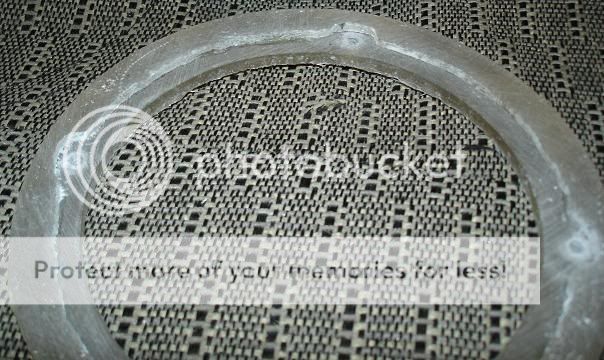
Now, its on to making the crossover mount ring straight and perfect.
I put the molding wax all over the bottom piece of the crossover (which is what I used to initially make the mount ring) and put body filler over all of the edges and sanded them smooth. I noticed when i looked at it closely, the edges weren't perfectly straight; the right side of the crossover had a big wave in it. I sanded the filler smooth and now its all perfectly flat and straight.
I put the crossover mounting ring back on the plastic piece while sanding the edges so there is support for the thin edges...i think this part originally curved because there was a high spot on the bottom side which pushed up causing more of the piece in that spot on top to be sanded so when pressure was relieved, this was a low spot.
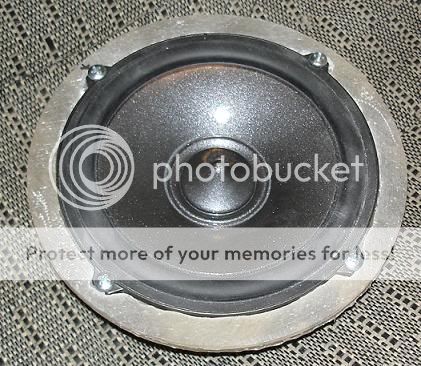
Now since everything is as good as it will get, I am starting to mount the components: first the speaker ring, then the tweeter ring and finally the crossover mounting ring.
Here is a test fit:
The speaker holes are not "straight" to accommodate for 2 possible grills that I want to use. The grill i want to use is made to fit an older alpine speaker. To make this work, this is why the speaker is recessed into the ring. 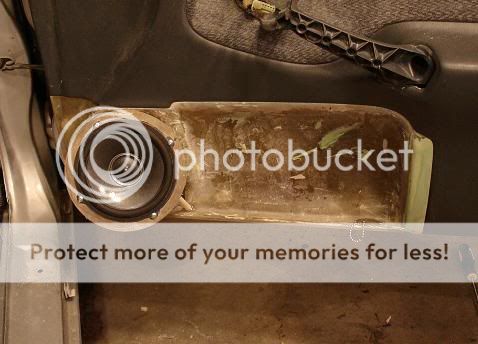
Next was adding the tweeter ring. I wanted the tweeter ring to be pointing exactly the same direction (being parallel) even though its a little higher. I taped a broken up ruler together to make a stack of wood. I then attached this to the large speaker ring so the top of the wood stack was exactly parallel to the speaker ring. I then laid the tweeter on this stack of wood so the tweeter ring would be exactly parallel to the speaker ring.
UPDATE:
I decided to relocate the tweeter. I realized that the tweeter would actually cut into the door panel if it was kept there because of the tweeters depth. I moved it to the bottom corner of the large speaker(woofer cone). I use the same principal of lining up the angle of the tweeter ring with the woofer cone by using a flat piece of wood against the flat plane and extending it out. For those who might attempt this, double sided tape might work. I held all this by hand; it came out perfect but it was hard holding the tweeter ring against the wood at the same time as hot gluing the wooden supports: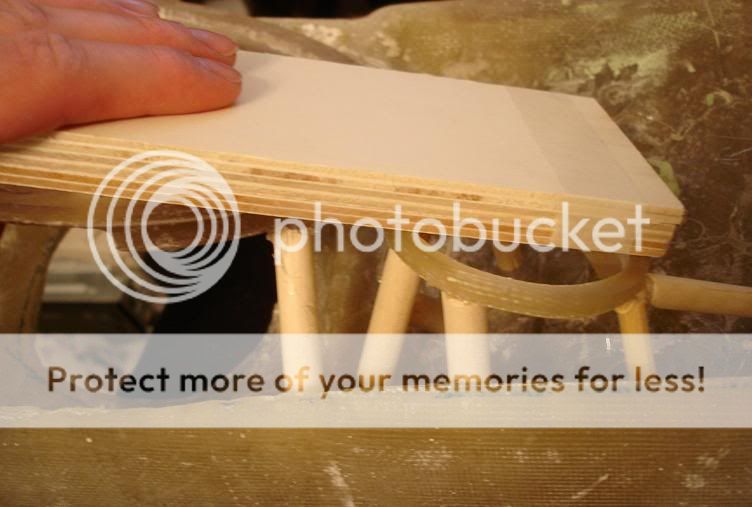
Now it was time to mount the crossover ring. I wanted it to be on the flat plane that goes in a stright line from the top and bottom edge. For this, I laid a stack of 3 pieces of wood and taped it to the piece. I then measured the exact space distance between the top and bottom edge so the crossover ring will be centered; I marked this on the piece of wood. Also, I measured the exact center between the tweeter and the right side edge right when it starts to curve horizontally. I matched this with the exact center of the crossover mounting ring: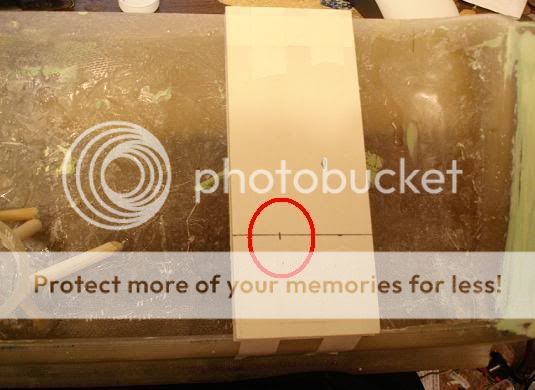
When everything was matched up, i taped the top part of the crossover mounting ring to the wood pieces to hold it still: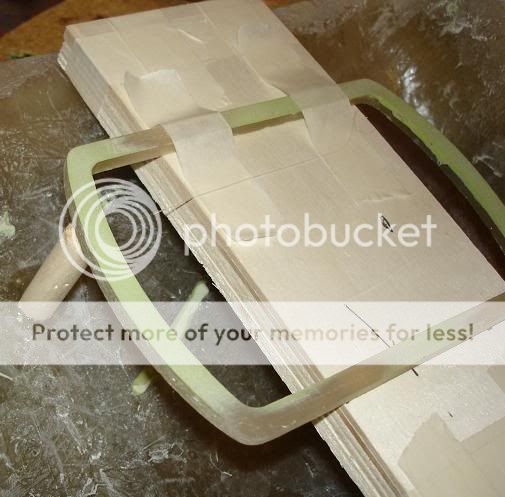
After 4 support pieces were under the crossover ring, i untaped the wood pieces and easily slid it out. I will add more support posts to it:
Now this part is ready for wrapping in cloth and ready to put resin on. Before this happens, I am going to tape off the inside of the speaker ring(both woofer and tweeter) but most importantly ill tape off the inside of the crossover so i wont lose the perfect fit when the resin would run down in there:
UPDATE:
Well I have been wrapping the piece very carefully but here is what has gone on before wrapping was started:
Just to check the "fit" or look of the fiberglass piece, i went around it and stretched a piece of cloth over it to make sure nothing interfered or made the piece look bad. One part that I found was that the very bottom right corner looked sort of bad since it was at a right angle; this didnt look the best so i filled the corner in with body filler and sanded it down to a curved shape. This was done with a large diameter socket wrapped in sand paper:
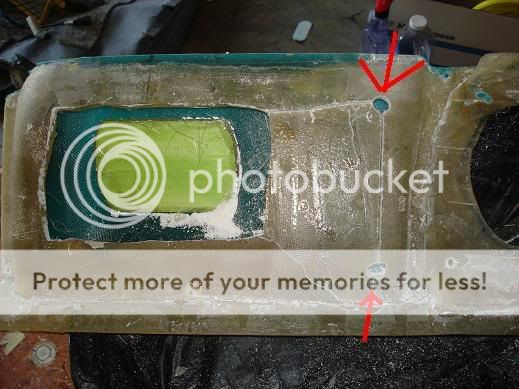
Since I had a perfect fit for the crossover, I didnt want the resin to get inside and mess the spacing up. I covered this with car painting masking tape:
Now its time to wrap the piece with the polyester cloth i got! I got this at Jo Anne's (i think thats how you spell the store name), which is a craft store. I got this kind because its stretchy and easy to work with on pieces that require fine detail. The way that I made this turn out is wherever i hot glued the cloth down at, that same vertical line of thread in the cloth would be at the same vertical position as the bottom. The way i did this was i made marks on the cloth that were on the same vertical row. Also, through trial and error, I learned to stretch the cloth over the high points first, then go back and stretch the lower spots in between the high spots. In this, high spots meant the crossover, tweeter and speaker ring. Low spots were any space in between:

This is not finished being wrapped but you can get the general idea how it will turn out:

Before I put resin on this, I am going to have to hold down the cloth where the speaker rings are (woofer cone and tweeter). I think the way ill do this is, just make another set of speaker rings(which i will use for the drivers side when i make it) using the molds that I made, wax them up with the mold wax, and put them down on top of where the rings are under the cloth. Ill find a way to put tension on them so they lay flat while the resin is curing. for the speaker ring, ill probably just end up screwing it down to to woofer cone ring...but i need to figure something out for the tweeter ring.
This is the corner that is attached:

Now its ready to be fiberglassed! Ill still need to get those speaker rings made to hold the cloth down while its hardening:
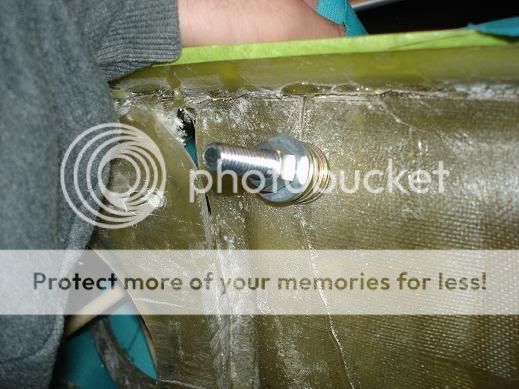
Before i fiberglass the piece just yet, i have to attach the second speaker rings on the outside of the piece so the cloth will be pressed down while its curing. Since the cloth is so tight, if theres a hole, then it will all unravel. To solve this, I drew marks where i am going to put screws in to attach the speaker rings and then put epoxy on it. I would recommend epoxy that has a rating of 5 minutes or more. This is so the epoxy is still fluid enough to soak through the cloth and saturate the later. This epoxy will be able to hold the cloth together when a hole is drilled through it. The tweeter ring gets a big spot because i am going to use a bolt and nut on the other side to hold it down:

Epoxy:
Posted By: bombsquad91
Date Posted: May 19, 2009 at 4:10 PM
-------------
".....um, is that wire hot?"
Posted By: bigjohnny
Date Posted: May 26, 2009 at 5:50 PM
measurement is my big problem, I'm not sure how to get correct measurements on odd surfaces/angles, and how to duplicate something symmetrically... IE dual amp racks, which is what I'm toying with in my head.
Posted By: auex
Date Posted: May 31, 2009 at 12:08 AM
-------------
Certified Security Specialist
Always check info with a digital multimeter.
I promise to be good.
Tell Darwin I sent you.
I've been sick lately, sorry I won't be on much.
Posted By: jack a lope
Date Posted: July 12, 2009 at 11:37 AM
-------------
It's not until you have herd music through a high end system that you notice how badly produced most of it really is.
Posted By: silentblackhat
Date Posted: July 12, 2009 at 12:16 PM
jack a lope wrote:
Your project looks like it is coming along nicely by the way. I can all ways appreciate a job well done.
Thanks. This one is actually almost done now. I have the whole thing fiberglassed on the inside for strength and now im doing the body work to smooth the rough spots and then it should be ready for primer/paint
Posted By: deeg money
Date Posted: August 18, 2009 at 5:24 PM
-------------
Deeg money
"If you cant be good, be good at it"
Posted By: silentblackhat
Date Posted: August 18, 2009 at 6:54 PM
deeg money wrote:
Silent where is the rest of this man.... I always checked on this post you cant ditch us now. let us know whats going on with it. Thanks
Ask and you shall receive! This should be done soon, i got more materials to start the other side. the other side should take MUCH less time since I know exactly what needs to be done.
After it was wrapped, i used epoxy to make it where i can drill through the cloth and not have the cloth unravel. This is so after i put resin on the door piece, i could screw down an external speaker ring to hold the cloth down while it cures.
This picture is of the main speaker ring held down(this is to make sure it will work):
And here is the tweeter ring:

The back side of it:
Now its time to put resin on the piece!
Here is a video on YouTube where I show how I mix the resin and hardener together. I use 2 popsicle sticks and i do it really slowly:
YouTube How to Mix Resin Link
And here is the video of me putting the resin on the door piece. I apologize for the camera zooming in and out slightly, i didnt have the camera set right:
***this is not the full video, it stops half way through due to a camera battery going dead but you get the idea of what im doing***
YouTube How to Put Resin on Door Piece
Remember, after this step is where I screwed down the speaker rings from before.
MAKE SURE TO COAT THESE EXTERNAL RINGS IN MOLD RELEASE WAX BEFORE SCREWING DOWN or you might find that getting them off is impossible.
Make sure to use a respirator, glasses and gloves AT THE VERY LEAST inside a well ventilated place.
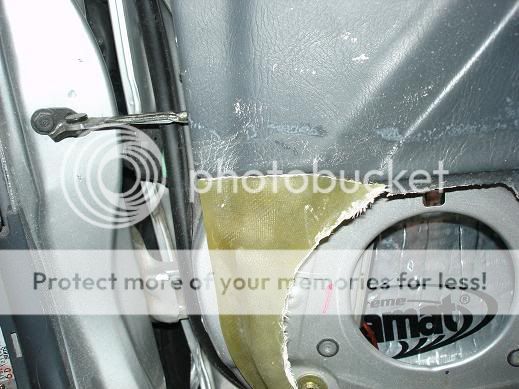
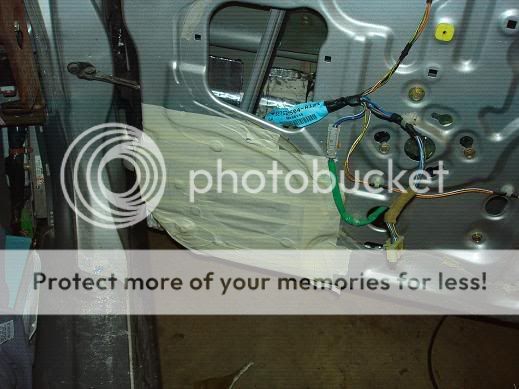
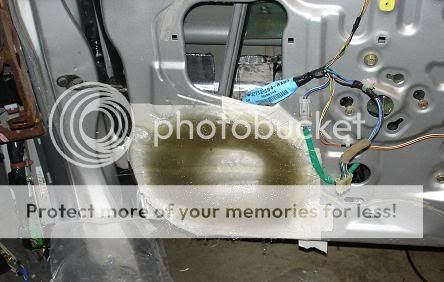
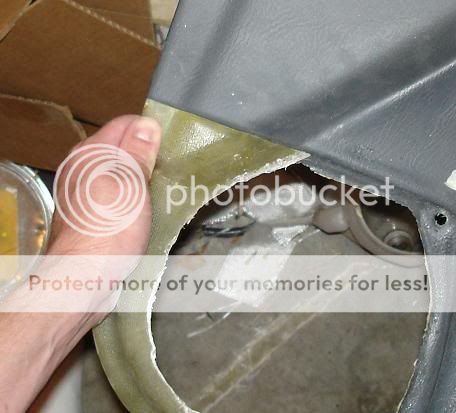
Now since everything has resin and is cured, its time to lay fiberglass mat and resin on the inside. To do this you will need to cut the back off(no one will see this anyways).
The way I did this was drill holes to where i can fit a power jig saw into it and just cut in straight lines. make sure not to have the blade go in deep to poke the front. also, dont put weight on the front face of the piece, this is still pretty fragile till the mat is laid down and cured:
Before you lay the resin inside, i would recommend sanding the inside surfaces first, this will greatly enhance adhesion of the laid fiberglass mat to the existing cured fiberglass.
One thing i would make sure to do is to NOT add extra hardener to speed up curing time in this specific process. Especially on this part, you want just enough for the piece to cure so it wont warp anything due to excessive heat. When I first started out, i would put a lot extra. this was a HUGE mistake because the newly laid fiberglass got very hot and warped(and actually broke through) the front of the piece, so i had to cut the cured cloth shell off and start over from stretching the cloth back over everything.
Make sure to lay glass along the edges inside to attach the front to the already cured fiberglass.
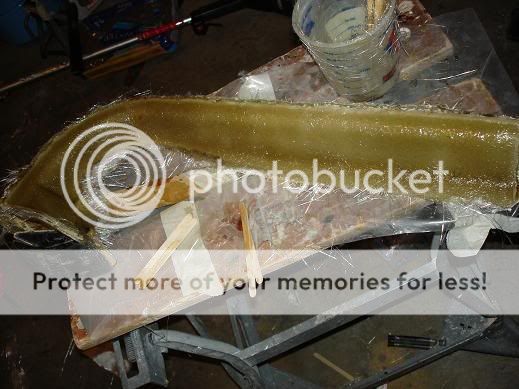
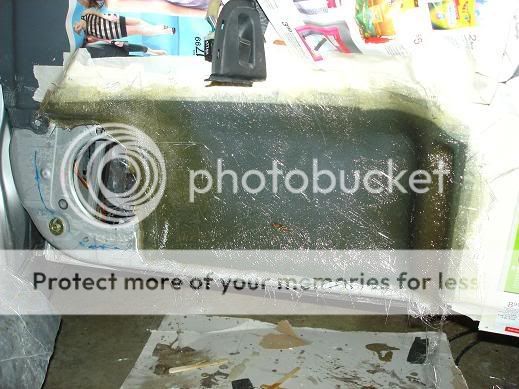
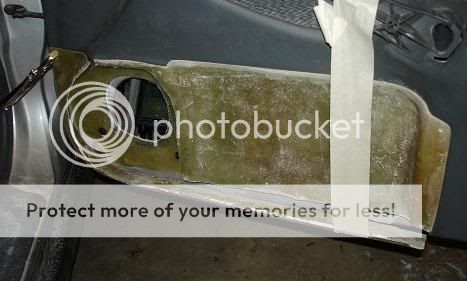
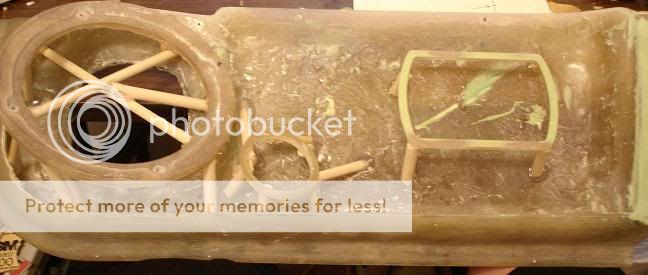
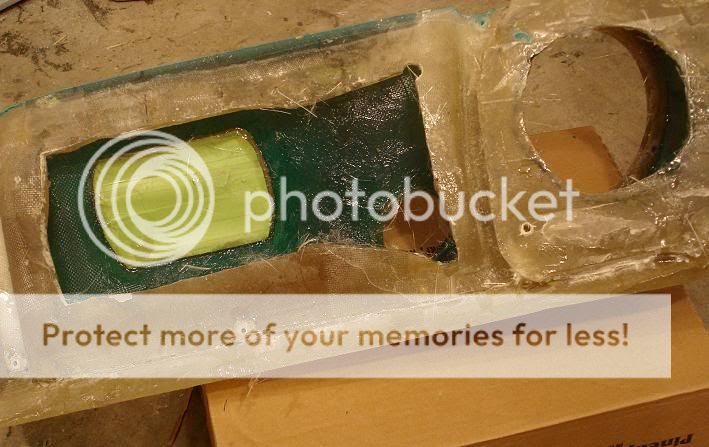
Here is the picture of the back cut open and glassed. It looks like crap on the back but I didn't care because it will be against the door. This is also cut open to make room for installing the crossover:
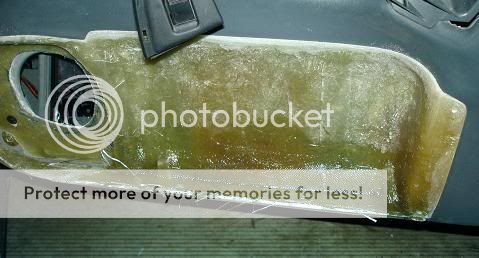
Here is a picture of the piece after everything is glassed. In this picture I also sanded down the face of the piece to start getting it ready to paint. I still have to do body work on it to make it perfect to paint. It looks like crap right now but body work on it will make it perfect:
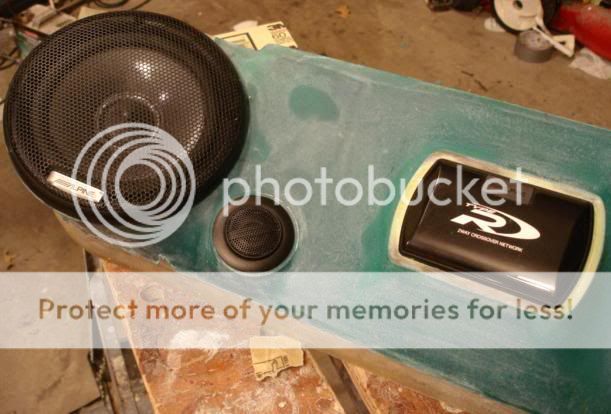
and for a final fit check(this is where it is now) I put it on the door and door panel to make sure everything fits ok. The edges need some work to make it perfect but thats a piece of cake to do.
More to come!
Posted By: deeg money
Date Posted: August 20, 2009 at 8:45 AM
-------------
Deeg money
"If you cant be good, be good at it"
Posted By: silentblackhat
Date Posted: August 20, 2009 at 12:00 PM
I am also getting into video tutorials. I am learning Adobe Premiere so this is a good opportunity.
If you want to see a video tutorial on how I laid the rubber down for the rubber mold, visit my YouTube link (this account is specifically for this project):
Youtube Videos for CivicFiberglassDoor
I would put a specific link to the videos but right now, they are constantly changing. The camera isnt the best but you can clearly see what I am doing. Hope this helps!
(still more to come)