2007 Nissan Pathfinder, Fiberglass Projects
Printed From: the12volt.com
Forum Name: Fiberglass, Fabrication, and Interiors
Forum Discription: Fiberglass Kick Panels, Subwoofer Enclosures, Plexiglas, Fabrics, Materials, Finishes, etc.
URL: https://www.the12volt.com/installbay/forum_posts.asp?tid=132139
Printed Date: April 29, 2026 at 2:28 PM
Topic: 2007 Nissan Pathfinder, Fiberglass Projects
Posted By: krush
Subject: 2007 Nissan Pathfinder, Fiberglass Projects
Date Posted: September 05, 2012 at 1:15 PM
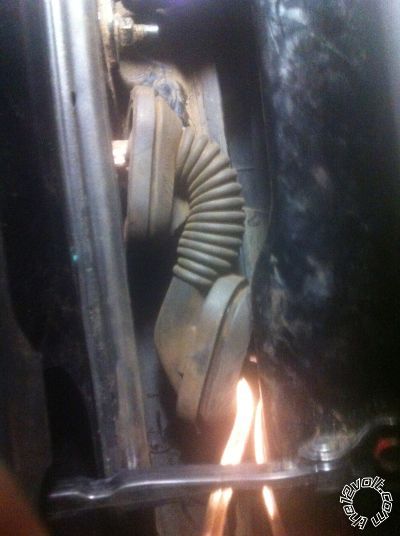
Hi all... newbie here. I just started the work on my 2007 Pathfinder, its my daily ride. Plan to make major stealth modes to it over the next year.
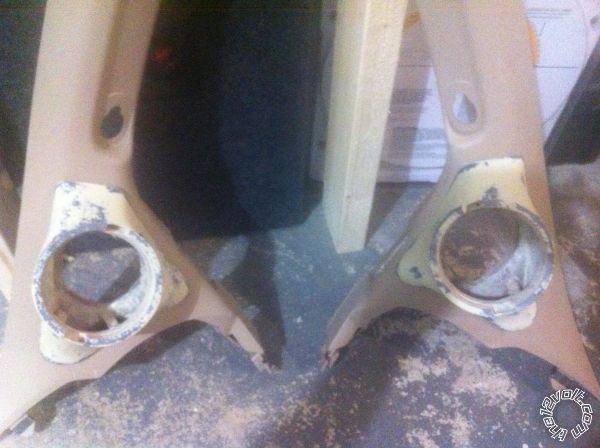
I have started with the a-pillars on the car. Thanks to all the info on this site the project is coming out better then i hoped. I wanted a nice front stage so the infinity 32.9cf are facing to center point of the opposite passenger. I went with removable pods in case i ever decide to go with 4" speakers instead. Big problem with SUV's is road noise, road noise and more RN, so my i plan to deaden the panels with sound-deadener, foam, and MLV.
Will post pic later
-------------
The best tool in my work shop, is my BRAIN!!!!
Replies:
Posted By: krush
Date Posted: September 05, 2012 at 2:04 PM
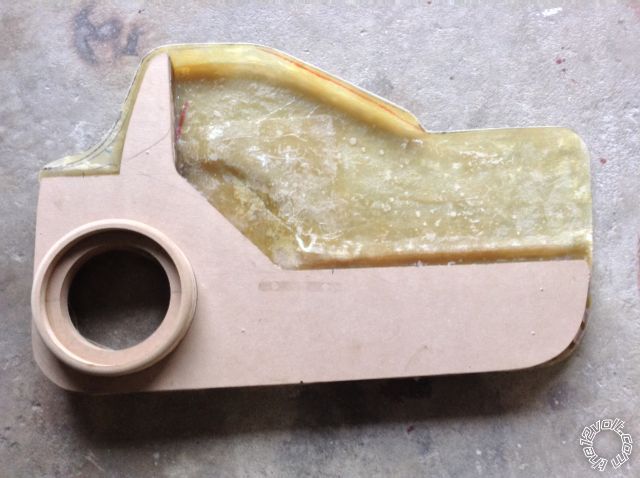
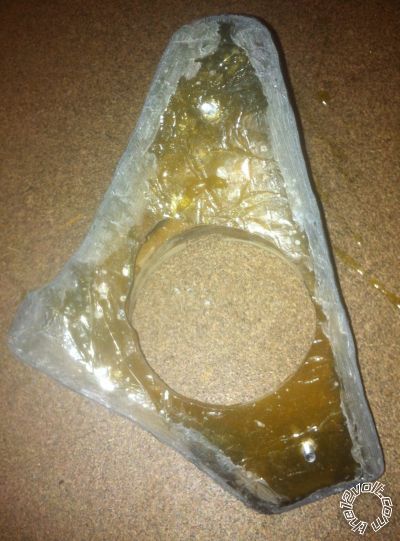
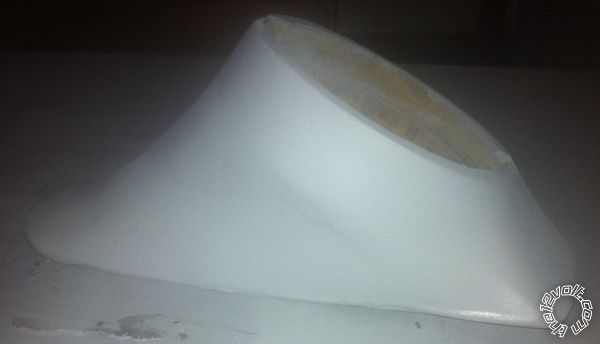
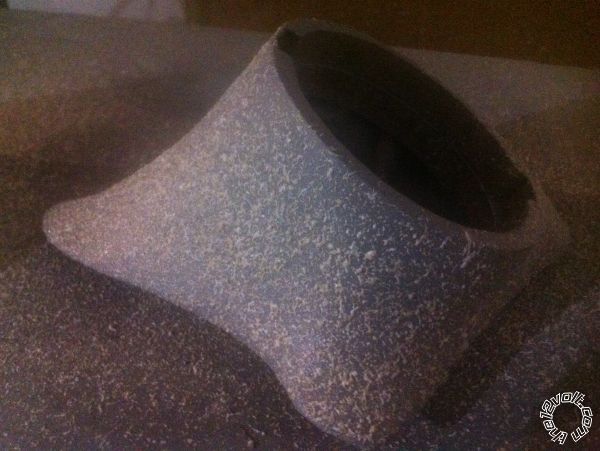
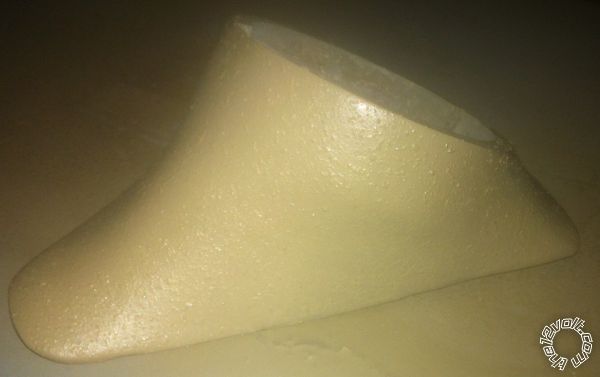
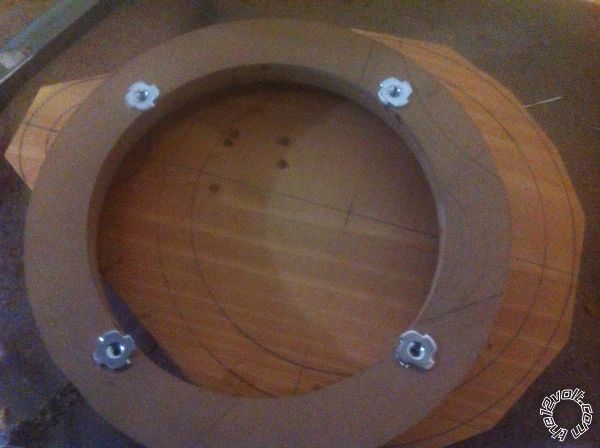
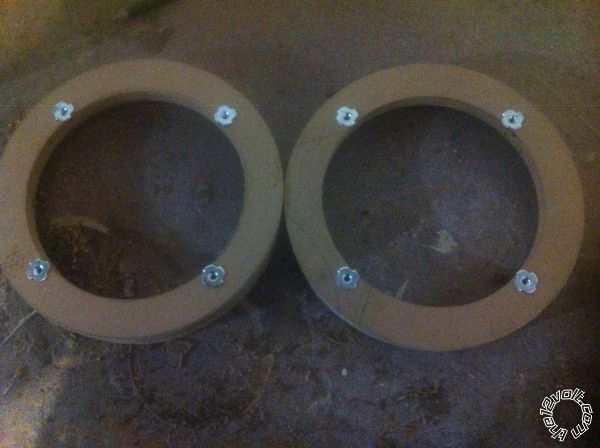
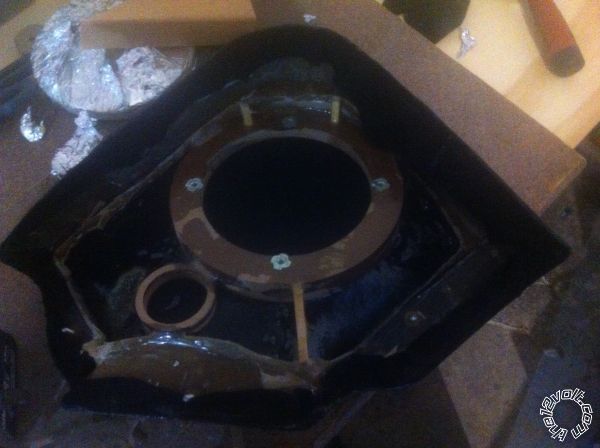
stated with a fiberglass base.
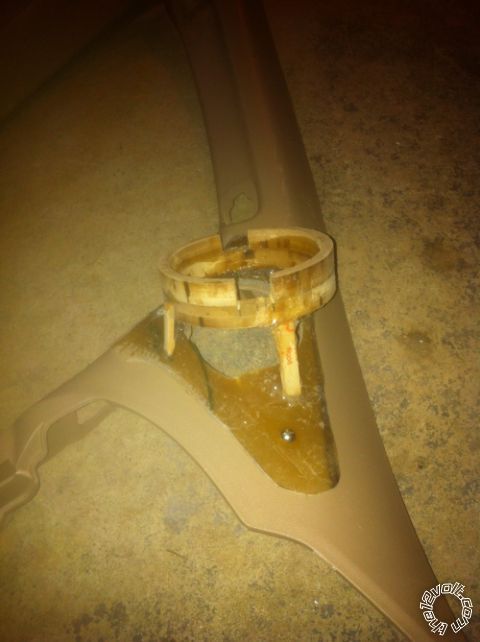
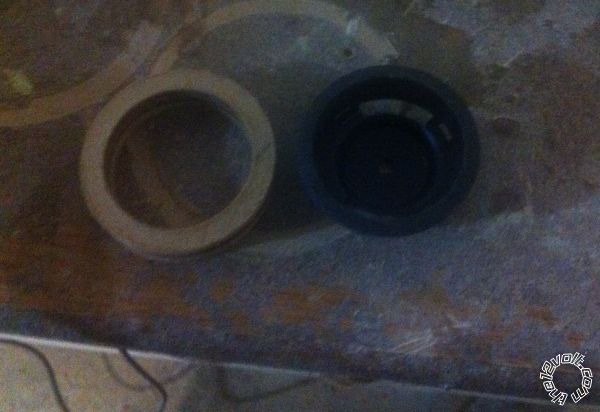
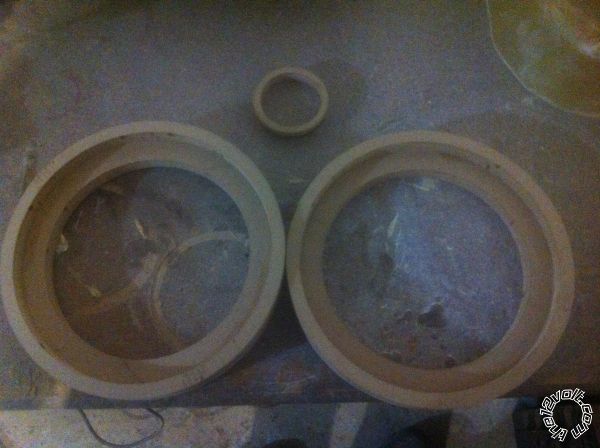
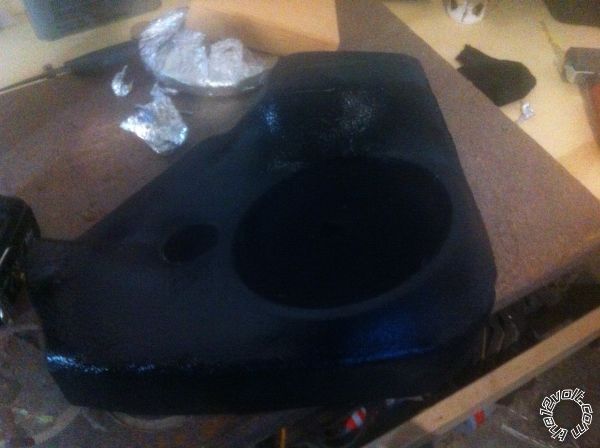
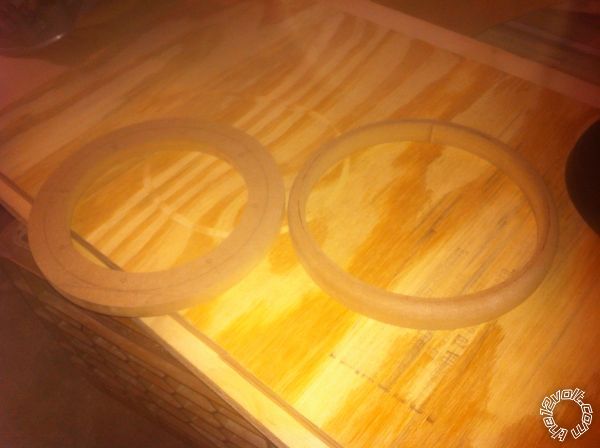
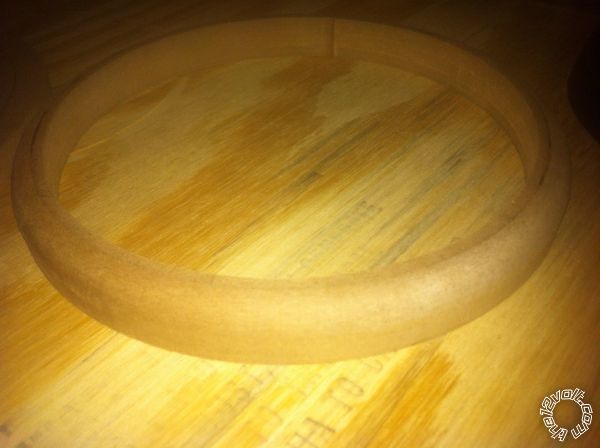
The speaker rings are router-ed from 2 pieces of 1/2" mdf glued together.
my goal was to mount the as deep as possible into the panel so the pods wouldn't block my view.
------------- The best tool in my work shop, is my BRAIN!!!!
Posted By: krush
Date Posted: September 14, 2012 at 4:18 PM
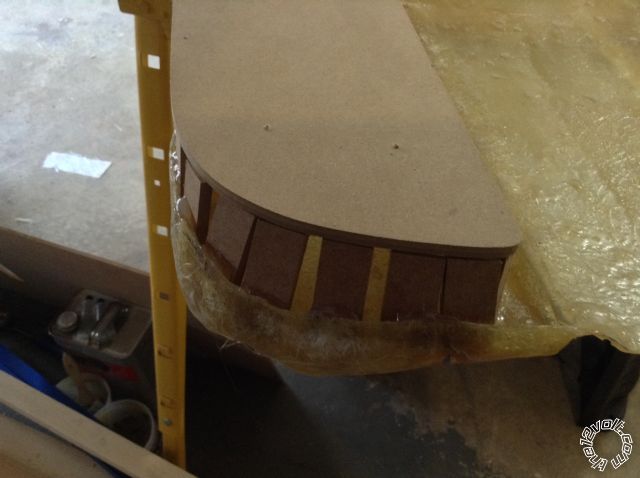
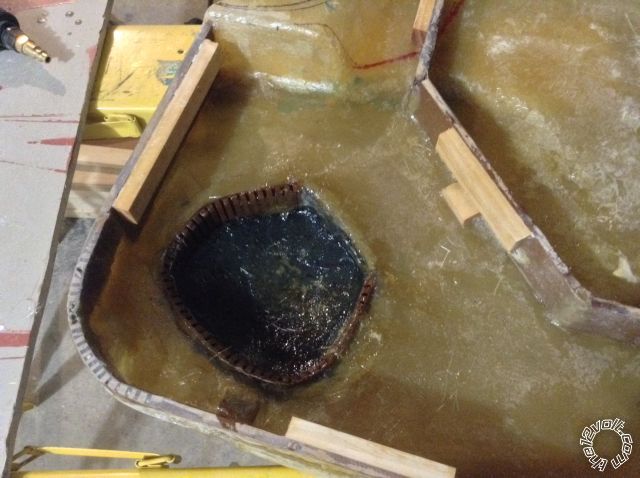
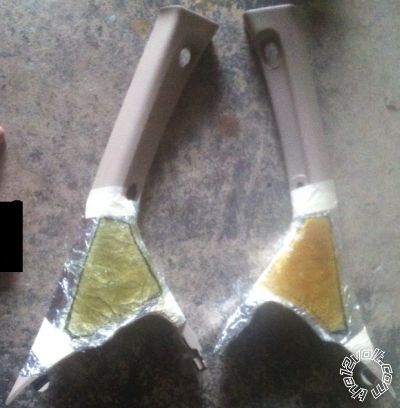
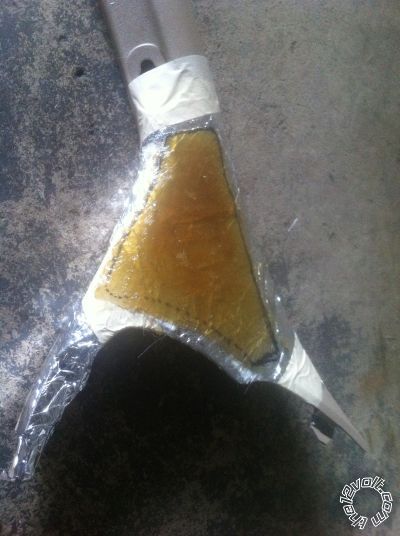
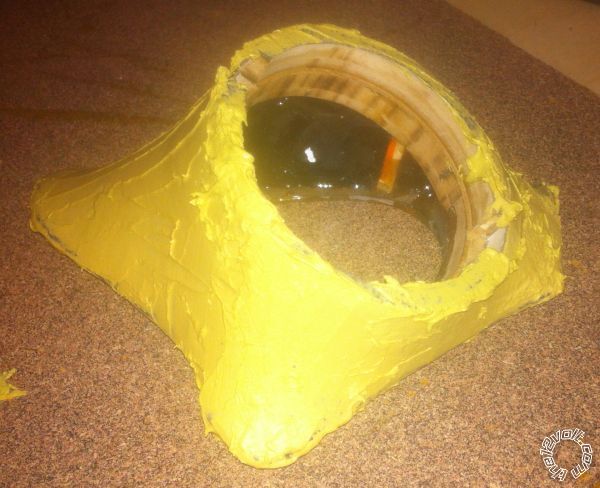
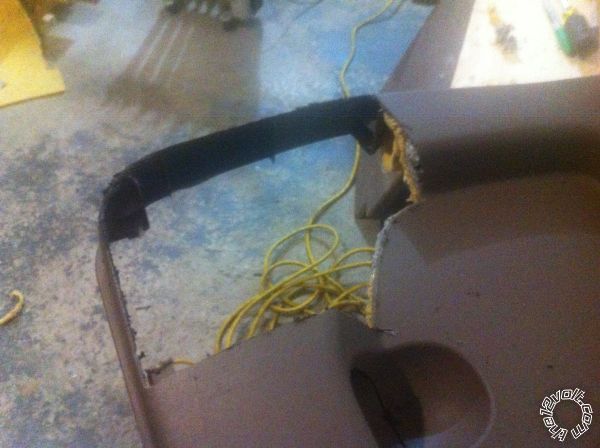
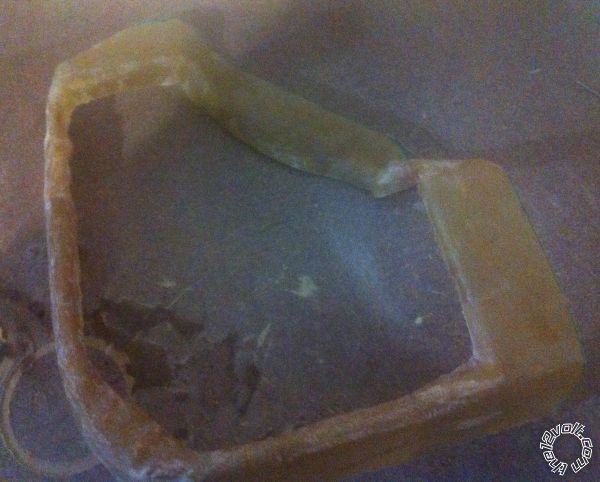
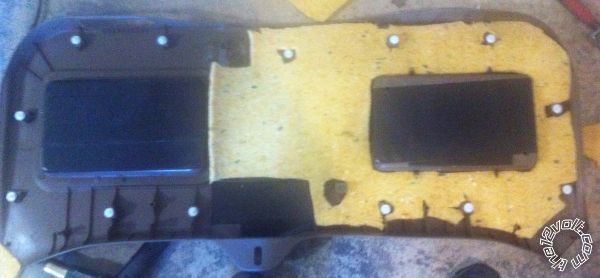
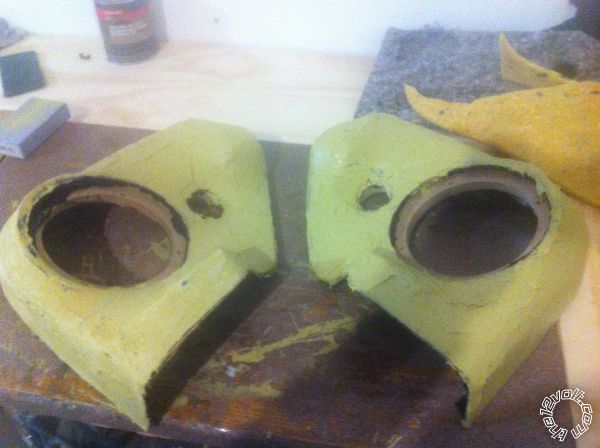
Was up a few late nights and got some more work done on the pods.

Mixed up some JB-Weld to put over the screw heads to secure them to the pod base plate.
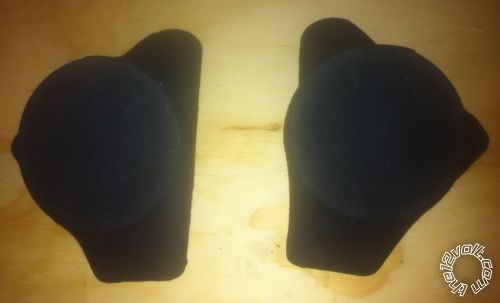
Used a old t-shirt and hot glue to wrap the pods. I was planing to use fleece but the curves and small size of pods made very difficult to rap around. I prefer hot glue over other methods because that way i can use a heat gun to undo any mistakes and later after the resin is harden to remove the cloth as close to the edge of the base plate. ( you will see what i mean in another pic.)

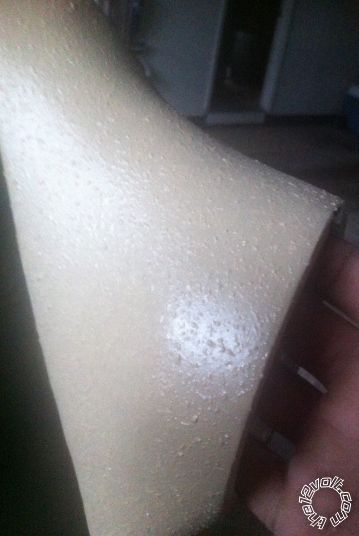
resin is brushed on and harden. downside to using a t-shirt is weakness, fleece will hold more Resin. Next step is to reinforce the pods from the inside with FG and poring resin into the pods.
Quick test fit to the A-pillar ------------- The best tool in my work shop, is my BRAIN!!!!
Posted By: krush
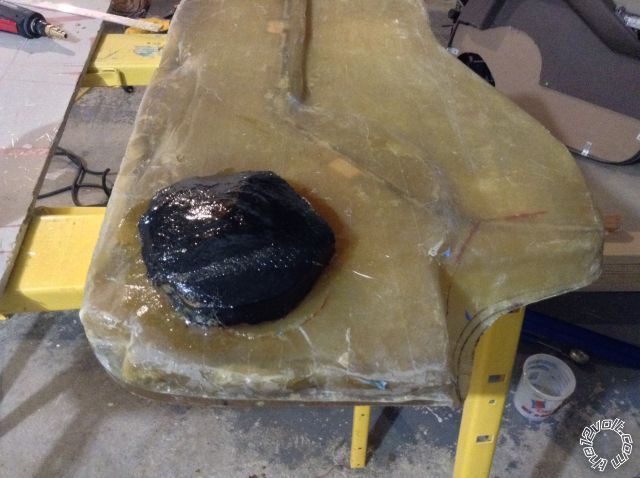
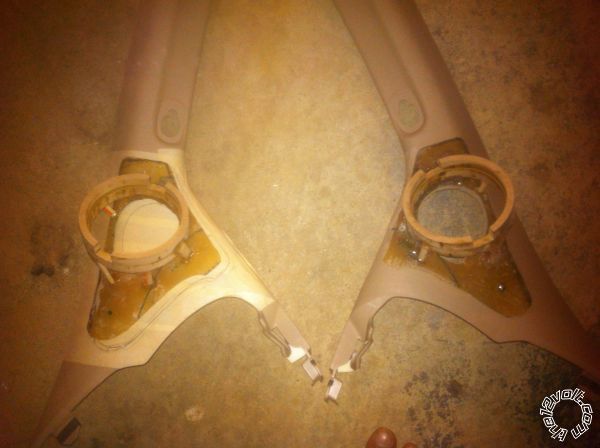
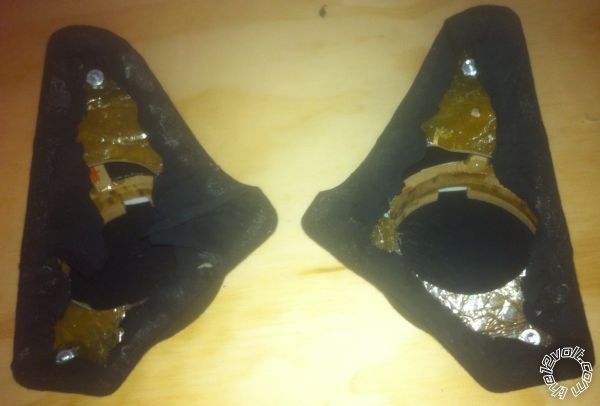
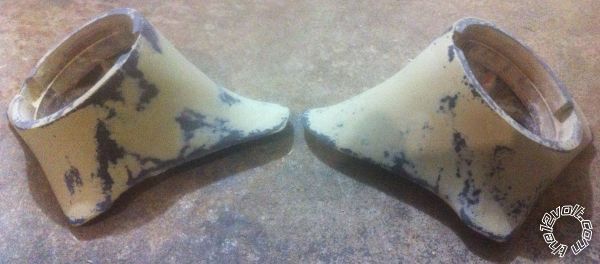
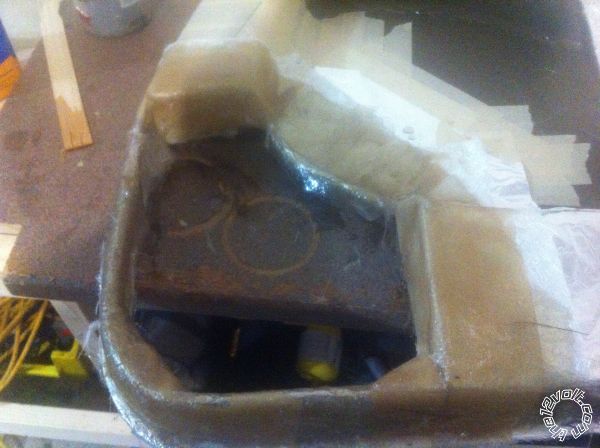
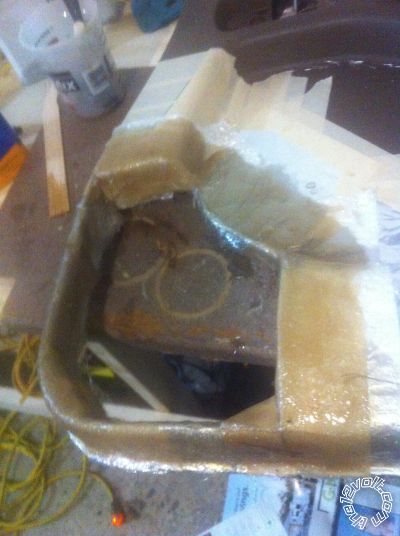
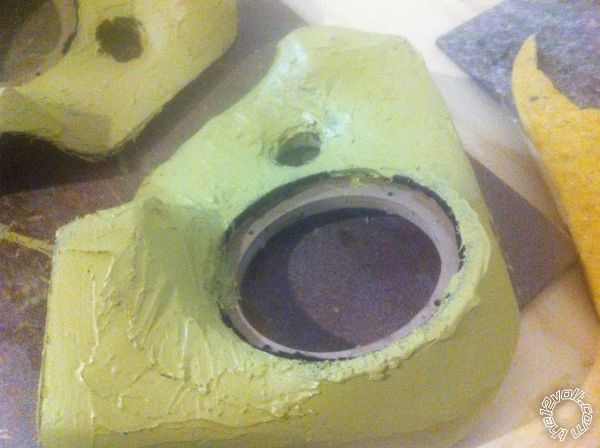
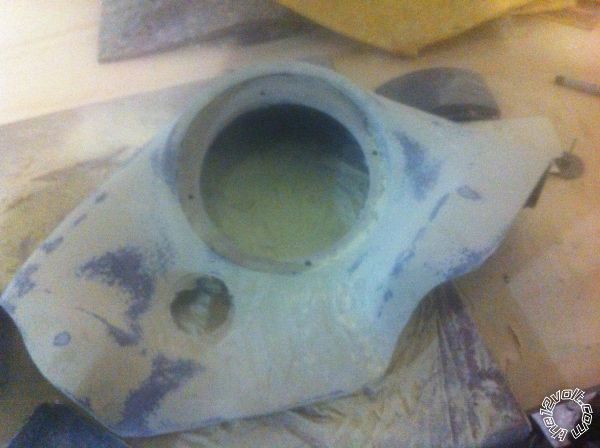
Date Posted: September 22, 2012 at 4:53 PM
All done with the back and fill with resin on the inside. I us a small heavy plastic cup and poured the resin in and use a heat gun on low to set the resin a bit faster to get it thick on the inside. Also because i used hot glue on the backside of the pod. it was very easy to use a heat gun to peal back the cloth to the edge and just dremel it flat and smooth. Saves a lot of sanding time. Now the pod is ready for Evercoat, sanding, and more sanding. I plan to use a texture primer and then paint to match the factory OEM A-pillar. The Krylon plastic beige is dead on with the Nissan factory color.
 ------------- The best tool in my work shop, is my BRAIN!!!!
Posted By: krush
Date Posted: October 04, 2012 at 1:08 PM
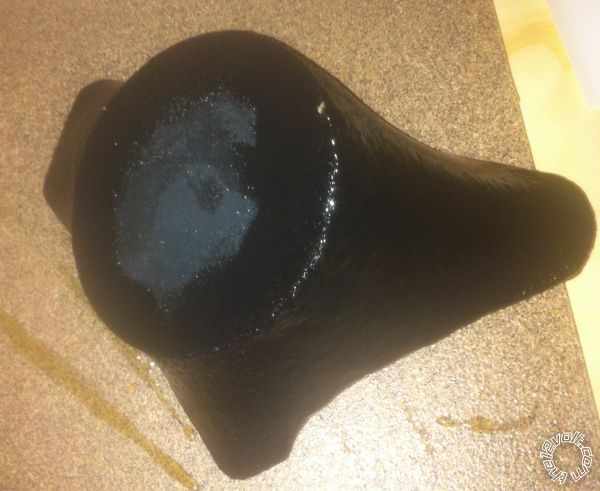
up late last night working on the pods.
tried out the new Bondo gold. Set time is 5 mins and sand-able after 15 mins to cut down sanding time after it fully cures in ~30 mins. I sanded with a 80 grit. excess came of very easy.
after bondo fully cured. Hand sand it with 120, 200, final 400 grit.
quick test fit
Cleaned up with alcohol and compress air. let it dry off for 10mins or so. Then put 4 light coats of primer 10 mins apart as per can. I used a fast dry primer that was wet sand-able after 20mins :) . Wet sanded with 800 then 1000 grit. Don't for get to soak the sand paper for 30mins at least. Will let them sit for a day or so then its time for the texture paint and clear coat. *note that you don't have to go pass 120 grit sandpaper if you use texture paint, I was undecided on the finish!!!!
 ------------- The best tool in my work shop, is my BRAIN!!!!
Posted By: krush
Date Posted: October 05, 2012 at 1:18 PM
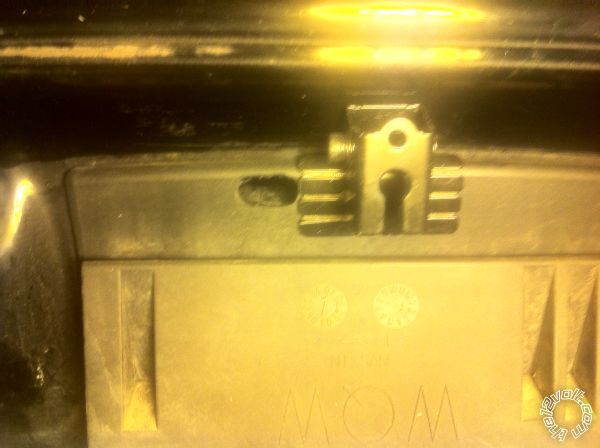
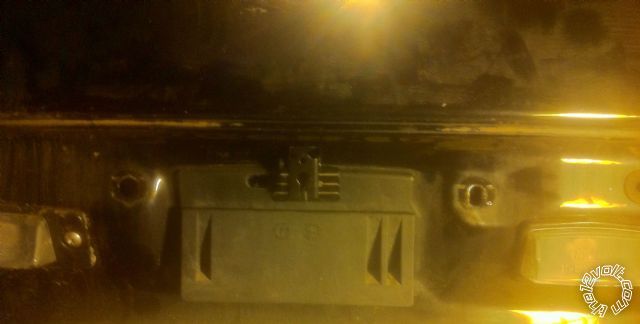
Hey guys, when i removed my a pillars the retainer clip on the plastic mold were missing (this is what happens when a local installer at a shop doesn't reinstall thing correctly back in). Anyway I went to the Nissan deal and they tell me i need to buy the a pillars mold cause they don't sell just the clips. I'm not paying $50 a pop just cause of some missing clips. So i found the company that sell the clips and fastener for All make and model. So to all that have broken or lost those B@$terd clips, plastic things and don't know where to find them, here you go:
https://www.auveco.com/product/index.html
-------------
The best tool in my work shop, is my BRAIN!!!!
Posted By: krush
Date Posted: October 05, 2012 at 1:23 PM
Sorry here is the dealer for the company to:
https://www.thecliplink.com/
-------------
The best tool in my work shop, is my BRAIN!!!!
Posted By: krush
Date Posted: October 05, 2012 at 2:00 PM
One more good site:
https://www.clipsandfasteners.com/default.asp
-------------
The best tool in my work shop, is my BRAIN!!!!
Posted By: krush
Date Posted: October 09, 2012 at 12:23 PM
almost done.....
I put a light coat of stone efect spray on to give it a texture and then 3 light coats of the beige coat. Let it dry for a few days and the 2 more light coats of beige and then 3 to 4 light coats of flat clear coat.
 ------------- The best tool in my work shop, is my BRAIN!!!!
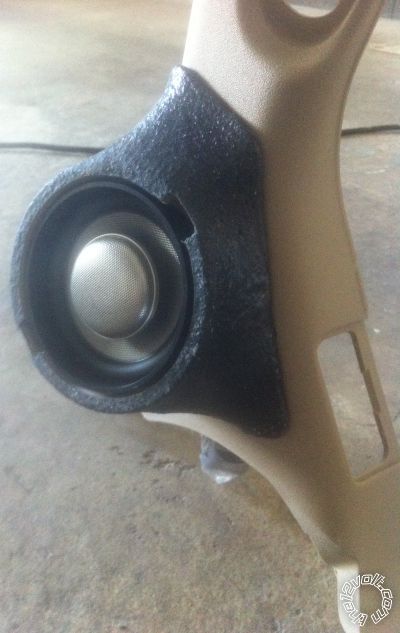
Posted By: krush
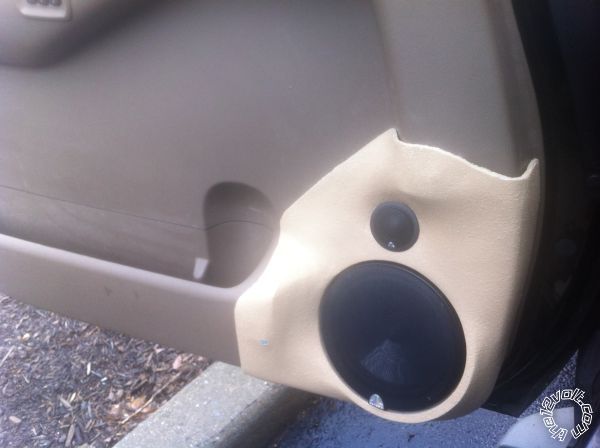
Date Posted: October 22, 2012 at 12:51 PM
Finished the pods over the weekend. All that's need is now the grilles. Looking for some 5 1/2 or 6 1/2 mess grilles to cut and form them. Will show you guy a easy way to make snap in grilles for your flat speaker ring to.
Here they are install and wired.
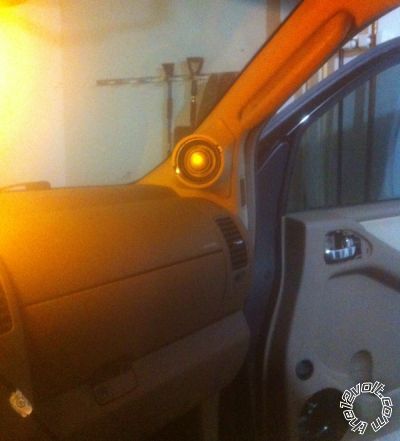
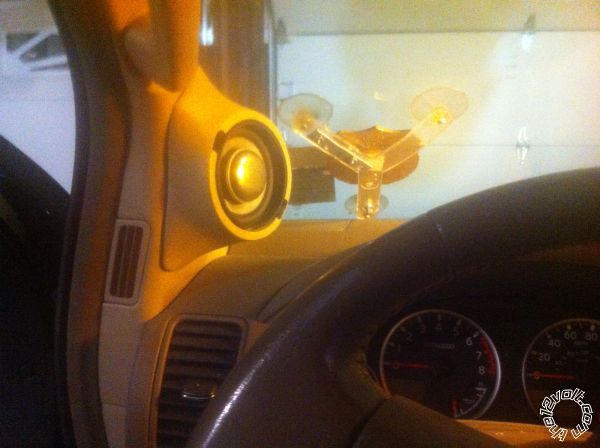
Sorry for the bad pic. (was taken at night)
Doors are next up. ------------- The best tool in my work shop, is my BRAIN!!!!
Posted By: krush
Date Posted: October 23, 2012 at 2:10 PM
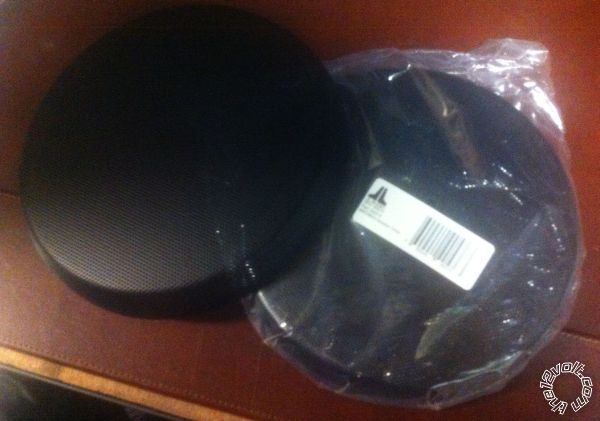
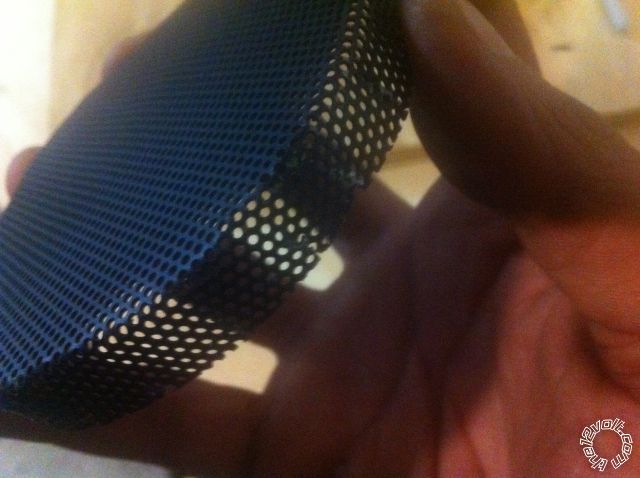
Picked up a pair of JL 8" inch fine mess grills from a local shop to use to make snap grill covers for the pods.
I will take a lot of pics and do a step by step on making the snap grill. I though of this idea back in the days of when i was putting 4 EV-10's in the decks of my car. ahhh the good old days!!!!!....
-------------
The best tool in my work shop, is my BRAIN!!!!
Posted By: krush
Date Posted: October 23, 2012 at 2:16 PM
 ------------- The best tool in my work shop, is my BRAIN!!!!
Posted By: z03mz03m
Date Posted: October 25, 2012 at 2:50 PM
VERY NICE WORK!
I look forward to the grill how to...I'm in the process of brainstorming how and what to make matching grills for my future system in my Magnum.
I like your signature too....its true for me too....don't have the right tool?...make one or make one work! ------------- Dodge Magnum in progress:
Pioneer DEH-80PRS - PPI Amps - Dayton Subwoofer(s) - Exodus Anarchy's - Vifa Tweeters - Kinetik Battery
Posted By: soundnsecurity
Date Posted: November 04, 2012 at 10:00 AM
definitely nice work. they are basically the same as the pods i made for my frontier, mine are just a little smaller and i made the base out of wood instead of all glass. ill post a pic of mine once i get back to my own computer. sometime in the near future im planning to build a whole new center console because im tired of how the stock console looks and operates.
-------------
Posted By: krush
Date Posted: November 06, 2012 at 2:32 PM
hi guy sorry i haven't post the grill how to...... sandy left me in the dark for a week. Just got power up/running a few days ago and still cleaning up the damage to the house. Need to d-stress from sandy so i should be back at it tomorrow. :)
-------------
The best tool in my work shop, is my BRAIN!!!!
Posted By: z03mz03m
Date Posted: November 06, 2012 at 2:48 PM
Damn... sorry to hear Sandy hit you hard. Glad your ok. I live across the way in Slower Lower Delaware and we had some pretty bad flooding but nothing like Jersey. ------------- Dodge Magnum in progress:
Pioneer DEH-80PRS - PPI Amps - Dayton Subwoofer(s) - Exodus Anarchy's - Vifa Tweeters - Kinetik Battery
Posted By: soundnsecurity
Date Posted: November 08, 2012 at 9:40 PM
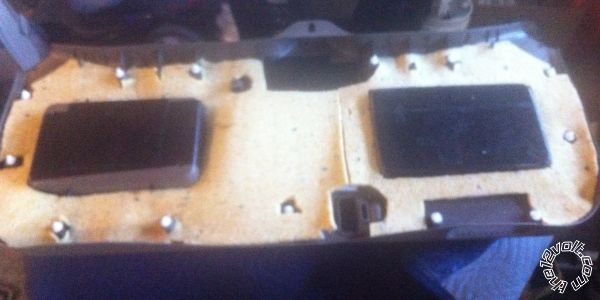
tweeter pods in my frontier. diamond audio HEX pro tweeters, they are i think 1.5 inch aluminum dome tweeters. i made it hug the dash because i only wanted to use one screw to mount it to the pillar. i eventually want to mold the pods into the pillars. -------------
Posted By: krush
Date Posted: November 23, 2012 at 7:55 PM
Sorry for the delay..... had a lot going on the home front.
So here is a pic of the finish formed grill, just needs some paint and may fiberglass the two ends. Sorry they were taken at night.
 ------------- The best tool in my work shop, is my BRAIN!!!!
Posted By: krush
Date Posted: November 23, 2012 at 8:47 PM
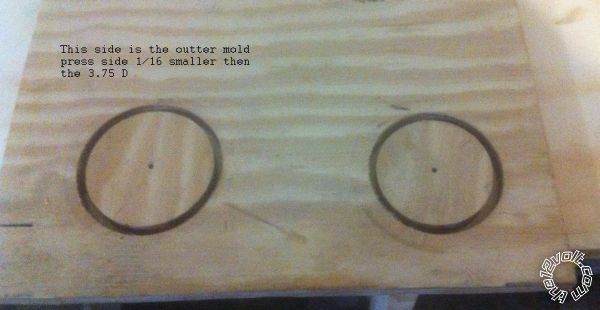
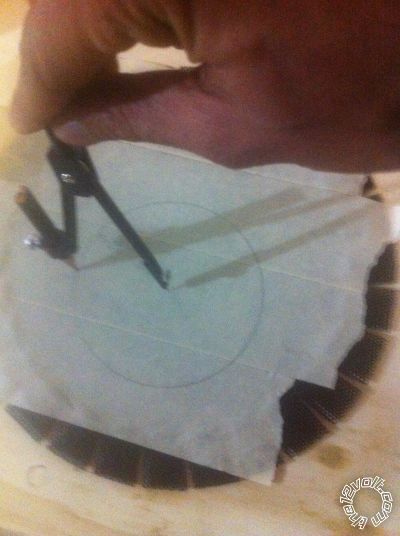
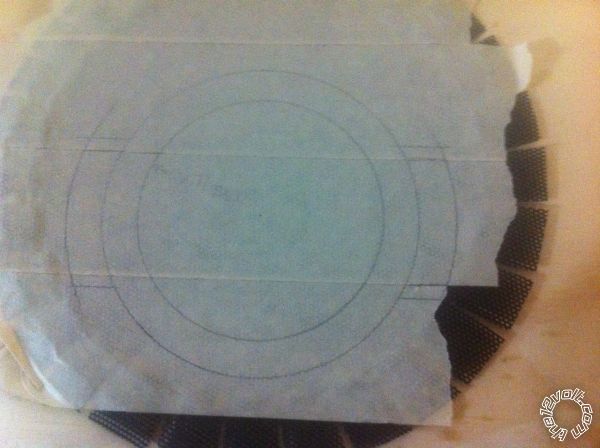
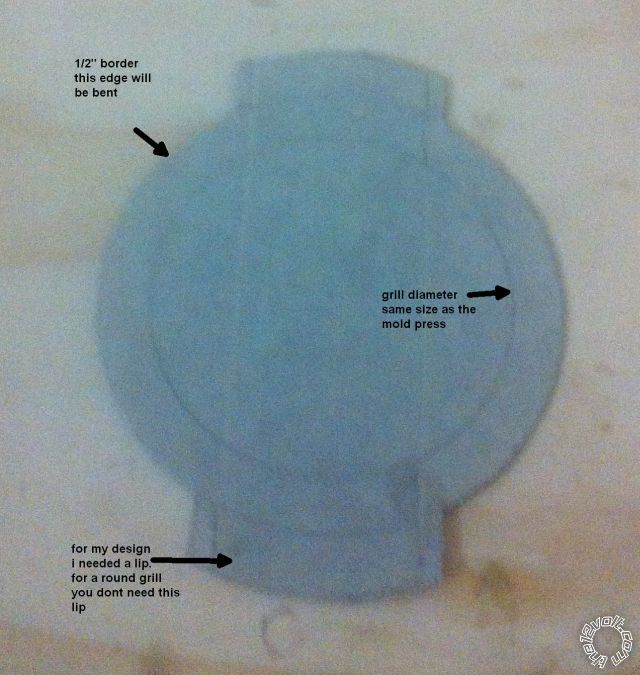
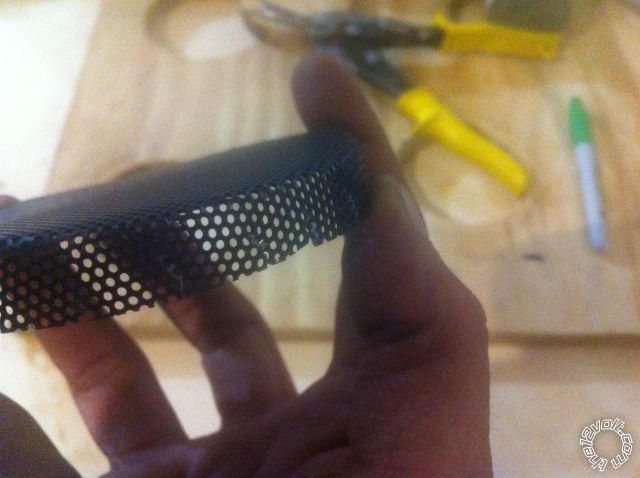
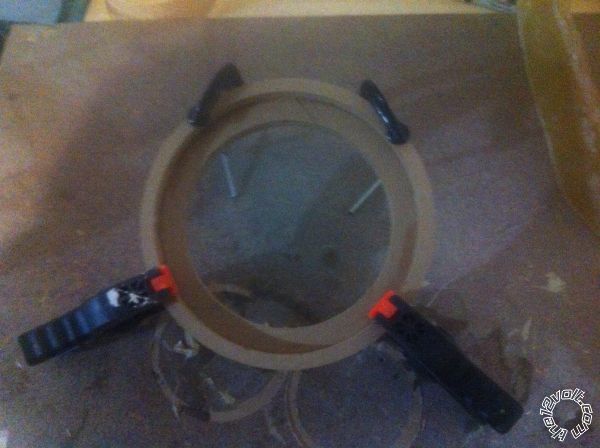
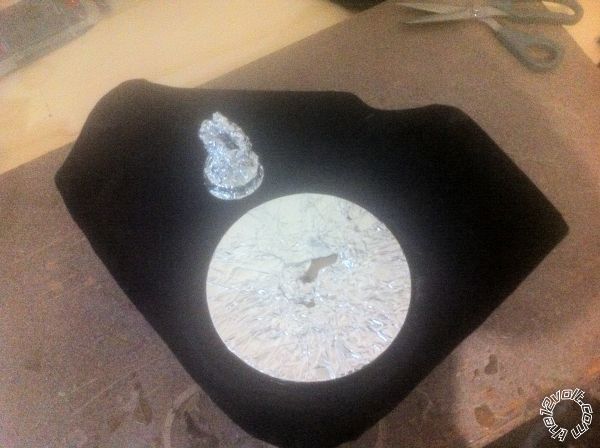
First start with the outer molding press. Round is the simplest to make but you can do this for almost any shapes.
1) Start by measuring the area you want to cover with the grill. In my case is was 3.75" Diameter edge to edge of the pod.
2) Next you need to transfer that diameter but a 1/16 or 1/8 smaller on all sides then the size of the grill you need to a piece of hard plywood for the outer grill mold press and cut it out using a router, hole-saw or jigsaw if its a different shape (don't know if mdf would work because of the softness of the wood).
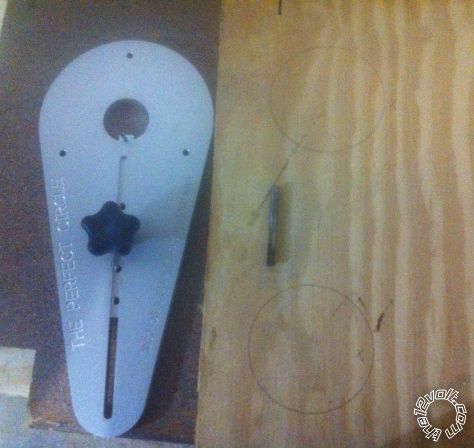
3) Now that you have the outer mold, you will need the inner mold. From the origal measurement tranfer the shape 1/8 to 3/16 smaller (this is to compensate for the grill thickness) to a hard wood and cut out.
4) Next mask up the grill peace you intend to use and draw the shape 1/6 or 1/8 smaller. Also draw a border of the shape on the out side to the same size to the depth you need. In my case it was 1/2 inch.
------------- The best tool in my work shop, is my BRAIN!!!!
Posted By: krush
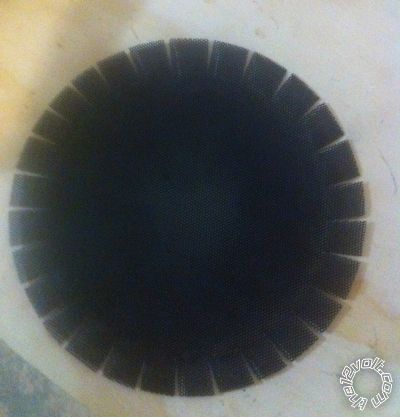
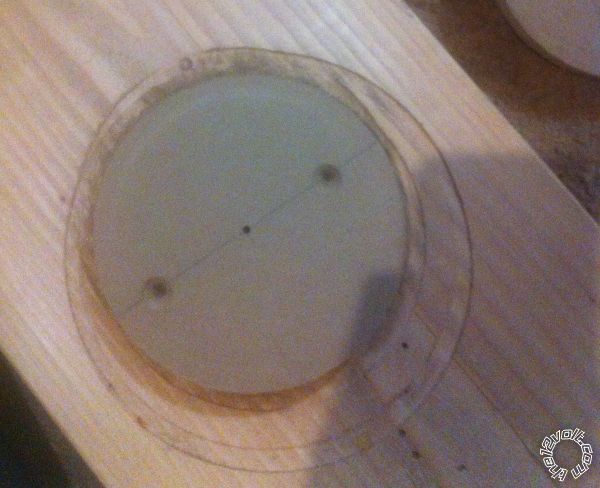
Date Posted: November 27, 2012 at 12:25 PM
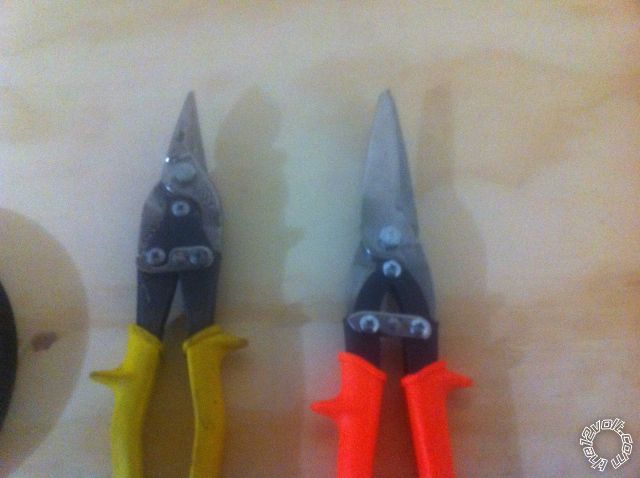
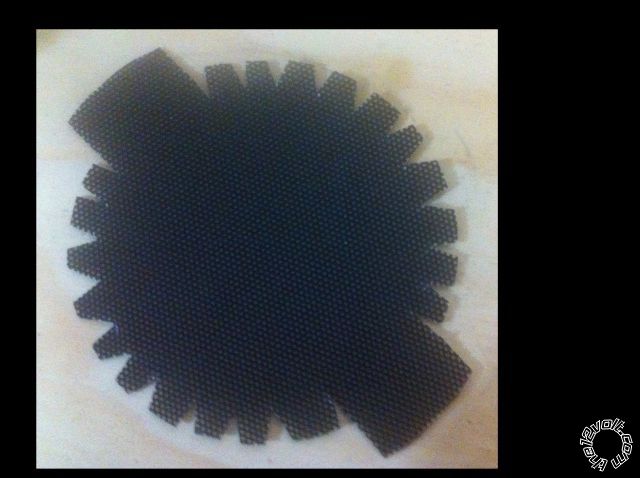
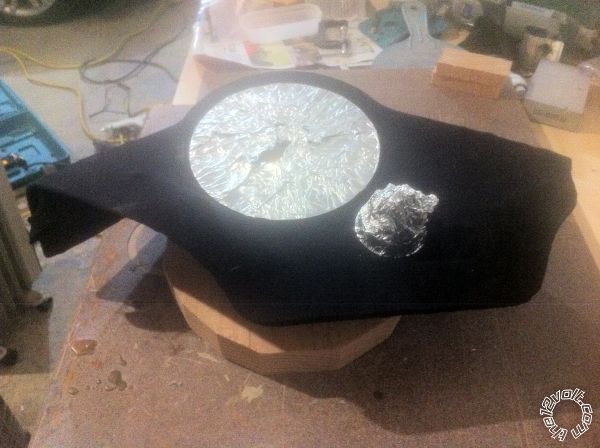
5) after you draw the template to the grill, cut the shape out with metal shears (the grill should be thin enough so you don't need any power tools) Don't for get to cut on the outer border and cut rite to the line.
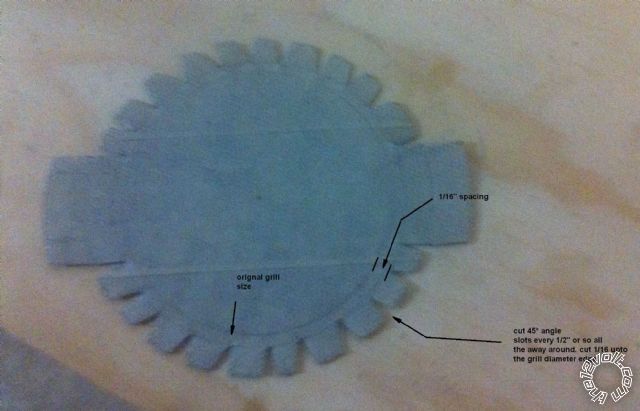
here is a pic of the back side so you can see the V cuts round the edge
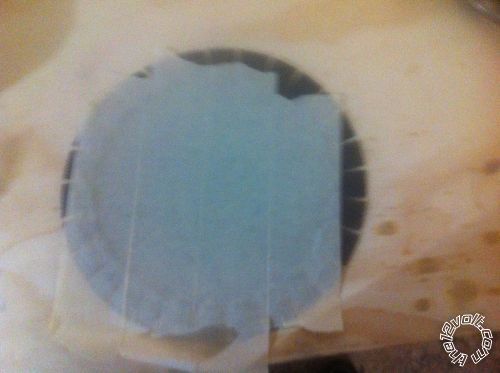
6) now you need to line up the grill piece to the mold press
use a piece of scape wood larger than the mold shape on the bottom.

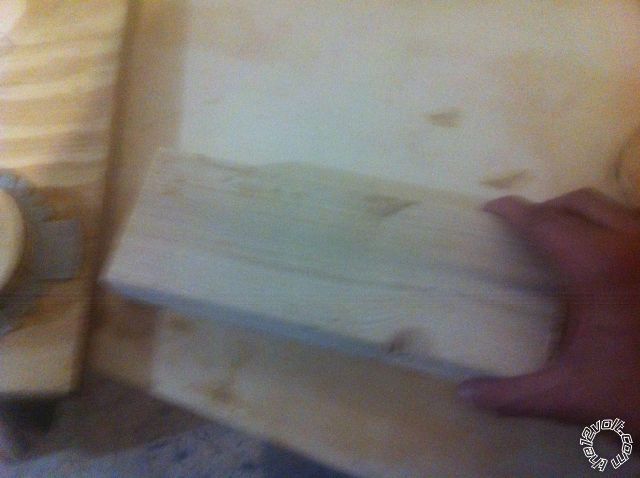
side pic of my mold press lined up

After that get out a good clamp. And just clamp press the top mold thru.( may need more clamps or need to shift the clamp so the top mold presses thru evenly.


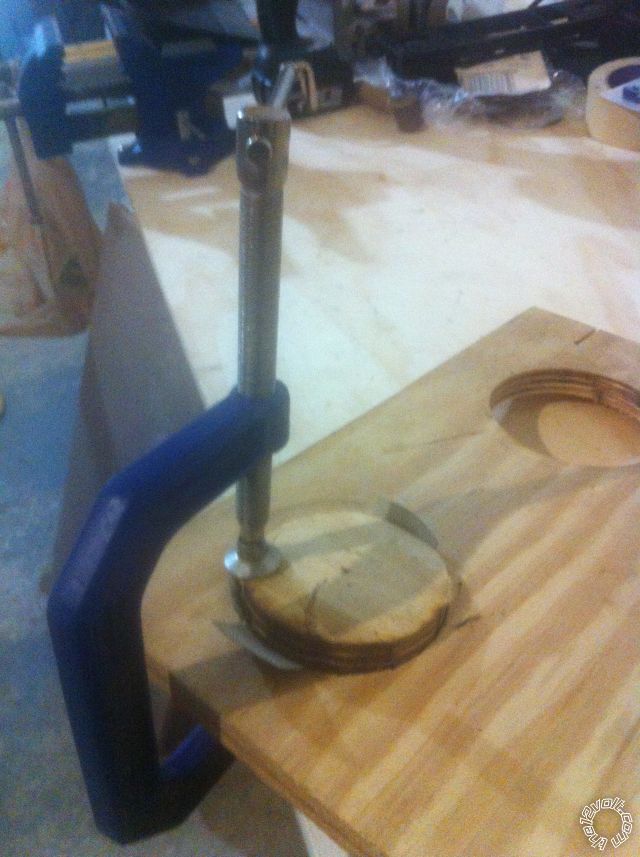
Finally tap or hammer the top mold all the way thru and remove the molded grill.
This method will work for teardrop, square, round, trapezoid, oval shape perfectly.
If you guys need help or have question email me.......
This should be a major game changer in kick & door panels as well as sub boxes grill design.
Next I will do a video on YouTube for a teardrop grill mold for a kick-panel. And if any 2 star and up member wants the teardrop Mold Press after i make the video email me. And no i will not charge for it. Just put it to good use ( membership has its rewarded lol ) ------------- The best tool in my work shop, is my BRAIN!!!!
Posted By: z03mz03m
Date Posted: November 27, 2012 at 6:45 PM
Totally worth the wait!!!
Its simple but you have taken all the time to find the proper spacing and kerf amounts.
I am going to share this with my friend so he can make custom grills for his bumper!
-------------
Dodge Magnum in progress:
Pioneer DEH-80PRS - PPI Amps - Dayton Subwoofer(s) - Exodus Anarchy's - Vifa Tweeters - Kinetik Battery
Posted By: krush
Date Posted: November 29, 2012 at 12:16 PM
Hey z03mz03m...... great idea!!!! Ooooh how my Nissan front grill can use a mess type upgrade. Will try that soon. Let me know how your friend makes out first then ill give it a try.
-------------
The best tool in my work shop, is my BRAIN!!!!
Posted By: krush
Date Posted: November 30, 2012 at 10:13 AM
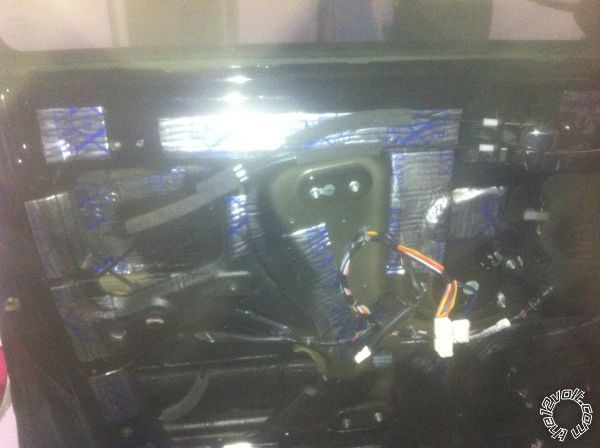
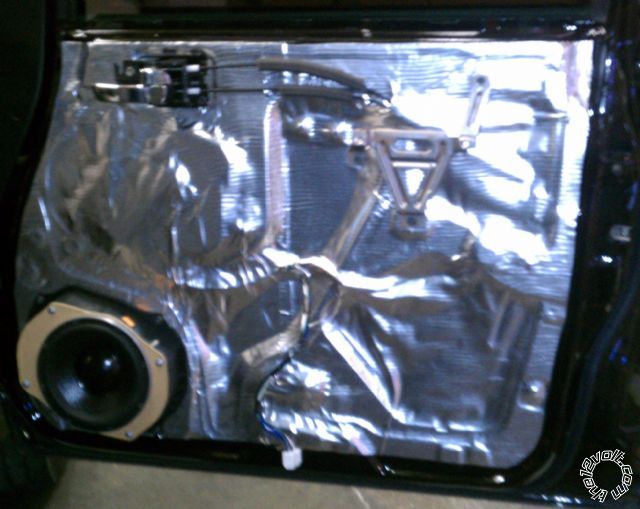
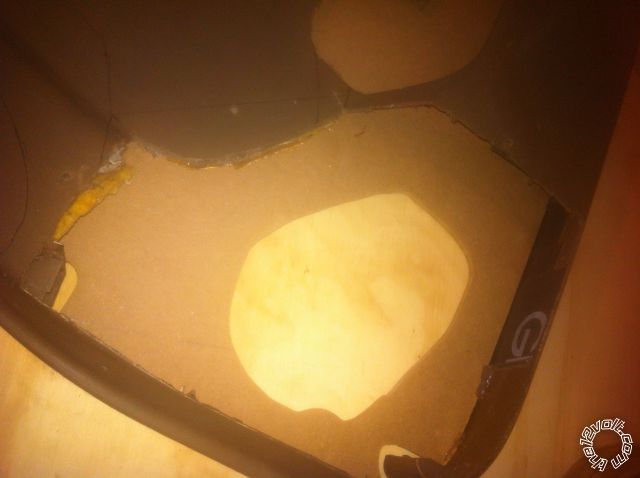
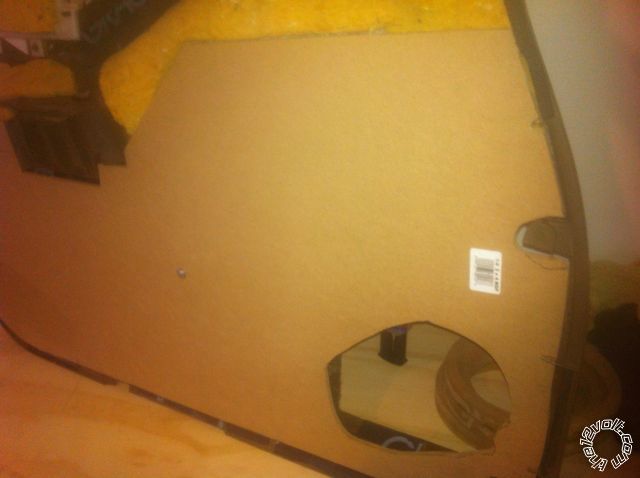
Started on the doors, going to install JL Audio C5-650.
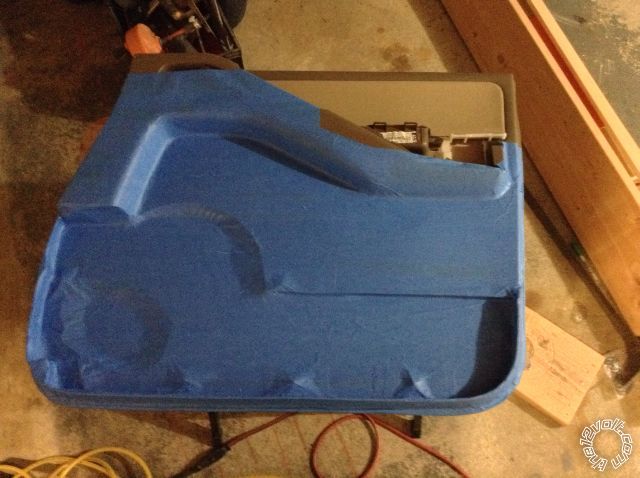
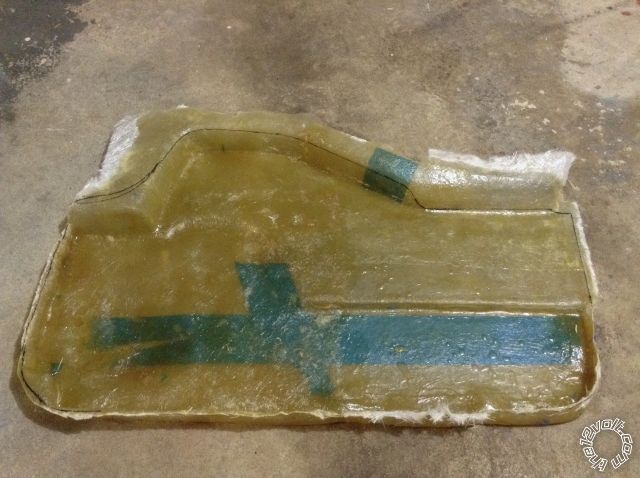
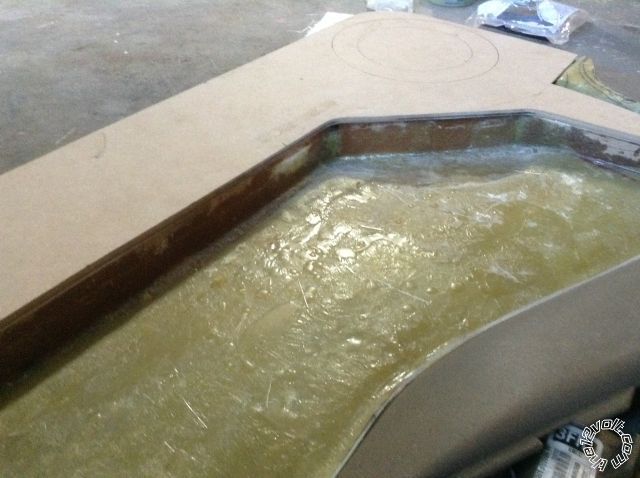
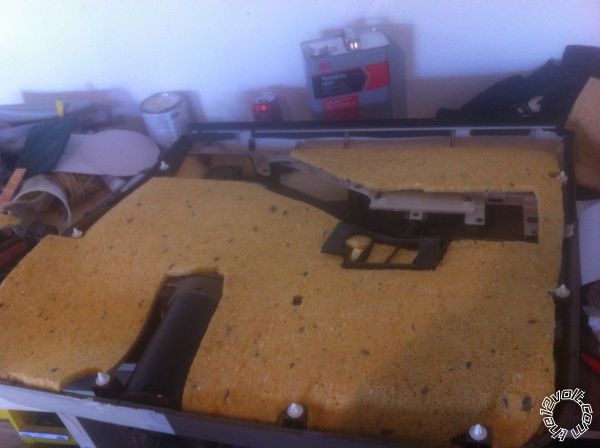
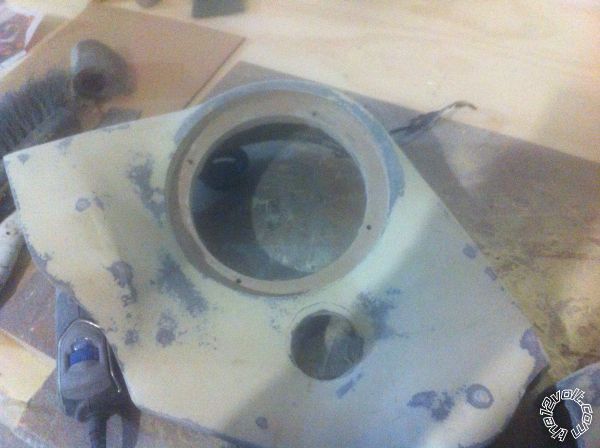
Cut the door panel and laid down the first layer of FG.
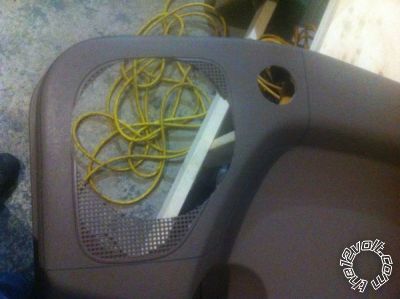
Cause of the cold in Dirty Jersey the resin is not hardening well. Anyone know where i can get a good heat lamp or something for it??????
I don't want to spend a lot,, $20-$30 if i can get away with it???? ------------- The best tool in my work shop, is my BRAIN!!!!
Posted By: soundnsecurity
Date Posted: November 30, 2012 at 9:42 PM
mix the FG right... no amount of heat lamp will help a fiberglass project that isnt mixed right. not intending to be mean, im just speaking from experience. ive had a few fiberglass pieces scrapped because i didnt mix the resin the right way for the temperature.
id love to see what you have planned for those door panels though. i dont quite have the same "all out" vision for my frontier but i am coming to the point where im needing to think about doing come custom work to my doors to justify owning my own custom shop.
im wanting to take some diamond audio mids that i have saved from a set of components and use them to turn my diamond audio HEX pro components into a custom 3-way component set, running totally active.
i might be making some pods in the space between the 6x9 location and the door handles to hold a set of HEX 6.5 mids. if this idea doesnt pan out then the mids will be thrown into the back doors as rear fill.
anyway, good job so far with cutting the door panels and glassing the opening so keep up the good work. my truck is too new for me to even think about wanting to mod my door panels this much. maybe in a few years ill go all out and make some truly custom glassed panels for my frontier.
-------------
Posted By: z03mz03m
Date Posted: December 03, 2012 at 7:26 AM
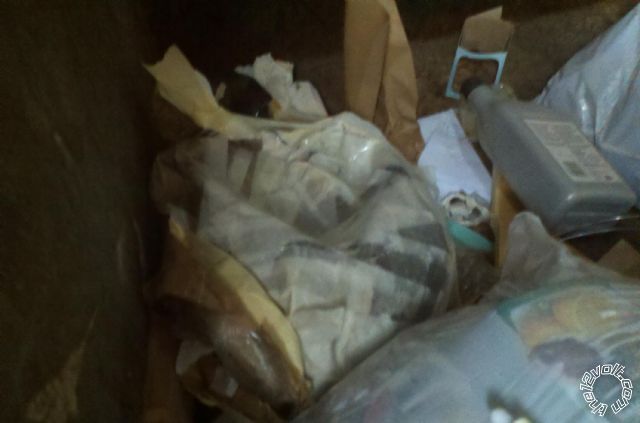
I used a 1000 degree heat gun $30 from ACE and more MEKP when its cold. I learned the hard way....in the dumpster below is the driverside of my trunk.....
z03mz03m wrote:
Well I have another reason why I hate winter....
winter + fiberglass = MORE MEKP  
Oh and don't use doodiey tape. And always use two layers...its not a waste.
I didn't care because I was going to put black carpeting over the sides of my trunk anyway. But if that had hardened it probably would not have come off.
------------- Dodge Magnum in progress:
Pioneer DEH-80PRS - PPI Amps - Dayton Subwoofer(s) - Exodus Anarchy's - Vifa Tweeters - Kinetik Battery
Posted By: krush
Date Posted: December 04, 2012 at 8:29 PM
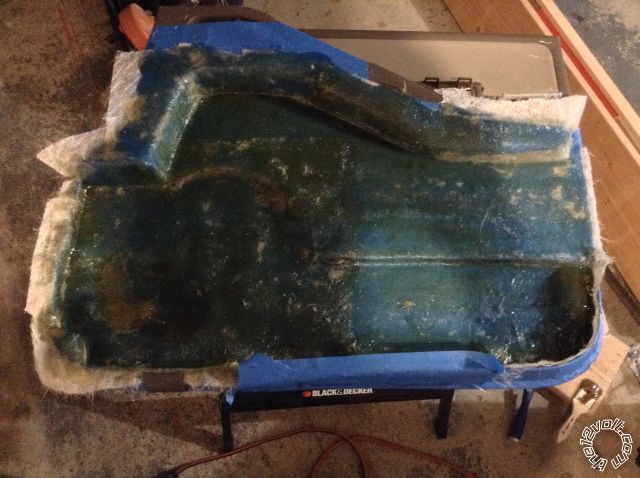
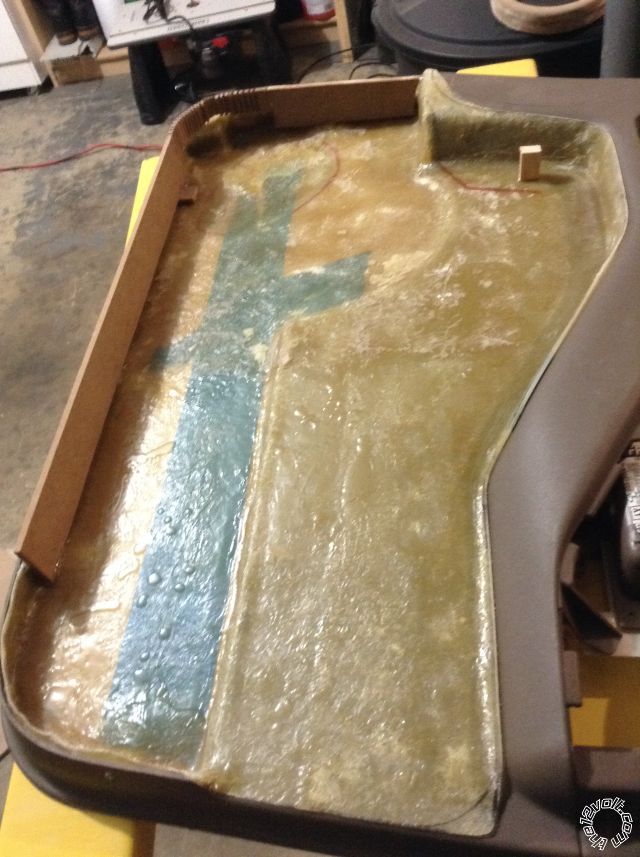
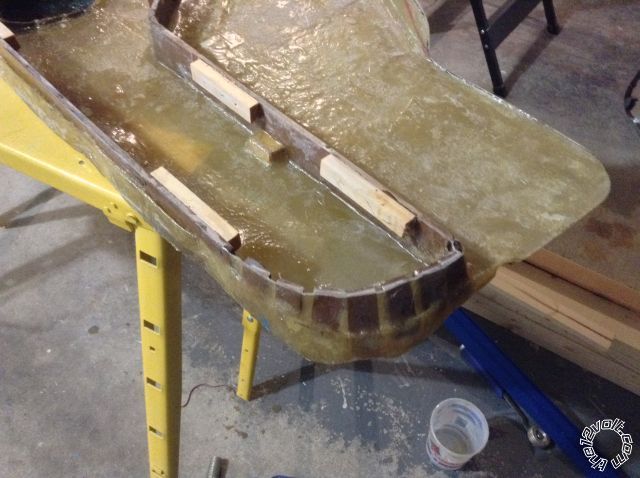
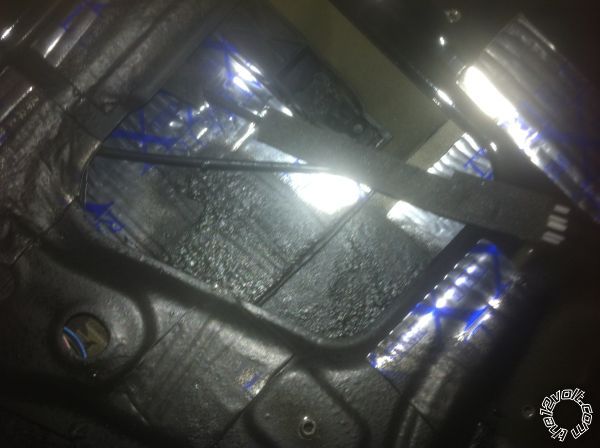
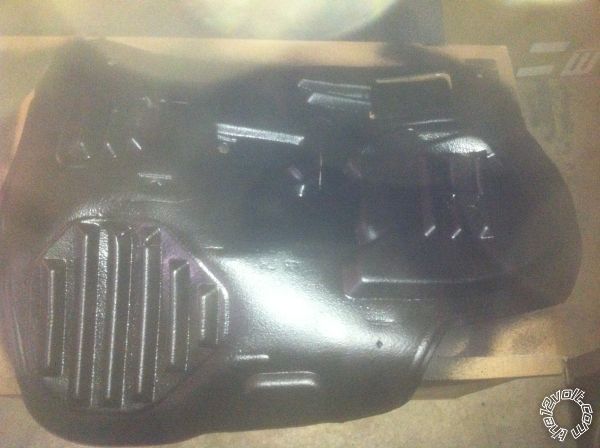
Put on a 2nd & 3rd layer of FG with 3M resin (poly type), first layer took forever to harden, 3 days. This time I used a room heater and 3M resin ( worked 10X better then Bondo CR@p resin..... ill never use that stuff again. Lesson Learned !!!!!
-------------
The best tool in my work shop, is my BRAIN!!!!
Posted By: soundnsecurity
Date Posted: December 10, 2012 at 7:31 PM
what do you plan to fill that gaping hole with in your door panel? speaker ring?
-------------
Posted By: krush
Date Posted: December 13, 2012 at 11:43 AM
Plain to do a teardrop ring, aimed to the front dome light for proper imaging. Did the large gap cause i was thinking to FG the back to make a ported enclosure tuned to 63Hz? The 2 JL 10w6 subs will be 80Hz and below. But cant find all the specs on the JL 6.5" for the box calc. May need to call JL.
-------------
The best tool in my work shop, is my BRAIN!!!!
Posted By: krush
Date Posted: December 17, 2012 at 10:12 AM
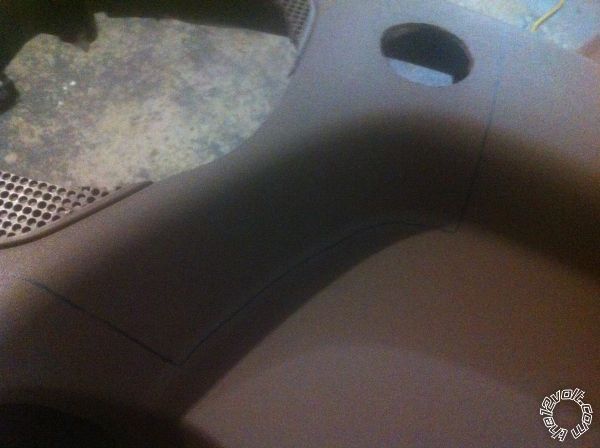
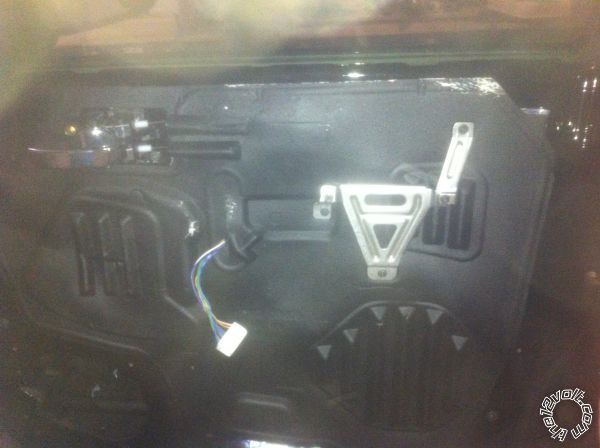
Trimed up the FG Door mold.
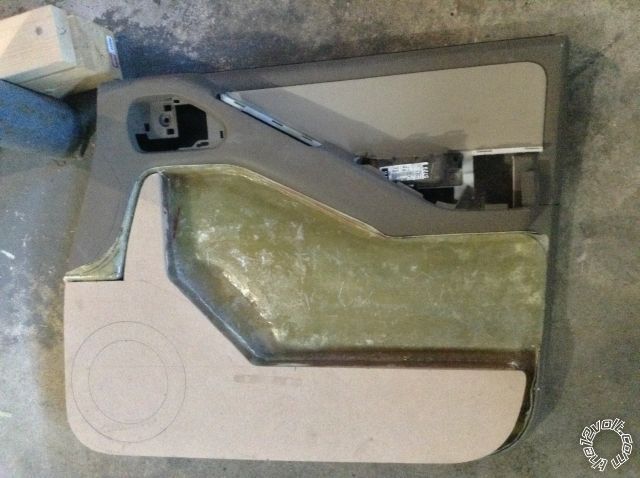
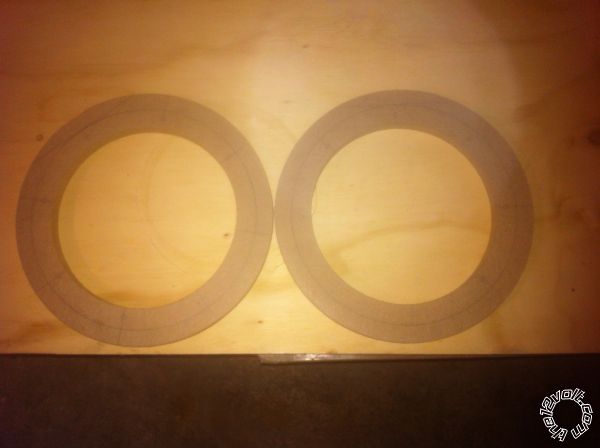
Cut out the 6.5 mdf rings and the tweets.
Make life easy i used 2 hole saws together came out perfect.

Counter sunk the screws to hold down the mdf for the Tweeter rings
need to make last tweeter ring :) , the rest all sanded and done
 ------------- The best tool in my work shop, is my BRAIN!!!!
Posted By: krush
Date Posted: December 17, 2012 at 10:21 AM
waiting for the new FG rollers to come in today so i can finish the doors off. I cant stress how important it to have the right tools. When i made the door molds i had a few bubbles and weak spots cus i didn't roll/push the resin in correctly for the mat with the paint brush. I ordered 3 different roller for $70 with shipping, not bad for the trouble it will save me. It took me 2 hours of sanding and glassing to make the repair in the door mold. Lesson learned!!!!!
-------------
The best tool in my work shop, is my BRAIN!!!!
Posted By: krush
Date Posted: December 18, 2012 at 11:21 AM
just came in my new FG rollers.... now i can get some work done tonight on the door panels. Any one have tips on cleaning the rollers???
I purchased a 1/2"x3", 1"x3" Al barrel, and 1/2" corner.. May need to also get a 1/8" corner too.
 ------------- The best tool in my work shop, is my BRAIN!!!!
Posted By: z03mz03m
Date Posted: December 19, 2012 at 8:48 PM
I'm still enjoying your posts! Nothing like an innovative can do attitude to getrdone with high quality!
I also need to invest in some FG rollers before I begin my next FG project.
I used a cup of acetone to keep my brush use-able in between layers but and I found this on yahoo answers: "If you are thinning then you use styrene, but if your cleaning up, use acetone. I hope this helps!"
so yea....acetone.
keep at it!
-------------
Dodge Magnum in progress:
Pioneer DEH-80PRS - PPI Amps - Dayton Subwoofer(s) - Exodus Anarchy's - Vifa Tweeters - Kinetik Battery
Posted By: krush
Date Posted: December 20, 2012 at 1:37 PM
got home early from my Liquor store last night to do some work on the Pathfinder....... Got a lot of work done....
Deaden the driver door with Rattle trap, Sprayed 4 coats of liquid deaden-er
Passenger side door done
Got started on the driver door with 1st layer of FG
Used the new roller (work like a dream, no bubble and used less resin)
Ran the 2 14awg speaker wires for the 6.5 comps... Let me tell you it was a pain the but.... it took me a hour to get the wires thought the boot.
Just received the new RCA wires from Knukonceptz. Will be taking the head unit out soon now.... need to redo the z130bt basal as the shop i got it installed from did a crap install job.
 ------------- The best tool in my work shop, is my BRAIN!!!!
Posted By: krush
Date Posted: December 21, 2012 at 9:31 AM
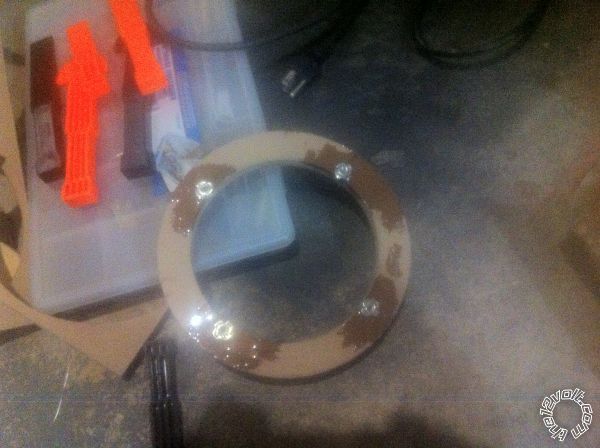
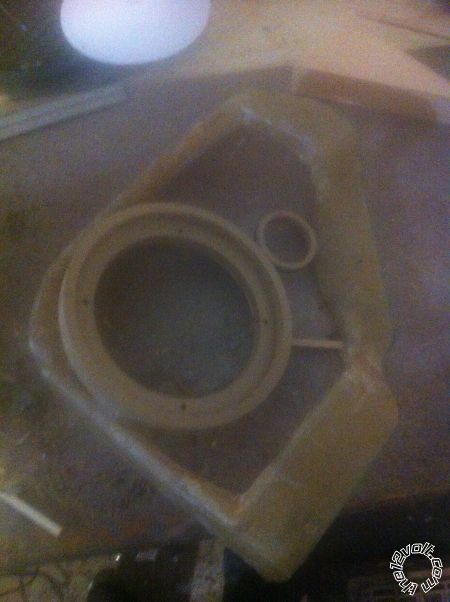
fitted the 6-1/2 rings with a #8 T-nuts on the back of the rings.
Thinking of mixing up some JB-Weld to strengthen the t-nuts
Next is to glue the rings to the FG door mold after i test the angle i need to face them for the center dome. But the space is tight on each side of the front seat area that i don't know if it will make a diff? but i have the 3-1/2 in the A-pillars for my mid/highs :) ------------- The best tool in my work shop, is my BRAIN!!!!
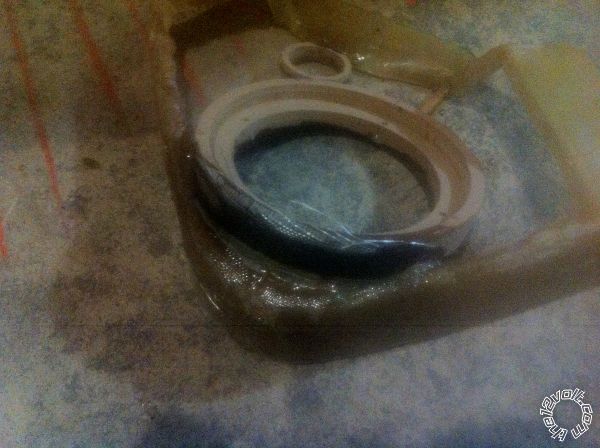
Posted By: krush
Date Posted: December 25, 2012 at 9:43 AM
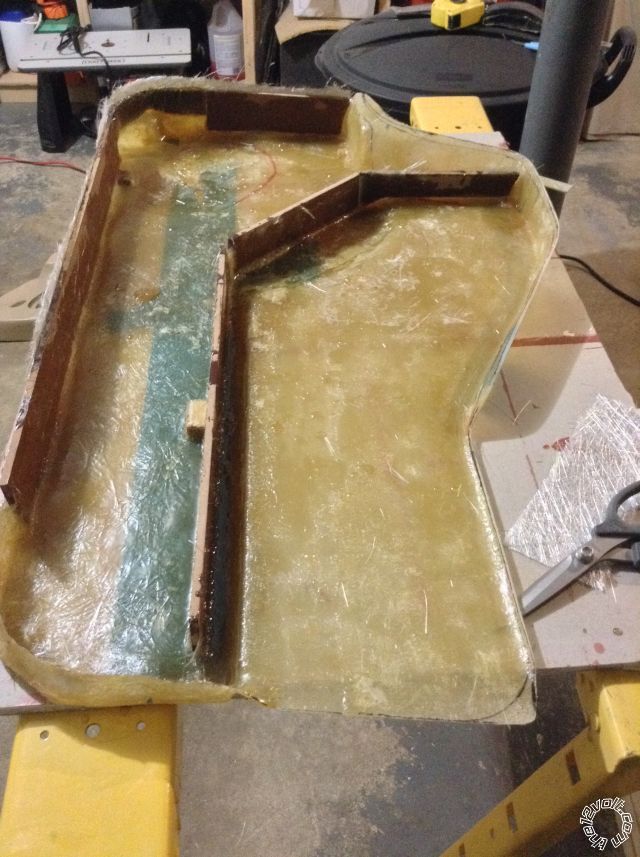
put some FG on the t-nuts and FG to make it stronger. Next is to get a t-shirt and rap the whole door panels and then a lot of FG layers.

Stay tuned kids..... I will show you a way to reinforce your FG work cheap. Another trick my dad showed me back in the days. I use this trick mostly on FG sub box's..... and never had one crack or fail yet.
Happy Holidays ------------- The best tool in my work shop, is my BRAIN!!!!
Posted By: soundnsecurity
Date Posted: January 01, 2013 at 10:23 AM
so you sprayed the stick on door liner with deadener? why? the door skin itself is what you need to spray to get best results and if i saw correctly you only used some strategically placed strips of the rattle trap? did you spray the inside of the door too?
this is how i did mine. its just some cheap generic dynamat.
it was a real pain to work around all the wire harnesses and door cables and also mark and cut out all of the screw holes and snap holes. once they were dont though it made a huge difference in road noise.
i have those same knukonceptz RCA's and i will warn you that the flexible ends have a problem, when they bend or shake they will send a clicking sound through them so make sure the ends are very secure when you run them.
nice job on the rings -------------
Posted By: krush
Date Posted: January 04, 2013 at 6:15 PM
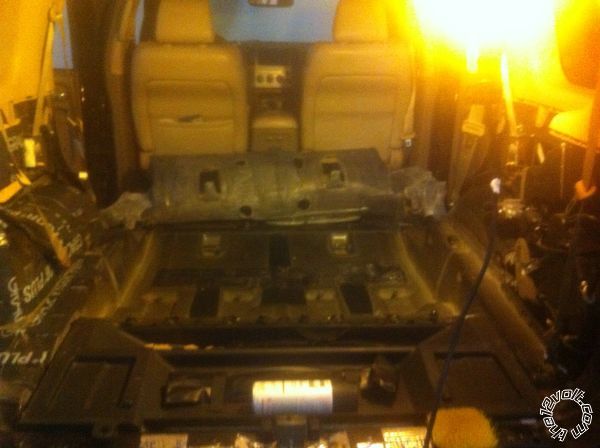
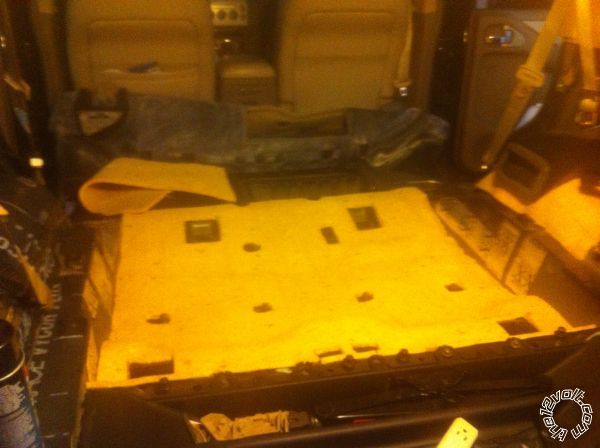
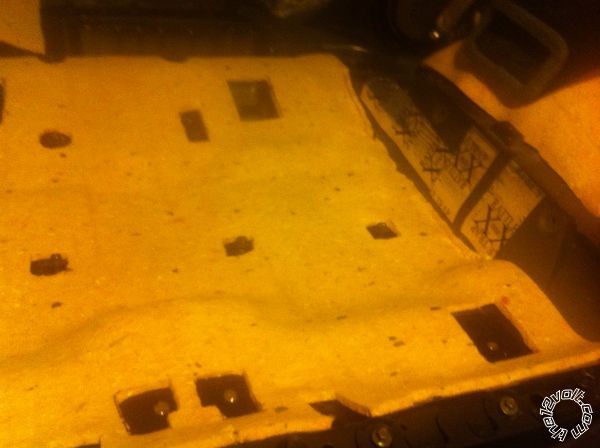
I did the ping test to see what areas needed the deadener, i used 80mil deadener so i only need to cover 50%. Also added deadener to the inter as well. I'm going to cut 1/4 MDF for the open areas of the door and screw them in. I hate to block the access port for the doors. I sprayed 5 coats to the open-cell door lining with Spray and Seal from Home Depot (didn't want to use MLV). They had them for 1/2 price, so i pickup 3 cases. This stuff works great as deadener, is very flexible after it drys and its waterproof. But has no control spray lol that why the over spray on the fat-mat hahaha. Made a big difference to the doors and floor.
I want my truck to be soundproof as well as dead, so i did the same for floor. Laid fat-mat 80mil for deadener (got it in bulk of amazon), the used 8" wide 20mil rubber on top of the fat-mat and then sprayed the rubber with spray & Seal to seal the over laps. and final added 3/4 cell foam to the floors.
 ------------- The best tool in my work shop, is my BRAIN!!!!
Posted By: soundnsecurity
Date Posted: January 04, 2013 at 6:45 PM
damn thats a lot to do to deaden your floor. im about to roll my whole floor too probably in a month or two. im pulling the entire interior and using a combination of fatmat and rubberized under coat and probably some dense foam in certain locations like the kick panels and inside the pillars. also going to roll the roof twice which i should have done when i changed the headliner to a different color and material, but i didnt have the money for another roll of fatmat at the time.
i just wanted to make sure you knew that just spraying that rubber door liner with deadener is not enough to seal out outside sounds. you have a good idea with making cover panels to cover the holes in the door instead of covering it with fatmat like i did, i should have done that myself but i didnt think about how hard it will be if i ever need to change the window or the regulator. ill be doing that myself so at least nobody else has to suffer from my mistakes.
-------------
Posted By: krush
Date Posted: January 05, 2013 at 9:41 AM
Hey sound, i saw that knukonceptz has a 100mil deadener out, going to get that for the front floor. I like there products so far and if its 100mil thick that's the best so far. i will let you know. I want to do the roof too, just no time yet. if you have pic or tips on how to remove the liner plz post it for me. thx
-------------
The best tool in my work shop, is my BRAIN!!!!
Posted By: krush
Date Posted: January 05, 2013 at 10:54 AM
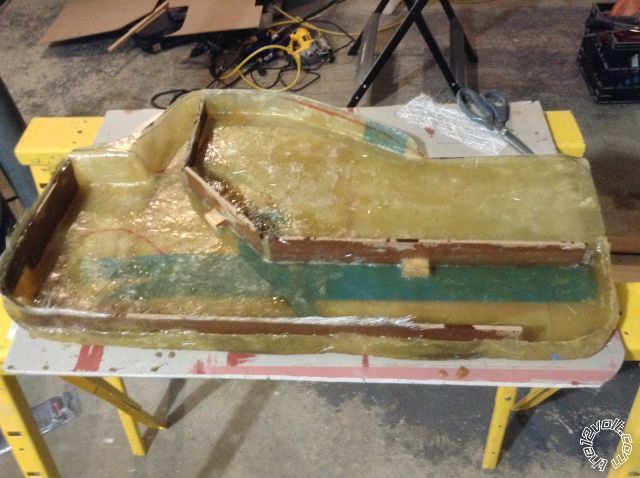
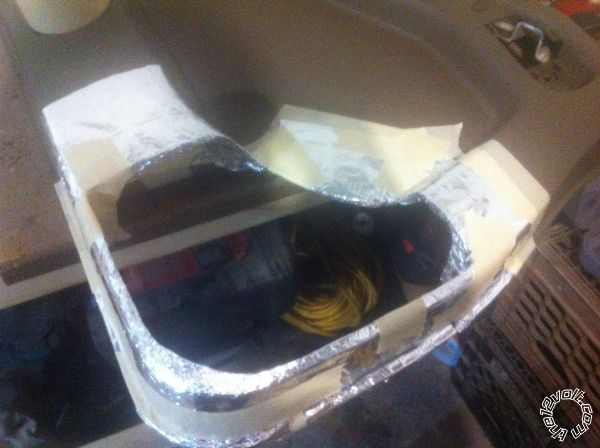
Wife did a great job on wrapping the FG door pods with a t shirt.
YA i said the wife. Gotta love her!!!!!
Now for the fun part..... FGing ------------- The best tool in my work shop, is my BRAIN!!!!
Posted By: soundnsecurity
Date Posted: January 05, 2013 at 7:04 PM
nice pods dude those look good. the headliner in your pathfinder should be way easier to take out than my frontier because you can slide your through the back hatch. i cant really give you specific instructions on yours without seeing it so if you want to post pics of your pillars and anything thats attached to the headliner then i should be able to walk you through it.
but, basic instructions would be to pull all of the pillars out. i think you have to start from the bottom on the B pillars.
all of the overhead handles need to come off, they are screwed in with 10mm bolts.
the map light and overhead compartment should just pop off if it is the same like mine. it might be hard to pull off if it has never been detached before.
any rear dome lights should have screws in them that you can get to after you pop off the cover.
be careful when you finally release everything from the headliner because any wiring harnesses that run along the roof will be glued to the headliner. just pull them loose but try not to rip the headliner form too much because its made of paper.
after everything is loose you should be able to just slide the headliner out the back hatch. you might have to bend it a little. i almost had to bend mind in half to get it through my door.
after that you just need to glue the new material on top of the old headliner. most headliners you would have to strip the old material off but these you dont have to.
MAKE SURE YOU USE GOOD GLUE AND SPRAY BOTH THE HEADLINER AND THE NEW MATERIAL. i use fabric and foam glue that i get from a distributor that needs to be sprayed with a spray gun. the lowest i would recommend is 3M foam and fabric adhesive.
do half of the headliner at a time, dont try to do it all in one shot. line up the new material on the headliner to make sure you have the fabric straight. fold the material in half and spray glue on the exposed half. let the glue rest for about 5 minutes and then lay the fabric over a little bit at a time, smoothing it out with your hands. be careful not to cause any wrinkles or creases when you lay the fabric because they dont come out. i suggest at least one other person help you with this part.
once you have one half done just repeat the process with the other half and then let the headliner sit and dry for a few hours before you try to put it back in your truck.
edit: just realized that all you wanted was to drop the headliner to dynamat the roof so sorry about the giant post but ill leave it up since it might be helpful to someone.
-------------
Posted By: krush
Date Posted: January 07, 2013 at 11:28 AM
Thx for the tips Sound....
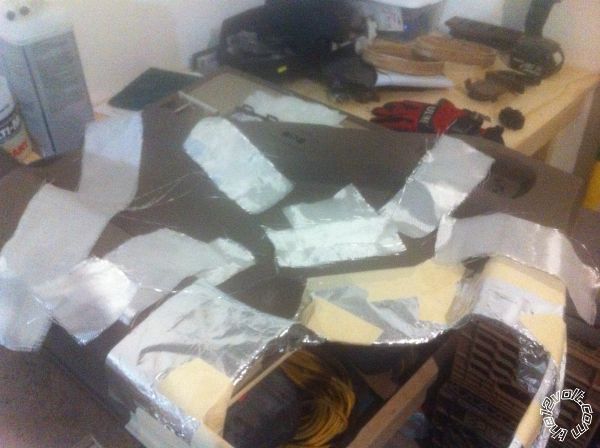
Did the soundproofing on the door and tailgate panels.
laid the rubber and open cell foam. I was going to use Great Stuff in the large gaps, but its messy and expands to much which may cause the door panels to warp.

laid 5 layers to inside of the pods. Didn't put any on the outside cause i didn't want to bulk up the nice curves.
put on filler and Cant get good curves with machine sanders so i hand sanded for 3 hours and still not done.
 ------------- The best tool in my work shop, is my BRAIN!!!!
Posted By: soundnsecurity
Date Posted: January 09, 2013 at 10:17 AM
is that yellow foam you used in your door expensive? im thinking of doing the same thing but im also going to roll some dynamat along the seams of the door panel to make sure they are solid.
i learned my lesson about using great stuf foam inside a car long ago. just dont do it. its hard to work with and keep clean and it never comes out if you get it somewhere you dont want it.
-------------
Posted By: krush
Date Posted: January 11, 2013 at 11:34 AM
The yellow foam is just carpet lining from your local Carpet Store. Its the same open cell foam that the car audio company's push on us, just not as pretty lol. i think i pay $100 for a 20'x10'x3/4" roll, got it last year. I glued down MLV (got from Amazon) to the panels fist and then put the cell foam on. Cheaper then deadner and way better improvement.
-------------
The best tool in my work shop, is my BRAIN!!!!
Posted By: krush
Date Posted: January 15, 2013 at 10:54 AM
OK so i finished the door pod!!!! not liking them at all!!!!
1) color doesn't flow with the doors
need to add a few flat panel designs with more same color.
2) dam pod edges are way too thick
sand the hell out of them to 1/8 thick instead of the 3/8 (got a little layer happy when i got the new FG rollers in LOL)
3) there is a lot of where and tear in the doors so I'm going to cover the pod in beige vinyl.
Guys let me know what else you see wrong!!!! open to comments and help
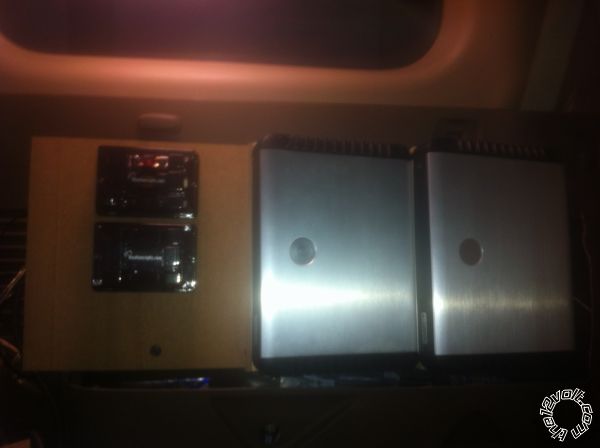
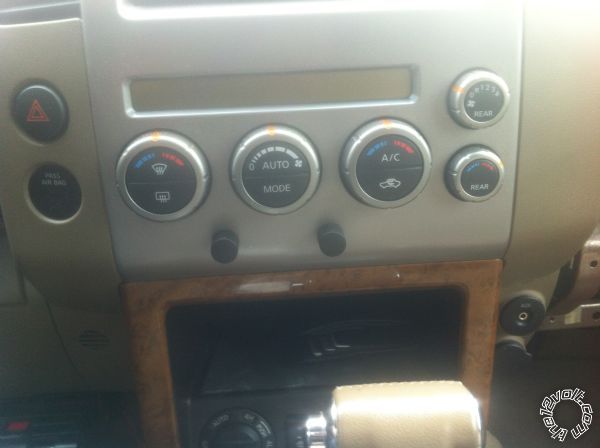
Installed the JL amp volume controls and the pioneer rear-view camera controller in the dash. The local shop that install the Avic-Z130bt did a very bad job on the install. Had to redo most of it. Even worst they put the GPS antenna behind the radio under the dash. wth NO WONDER why my GPS was always giving problems. Going to mount it on the center dash.
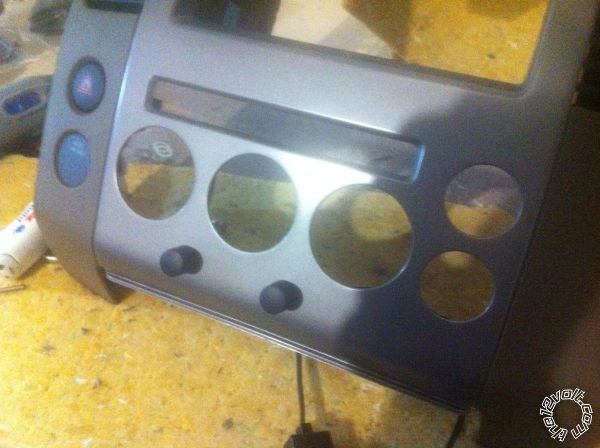
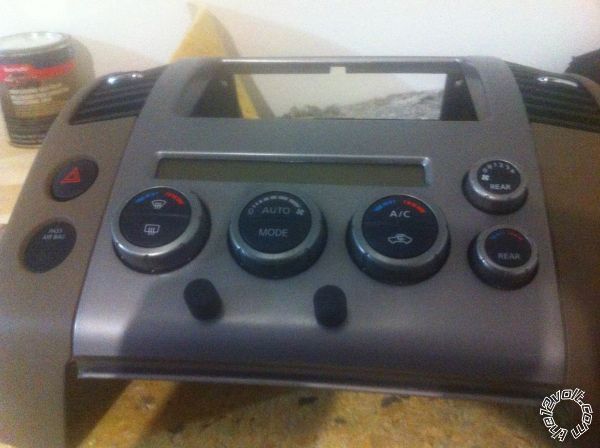
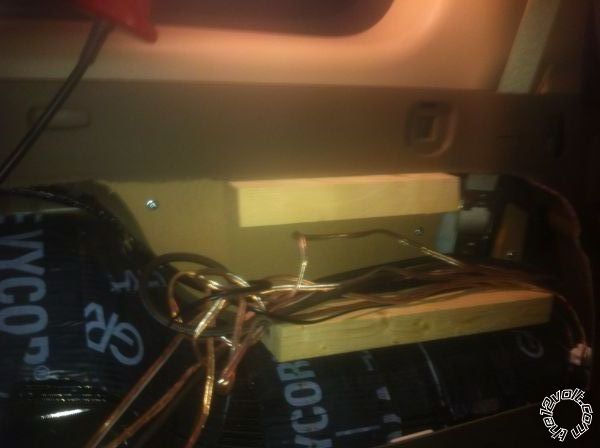
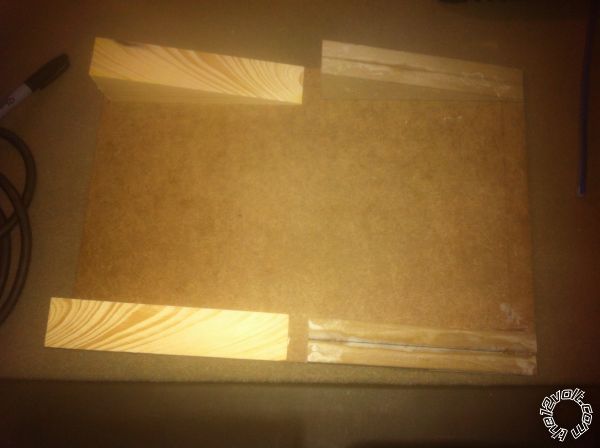
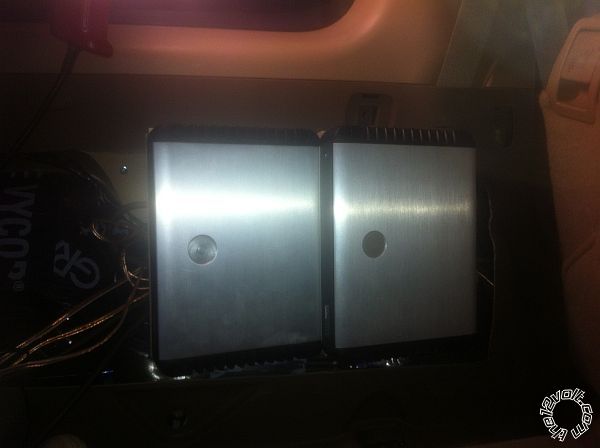
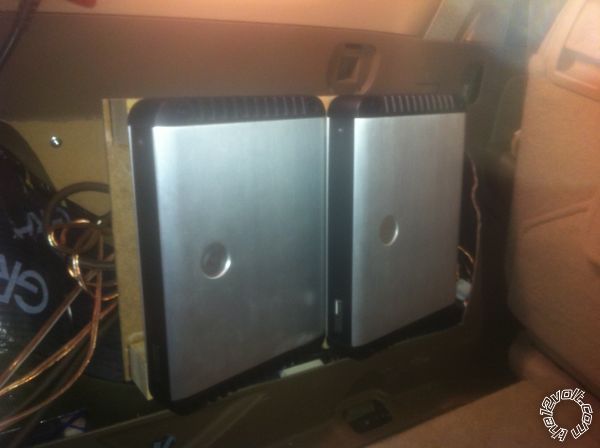
Wired the RCA's and front a-pillar speaker wires (still haven't ran any of my power/ground wires) to the JL XD400/4 under the driver seat
Cut the volume controller wire and re-crimped the RJ-3 jack (just so you guys know the JL volume controller wire is just a simple 4wire pots line crossed over)
 ------------- The best tool in my work shop, is my BRAIN!!!!
Posted By: soundnsecurity
Date Posted: January 16, 2013 at 3:10 PM
arent those giant RCA's just a blast to work with in tight spaces? i hated running those under my seats...
wow ive never seen someone just stick the GPS antenna under the dash. if i were you i would run the antenna to the roof or at least to the center of the dash in the corner by the windshield. the gps works better with line-of-sight, so having it inside your vehicle is still not the best spot.
i saw the cover you made for the shift knob too, i once thought about making something for my shifter but i dont know what i want to use. i didnt think of fiberglass but maybe i should make one
-------------
Posted By: krush
Date Posted: January 16, 2013 at 4:27 PM
Ya they are a pain in the but. The RCAs are the same size as the 4AWG Knuknoceptz. And i had to run 4 of them, 2 for the front, 1 for the rear and sub channels. Just the 2 took up all the space in the side well under the door sills :(
Sound that's the OEM shifter on the LE Pathfinder!!!! LOL
I have no clue how to make one YET....
-------------
The best tool in my work shop, is my BRAIN!!!!
Posted By: soundnsecurity
Date Posted: January 16, 2013 at 5:40 PM
OH! damn, it looks like it has about the same texture as the pods you made and i didnt notice the stitching that you can barely see in the picture. oh well i wanted to make a cover because it has a scratch on it. but it did give me an idea to make a cover out of fiberglass. it should be awesome painted gloss black like my truck and also planning on painting the dash kit and some other accent pieces with my new snap-on airbrush that i have been itching to use.
i only had to make one long run with those RCA's to my passenger seat and then two 3ft runs under the console to the drivers seat to my PDX 4 channel. i have a different kind of RCA running to my bass amp.
-------------
Posted By: krush
Date Posted: January 23, 2013 at 2:48 PM
Posted By: soundnsecurity
Date Posted: January 25, 2013 at 9:21 PM
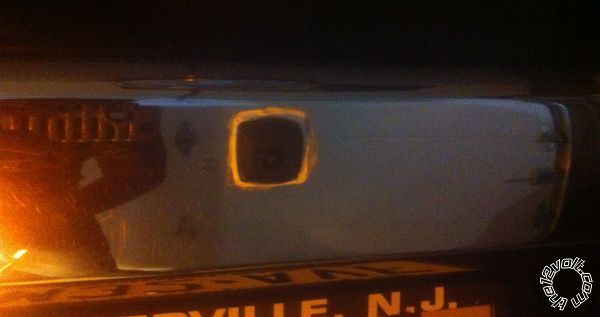
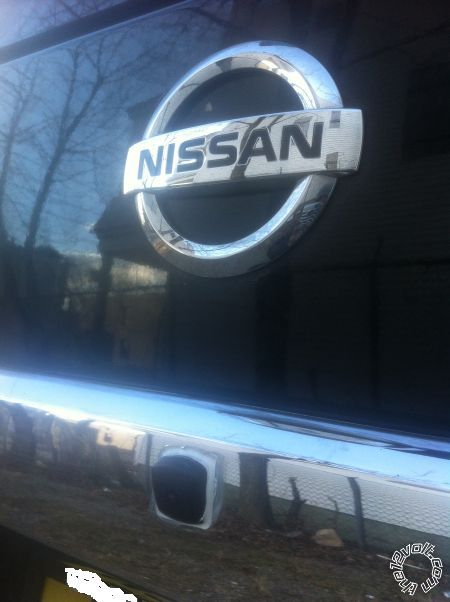
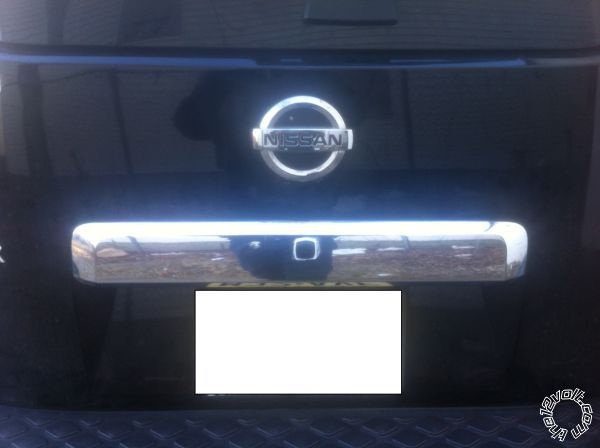
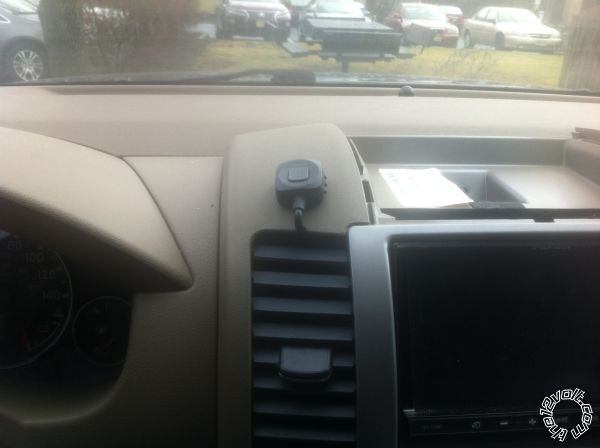
did you have to cut a hole for that rear view camera? or did you do that so it would sit more flush?
-------------
Posted By: krush
Date Posted: January 28, 2013 at 11:11 AM
well i wanted it centered, flush, and it was the best height for the view angle. Also tying make it look like a factory fit, well after i put the plate over it, lol.
-------------
The best tool in my work shop, is my BRAIN!!!!
Posted By: krush
Date Posted: April 16, 2013 at 11:09 AM
OK so I wasn't very happy with the JL Audio C3-650's..... So purchased the JL ZR650 front the fronts :)

Started redoing the front doors cause I also bought JL6W3v3 for the door subs. The first pods don't flow with the door, so the extra 6"sub should work better. Need to make a enclosure for the 6" sub that 0.16 cu ft (will probably need to cut away the bottom of the door panel..... and i was so looking to save the cup holder in the door :(
New rings for the ZR's, I round the top to get a better shape on the FGing. Still need to drill the 8 holes and add T-nuts to the rings
 ------------- The best tool in my work shop, is my BRAIN!!!!
Posted By: krush
Date Posted: April 16, 2013 at 11:26 AM
Posted By: soundnsecurity
Date Posted: April 16, 2013 at 8:49 PM
hey man, this is kind of off topic but relevant at the same time. this is a problem with my doors that i just fixed and you should be experiencing the same problem considering that our doors are the same.
i have 7" diamond audio mids and you will be using 6" subs in your doors. there is a rattle on the door that i just finally tracked down a few weeks ago and fixed and its probably the last this youd expect to rattle. the rubber trim that goes around the door glass on the top of the door frame will rattle against the rubber on the body side. it takes a considerable amount of bass and vibration to make this happen but when it does its really annoying and very audible even when the music is up. for the longest time i just chalked it up to my tweeter pods or some piece of plastic on the door but everything i tried didnt stop the noise. my doors are deadened very well.
if you havent noticed this yet and hearing this makes you notice it then im sorry but i also have the fix. just pull back the rubber trim to expose the pinch-weld around the upper door frame and use some sticky-backed foam in between the rubber and metal, this will put enough tension on the rubber so that it doesnt rattle.
also when the door is open, you see that plastic panel that runs against the side of the dash and is held on by a few snaps, this panel also rattles with the door speakers, put some light foam behind this panel too.
i hope your new components sound as good as you think they will, ive never been a fan of JL speakers, although ive never heard a set of ZR's, im sure they sound pretty nice when properly installed. they come in a nice box, my diamond D9's came in a wooden chest and the crossovers are probably 3X the size of those JL's. honestly, any speakers that come in a special box should sound awesome, even though i think you used the flash on your phone to make them look nice and sparkly 
im about to start my FG box build for an RE XXX 12 in my frontier, my glass and kevlar came in the other day and im just waiting on some money to order the XXX and a crossfire BMF1700, dont let the number fool you though, at 14 volts its a 2300 watt amp. the box will be a beast i promise and pics will be coming.
im also planning to re-make all of my upper pillars in pure carbon fiber and possibly my center console too, i just need to have some mold making practice and its on like donkey kong.
sucks you had to re-do your doors but i thought that you made a critical mistake of letting the edges of your cut show through in your glass work. i guess it was inevitabe because you only made a small part of your door with glass so its harder to make glass work blend in with a factory door panel, i think by making the whole bottom into a box for your JL 6" subs you can avoid having to make them blend and just show them off as a custom add-on. should be nice... -------------
Posted By: krush
Date Posted: April 24, 2013 at 10:38 AM
OK all work on the car has come to a HALT. Trans issue on the pathfinder along with the radiator :( in the hole for $5k now.
-------------
The best tool in my work shop, is my BRAIN!!!!
Posted By: soundnsecurity
Date Posted: April 24, 2013 at 5:18 PM
damn, what happened with your transmission? do you know? i think the transmission has a line that goes to the radiator that cools the transmission fluid, maybe the radiator malfunctioned and caused the trans to overheat.
-------------
Posted By: krush
Date Posted: May 07, 2013 at 10:05 AM
got the pathfinder back $5500.00 later...... Sound it was the exact problem you said, known problem with Nissan.... but its all fixed and back to work on the car again :)
Question: any one have a idea on how to bolt the door panel to the doors, with the subs in the panel i don't think the plastic snaps are going to hold very well.
-------------
The best tool in my work shop, is my BRAIN!!!!
Posted By: z03mz03m
Date Posted: May 07, 2013 at 7:13 PM
Damn dude that's a b that you had to put a new tranny in. I just put a new motor and turbo in my Mazda...7 G's later...It hurts...but it was worth it.
I have been brainstorming ways to go about bolting the door panel to the door in my Magnum. I believe i'll be making a tunnel between the speaker baffle and the sheet metal with flanges that I can screw into the baffle and the sheet metal. I will also be filling the holes in the door to make a mostly sealed enclosure for the Anarchy's. I will also use some threaded rivets to convert the holes for the plastic pins to bolt holes.
-------------
Dodge Magnum in progress:
Pioneer DEH-80PRS - PPI Amps - Dayton Subwoofer(s) - Exodus Anarchy's - Vifa Tweeters - Kinetik Battery
Posted By: lucasoil4u
Date Posted: June 18, 2013 at 1:57 PM
new Transmission and New Radiator. Transmission cooler breaks inside the radiator and allows coolant in the transmission fluid. Everyone of those trucks does it. Put on an external cooler and dont use the radiator cooler for the transmission.
Posted By: soundnsecurity
Date Posted: June 22, 2013 at 7:19 AM
Krush, you can easily find some different snaps to use on the door panel, might take a little trial and error to find the right ones though. also i dont know if you have seen or done this already but to get yourself some extra clearance around the factory speaker location you can trim down the plastic grid lines that raise up 1/4 inch or more from the main door panel. i had to trim those completely out to give myself enough room for my 7" diamond mids to move freely without hitting the door panel.
you should use a blade thats kind of flexible so that you can get all the way to the base of the grid lines without cutting into the panel itself. that alone could give you the clearance that you need for the panel to snap back on.
Posted By: krush
Date Posted: August 23, 2013 at 10:28 AM
Hey guys have a question.... what should i use to bond MDF to my plastic door panel? i used hot glue in a few spots to hold the MDF to the panel for now, but i know that wont hold for long. Would FG give a good bond? keep in mind that i will be building a sealed enclosure for a 6w3 JL sub, a lot of vibration to the panel. I cant use super glue type cause its to thin and run thou the cracks.
-------------
The best tool in my work shop, is my BRAIN!!!!
Posted By: soundnsecurity
Date Posted: August 26, 2013 at 9:03 PM
use an epoxy type glue, and make sure you can clamp the pieces together so it will bond . i would use some bolts and washers as extra support.
Posted By: krush
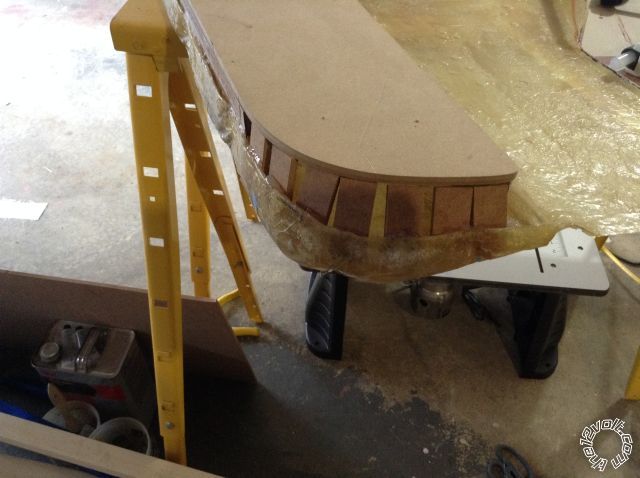
Date Posted: October 17, 2013 at 11:50 AM
Ok so i tried a epoxy glue, but the hold wasn't strong enough for me.
So i cut 1/8" thick x 3/4" wide aluminum strips and bent them to the angle i need. worked out better for me.
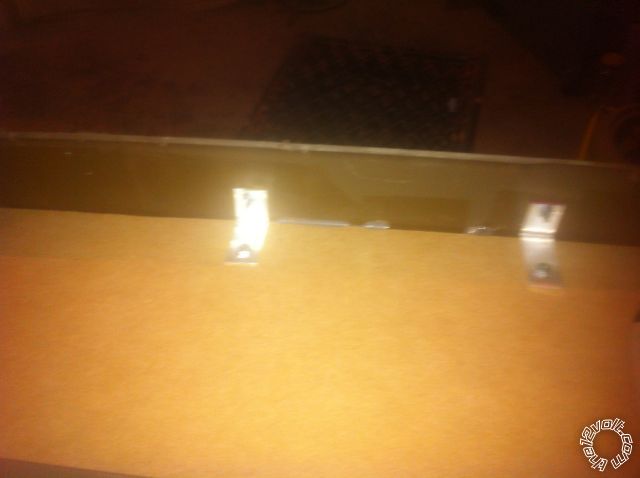
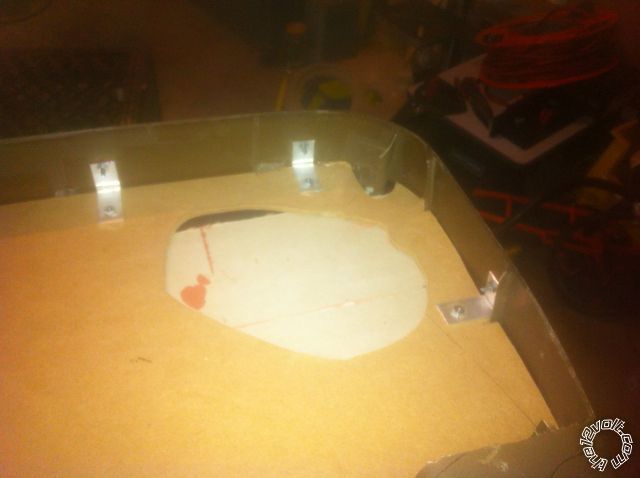
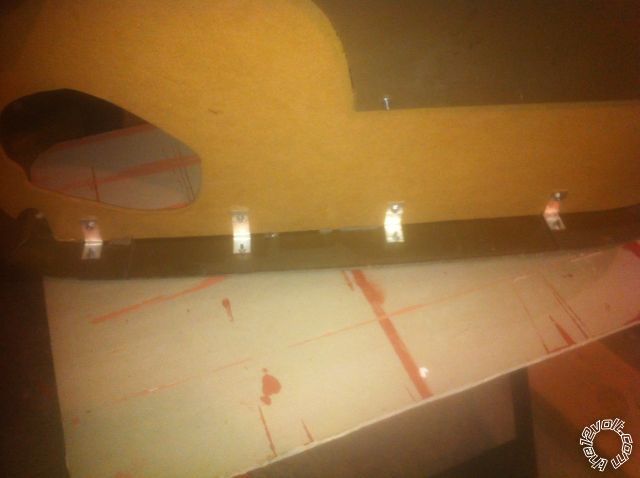
Now its time to get out the blue tape and FG!!!!!
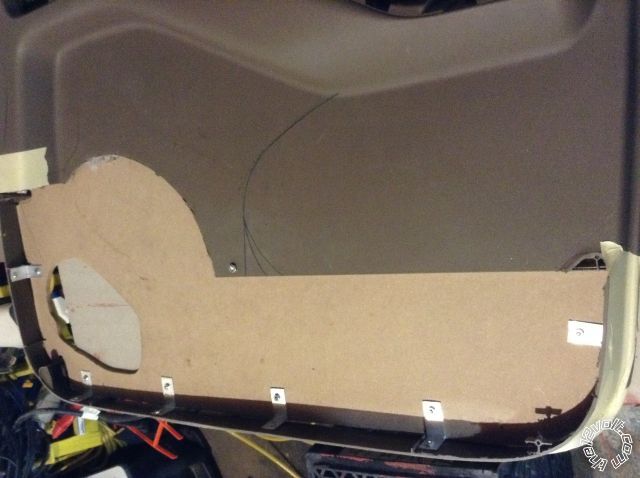
This time i cut away most of the bottom of the door panel to get the FG box for the JL 6w3 to fit and look right. ------------- The best tool in my work shop, is my BRAIN!!!!
Posted By: z03mz03m
Date Posted: October 17, 2013 at 2:27 PM
This guy has some good technique and attention to detail. I know i watched a FG tutorial in which they used some profesionall grade epoxy called somthing 90 that I cant find anymore but I looked into it and you have to buy a $100 dual tube caulk gun to use it and the epoxy/glue is really expensive itself andd theres no good way to save the stuff once its open. So ive been stuck figuring out ways to get around this problem. Your's seems to be the most reliable although it creates more finishing work to hide the screws.
Writing this made me think of an adhesive i used all the time when i worked at the arcade "Amazing Goop" "Plumbing formula" its in a purple tube and has caracteristics similar to hot glue but is not temprature sensitive. you may want to get some to use in addition to your brakets to prevent rattling. alone it wouldn't be strong enough but it bonds well to most plastics and ....web search later...Here is your best bet, the Automotive fomula "Fix cracks in dashboards and paneling"
Amazon has it for sure the Home Depot may have it because they also have the plumbing formula. I'd scuff up the surfaces well too if you use it. ------------- Dodge Magnum in progress:
Pioneer DEH-80PRS - PPI Amps - Dayton Subwoofer(s) - Exodus Anarchy's - Vifa Tweeters - Kinetik Battery
Posted By: krush
Date Posted: October 18, 2013 at 9:39 AM
Posted By: soundnsecurity
Date Posted: October 19, 2013 at 3:09 PM
interesting.
Posted By: krush
Date Posted: October 23, 2013 at 10:05 AM
Posted By: krush
Date Posted: October 23, 2013 at 10:15 AM
****** Forgot that where i put the Screws on the angles, I should have used Rivets with large diameter heads :( (flatter and easier to hide with paint). Will have to fix that tonight.
-------------
The best tool in my work shop, is my BRAIN!!!!
Posted By: z03mz03m
Date Posted: October 23, 2013 at 2:55 PM
Are you planning on using any bracing? There is a lot of flat fiberglass in that enclosure that may flex more than you would like, especialy with that little monster in there! I am thinking a few dowels between the FG back and the MDF baffel?
-------------
Dodge Magnum in progress:
Pioneer DEH-80PRS - PPI Amps - Dayton Subwoofer(s) - Exodus Anarchy's - Vifa Tweeters - Kinetik Battery
Posted By: krush
Date Posted: October 23, 2013 at 4:25 PM
I plan to fiberglass 2 1"x1" blocks in the middle of the box and then drill a 1/4 thou hole in the middle of each block for screws, this way the block act as bracing and hold the panel to the door like a spacer.
-------------
The best tool in my work shop, is my BRAIN!!!!
Posted By: soundnsecurity
Date Posted: October 24, 2013 at 6:52 AM
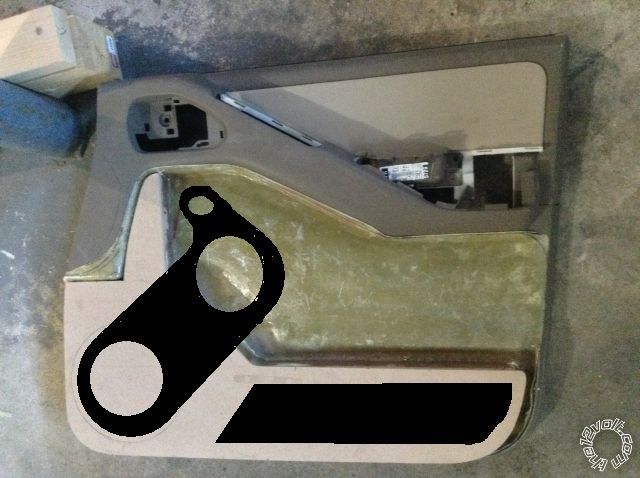
looks good so far man, if i were you i would maybe add an accent piece towards the right side of the panel just so its not so flat and featureless. give the front a body line so-to-speak, it will give it a beveled edge effect just like the rest of the panels in your pathfinder.
Posted By: z03mz03m
Date Posted: October 24, 2013 at 7:00 AM
SNS I was thinking the same thing! But it looks to me like he is planning on stretching some fabric over the whole thing based on the raised speaker ring. Am I right Krush?
------------- Dodge Magnum in progress:
Pioneer DEH-80PRS - PPI Amps - Dayton Subwoofer(s) - Exodus Anarchy's - Vifa Tweeters - Kinetik Battery
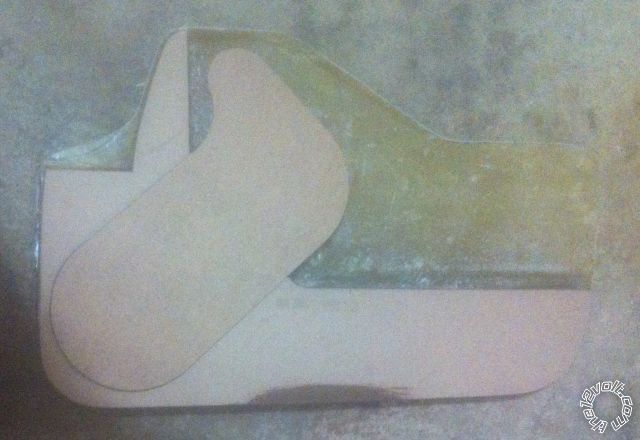
Posted By: krush
Date Posted: October 24, 2013 at 10:24 AM
I plan to put a raised template shown in black and then FG it Then put a 1/2 boarder around it. This way I can cover the whole thing with vinyl and the boarder pieces with carbon fiber vinyl and the speaker cover in black paint to match the car.... sorry i know its had to understand it from what I've write. But, in simple, there is no way
I'm leaving the panel flat. Ive seen and learned way to much from this site to do that.
 ------------- The best tool in my work shop, is my BRAIN!!!!
Posted By: krush
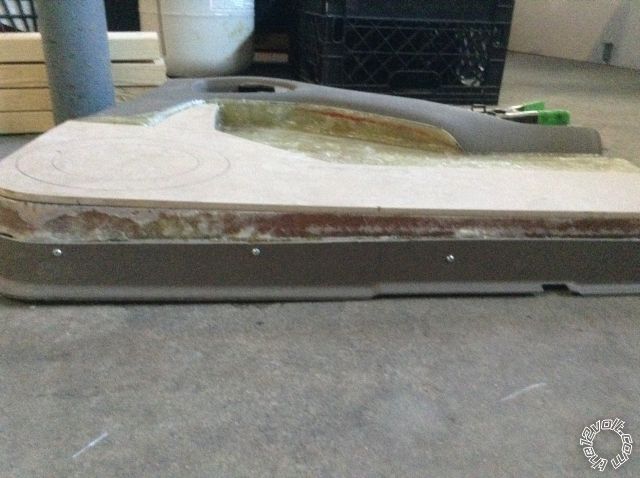
Date Posted: October 30, 2013 at 10:49 AM
Stated out on the templates for the doors. I made both of them out of 1/4" MDF. Used a 1/4" rabbit bit to make the inner template, next will be to bondo it to make a 1/4" trim peace. Then onto the trim plate for the flat end.
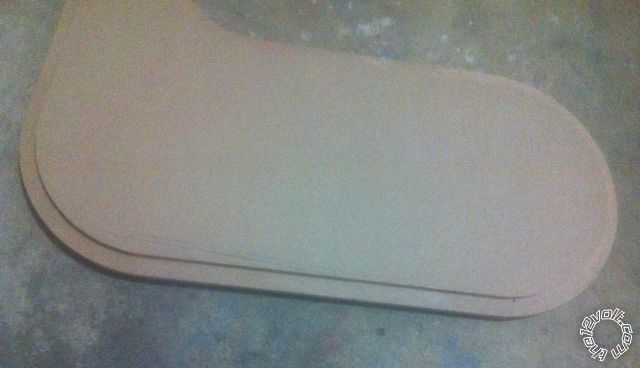
I wont be using the ring, just put there to give me a idea of the set up.
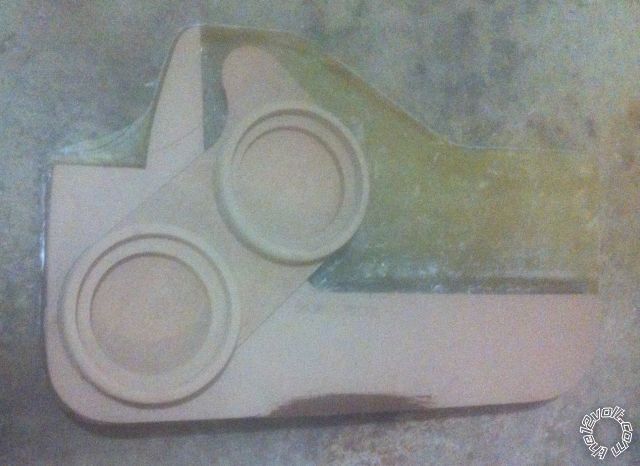 ------------- The best tool in my work shop, is my BRAIN!!!!
Posted By: soundnsecurity
Date Posted: November 02, 2013 at 8:59 AM
its definitely coming together nicely. carbon fiber vinyl? please tell me you arent planning to use the stick on vinyl that looks like a checkerboard? or do you mean fabric vinyl? either way, check out the 3m carbon fiber stick on vinyl, its about as real looking as it gets. its stick on vinyl so it will take a little bit of practice to apply to your curved surfaces.
Posted By: soundnsecurity
Date Posted: March 03, 2014 at 11:51 AM
any updates man?
|