First box, w/ pics
Printed From: the12volt.com
Forum Name: Fiberglass, Fabrication, and Interiors
Forum Discription: Fiberglass Kick Panels, Subwoofer Enclosures, Plexiglas, Fabrics, Materials, Finishes, etc.
URL: https://www.the12volt.com/installbay/forum_posts.asp?tid=48778
Printed Date: May 12, 2026 at 8:30 AM
Topic: First box, w/ pics
Posted By: Jack@$$
Subject: First box, w/ pics
Date Posted: January 28, 2005 at 2:38 AM
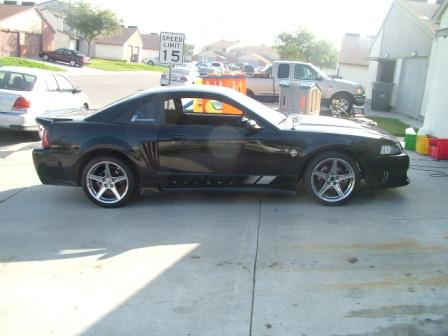
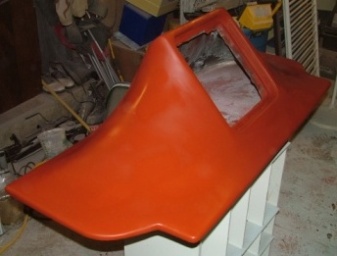
Ok, so after months of reading and learning, i finally found a candidate for some prac/app. My friend wanted a fg box built, and was willing to hire me to do it. I was going to wait till it was completely finished to post this, but i think it's close enough to done to post. the plan is to put a single 12" L7 in this mustang, where the rear seat used to be, firing towards the rear window, and the amp rack going where the rear seatback used to be.
so, here's the car:
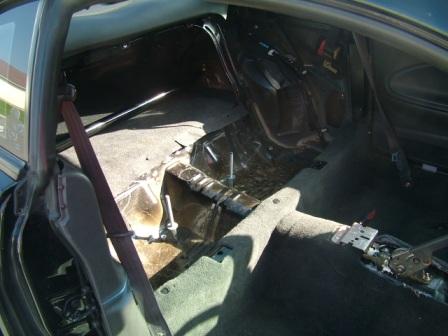
and here's where it'll mount down:
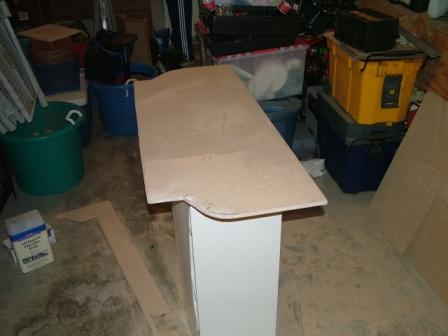
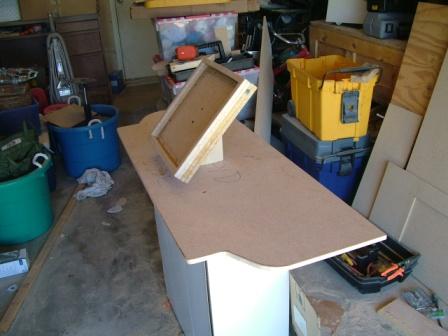
after getting a template on cardboard of the contours of the rear panels, we get our base cut:
four pieces of 5/8" mdf, lots of cutting, and lots of glue, got us our ring:
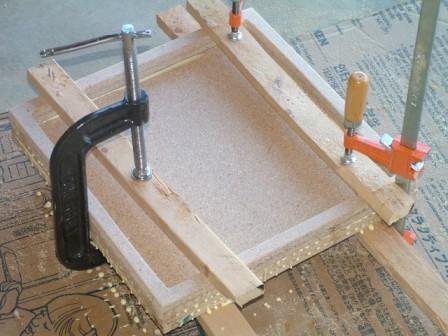
ring sanded, and mounted to the base with a 2x4 to support the stretching:
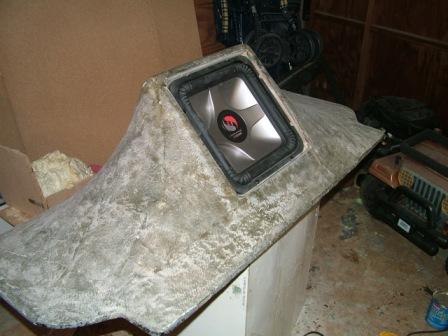
and all stretched and plugged:
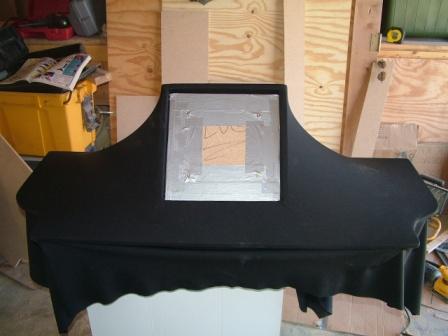
first layer of glass. over the next couple days of working on this when i could, i came to the conclusion that weave is bad, mat is the shiz:
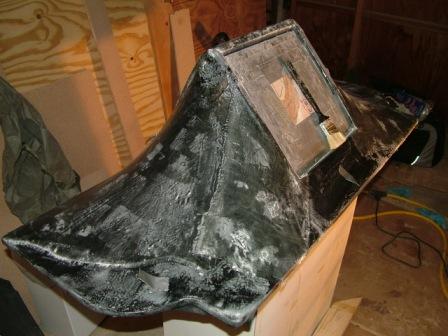
and after the 7th and final layer of glass:
then the real fun begins....SANDING!!:
one of the many things that i learned on this project, is that i really don't like hurricane nuts. my friend ordered them from parts express because of how much better than t-nuts they claimed to be, i didn't find them to be all that. when doing a mock up with the sub, four of the hurricane nuts came out with the bolts half on them, so the only way to get them off the bolts, was to cut a hole in the bottom to get my hand up there to hold them. luckily i read in the forum how to repair such a F-up: 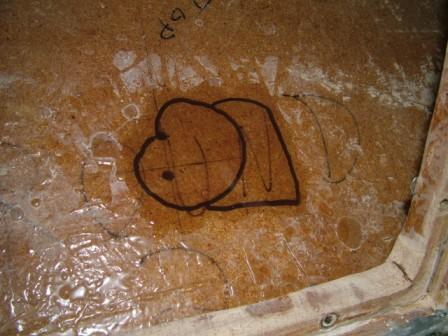
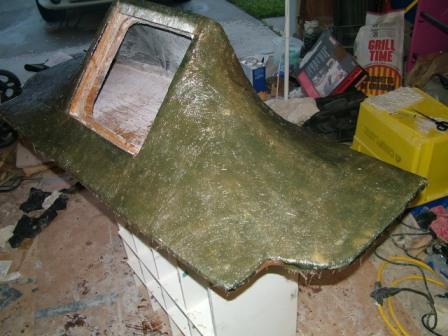
couldn't find any rage gold, not that we looked for days or anything, so went with the bondo premiere. not bad stuff:
and after way more sanding:
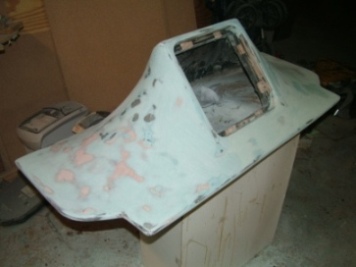
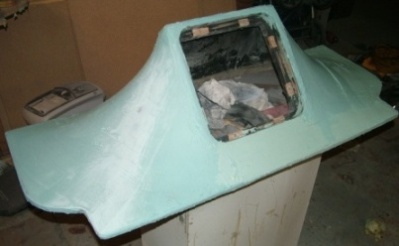
which brings us to the current state, fresh primer, waiting for wetsand and paint:
and after that's done, wire it, and build the amprack. finished pics should be in by next week. hope you enjoy.
Replies:
Posted By: realitycheck
Date Posted: January 28, 2005 at 8:27 AM
First off phenomonal job for your first box man. Thats incredible, and I cant wait to see the finished pics good job man.
-------------
Learning the trade one fiberglass creation at a time!
Posted By: Teamrf
Date Posted: January 28, 2005 at 8:30 AM
I agree that is a GREAT job for your first time. Be sure to keep us updated with pics..we like pics..  ------------- ~The Rookie~
Rookie of the year that is...
Don't let the smoke out of your equiptment..it doesn't go back in.
Posted By: spl-Hz
Date Posted: January 28, 2005 at 11:41 AM
Nice work BRO. Always love step by step photo's. Keep up the good work.
Posted By: j_darling2007
Date Posted: January 28, 2005 at 12:34 PM
Thats an awesome looking box. Was it very hard. Do you think anyone can do it with enough time and patience (and a lot of sanding). I want to try to do a fiberglass sub-box. How many hours do you have in it. Anyway, nice job on the box. ------------- There are 3 kinds of people in the world, those who can count and those who can't
Posted By: Jack@$$
Date Posted: January 28, 2005 at 12:44 PM
hey, it was my first time touching fiberglass, so it's definately possible for a begginer. i've been working on it for about a month and a half, however that's just doing little bits here and there when i had the time. i just advise doing your research and having the plan before you start. while i was in iraq this year, that was what i tried to do was get as much knowledge as possible so i could start it. but i've got a couple other orders lined up, and i'm figuring they'll just get easier with experience. total working time till now is probably at about 100 hrs or so.
Posted By: doc t
Date Posted: January 28, 2005 at 4:43 PM
looks great can't wait to see the finshed product in the car, working on my son's box some more this weekend and will post pics sunday night. keep up the great work. fiberglassing is not as hard as it looks...just take your time.
-------------
All Bleeding stops.....eventually!
Posted By: HottAccord
Date Posted: January 31, 2005 at 1:29 PM
Once again some nice a$$ work...it's good to see more and more new people are tryin out the whole glass thing. Very much worth the time and effort once you see the finished product.
One hint for you though...kinda good that you used a MDF base. Try doing a search on cabosil or aerosil on here. Saves a lot of time instead of applying multpile layers of glass on the outside. Basically its a resin filler. Powdery substance you mix up with resin & hardener and makes a paste/gel type of texture. You can you this to stiffen up the enclosure from the inside. You basically, cut a big enough hole in the base, mix up your mixture of resin/cabosil/hardener & pour it into the enclosure. Spread it around, make sure you get in those corners. This stuff hardens up and forms a nice barrier that wont flex. Try to achieve at least 1/2 inch thickness.
But like I said, do a search, you will find a lot. I think I may still have a post floating around where I did this with an all fiberglass enclosure for my old Accord.
-------------
Im a fiberglass whore!!
Posted By: Jack@$$
Date Posted: January 31, 2005 at 4:07 PM
i have read up on the cabosil/aerosil, unfortunately i read about after a couple layers were already layed. did end up getting some q-cells though, same product basically. and yes, they were awesome to work with.
Posted By: realitycheck
Date Posted: February 01, 2005 at 7:49 AM
How do the q-cells work i've seen them before but didnt really know what they were used for??
-------------
Learning the trade one fiberglass creation at a time!
Posted By: Jack@$$
Date Posted: February 01, 2005 at 12:34 PM
q-cells are a thickening additive for resin, that basically makes a nice peanut butter that you can use for filler, and can even apply it in a vertical spot. sands like a dream. here's the link.
Posted By: Jack@$$
Date Posted: February 03, 2005 at 12:33 PM
ok, here's another pic to hold you over till the final pics are in. it took awhile, because we had it painted, but had to strip it and go through primer and paint again. clear coat ate the paint. but, we're back to having a sexy box. more pics in a couple days of the whole project done. 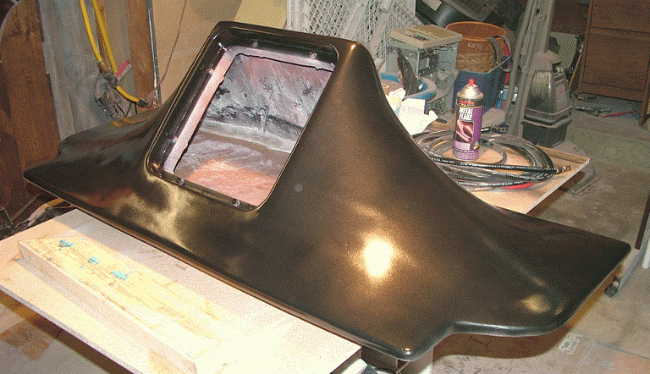
Posted By: realitycheck
Date Posted: February 03, 2005 at 1:36 PM
Looking awesome man, excellent job! Hey dont feel bad about the clear coat thing I built my little brother a gauge pod for his mustang. The exact same thing happened to us, I think it was just the type of paint we had.
-------------
Learning the trade one fiberglass creation at a time!
Posted By: Jack@$$
Date Posted: February 03, 2005 at 2:27 PM
yes, aparently lacquer and enamel are not good friends. guess i should have read a little bit more huh. oh well, the owner got to play with the q cells some more last night fabricating the console. love that stuff.
Posted By: realitycheck
Date Posted: February 03, 2005 at 3:43 PM
what did you use the q-cells for again?
-------------
Learning the trade one fiberglass creation at a time!
Posted By: Jack@$$
Date Posted: February 03, 2005 at 7:46 PM
ok, the q-cells, are a super duper ultra turbo fine powder (fumed cilica), that you mix with your regular poly resin, and after mixing it, you let it sit for a few minutes, and then add the MEKP according to how many original ounces of resin you started with. then you have what i like to call peanut butter. then you spread it around and use it to fill crevaces, or it can be used to do serious buildups. right now we're using it reconstruct a console. the undesired portion was cut out, fiberglass was stretched across the opening, then it was filled with peanut butter. then we took an iced tea bottle, wrapped it with foil, then a layer of weave. after it was dried, we pulled it off, and now we have what will be the base of the new cup holder. more pics to follow after tonight, lots to be done tonight. but here's the q-cells on the console.
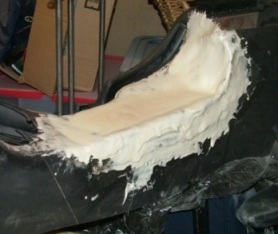
and the cup holder 
Posted By: Jack@$$
Date Posted: February 04, 2005 at 12:33 PM
AND THE BOX IS FINISHED!!!! bout time, but it's done. still working on the panels, more pics of those whenever we get them done. 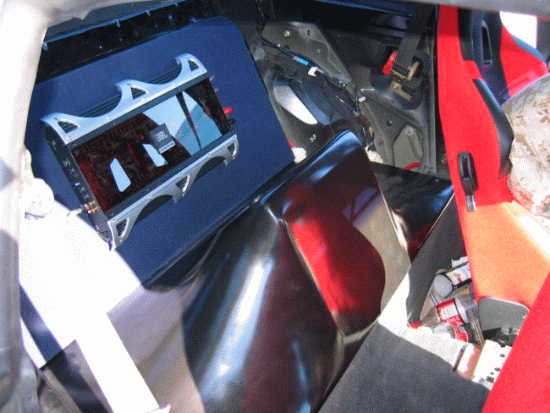
and another 
one more. 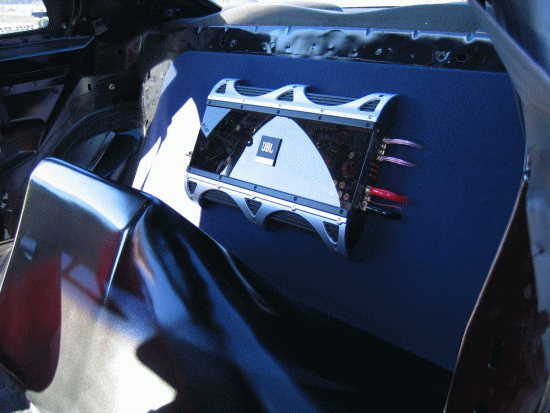
all you seasoned vets, let me know what you think... everyone else too of course.
Posted By: realitycheck
Date Posted: February 04, 2005 at 4:34 PM
Yeah my bad man I didnt make myself clear. I understood what they were I was asking what piece you used it on because I didnt see it on your box. I may just be missing it though. But now I see the pic you posted of the console. Good job mate on the box, looks like the amp rack is coming along nicely also. Good job man keep them coming. ------------- Learning the trade one fiberglass creation at a time!
Posted By: doc t
Date Posted: February 04, 2005 at 5:53 PM
most excelent!!
-------------
All Bleeding stops.....eventually!
Posted By: burton6363
Date Posted: February 06, 2005 at 11:10 PM
that is amazing work... i am at this time extremely aggrivated with big name install shops..(a&b sound) and am interested in starting my own fiberglass box. Only for two 10's, but hey i still want the trunk space and the ability to actually take out the spare tire. im looking for a good fiberglass research site but all i find are advertisments. i would be thankful for advice from anyone. again... great job doesn't look like the work of a beginner.
Posted By: realitycheck
Date Posted: February 07, 2005 at 8:50 AM
Here you go man check out this site to get you started on the basics. https://chris.pfharlock.com/glass/index.htm after you read up on it. Then you can create your own design of anything you want. I just built mine not to long ago, and I kept my spare tire. The possibilities are almost endless. If you have any questions let us know. ------------- Learning the trade one fiberglass creation at a time!
Posted By: ratmkicksass
Date Posted: March 30, 2005 at 1:06 AM
YO! Jack@$$, can you put out a list of the products/materials you used because i have a 2002 rsx, and i want to get started on a box too! even the paint you used, and if you can remember, the names too! also, if you could do it all over again, what would you of done different?!!?
|