integra trunk setup - first project
Printed From: the12volt.com
Forum Name: Fiberglass, Fabrication, and Interiors
Forum Discription: Fiberglass Kick Panels, Subwoofer Enclosures, Plexiglas, Fabrics, Materials, Finishes, etc.
URL: https://www.the12volt.com/installbay/forum_posts.asp?tid=50204
Printed Date: April 05, 2026 at 11:13 AM
Topic: integra trunk setup - first project
Posted By: justtegit
Subject: integra trunk setup - first project
Date Posted: February 16, 2005 at 12:20 AM
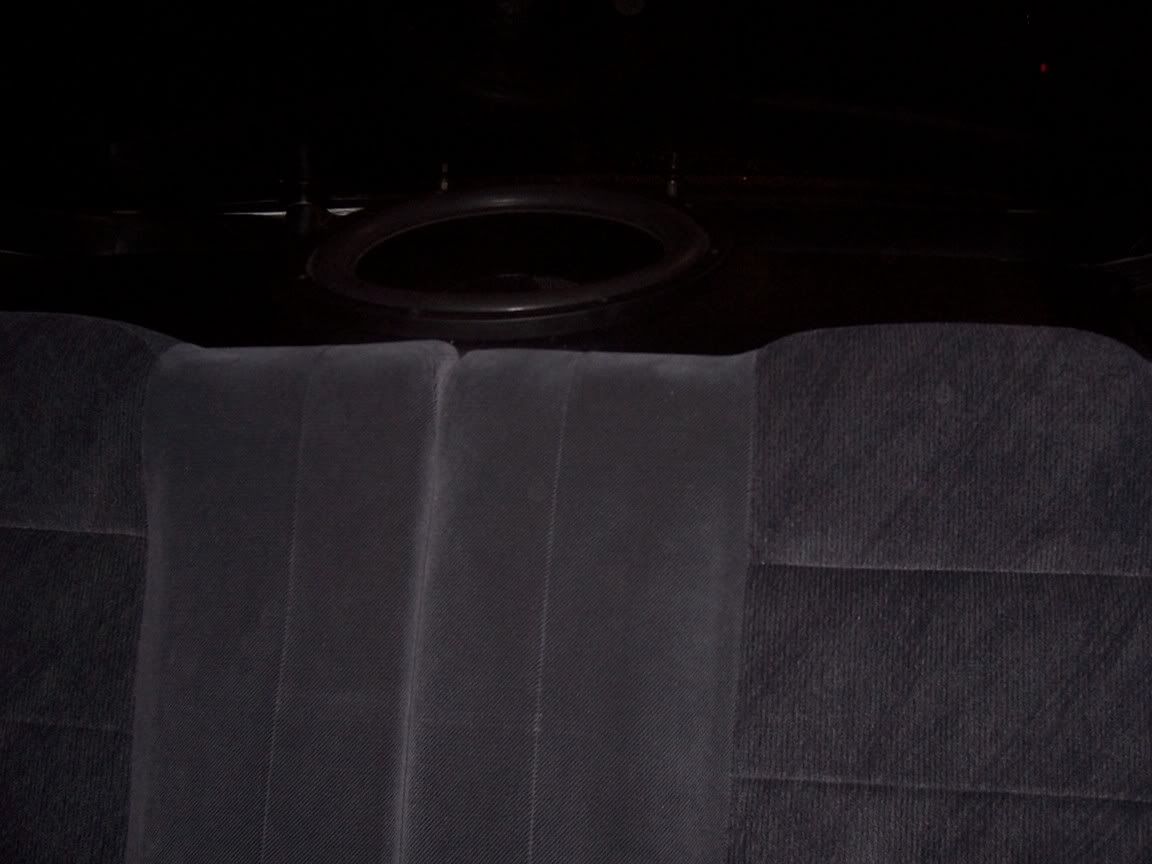
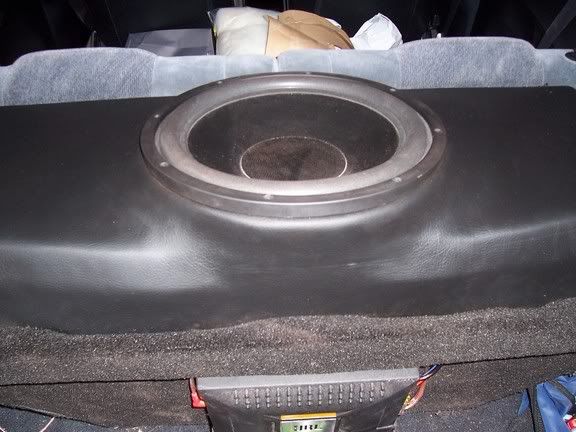
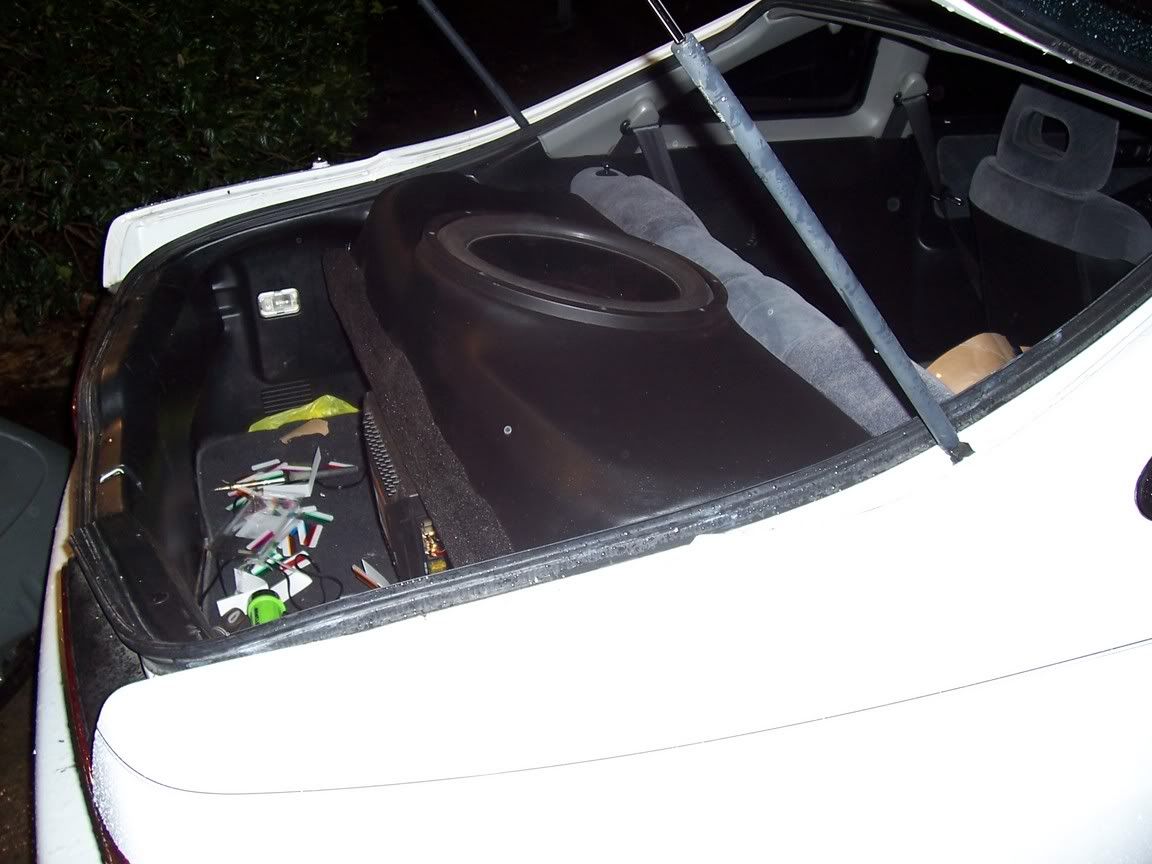
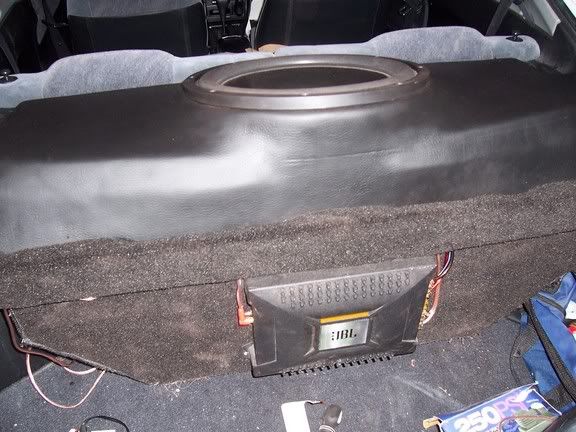
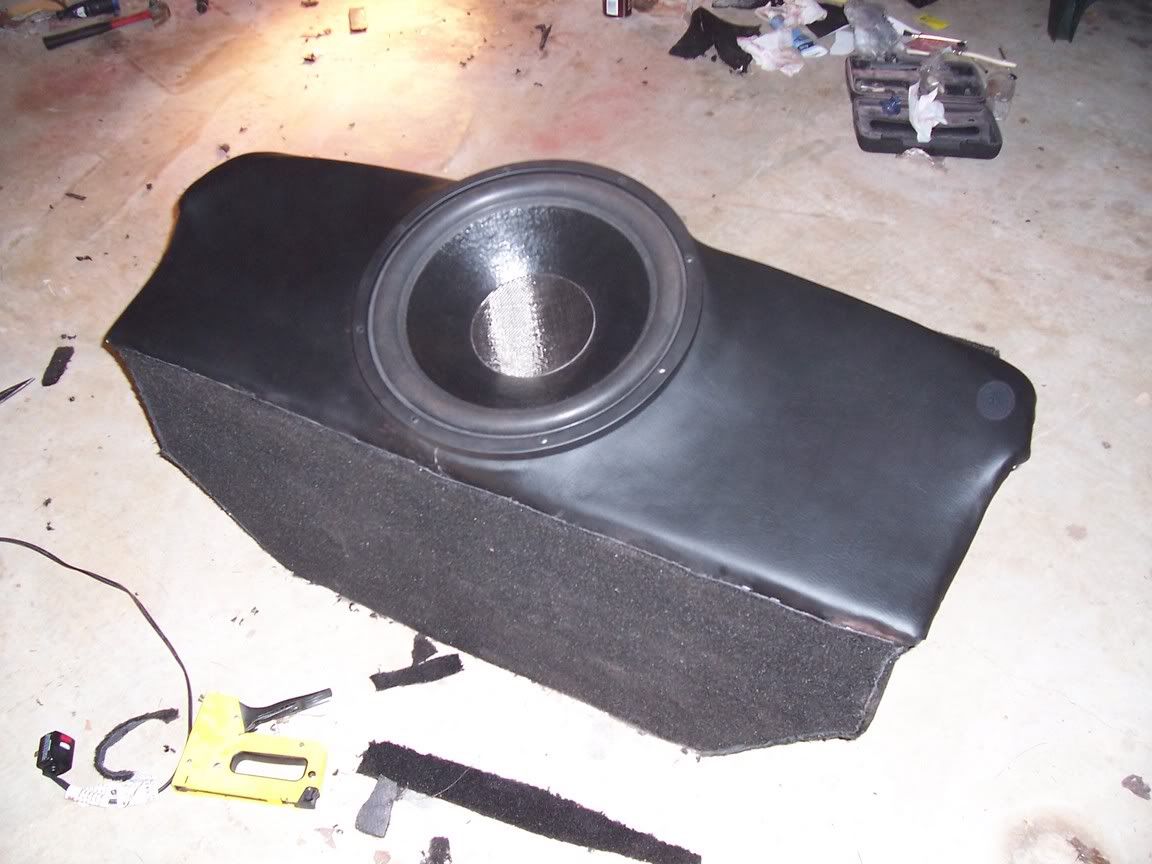
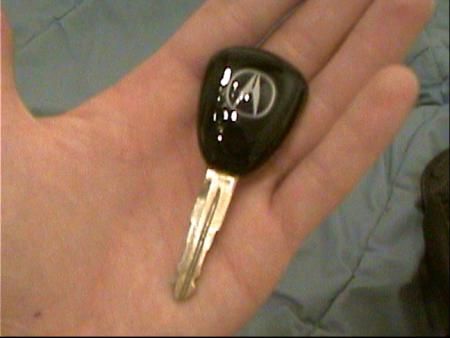
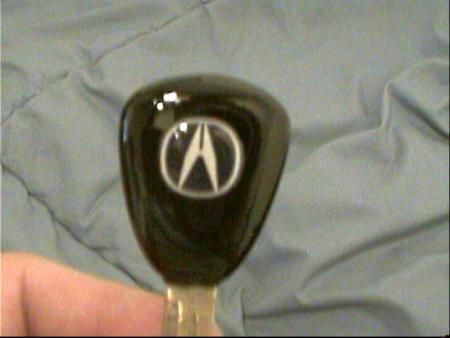
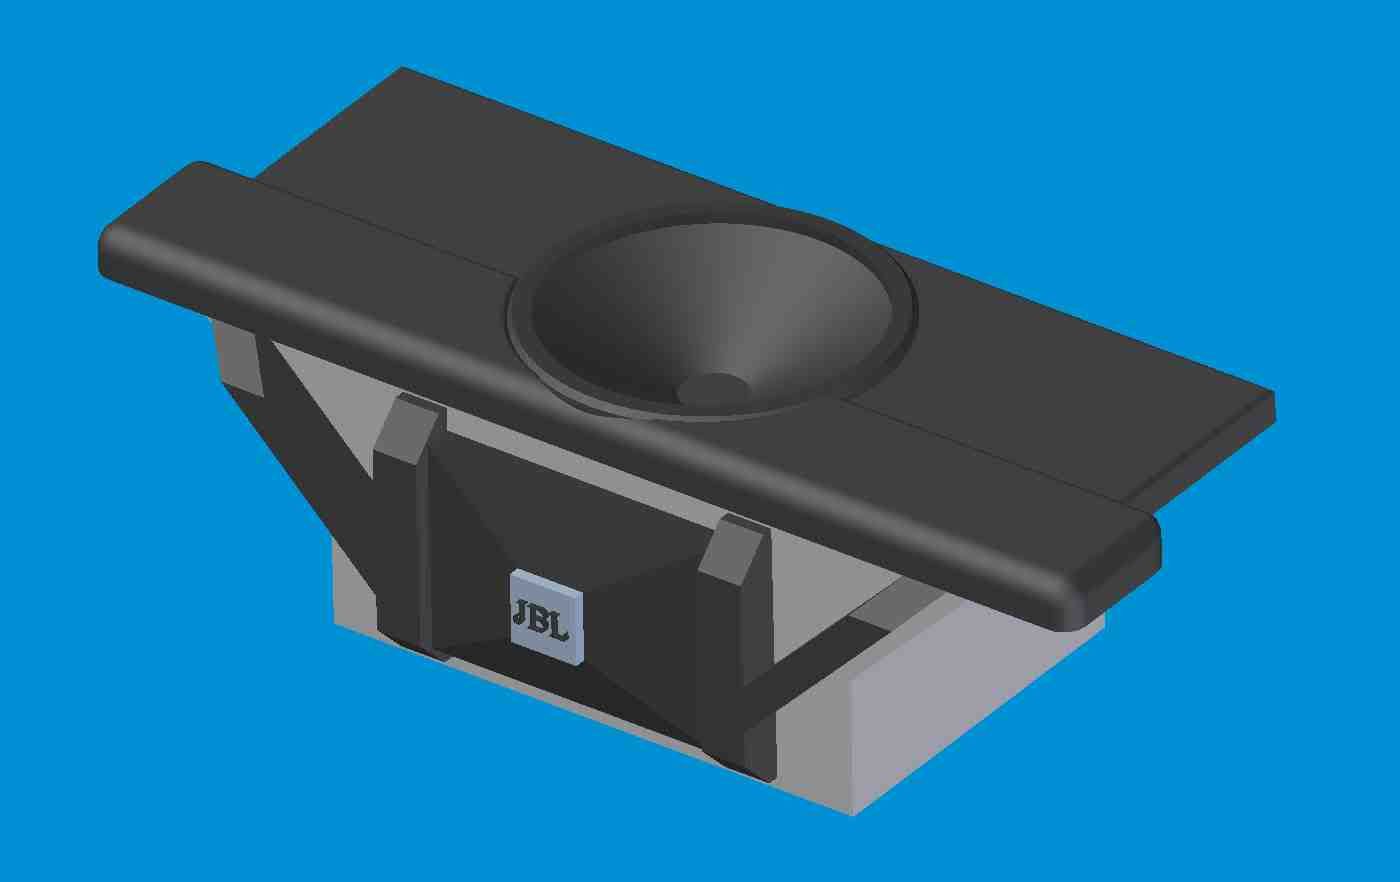
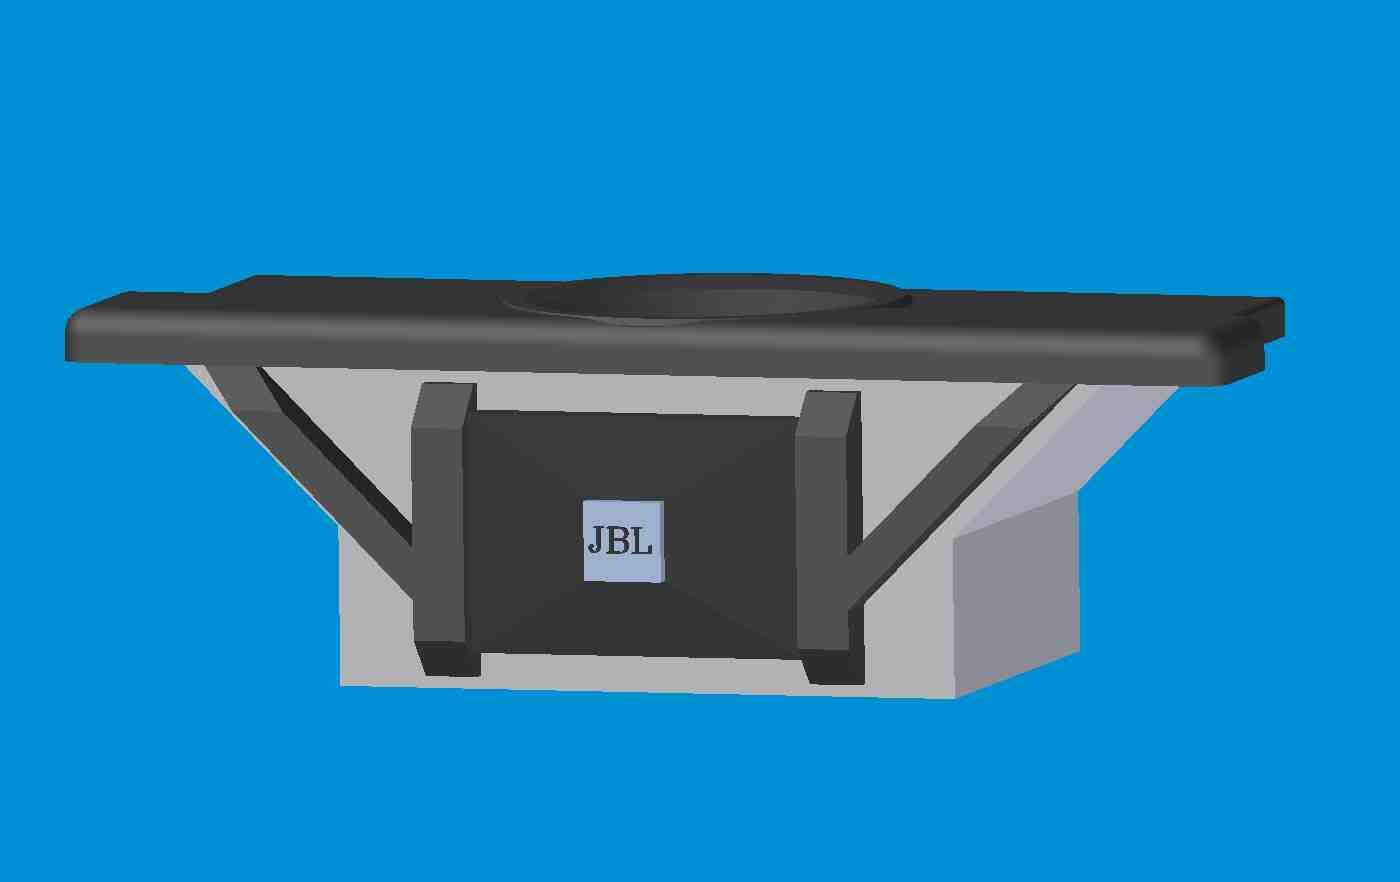
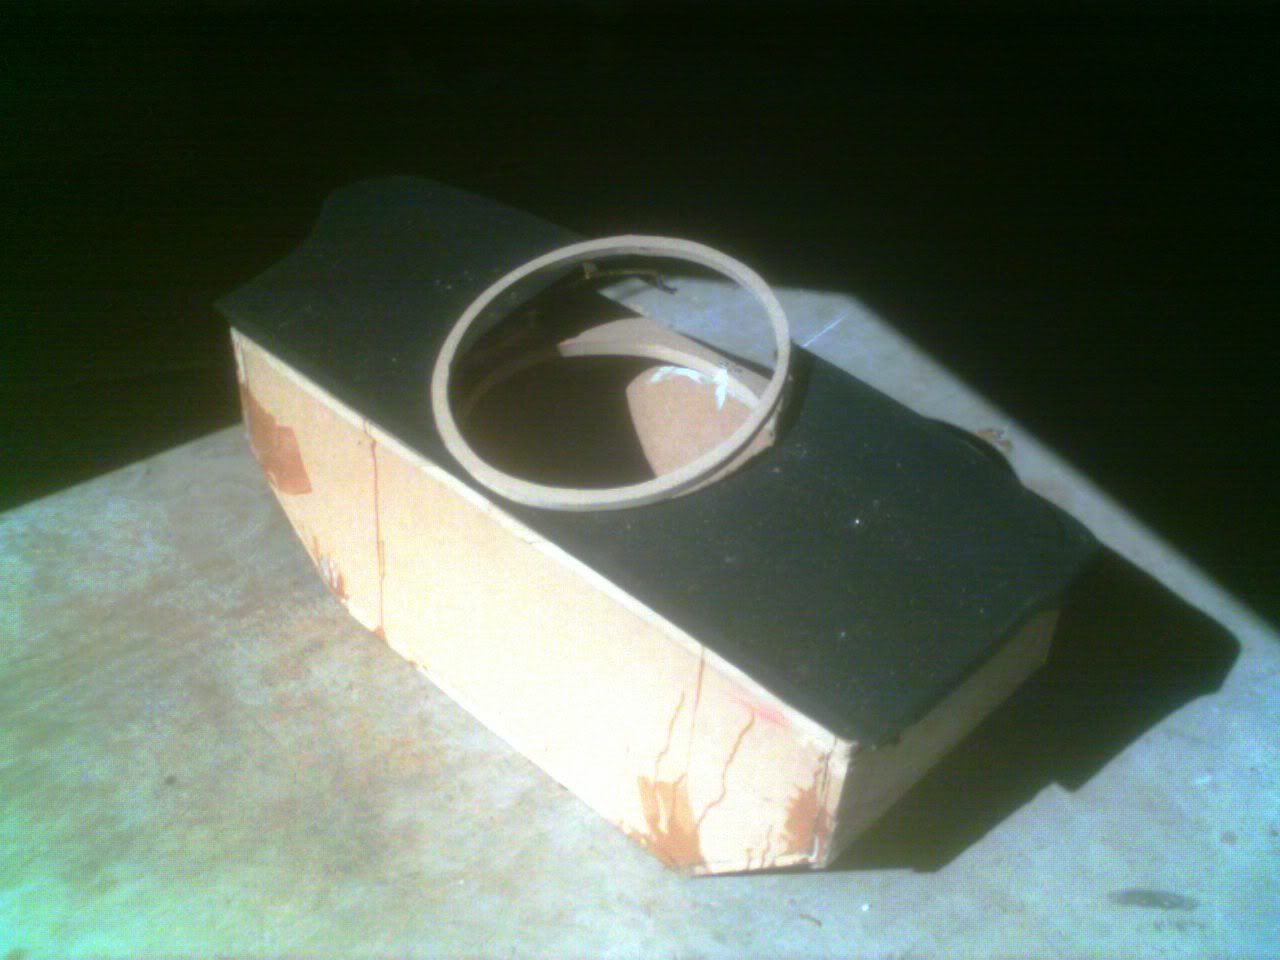
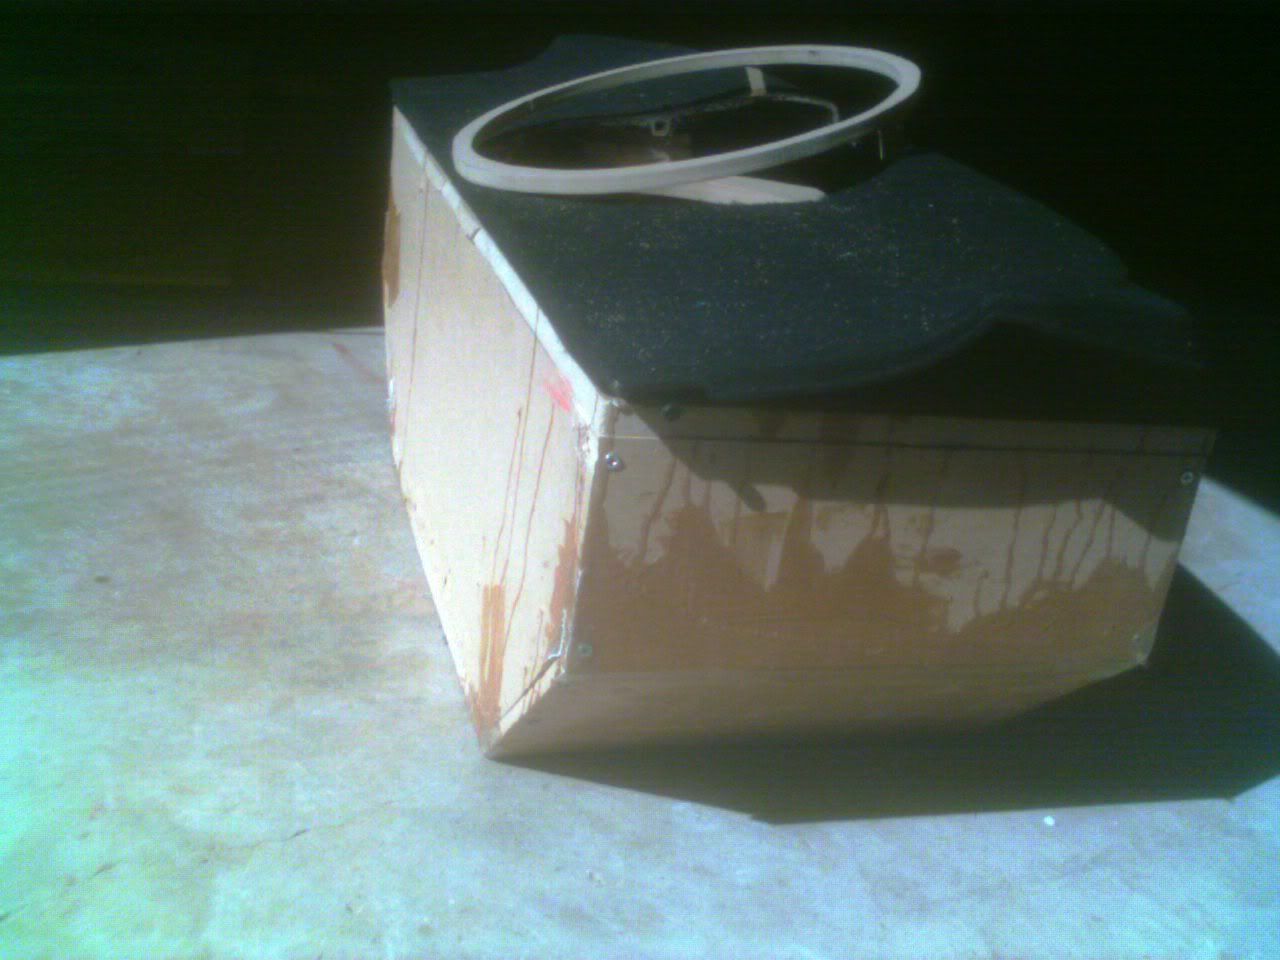
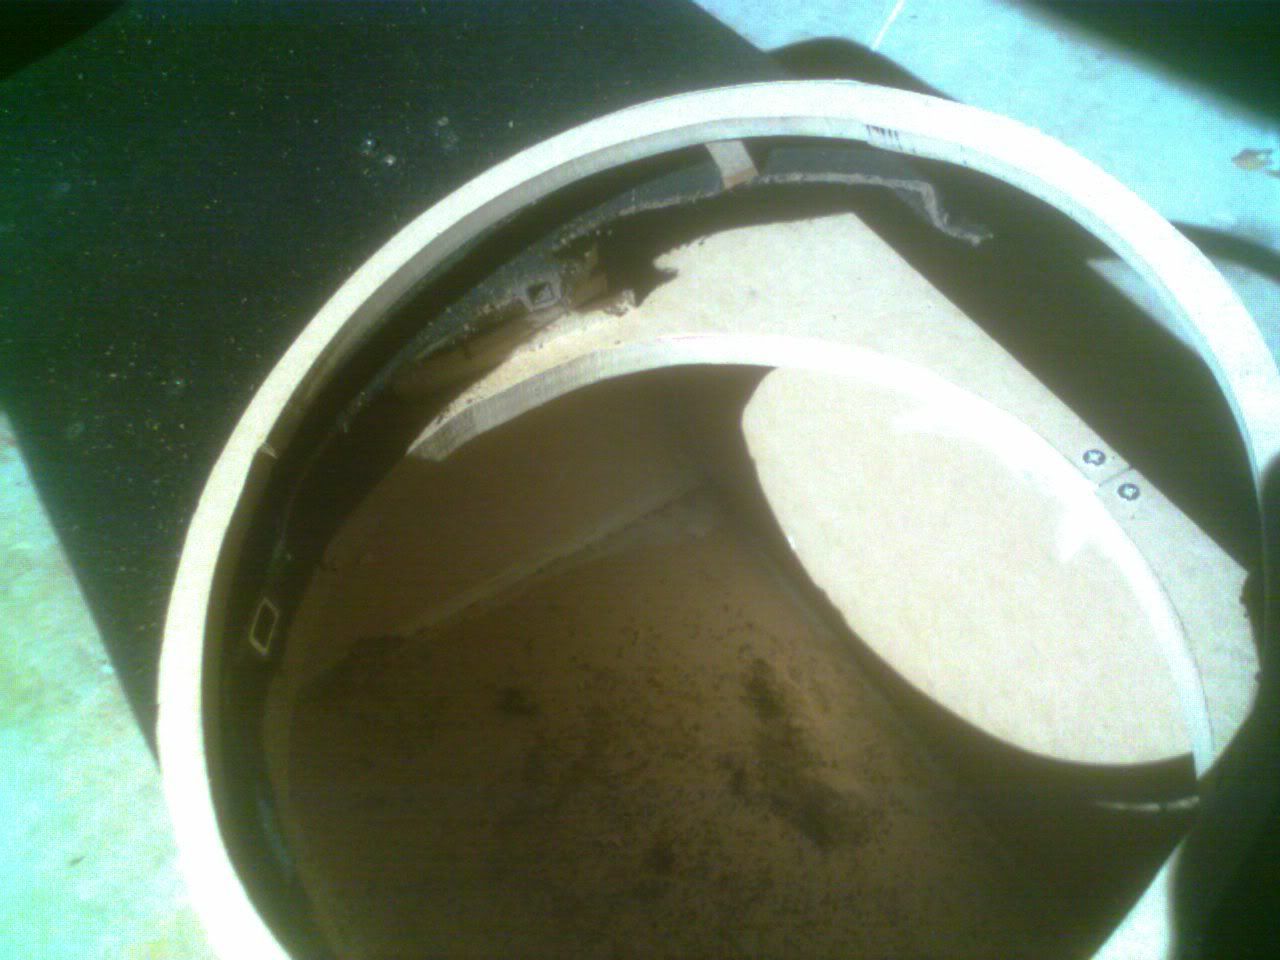
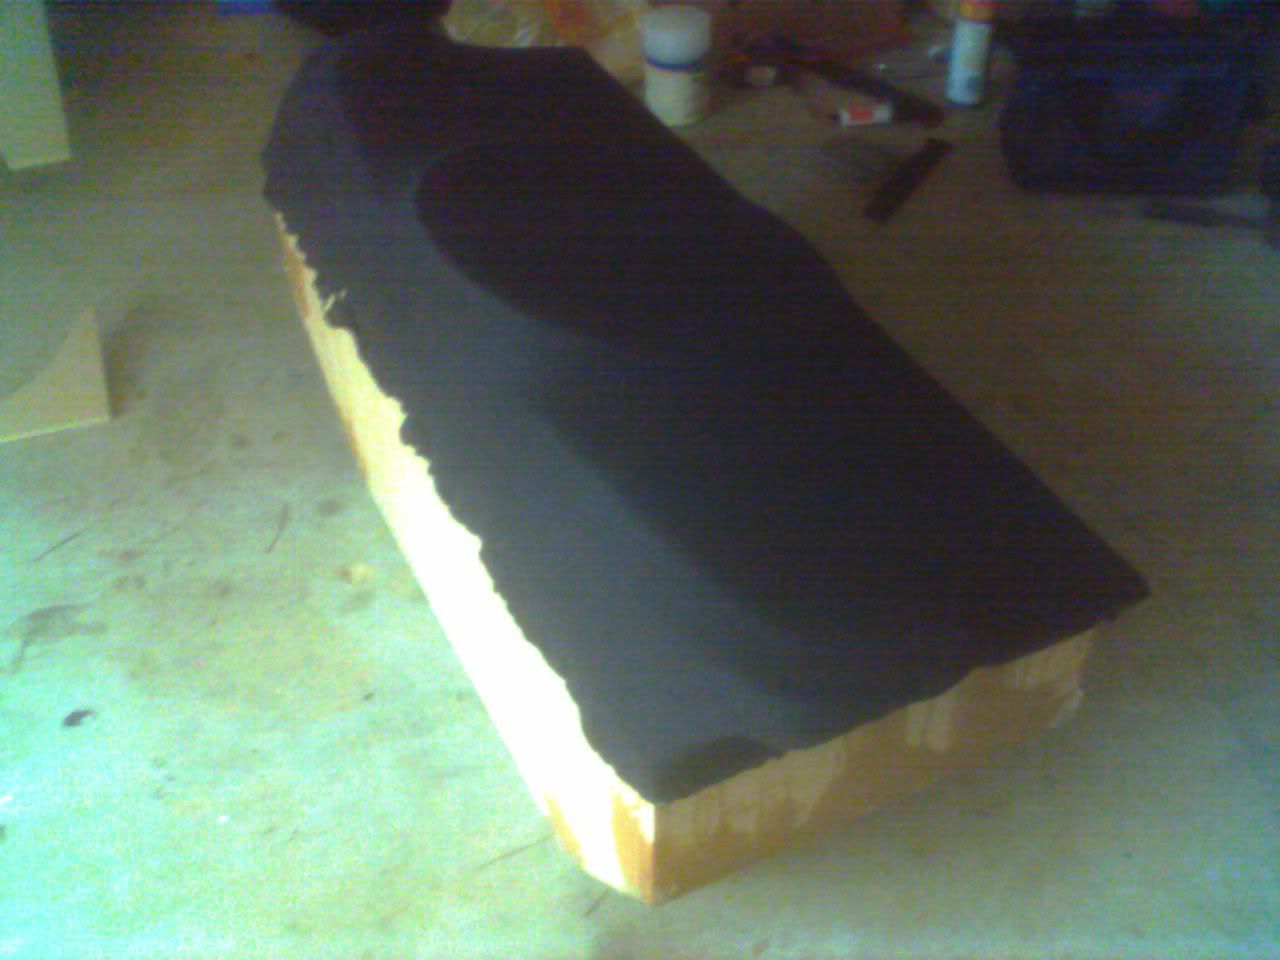
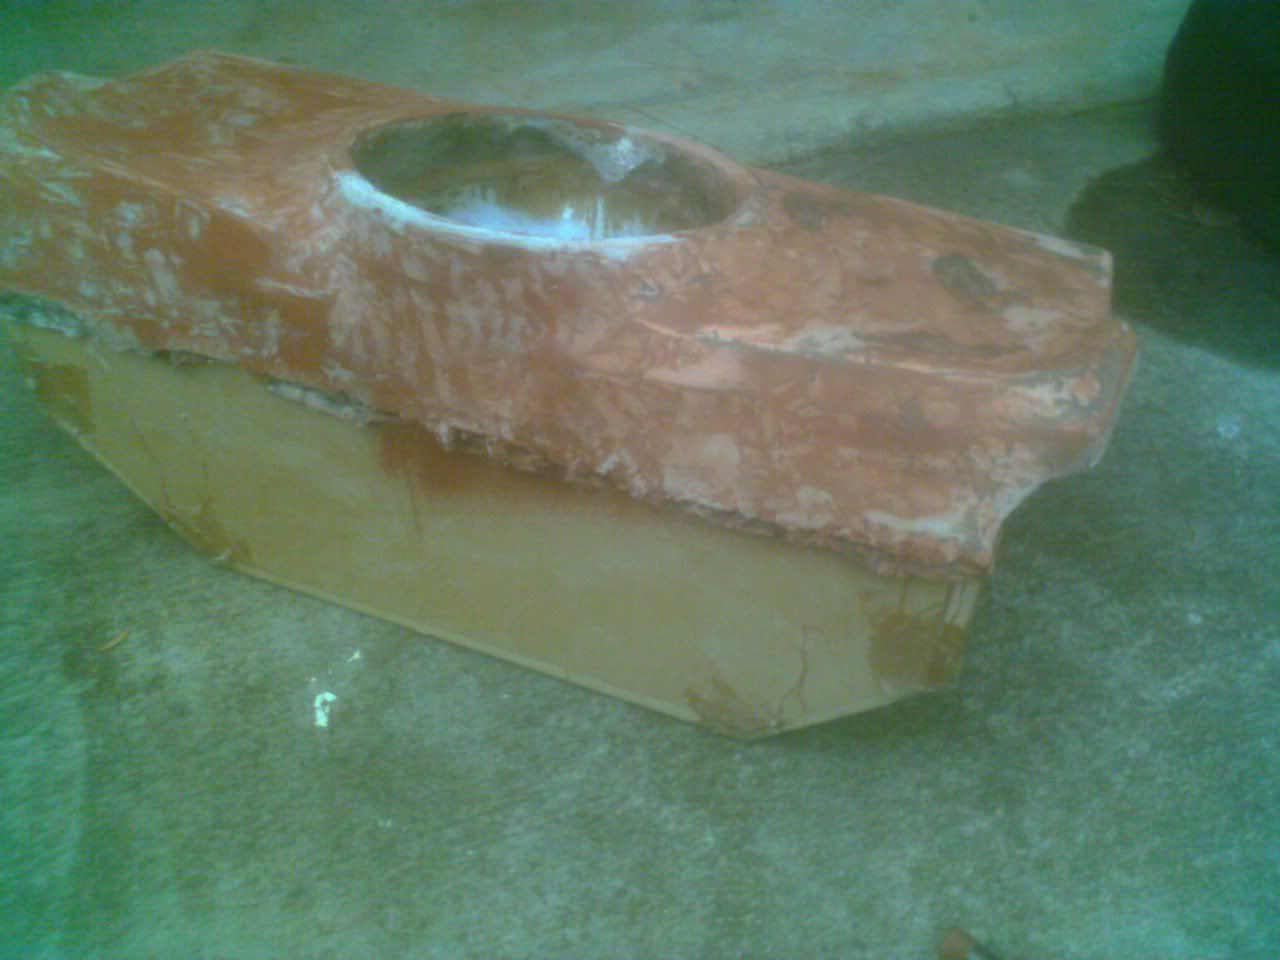
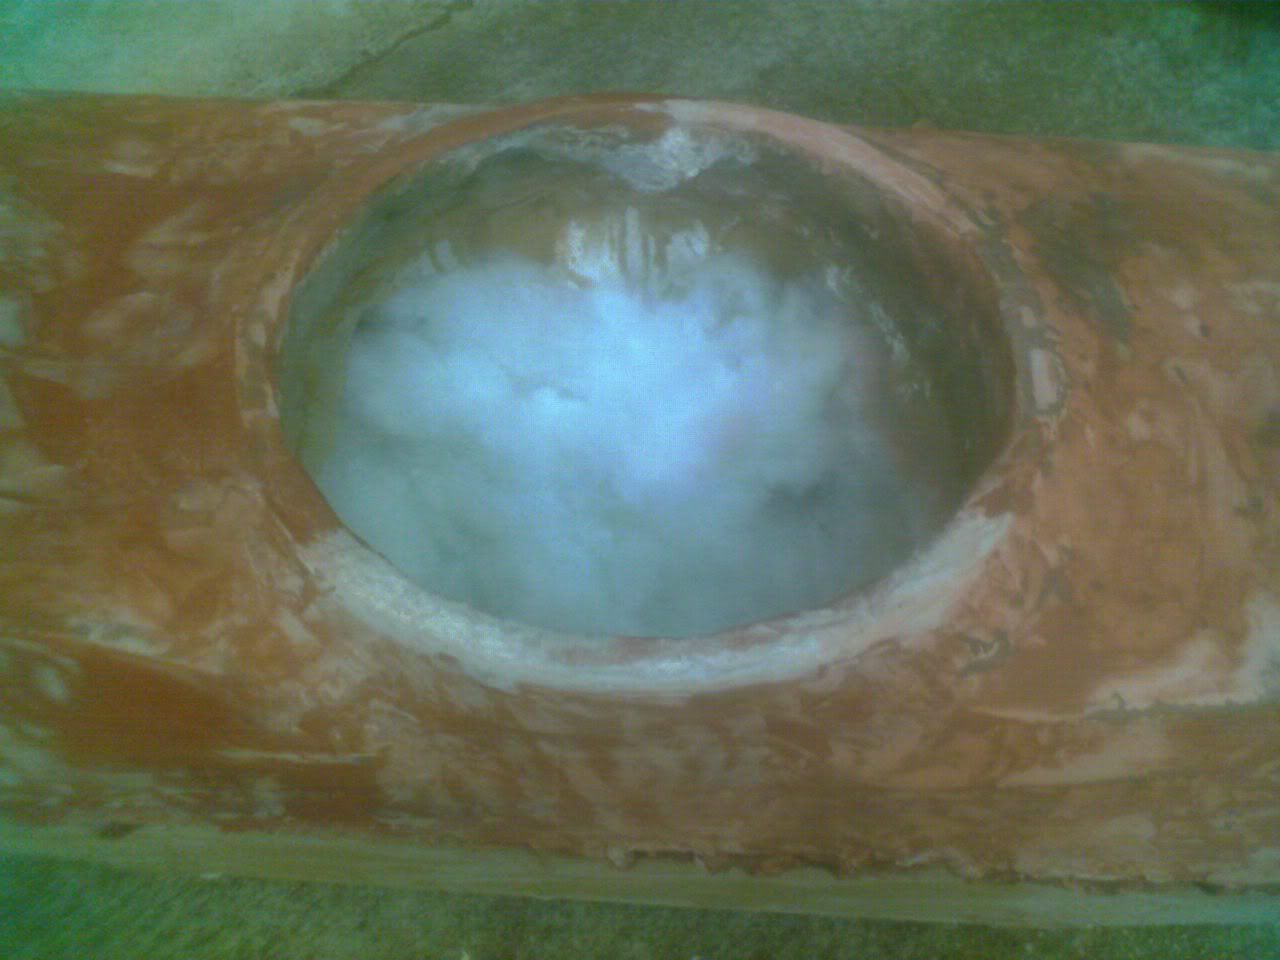
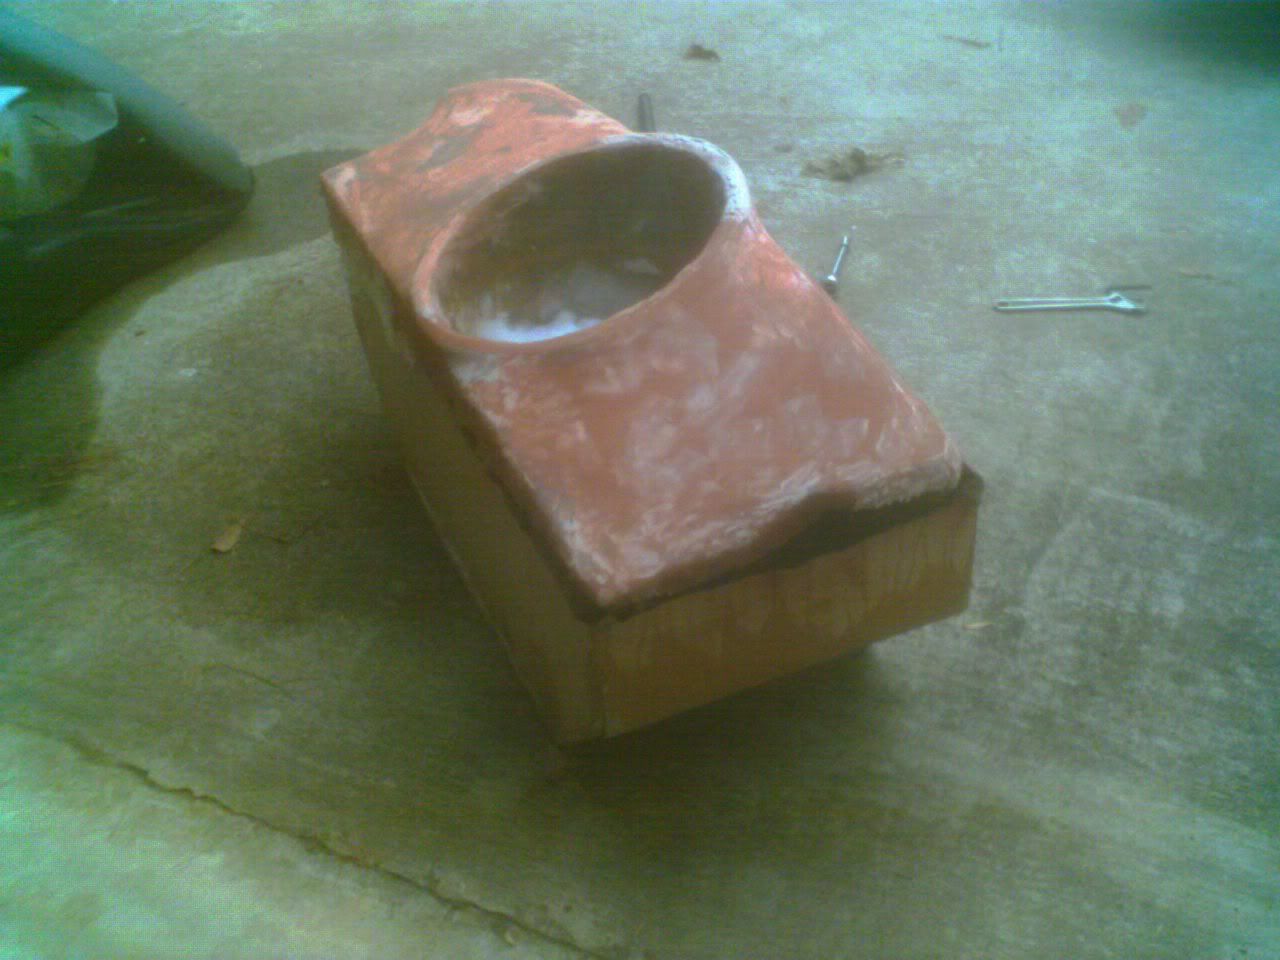
Hey guys - great site here....i have startd my first large fiberglassing project. it is a combination MDF/fiberglass single 15" sub setup for my Acura integra hatch. I am using an Ascendant Audio (new company aimed at SQ subs, they use XBL^2 technology like Adire and Resonant Engineering) Atlas 15. Here are some pics and a CAD drawing I did with the essential box design. The pics some the MDF box, with the actual rear deck of the car from above the back seats taken out and used as a base for the fiberglass. i screwed it to the MDF box, then cut out the middle of it. it was made of a masonite material. i added a thin speaker ring (thin because i am limited on space, a 15 barely fits between the seats and the rear window) though it was thick enough to support the sub and screw into. I fleeced it and added 4 layers of glass. there was very slight flexing in the large flat areas before bondo but no longer. i am not worried about fiberglass strength really becasue no pressure will be exerted on it - the MDF box is all that will have pressure on it (and actually the fiberglass tunnel i made will too, connecting the speaker ring with the hole in the MDF and making a seal....i think i need to add a layer or 2 more that tunnel actually) i have bondoed the main section, and added a layer of high build primer to see the rough spots clearly. i then re bondoed and added another coat of HB primer. that is where i am at now. i need to finish sanding/spot puttying, primer, paint, and clear. the lower portion of the box that is MDF will be covered in black carpet. the top fiberglass section will be high gloss black. to clarify the design the 15" sub will actually face INTO the cabin. i have tested it and it sounds amazing. great SQ...Ascendant really delivered with its use of XBL^2 motors. as for paint i have a trick up my sleeve that i dont think i have seen anyone on the internet talk about - i may be the first, lol! anyway, i do not have a way to spray good quality clear, and i cant really afford to have this painted professionally. i came upon a product called Enviro-Tex while reading one of my Model Railroading magazines. This is a 2 part (epoxy) clear coat product that is 100 percent self leveling and dries very thick and hard in just one coat. once mixed, it pours out wit te consistency of honey (very thick stuf) and SLOWLY spreads over the work surface, using gravity to self level. with help from a brush on some spots to reduce surface tension, this stuf wil just keep spreading itself to the edge of the workpiece and excess will drip off. when it dries you get a hard, glass like finish that is completely free of orange peel. this is a great alternative for those of us that cant spray our clear on our fiberglass projects. here is a pic of a key i made from scratch using only the metal portion of a standard key...i used QuikSteel to shape the key, flat black paint, then printed Acura emblems on photo paper, glued them to the flat black, the added Enviro-Tex....BTW, only drawback to this product is that is takes about 2 days to dry..as in, still sticky and you cant even touch it for 2 days or it will ruined.... anyway, here are some crappy camera phone pics...good ones to follow when i finish even though it doesnt look it, it was actually pretty damn smooth when those pics were taken -------------
Replies:
Posted By: ravenndude
Date Posted: February 16, 2005 at 2:50 PM
looks great so far ... Good Job!
Posted By: justtegit
Date Posted: February 16, 2005 at 3:34 PM
i am doing ceratin things with this unconventionally because of the tight space constraints...the top of the sub will be at the apex about 3/4" from the glass! this meant i couldnt do the conventional double speakker ring setup to recess the sub. after much debate, i have decided i like the recessed look far better than not, so i am going to add a very thin ring and then do a concave shape up to it from what it alreay there using a resin and sawdust mixture i see so much about on here. the ring will be about 3/4 inch tall, and only like 1/8 thick or so.....using MDF to make a ring this thin will be very ard, especially since i am relegated to using a jigsaw as my routers are at home and i am at college 900 miles form most of my tools. any ideas on what i could use? i was thinking maybe a strip of aluminum that i could bend around the subwoofer itself to get the circle and radius nice and tight to the woofer, then glue it to what i have, and fill in the concave shape....
Posted By: profuse007
Date Posted: February 17, 2005 at 1:29 AM
whats the deal w/ the key? what did you do to it? what happen to the hole for the ring?
-------------
Houston,TX
"The two most common elements in the universe are H+ and stupidity" (Ellison).
Posted By: justtegit
Date Posted: February 17, 2005 at 7:53 AM
profuse007 wrote:
whats the deal w/ the key? what did you do to it? what happen to the hole for the ring?
the deal is that i made that from scratch...and the clear coat i used is the product i described in the first post.....i was showing the key as an example of the clear with no orange peel... as for no hole for the key....i originally designed it as a key fob, that is all i carried around....since then i have drilled a hole for my alarm remote key ring....
Posted By: realitycheck
Date Posted: February 17, 2005 at 9:09 AM
Cool man!
-------------
Learning the trade one fiberglass creation at a time!
Posted By: 97Avalonxls
Date Posted: February 17, 2005 at 11:10 AM
hey, I like the look of the project so far, i can't really understand how it'll fit in the car, on it's side or bottom, but it looks well made, I'll wait on the install pics :) ps that epoxy is really cool stuff, where did you get it, and how much is is?
Posted By: justtegit
Date Posted: February 17, 2005 at 3:15 PM
the epoxy clear is called Enviro-Tex...it is about $16 for like 32oz i think....i got it at a craft store but i think Home Depot sells it now, in the paint section by the wood finishes and Minwax etc...
Posted By: doc t
Date Posted: February 17, 2005 at 6:03 PM
I cant use it. It sounds cool as hell but the 2 days of dust and dirt free drying time... i don't have.  -------------
All Bleeding stops.....eventually!
Posted By: justtegit
Date Posted: February 18, 2005 at 1:28 AM
ive never had a problem with dust getting in it while drying before...i mean it tacks up within a few hours. basically if left in a normal room under ordinary conditions it can dry dust free.....but if you are sanding in the room woth it or something then obviously you are gonna be SOL
Posted By: justtegit
Date Posted: February 28, 2005 at 12:41 AM
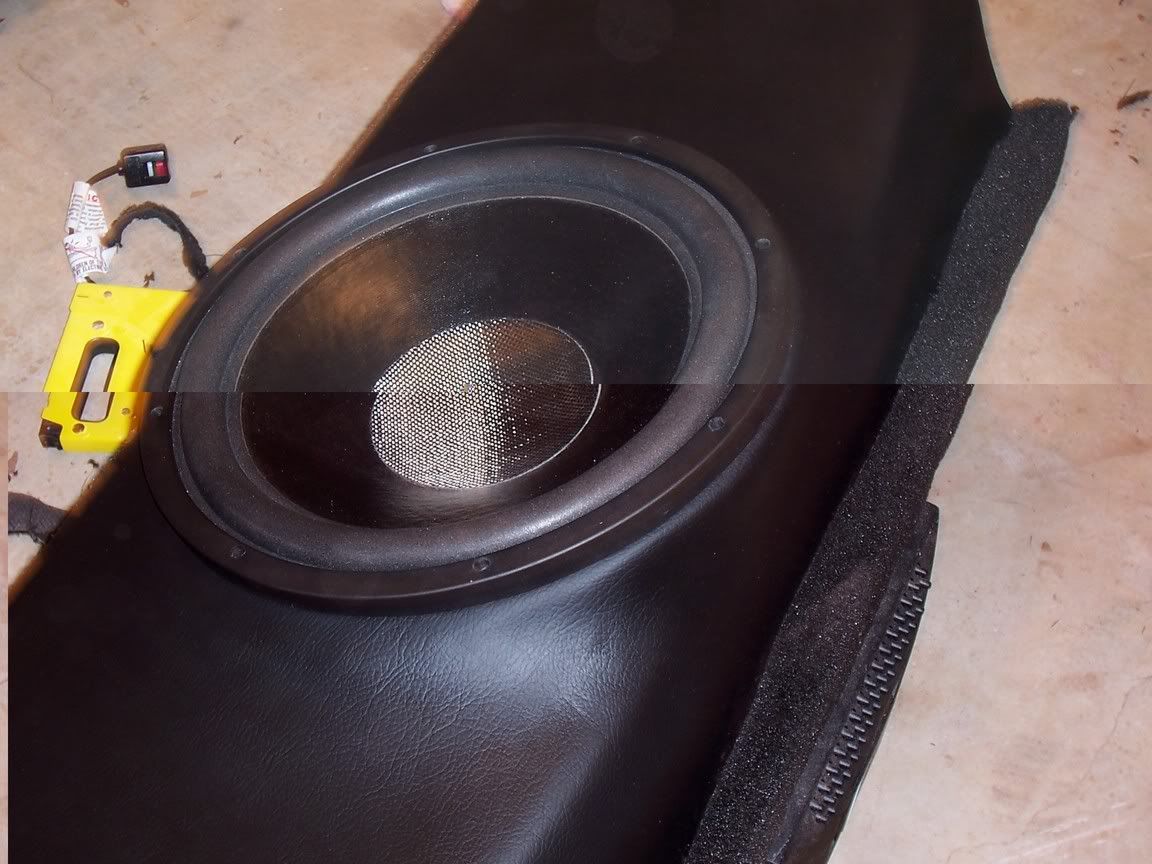
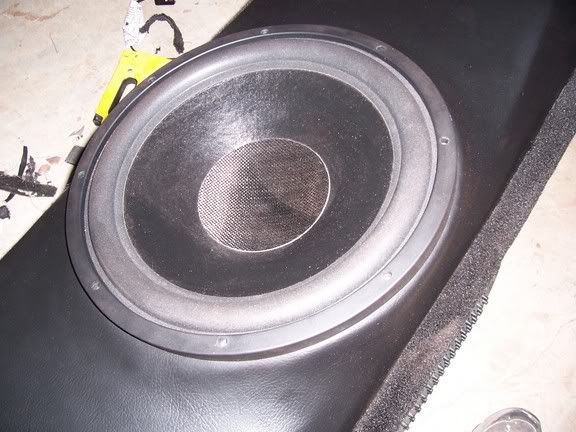
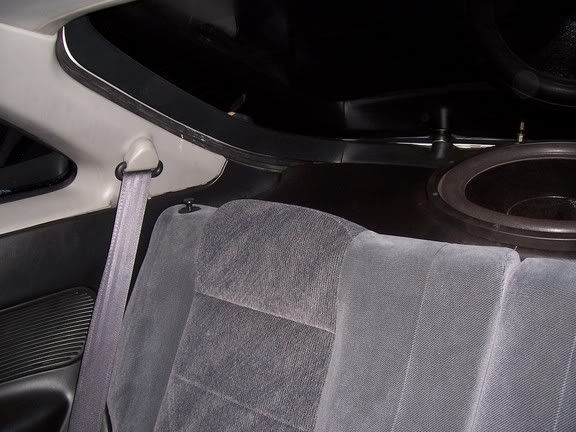
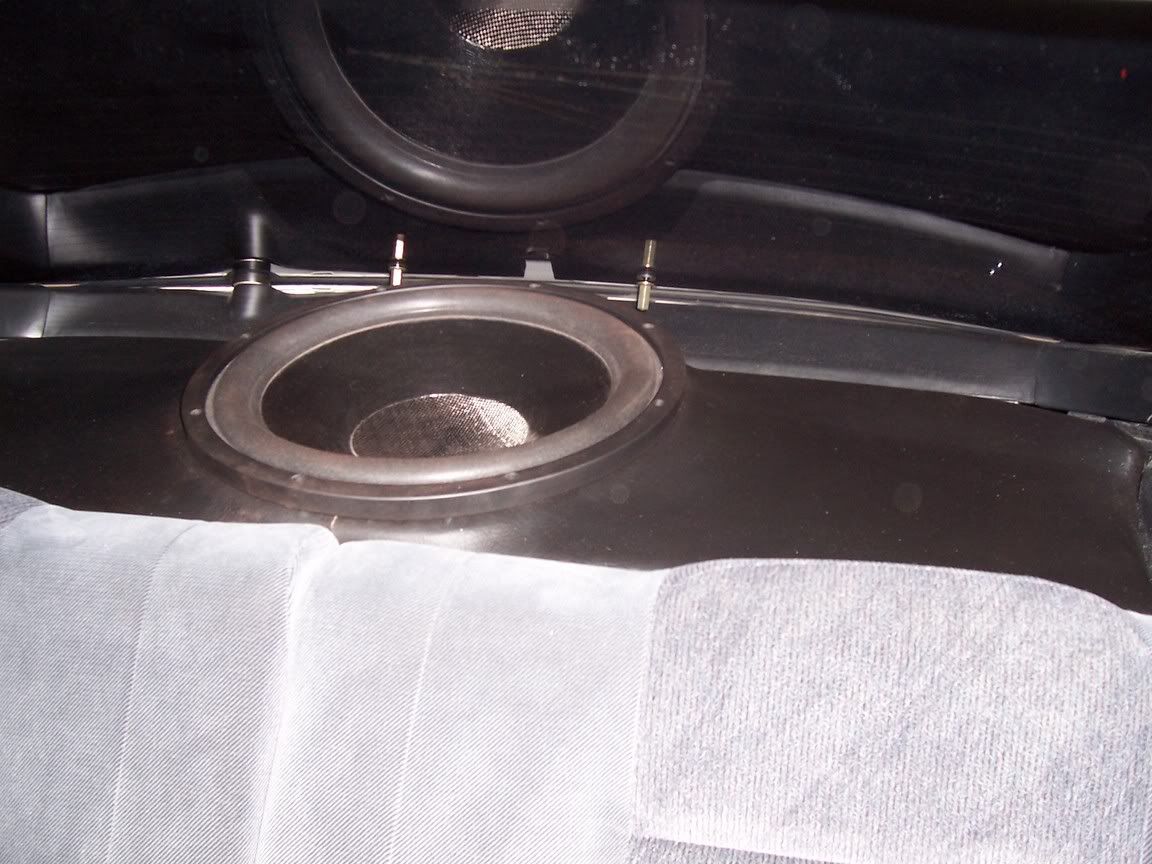
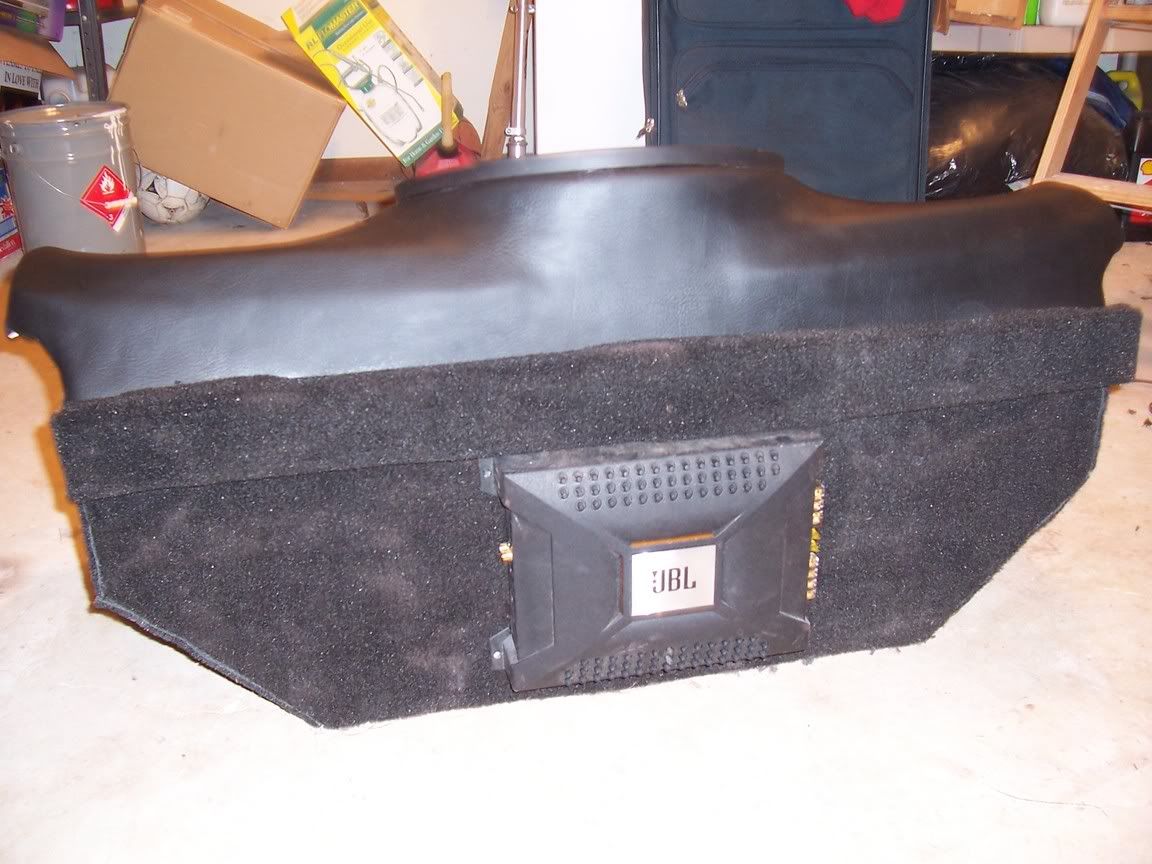
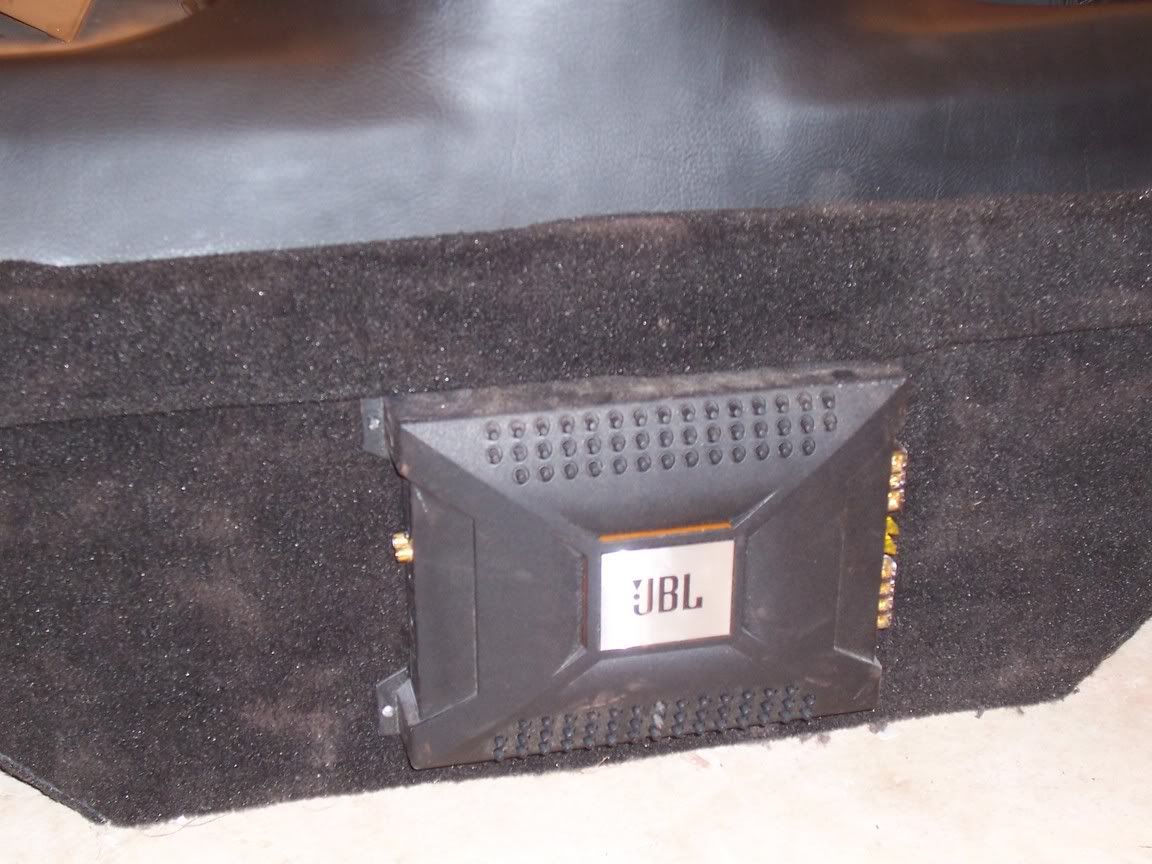
Well there it is guys, I finally completed this 4 weekend project. I estimate about 50 hours of work went into this box. One page one are the pics showing the steps up until this point. I decided to go with a factory look instead of the flashy high gloss black on the fiberglass top portion. There were so many curves and contours that the bondoing was killing me....I kinda just wanted to see what it would look like with the high gloss, I probably would have eventually covered it in vinyl anyway. The vinyl I went with was the stretchiest most expensive vinyl I could find. It has a very nice feel to it and is nicer than the material our dash's and doorpanels are made of even. The bottom is automotive/marine carpet. I am still going to make wire covers for the sides of the amp, but that didnt prohibit me form putting it in the car as is and taking pics...let me know what you think...IO dont know of anyone else with a 15 fiberglassed into the rear deck of a teg -------------
Posted By: justtegit
Date Posted: February 28, 2005 at 12:43 AM
damnit why do pics on this forum always do that......could a mod help me out and fix those since it wont let me edit my posts yet....sheesh i never have these problems on any other forum
Posted By: oonikfraleyoo
Date Posted: February 28, 2005 at 7:58 AM
Very nice. Good work man. ------------- Nik
Jeeputer Progress
[|||||||||||-] 90%
Check it out.
Posted By: realitycheck
Date Posted: February 28, 2005 at 8:16 AM
Yeah cool man, from your first post 4 weeks ago I was extremely confused as too what you were doing. I see it now though and it looks really nice, excellent job on the vinyl.
-------------
Learning the trade one fiberglass creation at a time!
Posted By: Velocity Motors
Date Posted: February 28, 2005 at 9:41 AM
justtegit wrote:
damnit why do pics on this forum always do that......could a mod help me out and fix those since it wont let me edit my posts yet....sheesh i never have these problems on any other forum
Done, the pics get distorted for some odd reason?? ------------- Jeff
Velocity Custom Home Theater
Mobile Audio/Video Specialist
Morden, Manitoba CANADA
Posted By: justtegit
Date Posted: February 28, 2005 at 4:44 PM
Posted By: Velocity Motors
Date Posted: February 28, 2005 at 6:49 PM
When you take your pics, try to use a smaller resolution or size it down in Photoshop . Not trying to pick on anyone here but your killing the bandwidth here with these huge sized pics.
-------------
Jeff
Velocity Custom Home Theater
Mobile Audio/Video Specialist
Morden, Manitoba CANADA
Posted By: justtegit
Date Posted: February 28, 2005 at 9:09 PM
sorry im not used to having to do that most forums autoresize...will do
Posted By: 1hot944
Date Posted: February 28, 2005 at 9:16 PM
Looks good! Nice job  ------------- In a world full of copycats, it's great to be an original!
|
