Started Integra Enclosure Today
Printed From: the12volt.com
Forum Name: Fiberglass, Fabrication, and Interiors
Forum Discription: Fiberglass Kick Panels, Subwoofer Enclosures, Plexiglas, Fabrics, Materials, Finishes, etc.
URL: https://www.the12volt.com/installbay/forum_posts.asp?tid=65571
Printed Date: March 29, 2026 at 1:05 PM
Topic: Started Integra Enclosure Today
Posted By: footbaldd
Subject: Started Integra Enclosure Today
Date Posted: November 03, 2005 at 8:44 PM
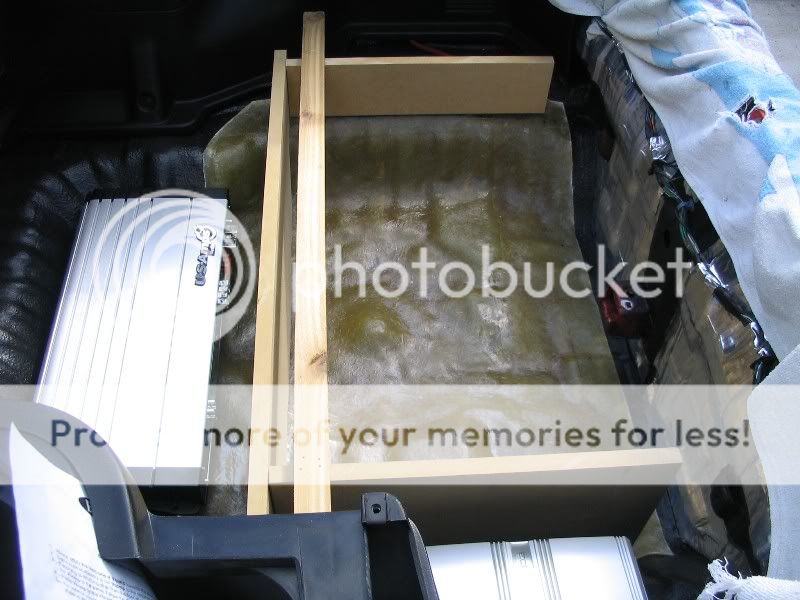
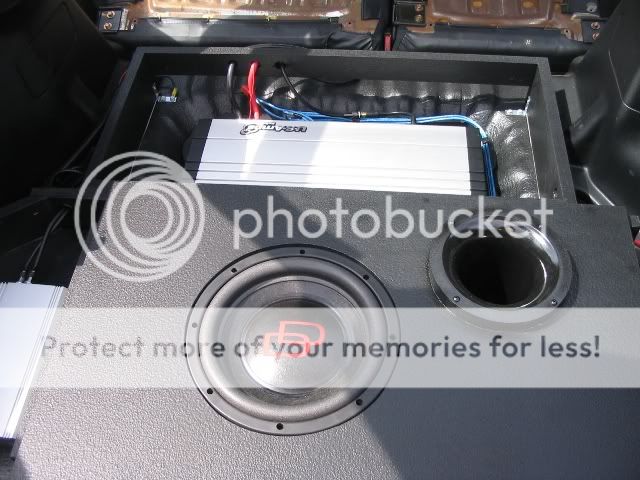
I finally got started on my enclosure today after a couple months of hold up. Im making a subfloor with a single dd3510 in the center and my amps on either side. The mold went pretty smoothly besides a couple issues with the hardner. I put down 6 layers so far, but i think i am going to put down one more after i get the sides cut and fit to the mold. Here is what i have done so far.
Pic 1
Pic 2-------------
Replies:
Posted By: footbaldd
Date Posted: November 03, 2005 at 8:50 PM
doesnt look like imagestation likes me. Where to you guys host your pics?
Posted By: realitycheck
Date Posted: November 04, 2005 at 7:24 AM
I use photobucket. Never had a problem with them.
-------------
Learning the trade one fiberglass creation at a time!
Posted By: footbaldd
Date Posted: November 04, 2005 at 5:27 PM
Posted By: footbaldd
Date Posted: November 04, 2005 at 5:31 PM
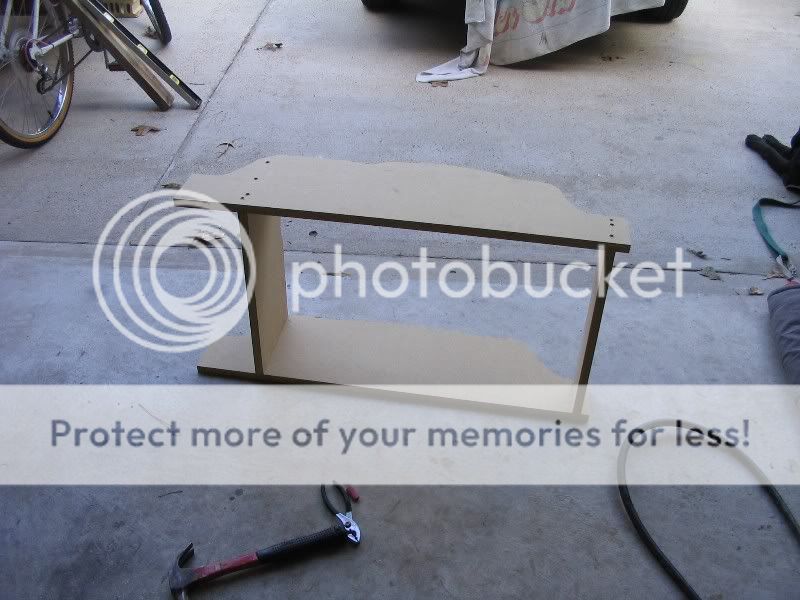
There were a couple of small air bubbles in the first layer and I didn't mix the first batch hot enough, but it came out pretty good, and I am gettin ready to cut the sides out of 3/4 mdf. Tommarrow I should be pretty much done, and I will hopefully get a couple more pictures.
Posted By: footbaldd
Date Posted: November 05, 2005 at 6:28 PM
Posted By: jlord16
Date Posted: November 06, 2005 at 4:29 AM
looking good  ------------- Clarion DB36MP
Infinity Kappa Perfect 10"
Respone 800w Mono
ALPINE MRP-F250
*Custom fabrications*
Posted By: footbaldd
Date Posted: November 06, 2005 at 7:50 PM
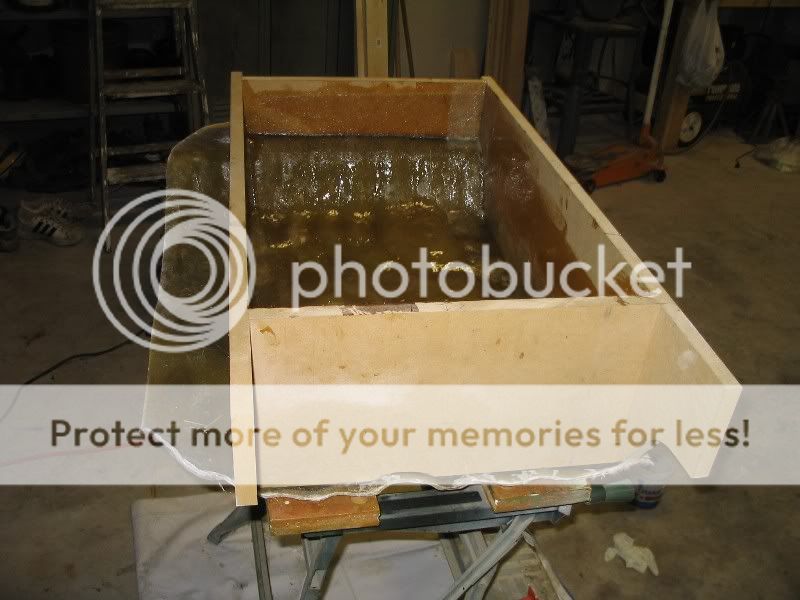
I didnt get the top cut, but i finished glassing the box. Tomarrow or Tuesday I am going ot try to get everything mounted and the top finished. 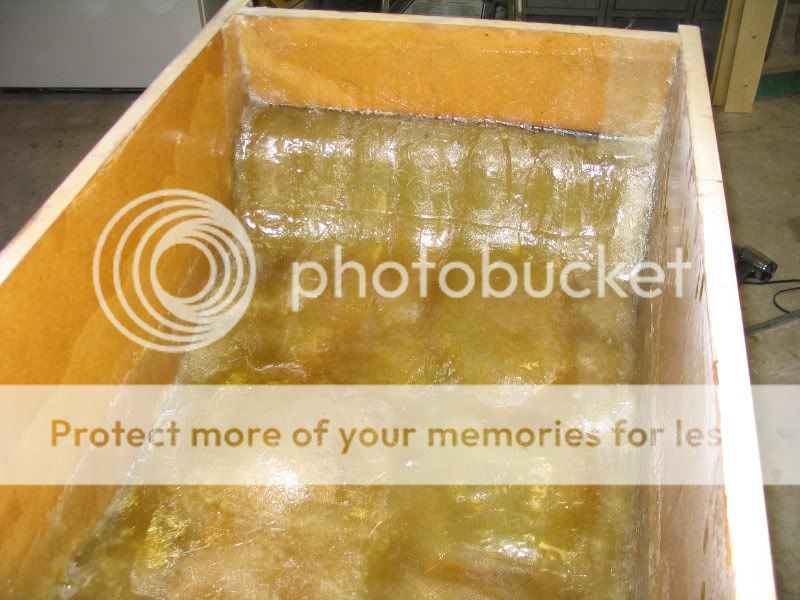 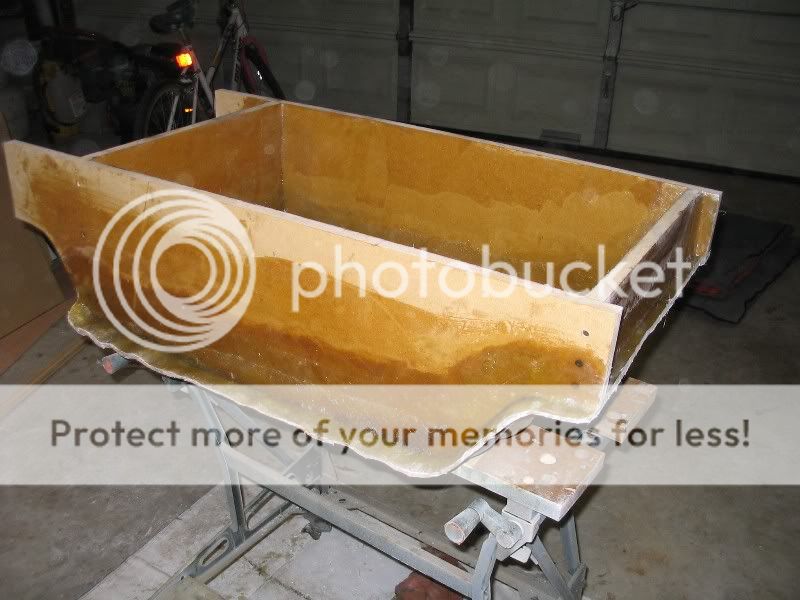
Posted By: realitycheck
Date Posted: November 07, 2005 at 7:31 AM
That looks awesome man, is this your first glass project?
-------------
Learning the trade one fiberglass creation at a time!
Posted By: footbaldd
Date Posted: November 07, 2005 at 4:58 PM
Yea this is my first time fiberglassing, and this is actually my first "stereo". The thing is Ive spent months researching so hopefully it will turn out pretty good, which it is so far. Tonight, I only have a couple hours to work, but Im going to try to get the amps mounted, and brace the lids for the subfloor. I am making lids that are hinged to the top of the enclosure so I have a clean look but easy access to the amps.
Posted By: footbaldd
Date Posted: November 07, 2005 at 5:06 PM
Ive got a quick question if you guys dont mind. I have layed 2-3 layers attaching the mold and the sides, and I filled and gaps between the two on the outside with epoxy, along with two more layers on the outside. Do you think that should be enought or should I do more? As of now the floor is 7 layers thick in the middle and 9 directly underneith the sides (I layed down 2 short layers under the wood right before screwing the two together).
Posted By: youngone
Date Posted: November 07, 2005 at 8:34 PM
yes do what you think is nesisary if the sub is going to be puting alought of pressuer on that area then you need to reinforce it. but that epoxy sould hold up real good. do gust do it as a precausin and put down an extra layer were you think is nesisary. hope this helps
good luck looks good
Aaron ------------- Want to know some good equipment- JL,Adire Audio,Mcintosh,Brax,Helix,Eclipse,JBL,RE,Dimoand Audio,Zapco, pritty much anything DYhon,Forbidden recommend
On the12volt you give some info and you get in
Posted By: footbaldd
Date Posted: November 16, 2005 at 8:35 PM
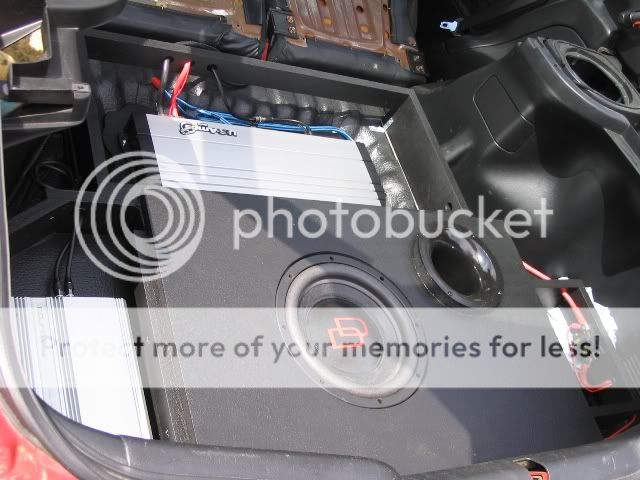
I got the top cut, but I am still working on mounting the amps, hope to wrap it up this next week.  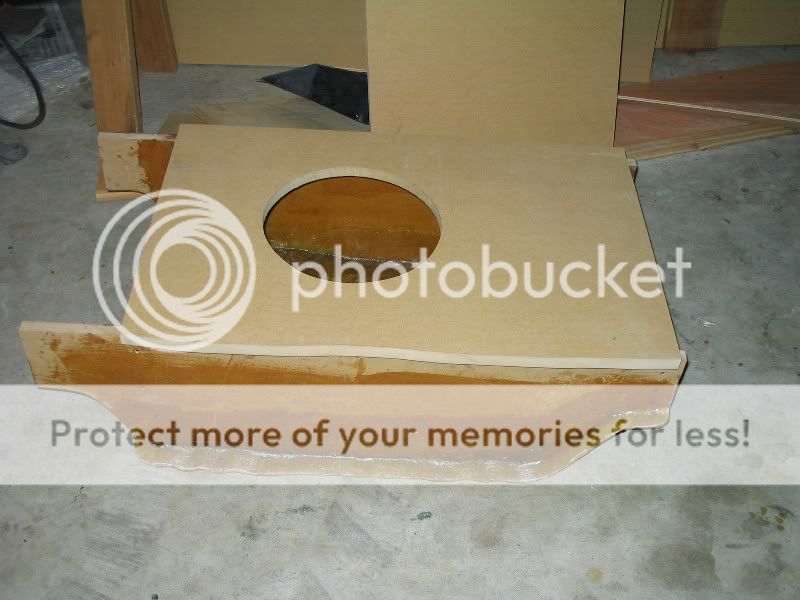
Posted By: oxygen65
Date Posted: November 19, 2005 at 8:11 PM
looks good cant wait to see it when its done
Posted By: Cougar.Modder
Date Posted: November 19, 2005 at 10:49 PM
Hows this project coming along? Looking good so far. Keep the pics coming.
-------------
Alpine 7830 HU-4X100 W McIntosh -2X110 W McIntosh-MB Quart Q's Mid Tweets-4X10" Phoenix Gold Subs-Phoenix Gold EQ215ix-AC Epi-PG Line Driver-Phoenix Gold 1 Farad Cap -Clifford Avantguard 4-2 Ear Plugs
Posted By: footbaldd
Date Posted: November 20, 2005 at 4:28 PM
Its getting there, I am currently trying to finish up on the mounts for the amps, and then I need to get everything covered. Heres another picture from the other day. 
Posted By: jlord16
Date Posted: November 20, 2005 at 5:52 PM
looking good, nice and clean, is that sound dampening material over the trunk floor?
-------------
Clarion DB36MP
Infinity Kappa Perfect 10"
Respone 800w Mono
ALPINE MRP-F250
*Custom fabrications*
Posted By: footbaldd
Date Posted: November 20, 2005 at 6:39 PM
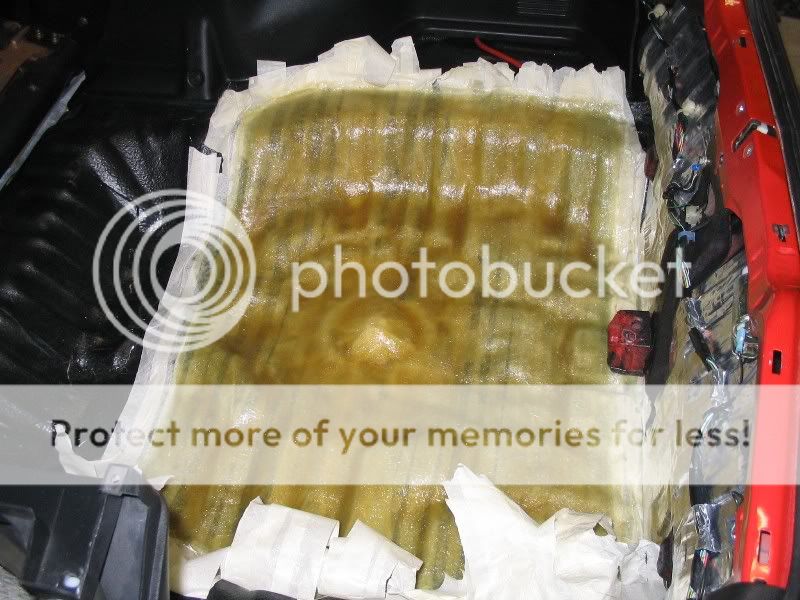
It is, I sprayed 3 gallons of bedliner along with 50sq feet of bquiet, 15sq ft of vcomp, and a good bit of foam before starting this. Im getting close to wrapping this project up, but I havent had a whole lot of time lately.
Posted By: jlord16
Date Posted: November 20, 2005 at 7:07 PM
shhh !! That sub is gonna sound sooo good in that trunk
-------------
Clarion DB36MP
Infinity Kappa Perfect 10"
Respone 800w Mono
ALPINE MRP-F250
*Custom fabrications*
Posted By: footbaldd
Date Posted: November 22, 2005 at 6:52 PM
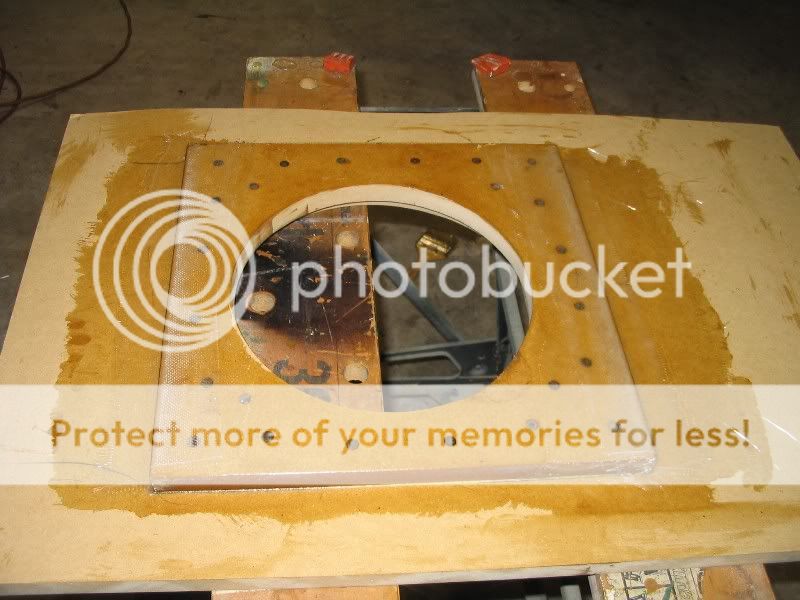
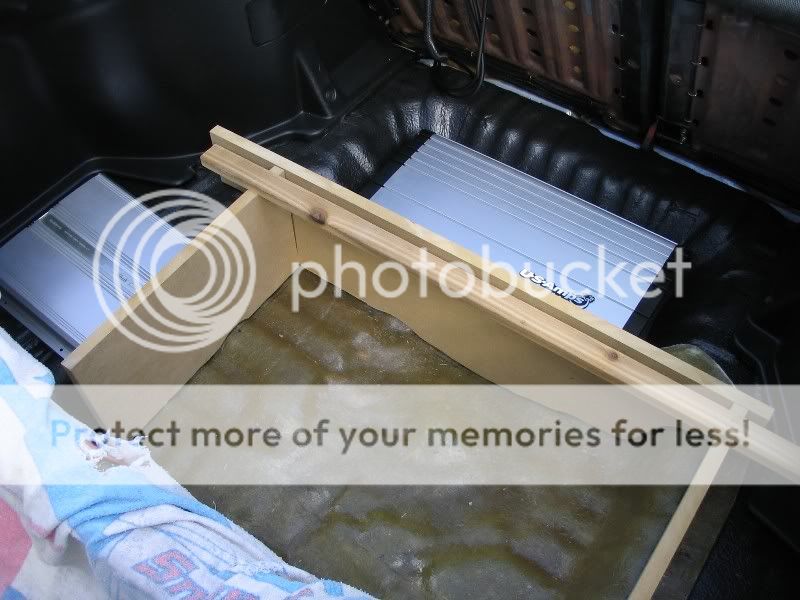
Did some more bracing.
Posted By: footbaldd
Date Posted: November 26, 2005 at 10:17 PM
The enclosure is finished. Tomarrow I am going to work on the mounts for the larger of the 2 amps, and look for fabric to cover everything in. I am thinking of just matching the original carpet for the top, and vinyl underneith, but I got to price it out. 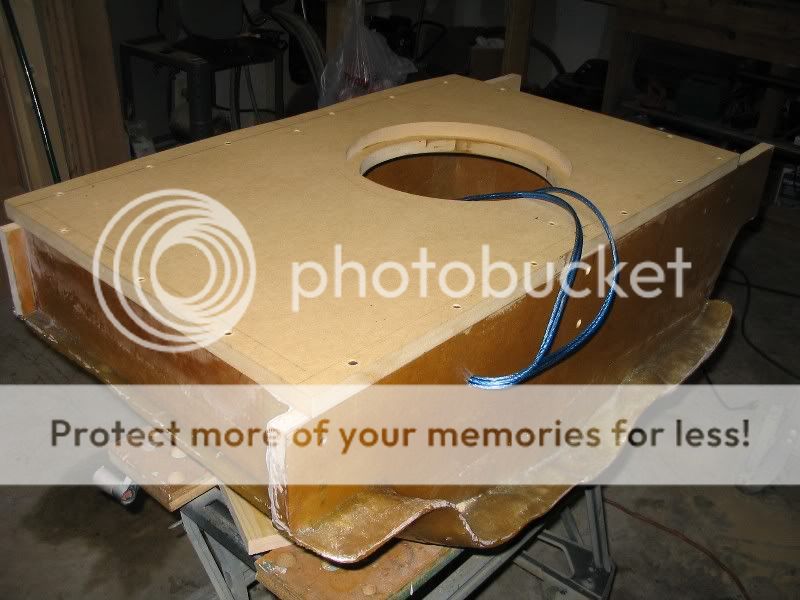
Posted By: footbaldd
Date Posted: November 27, 2005 at 4:27 PM
Got a little more done this weekend. 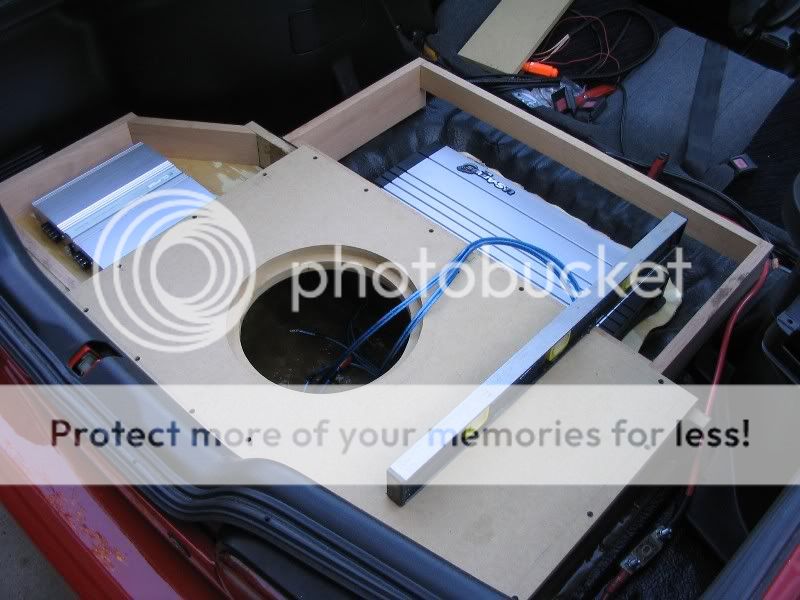
Posted By: jlord16
Date Posted: November 27, 2005 at 9:20 PM
lol i can truely say the same
-------------
Clarion DB36MP
Infinity Kappa Perfect 10"
Respone 800w Mono
ALPINE MRP-F250
*Custom fabrications*
Posted By: footbaldd
Date Posted: November 27, 2005 at 9:36 PM
I powered the sub up for the first time this morning to test everything up. It really pounded (it was surprisingly quiet outside besides a few small rattles and the fact the I could see all the glass bouncing). I noticed was that it sounded like the box was a little too big; although, it would be the perfect size for a sq based ported box. Tonight I am going to decide whether or not to port it, or fill it with wood and fg until I am happy with the sound.
Posted By: realitycheck
Date Posted: November 28, 2005 at 1:44 PM
Man i've got to say that looks amazing.
-------------
Learning the trade one fiberglass creation at a time!
Posted By: footbaldd
Date Posted: November 29, 2005 at 8:47 PM
I decided to go ahead and port it. The volume ended up being right around 2.1 ft3 after sub displacement. I am going to use a 4inch round port, but I was wondering whether winisd subtracts port displacement from the enclosure or not? If not it gave me a length of 7inches.
Posted By: footbaldd
Date Posted: November 29, 2005 at 9:03 PM
www.ddaudio.com
They have the most of the parameters on there, and they also have the sub in winisd. It is a dd 3510d dual 2ohm. I want to start the tuning somewhere in the low 40s high 30s.
Posted By: seanas
Date Posted: January 02, 2006 at 2:51 PM
hey where are the rest of the pics for your install?
Posted By: HottAccord
Date Posted: January 03, 2006 at 10:57 AM
Wow that's lookin pretty good, especially for a 1st timer. Its good to see you are taking the time & having patience so that you do it all right the 1st time.  ------------- Im a fiberglass whore!!
Posted By: footbaldd
Date Posted: January 10, 2006 at 10:23 PM
Sorry I havent updated this lately, I have spent the last couple weeks messing with the port tuning, and am working on a diy aeroport. Once I am happy with that I will cover it all, but progress has slowed down as I injured my shoulder and I can't really do much with my right arm right now. I think I am just going to buy a aeroport as I havent been satisfied with the finish of my handmade ones. If I am feeling better this weekend I should be able to get some good progress. I also replaced my front speakers with a pair of alpine type-s and put them in 3/4in mdf rings. They are a temporary setup, but I am pretty happy with the setup so far.
Posted By: Benji999
Date Posted: January 18, 2006 at 12:34 PM
Nice work man, good luck w/ the rest of it, I'm glad to see that you used MDF for the flat portions.
Posted By: footbaldd
Date Posted: January 23, 2006 at 8:03 PM
I have it out right now and have everything almost finished, I did end up changing the pvc port out for a 4 inch aeroport. I dont have any pictures as it sits (my main computer has a hosed xp install) but I will post up a couple when I put it back in. I know its rather slow progress, but I haven't had a lot of time and I would rather have it done right. Thanks for the compliments.
Posted By: footbaldd
Date Posted: March 13, 2006 at 12:11 AM
Posted By: Clif
Date Posted: March 13, 2006 at 7:57 PM
looks great! how dose it sound with that aroport? looks great tho for a first project
-------------
hmmm.... was that the right wire?
Posted By: footbaldd
Date Posted: March 13, 2006 at 9:25 PM
I made a huge difference going from the straight pvc that I was messing around with when I first started to this setup. I have yet to hear any port noise, and it seems to have a rather flat response down to 30. Tomorrow I have to take out that md2 and fix one of the inserts, and then I have to Isolate a couple rattles with some weatherstripping (it fits right up to the panels on the sides so there is a slight vibration there, and I just put the trunk lid cover on but didnt have enough weather stipping to pad it) Besides that I need to finish the top lids for the amps. With the lids on all you will see is the sub and port.
Posted By: arrivalanche
Date Posted: March 13, 2006 at 11:26 PM
why is there a breaker in the back?
Posted By: footbaldd
Date Posted: March 13, 2006 at 11:34 PM
Its a 120 amp circuit breaker. I put it back there so It will pop before the anl fuse up front and to serve as a distrobution block if I want to and anything down the road.
Posted By: cavy9939
Date Posted: March 19, 2006 at 2:56 AM
i'm about to do something similar, but am wondering something. How do you attach the fiberglass base to the bottom of the trunk? OR does it just sit there in it's place? TIA
Posted By: drvnbysound
Date Posted: March 19, 2006 at 9:30 AM
The best way to permanately attach a fiberglass mold or any other panels to the bottom of the trunk is to drill holes through the bottom of the panel and trunk floor, and literally bolt them into place. Use silicone or other sealer on the bottom of the trunk to prevent rusting.
Many people dont like the idea of drilling through the floor of their car, however along with having your equipment safe in-case you were in a wreck (the equipment will stay in place and not bang around in the trunk). It also becomes a security feature; if you have a spare tire well enclosure, no one can just rip out your box, they would have to individually take each sub off of the sub baffle, and if you used special security screws they may not even bother.
Posted By: younguru
Date Posted: March 23, 2006 at 7:02 PM
looks pretty clean can't wait to see ur next one maybe u could get more creative with it
-------------
ALEX
Posted By: footbaldd
Date Posted: March 25, 2006 at 11:35 AM
Mine is secured in a couple places. the actual enclosure is bolted to the frame (spair tire bolt in bottom), and the under the front amp is a pair of ripped down 2x4s that are screwed the frame with l-brackets and the lid supports are secured the same way. I am hoping to start acouple more projects for some friends, but for my car I plan to do some custom door panels to house a nice set of components and have them wrapped in leather to match the rsx type-s seats I am getting.
|
