97 eclipse rs, sub enclosure
Printed From: the12volt.com
Forum Name: Fiberglass, Fabrication, and Interiors
Forum Discription: Fiberglass Kick Panels, Subwoofer Enclosures, Plexiglas, Fabrics, Materials, Finishes, etc.
URL: https://www.the12volt.com/installbay/forum_posts.asp?tid=80656
Printed Date: May 14, 2026 at 10:45 AM
Topic: 97 eclipse rs, sub enclosure
Posted By: bliz_kid
Subject: 97 eclipse rs, sub enclosure
Date Posted: July 23, 2006 at 6:14 PM
i am new and i am interested in my own sub enclosure for my 97 mitsibishi eclipse and was looking for some ideas i have 2 10" mtx subs and an mtx amp from my cousin and was basicly just asking if any one has seen a deece settup in the back of an eclipse or has an idea to incorporate these into a fg project
Replies:
Posted By: bliz_kid
Date Posted: July 23, 2006 at 6:16 PM
sorry forgot pics 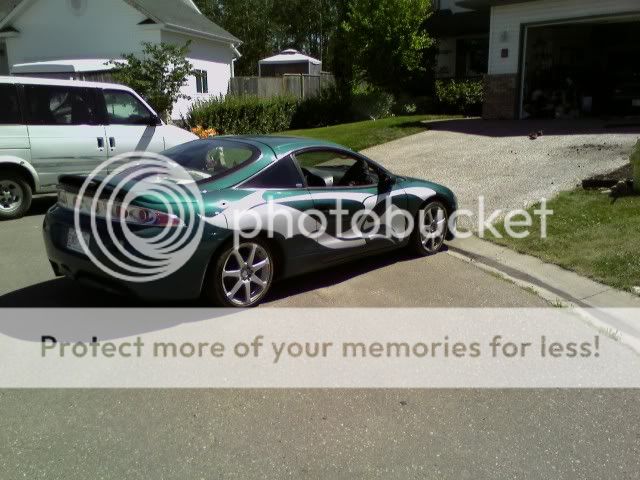
Posted By: Melted Fabric
Date Posted: July 24, 2006 at 10:55 AM
Post pictures of the trunk / hatch area.
-------------
I have not failed. I've just found 10,000 ways that won't work.
When you do not know what you are doing and what you are doing is the best -- that is inspiration.
Posted By: 1qwkfox
Date Posted: July 24, 2006 at 10:57 AM
Poor car ..
But on the bright size there are a slot of curves in the back of that car to potentially make a sick fiberglass product .
Posted By: coralfishg
Date Posted: July 30, 2006 at 4:33 PM
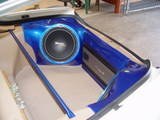
here's a picture of the sub box in my 97 gst.. [IMG]https://img.photobucket.com/albums/v655/coralfishg/304_0415.jpg[/IMG]
Posted By: austincustoms
Date Posted: August 06, 2006 at 12:30 AM
I would do corner boxes, and an arched amp rack across the rear strut mounts (like a rear strut bar with amps on it) all fiberglass of course, and painted to match the car or if you've got a theme in mind. You could also throw a few screens in there too.
Posted By: philliphamby
Date Posted: August 10, 2006 at 4:25 AM
i agree with this guy. but i would also laydown a removable wood floor cap over the spare tire area top it with fiberglass and make a removable cover to come from that up and under the amp rack and meet your back seats. this way it looks like your hole rear section is done in fiberglass. and you wont loose your spair tire in the proses. ------------- give a man a fish he will eat for a day. teach a man to fish he will eat for a lifetime.
Posted By: Melted Fabric
Date Posted: August 10, 2006 at 10:20 AM
I agree with phil, but if you are going to use this as a show car or weekend driver, you can remove the spair and have more room to expand and position items.
-------------
I have not failed. I've just found 10,000 ways that won't work.
When you do not know what you are doing and what you are doing is the best -- that is inspiration.
Posted By: anarchy customs
Date Posted: September 08, 2006 at 8:48 PM
I used to own a 2g eclipse and heres what I did. Scrap that back seat. They're basically worthless anyways. They're tiny, cramped and uncomfortable. Cut out an mdf panel roughly the same shape as the bottom of the rear seat. Carpet or in my case vinyl it. Then build yourself an enclosure that sits in the same place as the top half of the seats went. 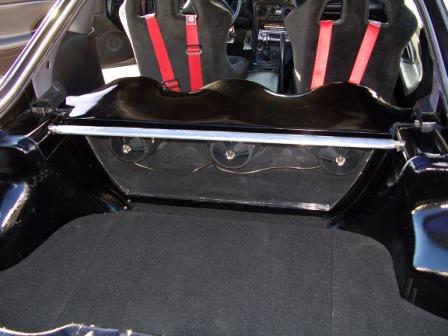
This was one of the first enclosures I ever did. I had originally built two small boxes on either side of the trunk. If you're planning on doing that be wary of making glass molds of the sides of the trunk for the base of your boxes. Especially the passenger side. The sides of the trunk are shaped oddly and have deep pockets that make popping out the molds pretty difficult. I actually had to cut mine into 2 peices each to get them out.
Posted By: torquehead
Date Posted: September 08, 2006 at 11:25 PM
.....all sound like great ideas! Coincidentally, Im building a foreward firing hatch enclosure for an Eclipse like yours. Ive removed the whole hatch lid from the car. The molded enclosure will contain three 12 inch JL's. The three amplifier will be hanging in front of each port on the lower side. The ports are going to serve as a cooling effect for the amps, relying on air movement from the port directly onto the cooling fins of the amps. Im leaving the back glass in, but I had to take the glass to a coating shop that did some kind of electro-plating, which made the back glass look as if it were chrome-like...or like the chrome window tint, its not transparent at all though. I re-installed the glass, and left all of the factory plastic trim and panels off, they are useless. I fiberglassed the whole section to make a skin, this took a while to get it thick enough. Half x half inch strips of MDF were integrated into this skin after the 2nd layer of FG, then 4 more layers of FG added. The MDF rings were fabricated, drilled, screwed to wood dowels serve as stand offs to secure them in thier odd directions to the FG/hatch. Other MDF forms were formed such as the flute edged rectangular port holes, the amplifier hangers, and the neon crap. Then the thin polyester fabric was layed so I could see if my guess-timation for air space was close, in which I was only 0.015 too large for each. I used the styrofoam micro-bead process to obtain this figure per 1.6 cu.ft. After clean-up, I glued, stapled, and then resin was added . After curing, 3 layers in some areas, and 5 layers in some areas were layed to cure. When cured, I took the hatch and EVERYTHING that is envolved to get weighed. I finally grasped the reality this thing is going to be heavy. So, I opted for heavier struts to aid in opening the hatch when finished...ends up 4 struts will be required...now back to work I go. I drilled holes and bolted the amp hangers to the box/panel in a symmetrical mannor with the port holes. Time for routing! All holes were drilled for....everything from wires, brackets, to the speaker rings. This was a good time to test fit all of the components for the last time. Body filler was used for smoothing......now its time to sand this baby down for her pretty curves.... So, here I am.........SANDING........
Posted By: anarchy customs
Date Posted: September 08, 2006 at 11:30 PM
That sounds like its gonna be a pretty impressive set up. Got any progress pics so far?
Posted By: glassmaster808
Date Posted: September 15, 2006 at 8:29 PM
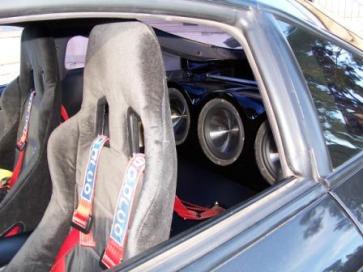
This is what I did for a guy with a eclipse.
Posted By: bliz_kid
Date Posted: September 18, 2006 at 10:07 PM
Anarchy i love how the box looks but i am a major newb to this and this will be my first project i need a bit more info on that fisrt off i get the taking out the seat but after the bottom mdf how did you mold the three rings for the subs into the plastic and ya im confused ...
Posted By: Melted Fabric
Date Posted: September 19, 2006 at 9:50 AM
glassmaster808 wrote:
This is what I did for a guy with a eclipse.
I am very impressed by this concept. Just got a 1G Talon Tsi a month ago and was pondering what approach I should take, while allowing me to keep a full size spare tire back there too.
Nice  ------------- I have not failed. I've just found 10,000 ways that won't work.
When you do not know what you are doing and what you are doing is the best -- that is inspiration.
Posted By: anarchy customs
Date Posted: September 20, 2006 at 5:28 PM
bliz_kid wrote:
Anarchy i love how the box looks but i am a major newb to this and this will be my first project i need a bit more info on that fisrt off i get the taking out the seat but after the bottom mdf how did you mold the three rings for the subs into the plastic and ya im confused ...
If I still had my build up pics it would make perfect sense but since I dont I'll try to describe it to you. First thing you're going to do is make an mdf panel that covers where the botom of the rear seat used to be. Have this panel butt right up to the edge of that metal hump that seperates the back seats and the trunk. Next you want to tape off part of that mdf panel and your plastic interior peices on either side of the rear seat. Once fiberglassed the plastic panels are going to give you your base for the sides of the box. And the mdf panel is going to give you the shape for the front. Now you're going to have a mold that stretches the length of the rear seat space. Trim the mold to whatever size/shape you want. Then mount your sub rings where you want. Build an mdf panel to close the back of the enclosure. Once all that it done you can fleece and glass it. Hope that helps.
|