Custom Dash Kit, How To
Printed From: the12volt.com
Forum Name: Fiberglass, Fabrication, and Interiors
Forum Discription: Fiberglass Kick Panels, Subwoofer Enclosures, Plexiglas, Fabrics, Materials, Finishes, etc.
URL: https://www.the12volt.com/installbay/forum_posts.asp?tid=81032
Printed Date: May 14, 2026 at 11:04 AM
Topic: Custom Dash Kit, How To
Posted By: josh1979
Subject: Custom Dash Kit, How To
Date Posted: July 31, 2006 at 9:37 PM
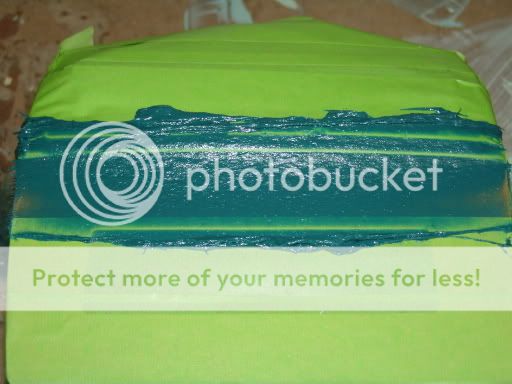
this one is fairly simple and made me some good money is for a 2003 jaguar X-type first i disassembled the factory radio and removed the circut boards, and taped up the edge. the tape will ensure a tight fit and hep the router bit not to burn through the soft plastic 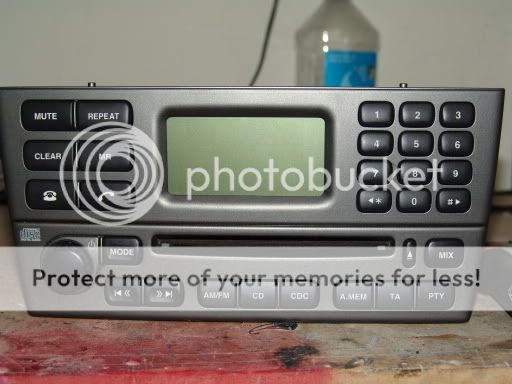

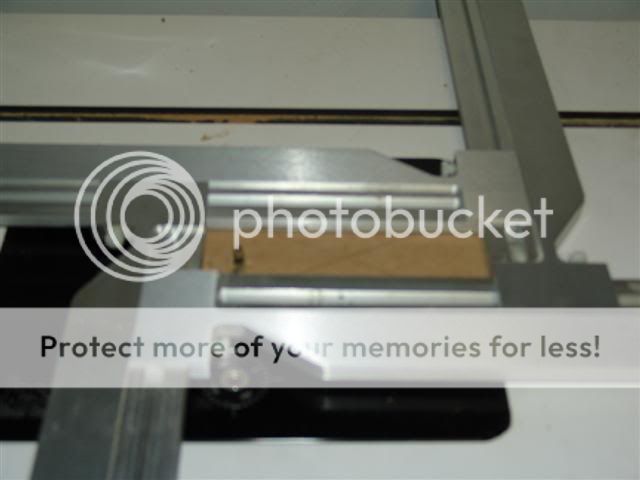
useing some dub. sides tape, a peice of 1/4 inch MDF we flush trim the face on the router table, and test fit 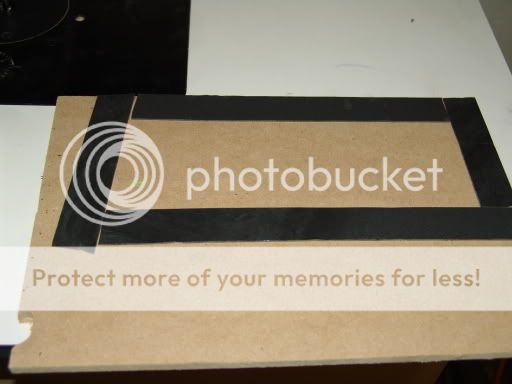
next we use supplied radio trim ring and mark out the inside on the panel where we want the radio to be, we than use a perfect square tool to router out the hole for the face of the radio. after test fitting i made another one on the router table incase i messed up or ever need to make another one 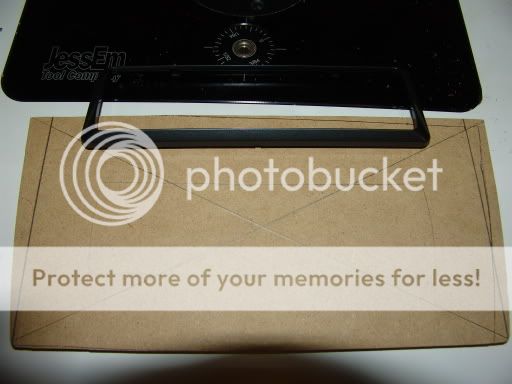

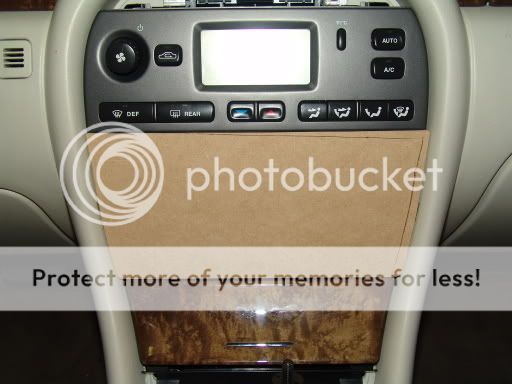
with some CA glue i tacked the pande to hy heat/ Ac controls (careful not to get on visable surfaces) than place back in to the car now i can adjust the bottom of the panel if you look through th radio opening you can see a mdf stilt i ca glued in to keep the panel just right at the bottom. removed from the car i made a stilt fo all 4 corners and glued to the factory radio brace and lightly tacked to the new face panel as it will be remove later 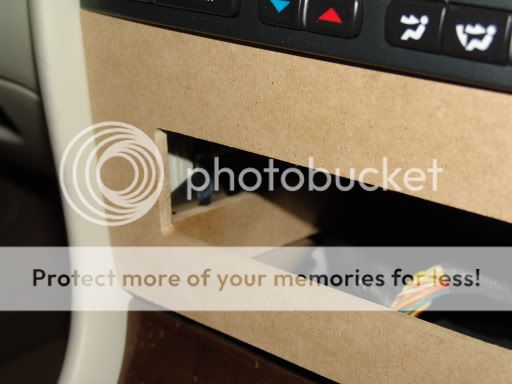
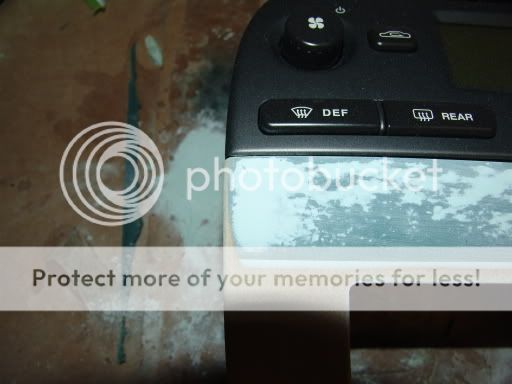
with the face tacked in place we have a flat piece of wood and a curved HAVC control above it. now we tape up the HAVC controls and any where else we dont want body filler. with some reinforced body filler lay down a smoth even coat that fills the gap and contours the HAVC controls 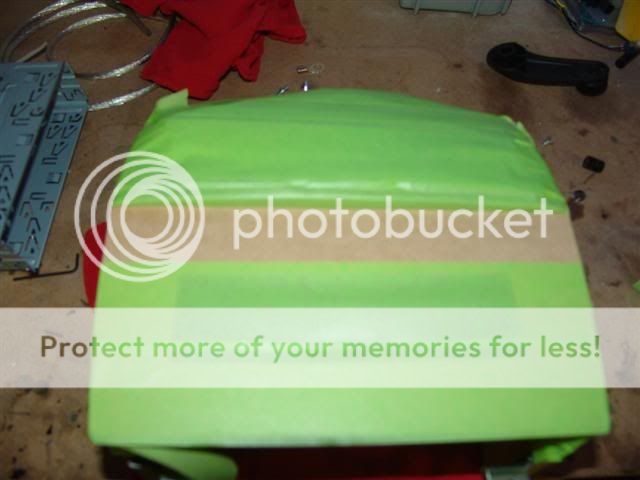
than remove all tape and remove panel from stilts and lightly smoothe the edges just enough to get rid of the rough. retape just below where the last line was and any where you dont want to get filler(very inportant to tape off where the new panel meet the HAVC) 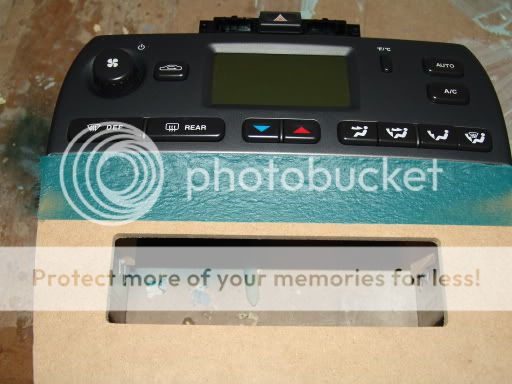

with some EZ sand light filler put on a good coat and sand smoothe down to 400 grit. it is at this time i round and shape the corners and edges to match factory ones. and test fit. 
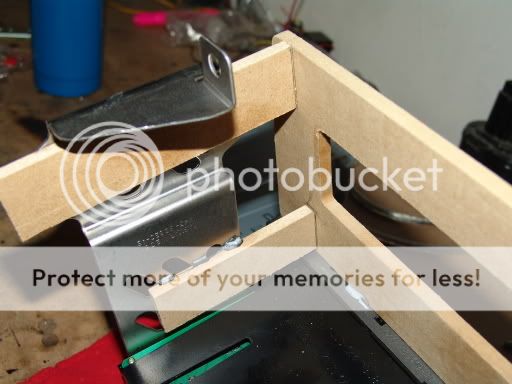
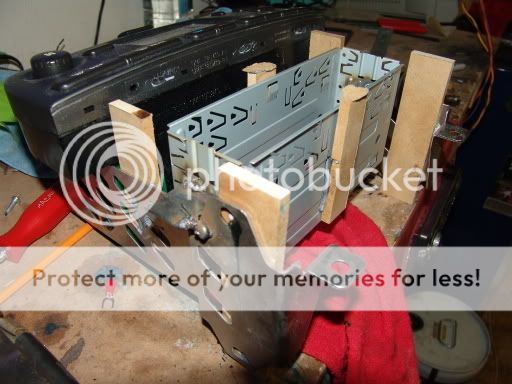
next i made to stilts and secured (with CA glue) them to the back of the panel (lightly as we will remove them later) with the radio mounted in the cage i placed the trim ovew the radio squared it up and CA glued the stiltes to the cage this (will ensure that the radio is trimed right when finel assembled)now remove the radio out the back of the cage, its a little trickey but can be done. with the radio removed i placed the panel and newly mounted cage back on the HAVC controls where it should fit like a glove ,and welded some tabs to the cage and then to the factory brackets than once again remove the panel from the mounts we put on the cage. 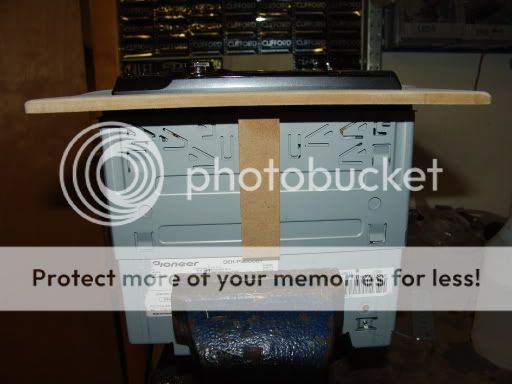
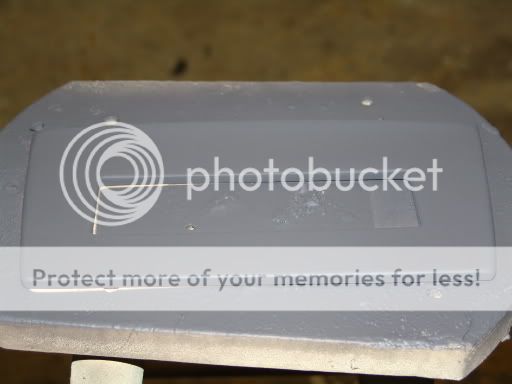
next i primed the panel with high build EZ sand prime sanded with 400grit till smoothe. than laid down a few light coat of SEM Clasic Coat let dry than laid down a few texture coats by holding the can about 2FT away mounted the radio in the cage and reatached the panel useing caglue an reinstalled in the car 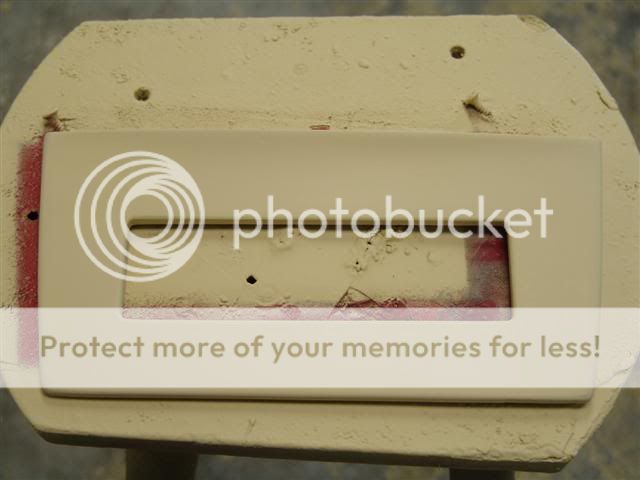
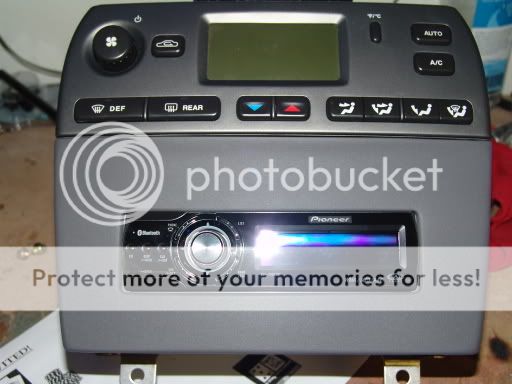
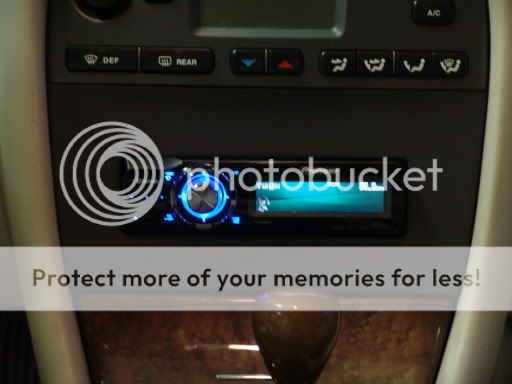
a small job a few dollors of meterials and hundreds added to the total i love car nobody else will touch ------------- bring back the rotary phone so i dont have to press 1 to proceed in english
Replies:
Posted By: KarTuneMan
Date Posted: July 31, 2006 at 10:02 PM
NICE......real nice
Posted By: oscarnl86
Date Posted: July 31, 2006 at 10:06 PM
nice job there josh looks prety good
Posted By: cutlass013
Date Posted: July 31, 2006 at 11:36 PM
DANG J that install looks awsome and is tight. great job
Posted By: memphis9
Date Posted: August 01, 2006 at 5:55 AM
nice job, very clean
-------------
G-Boys Customz
Northville, MI
Posted By: Velocity Motors
Date Posted: August 01, 2006 at 9:17 AM
Where did you get your perfect square tool ? Is there a more technical name for this ?
-------------
Jeff
Velocity Custom Home Theater
Mobile Audio/Video Specialist
Morden, Manitoba CANADA
Posted By: josh1979
Date Posted: August 01, 2006 at 7:24 PM
Velocity Motors wrote:
Where did you get your perfect square tool ? Is there a more technical name for this ?
from here that have lots of cool stuf for custom fab so check it all out.https://mobilesolutions-usa.com/ ------------- bring back the rotary phone so i dont have to press 1 to proceed in english
Posted By: blufab
Date Posted: August 02, 2006 at 3:51 PM
Sweet lookin install. If you could find some wood grain material that matches the rest of the panels in your vehicle, you should cover the piece with it. It would really make the peice POP!
Posted By: josh1979
Date Posted: August 03, 2006 at 9:42 PM
i do have a company in CA that will match the wood grain. all thay need is a peice of the factory stuff. thay have some kind of dip that will stain allmost anything its cool stuff but takes weeks and cost some real loot.
-------------
bring back the rotary phone so i dont have to press 1 to proceed in english
Posted By: auex
Date Posted: August 04, 2006 at 12:43 AM
Good job. I love that square jig as well.
-------------
Certified Security Specialist
Always check info with a digital multimeter.
I promise to be good.
Tell Darwin I sent you.
I've been sick lately, sorry I won't be on much.
Posted By: Velocity Motors
Date Posted: August 04, 2006 at 10:52 AM
Thanks for the link on the square jig..... one in the mail coming my way now  ------------- Jeff
Velocity Custom Home Theater
Mobile Audio/Video Specialist
Morden, Manitoba CANADA
Posted By: realitycheck
Date Posted: August 04, 2006 at 11:36 AM
Thanks velocity, I too was looking for the jig. Very nice tool looks like.
-------------
Learning the trade one fiberglass creation at a time!
Posted By: Melted Fabric
Date Posted: August 04, 2006 at 5:20 PM
Yea, good job as you may already know. Thanks for that link too. I love having a list of good resources, I will post a topic with some of my best links too.
-------------
I have not failed. I've just found 10,000 ways that won't work.
When you do not know what you are doing and what you are doing is the best -- that is inspiration.
Posted By: the rah
Date Posted: August 06, 2006 at 3:07 PM
dude thats very nice job the rah ------------- rah2son
Posted By: darthness
Date Posted: August 06, 2006 at 5:23 PM
damn dude, thats pretty lovein nice.
Posted By: 190db
Date Posted: August 21, 2006 at 10:52 PM
wow i would like to do something with my BMW with a AVIC-Z1. that look hot keep up the good work
Posted By: Flakman
Date Posted: August 22, 2006 at 12:33 AM
Great job josh! Love the integration without a lot of difficulty. Nice tutorial. Oh yeah...got that site bookmarked...will be spending some good perusing time on there for sure.  ------------- The Flakman
I feel strange. I have deja vu and amnesia at the same time.
John | Manteca, CA
Posted By: babatbabat
Date Posted: August 22, 2006 at 6:40 AM
Nice......
Posted By: layzboy
Date Posted: August 23, 2006 at 4:23 AM
Excellent job, and great integration into the console. By the way, thanks for the link to that site, it shot right up near the top of my most useful links list.
Posted By: INSTALLER_MSS
Date Posted: August 28, 2006 at 4:33 PM
good job
Posted By: integratyper934
Date Posted: August 29, 2006 at 2:38 AM
man that looks fun! i need to get are shop a damn welder....
Posted By: punkbastard
Date Posted: August 29, 2006 at 3:21 PM
Hey you guys, I just wanted to let you know that Mobile Solutions is a local company here and Bryan Schmitt, the owner is a very cool guy and extremely helpful. I attended one of his trainings and he showed me some very cool ideas and ways of doing things. I look at custom jobs an entirely different way now and he is always there to help me with anyquestions I might have. I highly reccomend his class to any of you business owners out there. The _uda router tool is awesome, I use it all the time, he has a bunch of other really nice time saving tools on there too
|