First Attempt at Glassing
Printed From: the12volt.com
Forum Name: Fiberglass, Fabrication, and Interiors
Forum Discription: Fiberglass Kick Panels, Subwoofer Enclosures, Plexiglas, Fabrics, Materials, Finishes, etc.
URL: https://www.the12volt.com/installbay/forum_posts.asp?tid=84537
Printed Date: March 28, 2026 at 10:41 AM
Topic: First Attempt at Glassing
Posted By: jlaudiokyle
Subject: First Attempt at Glassing
Date Posted: October 23, 2006 at 11:32 PM
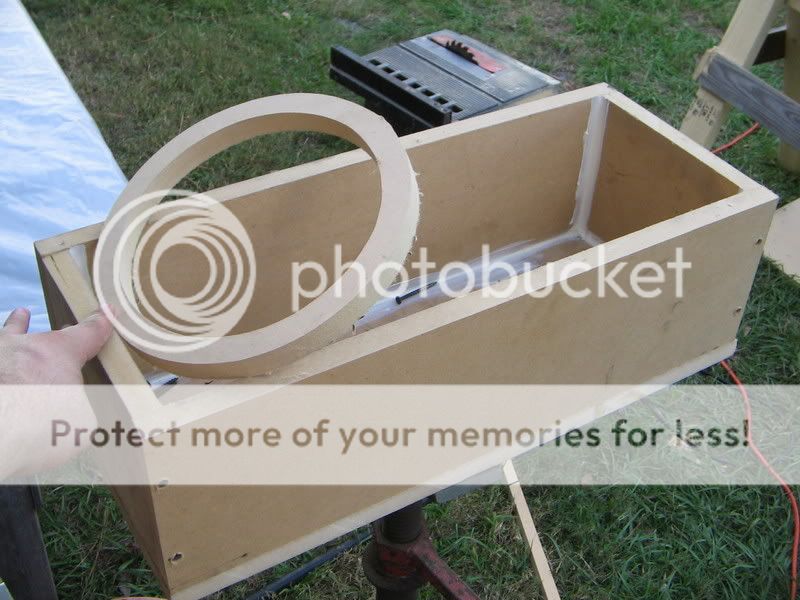
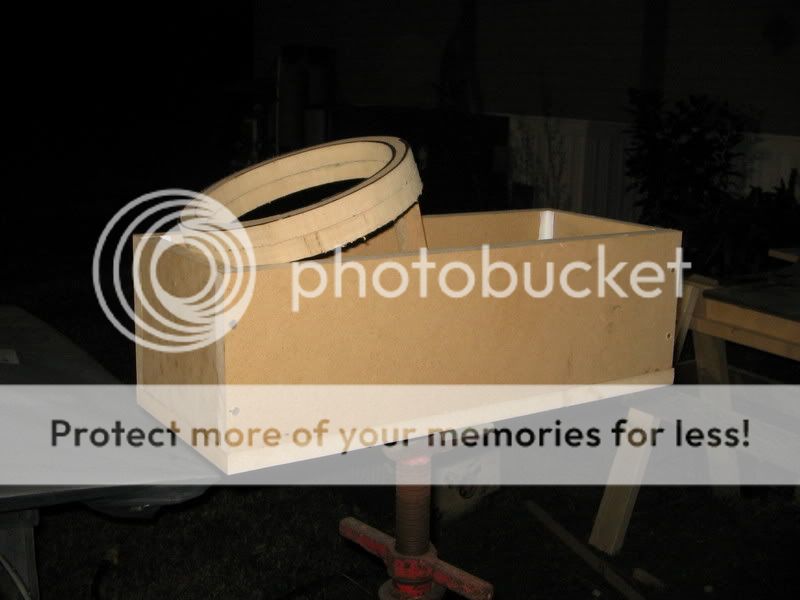
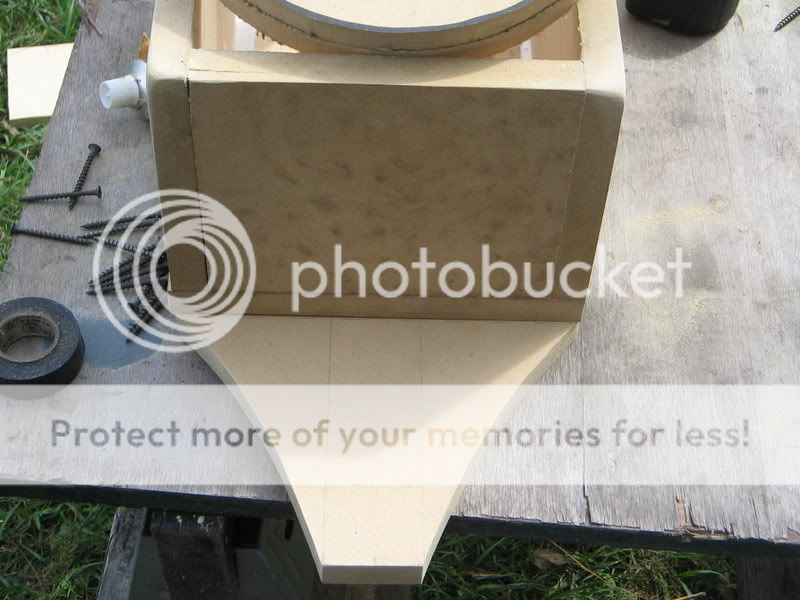
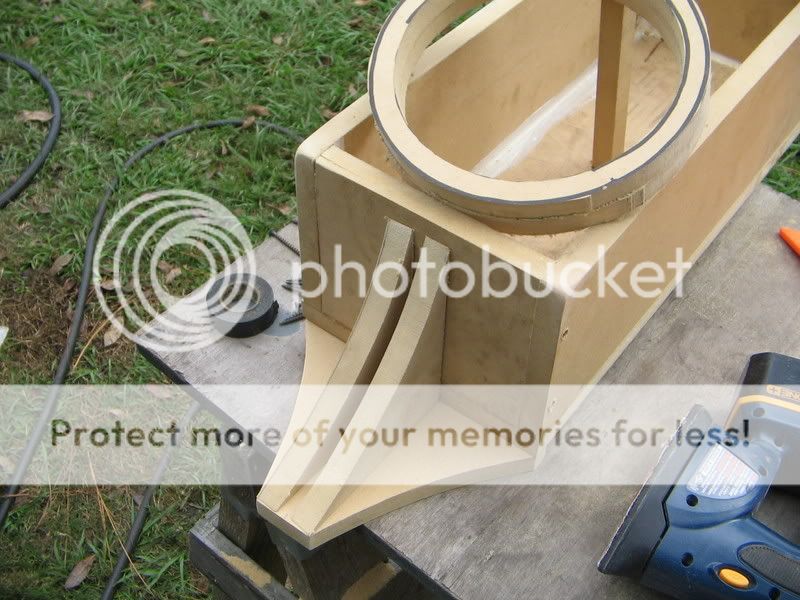
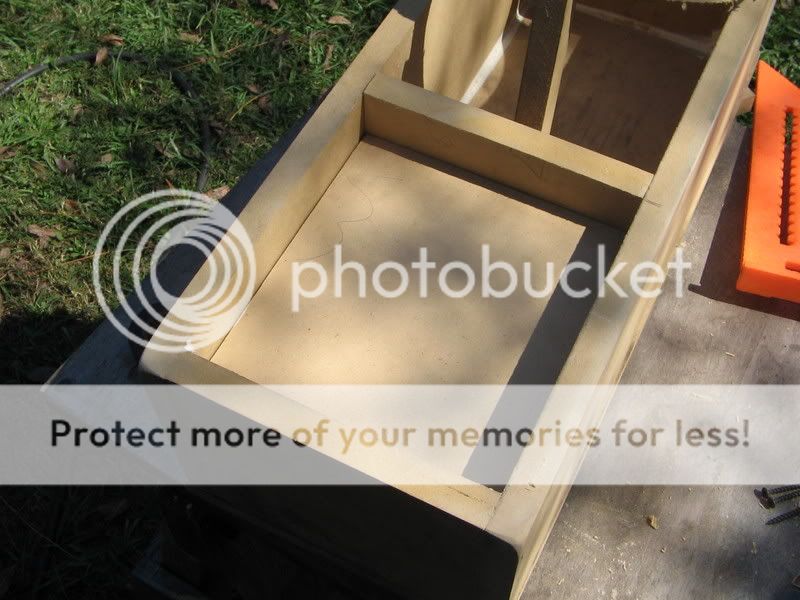
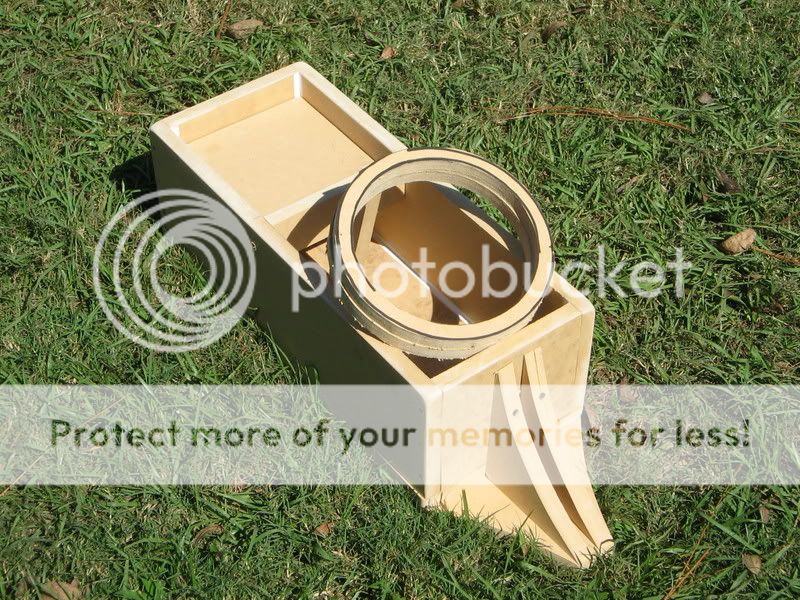
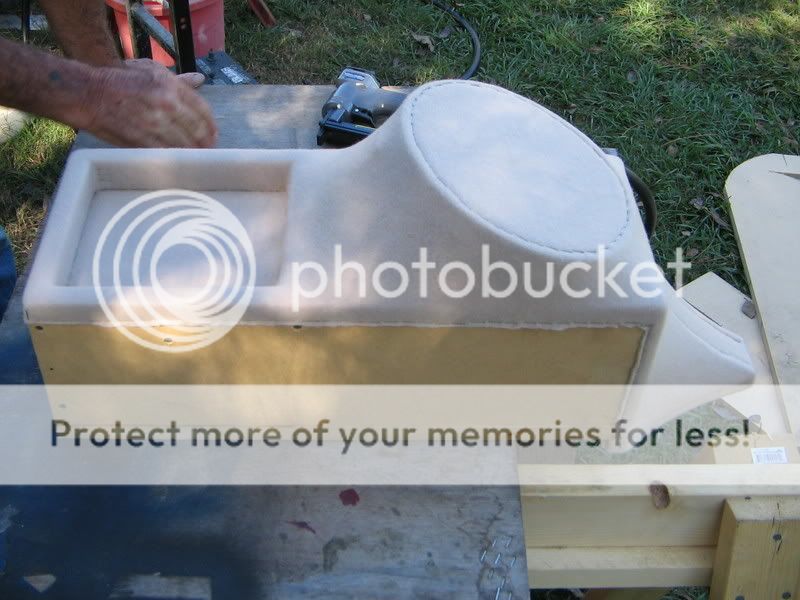
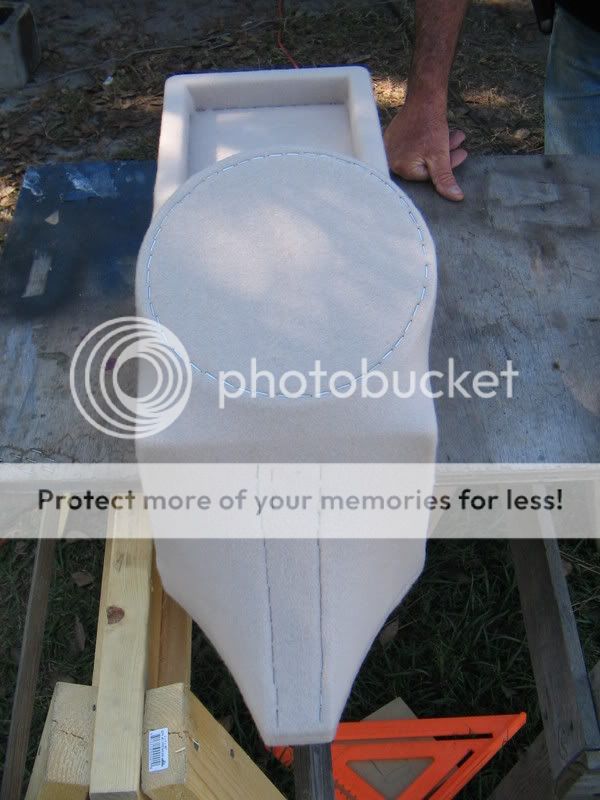
Just a few pics of what I'm working on... Let me know what you think and any pointers/tips are greatly appreciated. 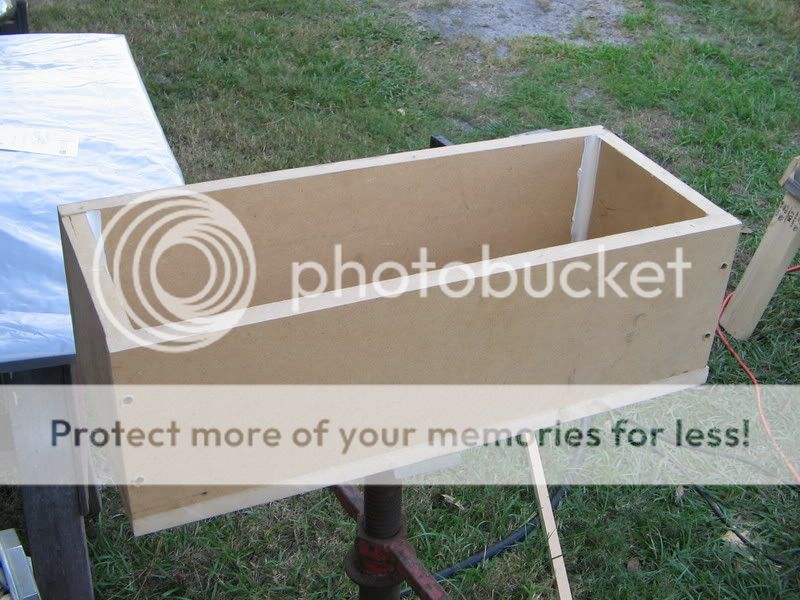
Replies:
Posted By: glassmaster808
Date Posted: October 23, 2006 at 11:39 PM
That looks like it will come out pretty swell.....Good job. Keep the pic's comin.
Posted By: auex
Date Posted: October 24, 2006 at 12:01 AM
Well since you are using 2 rings I would recommend flushing(sub mounts to the bottom ring and the top ring would rise to the top of the sub so it doesn't stick out) the sub in before you apply the resin. That is just me though.
I also would have left the bottom of the enclosure off to make sure that it gets a good seal around the pockets.
IMO you may have gone overboard with the staples.
Definately looks like good prep though. Do you have access to a router? It could help in the future with the edges and rings.
How are you planning on covering this enclosure? I hope either paint or suede flocking for the curves because carpet or vinyl would be a major pain.
-------------
Certified Security Specialist
Always check info with a digital multimeter.
I promise to be good.
Tell Darwin I sent you.
I've been sick lately, sorry I won't be on much.
Posted By: jlaudiokyle
Date Posted: October 24, 2006 at 12:11 AM
Yeah.. I had planned on routering the ring but it being installed into a standard cab ranger I had limited space. Especially between the seats. Right at 9" for a very tight fit. The sub is going to be a rockford fosgate P2 8" sub. The exterior of the mouting ring for the sub is 8 3/4" so I wouldn't have left me with much on each side. That's why it's going to be mounted directly to the top. As far as leaving the bottom off that sounds like something I'll consider for the future on another box. My ranger has kinda a uneven floor pattern I had to work with which turned out to be a 3/4" drop down so I made the box over shoot the drop about 3/4" and screwed the "point" piece to the bottom overlapping that 3/4" I added to the length of the box. And yeah it's going to be painted. I've worked with bondo and bondo-glass and have painted a good amount of times before.. i like that look better. but yeah it woulda been a pain haha. Thanks for the advice!
Posted By: integratyper934
Date Posted: October 24, 2006 at 1:29 AM
coming out good! i think your going to have a very fun time sanding that 
Posted By: Aruman
Date Posted: October 24, 2006 at 4:46 AM
lookings good, one thing i would do is resin inside the box for better sealing, but in your case you can't do it anymore. but it's a nice looking enclosure, good job.
-------------
Shaking The Neighborhood
Posted By: jlaudiokyle
Date Posted: October 24, 2006 at 8:13 AM
yeah haha I'm sure it should be fun.. guess a little hard work pays off..
Posted By: killer sonata
Date Posted: October 24, 2006 at 1:46 PM
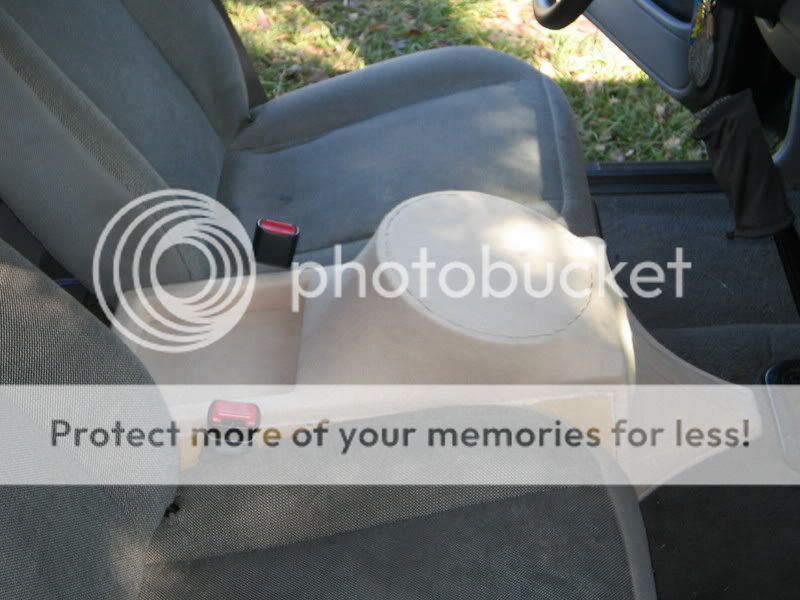
Looking good so far. Is it just me or in the 9th pic, does the sub ring not look centered? to me it looks like its more on the drivers side.
Posted By: jlaudiokyle
Date Posted: October 24, 2006 at 3:50 PM
killer sonata wrote:
Looking good so far. Is it just me or in the 9th pic, does the sub ring not look centered? to me it looks like its more on the drivers side.
Yeah it was at the time.. I found out that my killer staple gun jarred the support loose from the back of the ring where it was glued and stapled. Thing's got a mind of it's own. Nothing new so far though. That's where I left off yesterday.. Today was project rabbit house. Had to build a rabbit house for my wife so it didn't freeze to death. So I recycled an old box of mine for 2 solo baric 15's. Monster box (13 cu.ft.) haha.
Posted By: Melted Fabric
Date Posted: October 25, 2006 at 3:02 PM
Nice job, it looks like it will be heavy, but sturdy nonetheless.
-------------
I have not failed. I've just found 10,000 ways that won't work.
When you do not know what you are doing and what you are doing is the best -- that is inspiration.
Posted By: HottAccord
Date Posted: October 29, 2006 at 10:48 PM
Nice design, looks like it fits in there like a glove, cant wait to see the finished product!
-------------
Im a fiberglass whore!!
Posted By: bellsracer
Date Posted: October 30, 2006 at 12:16 AM
Very not bad. I think it'll look good with some more work... can't wait to see more pictures. If you don't mind me asking... I was wondering if you predilled where the screws are before drilling them in. I noticed the split in the wood and didn't see any wood glue filled in the split and seams. Good job. ------------- Never send your ducks to eagle school.
The difference between ordinary and extraordinary is that little extra.
The 3Ls of life: Learn from the Past, Live for the Present, Look to the Future.
Posted By: 05honda
Date Posted: October 30, 2006 at 7:56 AM
Nice, I just built a very similar project with the sub facing the opposite direction....very very similar, good work.
|