fiberglass trick of the year
Printed From: the12volt.com
Forum Name: Fiberglass, Fabrication, and Interiors
Forum Discription: Fiberglass Kick Panels, Subwoofer Enclosures, Plexiglas, Fabrics, Materials, Finishes, etc.
URL: https://www.the12volt.com/installbay/forum_posts.asp?tid=90998
Printed Date: April 01, 2026 at 9:04 PM
Topic: fiberglass trick of the year
Posted By: speakermakers
Subject: fiberglass trick of the year
Date Posted: February 26, 2007 at 1:00 AM
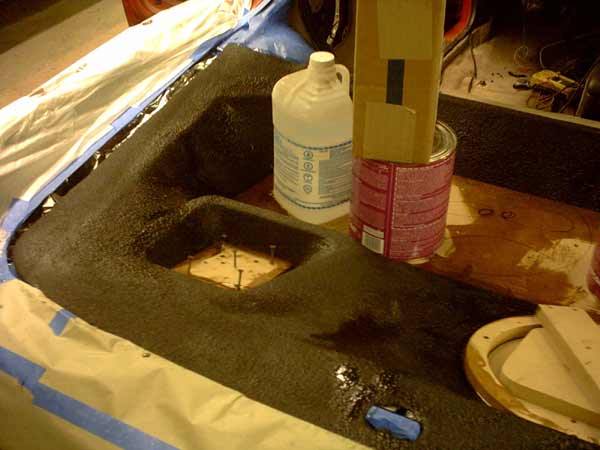
Mix good quality body filler like Evercoat Rage Extreme with polyester resin to thin it down. Carefully mix in cream hardener (50:1) so that you dont introduce a lot of air bubbles. Paint the mixture on to your rough project with a 2 disposable brush Sand down to desired shape with 80 grit on a 3 DA Spray on guide coat Sand flat surfaces level with 36 and then 80 grit with a long block. Sand radiuses with a soft block Spray on high build primer Paint I use this trick on every fiberglass project and save dozens of hours of sanding and refilling every time. It works on curved and vertical surfaces as well as flat surfaces. It makes creating perfectly flat and level surfaces a snap! Think about it if mixing some body filler, applying it waiting for it to cure and then sanding it down only takes you 30 minutes every time you encounter an imperfection or an air bubble, how many half hours do you have to waste in a day? Sorry about the crappy pics. I took them with my phone. If you check out that site you should know that My buddy Tony is responsible for the monitors in the back window and the kick ass interior glass work. 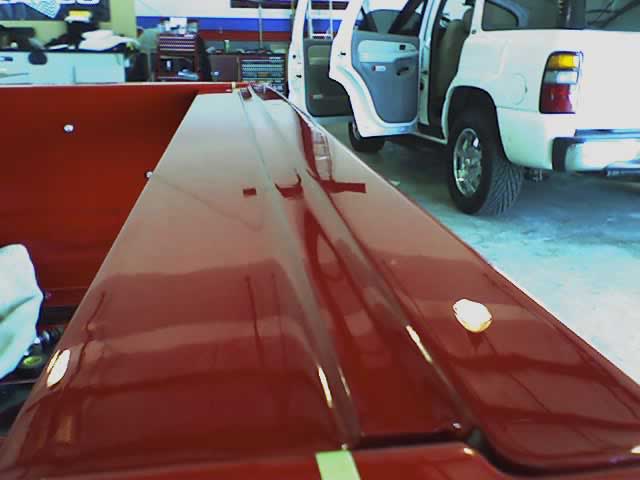 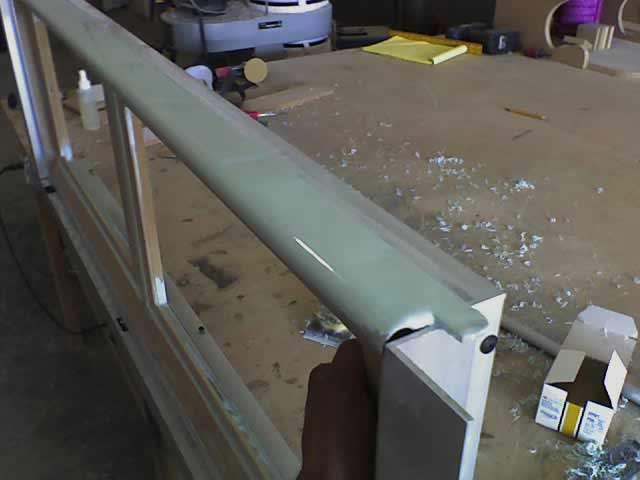 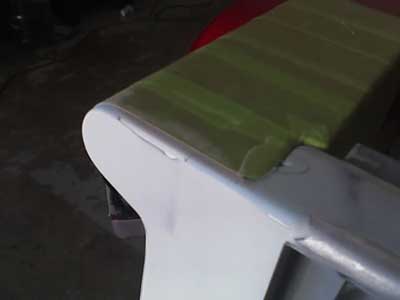 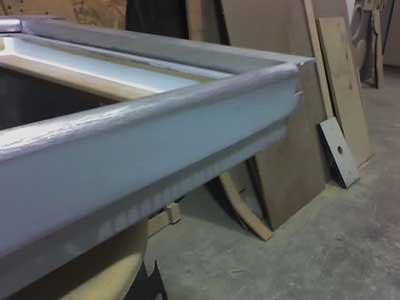 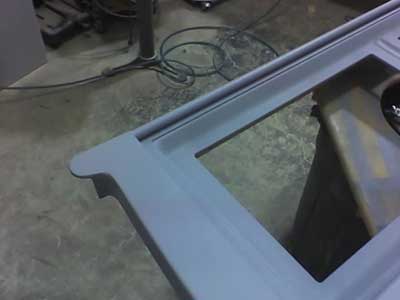 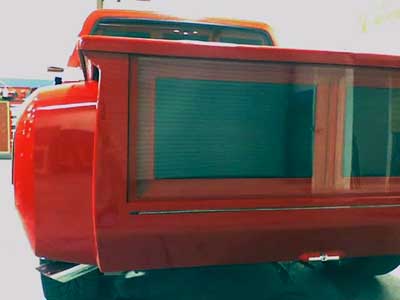
Replies:
Posted By: cyberclown
Date Posted: February 27, 2007 at 8:40 AM
NICE JOB!!!
Posted By: maxxheadroom
Date Posted: March 05, 2007 at 1:38 PM
When you mix the hardener are you using just the body filler hardener, and are you mixing the resin and the body filler first then the hardener? ------------- WDTSF
Posted By: spawn12336
Date Posted: March 05, 2007 at 3:40 PM
Similar trick that I have seen, and from what I have seen you use both hardeners, just the appropriate amounts had they not been mixed. I'll be trying this on the weekend and am going to mix the 2 hardeners together prior to mixing them into the filler and resin mix. should help prevent any bubbles that way.
-------------
"the universe has a way of balancing itself"
Posted By: 1qwkfox
Date Posted: March 05, 2007 at 6:05 PM
this is also known as a "milkshake"
Ed
Posted By: auex
Date Posted: March 06, 2007 at 10:38 AM
Which year?
-------------
Certified Security Specialist
Always check info with a digital multimeter.
I promise to be good.
Tell Darwin I sent you.
I've been sick lately, sorry I won't be on much.
Posted By: speakermakers
Date Posted: March 07, 2007 at 12:16 AM
I have been using this method for many years now and I have tried every mix that you can think of. What I have come up with is that using just cream hardener gives you the best sanding window(15-20 min of sand time). Basically just put in the same amount of hardener as you would if it was just straight body filler.
Remember this is a multi step tip!
1. The mix
2. Using the paint brush instead of a bondo card
3. Sanding after the filler setsup but before it fully cures
4. Using guide coat (check out your local paint shop and ask how to properly use this stuff)
5. Quickly level your project with heavy grit sand paper (get rid of the waves)
6. Let a high build primer take care of the scratches left buy the sand paper.
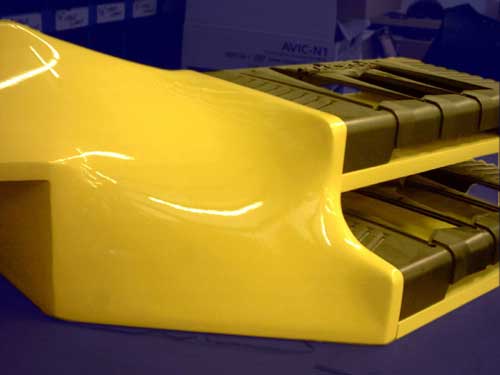
This amp rack took me les than an hour too go from fleece to paint. Also dont forget to reinforce with real glass (I have a trick for that to!). If you do not, the sun will cause your project to crack in a dozen places after a couple of weeks, making you look real bad!
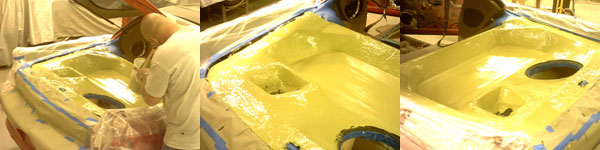
And dont make the mistake that Scott and I made here. mix mo more than 1 sq. ft. at one time or it will harden completely before you can do your magic. This project took me a full day and a half of extra sanding do to this mistake.
Posted By: ndm
Date Posted: March 22, 2007 at 9:50 AM
speakermakers wrote:
Also dont forget to reinforce with real glass (I have a trick for that to!). If you do not, the sun will cause your project to crack in a dozen places after a couple of weeks, making you look real bad!
And dont make the mistake that Scott and I made here. mix mo more than 1 sq. ft. at one time or it will harden completely before you can do your magic. This project took me a full day and a half of extra sanding do to this mistake.
Whats the trick for laying the Glass? I am starting a new project soon and would like to know. ------------- do it right the first time ....or do it again and again and again...
Posted By: speakermakers
Date Posted: March 28, 2007 at 1:02 AM
Ok. The trick to laying the glass is to do it.
I know what your thinking.
What?
There is more to it than that.
Whats important to realize is that after you form your project with fleece, and you have this really good look going on, its ok to lay down some chop fiber glass, resin and then a layer of Marglass (short hair fiberglass reinforced body filler).
You dont have to worry about your project being perfectly smooth. The resin/body filler mix will take care of that.
I have seen countless installers mess up a good project at this point.
The installer will knock his knuckles against the hardened fleece and say thats pretty darn strong and then skip the glass entirely. Or only glass from the back side.
What happens when the fleece and body filler expands in the heat of the sun and the glass reinforced layer beneath dose not? It CRACKS!
It is critical to reinforce both sides of fleece with glass!
Resin soaked fleece is extremely unstable. It will shrink 7-9% initially in the first week and continue to expand and contract in the heat and the cold forever. Anyone who might not believe me on this should go to a resin producers web site and check out the technical specifications of polyester resin.
Keep on mind when reinforcing that the glass is the strong part. Glass its self will not expand or contract.
On the Back side of my projects I will often pour a mix of Kitty Hair (long stranded fiberglass reinforced body filler) and resin. It takes 2 minuets to mix, 1 minuet to pour, and 10 minuets to harden. This is the fast way. It works just fine in most cases. The trick is to become familiar with just how much your mixtures and layers will shrink and how stable they will be from that point on.

Posted By: ndm
Date Posted: March 28, 2007 at 9:30 AM
do you have a website that I can see more of your work? Im really digging it. ------------- do it right the first time ....or do it again and again and again...
Posted By: speakermakers
Date Posted: March 28, 2007 at 9:59 PM
Thanks!
www.enrichedaudio.com
is the website for the shop that I manage.
Some of my pics are on that site. I have only been working there for 8 months now so most of the work that you see will not be my actual work. I have been posting a lot here so you might try running a search for speakermakers on this site.
Posted By: ndm
Date Posted: March 29, 2007 at 2:53 PM
speakermakers wrote:
Thanks!
www.enrichedaudio.com
is the website for the shop that I manage.
Some of my pics are on that site. I have only been working there for 8 months now so most of the work that you see will not be my actual work. I have been posting a lot here so you might try running a search for speakermakers on this site.
Your should modify your signature to include it. ------------- do it right the first time ....or do it again and again and again...
|