I plan on making a fibreglass amp rack on my trunk lid and I was wondering what the best way to attach the rack to the lid would be. I would like to avoid cutting my car if at all possible so that I could take it out if I were to sell my car so that it could be completely reversed, but I would be willing to if it were absolutely necessary.
Here is a picture of my trunk lid
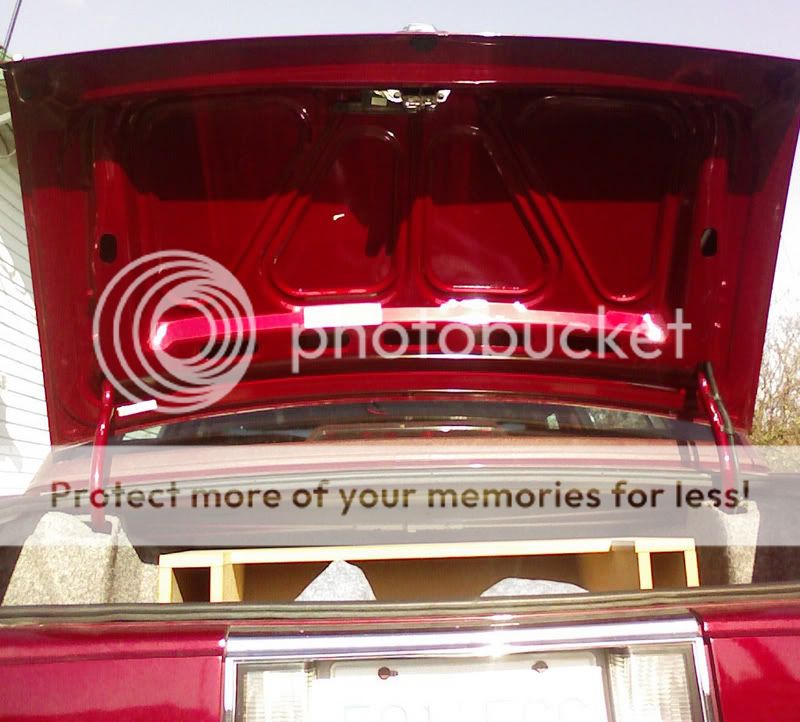
Thanks for the help
Nathan
I would make use of the frame holes and put a brace behind them and mount to them.

I would use a steel strip with a felt lining to protect the paint and put a bolt through it. Then add a strip of MDF on the underside of the trunk lid for your base to build off of. Again, line it with felt (or whatever is soft) to help protect the paint. The more points you make the stronger it will be. In this case I would make use of all the holes.
Ganbatte Ne!
-------------
Never send your ducks to eagle school.
The difference between ordinary and extraordinary is that little extra.
The 3Ls of life: Learn from the Past, Live for the Present, Look to the Future.
yup yup...
a rectangular peice that has a tapped hole in the middle, pushed up through then turned 90 degrees. *nods*couple washers, wrap it in felt if you're worried about scratching hte paint, and you got yourself a winner. good luck.
 Just what I needed to hear, thank you for the information
I'll get started on the braces tomorrow, I already have cardboard templates of the peices I of steel I need to cut
I was a little intimidated by this project at first but I feel ready to just giver now
Post pictures of the various stages here please. TYVM!
-------------
Never send your ducks to eagle school.
The difference between ordinary and extraordinary is that little extra.
The 3Ls of life: Learn from the Past, Live for the Present, Look to the Future.
yeah... but don't use a nut and bolt. tap the steel plate... that way you don't have to try to hold onto a bolt head thats inside the framwork of the trunk lid. *chuckle*
I welded a nut onto the metal when I did a similar project. It'll give more threads and more security when it came ot heavier parts. I just drilled a hole just a bit bigger than the nut hole; then welded in place.
-------------
Never send your ducks to eagle school.
The difference between ordinary and extraordinary is that little extra.
The 3Ls of life: Learn from the Past, Live for the Present, Look to the Future.