step by step mid bass project w/ pics
Printed From: the12volt.com
Forum Name: Car Audio
Forum Discription: Car Stereos, Amplifiers, Crossovers, Processors, Speakers, Subwoofers, etc.
URL: https://www.the12volt.com/installbay/forum_posts.asp?tid=117485
Printed Date: May 04, 2026 at 3:16 PM
Topic: step by step mid bass project w/ pics
Posted By: spmpdr
Subject: step by step mid bass project w/ pics
Date Posted: November 05, 2009 at 2:55 PM
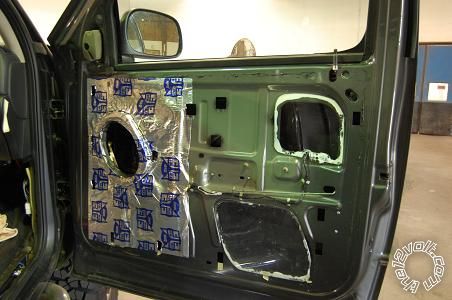
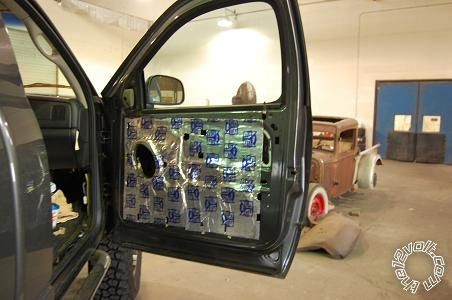
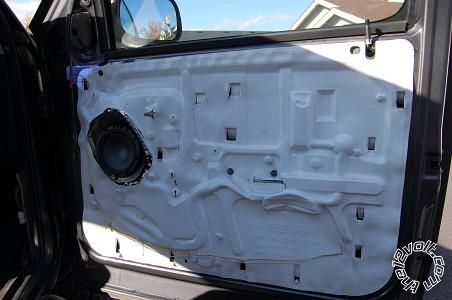 This is what my doors looked like before.  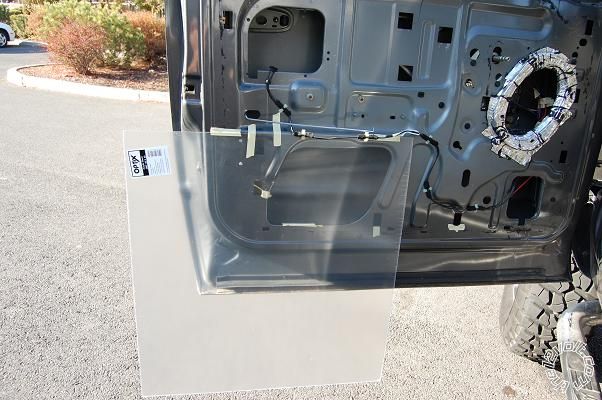 This is the pleix glass to cover up the holes 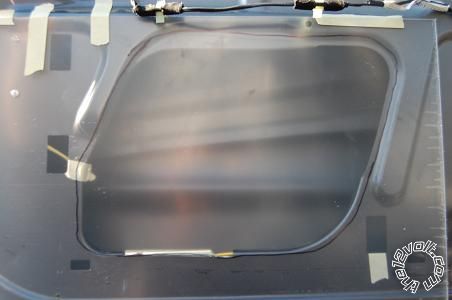 This is the outline i drew of the hole,did that to all 3 holes in door.I will trace those and cut duplicates then flip them over for the other door!! 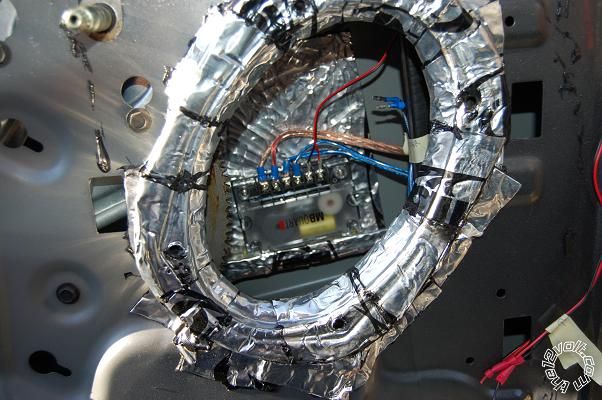 This is the crossover with dynamat backing inside the door panel 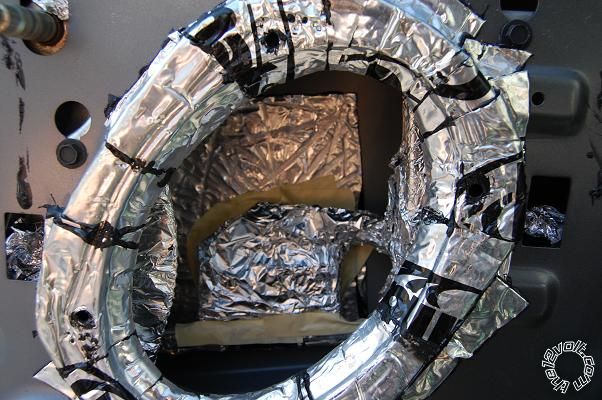 This is the crossover and window channel covered with foil,so sound deadener does not get on it. 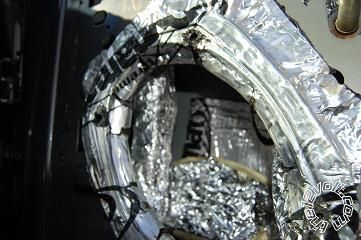 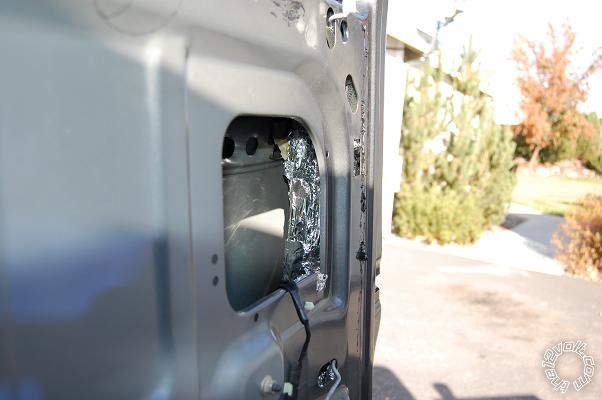 More pics of crossover and window channel wrap in foil.I also masked off the window tract,door lock and the bottom of the window. I will posts after sound deadener pics soon.suggestions appreciated ------------- -A vision without a plan is just a hallucination-
Replies:
Posted By: boogeyman
Date Posted: November 05, 2009 at 4:54 PM
What midbass driver are you going with?
Posted By: spmpdr
Date Posted: November 05, 2009 at 5:15 PM
boogeyman wrote:
What midbass driver are you going with?
Dayton RS150-4 6" Reference Woofer 4 Ohm ------------- -A vision without a plan is just a hallucination-
Posted By: spmpdr
Date Posted: December 07, 2009 at 7:30 PM
spmpdr wrote:
boogeyman wrote:
What midbass driver are you going with?
Dayton RS150-4 6" Reference Woofer 4 Ohm
also peerless sls 6.5" ------------- -A vision without a plan is just a hallucination-
Posted By: spmpdr
Date Posted: December 07, 2009 at 7:56 PM
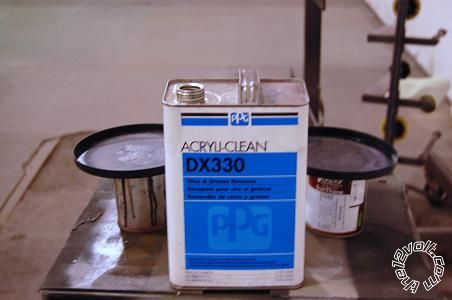
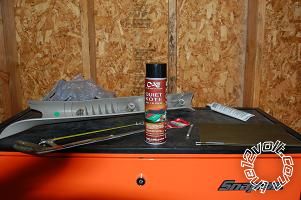 This is the product i used to sound deaden the door skin,its called quiet kote by cascade products 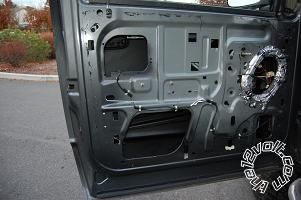 This is a pic of the product applied to the inner door skin, it called for 1 can per door but i used 2 per door just to be sure.This stuff is quite thick and i did notice a huge noise reduction.  Heres a close up of the door skin support coated with the sound deadener 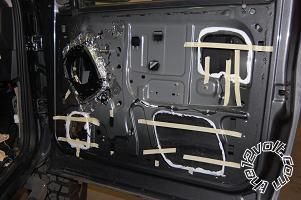 Here is the 1/8" plexi glass cut to shape and silicone caulked 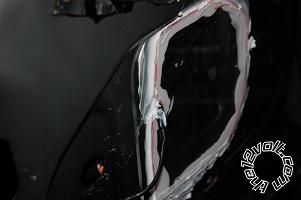 ------------- -A vision without a plan is just a hallucination-
Posted By: blackcivichatch
Date Posted: December 07, 2009 at 8:09 PM
how much was that spray on stuff??
Is it comparable to the matt?
-------------
UNLABELED Custom Car Club President
Posted By: spmpdr
Date Posted: December 07, 2009 at 8:10 PM
Heres the fat mat being applied ,If I knew then what I know now about this stuff I would have chose a different sound deadener , This stuff is way to thin ,i ended up doubling it up to try to help.
Here the first layer on one of the doors,both doors were done the same no need to upload so many pics
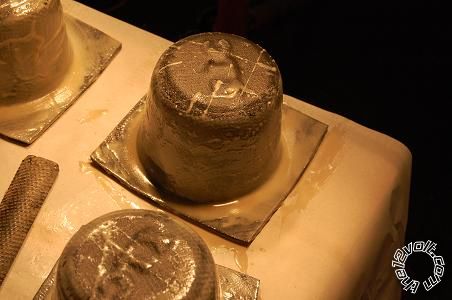
Heres a pic of the 6.5" xtc baffles getting sealed up with f/g resin/bondo mix and crushed up f/g mat.applied 3 medium coats and let dry over night
------------- -A vision without a plan is just a hallucination-
Posted By: spmpdr
Date Posted: December 07, 2009 at 8:23 PM
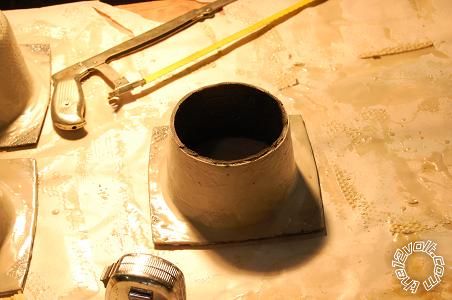
This is a pic of one of the four baffles with the bottom cut off,The makings of an aperiodic vent!!

Heres how i made the vent,I took some left over speaker box carpet from a previous install and cut it about an 1/8" bigger than the hole I cut in the baffle
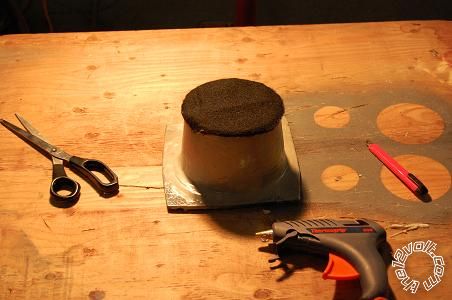
Then I hot glued it to the baffle!!!These ended up workin really well ,just remember to measure the baffle to length bfore you cut I.E. if its going in your door measure the depth in your door with the window down. ------------- -A vision without a plan is just a hallucination-
Posted By: spmpdr
Date Posted: December 07, 2009 at 8:38 PM
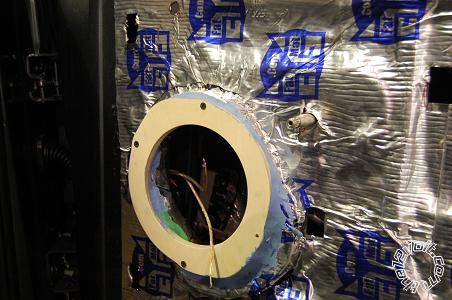
Here is the custom made 6x9 adapter to fit a peerless sls 6.5" woofer perfectly!!!(im pretty proud of that accomplishment)There is non drying molding clay around the inside and the outside of the ring to seal any gaps,make sure you put the screws in slowly so that you dont push the clay out!!.
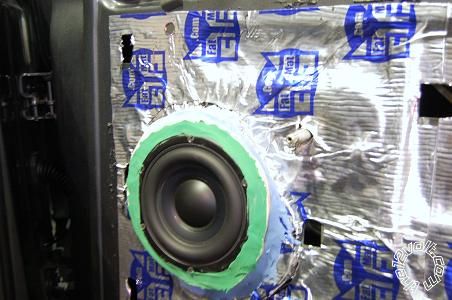
Here is the peerless sls 6.5" mounted and clayed ,I cleaned up the clay more so it really isnt that messy looking, I installed the baffle in the door and cut the top to the diameter of the speaker, I ran the wires through a tiny hole i cut in the carpet of the baffle.These woofers will be my dedicated mid bass they are bandpassed from 80-hz/hp- 600hz/lp .These are very good sounding speakers by the way, thanks dyohn!!
------------- -A vision without a plan is just a hallucination-
Posted By: spmpdr
Date Posted: December 07, 2009 at 8:52 PM
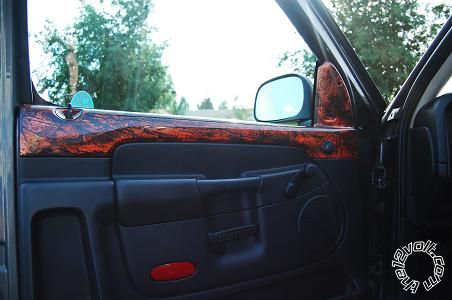
Here is a pic of the door panel reinstalled , the marbilizing was done previously by me ,I will explain how to do it later in this post if interested
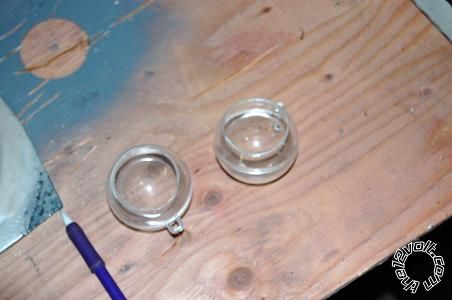
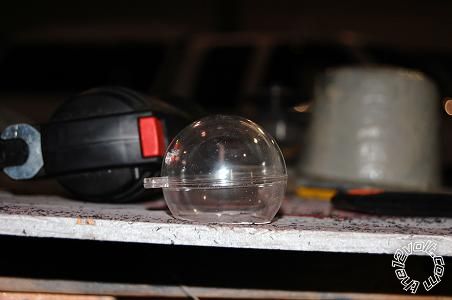
These are clear spheres that cost about 2.00 at any craft store,I cut a hole in them just big enough to house the jl audio crt 050 tweeters i am installing in my qlogic kick panels, honestly I dont know if they made a bit of difference but it sounded like a good idea and it was only 2.00
------------- -A vision without a plan is just a hallucination-
Posted By: spmpdr
Date Posted: December 07, 2009 at 9:05 PM
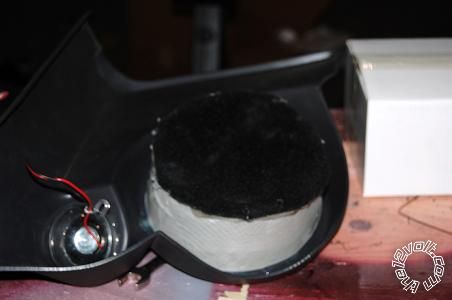
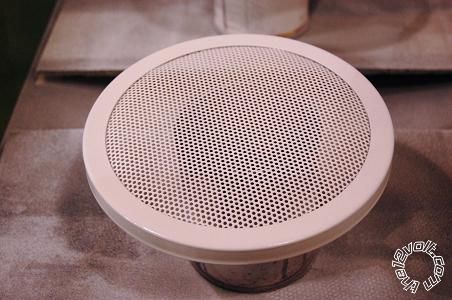
Heres the back of the kick panel with the baffle and the sphere hot glued and ready for install!!!
Here is the first step of marbilizing or painting anything,sand ,sand and sand some more!! I used a grey scotch brite to scuff these up.
The next most important thing to painting anything is cleanliness,wax and grease remover work well for this!!
------------- -A vision without a plan is just a hallucination-
Posted By: spmpdr
Date Posted: December 07, 2009 at 9:26 PM
Heres my first color,it is house of kolor snow white pearl,this will make the tangelo brighter.I applied 3 coats of this about 7 minutes apart in medium coats.
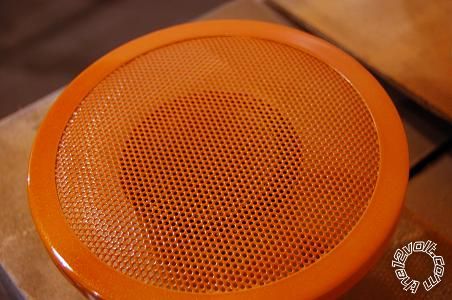
Here is my second color this is house of kolor tangelo pearl orange.I applied this the same way as the snow white pearl.I love this color!!!
Now for the marbilizing trick, get some saran wrap a little bigger than the length of the object you intend to marbilize
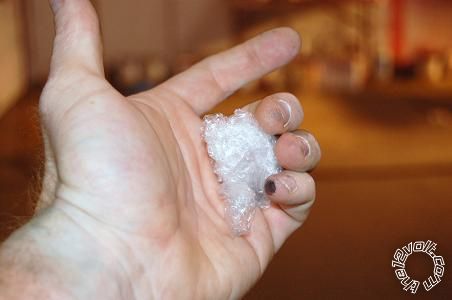
crumble the saran wrap up in a ball and roll it around in the palm of your hand for a while
------------- -A vision without a plan is just a hallucination-
Posted By: spmpdr
Date Posted: December 07, 2009 at 9:37 PM
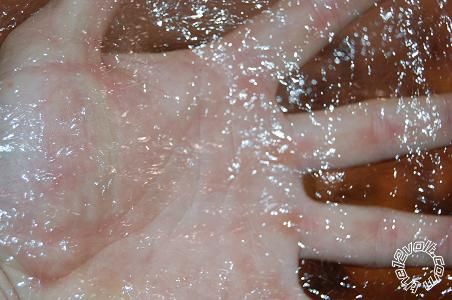
unroll the saran wrap and lay it flat ,I usually have another person hole it so it doesnt get dirt on it , you will need a fresh piece of saran wrap for each piece you want to marbilize. 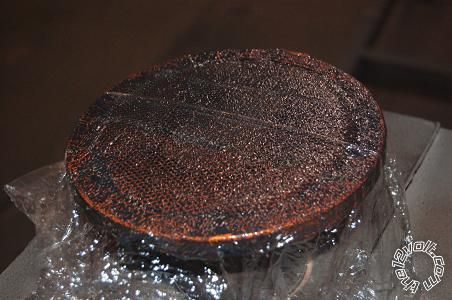
Now for this step I had to move fast.First I sprayed a wet coat of slate grey on top of the orange ,I let it setup for about 15 seconds then I stretched the saran wrap over it and made sure I covered the entire piece with it.Tip:if you have air pockets,dont panic just blow on the saran wrap and in will stick to the paint.I left the saran wrap on the grill for about 20 seconds or so then I pulled it off in one motion (if you stop pulling it will show).
------------- -A vision without a plan is just a hallucination-
Posted By: spmpdr
Date Posted: December 07, 2009 at 9:55 PM
This is what the it looks like
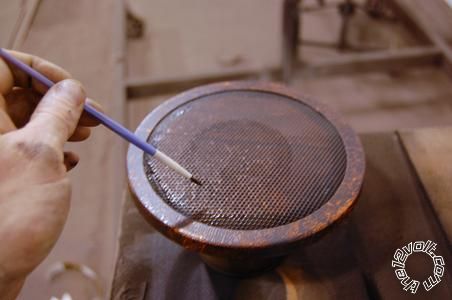
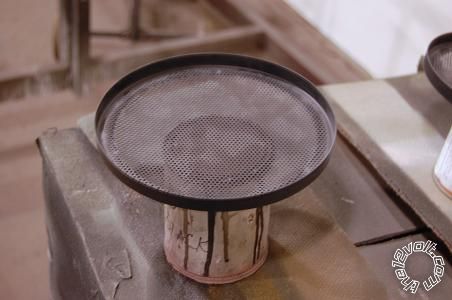
I didnt like how the mesh part of the grill turned out so i hand painted it slate grey
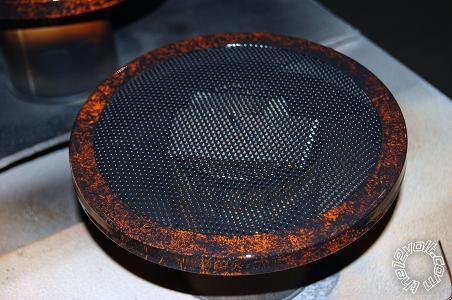
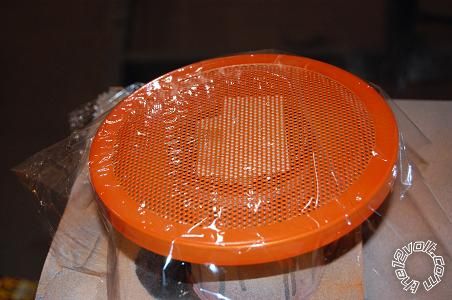
Heres the finshed product with 2 coats of clear applied,ready for install
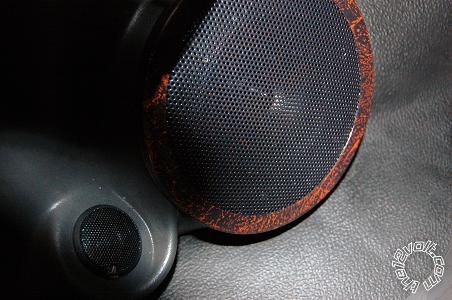
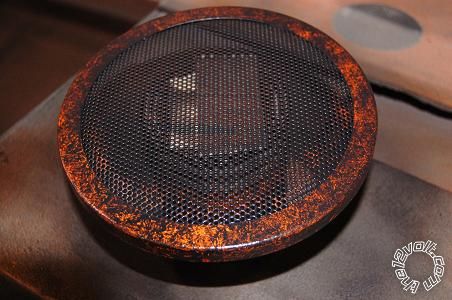
Heres the completed install of the qlogic kick panels that house the dayton rs 150's they are bandpassed @600hz/hp-4000hz/lp and the jl audio crt050 tweeters wich cover the 4000hz and up frequencies. All the crossovers are inline crossovers and were alot easier to hide than a huge passive crossover.This set up sounds very good to me and people who hear it say that its one of the cleanest sounding systems they have heard. Thanks again dyohn for all the advice and system how to , also haemphyst and I am an idiot for advice and tips. By the way these all run off a kenwood kdc 500X4 if you wanted to know. ------------- -A vision without a plan is just a hallucination-
Posted By: spmpdr
Date Posted: December 07, 2009 at 9:59 PM
blackcivichatch wrote:
how much was that spray on stuff??
Is it comparable to the matt?
It was like 18.00 a can and in my opinion I would use on inner door skins over mat because of ease of use,but i would bet that mat would have a better effect because of its properties ,however the spray did reduce exterior noise dramatically. ------------- -A vision without a plan is just a hallucination-
Posted By: DYohn
Date Posted: December 08, 2009 at 12:44 PM
Nice work and nicely documented. I look forward to pics of the finished product and how you think it sounds. Those Peerless SLS woofers are pretty nice, eh? ------------- Support the12volt.com
Posted By: spmpdr
Date Posted: December 08, 2009 at 1:53 PM
DYohn] wrote:
ice work and nicely documented. I look forward to pics of the finished product and how you think it sounds. Those Peerless SLS woofers are pretty nice, eh?
Thanks,completed pics coming soon,Those sls 's are super nice sounding and my setup sounds great now ,I am thinking of changing my amp(kenwood6404500x4) out for a jl audio 300.4 now though because of true and clean rms power . ------------- -A vision without a plan is just a hallucination-
|