safe way to connect 14ga to 10ga?
Printed From: the12volt.com
Forum Name: Car Audio
Forum Discription: Car Stereos, Amplifiers, Crossovers, Processors, Speakers, Subwoofers, etc.
URL: https://www.the12volt.com/installbay/forum_posts.asp?tid=122650
Printed Date: April 19, 2026 at 1:20 AM
Topic: safe way to connect 14ga to 10ga?
Posted By: neek804
Subject: safe way to connect 14ga to 10ga?
Date Posted: July 13, 2010 at 12:32 AM
Is there a Safe way to connect or crimp these together for my alpine radio? Or do I need to do something extra
I have a 05 impala base model
Alpine cda-9815
And a scosche gm2000 class II
Replies:
Posted By: haemphyst
Date Posted: July 13, 2010 at 12:46 AM
Are you going from a #14 TO a #10? If so, I don't recommend it at all. BESIDES the safety issue, read here... It states:
Crutchfield wrote:
Wiring Note: While providing high power output, this unit can draw a substantial amount of current. Per Alpine, this receiver's constant power wire must be connected directly to the positive terminal of the battery in your vehicle, and 10-gauge wire must be used to make the connection. This requires a length of 10-gauge power cable, an in-line fuse holder with a 20- to 30-amp fuse and a ring terminal (the ring terminal is used to connect the cable to the battery clamp). Although all the pieces of a basic amplifier wiring kit will not be not needed, if you do not wish to assemble the required items separately, the power wire and in-line fuse holder from a basic 10-gauge kit can be used to connect the constant power wire to your vehicle's battery. For a secure, permanent connection, the 10-gauge cable must be soldered to this receiver's 16-gauge constant power wire.
DO NOT ATTEMPT TO PULL THE NECESSARY POWER FOR THIS DECK THROUGH ANY #14 WIRE! Follow the instructions, and connect directly to the battery, using at least a #10 wire, and solder to the deck's power lead. Larger would be even better, although not necessary. ------------- It all reminds me of something that Molière once said to Guy de Maupassant at a café in Vienna: "That's nice. You should write it down."
Posted By: oldspark
Date Posted: July 13, 2010 at 9:51 AM
Oh well, so much for lowering voltage drops....
Posted By: DYohn
Date Posted: July 13, 2010 at 10:54 AM
neek804 wrote:
Is there a Safe way to connect or crimp these together for my alpine radio? Or do I need to do something extra
I have a 05 impala base model
Alpine cda-9815
And a scosche gm2000 class II
What is it you're trying to do? ------------- Support the12volt.com
Posted By: neek804
Date Posted: July 13, 2010 at 11:47 AM
I'm trying to connect my alpine deck to the battery since I'm going to use the internal battery
Posted By: DYohn
Date Posted: July 13, 2010 at 12:30 PM
neek804 wrote:
I'm trying to connect my alpine deck to the battery since I'm going to use the internal battery
You mean internal amplifier, right? You will need to install a #10 wire all the way to the battery, and fuse it properly. You will not use the wiring harness for this purpose. ------------- Support the12volt.com
Posted By: neek804
Date Posted: July 13, 2010 at 12:36 PM
I know what I have to do I'm asking how do I do it like how do I Connect the 10 gauge to the harness correctly
Posted By: DYohn
Date Posted: July 13, 2010 at 12:43 PM
neek804 wrote:
I know what I have to do I'm asking how do I do it like how do I Connect the 10 gauge to the harness correctly
You don't connect it to the harness at all. You connect the power for the head unit to the head unit directly and bypass the vehicle integration harness. ------------- Support the12volt.com
Posted By: neek804
Date Posted: July 13, 2010 at 1:01 PM
I am talking about talking about the power wire on the alpine deck it's self not the cars harness..I thought they both were called "harness" guess not..but whatever how do I connect the 10 ga power and ground wire to the small power and ground wire coming out of the alpine unit it's self..do you understand yet?
Posted By: DYohn
Date Posted: July 13, 2010 at 1:44 PM
If you refer to your owner's manual page 40 it shows the yellow wire connects directly to the battery. This is the yellow wire coming out of the Alpine radio's wiring harness. You use a crimp splice connector to attach a longer wire and make it reach to your battery, and you should fuse this wire at the battery with a 20 amp fuse. What part of this do you not understand? ------------- Support the12volt.com
Posted By: neek804
Date Posted: July 13, 2010 at 2:50 PM
I'm confused about connecting the larger 10ga to the tiny 14ga is soldering the only way
Posted By: DYohn
Date Posted: July 13, 2010 at 3:49 PM
neek804 wrote:
I'm confused about connecting the larger 10ga to the tiny 14ga is soldering the only way
What wire is #14? The yellow one coming out of the head unit? ------------- Support the12volt.com
Posted By: neek804
Date Posted: July 13, 2010 at 5:13 PM
Sorry 18
Posted By: DYohn
Date Posted: July 13, 2010 at 6:21 PM
If you have an 18 AWG yellow wire coning from your head unit, then you do not have the factory Alpine wiring. Where did you purchase the head unit? ------------- Support the12volt.com
Posted By: neek804
Date Posted: July 13, 2010 at 7:11 PM
Look I'm guessing ok I just want to know how to connect the 2 different ga wires together pls and thank u
Posted By: oldspark
Date Posted: July 13, 2010 at 7:42 PM
Neek - if you do that you will probably burn your car down.
Your unit requires 10G to the battery (at least).
If you use the thinner 14G, the wire will get hot....
And the unit will not operate properly due too excessive voltage drops.
Posted By: neek804
Date Posted: July 14, 2010 at 12:20 AM
No no no
i meant to say the yellow wire ooming from my deck with a grey box on it i dont know how many gauges that is im not worried about that i just want to know how to connect the YELLOW wire to the 10 GAUGE POWER and GOUND wires im going to purchase from the amp kits
Posted By: haemphyst
Date Posted: July 14, 2010 at 3:00 AM
Calm down... It's nothing to get frustrated over...
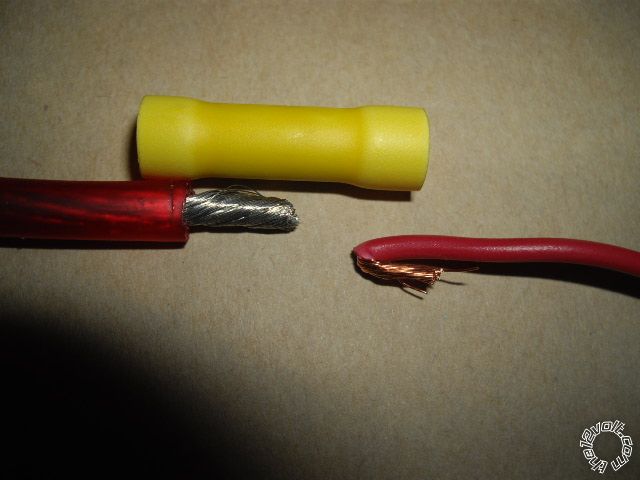
We have all told you, some of us several times, (and I know you NOW know that you must run a dedicated 10G wire - stick with me, here...) go to your local electrical and ask them for either a crimp-on or a twist-on (AKA "wire nut) connector for a #10. There will be MORE than enough room for the #10, so strip a bit of insulation off the wire going to the deck (we also know you are unsure of this gauge) and twist it to the larger power wire, Install either crimp cap or wirenut.
It's that easy. We all understood what you were asking, and we were all trying to explain it to you.,
-------------
It all reminds me of something that Molière once said to Guy de Maupassant at a café in Vienna: "That's nice. You should write it down."
Posted By: neek804
Date Posted: July 14, 2010 at 8:08 AM
Thanks but I don't think everybody knew what I was saying but yea thanks any way u think lowes or home depot have any
Posted By: oldspark
Date Posted: July 14, 2010 at 9:12 AM
I think neek's right in my case - but I'm one that butts in, or reads to fast....
Posted By: i am an idiot
Date Posted: July 14, 2010 at 9:13 AM
Posted By: neek804
Date Posted: July 14, 2010 at 12:34 PM
Thanks what size butt connector is that
Posted By: i am an idiot
Date Posted: July 14, 2010 at 1:30 PM
 A yellow one.
Posted By: neek804
Date Posted: July 14, 2010 at 6:07 PM
I just got a 8 ga amp kit since most places don't carry 10 ga unless online... And I'm going to solder so is this 40amp fuse too much or will I be fine
Posted By: i am an idiot
Date Posted: July 14, 2010 at 10:30 PM
What size fuse is in the grey thing in the yellow wire of the radio. There is no need for anything larger than that.
Posted By: i am an idiot
Date Posted: July 14, 2010 at 10:36 PM
The fuse in the grey thing is the proper size for the wire on the radio. The fuse you put at the battery needs to protect that wire. Earlier I said there is no reason for it to be larger than the fuse in the grey box. Let me rephrase that, It has to be the same size as that fuse to ensure protection of that small wire of the radio.
Posted By: neek804
Date Posted: July 15, 2010 at 7:49 AM
Ok well now I gotta find a 20 amp tube fuse
Posted By: tommy...
Date Posted: July 15, 2010 at 8:46 AM
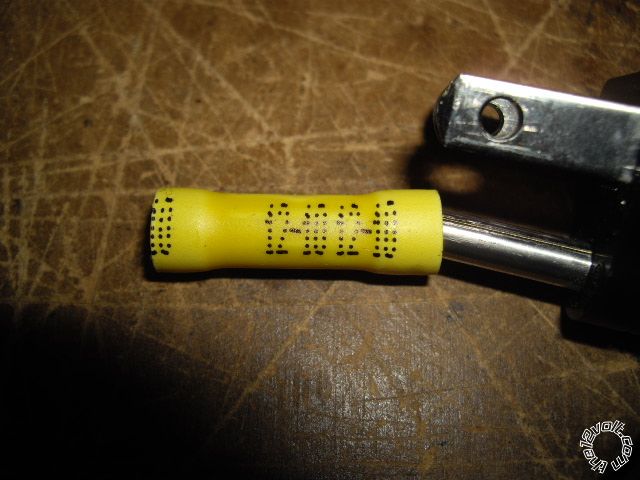
Hmmm...Might have to go online for those 20 amp fuses...Not sure if someone would stock those...? You could always replace the entire fuse holder...maybe to a mini ANL fuse holder($10-$25 most install shops should carry these)...? There are some automotive(blade) fuse holders($5 +) you could replace it with , but sometimes they have connection issues where leg of fuse slides into fuse holder(female spade)...But are as easy as going to an auto repair store to purchase and find replacement fuses...! Though i would recommend just sticking with the AGU Fuse Holder(at least) and ensure that that you get a good (snug) connection at each end of the fuse holder where the wire is inserted...! Also keep the fuse holder as close to the battery as possible...! Hope i helped some... Solder would be the recommended way to make the connection at the stereo...A good connection will be obvious after soldering and is usually the preferred method...Although most shops would probably just use a Butt Connector and usually holds up just as well with a quality connector and crimp...! BTW Mr. Idiot...Where did you get the Connector Holder in the pic(probably could of came up with a better name...ehhh...)...?
-------------
M.E.C.P & First-Class
Go slow and drink lots of water...Procrastinators' Unite...Tomorrow!
Posted By: i am an idiot
Date Posted: July 19, 2010 at 10:06 PM
Tommy, that is the plug on the end of a Captain Morgan flourescent light fixture.
Posted By: tommy...
Date Posted: July 24, 2010 at 9:40 AM
i am an idiot wrote:
Tommy, that is the plug on the end of a Captain Morgan flourescent light fixture.
Enough said...! ------------- M.E.C.P & First-Class
Go slow and drink lots of water...Procrastinators' Unite...Tomorrow!
|