First Pictorial So Please be kind. Did not have much time to be detailed but provided all the info I could in a short period of time.
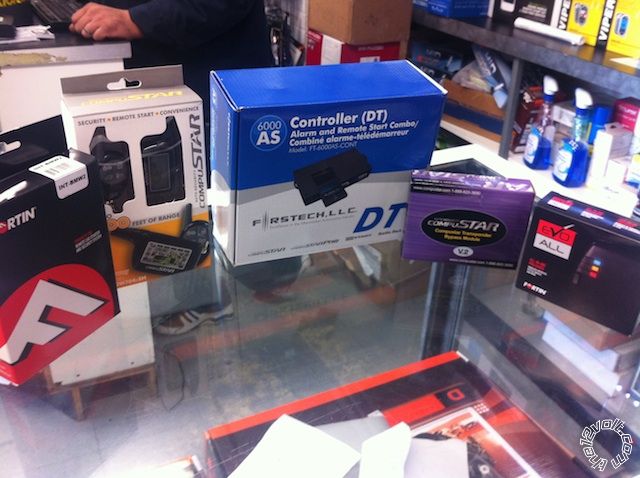
Parts Used in this Install were as Followed from Left to Right: INT-BMW2, RF-2W704( Changed to RF-P2W901), FT-6000AS, Computran, and EVO-ALL.
Picture above show the parts bench prepped. There are actually only a few wires to connect to the vehicle after the parts are connected to each other.
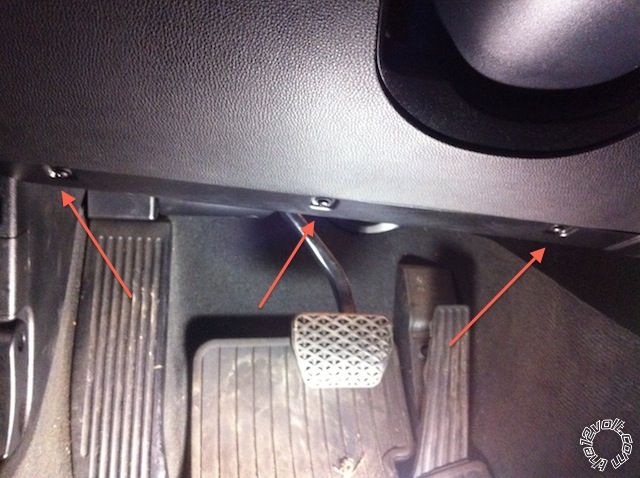
Three Screws are removed to take off the cover under the driver's dash.(Not pictured) You can access the brake harness easily to make your connections to the EVO-ALL
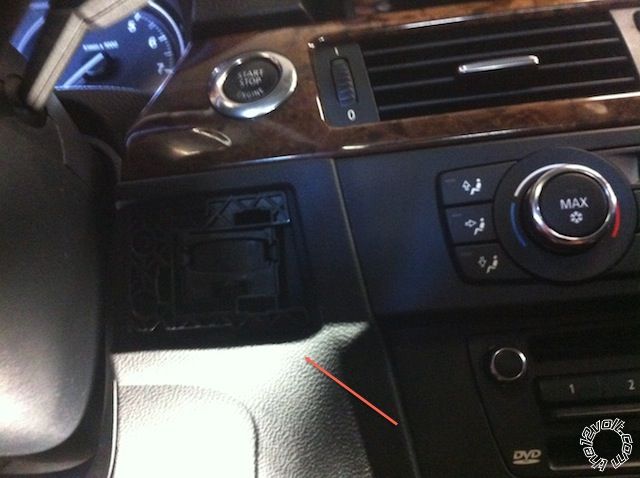
The INT-BMW2 needs to be connected behind the key slot and not at the push button. It basically is a T-Harness. Picture above shows the key slot exposed already. It has a plastic cover that needs to be gently pried. After it is pried open it will expose two screws that need to be taken out.
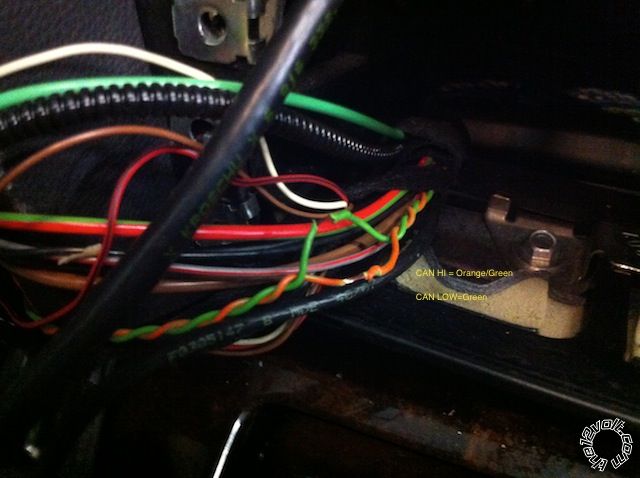
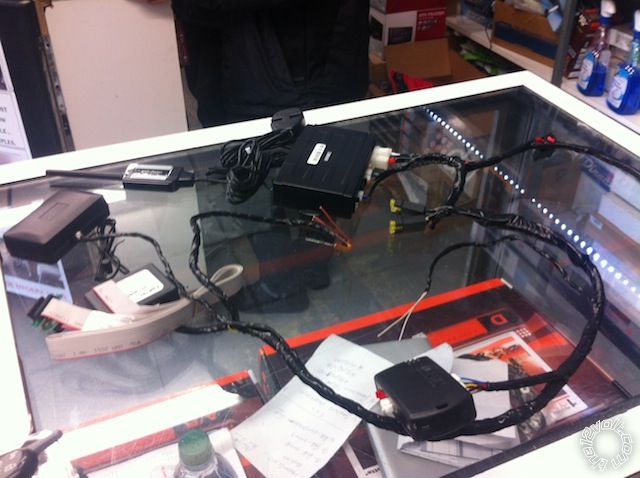
To Get to the CAN Wires I actually took the safest way but a little lengthy by taking out the radio. The wires shown in the pic are the harnesses connected behind the radio.
A benefit to this is that you can pop open the key slot by going behind the key slot through the radio opening because on the right hand side of the key slot it has a sort of a hook that doesn't let the key slot come out easily. It also allows you to route the INT-BMW2 harness from underneath through the radio opening and ultimately reaching the key slot.
Notes:
- The Install diagram shows that you would have to wrap the WHITE/ red wire off the EVO ALL between 5 to 10 times around the key slot and the key with WHITE/ blue wire. I did not do this. Instead I used the Computran and wrapped the ring around the key slot several times and worked like a charm.
- Power Can be taken at the battery post.
- The job did take a little longer then expected but I wanted to make sure that I didn't make any mistakes. Tech support isn't' very good. I asked where the can wires were because the install manual stated that they were at the driver's kick and they said it would be behind the glove box. They might as well said that "it was in the car". Instead I looked at my mitchell diagram and found that they were directly at the radio harness.
-------------
Eric
Audiomaxx
528 East Fordham Road
Bronx NY 10458
Compustar Top Gun Dealer Award 2012-2013
I wanna install on a 08 X5. Same setup but we're looking at just the Smart Start. We want to keep everything the same but add the Cell Phone Remote Start. When everything was done, how well did it play with the Comfort Access and other normal operations?
It may work well through data but we hardwired the system. The compustar system controlled the factory keyless entry system. All factory settings were still intact.
-------------
Eric
Audiomaxx
528 East Fordham Road
Bronx NY 10458
Compustar Top Gun Dealer Award 2012-2013
that looks like fun. i may try that one day. until then ill stick with my idatalink BM1 plug and play. Kudos for the manual install!!!