This how-to applies to 07-12 Silverado, Tahoe, and Suburban. In the first part I will run through how I bench prep and what connections need to be made between remote start and bypass module. In the second part we will physically install the unit.
I am using a basic remote start the Avital 4103 and a Directed DLPK. The DLPK will control door locks, give us tach signal, and handle the transponder bypass. We will be doing a W2W conenction between the Avital and the DLPK.
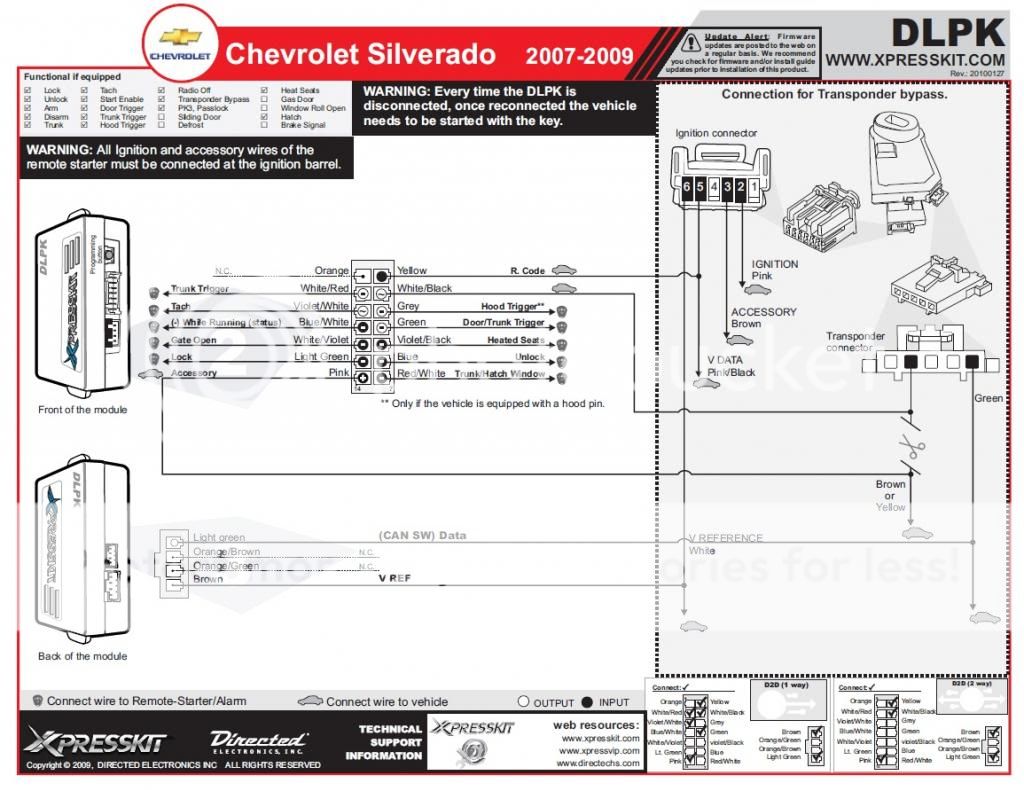
First the DLPK printout which shows all the connections we will have to make at the ignition harness. This covers all connections except a +12 volt, ground, parking light, and brake wire.
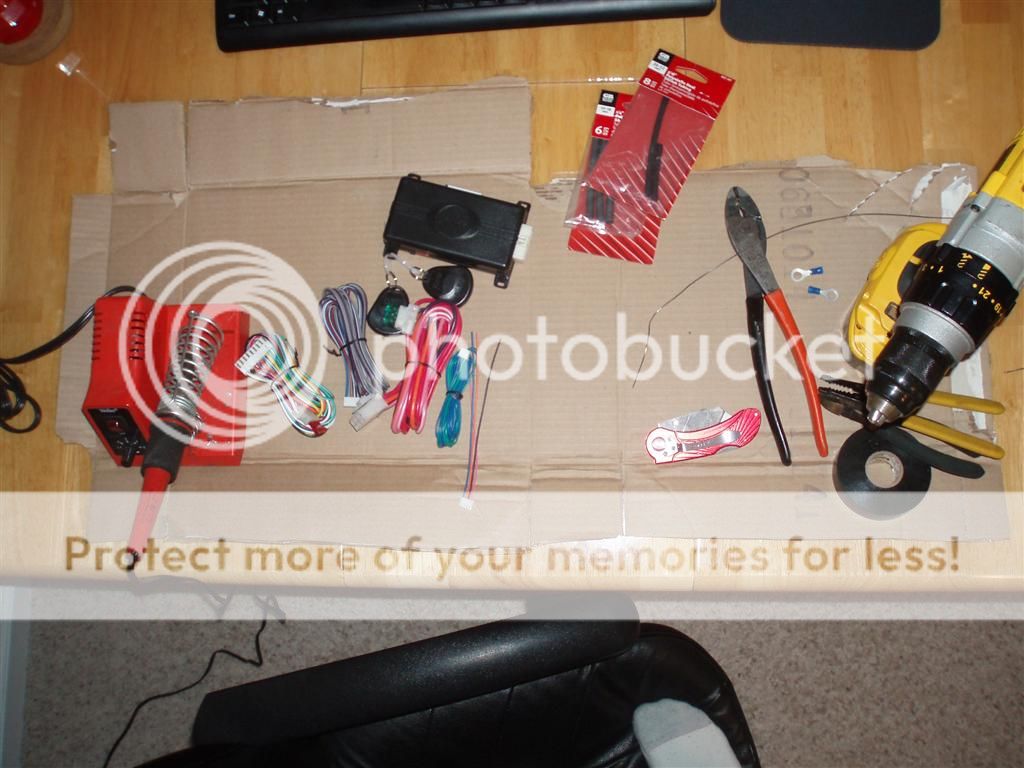
Tools I use for bench prep and for install. A cordless drill, wire cutters, strippers, crimper, electrical tape, soldering iron, solder, heat shrink tubing.
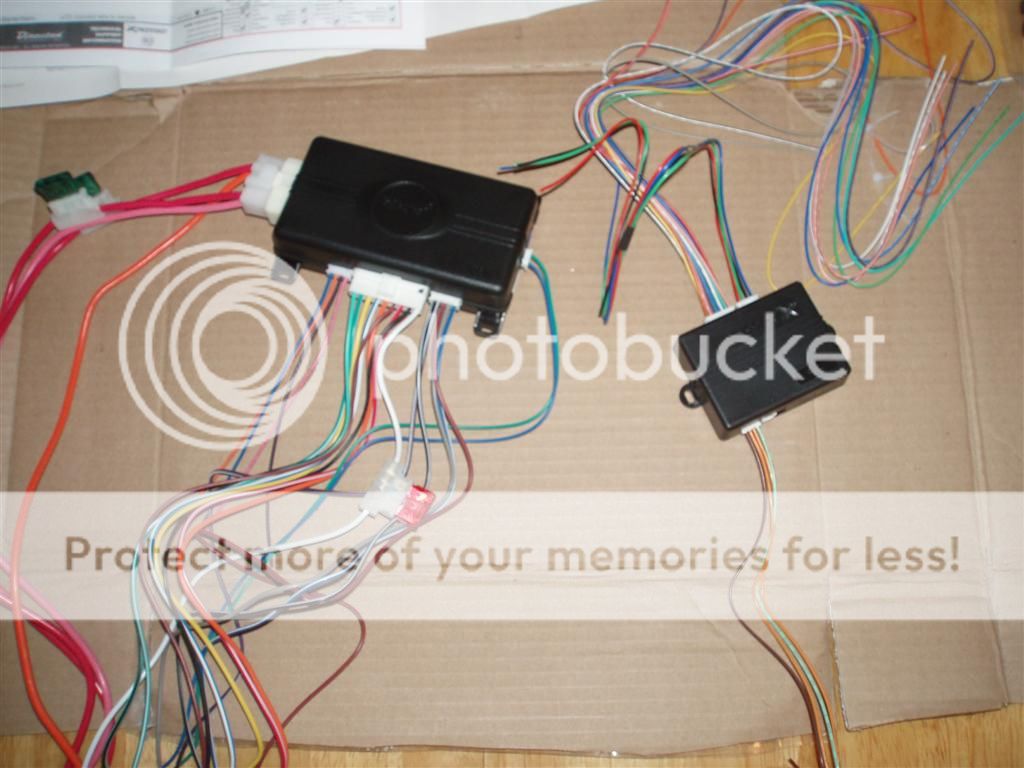
Avital & DLPK laying out with all harness opened up and connected. At this point many will be intimidated by all the wires but dont worry we wont use many of them.
The wires we will use for this are as follows, all others are cut back and not used.
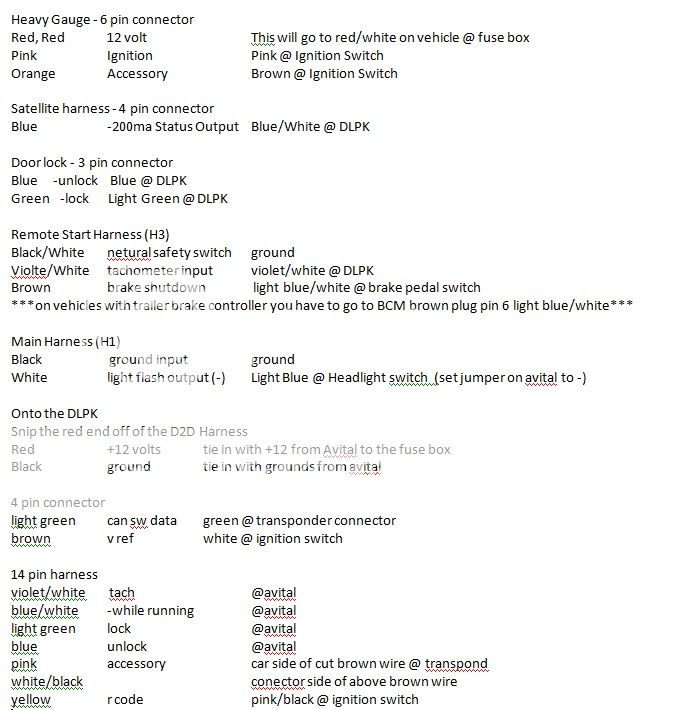
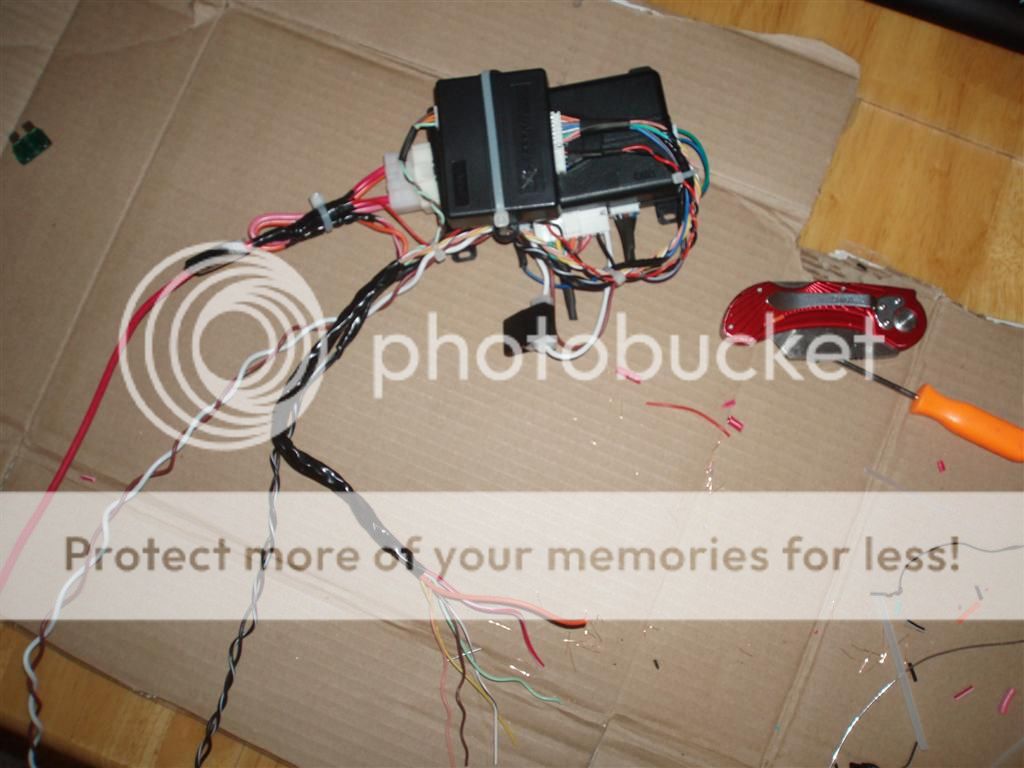
The above are the only wires we will be using, all others can be cut back and have heat shrink put over them. Make your connections between the avital and the dlpk and then group your wires that are going to ignition switch and transponder connector and spin them together in your drill.

In this pictures you can see I have strapped the dlpk to avial and cut most of the unneeded wires away. I have heat shrunk over them and I am starting to spin wires together with the drill.
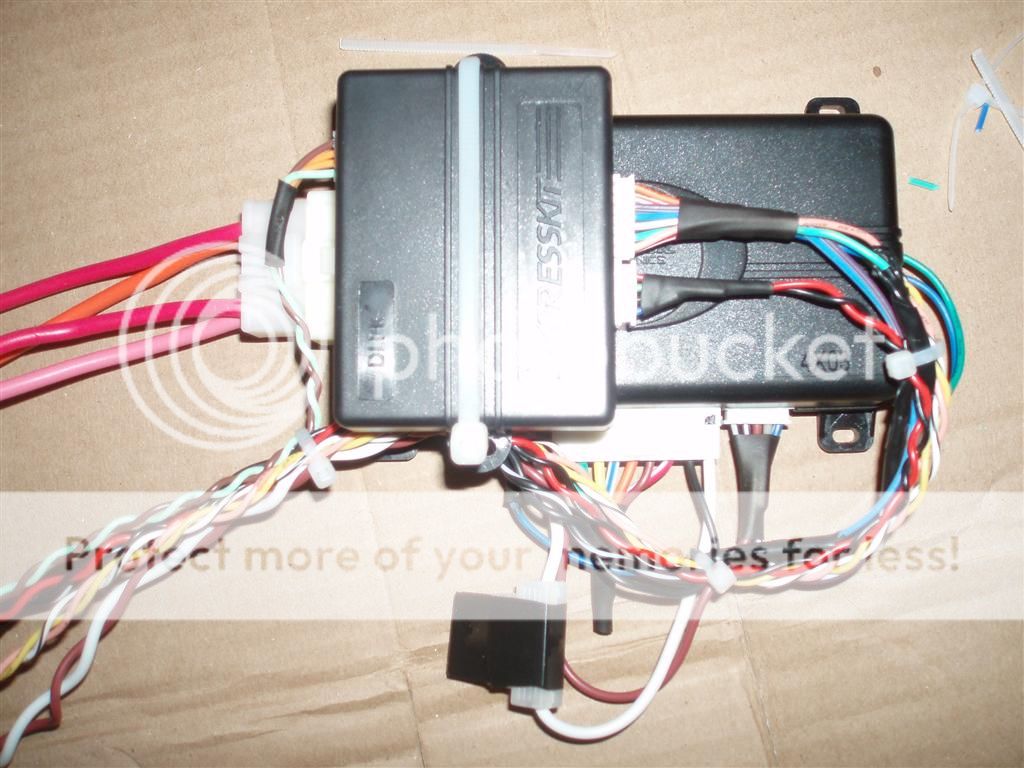
I now have made all connections between avital and dlpk. All connectinos are soldered and taped or heat shrinked. Most wires have been spun up in the drill and everything is zip tied together. Dont forget to tape the fuse into the fuse holder as well.
At this point we now have taken the black and red from dlpk and spliced them in with the +12 and ground from the avital. Since this unit will pull very little current as it is just picking relays not really powering anything I cut the one +12 volt wire from the avital just before the fuse holder and splice it and the red wire from dlpk into the other +12 volt wire after the fuse holder. I also downfuse the unit as well to 10 amps.
Also I take the Pink and Purple heavy gauge wires and splice them into a 16ga wire since heavy gauge isnt needed for this vehicle and it will make it easier to run. I then tape up my main bundle that will run up into the steering column. This bundle has Ignition, Accessory, R code, Data, V Ref, and the 2 wires that go to accessory feed at transponder. We then have the ground/nss wire that will be grounded on a factory stud, brake shutdown, parking light wire, and +12 volt feed. Looks much less intimidating then the early picture.
Part 2 will cover the actual installation into a 2012 Silverado
Excellent and very informative Pictorial. This is really the most important part of the entire project. Many of the
issues encountered by DIYers can be prevented with thorough research, good planning and wise selection of the
units / modules used for the particular vehicle.
The bench prep assembly techniques shown are tried & true quality procedures that will provide trouble free
operation for the life of the vehicle. The importance of this part of the install can't be stressed enough. Soldered
connections, heat shrink and quality electric tape insulation resulting in a neat, compact package ready to install
will make the actual vehicle install go very smoothly. The bonus tips like securing the fuses with tape ( or tie wraps )
are a great plus for novice installers.
Two thumbs up!  Can't wait for Part 2!
-------------
Soldering is fun!
I always use 3M Super 88 electrical tape also. We got in a rush and I didnt grab pictures of the 12 Silverado, but we have a whole fleet of them at work and I will be doing about 4 of them in a few weeks and I promise to get pictures then and complete the writeup. Sorry to leave you guys hanging
Glad to see you fused it properly down to one fuse for the whole install. I hate it when i go into one of these new low current vehicles and find 3 30 amp fuses in place. For F**k sake it is low current! 20-25a max even for an alarm! 
Excellent write up! Looks like the FlashLogic bypass is VERY similar to the DLPK.
-------------
To master and control electricity is perfection. *evil laugh*
I used my clamp on amp meter and remote start draws under 1 amp if I recall since its all low current
I've only done this same install five more times and sadly never took the pictures, I have a new one coming in a month and will make a genuine attempt