This is a Remote Starter with Keyless Entry Pictorial for the 2010 through 2012 RAM 1500 pickup truck. This vehicle
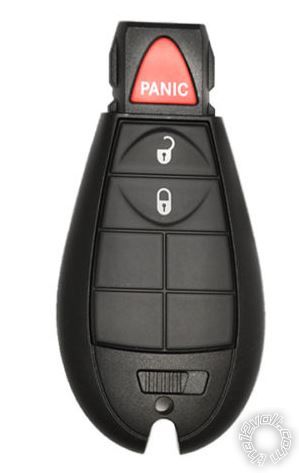
was a 2012 with automatic transmission, Hemi V8, regular key and no Factory Alarm system. Probably one of the easier
vehicles to upgrade. By regular key, we mean the plastic FOB / Remote assembly. Photo below :
For this install an Ultra Start U1272 and an iDatalink ADS AL-CA bypass module with DL CH4 firmware was chosen. These
units were bench prepped in the W2W fashion following the iDatalink Type 2 diagram. Done this way, the two +12V inputs
for the U1272 were combined into one and fused at 10 Amps. The unused fuse holder was transplanted to the U1272's
thick Blue Ignition Input/Output wire and fused at 5 Amps as per the Type 2 diagram. The only extra parts required were
the fuses ( one 5 and one 10 Amp ) and the 1N4001 diode. The extra relay shown in the diagram is only required if your
ADS AL-CA module is HW Ver 1.23 or less. Not very likely as Ver 1.24 has been out for many years.
Link to ADS AL-CA with ADS AL(DL) CH4 install guide :
https://cdncontent2.idatalink.com/corporate/Content/Manuals/DL-CH4/ADS-AL(DL)-CH4-EN_20151028.pdf
Follow this guide and the Type 2 diagram for all of your wiring.
There are many other quality R/S w/Keyless systems available. Other current good choices are the Viper 4105V, Avital
4103LX, Prestige APS57E and the Compustar CS800-s. All should be set for Tach Mode operation due to the vehicles'
and bypass modules' requirements.
Most of the time is spent during bench prep. There are only 6 vehicle wires to locate / verify and 9 solder connections to
make ( including Chassis Ground and the Hood Pin terminal rings ).
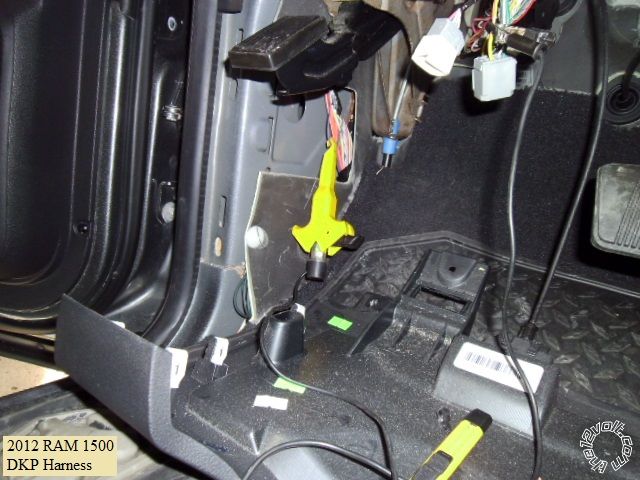
Vehicle disassembly :
Start by removing the drivers door sill panel by lifting it straight up. Next remove the DKP trim by pulling it straight back
towards the rear of the truck. To make running the antenna harness easy, remove the side dash panel. Finally, remove
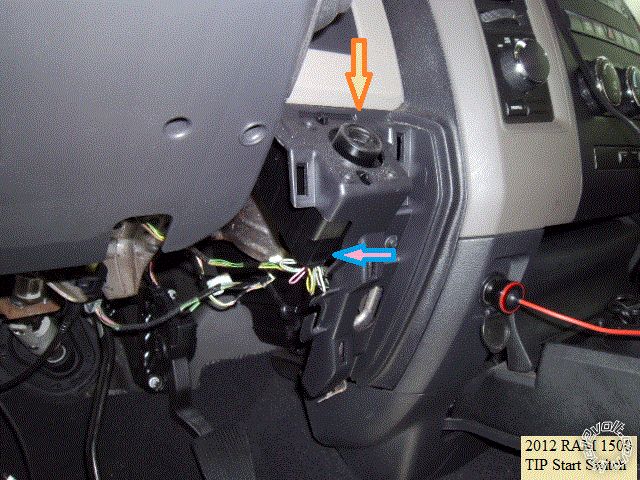
the two 7mm screws shown below and pull the lower dash panel back and off.

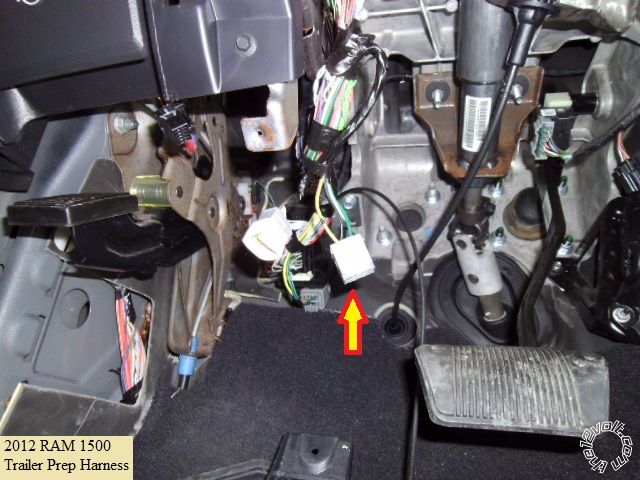
Please note the indicated Trailer Plug as this will be used during the install.
Wires :
Below is a photo of a convenient +12V constant power source found at the Trailer Prep Plug :

By reaching up behind the Headlight Switch, you can release this connector for the Parking Light MUX wire :

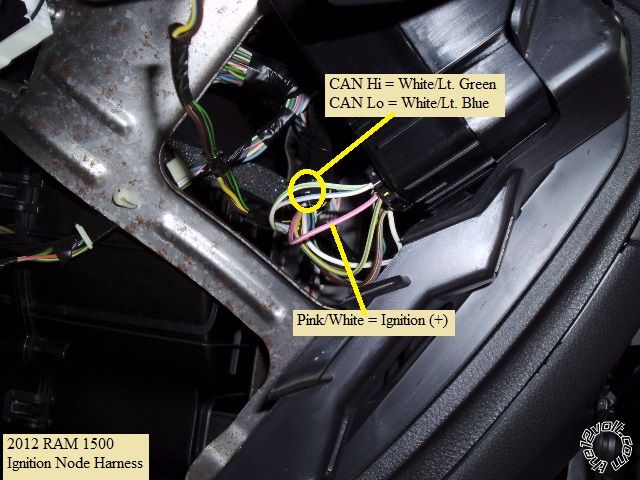
The Ignition Node Harness can be accessed without unplugging the connector. Photos below :
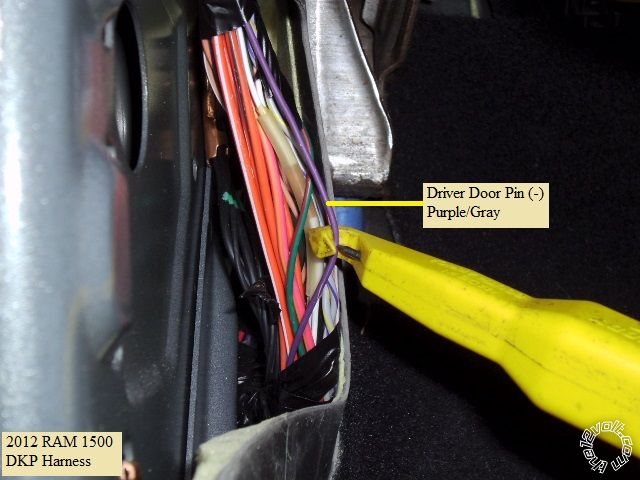
The Driver Door Pin wire is found in the DKP area. Pictures follow :
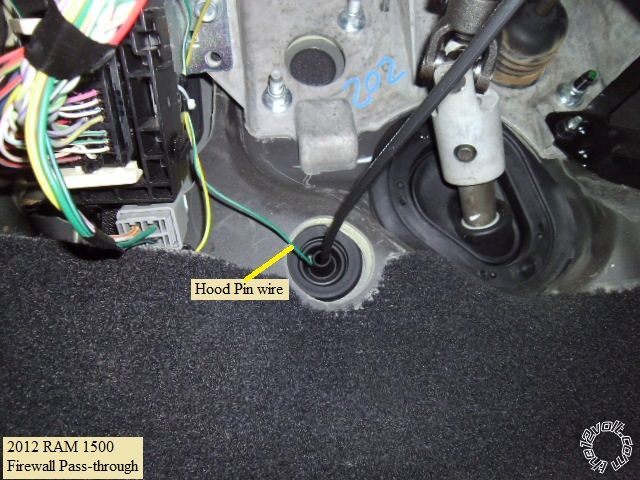
Firewall pass-through for the Hood Pin safety wire can be found in several places. The photo below shows a convenient
place :
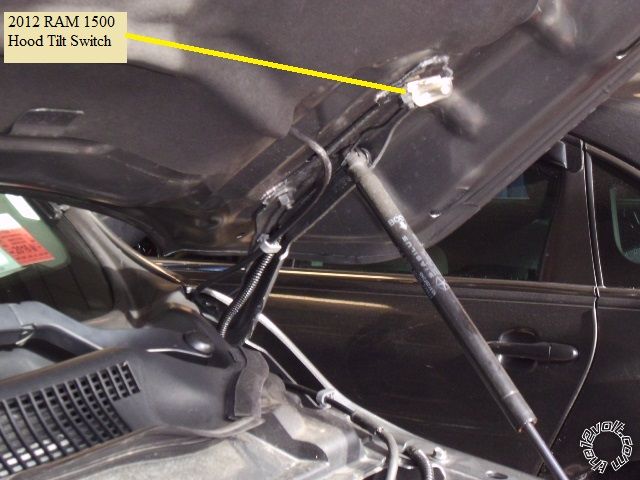
Rather than use the U1272 kit supplied hood pin ( and drilling a hole in the truck ) I used a tilt switch mounted to the
hood hinge as pictured below :
That's pretty much it. The U1272 should be strapped for (+) Parking Light output. All other programming can be left at
the factory defaults. Programming the bypass module to the truck is quick and explained well in the CH4 install guide.
After that the truck should be started for 30+ seconds to allow the U1272 to do its' automatic Tach Learn.
There is plenty of room under the dash for module placement and several good Chassis Ground screws nearby.
If I'm not mistaken, all iDatalink ADS AL-CA's come from the factory with the ADS AL(DL) CH4 firmware loaded, so no
special cables to flash the bypass are required.
Test everything and button her up. Soldering all the connections and using quality electric tape or heat shrink tube will
provide many years of happy truckin'.
-------------
Soldering is fun!