07 dodge ram 3500 viper 5501 idatalink
Printed From: the12volt.com
Forum Name: Car Security and Convenience
Forum Discription: Car Alarms, Keyless Entries, Remote Starters, Immobilizer Bypasses, Sensors, Door Locks, Window Modules, Heated Mirrors, Heated Seats, etc.
URL: https://www.the12volt.com/installbay/forum_posts.asp?tid=129951
Printed Date: May 16, 2026 at 7:45 PM
Topic: 07 dodge ram 3500 viper 5501 idatalink
Posted By: swatter101
Subject: 07 dodge ram 3500 viper 5501 idatalink
Date Posted: December 30, 2011 at 8:36 PM
I need some help with wiring this remote starter/bypass up.
The viper instructions differ from the idatalink ones, so which ones do i go by?
And do i need to use relays as per doc 1084 or go with the datalink and just do what it says?
Thanks
Replies:
Posted By: Twelvoltz
Date Posted: December 30, 2011 at 10:38 PM
I am going to assume you are using the Idata ADS-AL-CA. Follow the instructions in the Idata instructions. 1084 would only be needed if you were tying to do the install without a bypass that handled the MUX circuit the vehicle requires.
-------------
Installer, IT support, and FFL. I need less hobbies.
Posted By: swatter101
Date Posted: December 30, 2011 at 10:51 PM
So what wires for the viper remote starter do I need to hook up?
Posted By: kreg357
Date Posted: December 31, 2011 at 5:03 AM
Could use some more info.
Diesel or Gas?
Auto or Manual trans?
Which iDatalink bypass module? Which Firmware and Firmware version?
Assuming Auto Trans & Gas, iDatalink with latest CH5 firmware and W2W mode. Follow the iDatalink Type 3 install guide and make all the necessary connections shown from the iDatalink module to the Viper and the 5 connections from the iDatalink to the trucks 8 Pin ignition connector.
The following wires from the Viper will be connected to the truck:
H1/2 Red +12V Battery
H1/3 Brown (-) Horn (optional)
H1/5 Black Chassis ground
H1/11 Parking Light Set jumper,etc...
H3/5 Red +12V Battery
H3/8 RED / Black +12V Battery
Remote start input, 5-pin connector
BLACK/ White NSS input
Gray Hood Pin
Here is a note from the iDatalink Type 3 install guide :
WARNING: DO NOT CONNECT ANY OTHER ACCESSORY, IGNITION OR START WIRE
FROM THE REMOTE STARTER TO THE VEHICLE. ------------- Soldering is fun!
Posted By: swatter101
Date Posted: December 31, 2011 at 2:05 PM
Its a diesel truck, automatic
Its the ADS-AL CA module. Sales guy said it was good to go when i asked about the firmware. Im assuming now its probably now flashed to the CH5 version, would that make a difference? Or can it still work?
I didn't know I needed the 3/5 and 3/8 wires hooked up to +12v, instruction said it was only for polarity feeds for relays.
Do i need to have the parking lights wired up for the remote start to work?
Posted By: kreg357
Date Posted: December 31, 2011 at 2:35 PM
The ADS AL CA flashed with ADS AL(DL) CH5 firmware is correct. Did you get a special D2D harness ( not included in the box ) to
connect the ADS AL CA to the Viper in D2D mode? I'm guessing not, but that will save you some money and W2W mode always
works. Play it safe and connect the Viper to the iDatalink following the Type 3 install guide. You will make all of the Black dashed
connections and most of the Red solid connections. You can do all of those connections "on the bench" before the actual install.
Here is a photo of an ADS AL CA w/CH5 firmware mated W2W with an Ultra Start remote starter w/Keyless ready for install into
a Jeep Patriot :
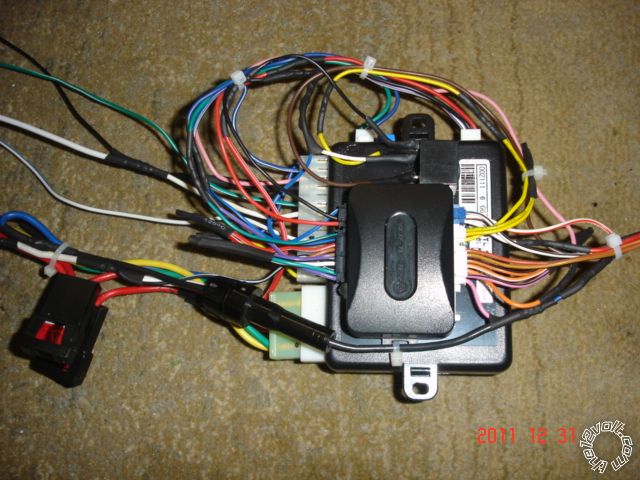
Make sure you set the iDatalinks' Installation Mode to Standard ( 2 blinks ) and lock it in. Then program the bypass to the truck.
Yes, H35 and H3/8 are required. They are the source for H3/1, H3/3 and H3/4 outputs. You will be using H3/1 and H3/4.
No, the Parking Lights are not required for the Viper to work, but provide a nice visible feedback to any commands from the FOB's.
------------- Soldering is fun!
Posted By: swatter101
Date Posted: December 31, 2011 at 2:39 PM
I do have the data wire that says it replaces all the black dashed and red wires needed,
Is that the one you mean?
If I don't have the module flashed will it still work?
Posted By: kreg357
Date Posted: December 31, 2011 at 2:58 PM
Check the iDatalink box for a white label. It should list any firmware loaded on the module ( at the time of production ) and the associated install guide number. If the store flashed the firmware, hopefully they noted it somewhere.
The extra D2D harness is a special harness that plugs in to the Vipers D2D port and then to the iDatalink's D2D port. It is not included with the harnesses in the plastic bag. It is called the ADS HRN DBI. Here is a link for more info : https://store.idatalink.com/index.php?l=product_detail&p=143 Besides this special cable the iDatalink ADS AL CA would have to be flashed with the DBI AL(DL) CH5 version of firmware. Check to see if the D2D harness has the correct ends on it and will plug into the correct ports. Also contact the store to verify which flavor of CH5 firmware was flashed onto the bypass module.
If the module was flashed with either the ADS CH5 or the DBI CH5 firmware it will work in W2W mode. If it was flashed with the DBI CH5 firmware and you have the correct harness, then, yes, you can use the D2D mode and eliminate a lot of wires between the units. ------------- Soldering is fun!
Posted By: swatter101
Date Posted: December 31, 2011 at 3:26 PM
Well i do have that harness so thats good. But its still not working, so im guessing my module isnt flashed (can't find the box anymore to check it).
With everything hooked up it only makes a clicking sound when i try the remote start and the door locks dont work either, would this be because of it not being flashed?
Posted By: kreg357
Date Posted: December 31, 2011 at 3:36 PM
Did you try doing a Factory Reset on the bypass module? After the reset, set the Install Mode to Data ( one blink ) and lock it in. Then do the procedure to program the module to the truck. All this is listed on the last 2 pages of the install guide #7783.
-------------
Soldering is fun!
Posted By: swatter101
Date Posted: December 31, 2011 at 4:57 PM
So I just got back from the audio store with the flashed module.
The door locks work but remote start won't still. Still just the clicking sound and no cranking
Any thoughts?
Posted By: kreg357
Date Posted: December 31, 2011 at 7:40 PM
The clicking sound might be the parking light relay in the Viper. It could be blinking out an error code. Try connecting a +12V test light to the Parking Light output wire with the internal fuse/jumper set to (+) and count the blinks. Lots of possibilities.
Did you verify that the Viper's D2D jumpers are in the horizontal position?
Did you set the Viper to Tach Mode and do the Tach Learn process?
Did you connect the neutral safety wire to the EBrake or chassis ground?
Did you plug in the Neutral Safety Switch harness and set the switch to ON?
Did you program the Viper for a fixed Wait to Start time or connect the Wait to Start input wire to a valid source? ------------- Soldering is fun!
Posted By: swatter101
Date Posted: December 31, 2011 at 8:45 PM
The jumpers are set to horizontal.
I haven't set the tach mode. Wasn't sure if I had to do it first to make the remote start work.
The neutral wire is connected to the chassis ground.
The neutral switch is plugged in and set to on.
I didn't program the viper for the wait to start or connected to the wire, was going to program it after I got it working.
So I guess I have a couple thing to try tomorrow.
Do the +12v sources have to be directly to the battery? Would it effect anything if they weren't?
Posted By: kreg357
Date Posted: December 31, 2011 at 9:38 PM
I usually fuse them down to 10 Amps and connect to a thick gauge +12V constant wire in the drivers kick panel. There isn't a lot of current flow to the R/S & bypass in this application. But the ADS AL CA needs to see the Vipers Starter output signal.
Definitely worth while to do the Shutdown Diagnostics. It will point you in the right direction. ------------- Soldering is fun!
Posted By: swatter101
Date Posted: December 31, 2011 at 9:52 PM
Shutdown diagnostics?
So on the h3 harness i just hook up the 2 +12v wires and the ignition to the bypass ign wires? I don't have to do the starter and access wire right? The mux wire takes care of all that?
Posted By: kreg357
Date Posted: December 31, 2011 at 10:35 PM
No.
The Viper R/S has two thick gauge wire connections to the iDatalink ADS AL CA bypass module.
The H3/1 Ignition wire connects to two wires on the bypass, one thru a 1N4001 diode. ( follow the Type 3 guide ).
The H3/4 Starter wire connects to the bypass Black /White wire. ( shown on the right side of the Type 3 diagram )
Here is a link to the Viper 5501 Install Guide : https://www.the12volt.com/installbay/file.asp?ID=967 See Page 58 for shutdown diags.
------------- Soldering is fun!
Posted By: swatter101
Date Posted: December 31, 2011 at 11:05 PM
Ok I think I have all that right.
One thing I just might have found is that in The remote menu it says it's apparently set to manual transmission by default, so my guess would be that it's not working because I have the neutral wire grounded and not to the ebrake line at first but if I switch it to auto trans then maybe it'll work finally?
In the type 3 guide it said that the starter wire was not needed with the data wire I thought?
Posted By: kreg357
Date Posted: January 01, 2012 at 5:16 AM
Yes, you must change the Viper over to Auto Trans, Menu3, Item1, Opt2. That would be 7 blinks of the Parking
Lights with a failed remote start attempt. The Neutral Safety wire to chassis ground is OK. You would need
it connected to the EBrake to get into Manual Trans Reservation Mode, but with an Auto, chassis ground is OK.
The other Viper programming that should be set is Menu3, Item2 and Menu3, Item9.
I'm sorry. You are correct. The Starter signal should be handled by the D2D connection. ( A little
distracted last night  & my brain is always in W2W mode. ) & my brain is always in W2W mode. )
------------- Soldering is fun!
Posted By: swatter101
Date Posted: January 01, 2012 at 2:43 PM
Ok so it's FINALLY working. Did the shutdown diagnostics and it was that it was set for manual transmission mode. Changed that and it started right away.
Just have to fine tune it for wait to start timer and the crank timer.
Thank you so much for your help.
Posted By: tedmond
Date Posted: January 01, 2012 at 6:13 PM
hook up tach, dont use virtual tach.
-------------
Ted
2nd Year Tier 1 Medical School
Still installing as a hobby...pays for groceries
Compustar Expert
|