2011 honda accord lx-s remote start
Printed From: the12volt.comForum Name: Car Security and Convenience
Forum Discription: Car Alarms, Keyless Entries, Remote Starters, Immobilizer Bypasses, Sensors, Door Locks, Window Modules, Heated Mirrors, Heated Seats, etc.
URL: https://www.the12volt.com/installbay/forum_posts.asp?tid=137644
Printed Date: April 10, 2026 at 6:43 AM
Topic: 2011 honda accord lx-s remote start
Posted By: misturnice
Subject: 2011 honda accord lx-s remote start
Date Posted: November 10, 2014 at 11:43 AM
I looked up a relatively inexpensive remote start - Avital 4103LX
and found a bypass - DEI DBALL2
If you have a better alternative (not looking for the most expensive remote start, just a decent remote start) better bang for your buck.
My question is the bypass part - how would I program it, change settings (does it come with software, do I have to get any accessories to program it)? Or is it pre-programmed, and ready to go once I wire everything up.
Also if anyone can provide me with what are the necessary connections needed to be made given the Remote start and bypass I listed. From the posts I've seen, some people find ways to use less wires, more wires, connect it different ways, I just want a concrete method of installation.
Any help would be great.
-------------
misturnice
Replies:
Posted By: kreg357
Date Posted: November 10, 2014 at 8:16 PM
ignition circuits without any additional relays. You should be able to find an on-line dealer that will flash the correct firmware on to the
DB-ALL2 prior to shipment. There might be a small additional fee for this but it is less expensive than buying the XKLoader2 USB cable.
There is a full 4103 install guide in the Downloads Section and the DB-ALL2 w/Honda56 firmware install guide is available at the XPressKit
WEB site.
The only possible "gotcha" would be switching the Avital 4103's Data port over to DBI D2D from ESP, assuming you decide to go with D2D.
Other than that, it is a pretty straight forward install.
-------------
Soldering is fun!
Posted By: misturnice
Date Posted: November 12, 2014 at 11:12 AM
I have been reading up on bypasses and it seems the general consensus is DBALL2 is not as good as idatalink due to buggy installs.
If I were to go with idatalink, the spec sheets show exactly all the connections I need to make; and leaves myself with about a handful of wires needed to connect to the vehicle.
The biggest question is the differences between the idatalink hardware - ADS ALCA is the one that is universal to almost all cars - is this the one that I want; and what is the differences or adavantages of the other bypasses offered by idatalink.
Lastly, a big question I have is the concern of people saying they would rather wire it Wire to Wire, over Data to Data? What is that specifically, and how would that differ between the two. I assume the method offered in the installation guides on idatalink and dball are all D2D rather than Wire 2 Wire?
Pros and cons of either, and how do they differ (what do I actually use on the bypass, and what exactly do I connect to the car) etc.
Sorry if these questions have been answered, but navigating the site is a learning curve.
Thanks again!
-------------
misturnice
Posted By: misturnice
Date Posted: November 12, 2014 at 11:18 AM
The only possible "gotcha" would be switching the Avital 4103's Data port over to DBI D2D from ESP, assuming you decide to go with D2D.
Other than that, it is a pretty straight forward install.
What is ESP? and what would the process be to switch to D2D? This might be answered if I understood what D2D connections are and what W2W connections are, and how they would differ in the same application. Thanks again!
-------------
misturnice
Posted By: misturnice
Date Posted: November 12, 2014 at 12:15 PM
There are dashed black lines stating - Not required in data mode (1-way) and solid red lines (not required in data mode (2 way)
What is the difference between the two and what is really needed.
What is E-Brake Status (-) - idatalink
when the remote start only has (-) neutral safety switch input
What is Disarm (-) output?
trunk (-) output?
12V(+) for the idatalink - does that go to both Reds +(30 A) High Current 12V Input?
There is a ground for both remote start and idatalink
however, GWR(-) is not shown on the remote start side
Also, let's say the remote start did not come with;
right sliding door or tailgate window (-) output
Left sliding door (-) output
Disarm (-) output
GWR (-)
What do I do with those? Do I leave them unconnected?
Lastly,
There are a bunch of heavy wires not connected from remote start to bypass; such as Output to ignition circuit, output to start circuit, output to accessory circuit, programmable output for accessory or ignition?
Should I go soley on the idatalink data sheet and connect only what I have on the remote start side? Or if it's missing do I have to find it in the car, and hardwire it to the bypass side/remote start side?
I'm a bit lost with some remote starts having less functionality.
-------------
misturnice
Posted By: kreg357
Date Posted: November 12, 2014 at 7:07 PM
OK, I'll try to answer in order.
The DB-ALL2 is getting better or so I've been told. I started with ADS iDatalink products when they first came out
and haven't seen a need to switch. ( I have used and had good results with Fortin products, too.)
The ADS AL-CA flashed with ADS-AL(DL)-HA3 is nice in the fact that it has a separate Disarm input, instead of
doing a "Unlock before and Lock after". I believe that the DB-ALL2 handles the disarm slightly differently with
their Smart OEM Alarm function. Your main concern is getting the bypass module flashed with the correct
firmware. You can find "on-line sellers" that will do this for you prior to shipment. Doing it yourself means
buying the specific cable ( XKLoader2 for the DB-ALL2, FlashLink cable for Fortin or ADS USB cable for iDatalink ).
Additionally you will need to register with iDatalink as an authorized dealer for WEB site access to the firmware
download area.
W2W vs D2D. Talk about a learning curve... W2W is easy. You just make the connections between the bypass
module and the remote starter as shown. Just wire to wire. With your install application, there will be some
connections that are not needed. The Avital 4103 has no alarm functions, so the Door and Trunk Status is not
needed. Same for the E-Brake, not needed for an auto trans install. The Hood Status will only be suupplied by
the bypass module if the vehicle has a factory installed hood pin, otherwise use the kit supplied hood pin. Hood
Status is important so make sure it is there for the R/S to use.
D2D is passing all the info between the bypass module and the R/S via a 4 Pin harness. Makes things neat and
saves time for the installer. Here is where it gets complicated. There are 3 different communication protocols in
use. Directed has their own, DBI. Fortin has their own, FlashLink. ADS has their own, iDatalink. If you plan on
using the Avital 4103, it uses the DEI DBI D2D protocol. The DB-ALL2 uses this protocol. The Fortin and ADS
bypass modules can be flashed with a version of the firmware that speaks DBI, also. Confused yet? Next we
come to 2 way and 1 way D2D. Some R/S units can only handle 1 way D2D, info from the R/S to the bypass only.
The 4103 is OK with 2 way but the Compustar CM600-s is one way only. Then we have "special" units that can
do 2 way but not the Tach Signal. Still not confused? As mentioned, the Avital 4103 is one of these special units
that has it's own peculiarities. The D2D port is factory set to ESP for BitWriter interface use. However, you want
to use it as a D2D bypass module port. It isn't smart enough to switch itself, so you must manually switch it over
to DBI D2D. Here are the steps :
To use as D2D mode follow the below steps:
1. Remove all power from the Avital R/S brain.
2. Make sure Avital's WHITE/ Blue activation wire is grounded.
3. Power the unit up. The system LED flashes for 5 seconds to confirm D2D mode change.
4. Remove the WHITE/ Blue wire from ground. ( Do this cleanly, without pulsing the WHITE/ Blue wire.)
If you spend some time looking over and studying the DB-ALL2 install guide and compare it to the ADS DL HA3
install guide, you will notice a few things. First the iDatalink guide only shows the bypass modules needed
connections. The R/S still has some connections to the vehicle, like all those ignition wires. They are mentioned
in the DB-ALL2 install guide. Next is the solid, dashed and colored wires. These designate W2W and D2D
differences. Also notice that some supported functions can only be D2D with the DB-ALL2. These is shown in
the Feature Chart. Lucky for you, you are only doing a basic remote start install.
My suggestion to you is make up a wire chart showing your proposed connection and post it for Forum Member
review. Here is an example of a Avital 4113 with a Fortin EVO-ALL bypass module in W2W mode on a 2013 Caravan :
https://www.the12volt.com/installbay/forum_posts.asp?tid=134484
-------------
Soldering is fun!
Posted By: misturnice
Date Posted: November 12, 2014 at 9:12 PM
Primary Harness (H1)
H1/1 Factory Alarm Disarm ????
H1/2 Factory Rearm ????
H1/3 (+) Ignition Out (To Alarm) ????
H1/4 (-) Activation Input ????
H1/5 (-) Ground When Locked ???? where does this go
H1/6 (-) Horn Output GREEN/ YELLOW (Green 42 pin plug)
H1/7 (-) Trunk Release Output orange (Green 42 pin plug)
H1/8 Ground chassis ground?
H1/9 (+/-) Light Flash (is this parking lights?) (-) Gray Pin 11, 12 pin connector
Does the iDataLink deal with these connectors ^?
4-pin satellite harness diagram Is this the D2D 4 pin cable?
1 Status Output
2 (-) Accessory Output
3 (-) Starter Output
4 (-) Starter Output
Heavy Gauge Relay Wiring Diagram
1 (+) (30 AMP) Output to ignition circuit Blue Ignition Wire
2 (+) (30 AMP) Output to Starter Circuit Yellow Starter Wire
3 (+) (30 AMP) Output to Accessory Circuit Orange Accessory Wire
4 (+) (30 A) High Current 12 Input White +12 Volt
5 (+) Programmable Output for Accessory or Ignition Fuse with (+) Output to Accessory?
6 (+) (30A) High Current 12 V input Fuse with White +12 Volt?
Are these wires always connected to the ignition system? Or does the bypass deal with these?
Door lock harness, 3-pin connector
1 (-) Unlock Output idatalink? Or white and Brown at same time, diode isolate
2 Not used
3 (-) Lock Output idatalink? Or Orange Switch in driver door
Remote Start Harness (H2) wiring diagram
H2/1 (-) Neutral Safety Switch Input idatalink? Lt Green at Parking brake switch
H2/2 Tachometer Input Wire idatalink?
H2/3 (+) Brake Switch Shutdown Wire idatalink? Green at Brake Switch
H2/4 (-) Hood Pin Switch Shutdown Wire idatalink?
H2/5 (-) 200mA 2nd Status/Rear Defogger Output
iDataLink states
WHITE/ Black (-) output connect to driver door pin to turn off head lamps on vehicles equipped with auto headlights??
White Ground connect to ground
BROWN / Red Can H CanH pin 4 key cylinder
BROWN / Yellow Can L CanL pin 3 key cylinder
ORANGE / Black Key Data Data pin 6 key cylinder
Pink Ignition (+) Ignition (+) pin 2
Does this mean, the primary wiring Heavy Gauge wires dont need to be connected?
How do I know which wires need to be connected to the car, and which wires need to be connected to the idatalink?
Overall Im confused, on what exactly needs to be connected where.
To help break it down for me, should I do Data 2 Data? which is the use of only the Data cable and no additional connections between the R/S and bypass << is that correct?
Is wire to wire, connecting everything between the Remote starter and bypass, without the use of Data mode < or do I have to connect all the wires between the R/S and the bypass along with the data cable?
Or can I choose to connect the R/S to wires in the car, and connect the Data cable to the R/S and bypass?
Could you start with the basics of what should always be connected to what? - or based off my scenario?
What wires are always connected to the vehicle from the Remote start? i.e. the Ground, +12V, Starter, Accessory, Accessory 2, Ignition? <
iDataLink shows me connections to make from the bypass to the car, so that I understand.
Lets say I connect the data cable between the remote start and bypass, what wires do I need to wire together?; can I wire all the ones that match together, and still leave the data cable?
Can I leave the data cable out, and connect straight bypass to remote start? Can I connect remote start wires straight to the car? How does the bypass work (or what has to be connected for it to work?)
I have the XpressKit wiring diagram in front of me, as well as the iDataLink, and not all of the connections are the same.
Such as parking lights connected in Dball and not idatalink.
data cable connection between the DBALL and R/S is not present, however is present in idatalink.
ignition is connected to bypass for idatalink.
dball states connecting the remote start gorund 12V starter accessory ignition to the car, however idatalink as none of those connected to the car.
Thank you for your time, and sorry for the redundant questions. I promise I'm not incompetent just a bit confused, and would love to have the concept understood before purchasing everything
-------------
misturnice
Posted By: kreg357
Date Posted: November 12, 2014 at 9:51 PM
First, try to get a FLCAN bypass module flashed with FLC-AL(DL)-HA3 firmware. Here is a link to the install guide :
https://cdncontent2.idatalink.com/corporate/Content/Manuals/DL-HA3/FLC-AL(DL)-HA3-EN_20141031.pdf
The FLCAN is an ADS AL-CA bypass module OEM'd by Audiovox with the DBI protocol D2D firmware flashed on it with
the correct D2D harness included with the wire harnesses. It will save you some headaches doing it this way.
Here is the wiring if you are going to go D2D :
Primary Harness (H1)
H1/1 Factory Alarm Disarm handled by D2D
H1/2 Factory Rearm handled by D2D
H1/3 (+) Ignition Out (To Alarm) not used
H1/4 (-) Activation Input not used
H1/5 (-) Ground When Locked not used
H1/6 (-) Horn Output GREEN/ YELLOW @ driver dash fuse box, lt. green 33 pin plug (F), pin 23
H1/7 (-) Trunk Release Output handled by D2D ( only works while engine is off )
H1/8 Ground chassis ground
H1/9 (+/-) Light Flash set jumper to (-) (-) Gray Pin 11, 12 pin connector @ headlight switch
4-pin satellite harness diagram
1 Status Output handled by D2D
2 (-) Accessory Output not used
3 (-) Starter Output not used
4 (-) Starter Output not used
Heavy Gauge Relay Wiring Diagram
1 (+) (30 AMP) Output to ignition circuit Blue Ignition Wire @ main ignition switch harness
2 (+) (30 AMP) Output to Starter Circuit Yellow Starter Wire @ main ignition switch harness
3 (+) (30 AMP) Output to Accessory Circuit Orange Accessory Wire @ main ignition switch harness
4 (+) (30 A) High Current 12 Input White +12 Volt @ main ignition switch harness
5 (+) Programmable Output for Acc or Ign Red Accessory2 wire *** Program viper to Flex Relay = ACC2
6 (+) (30A) High Current 12 V input White +12 Volt @ main ignition switch harness
Door lock harness, 3-pin connector
1 (-) Unlock Output handled by D2D
2 Not used
3 (-) Lock Output handled by D2D
Remote Start Harness (H2) wiring diagram
H2/1 (-) Neutral Safety Switch Input Chassis Ground if auto trans
H2/2 Tachometer Input Wire handled by D2D
H2/3 (+) Brake Switch Shutdown Wire handled by D2D
H2/4 (-) Hood Pin Switch Shutdown Wire handled by D2D ** if car has factory hood pin
H2/5 (-) 200mA 2nd Status/Rear Defog Out not used
iDataLink FLCAN
WHITE/ Black (-) output connect to driver door pin to turn off head lamps on vehicles equipped with auto headlights
White Ground connect to ground Does your Accord have Auto Headlights?
BROWN / Red Can H CanH pin 4 key cylinder
BROWN / Yellow Can L CanL pin 3 key cylinder
ORANGE / Black Key Data Data pin 6 key cylinder
Pink Ignition (+) Ignition (+) pin 2
D2D harness to 4103 D2D port
Besides making the necessary programming changes to the Viper noted above, you must follow the FLCAN guide
to select Data Installation Mode and then program the module to the car. See Page 8 of the guide linked above.
-------------
Soldering is fun!
Posted By: misturnice
Date Posted: November 12, 2014 at 10:06 PM
I'm curious because I would like to learn the procedure to do this on a variety of other cars, and what to look for when choosing components. how would I know which bypass module to use with different cars, such as my honda civic 07 Auto, Mitsubishi lancer 08 auto, 2014 Subaru forester 4cyl auto, etc. I was hoping to be able to use understand a single bypass which would be universal to all - but if you could educate me on how to choose the correct bypass, that works as well.
As for the program viper to Flex Relay = ACC2 < where is this programming taking place?
And I believe the accord has auto headlights (this is my friend's car I'll be installing on) If it does, do you know the wire location for this? And if it doesn't have auto headlights, do I leave it unconnected?
Ultimately looking at the list you have provided, everything is connected D2D, where the bypass is concerned. And where additional connections such as trunk pop, horns, headlights, the remote start connects straight to the vehicle?
-------------
misturnice
Posted By: kreg357
Date Posted: November 12, 2014 at 10:07 PM
Answers :
Does this mean, the primary wiring Heavy Gauge wires dont need to be connected?
Absolutely not. They must be connected. iDatalink just assumed the installer knew this.
How do I know which wires need to be connected to the car, and which wires need to be connected to the idatalink?
Follow the install guide and the chart I supplied.
To help break it down for me, should I do Data 2 Data? which is the use of only the Data cable and no additional connections between the R/S and bypass << is that correct?
I would try going D2D. If it doesn't work properly, you can switch to W2W.
Is wire to wire, connecting everything between the Remote starter and bypass, without the use of Data mode < or do I have to connect all the wires between the R/S and the bypass along with the data cable?
Yes, W2W has all the necessary dashed wires hardwired between the modules. As shown in the Caravan Pictorial.
Or can I choose to connect the R/S to wires in the car, and connect the Data cable to the R/S and bypass?
This is the way it must be done. Some R/S wires go to the car, the D2D harness allows the R/S to communicate with
the bypass and the bypass has wire connections to the car.
Could you start with the basics of what should always be connected to what? - or based off my scenario?
Follow the above chart.
What wires are always connected to the vehicle from the Remote start? i.e. the Ground, +12V, Starter, Accessory, Accessory 2, Ignition? <
Depends on the R/S used, the bypass used and the vehicle.
iDataLink shows me connections to make from the bypass to the car, so that I understand.
Yes, but only the connections it's concerned about. The DB-ALL2 diagram shows all the connections.
Lets say I connect the data cable between the remote start and bypass, what wires do I need to wire together?; can I wire all the ones that match together, and still leave the data cable?
Follow the above wire guide.
Can I leave the data cable out, and connect straight bypass to remote start? Can I connect remote start wires straight to the car? How does the bypass work (or what has to be connected for it to work?)
Yes, that is W2W mode. If you decide to go with W2W, the above chart is N.G. All of the "handled by D2D" wires must
be hardwired between the R/S and the bypass.
I have the XpressKit wiring diagram in front of me, as well as the iDataLink, and not all of the connections are the same.
True, that was mentioned. Different companies do things differently.
Such as parking lights connected in Dball and not idatalink.
Yes, but the Parking Light connection is from the R/S to the car. The bypass has nothing to do with that connection.
data cable connection between the DBALL and R/S is not present, however is present in idatalink.
Just different ways of showing the setup.
ignition is connected to bypass for idatalink.
Only Starter, if in W2W mode. DB-ALL2 handles it differently.
dball states connecting the remote start gorund 12V starter accessory ignition to the car, however idatalink as none of those connected to the car.
True, DB-ALL2 gives a more complete picture of the necessary connections while iDatalink is only concerned &
showing the connections it needs / uses.
-------------
Soldering is fun!
Posted By: kreg357
Date Posted: November 12, 2014 at 10:31 PM
More answers :
Thanks for the great information. Out of curiosity, how were you to decide on a FLCAN over a ADS ALCA.
The FLCAN is a bypass module typically used with Audiovox products. Audiovox systems have a D2D port that
is DBI D2D mode just like your Avital 4103. Rather than trying to obtain an ADS AL CA flashed with the needed
DBI flavor of firmware and then getting the correct D2D harness for the Avital to iDatalink connection, it's easier
to get a FLCAN bypass module. This knowledge comes from experience.
I'm curious because I would like to learn the procedure to do this on a variety of other cars, and what to look for when choosing components. how would I know which bypass module to use with different cars, such as my honda civic 07 Auto, Mitsubishi lancer 08 auto, 2014 Subaru forester 4cyl auto, etc. I was hoping to be able to use understand a single bypass which would be universal to all - but if you could educate me on how to choose the correct bypass, that works as well.
Again, most of this comes from prior experience. When you realize the vast amount of knowledge required to do
this type of work, you can better understand and accept the price charged by professional installers.
As for the program viper to Flex Relay = ACC2 < where is this programming taking place?
Down load the full Avital 4103 install guide. It has the programming tables and the procedure that you follow using
the remotes to make changes to the programming defaults. For the Flex Relay it's Menu 2, Item 6, Opt 2. Also
change to Tach Mode, Menu 2, Item 1, Opt 4. Most of the rest will be OK at the default.
And I believe the accord has auto headlights (this is my friend's car I'll be installing on) If it does, do you know the wire location for this? And if it doesn't have auto headlights, do I leave it unconnected?
Yes, if it has Auto Headlights, wire as shown in the guide. Without Auto Headlight, omit the 2 wires.
Ultimately looking at the list you have provided, everything is connected D2D, where the bypass is concerned. And where additional connections such as trunk pop, horns, headlights, the remote start connects straight to the vehicle?
Yes. The R/S sends certain support commands to the bypass module. The bypass module passes them on to the
vehicle via the CAN wire and the Data wire shown. The bypass module also gathers info from the CAN wires ( like
Tach and Brake status ) and sends them back to the R/S via the D2D harness. The things that the bypass module
does not do ( like horn & Parking Lights ) must be handled directly by the R/S to the vehicle. The trunk pop is handled
by the bypass module and not a R/S direct connection to the car. However, the trunk pop will not work while the
engine is running ( just like the factory remotes ).
-------------
Soldering is fun!
Posted By: misturnice
Date Posted: November 13, 2014 at 10:31 AM
Connection wise - I have a better understanding now. The only problems I'm not 100% sure on is the bypass types.
When choosing a bypass for D2D and a DEI product such as Avital 4103, would you go straight for the FLCAN over the idatalink? If I chose anther DEI R/S (Viper 4104 lets say) would it be the same wiring procedure with the FLCAN, or would the R/S affect the choice of bypass.
Did you choose FLCAN because it is automatically in D2D? Thus you would use DEI's DBALL, because it's automatically in D2D because their products are D2D?
If I chose to go w/ W2W over D2D, datalink over FLCAN would be a better option because I'm not using D2D?
Also do you know if both the FLCAN and idatalink uses the same firmware flash cable?
would it be easier to use DEI's DBALL just because everything seems simplified with DEI R/S with DEI bypass.
I'm trying to learn for own personal knowledge and gratification, and would love to install the same/similar set ups on a list of these cars
11 Accord, 07 Civic, 08 Lancer, 14 Forester.
Let's say I chose a DEI product like Avital 4103 - would the FLCAN be applicable to all of them in D2D. (Which refers back to above questions of does D2D dictate the bypass choice?, would R/S dictate bypass choice, would car dictate bypass choice, etc.)
If you know of any place I could read up on all these questions I'm asking that would be great also. Most of the DIY guides I've seen, everyone has already chosen a bypass + R/S, and it's all programed and they show where the wire connections go to. I understand the wire connections now, but the choosing and programing is the part I'm not 100% confident on. Thank you again for taking your time to answer my questions.
-------------
misturnice
Posted By: misturnice
Date Posted: November 13, 2014 at 11:28 AM
DBALL > idatalink, FLCAN > Fortin
Which one would you recommend I go with (this is so I could do an install on the variety of cars I have mentioned, and for future reference).
Easy as in programming wise, user friendly, and overall opinion.
-------------
misturnice
Posted By: kreg357
Date Posted: November 13, 2014 at 12:11 PM
The FLCAN is hardware identical to the ADS AL-CA. They are both made by ADS iDatalink and can use the same
flash cable. The only difference between them is the FLCAN uses DBI D2D as its' default comm protocol while the
ADS AL-CA has iDatalink as its' default protocol. If you are registered on their WEB site and have access to the
module flash area, you can chose which firmware and protocol you want to flash on a given module. I could flash
an ADS AL-CA with the DBI D2D flavor of firmware and use it with any R/S system that uses that D2D comm protocol.
The FLCAN harness kit supplied with the module includes a D2D harness that will plug into the DEI R/S's D2D port.
The ADS AL-CA may not come with this cable. Either module, flashed with any comm protocol of firmware is capable
of going W2W mode with the R/S unit. See "Installation Mode Selection" at the top of Page 8 of the FLCAN install guide
mentioned previously.
As an installer, you get to know the strengths and weaknesses of the various products, both R/S and bypass module.
While they generally do similar functions, they might do some of them differently or not at all. There are many companies
producing R/S units and bypass modules. Your job is to determine the vehicles needs and the users desires and
match that up to the available products. Of course, everybody has their favorites and there isn't one perfect answer.
In your case, a basic one-way, standard range, R/S w/keyless entry into a 2011 Honda Accord LX-s, there are many
choices. DEI has a plethora of models from the Avital 4103, to the Viper 4105, to the Python 4106, and others from
Clifford and AstroStart. Other popular systems are available from Compustar, Audiovox, Omega, Ultra Start and
CrimeStopper. If you spend the time to evaluate and compare each system, you will discover many differences.
Your Accord has certain needs. Here are a few off the top of my head :
1. Capability to support an Accessory2 ignition circuit.
2. Able to interface with a bypass module for the transponder bypass.
3. Able to support a (-) Parking Light circuit.
Nothing real unusual there. The only PITA is the door locks and alarm system. Without a full featured bypass
module, the connection point is inside the drivers door. That means running a couple of wires into the door and
removing the door panel for access. Old or cold plastic can be difficult. Which brings us back to the bypass module.
There are basically thre manufactures, ADS, Fortin and DEI XpressKit. If you visit each WEB site and look up your
car, you will see many choices. Some only handle the bypass function while others do a lot more. The ones mentioned
so far, DB-ALL2, FLCAN / ADS AL-CA and EVO-ALL, all do pretty much the same things but there are differences.
Each has a different cable to flash the firmware. Each has a different method to program the module to the vehicle.
If you are looking for one brand to do all the listed vehicles, only the ADS module will handle the Subaru's transponder
without loosing a key.
It's a lot of research but the internet is a great tool. There is no one site that can give you all the info or a cookbook
synopsis of the remote starter business. Given the complexity, most people are better off going to a trusted, well
reviewed, local 12 Volt shop and getting suggestions / recommendations from them and allowing them to do the install.
Typically, it will come with a lifetime guarantee and local support.
-------------
Soldering is fun!
Posted By: misturnice
Date Posted: November 13, 2014 at 5:45 PM
The FLCAN is just comes with a D2D cable, and is already flashed to D2D mode? - however, I would still need the same cable from above to flash the software for the car? - just one less cable to purchase with the FLCAN vs ADS-ALCA.
If I went with the ADS-ALCA, I would purchase the cable needed for firmware flashing (due to research dictating that the firmwares can be flashed through their website w/ an account; dispite everyone saying you need to be a dealer). If this is true, could I just go w/ the ADS and just flash it to do the same as FLCAN - and have the same features, or am I missing something else that the FLCAN has as well.
Lastly, if I chose to not purchase the D2D cable, I could just do W2W. Which protocol would I go with?
DBI D2D protocol needs to be flashed for D2D correct? (what does DBI mean anyway?)
However, if I went with W2W, what protocol is it named?
-------------
misturnice
Posted By: kreg357
Date Posted: November 13, 2014 at 7:30 PM
Still some confusion here. Not sure if I can explain it any better.
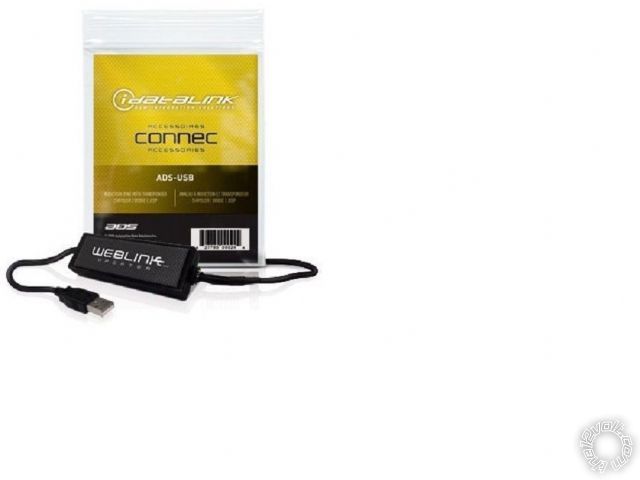
To flash the correct firmware on to the module you need the ADS USB cable. It is a USB cable that connects to a PC
with internet access. The same cable can be used with either Audiovox, Omega or iDatalink modules. There are three
types of modules made, a CAN, a DL and a TB. This cable is only used during firmware flash. ADS USB photo below :
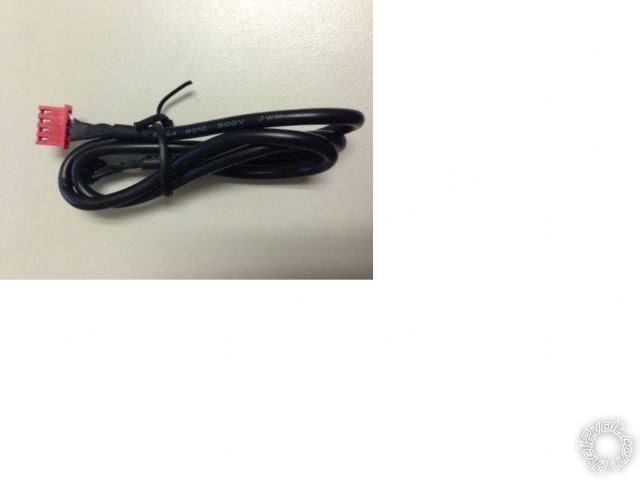
The other cable we have been talking about is the D2D harness. It is the cable that is installed with the R/S system
and connects the R/S to the bypass module. There are basically two types of D2D harnesses, one for DBI and one
for iDatalink & Flashlink protocol. The FLCAN modules include this DBI D2D harness in the package. Here is photo :
If we confine our conversation to the ADS AL-CA and your specific application, you will find that there are several
firmwares that you can flash onto the module with the ADS USB cable. Here is the list below :
ADS-AL(DL)-HA3
DBI-AL(DL)-HA3
The above two are the full featured firmware that handles the transponder bypass plus many other things,
like door locks, alarm, sliding doors and power hatch plus supplies Tach, Brake and other signals. The only
difference is the D2D comm protocol used on the D2D port. Either will still run in W2W mode if selected during
pre-install programming prep.
ADS-AL(TB)-HA
DBI-AL(TB)-HA
These two firmwares only handle the transponder bypass function. D2D comm protocol as per the prefix,
ADS or DBI. Same W2W capability.
W2W is just that, wire to wire. The R/S unit outputs a (-) Lock command signal as a (-) one second pulse on a wire.
This wire could be connected directly to the vehicle, if the vehicle required a (-) pulse to Lock the doors. It can
also be connected to the bypass modules (-) Lock Input wire, if the bypass module supported that feature. The
ADS AL-CA flashed with the DL HA3 firmware does. The bypass module, via instructions in it's resident firmware,
knows how to handle this input command and converts it to the proper output signal on the CAN bus wires that
were connected to the vehicle as per the DL HA3 install guide. This causes the doors to lock and the alarm, if
equipped, to Arm. Easy to understand and very logical to follow and troubleshoot.
-------------
Soldering is fun!
Posted By: misturnice
Date Posted: November 13, 2014 at 7:42 PM
I might be confused on what the DBI meaning is
"There are basically two types of D2D harnesses, one for DBI and one
for iDatalink & Flashlink protocol."
The FLCAN includes the D2D harness, but you're positive on ADS not providing the D2D harness. In this even I would use wire to wire connection, and bypass the use of D2D. However, I could purchase the D2D harness, flash it to the ADS-AL(DL)-HA3 and I would be able to wire it D2D same as the FLCAN correct?
I'm just trying to see why FLCAN > idatalink, and it seems the only difference is the D2D wire, however, if I obtained the D2D wire, I could wire it up the same exact way as FLCAN w/ D2D, and the same flash of ADS-AL(DL)-HA3.
Did I get it wrong?
-------------
misturnice
Posted By: misturnice
Date Posted: November 13, 2014 at 7:45 PM
-------------
misturnice
Posted By: kreg357
Date Posted: November 13, 2014 at 8:24 PM
"I understand that the idatalink needs the ADS USB cable to flash the bypass. "
And that this same USB cable can be used to flash the FLCAN and other OEM iDatalink bypass modules.
"The FLCAN includes the D2D harness, but you're positive on ADS not providing the D2D harness. In this even I would use wire to wire connection, and bypass the use of D2D. However, I could purchase the D2D harness, flash it to the ADS-AL(DL)-HA3 and I would be able to wire it D2D same as the FLCAN correct? "
Not sure if I completely understand this. If you bought an ADS AL-CA bypass module instead of the FLCAN bypass
module, you could use the ADS USB cable to flash the firmware on it, but you would want the DBI-AL(DL)-HA3 firmware
to properly communicate with your Avital 4103 unit. Additionally, you would need the correct D2D harness to make
the comm connection between the 4103 and the ADS AL-CA bypass module.
The last batch of ADS TB bypass modules I received only had one D2D harness in the kit. It is not the D2D type
harness required for connection to DEI R/S units. It is the ADS style D2D harness that will connect to Compustar
R/S units. So, I don't believe that the D2D harness you need is included in the ADS AL-CA bypass module box.
I could be wrong. With a FLCAN bypass module the correct D2D harness is included in the box.
Still having trouble explaining this...
DBI is the name for the comm protocol used by DEI R/S units on their D2D port. It is also used by other R/S
manufacturers on their R/S products. Audiovox is one brand that incorporates the DBI comm protocol on their
units D2D port. The D2D harness has two ends with 4 Pin connectors attached. With ADS D2D comm protocol,
the D2D harness has the same black 4 pin on each end. With the FLCAN DBI style D2D harness, one end has
the same black 4 pin connector for insertion in the FLCAN's D2D port. The other end of this harness is different.
As shown in the photo above, it is slightly larger and red in color. It will plug into the DEI units D2D port. As
mentioned before, the FLCAN and the ADS AL-CA bypass modules are hardware identical. That means that
the 4 pin D2D port on the bypass module is the same and uses the same style black 4 pin connector.
In the Caravan Pictorial I linked to previously, the Avital 4113 R/S system was used. It is almost identical to the
4103 model. In that Pictorial I used the W2W mode for the R/S to bypass connections. While I used an EVO-ALL
bypass module, I could have used :
An FLCAN flashed with the standard FLC firmware.
An FLCAN flashed with the ADS firmware.
An ADS AL-CA flashed with the native ADS firmware.
An ADS AL-CA flashed with the DBI firmware.
Going W2W is possible with any flavor of firmware.
-------------
Soldering is fun!
Posted By: kreg357
Date Posted: November 13, 2014 at 8:32 PM
Here is the iDatalink link I use : https://www.idatalink.com/support
If you go there, enter your vehicle info :
Honda
2011
Accord
Std. Key Coupe 4 Cyl. Automatic
ADS ALCA
There are two full featured ( DL) firmware listed, ADS-AL(DL)-HA3 and DBI-AL(DL)-HA3. The DBI version is the same as
a FLCAN bypass module flashed with the FLC-AL(DL)-HA3.
There are two transponder bypass ( TB ) only firmwares listed, ADS-AL(TB)-HA and DBI-AL(TB)-HA.
-------------
Soldering is fun!
Posted By: misturnice
Date Posted: November 13, 2014 at 10:08 PM
Th reason I'm asking for a lot of questions is because I would like to stick to one bypass, and learn how to do as much as I can with it, and the ADS ALCA seems to be the most universal. (However, if it ends up being too complicated, I'd go for the proven explained FLCAN you mentioned earlier).
If I were to use the ADS-ALCA, I would need to flash it with the DBI-AL(DL)-HA3 (not the ADS-AL(DL)-HA3). I would need to purchase the separate D2D cable, ADS-HRN DBI?. And I would wire it completely the same as the FLCAN - flashed with the FLC-AL(DL)-HA3.
I would wire everything D2D as shown in the previous page. ^ Is this true for all D2D, regardless of manufacturer of the R/S?
If I don't purchase the D2D cable, I would still flash it to DBI-AL(DL)-HA3, and connect it wire to wire? If it's not too much of a hassle, could you specify which wires on the Avital 4103 would need to be connected W2W, so I can see the comparison of W2W compared to D2D?
^Trying to see both sides of W2W and D2D.
-------------
misturnice
Posted By: misturnice
Date Posted: November 13, 2014 at 10:15 PM
However, If I stuck with ADS, I would need to flash it to the vehicle, as well as flash it for DBI Protocol. And the D2D cable would be purchased to run D2D. However, if I were to run W2W, it would negate the need for D2D cable, and negate the need for the proper protocol?
Thus it makes me wonder, how do you know what's the protocol already on the device, and what firmware has the correct protocol?
-------------
misturnice
Posted By: misturnice
Date Posted: November 13, 2014 at 10:32 PM
-------------
misturnice
Posted By: misturnice
Date Posted: November 13, 2014 at 10:51 PM
Everything should be good to go working with DEI products and DBALL2 flashed with the correct firmware correct? - As well as, the cables are all correct due to the same company producing it?
I'm spitting out all the understandings I have, this way you can confirm my knowledge or correct me if I'm wrong. Thanks!
-------------
misturnice
Posted By: misturnice
Date Posted: January 27, 2015 at 2:31 PM
-------------
misturnice
Posted By: kreg357
Date Posted: January 27, 2015 at 7:51 PM
If you have one of the newer 4103's, it will have only 3 pins for the Parking Light jumper ( the Tach Hi / Lo has been deleted ).
On all the unit's I have used, there is a jumper position settings guide molded into the bottom on the black plastic 4103 shell
right by the pins. Go by that.
As for the automatic headlights, yes use the 4103's Rearm Output exactly as shown in the Type 1 diagram.
-------------
Soldering is fun!
Posted By: tedmond
Date Posted: January 27, 2015 at 7:56 PM
connect the factory arm to the driver door pin for RAP or auto headlight shutdown
-------------
Ted
2nd Year Tier 1 Medical School
Still installing as a hobby...pays for groceries
Compustar Expert
Posted By: misturnice
Date Posted: January 27, 2015 at 8:21 PM
One last question, double checking the connections I need to make, what do I do with this connection?
Heavy gauge relay wiring diagram
5 (+) Programmable Output for Acc or Ign Red Accessory2 wire *** Program viper to Flex Relay = ACC2
^ what is programing it to a flex relay, and what do I do exactly?
-------------
misturnice
Posted By: tedmond
Date Posted: January 27, 2015 at 8:43 PM
-------------
Ted
2nd Year Tier 1 Medical School
Still installing as a hobby...pays for groceries
Compustar Expert
Posted By: misturnice
Date Posted: January 27, 2015 at 8:44 PM
Just for personal knowledge, how would you program it as a secondary acc? Is there a procedure to do so?
-------------
misturnice
Posted By: tedmond
Date Posted: January 27, 2015 at 9:06 PM
it's just a matter of using the programming button
-------------
Ted
2nd Year Tier 1 Medical School
Still installing as a hobby...pays for groceries
Compustar Expert