viper 500esp
Printed From: the12volt.com
Forum Name: Car Security and Convenience
Forum Discription: Car Alarms, Keyless Entries, Remote Starters, Immobilizer Bypasses, Sensors, Door Locks, Window Modules, Heated Mirrors, Heated Seats, etc.
URL: https://www.the12volt.com/installbay/forum_posts.asp?tid=859
Printed Date: March 28, 2026 at 4:09 PM
Topic: viper 500esp
Posted By: imral3
Subject: viper 500esp
Date Posted: May 20, 2002 at 10:10 PM
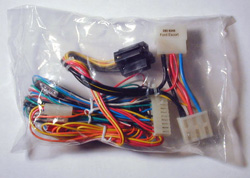
hello everyone, this is my first post here. i am very familiar with installing stereo systems in cars but have never done an alarm. i obtained the viper 500esp from a company who was going out of business. is this something i should try to install myself or should i pay to have it installed. there is also a 2 stage motion sensor included with the unit. any advice will be greatly appreciated.
-------------
good luck and good listening!
Replies:
Posted By: oldboy
Date Posted: May 21, 2002 at 12:33 AM
Imral, Welcome to where the big boys play. The Viper 500 is quite an easy alarm to install. Over here in Australia i am installing about 5 a week and yes it does have a 2 stage impact sensor.What sort of vehicle are you installing it into so as we might be able to help you with a diagram.... Regards.. Tony
Posted By: Velocity Motors
Date Posted: May 21, 2002 at 7:53 AM
Installing an alarm is really no different than installing a stereo. You test for each wire for certain characteristics and then attach each of the alarm wires to the corresponding wires that you have matched using your DMM. Most alarm or remote starter's have detailed instructions on how to install each of their own products, all you need is a vehicle wiring diagram and some common sense ( or experience will do just fine  ) As Tony said, WELCOME TO WHERE THE BIG BOYS PLAY.... it's fun and gratifying when you install something that ends up working !! ) As Tony said, WELCOME TO WHERE THE BIG BOYS PLAY.... it's fun and gratifying when you install something that ends up working !! ------------- Jeff
Velocity Custom Home Theater
Mobile Audio/Video Specialist
Morden, Manitoba CANADA
Posted By: imral3
Date Posted: May 21, 2002 at 8:02 AM
thanks for your quick replies. i will be installing it in a 1993 ford escort hatchback. the car is not nice but the stereo system is and i dont want to lose it. and i also have an add on component - (508D) field disturbance sensor.
-------------
good luck and good listening!
Posted By: Velocity Motors
Date Posted: May 21, 2002 at 8:27 AM
Peice of CAKE !! This install will take you about 4-5 hours , seeing that this will be your first one. Here's a wiring schematics for the Ford: Remote Starter Wiring Colors and Notes | Function | | | Vehicle Color | Location | Start: | | | BLACK/ DARK BLUE | IGNITION SWITCH HARNESS | Ignition #1: | | | DARK BLUE | IGNITION SWITCH HARNESS | Ignition #2: | | | BLACK/ RED | IGNITION SWITCH HARNESS (HEAT-A/C) | Ignition #3: | | | N/A | | Accessory: | | | BLACK/ WHITE | IGNITION SWITCH HARNESS | Brake Light: | | | DARK GREEN | AT SWITCH | Tach Signal: | | | YELLOW/DARK BLUE | AT COIL OR DIAGNOSTIC PLUG * | Parking Lights: | | | RED / BLACK (+) REALY | BEHIND DRIVER DASH, NEAR KICK PANEL | Headlights: | | | WHITE/ RED (+) RELAY | BEHIND DRIVER DASH, NEAR KICK PANEL | OEM Alarm Disarm: | | | N/A | | OEM Alarm Arm: | | | N/A | | Diesel Glow Plug: | | | | | Clutch Bypass Wire: | | | | | Notes: | | * Diagnostic Connector Located In Driver Rear Corner Of Engine Compartment On Firewall. |
Alarm and Keyless Entry Wiring Colors and Notes | Function | | | Vehicle Color | Location | Constant +12 Volts: | | | BLACK AND BLACK | IGNITION SWITCH HARNESS | Starter Kill: | | | BLACK/ DARK BLUE | IGNITION SWITCH HARNESS | Ignition +12 Volts: | | | DARK BLUE | IGNITION SWITCH HARNESS | Dome Lights/Superv: | | | RED / WHITE -DRIVER KICK | PANEL OR PINK / YELLOW AT PIN SW. (-) | OEM Horn: | | | DARK GREEN/ ORANGE (-) | STEERING COLUMN HARNESS OR AT RELAY | Power Lock: | | | ADD ACTUATOR | TO DRIVER DOOR ** | Power Unlock: | | | ADD ACTUATOR | TO DRIVER DOOR ** | Trunk Release: | | | N/A | | Alarm Input Wire: | | | RED / WHITE -DRIVER KICK | PANEL OR PINK / YELLOW AT PIN SW. (-) | Notes: | | ** Add Actuator Door Lock for keyless entry |
Hope this helps and if you need more help on this please post your requests. ------------- Jeff
Velocity Custom Home Theater
Mobile Audio/Video Specialist
Morden, Manitoba CANADA
Posted By: Big Dog
Date Posted: May 21, 2002 at 2:07 PM
Hey Imral3, I saw you mentionned a 508D prox sensor . . . just one thing, don't wire this in parallel with the impact sensor or you can damage one or the other or both. Instead twist the Blue and Green wires together of your 508D (no need for diodes) and attach them to the Blue multiplexed input on the main harness.  ------------- Prepare your future. It wasn't the lack of stones that killed the stone age.
Posted By: oldboy
Date Posted: May 21, 2002 at 5:00 PM
Or imral, why not just plug your 508D into the multiplex port. It should have a plug on the end to do this. Good Luck
Posted By: JeremyLaurenson
Date Posted: February 17, 2003 at 3:14 PM
I am doing the same thing. Right now I have the Proxy sensor working fine, and the shock sensor working fine, but I have not wired them up together. I take it I need to do this: Plug the Shock Sensor harness into the Alarm Splice the Red wire from this lead to the Red wire of the Proxy sensor. Splice the Black wire of this lead to the black wire of the Proxy sensor. (This gives it power) Splice the blue and green wires of the proxy sensor together with the Blue wire on the shock sensor harness. Correct?
Posted By: JeremyLaurenson
Date Posted: February 17, 2003 at 3:15 PM
PS: I have a new viper 790xv alarm.
Posted By: AlarmTech
Date Posted: February 20, 2003 at 2:59 AM
If you haven't installed it already, i have a few leftover main ignition inline harnesses for your Escort. Pre-Wired with the older style DEI plug, but easily chopped and the new plug attached. pre-wired starter kill, 12v, ign. $24 shipped priority.
Posted By: Big Dog
Date Posted: February 20, 2003 at 10:14 AM
Hey JeremyLaurenson,
Connect Black wire and Red wire as you said but connect the Blue and Green together from your proxy sensor to the loose Green wire of the shock harness at the brain side as described on page 20 of the install guide. 
|