
Cruise Controls, Connections, Micro Cruise Switch Settings
 Most of the time cruise controls are one of the easier accessories to install into
a vehicle. Most only take * 45 minutes to install.
Some may take longer. Vehicles with manual transmissions may add another
10 minutes to the job on average. There are usually only six electrical
connections and only two mechanical connections to make when installing
a cruise control into a gasoline (not diesel) powered vehicle with an
automatic transmission as well as mounting the control arm and servo.
Most of the time cruise controls are one of the easier accessories to install into
a vehicle. Most only take * 45 minutes to install.
Some may take longer. Vehicles with manual transmissions may add another
10 minutes to the job on average. There are usually only six electrical
connections and only two mechanical connections to make when installing
a cruise control into a gasoline (not diesel) powered vehicle with an
automatic transmission as well as mounting the control arm and servo.
I prefer to use the Micro Cruise, now manufactured
by Rostra
Precision Controls, Inc., but there are others to choose from. Each
has it's pro's and con's. The information below is most relevant to the
installation of the Micro Cruise, but in general will apply to most
cruise controls available on the market today.
Cruise Control Electrical Connections
 Electrical Connections
 |
| Hot and Cold side of Brake Switch |
| The connections to the hot and cold side of the brake switch are crucial.
Do not connect to any other constant 12 volt source or ground. This is
an important safety feature. The hot side of the brake switch will only
supply voltage to the cruise if there is voltage going to the brake light
circuit. The cold side of the brake switch in it's normal position will
only show ground if the lights are grounded. When the pedal is pressed,
this wire loses ground, supplies 12 volts (+) to complete the circuit
to the brake lights and disengages the cruise control if the brake lights
are operating correctly. If the brake lights don't work, the cruise control
will not work. If you connected to a different constant 12 volt source
and tried to disengage the cruise control in a vehicle with a malfunctioning
brake switch or lights, the cruise may not disengage! The installation
manual should provide you with the correct wire colors and location, if
not click here
or on the link at the bottom of this page. |
| Ground |
| This one's simple. Connect to a clean and solid chassis ground. |
| Tach |
| This provides another signal for the cruise control to monitor. Many
times it is not needed for the cruise control to work. But it too, like
the brake switch, provides a safety feature. If the engine RPM's reach
a certain rate (usually at or above 4000) the cruise control will disengage
preventing any possible harm to the engine. On some vehicles with a manual
transmission, this is the only wire the cruise control needs to monitor
for it to work. But, if you set the cruise while in 4th gear, then disengage
with the brake, then change to 5th gear and press the resume button, the
vehicle will accelerate to a higher speed than before. So I would still
recommend using the VSS wire or another generated signal for monitoring
speed of the vehicle in addition to the tach signal. The installation manual
should provide you with the correct wire colors and location, if not click
here
or on the link at the bottom of this page. |
| VSS |
| Most all vehicles today have what is known as a VSS ( Vehicle Speed
Signal ) wire. This wire provides the signal the cruise control will monitor
to maintain a constant speed. But for those that do not have a VSS wire,
including older vehicles, a signal generator or a
pick
up coil and magnets can be added to monitor the vehicle's speed. *
Even with all that may have to be added to the vehicle, installation time
rarely goes over 1 1/2 hours. I've included a link to Rostra's site for
VSS and Tach info. Enter the year and make, then select the model from
the list, and it will display the wiring colors and locations for you.
Just click
here
or on the link at the bottom of this page. |
| Ignition |
| Connect to a wire from the ignition harness that only shows 12 volts
(+) when the key is in the run position. |
|
|
Cruise Control Mechanical Connections
|
Mechanical Connections |
| Throttle |
| This connection can be the easiest and the most difficult to make of
all. But don't let it discourage you from installing cruises. So long as
you can get a straight pull on the throttle with a smidgen of slack in
the cable, then you'll be fine. Most are simple and very straight forward.
Some will require a throttle adapter. And some just a little ingenuity,
especially when you need to attach to the top of the pedal. Be sure to
check the application guide for each vehicle you will install a cruise
into. This will give you a list of parts the vehicle requires, or
even if it is recommended not to attempt the install. If the vehicle is
new and not listed (usually during model year changes), contact your dealer
/ distributor or manufacturer for any updates. |
| Vacuum |
| Some gasoline powered vehicles will not have a sufficient vacuum supply
for the cruise control to operate properly. 20 inches of vacuum is recommended.
Be sure to measure vacuum while accelerating the engine. Many vehicles
have a drop in vacuum when accelerating. If it does not have an adequate
vacuum supply, you'll have to add a vacuum reservoir. If the vehicle has
too high of a supply, you'll need to add a vacuum regulator. All of these
parts are available from your dealer / distributor. |
|
|
Cruise Control Servo Settings & Control Switches
|
Servo & Control Switches |
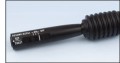
| Servo Settings |
| On the back of the Micro Cruise module/servo, are the 10 dip switches
that must be set accordingly depending on the number of cylinders, type
of transmission, number of pulses per mile generated at the transmission
on the VSS wire, type of control switch, sensitivity, etc. If you
need to change these settings, you must disconnect power to the unit for
the new settings to take effect. The table below shows
the 18 most common settings. |
| Micro Cruise Switch Settings |
| Switch 1 | Sensitivity, OFF = minimum, ON (default) = maximum |
| Switch 2 | 1st of 3 for VSS ppm, OFF = 1000 ppm, ON = 2000 ppm |
| Switch 3 | 2nd of 3 for VSS ppm, OFF = (+ 0 ppm), ON = (+ 2000 ppm) |
| Switch 4 | 3rd of 3 for VSS ppm, OFF = (+ 0 ppm), ON = (+ 4000 ppm) |
| Switch 5 & 6 | Number of cylinders, ON/OFF = 3 or 4, OFF/ON = 5 or 6, OFF/OFF = 8 |
| Switch 7 | Switch type, OFF = normally open, ON (default) = normally closed |
| Switch 8 | Input type, OFF (default) = VSS, signal generator, or pick up coil & magnets, ON = tach only |
| Switch 9 | Transmission type, OFF = manual, ON = automatic |
| Switch 10 | is no longer used for coil type, so it is always set to the OFF position (default) |
| Cylinders / Transmission Type |
Switch Numbers |
| 2000 Pulses per Mile (ppm) |
1 |
2 |
3 |
4 |
5 |
6 |
7 |
8 |
9 |
10 |
| 3 or 4
Automatic |
on |
on |
off |
off |
on |
off |
on |
off |
on |
off |
| 3 or 4
Manual |
on |
on |
off |
off |
on |
off |
on |
off |
off |
off |
| 6
Automatic |
on |
on |
off |
off |
off |
on |
on |
off |
on |
off |
| 6
Manual |
on |
on |
off |
off |
off |
on |
on |
off |
off |
off |
| 8
Automatic |
on |
on |
off |
off |
off |
off |
on |
off |
on |
off |
| 8
Manual |
on |
on |
off |
off |
off |
off |
on |
off |
off |
off |
| 4000 Pulses per Mile (ppm) |
1 |
2 |
3 |
4 |
5 |
6 |
7 |
8 |
9 |
10 |
| 3 or 4
Automatic |
on |
on |
on |
off |
on |
off |
on |
off |
on |
off |
| 3 or 4
Manual |
on |
on |
on |
off |
on |
off |
on |
off |
off |
off |
| 6
Automatic |
on |
on |
on |
off |
off |
on |
on |
off |
on |
off |
| 6
Manual |
on |
on |
on |
off |
off |
on |
on |
off |
off |
off |
| 8
Automatic |
on |
on |
on |
off |
off |
off |
on |
off |
on |
off |
| 8
Manual |
on |
on |
on |
off |
off |
off |
on |
off |
off |
off |
| 8000 Pulses per Mile (ppm) |
1 |
2 |
3 |
4 |
5 |
6 |
7 |
8 |
9 |
10 |
| 3 or 4
Automatic |
on |
on |
on |
on |
on |
off |
on |
off |
on |
off |
| 3 or 4
Manual |
on |
on |
on |
on |
on |
off |
on |
off |
off |
off |
| 6
Automatic |
on |
on |
on |
on |
off |
on |
on |
off |
on |
off |
| 6
Manual |
on |
on |
on |
on |
off |
on |
on |
off |
off |
off |
| 8
Automatic |
on |
on |
on |
on |
off |
off |
on |
off |
on |
off |
| 8
Manual |
on |
on |
on |
on |
off |
off |
on |
off |
off |
off |
|
|
Control Arms / Switches
|
Control Arms / Switches |
Consult your application guide first for the recommended control switch.
Most vehicles will accept a universal control arm, but an OEM type switch
may be available. Only a few require additional connections to lights,
ignition, etc. Most plug directly into a molex that attaches to the main
harness. When running the wires down the column, I use a slender piece
of welding wire. After you do a few, you'll quickly get the hang of it.
Be sure to plug the wires all the way into the molex connector until they
lock in (snap!). And be sure that they are in the correct order.
 |
|
|
Cruise Control Clutch Switches & Signal Generators
|
Additional Connections |
| Clutch Switch |
| On vehicles with a manual transmission, you will have to add
a clutch switch. This mounts to the arm of the pedal and is wired
in series with the wire attached to the cold side of the brake. Although
it is not necessary for this switch to be installed for the cruise to work,
it is highly recommended. Some cruise controls sense engine RPM and will
shut off at certain rates, but it is best to disengage as soon as the clutch
is being pressed. |
| Signal Generators |
| If you can not get a clean signal from the VSS wire or the vehicle
does not have one, the first solution is to add a signal generator if one
is available for the vehicle. Consult your application guide or your dealer
/ distributor / manufacturer. This will provide a signal of 8000 ppm to
the cruise control. Be sure to set the switches accordingly. If the unit
is still plugged into the harness you will have to disconnect it first
before the new settings will take effect. If a signal generator is not
available, you will need to add a pick up coil and magnets. See below. |
|
|
Cruise Control Pick Up Coil & Magnets
|
Pick Up Coil & Magnets |
| This used to be the only source for speed signal in the past. You will
only have to install this if the vehicle does not have a VSS wire and a
signal generator is not available. These too can be a little tricky. As
long as you secure and space the magnets evenly and position the pick up
coil correctly you will have no problems. Consult the manual for the correct
number of magnets to use and switch settings. These settings will be different
depending on the number of magnets and wheel drive type. Don't forget safety
when raising and getting underneath the vehicle. |
|
|
Other Cruise Control Connections
|
Other |
| Some vehicles may require additional parts.
Ford vehicles with a Differential
Speed Sensor, for example, may require an additional harness. This is nothing
more than a resistor and a small capacitor. But if you don't use it, the
cruise control will continue to accelerate. Be sure to consult your application
guide before any cruise control installation. This will save you time and
aggravation. |
|
• Rostra's VSS and Tach Info |
| Type in the
make and year of the vehicle, then
select the model from the list. This will display wire colors and
locations as well as the recommended control switch(es). If your vehicle
is not listed at first, try for example, Dodge instead of Chrysler. |
|
|

Follow the12volt.com
 Sunday, April 19, 2026
• Copyright © 1999-2026 the12volt.com, All Rights Reserved
• Privacy Policy & Use of Cookies
Sunday, April 19, 2026
• Copyright © 1999-2026 the12volt.com, All Rights Reserved
• Privacy Policy & Use of Cookies
Disclaimer:
*All information on this site ( the12volt.com ) is provided "as is" without any warranty of any kind, either expressed or implied, including but not limited to fitness for a particular use. Any user assumes the entire risk as to the accuracy and use of this information. Please
verify all wire colors and diagrams before applying any information.


