


great new material
Home /
the12volt's Install Bay /
Fiberglass, Fabrication, and Interiors / great new material ( Topic Closed)


Posted: March 28, 2007 at 2:13 AM / IP Logged


Posted: March 28, 2007 at 3:59 PM / IP Logged

Posted: March 28, 2007 at 11:42 PM / IP Logged
Posted: April 01, 2007 at 1:46 AM / IP Logged
Posted: April 15, 2007 at 11:06 PM / IP Logged
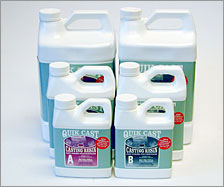 A fast curing polyurethane casting resin system that is faster and safer to use than polyesters. It is a two component (Side A and Side B), low viscosity, fast-curing, and non-rising material that produces high-detailed replicas in minutes. Virtually no shrinkage. Each kit includes Side A and Side B. There is approximately 2 minutes working time. Full cure in 5 to 10 minutes. It cures to a durable ivory finish.This material is intended for mold making. I have found that it is good for much more.
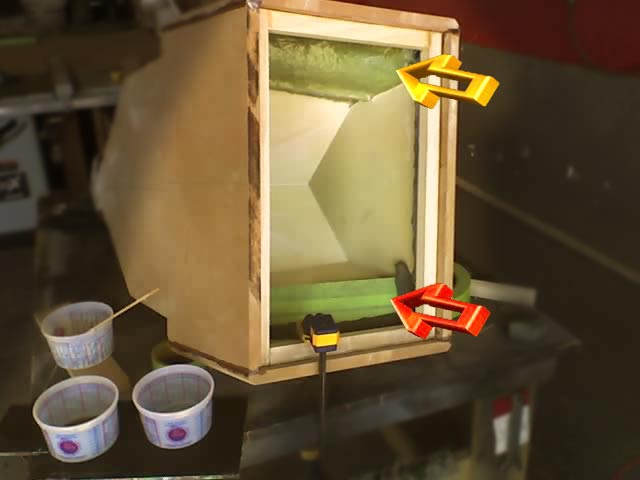 Here inside this box I wanted to make the inner surfaces paint ready fast. Also I have a deep hate for sanding inside corners, so body filler was out!I used gravity and barriers to dictate how the Quick Cast would flow and cure. The yellow arrow at the top points towards the rough bare fiberglass that the bottom and rear surfaces are constructed of. You can see that I have already covered the bottom and rear surfaces. I knocked down the big lumps slightly with a grinder and just buried what was left in Quick Cast. The Quick cast bonds to most any surface quite well. The red arrow points towards my barrier that I constructed out of 1/8th inch ABS covered in masking tape. I pressed clay around the edges of the barrier in order to keep the Quick Cast from flowing out the sides.
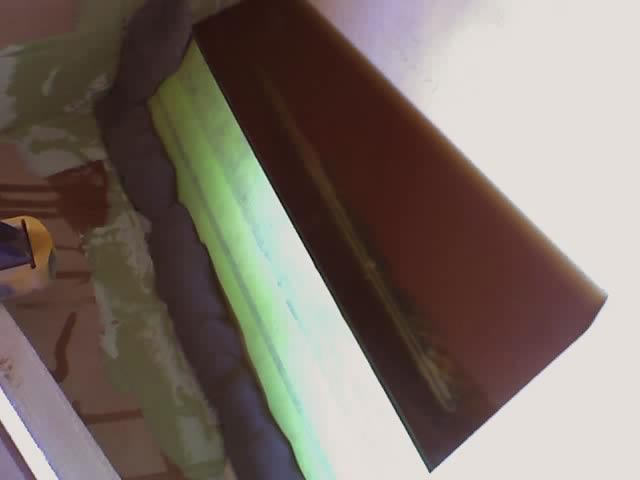 Here you can see that I have poured the Quick Cast. The dam held up nicely.
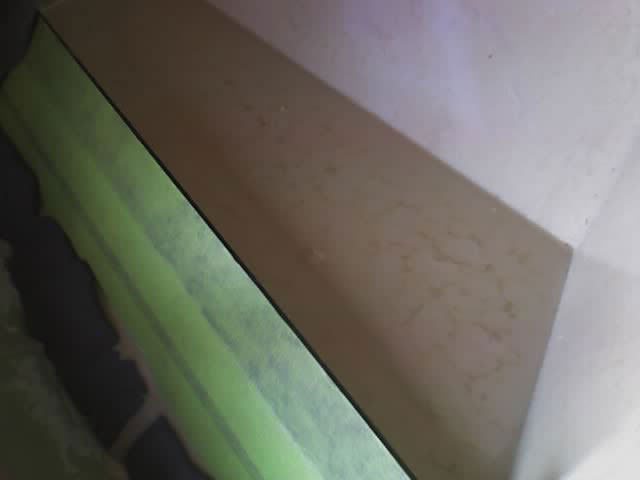 3 minuets later the Quick Cast has cured.
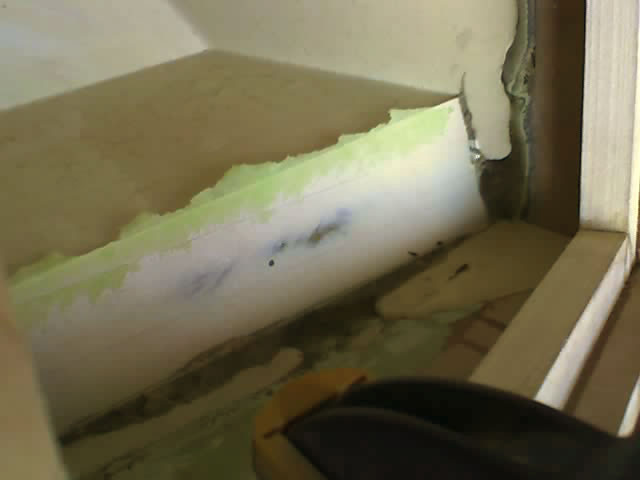 This is after I removed the barrier. You can see that some of the tape stuck. Like I said this stuff bonds quite well to most materials. After this pour I waxed all subsequent Barriers.
 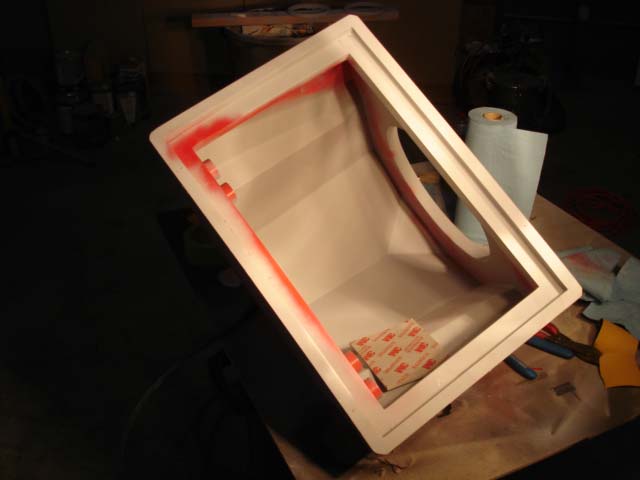 I also learned that you must pour the mix in gently and from a close distance. You dont want to introduce any air bubbles. On two of the pours I had to fill pin holes with Easy Sand (Ever Coat wonder product)because of this. On all of the rest of the sides I lightly sanded the Quick Sand with 220 grit and shot it with primer. Notice how perfect the lines came out. No shaping required!
 Some of you might remember my post where I built a tailgate with two 23 monitors built in. During this install I made the fatal mistake of placing two dissimilar materials right next to each other and bonding them together with resin. Well polyester resin shrinks 7-9% and that left a nasty line that showed through the paint. This might not have been a big deal normally, but the extreme temperature and humidity swings experienced 1 foot above the pavement made this a real bad idea. Rather than rebuilding the entire tailgate, I used Quick Cast to make a three piece mold of the entire bottom of the tailgate. Then I laid fiberglass and marine grade epoxy in my mold and popped out a paint ready replacement. And it took me a fraction of the time to do.
 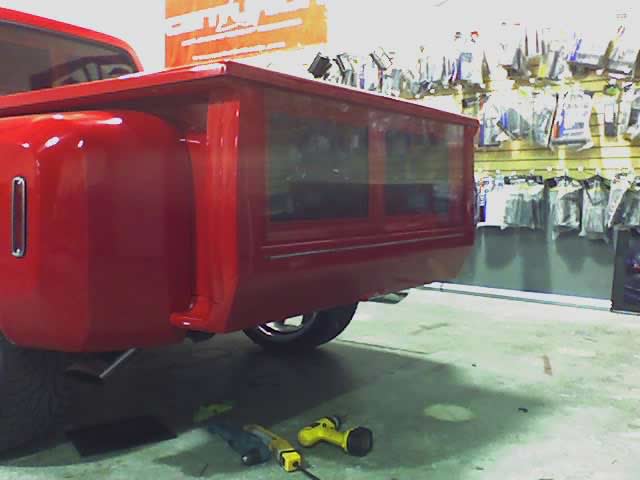 Before
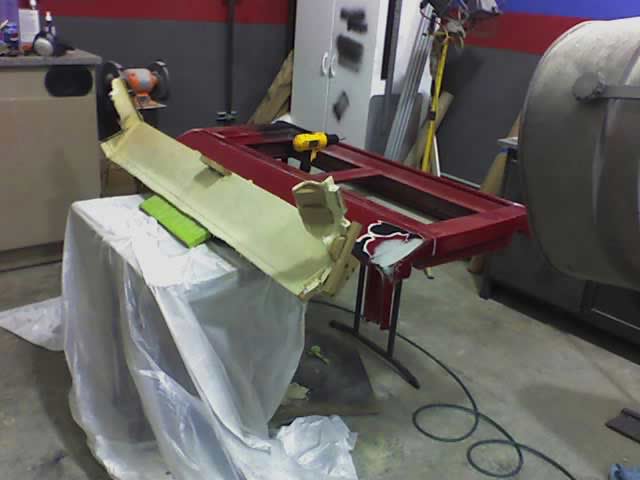 During
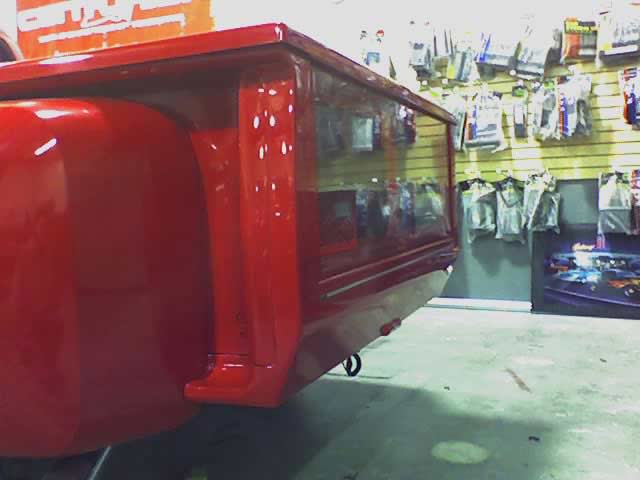 AfterPlease post ideas, tips, tricks and new materials
Posted: May 06, 2007 at 7:26 AM / IP Logged
Posted: May 07, 2007 at 1:50 AM / IP Logged
Posted: May 27, 2007 at 4:20 PM / IP Logged
Posted: May 30, 2007 at 1:20 AM / IP Logged
Sorry, you can NOT post a reply.
This topic is closed.
 Printable version
| You cannot post new topics in this forum You cannot reply to topics in this forum You cannot delete your posts in this forum You cannot edit your posts in this forum You cannot create polls in this forum You cannot vote in polls in this forum |

| Search the12volt.com |
Follow the12volt.com 
Monday, March 23, 2026 • Copyright © 1999-2026 the12volt.com, All Rights Reserved • Privacy Policy & Use of Cookies

Monday, March 23, 2026 • Copyright © 1999-2026 the12volt.com, All Rights Reserved • Privacy Policy & Use of Cookies
Disclaimer:
*All information on this site ( the12volt.com ) is provided "as is" without any warranty of any kind, either expressed or implied, including but not limited to fitness for a particular use. Any user assumes the entire risk as to the accuracy and use of this information. Please
verify all wire colors and diagrams before applying any information.
