


amp case, cheap style
Home /
the12volt's Install Bay /
Fiberglass, Fabrication, and Interiors / amp case, cheap style ( Topic Closed)


Posted: April 17, 2010 at 4:05 AM / IP Logged
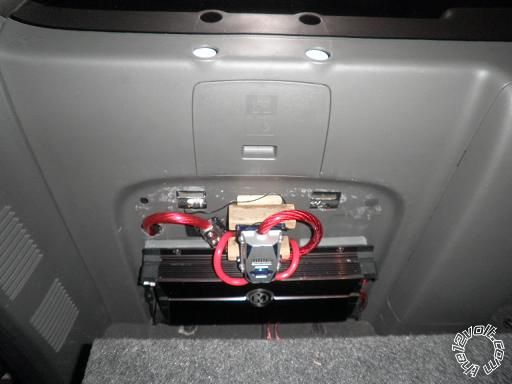
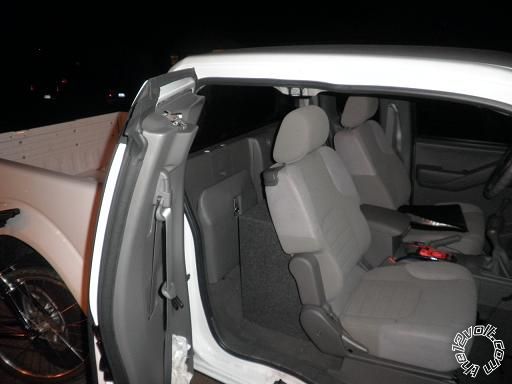
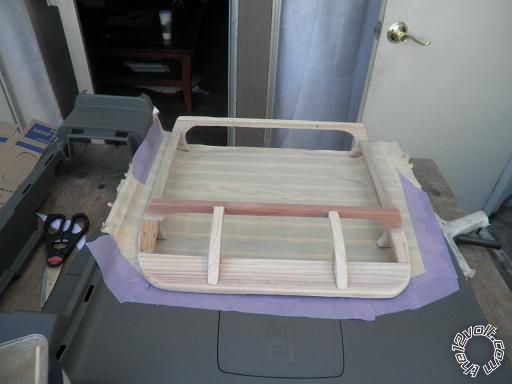 This frame was about as small as I could possibly go. Easy to do too. I set down 1 layer of cloth for a mold of the area that I'm working with.(This is the gap that holds the back seat rest of the back panel in my truck) I set the frame in the one layer mold while wet and added some glass patches to bond the mold and frame together.
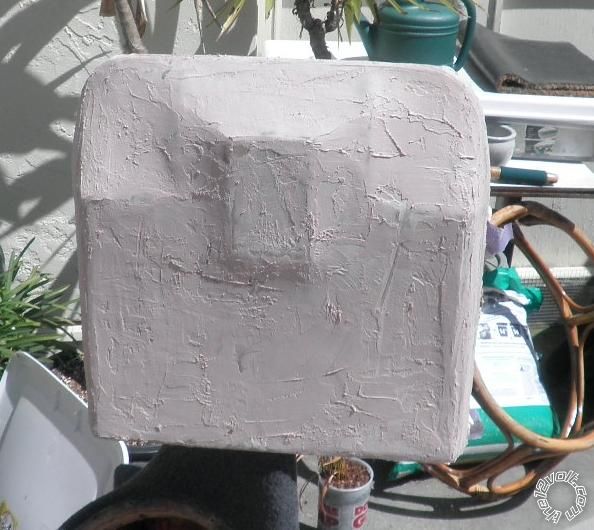
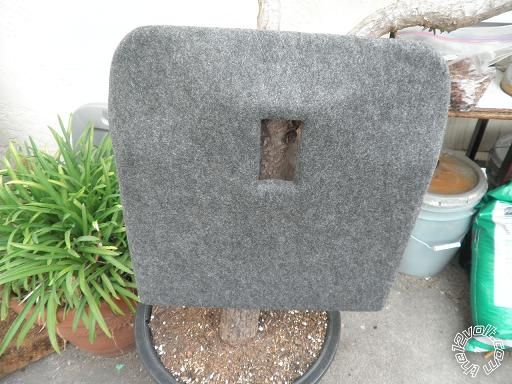
 After it dried, I had a base and a frame to do with as I please!
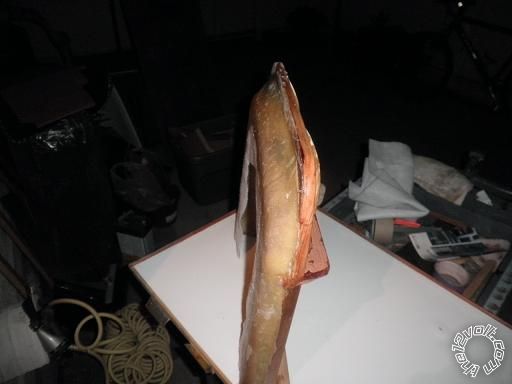 So, I added in the frame for the window. I went with some 3/4x" of some hard wood, cant recall type, but perfect for stapling the tension of the nylon. The other areas that were not going to anchor any staples, were formed just using masking tape. I ended up taping most of the face of the cover to make sure I didnt have any cloth sagging on the corners between the frame ribs. I painted the tape with just the FB liquid first and let it dry.
 Cloth? Hmmm Ahh yes, I pulled off the wife beater I was wearing and wrapped that.

Posted: April 17, 2010 at 5:23 AM / IP Logged
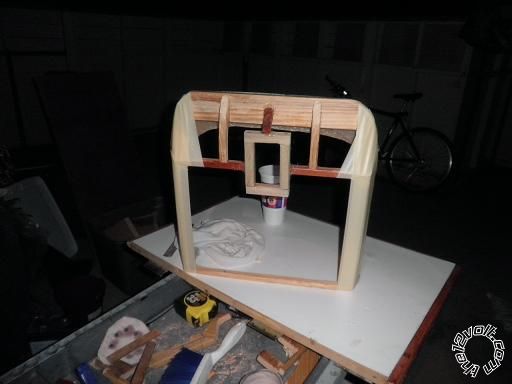
 Post nylon! Is where I be now lads!
[
Post nylon! Is where I be now lads!
[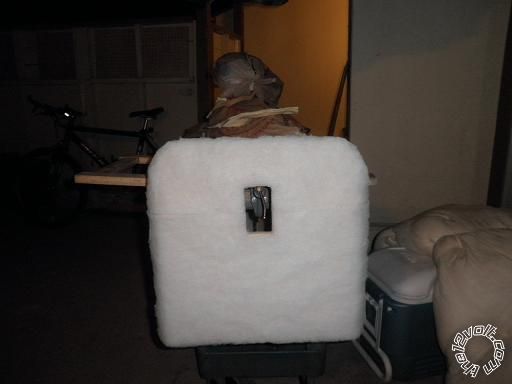 I can find the right color nylon, but the texture is off and it just does not go well with the interior...of MY WORK truck...geez, this stupid thing. Started out simple, just a sub, "I need a little bass". I purposely installed 4ga to limit the amount of equipment I put in. For all my beef I had with Memphis... well ironically I came across a discontinued but brand new amp. Offered to me for free. Could not refuse... Which pretty much means I need a set of subs! My Cerwin VMAX has to take a time out. So I came across these...
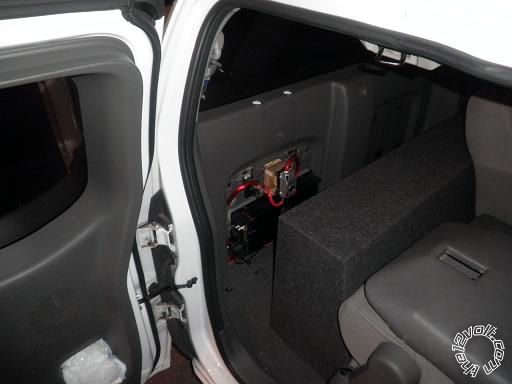
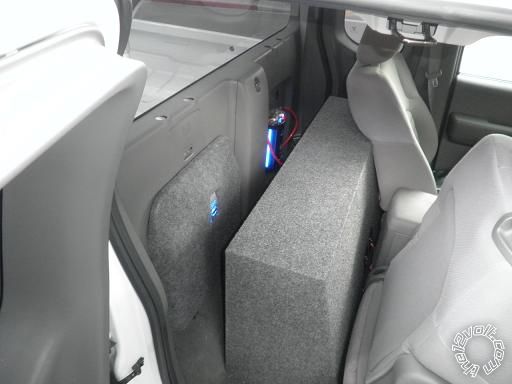
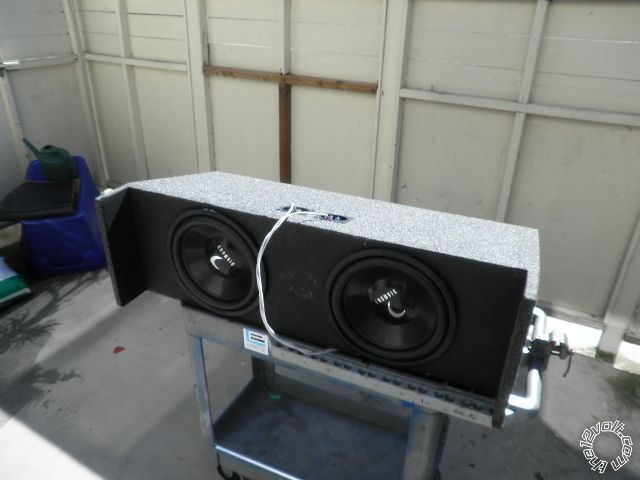 My favorites, D312D4's. Older but bran friggin new!! So we ended up building a downfire enclosure for them. 1.5ft3/sub sealed.. I'm just rockin these for kicks for the moment...there's no way I can keep that size box in there LOL.
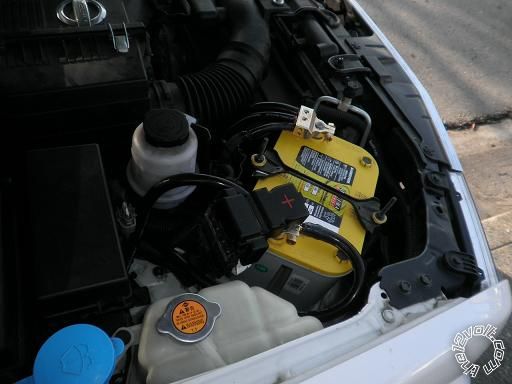
Now I'm on the verge of getting a huge alt. Unfortunately, I have no connections in this area of the business. I had to replace the power wire which was most disappointing...rookie manuever... but now I'm rockin 1/0, of some cable I had sitting around. Which I shall pay tribute too......MTX Thundercable 1/0. I could get a smaller bend radius with 1/2" EMT. Off the hook OFC. Real vitamin C!
My favorites, D312D4's. Older but bran friggin new!! So we ended up building a downfire enclosure for them. 1.5ft3/sub sealed.. I'm just rockin these for kicks for the moment...there's no way I can keep that size box in there LOL.
Now I'm on the verge of getting a huge alt. Unfortunately, I have no connections in this area of the business. I had to replace the power wire which was most disappointing...rookie manuever... but now I'm rockin 1/0, of some cable I had sitting around. Which I shall pay tribute too......MTX Thundercable 1/0. I could get a smaller bend radius with 1/2" EMT. Off the hook OFC. Real vitamin C!
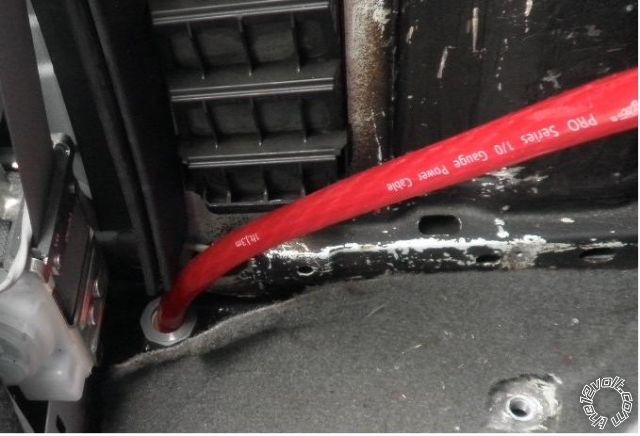 I had to run some stinger 1/0 from the main fuse to the distribution block on the account of the Thundercable not making the bends on the route I had to take. But I locked down my Big 3 with it!
 Whew Im tired, next update it will all come together...
Posted: April 18, 2010 at 1:16 AM / IP Logged
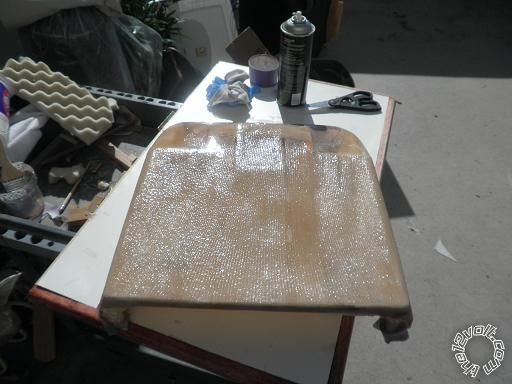
 DONE!
DONE!
Posted: April 18, 2010 at 2:31 AM / IP Logged


Posted: April 18, 2010 at 4:46 AM / IP Logged
Posted: April 19, 2010 at 11:47 PM / IP Logged
 I like this a lot better...
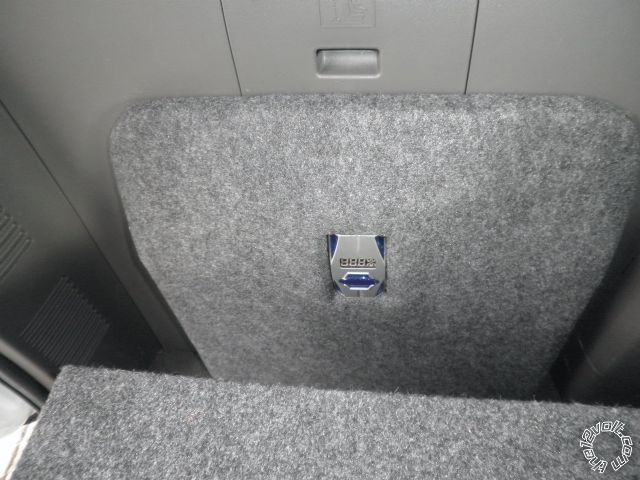 I also added a 4f digital cap...made by Phonics Digital.
Posted: April 21, 2010 at 12:19 AM / IP Logged

Posted: April 21, 2010 at 5:24 PM / IP Logged
Posted: April 21, 2010 at 5:42 PM / IP Logged
Posted: June 06, 2010 at 1:29 AM / IP Logged
Sorry, you can NOT post a reply.
This topic is closed.
 Printable version
| You cannot post new topics in this forum You cannot reply to topics in this forum You cannot delete your posts in this forum You cannot edit your posts in this forum You cannot create polls in this forum You cannot vote in polls in this forum |

| Search the12volt.com |
Follow the12volt.com 
Sunday, March 29, 2026 • Copyright © 1999-2026 the12volt.com, All Rights Reserved • Privacy Policy & Use of Cookies

Sunday, March 29, 2026 • Copyright © 1999-2026 the12volt.com, All Rights Reserved • Privacy Policy & Use of Cookies
Disclaimer:
*All information on this site ( the12volt.com ) is provided "as is" without any warranty of any kind, either expressed or implied, including but not limited to fitness for a particular use. Any user assumes the entire risk as to the accuracy and use of this information. Please
verify all wire colors and diagrams before applying any information.
