


Connecting Aux to Climate Control Buttons Pictorial
Home /
the12volt's Install Bay /
Car Security and Convenience - Alarm/Remote Start Pictorials / Connecting Aux to Climate Control Buttons Pictorial ( Topic Closed)


Posted: December 23, 2014 at 10:44 PM / IP Logged
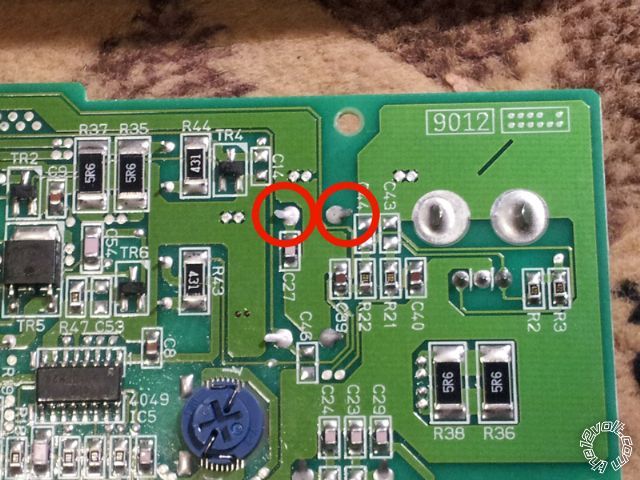
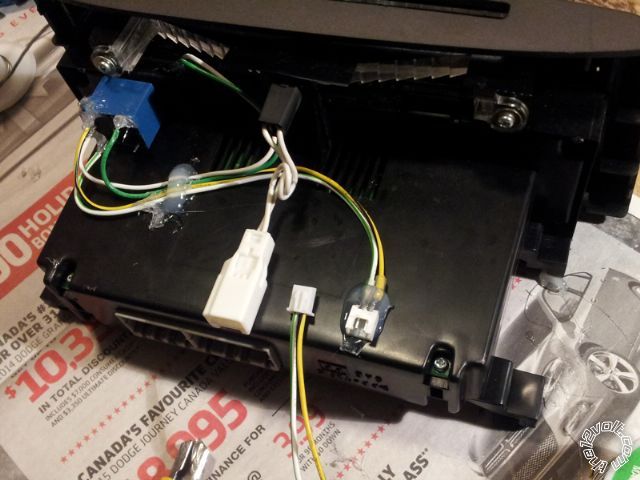
 Here's the back of the circuit. The contacts of the button are circled. MAKE SURE TO TEST THE CONTACTS USING DMM. It should read no-continuity normally, and close to 0 ohms while button is pressed.
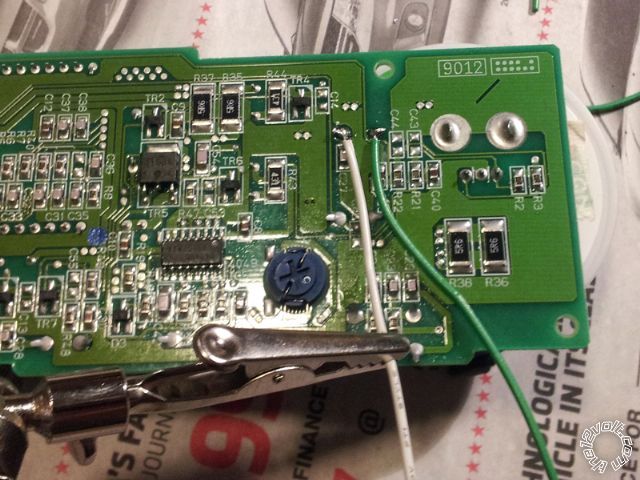
 Solder some thin (22-24 gauge) wire onto the contacts. To avoid a poor solder joint, be sure the wires don't move even a fraction while the solder is cooling; I used some "helping hands" to keep them steady.
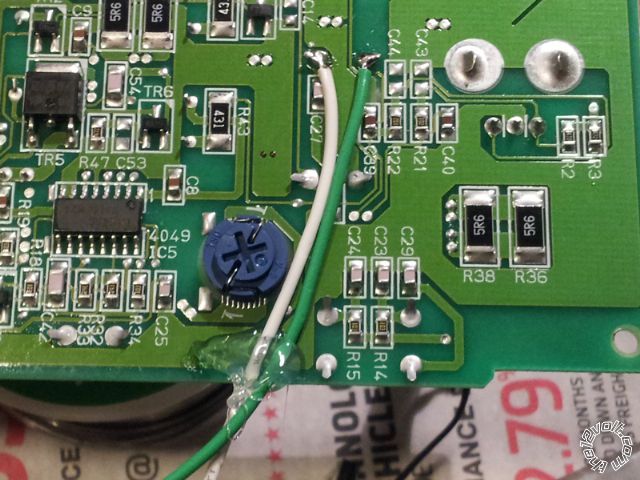
 I used hot glue to secure the wires (prevent strain & vibration on the solder joints).
 Rather than using a large Bosch style relay, I'm using a mini circuit board relay to avoid the unnecessary bulk.
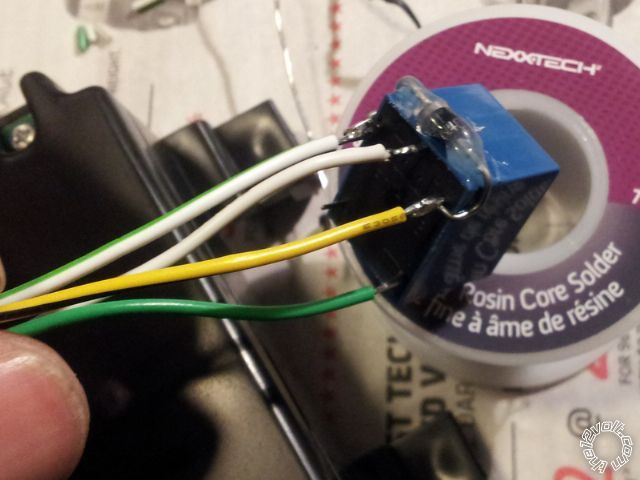 Everything is secured using hot glue. I put a mini-connector to make removal of the HVAC control unit easier.
 Here's the final look.


Posted: December 23, 2014 at 10:47 PM / IP Logged


Posted: December 24, 2014 at 7:31 AM / IP Logged
 Another good use for those mini-relays. Even had a coil quenching diode added ( Howard would be very happy ).
Posted: December 25, 2014 at 9:13 AM / IP Logged
Posted: December 25, 2014 at 8:48 PM / IP Logged
Posted: July 29, 2015 at 12:00 PM / IP Logged
Posted: July 29, 2015 at 12:01 PM / IP Logged
Posted: July 31, 2015 at 3:28 AM / IP Logged
Posted: December 02, 2015 at 5:00 PM / IP Logged
Sorry, you can NOT post a reply.
This topic is closed.
 Printable version
| You cannot post new topics in this forum You cannot reply to topics in this forum You cannot delete your posts in this forum You cannot edit your posts in this forum You cannot create polls in this forum You cannot vote in polls in this forum |

| Search the12volt.com |
Follow the12volt.com 
Saturday, May 23, 2026 • Copyright © 1999-2026 the12volt.com, All Rights Reserved • Privacy Policy & Use of Cookies

Saturday, May 23, 2026 • Copyright © 1999-2026 the12volt.com, All Rights Reserved • Privacy Policy & Use of Cookies
Disclaimer:
*All information on this site ( the12volt.com ) is provided "as is" without any warranty of any kind, either expressed or implied, including but not limited to fitness for a particular use. Any user assumes the entire risk as to the accuracy and use of this information. Please
verify all wire colors and diagrams before applying any information.
