the12volt.com spacer
icon

Focal Beryllium BMW


Post ReplyPost New Topic
< Prev Topic Next Topic >
Melted Fabric 
Silver - Posts: 509
Silver spacespace
Joined: October 24, 2003
Location: California, United States
Posted: March 08, 2010 at 4:13 PM / IP Logged Link to Post Post Reply Quote Melted Fabric
You know...I get compliments all the time that I am a great teacher and mentor, but everytime I check on this thread of this forum, I become a student all over again Focal Beryllium BMW - Page 13 -- posted image. and happy to be one. Robolop, this breakdown of the project is extremely appreciated.
The level at which you are fabricating those pieces is well... something to aspire to. I am sure all us of continue to be impressed and await more updates and pictures. Credit, where credit is due.
I am curious, what is your primary language? I also speak more than just english too.
I have not failed. I've just found 10,000 ways that won't work.
When you do not know what you are doing and what you are doing is the best -- that is inspiration.
afdanw 
Copper - Posts: 74
Copper spacespace
Joined: August 06, 2010
Location: Oklahoma, United States
Posted: August 07, 2010 at 6:05 PM / IP Logged Link to Post Post Reply Quote afdanw
Sir,
I am impressed. There is so much detail that i have to say, "you might be out of your damn mind." It is truly an amazing install. Wish i had that much patients and skill.
robolop 
Copper - Posts: 157
Copper spacespace
Joined: October 26, 2008
Posted: August 08, 2010 at 8:04 AM / IP Logged Link to Post Post Reply Quote robolop

afdanw wrote:
Sir,
I am impressed. There is so much detail that i have to say, "you might be out of your damn mind." It is truly an amazing install. Wish i had that much patients and skill.

THX DUDE  

t&t tech 
Platinum - Posts: 2,608
Platinum spacespace
Joined: October 05, 2008
Location: Trinidad and Tobago
Posted: August 22, 2010 at 11:38 AM / IP Logged Link to Post Post Reply Quote t&t tech

Great stuff there man hope you enjoy every moment of pleasure you get from it! lol

commit your way to jehovah and he will act in your behalf. psalms 37:5
radarcontact 
Copper - Posts: 54
Copper spaceThis member has made a donation to the12volt.com. Click here for more info.spacespace
Joined: June 16, 2009
Location: Florida, United States
Posted: September 13, 2010 at 11:10 AM / IP Logged Link to Post Post Reply Quote radarcontact

Truly unbelievable!!  I stumbled across this install yesterday and have been glued to it like a Clancy novel...waiting to find out how it ends!  I have literally found myself talking to myself, out loud, saying things like, "No way!", "That is frikin' awesome!", and yes (I apologize in advance), "This guy is CRAZY!"

Robolop, you honestly have an ingenious mind.  If you aren't already an engineer, you need to become one.  You've got serious engineering skills!

My hat is off to you, Sir!

RadarContact
robolop 
Copper - Posts: 157
Copper spacespace
Joined: October 26, 2008
Posted: October 02, 2010 at 12:27 PM / IP Logged Link to Post Post Reply Quote robolop
t&t tech wrote:

Great stuff there man hope you enjoy every moment of pleasure you get from it! lol

THX DUDE

robolop 
Copper - Posts: 157
Copper spacespace
Joined: October 26, 2008
Posted: October 02, 2010 at 12:32 PM / IP Logged Link to Post Post Reply Quote robolop

I think you already know, I ordered some things for the amplifierbox. Cause these things still aren't delivered, I worked on some other things in the meanwhile.

Sitting still isn't my style :)
The next update has nothing to do with car-hifi.
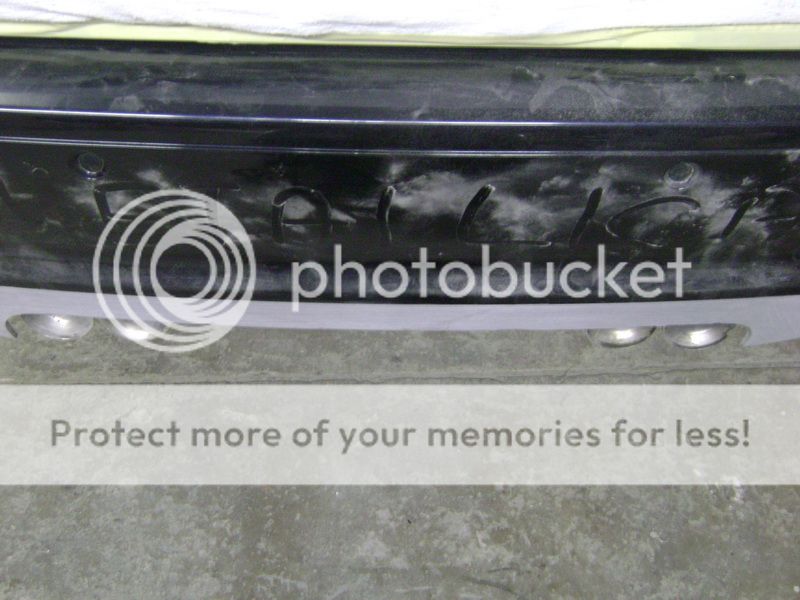
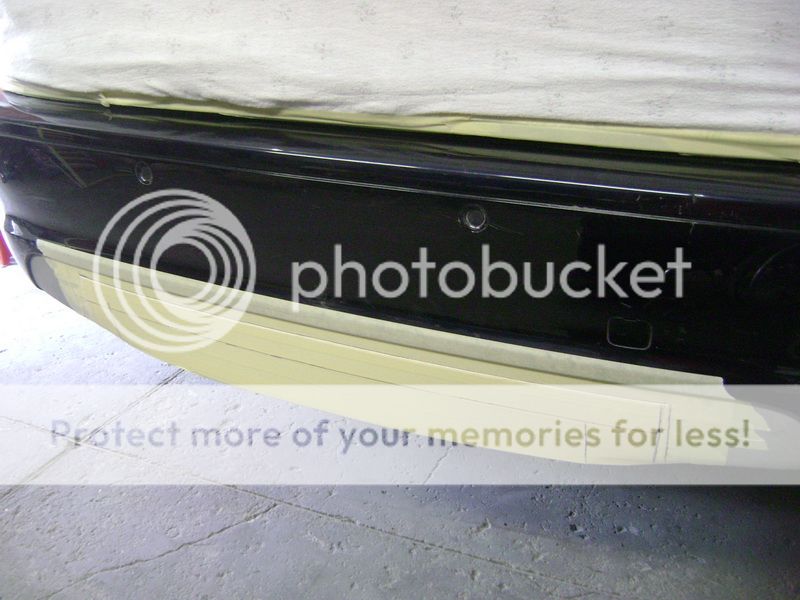
When I bought the car 2 years ago, I already knew I was going to make this some day....Now I purchased a M-tech2 rear bumper with pdc.
This is an original bumper from BMW itself, because I didn't want to get the same doodie, that I had with the front bumper.
Once I received the bumper, I mounted it on, and it fitted perfectly!
So I could paint it, and mount it on...but you know that's not my style :)
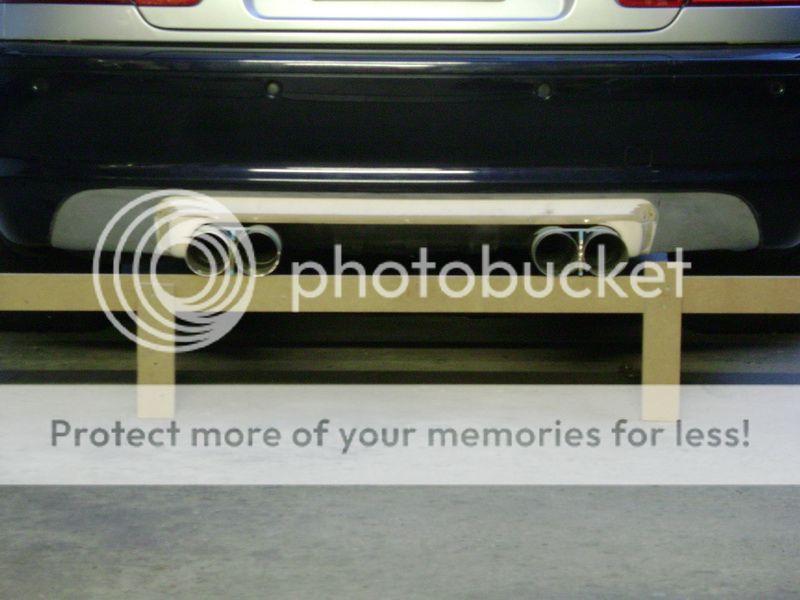
I want the back of the car, look more like an M3. What the comments will be about this, I don't know, but I think it's the most beautiful rear of an E46.

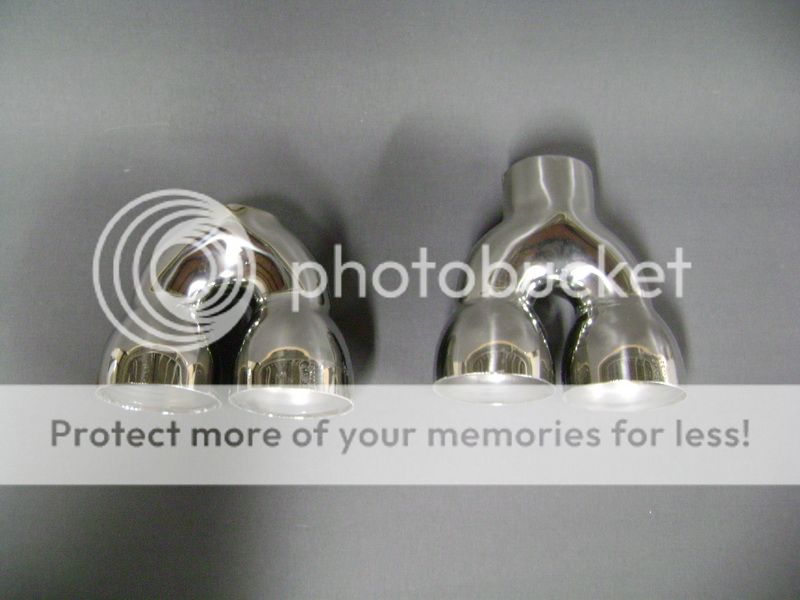
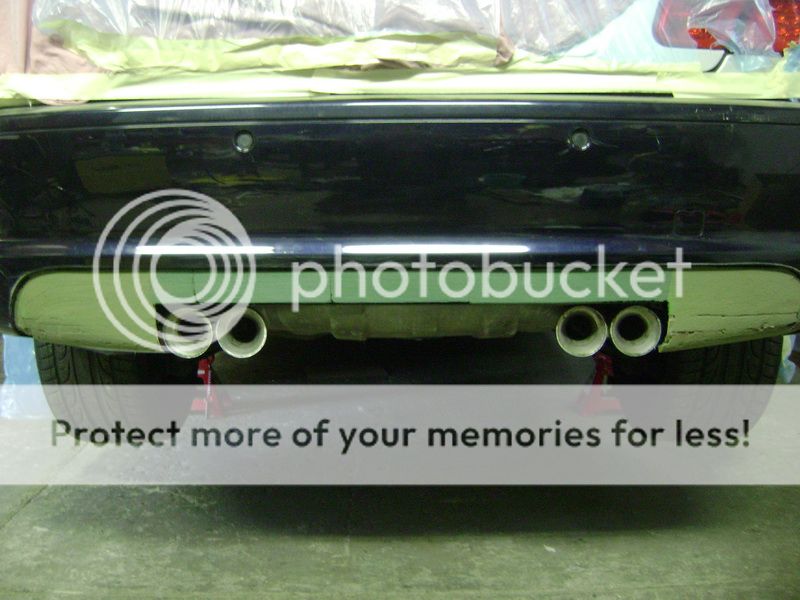
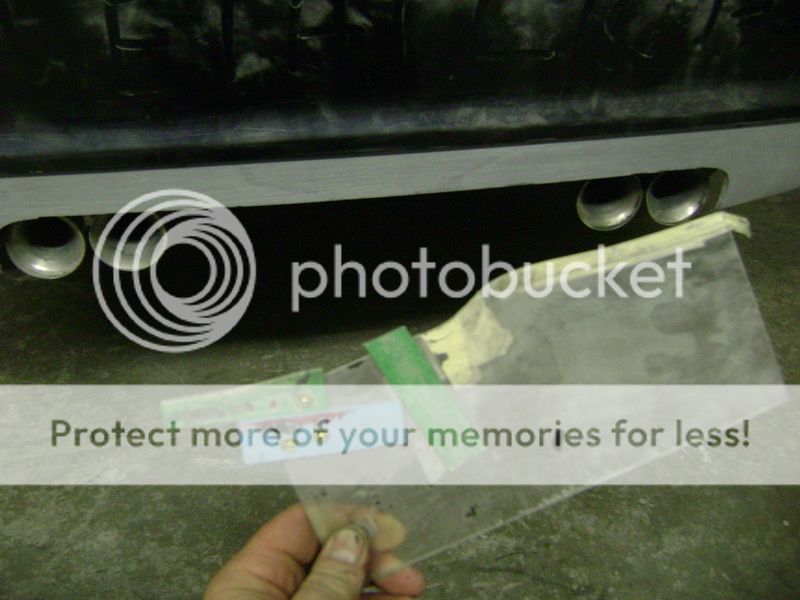
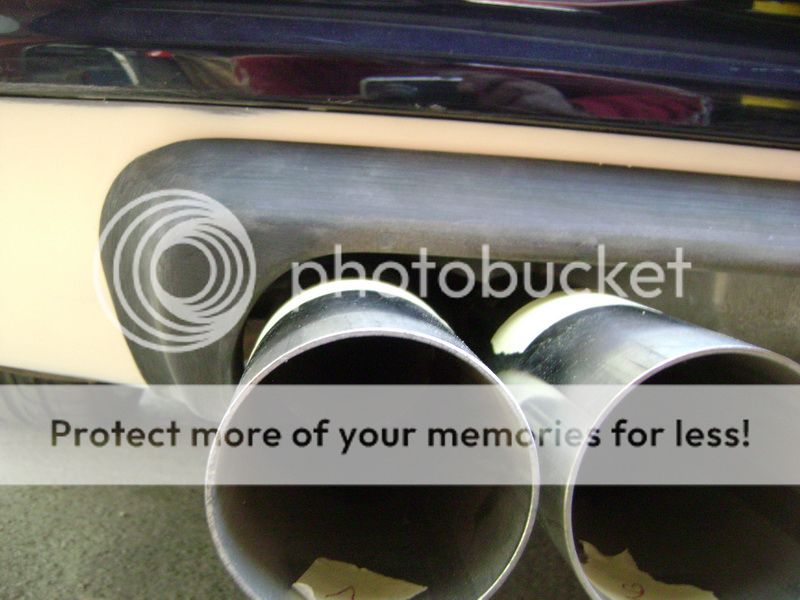
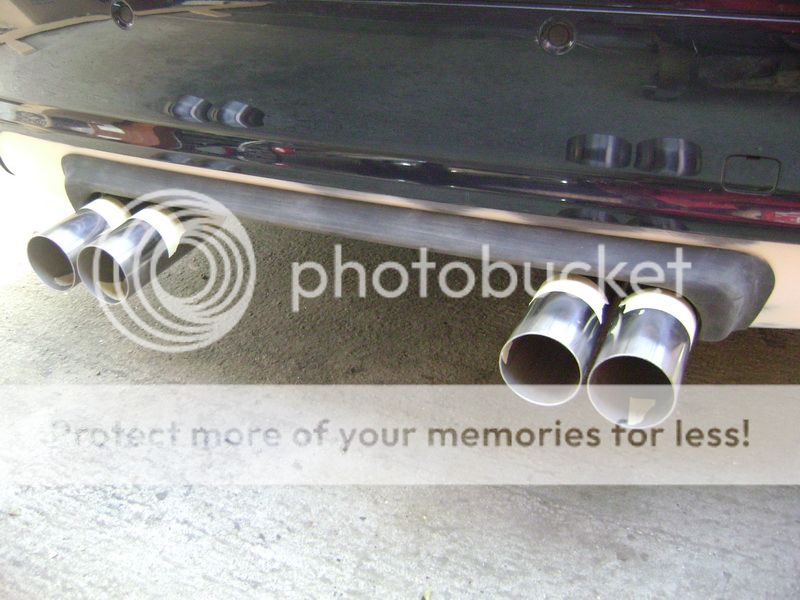
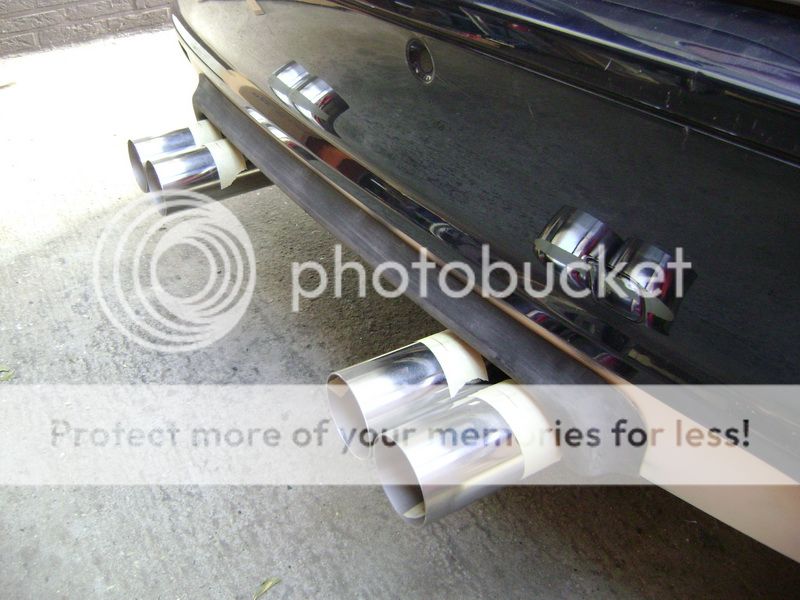
This also means I'm going for quad exhausts in the rear. This won't be easy...but yet, another challenge.

The original M3 doens't have a spare wheel in the back, but instead is the exhaust system.
What maybe an even bigger challenge is that I'll try to make this work on the original exhaust.
Because in Belgium, we have to go to a technical control every year with the car, I drove to the control-station and asked if this would be a problem.
they told me that whatever goes behind the original exhaust is no problem, as long as they can messure the CO-output.
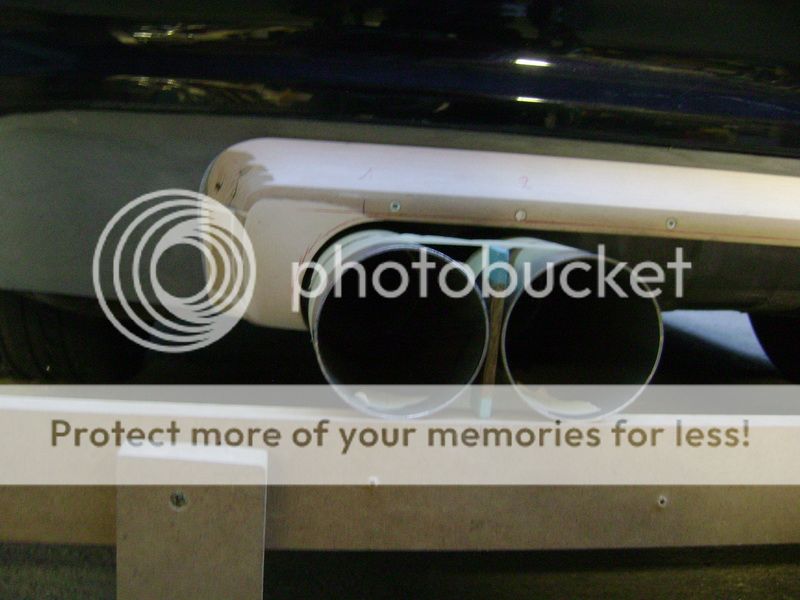
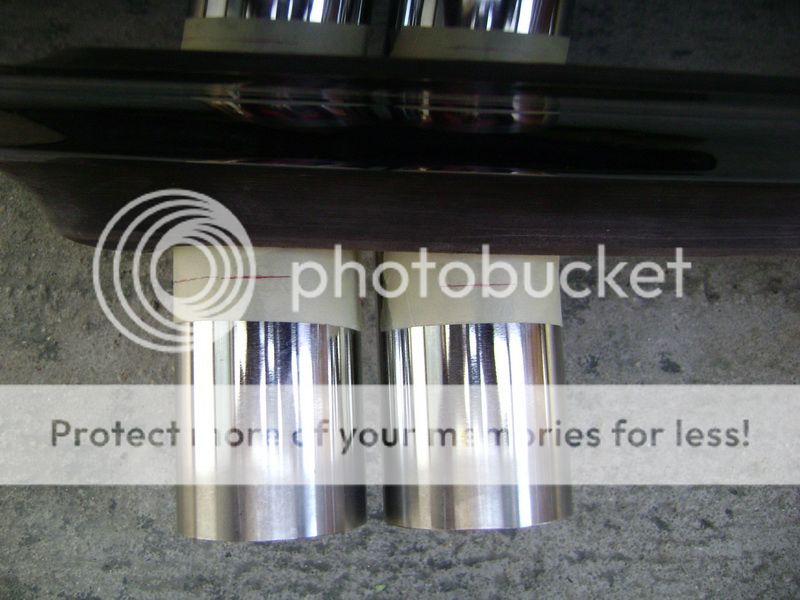
After a long search on ebay, I purchased these pipes.
Focal Beryllium BMW - Page 13 -- posted image.
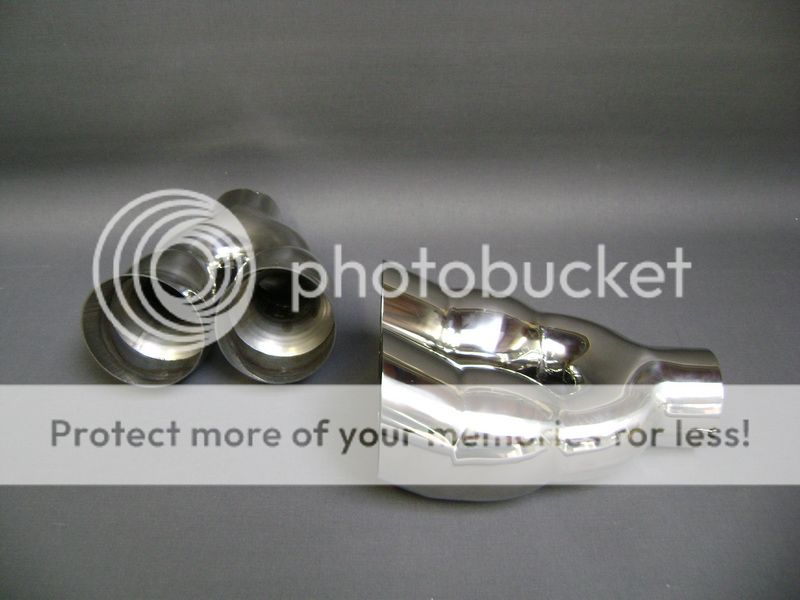
The end pipes didn't look like that when I ordered them on the internet.
The thing I'm pointing at, should have been straight.
Focal Beryllium BMW - Page 13 -- posted image.

You can see on the picture, it looks a bit curved.

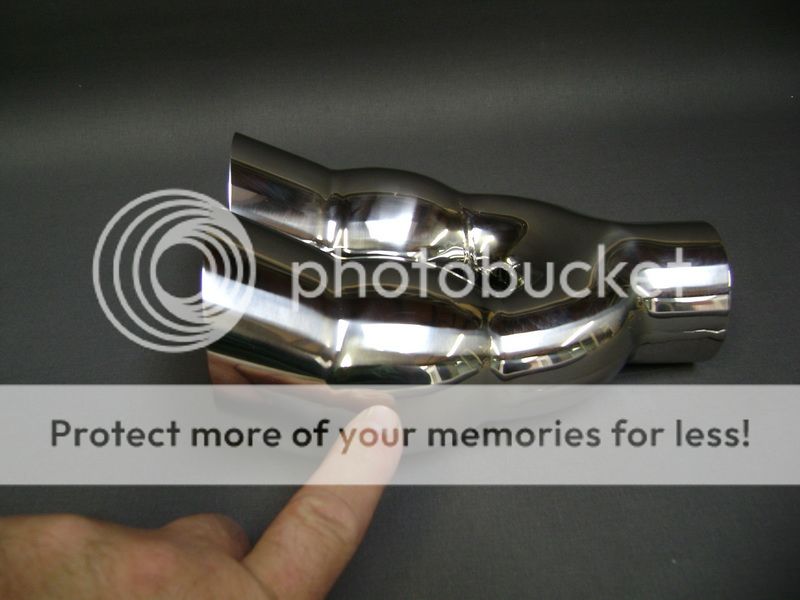
I could do 2 things: Send them back, or tune it myself.... I did the last one
I put in the disc an hour later after delivery .
Focal Beryllium BMW - Page 13 -- posted image.

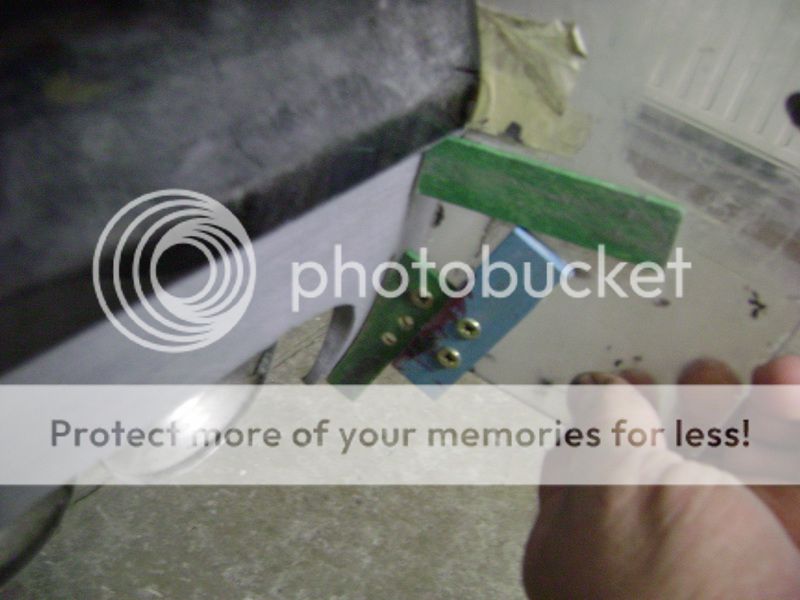
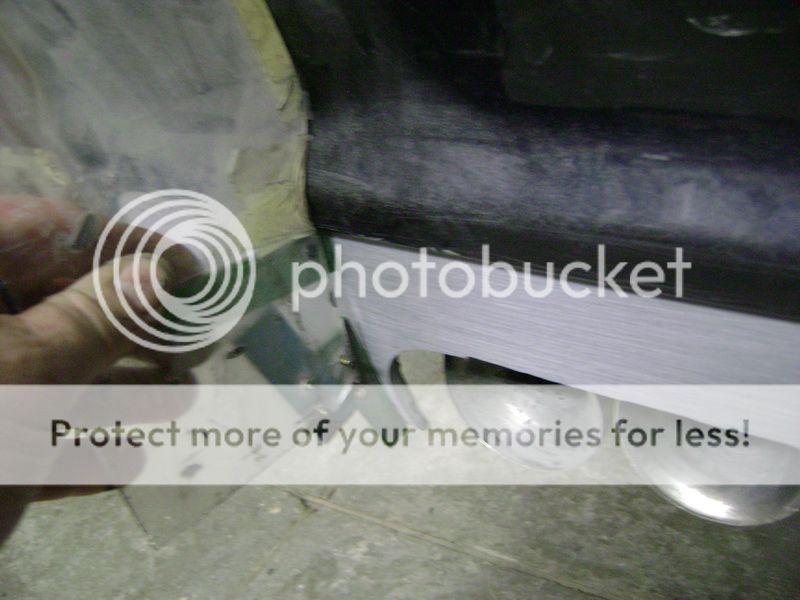
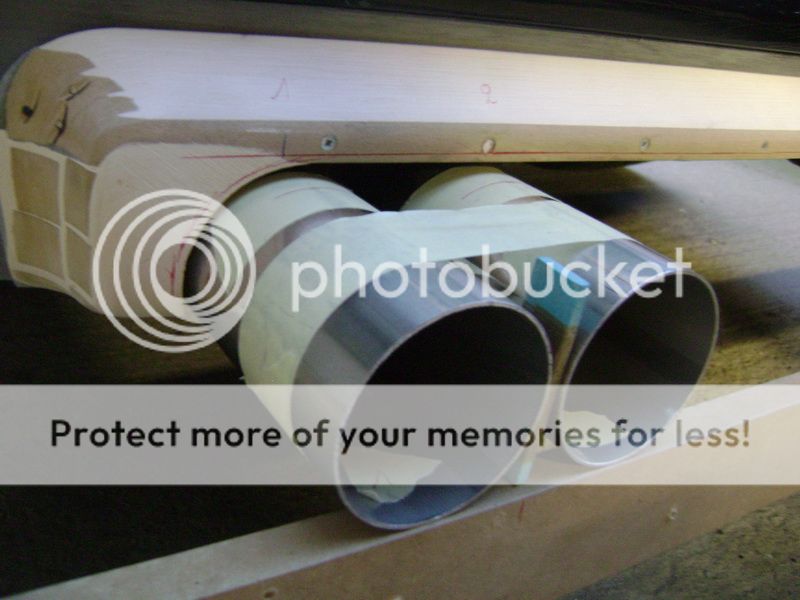
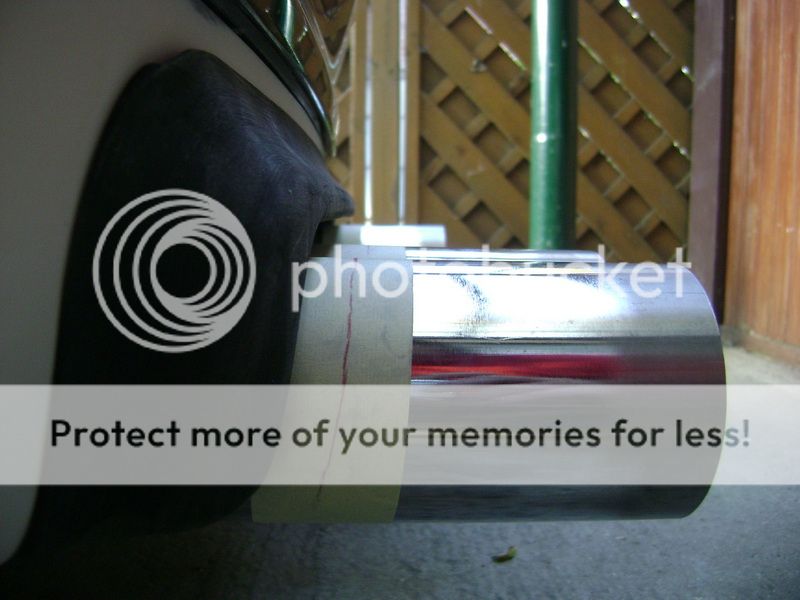
This looked much better according to me. Now it's the art of making these things fit descently onto the exhaust system.

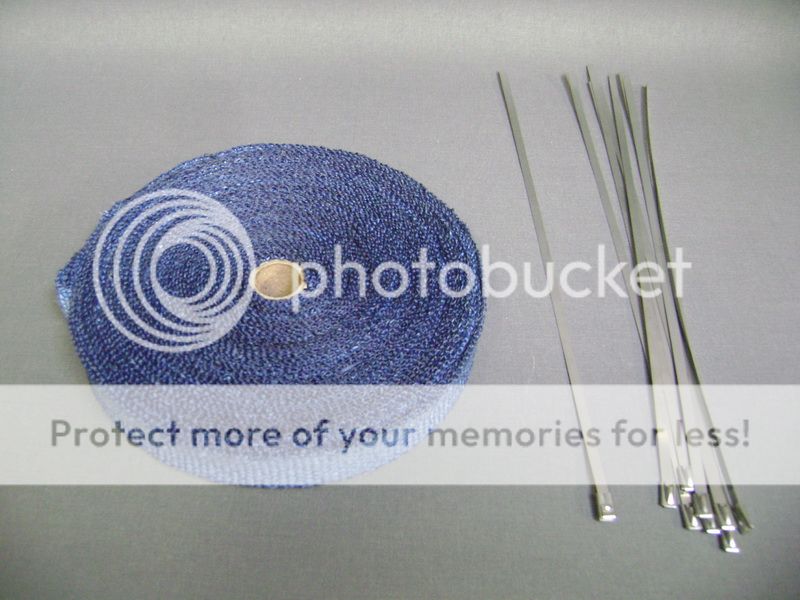
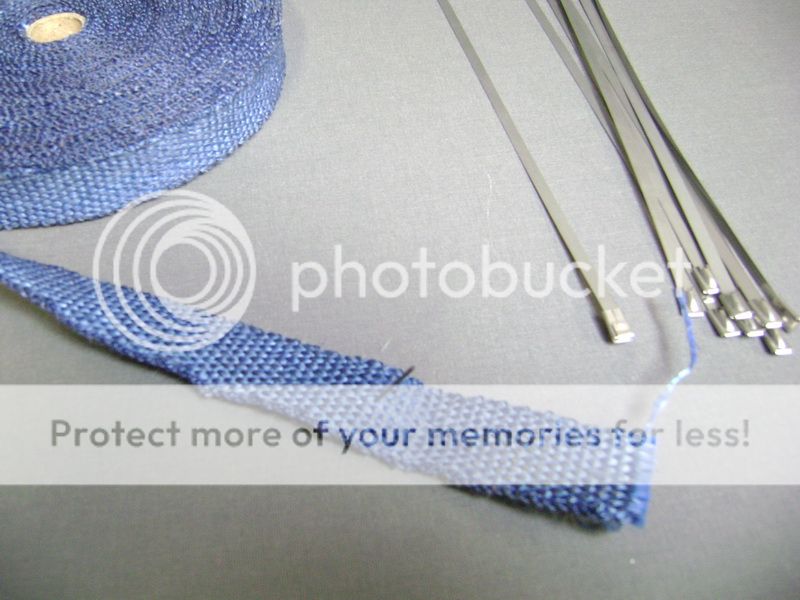
Because I knew that things of the exhaust will get very close to the rear bumper, I need to do something to keep the heat out of there. This is special material to go around the pipes, and can resist a temperature of 1200 degrees. Heath wrapping.

Focal Beryllium BMW - Page 13 -- posted image.

Focal Beryllium BMW - Page 13 -- posted image.
Then I also have a heat-shield to put on the back of the bumper.

robolop 
Copper - Posts: 157
Copper spacespace
Joined: October 26, 2008
Posted: October 02, 2010 at 12:48 PM / IP Logged Link to Post Post Reply Quote robolop

The hardest part of the exhausts is behind me now, and it worked out fine.

I put a lot of measure-work into it, but I'm proud to say that it's perfect onto the milimeter.
On this picture, the end-pipes aren't mounted yet. Going to measure this again when it's all finished. Cause I hate it when mufflers come out to far.
The original plastic piece on the bottom of the bumper....it already made a one way trip to the bin.
It didn't fit one bit anymore, and off-course I want to change the model to something more beautiful.
Here you can see the building of it.
First I glued OAZE on the piece with hot glue. This material rubs like butter, and so I got a model faster.
Focal Beryllium BMW - Page 13 -- posted image.
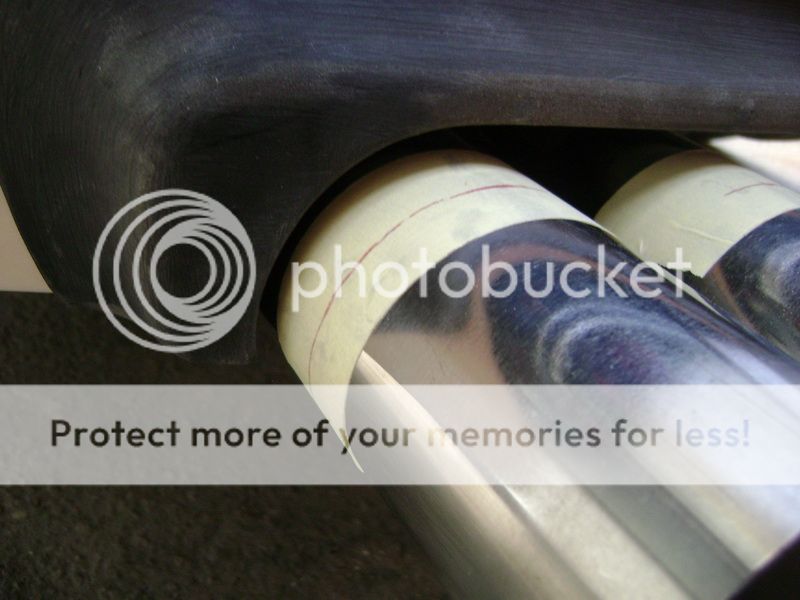
Once I had this, I taped it all with paper-tape.

Focal Beryllium BMW - Page 13 -- posted image.

Here you can see the original exhaust where the quad's are mounted on to.

Focal Beryllium BMW - Page 13 -- posted image.

I put on 4 layers of fiberglass polyester so it's all a bit more robust.
Focal Beryllium BMW - Page 13 -- posted image.

robolop 
Copper - Posts: 157
Copper spacespace
Joined: October 26, 2008
Posted: October 02, 2010 at 12:49 PM / IP Logged Link to Post Post Reply Quote robolop

Put some model into the polyester piece. Needs to be some more refining for the finishing off…

Cause I’m convinced that everything fits 100%, I discovered something.
If you look at this picture, it seems something is not 100% right somewhere.
Focal Beryllium BMW - Page 13 -- posted image.
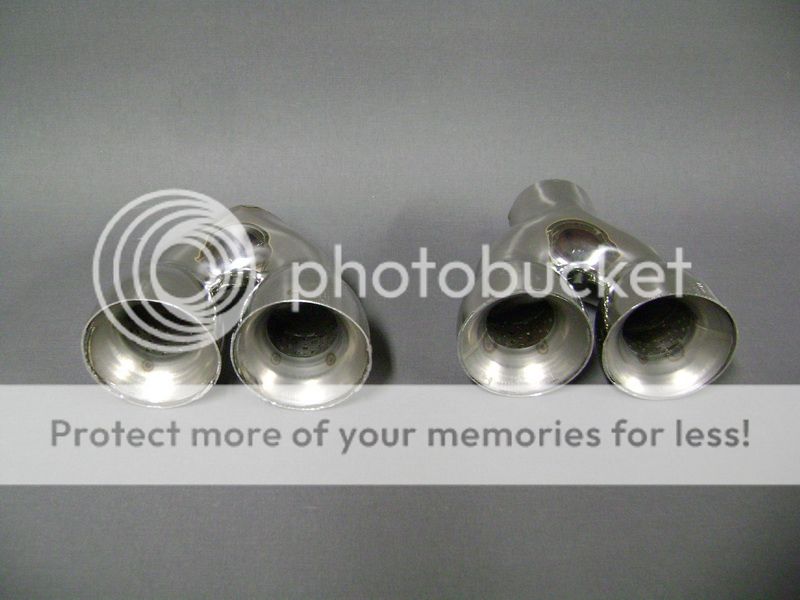
You see that the inner muffles are a bit higher then the outer ones. I already noticed this on several other cars too.
This is one of my favourites, and I immediately noticed that the exhausts weren’t on 1 line.
I never saw the car IRL, but I’m 200% sure that these are correctly placed too.
Focal Beryllium BMW - Page 13 -- posted image.
It just gives you a distorted image cause of the rounding of the bumper.
I for one, will think 2 times before I say that mufflers are placed awry.        
Focal Beryllium BMW - Page 13 -- posted image.

I also tried to make some pictures, exactly in the middle of the rear, but that’s not so easy.

Focal Beryllium BMW - Page 13 -- posted image.
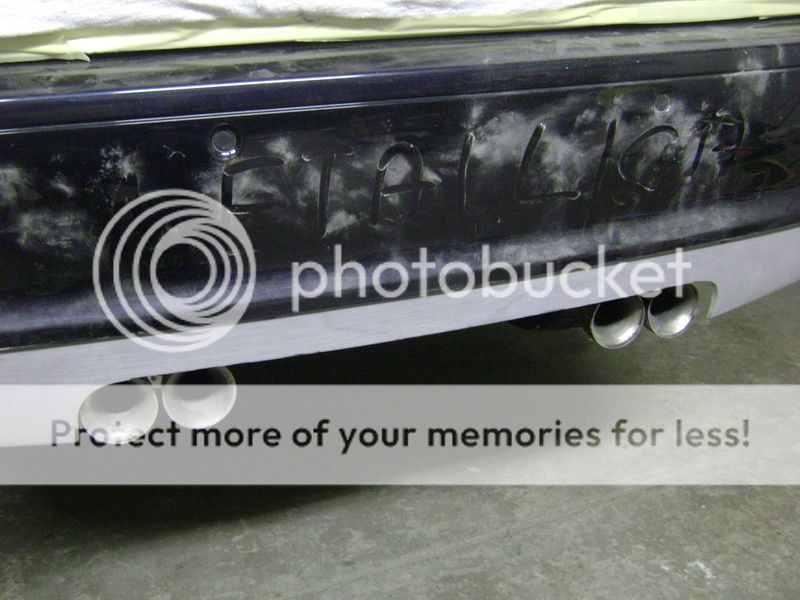
To make the polyester piece the same LEFT as RIGHT, I made a mold.

Focal Beryllium BMW - Page 13 -- posted image.

Focal Beryllium BMW - Page 13 -- posted image.

Focal Beryllium BMW - Page 13 -- posted image.

Sometimes it’s quite simple….when you know it

Focal Beryllium BMW - Page 13 -- posted image.

robolop 
Copper - Posts: 157
Copper spacespace
Joined: October 26, 2008
Posted: October 02, 2010 at 12:56 PM / IP Logged Link to Post Post Reply Quote robolop

This piece will connect nicely onto the exhausts. First, I taped the bumper.

Focal Beryllium BMW - Page 13 -- posted image.

Focal Beryllium BMW - Page 13 -- posted image.
Put on 4 layers of fiberglass cloth.
Focal Beryllium BMW - Page 13 -- posted image.

This will be the foundation for the piece.

I glued some MDF against this, and put some model into it.
Focal Beryllium BMW - Page 13 -- posted image.

Then I mounted it on the car, and you can see I'm working with great accuracy.

The space between the tubes and the piece is not more then 2 or 3 mm.
Focal Beryllium BMW - Page 13 -- posted image.
I want as little space as possible between there, but this is a bit TOO small. A child knows this will rattle after 5 kilometers.
So I took a little slath of 6 mm, and drew it out nicely onto the piece.

Focal Beryllium BMW - Page 13 -- posted image.

Then I defined the length of the tubes.

You can see the line, that they'll come out about 10mm. The outer mufflers will come out a bit more.
I determined this by the rounding of the bumper, when you look from above.
Focal Beryllium BMW - Page 13 -- posted image.

Then I looked with a sway-hook to get them diagonal aligned.

Focal Beryllium BMW - Page 13 -- posted image.

Here you can see how many space I have now. I sprayed the piece black to have a better view on it.

Focal Beryllium BMW - Page 13 -- posted image.

Focal Beryllium BMW - Page 13 -- posted image.

Focal Beryllium BMW - Page 13 -- posted image.

Focal Beryllium BMW - Page 13 -- posted image.

Now I'm about to saw the tubes on the good lenght, and spot-weld them on 4 places, then again, making sure they are still on the same line.

I made a mold of the black piece you see here. For the moment it is drying.
Once this piece is ready, I'm putting it back in the mold.

Page of 17

  Printable version Printable version Post ReplyPost New Topic
You cannot post new topics in this forum
You cannot reply to topics in this forum
You cannot delete your posts in this forum
You cannot edit your posts in this forum
You cannot create polls in this forum
You cannot vote in polls in this forum

  •  
Search the12volt.com
Follow the12volt.com Follow the12volt.com on Facebook
Saturday, May 4, 2024 • Copyright © 1999-2024 the12volt.com, All Rights Reserved Privacy Policy & Use of Cookies
Disclaimer: *All information on this site ( the12volt.com ) is provided "as is" without any warranty of any kind, either expressed or implied, including but not limited to fitness for a particular use. Any user assumes the entire risk as to the accuracy and use of this information. Please verify all wire colors and diagrams before applying any information.

Secured by Sectigo
the12volt.com spacer
Support the12volt.com
Top
the12volt.com spacer