the12volt.com spacer
icon

box build to specs for 2 jl audio 13w7s


Post ReplyPost New Topic
< Prev Topic Next Topic >
samuelsteven 
Copper - Posts: 123
Copper spacespace
Joined: April 27, 2003
Posted: September 08, 2009 at 12:14 AM / IP Logged  
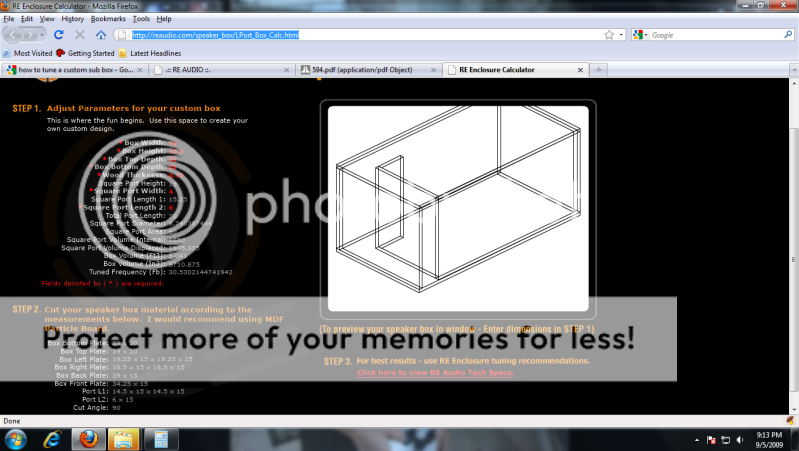
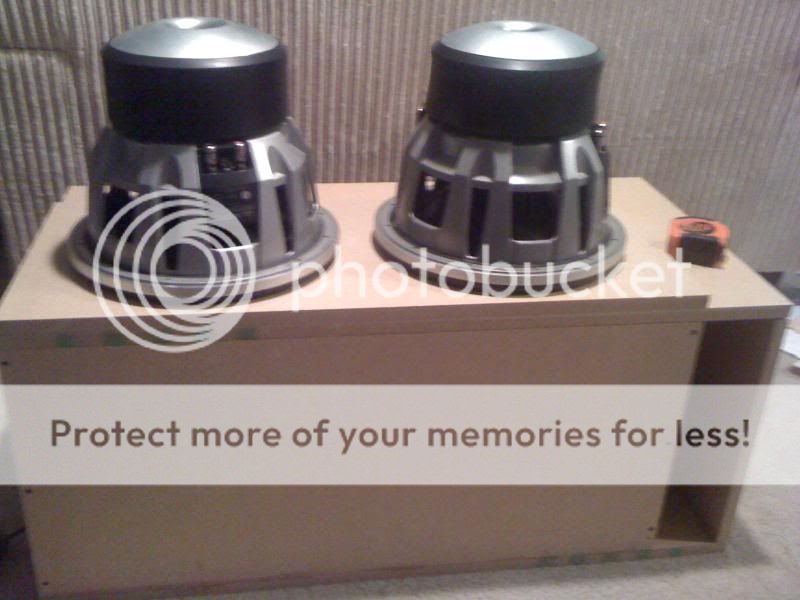
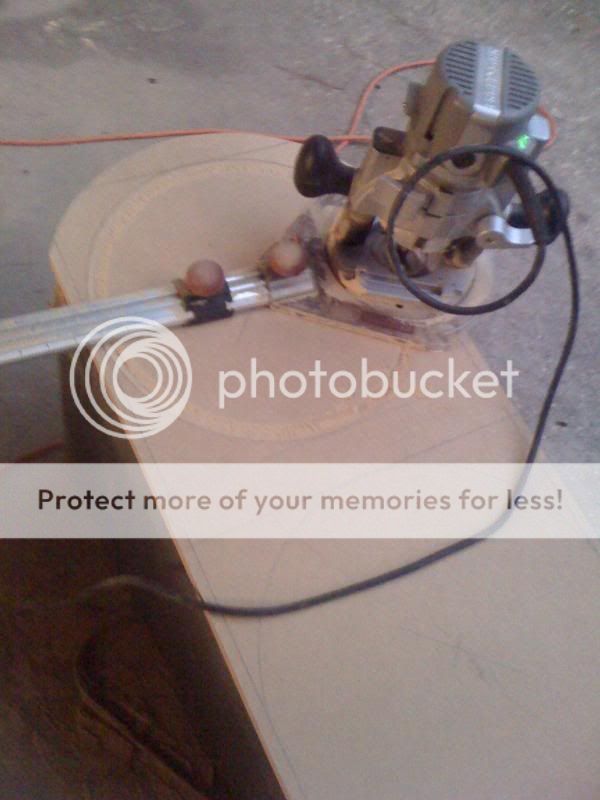
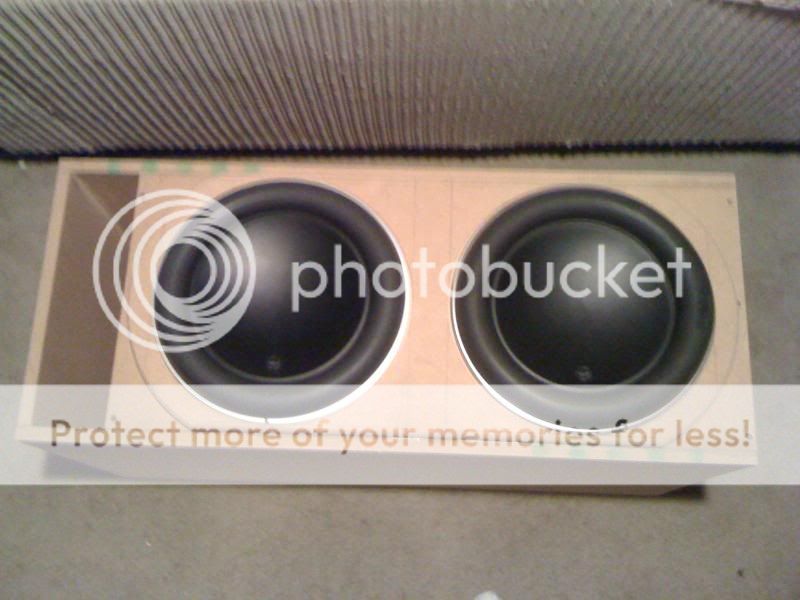
Just some pictures I took during my build, I'm no carpenter, but after pricing a custom ported box for these things, I decided to build my own for about $400 less. This is really my first build, so dont expect too much. I really wanted a different design, but my trunk isn't all that big, So I was limited to what I could do. Just used RE Audio's box calculator and adjusted it to my space and dimensions available and I tuned the Port to 30Hz, like JL recommends. As far as the separate front bezel, I actually added that on because I completely forgot about the subs needing a 1" front wall to mount on. I actually already had it cut the same size as the other front, I was just gonna double stack it, but it didn't fit because I didn't take the side walls into consideration, and I was gonna have to shorten it about 1 1/2" So it would slide in behind the other front panel. I didn't want to give up any airspace, so I decided to go with an oval like shape to makeup for the loss of thickness and not lose any air space. So that it wouldn't look tacky, I counter synced both holes with the router about 1/4", because I figured it would look better then just being flush. Then I took my router and rounded the edges of it with my half round bit. Tomorrow Ill have it wrapped with carpet or Vinyl, and I was gonna paint the front bezel and port gloss black and attach it after carpeting. Any recommendations on the covering/wrapping?
box build to specs for 2 jl audio 13w7s -- posted image.
h3_assassin 
Member - Posts: 20
Member spacespace
Joined: September 04, 2009
Location: South Carolina, United States
Posted: September 08, 2009 at 11:41 AM / IP Logged  
that looks sweet, how do they sound?
samuelsteven 
Copper - Posts: 123
Copper spacespace
Joined: April 27, 2003
Posted: September 10, 2009 at 2:16 AM / IP Logged  
They shake my entire block! they sound good..SPL and SQ
h3_assassin 
Member - Posts: 20
Member spacespace
Joined: September 04, 2009
Location: South Carolina, United States
Posted: September 10, 2009 at 12:15 PM / IP Logged  
That's awesome.
What is the tool used to create the box? it looks pretty handy.
I used Test Tones to tune my amplifier with my subs for the frequency range i wanted.
samuelsteven 
Copper - Posts: 123
Copper spacespace
Joined: April 27, 2003
Posted: September 10, 2009 at 12:25 PM / IP Logged  
I just used RE Audios Box calculator...Its very easy to use
icearrow6 
Copper - Posts: 497
Copper spacespace
Joined: February 02, 2009
Location: California, United States
Posted: September 10, 2009 at 3:03 PM / IP Logged  
NICE! Great job on your FIRST build!
samuelsteven 
Copper - Posts: 123
Copper spacespace
Joined: April 27, 2003
Posted: September 10, 2009 at 3:33 PM / IP Logged  
Thanx man
DYohn 
Moderator - Posts: 10,741
Moderator spaceThis member has made a donation to the12volt.com. Click here for more info.spaceThis member has been recognized as an authority in Electrical Theory. Click here for more info.spaceThis member has been recognized as an authority in Mobile Audio and Video. Click here for more info.spacespace
Joined: April 22, 2003
Location: Arizona, United States
Posted: September 10, 2009 at 3:35 PM / IP Logged  
Nice work, although I would recommend adding at least one brace between the woofers that connects all four enclosure sides.
Support the12volt.com
samuelsteven 
Copper - Posts: 123
Copper spacespace
Joined: April 27, 2003
Posted: September 10, 2009 at 4:09 PM / IP Logged  
So, just like a cross? Whats the best material to use? Ive seen people use the round wooden dowels, like for closets.
DYohn 
Moderator - Posts: 10,741
Moderator spaceThis member has made a donation to the12volt.com. Click here for more info.spaceThis member has been recognized as an authority in Electrical Theory. Click here for more info.spaceThis member has been recognized as an authority in Mobile Audio and Video. Click here for more info.spacespace
Joined: April 22, 2003
Location: Arizona, United States
Posted: September 11, 2009 at 11:20 AM / IP Logged  

samuelsteven wrote:
So, just like a cross? Whats the best material to use? Ive seen people use the round wooden dowels, like for closets.

Large diameter wooden dowels work, I use those a lot.  Or just cut a piece of MDF that fits and remove the center by cutting a hole in it.

Support the12volt.com
Page of 2

  Printable version Printable version Post ReplyPost New Topic
You cannot post new topics in this forum
You cannot reply to topics in this forum
You cannot delete your posts in this forum
You cannot edit your posts in this forum
You cannot create polls in this forum
You cannot vote in polls in this forum

  •  
Search the12volt.com
Follow the12volt.com Follow the12volt.com on Facebook
Thursday, April 18, 2024 • Copyright © 1999-2024 the12volt.com, All Rights Reserved Privacy Policy & Use of Cookies
Disclaimer: *All information on this site ( the12volt.com ) is provided "as is" without any warranty of any kind, either expressed or implied, including but not limited to fitness for a particular use. Any user assumes the entire risk as to the accuracy and use of this information. Please verify all wire colors and diagrams before applying any information.

Secured by Sectigo
the12volt.com spacer
Support the12volt.com
Top
the12volt.com spacer