


2000 Honda CR-V Remote Start Pictorial
Home /
the12volt's Install Bay /
Car Security and Convenience - Alarm/Remote Start Pictorials / 2000 Honda CR-V Remote Start Pictorial ( Topic Closed)


Posted: December 29, 2011 at 9:52 PM / IP Logged
 Remove 3 10mm bolts from metal support bracket (1 on left, 2 on right). Lift bracket and pull away.
 Remove 2 panel clips on driver kick panel cover. Pull panel towards back of vehicle.
Wiring Information:
Ignition wires can be found in 2 small wire looms coming from ignition switch. Constant 12v and Starter are in one loom, Ignition, Accessory, 2nd Accessory are found in the 2nd loom.
Remove 2 panel clips on driver kick panel cover. Pull panel towards back of vehicle.
Wiring Information:
Ignition wires can be found in 2 small wire looms coming from ignition switch. Constant 12v and Starter are in one loom, Ignition, Accessory, 2nd Accessory are found in the 2nd loom.
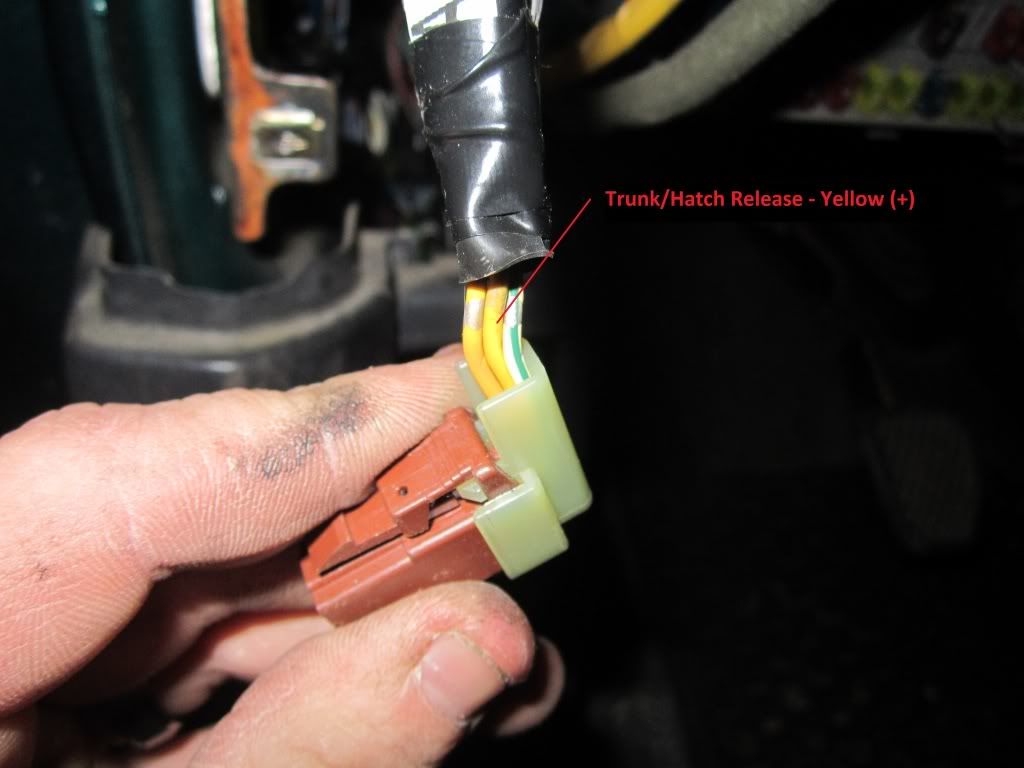
 Trunk/Hatch release wire is found at the release switch on the knee bolster panel.
 Parking brake wire is found in the main harness coming up the driver kick panel.
 Multiple wires found at factory alarm green connector in driver kick panel.
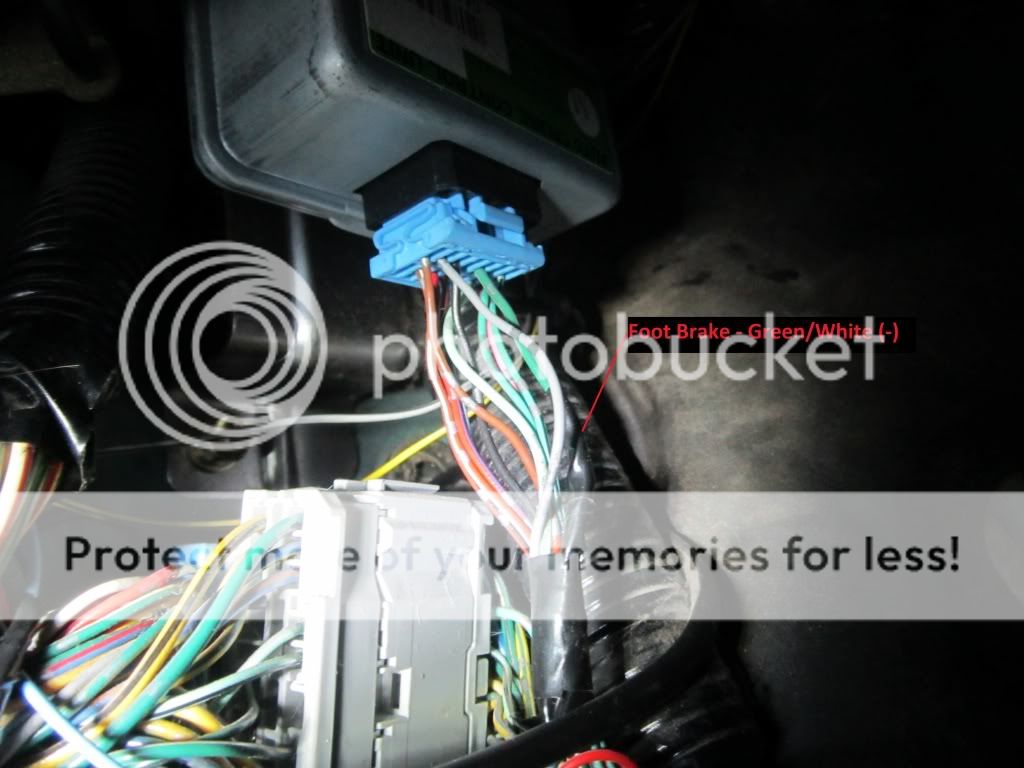
 Brake wire found at cruise control unit in driver kick panel.
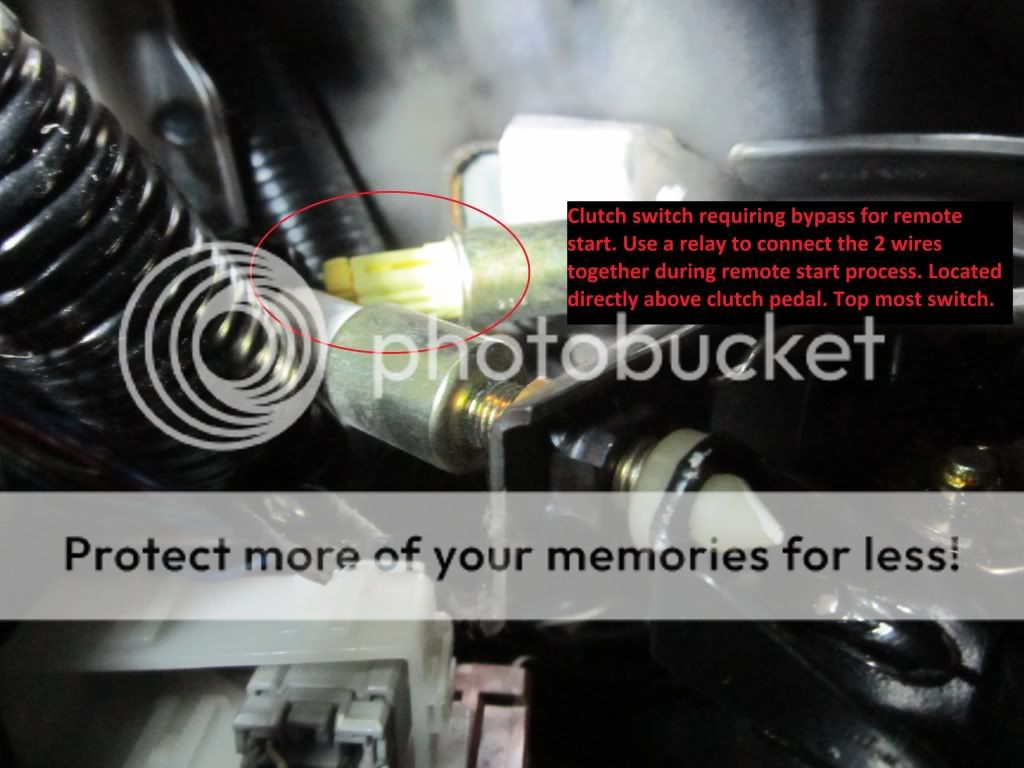
 Clutch switch is located high above the clutch pedal. Will require some contorting and skill with a set of strippers to access and expose wires.
 Tach signal found under hood behind driver side strut tower at test connector. There is a factory rubber boot directly above the driver kick panel that will lead directly to the tach test connector.


Posted: December 29, 2011 at 10:25 PM / IP Logged

Posted: December 29, 2011 at 11:29 PM / IP Logged
Posted: December 30, 2011 at 5:35 AM / IP Logged


Posted: December 30, 2011 at 6:25 AM / IP Logged
 Thanks, Kenny!
Posted: January 17, 2012 at 8:42 AM / IP Logged
Posted: January 17, 2012 at 9:04 AM / IP Logged
Posted: April 05, 2015 at 1:26 AM / IP Logged
Sorry, you can NOT post a reply.
This topic is closed.
 Printable version
| You cannot post new topics in this forum You cannot reply to topics in this forum You cannot delete your posts in this forum You cannot edit your posts in this forum You cannot create polls in this forum You cannot vote in polls in this forum |

| Search the12volt.com |
Follow the12volt.com 
Wednesday, July 16, 2025 • Copyright © 1999-2025 the12volt.com, All Rights Reserved • Privacy Policy & Use of Cookies

Wednesday, July 16, 2025 • Copyright © 1999-2025 the12volt.com, All Rights Reserved • Privacy Policy & Use of Cookies
Disclaimer:
*All information on this site ( the12volt.com ) is provided "as is" without any warranty of any kind, either expressed or implied, including but not limited to fitness for a particular use. Any user assumes the entire risk as to the accuracy and use of this information. Please
verify all wire colors and diagrams before applying any information.
