


2009 Pontiac Vibe Remote Start Pictorial
Home /
the12volt's Install Bay /
Car Security and Convenience - Alarm/Remote Start Pictorials / 2009 Pontiac Vibe Remote Start Pictorial ( Topic Closed)


Posted: January 01, 2012 at 10:43 AM / IP Logged
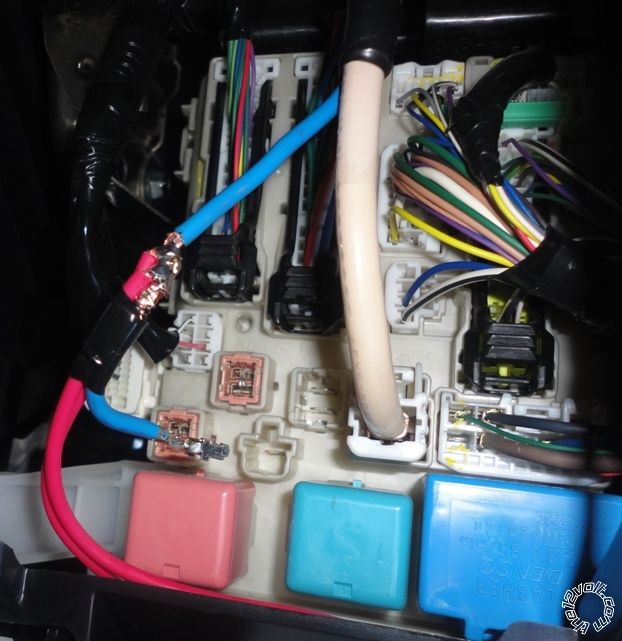 1. This is the first connection (the two +12V power wires from the R/S both soldered to this heavy blue wire (behind the bottom left dash panel)
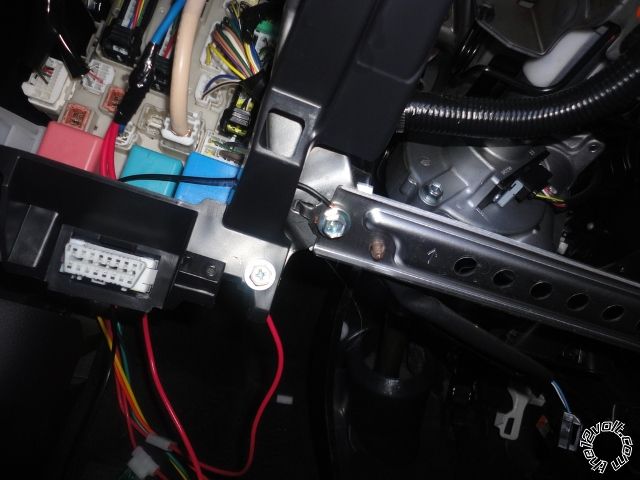 2. Second connection - ground wire from R/S wrapped around this screw.
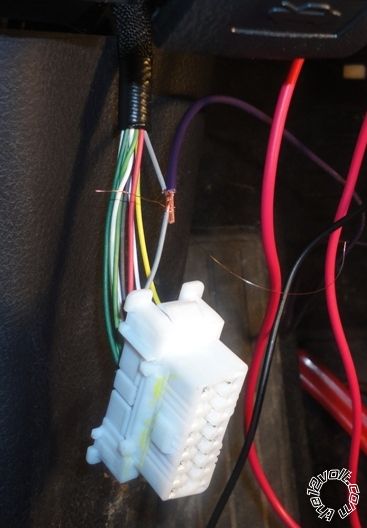
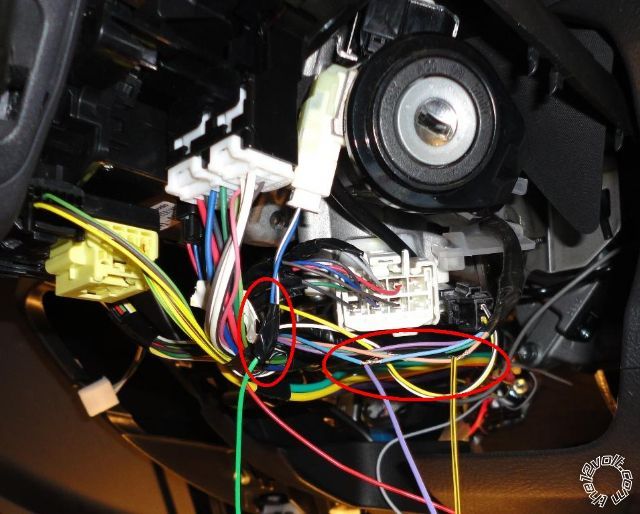
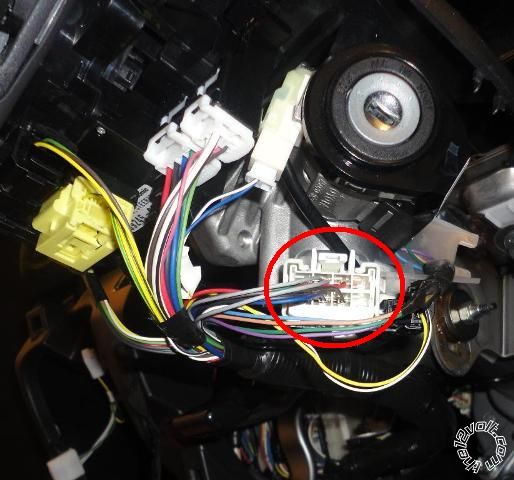 3. Picture of the ignition harness.
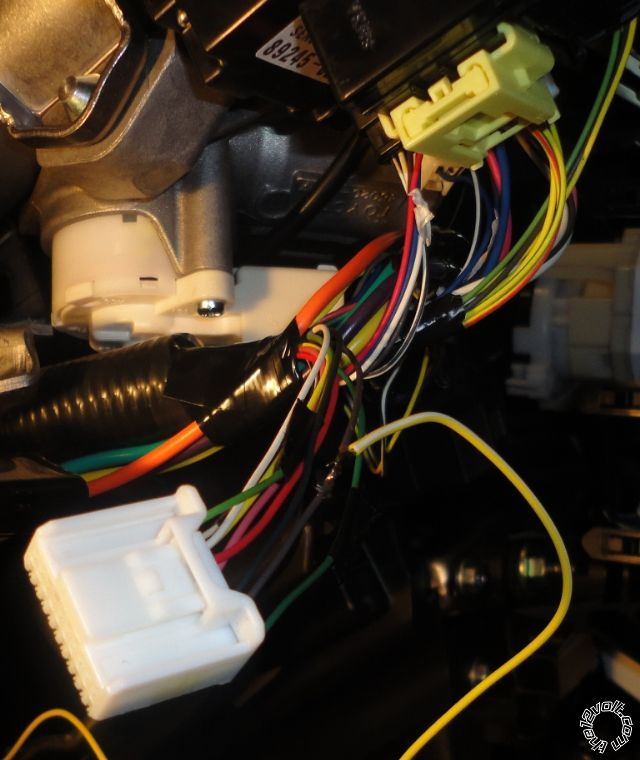
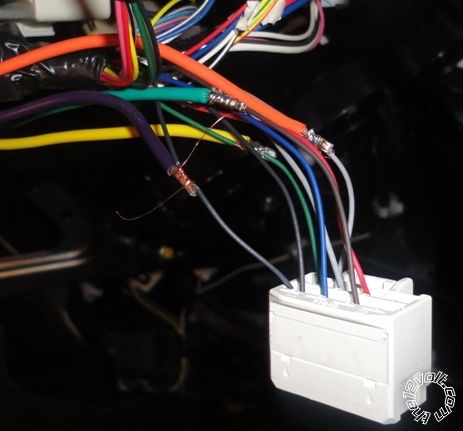 4. Splicing into the ignition harness. Careful here, there's two black starter wires joined together (not two separate wires as some wiring diagrams suggest). Other's match up good.
 5. Brake Wire easy one
 6. Tach Wire to Diagnostic Connector
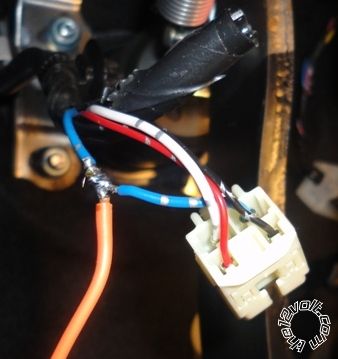
 7. Parking Lights, careful here! Color is not green as seen in some posts. Also this is a low logic level trigger so you have to setup your R/S to do a - pulse here to turn the lights on, not +. I heard if you try to put the +output from the R/S into here it'll fry some of your car's electronics.
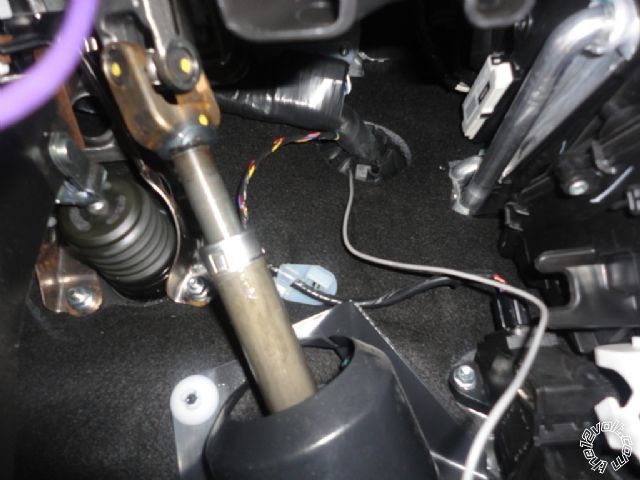
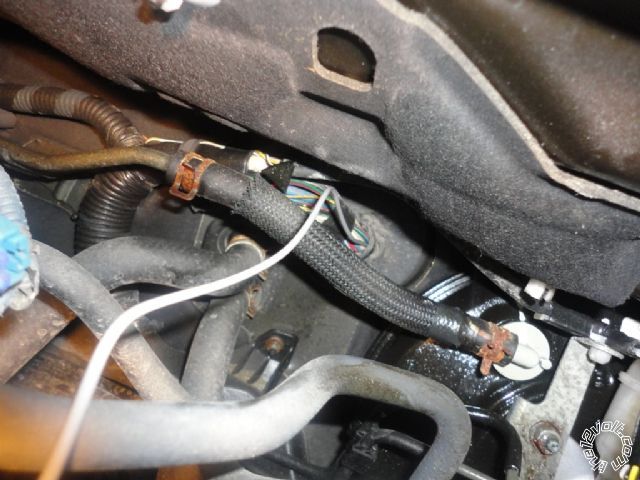 8. Hoodpin switch wire going through firewall. Use a blunt coat hanger to push though from the engine side.
Thats it. After this I programmed the tach level. Then closed the hood. My car has some anti-theft stuff in it so it requires a bypass (which I don't have yet - it's in the mail). So you need the -while running wire from the R/S left hanging for when you get that part. At this point, if the key is in the ignition (off position) the car will start no problem from the remote. If anyone wants, let me know and I'll send/post pics of the PKall bypass install and/or the dash removal.
Thanks,
Richard - Newfoundland
8. Hoodpin switch wire going through firewall. Use a blunt coat hanger to push though from the engine side.
Thats it. After this I programmed the tach level. Then closed the hood. My car has some anti-theft stuff in it so it requires a bypass (which I don't have yet - it's in the mail). So you need the -while running wire from the R/S left hanging for when you get that part. At this point, if the key is in the ignition (off position) the car will start no problem from the remote. If anyone wants, let me know and I'll send/post pics of the PKall bypass install and/or the dash removal.
Thanks,
Richard - Newfoundland
Posted: January 17, 2012 at 9:03 AM / IP Logged
Posted: January 17, 2012 at 10:52 AM / IP Logged


Posted: January 17, 2012 at 9:34 PM / IP Logged
Posted: January 17, 2012 at 11:31 PM / IP Logged
Posted: January 18, 2012 at 5:40 AM / IP Logged
Posted: January 18, 2012 at 5:46 AM / IP Logged
Posted: January 18, 2012 at 8:58 AM / IP Logged
Sorry, you can NOT post a reply.
This topic is closed.
 Printable version
| You cannot post new topics in this forum You cannot reply to topics in this forum You cannot delete your posts in this forum You cannot edit your posts in this forum You cannot create polls in this forum You cannot vote in polls in this forum |

| Search the12volt.com |
Follow the12volt.com 
Monday, May 18, 2026 • Copyright © 1999-2026 the12volt.com, All Rights Reserved • Privacy Policy & Use of Cookies

Monday, May 18, 2026 • Copyright © 1999-2026 the12volt.com, All Rights Reserved • Privacy Policy & Use of Cookies
Disclaimer:
*All information on this site ( the12volt.com ) is provided "as is" without any warranty of any kind, either expressed or implied, including but not limited to fitness for a particular use. Any user assumes the entire risk as to the accuracy and use of this information. Please
verify all wire colors and diagrams before applying any information.
