the12volt.com spacer
icon

final product pics


Post ReplyPost New Topic
< Prev Topic Next Topic >
gta94integra 
Member - Posts: 19
Member spacespace
Joined: September 11, 2003
Location: United States
Posted: October 05, 2003 at 7:28 PM / IP Logged  

After about 5 days of glassing and bondoing and sanding and bondoing and sanding...I painted them with a high gloss white with about 5 coats of clear.  This is the final result...notice the before and after shots.  Everyone tell me what u think...criticisms are welcome, since this is my first project I could use a few pointers on how i could have made it look better...

final product pics -- posted image.

Before

final product pics -- posted image.

After

final product pics -- posted image.

final product pics -- posted image.

ShayneBishop 
Member - Posts: 3
Member spacespace
Joined: October 13, 2003
Location: Cambodia
Posted: October 16, 2003 at 10:44 AM / IP Logged  
That is sweet! great work!
I'm to lazy
xetmes 
Silver - Posts: 586
Silver spacespace
Joined: May 18, 2003
Posted: October 16, 2003 at 11:00 AM / IP Logged  
wow that looks very good from what i can tell, maybe some bigger pics? good work
Velocity Motors 
Moderator - Posts: 12,488
Moderator spaceThis member has made a donation to the12volt.com. Click here for more info.spaceThis member has been recognized as an authority in Electrical Theory. Click here for more info.spaceThis member has been recognized as an authority in Fabrication. Click here for more info.spaceThis member has been recognized as an authority in Mobile Audio and Video. Click here for more info.spaceThis member has been recognized as an authority in Mobile Security and Convenience. Click here for more info.spacespace
Joined: March 08, 2002
Location: Manitoba, Canada
Posted: October 16, 2003 at 2:38 PM / IP Logged  
Looks great. The only thing tath I would have done differently was mount the tweeter an little farther inside the curvature of the panel so it would be comepletely flush with the white portion instead of having the grill thickness show. It cleans up the project and doesn't make it look like the grill is just sitting on top of the fiberglass. Does this make sense ? Other than that....... great job on the project. Start doing more and maybe you can land a job doing this as a living final product pics -- posted image.
Jeff
Velocity Custom Home Theater
Mobile Audio/Video Specialist
Morden, Manitoba CANADA
acornstu 
Member - Posts: 5
Member spacespace
Joined: October 17, 2003
Location: United States
Posted: October 17, 2003 at 9:02 AM / IP Logged  
great job man.   it gave me a few wild ideas of my own
sixxwheels 
Member - Posts: 1
Member spacespace
Joined: October 18, 2003
Location: United States
Posted: October 18, 2003 at 10:11 AM / IP Logged  
Looks good
Meathouse 
Member - Posts: 3
Member spacespace
Joined: October 26, 2003
Location: United States
Posted: October 30, 2003 at 11:14 AM / IP Logged  

Hey, I'm thinking about glossing over the bottom half of the door panels in my 02 corvette convertible, and glossing over the center arm rest plastic and dash, gloss black like the outside of the car.  How can I do this, and what do i have to do to do this?    I know sand first, then what do i do with the fiberglass? can i just bondo it after sanding it?? so i just use resin if i use fiberglass, and what type of resign if so and what type of bondo??

Thanks for the help,

Justin

2002 Black Corvette Convertible
Wherm 
Copper - Posts: 51
Copper spacespace
Joined: August 19, 2003
Location: United States
Posted: December 02, 2003 at 11:01 PM / IP Logged  

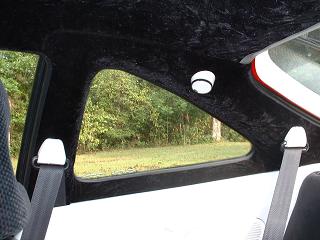
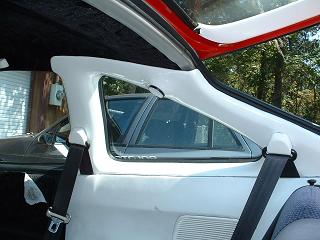
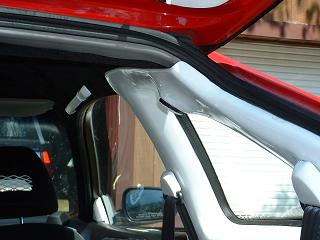
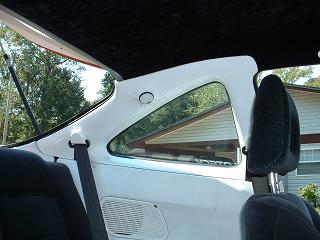
if you want to get that gloss look here is a great way to do it.

Remove the panels from your car and clean them very well.  Next, wipe them down with a wax and grease remover.  Spray the panels with three to four coats of high-build primer.  I use K-36 primer from PPG.  When that's dry, sand it down with 800 grit wetsand paper.  What this initial step does is it starts to smooth out the texture.  The primer gets into the tiny crevasses which make up the texture, and when you sand it you'll see what i mean about how it smoothes out your surface.

Once you're done sanding, clean the panels again and go over them with the wax and grease remover again.  Spray them with two or three more coats and let them dry.  It helps if you spray a fine mist of black spray paint over the pieces called a "guidecoat"  A guidecoat helps you see where you've sanded and where you haven't because you'll sand off the misted drops of black paint.  Anywhere you see guidecoat, you still need to sand.  For this process, continue to use 800 grit wetsand paper.  In this step what you are trying to do is remove the texture completely, yet not sand all the way down to the original panel material although you could always touch it up with a little more primer.

When your panels are smoother than a baby's ass you can prepare to paint them.  Spray two or three coats of your color choice on the panels, or enough to get full coverage and even color.  When that has cured, spray two coats of clearcoat over the paint.  Let that completely harden because if you don't, it'll get messed up.

The next step is up to you.  If you feel you sprayed your paint well enough to satisfy yourself which is possible, go ahead and re-install your panels.  If you want the ultimate shine that show car quality fiberglass installs have, you should wetsand your clearcoat with a 1500 grit wetsand paper.  What you want to do in this step is sand down the clearcoat to eliminate any ripple that you see when light reflects off of the paint surface.  Be careful not to sand through the clearcoat and into the paint.  Sand in one direction only, and try to go the length of the surface.  Once your sanding is complete, use a pneumatic or an electric buffer with a foam pad to begin bringing back your shine.  Your buffer should rotate no faster than 1800 RPM or you could burn through your finish.  For the first time over, use rubbing compound.  For the second time over, use a machine glaze.  Make sure to use the correct foam pad with each compound.  Hand wipe your panel off with some final inspection glaze and a non-abrasive cloth.  Your girl should be able to do her make-up in the reflection cause it's gonna shine nicely.

You should be able to get all the stuff you need at a local autobody supply shop.  PPG and Dupont are two great paints that most autobody supply shops should carry.  Adding a Flexibilizer to the primer wouldn't hurt at all, in fact I'd recommend it.  It helps allow the paint to flex instead of flaking off.  When you do your sanding you should use a foam backing pad (part #E-7200).  This, your sandpaper, and all your buffering compounds are available from Meguiars.  ( www.meguiars.com)

Now that I have carpotunnel in my wrists, hopefully you can get your supplies and make your project look its best.  You could easily do all these steps on a saturday and sunday.  Do everything from the primer to the clearcoat on a saturday.  Let the clearcoat harden over night, and do your sanding and buffering on sunday.  No fiberglass needed!  Just remember it's all in the prep work (priming and sanding) and in how well you lay the paint.  Let me know if you have more questions, or need some advice.

tcvaldez 
Member - Posts: 3
Member spacespace
Joined: December 05, 2003
Location: United States
Posted: December 05, 2003 at 9:57 AM / IP Logged  

I'm brand new to this forum.  Your project looks very nice.

Do you plan on doing everything in the car like that?

Keep postin' the pics with other projects.

tcvaldez 
Member - Posts: 3
Member spacespace
Joined: December 05, 2003
Location: United States
Posted: December 05, 2003 at 9:58 AM / IP Logged  

Those are some good tips.

Here is a project that I did.  It's a start.

final product pics -- posted image.


Sorry, you can NOT post a reply.
This topic is closed.

  Printable version Printable version Post ReplyPost New Topic
You cannot post new topics in this forum
You cannot reply to topics in this forum
You cannot delete your posts in this forum
You cannot edit your posts in this forum
You cannot create polls in this forum
You cannot vote in polls in this forum

  •  
Search the12volt.com
Follow the12volt.com Follow the12volt.com on Facebook
Tuesday, May 7, 2024 • Copyright © 1999-2024 the12volt.com, All Rights Reserved Privacy Policy & Use of Cookies
Disclaimer: *All information on this site ( the12volt.com ) is provided "as is" without any warranty of any kind, either expressed or implied, including but not limited to fitness for a particular use. Any user assumes the entire risk as to the accuracy and use of this information. Please verify all wire colors and diagrams before applying any information.

Secured by Sectigo
the12volt.com spacer
Support the12volt.com
Top
the12volt.com spacer