the12volt.com spacer
icon

2000 Dodge Neon head unit Install


Post ReplyPost New Topic
< Prev Topic Next Topic >
Sweekster 
Silver - Posts: 481
Silver spacespace
Joined: May 13, 2003
Location: United States
Posted: December 22, 2003 at 11:11 AM / IP Logged  
Hello all,
I'm getting ready to do a head unit swap in a 2000 Dodge Neon. What i need is the instructions on how to remove the stock radio. Thanks in advance.
Duane...
If you think you're confused, imagine how you feel.   2000 Dodge Neon head unit Install - Last Post -- posted image.
hobbes6981 
Copper - Posts: 52
Copper spacespace
Joined: May 14, 2003
Location: United States
Posted: December 22, 2003 at 6:04 PM / IP Logged  
Here is a link to some helpful info...although its for a '99. I have a '95 Plymouth, chances are it's the same For a 2000.
'94-99 Dodge/Plymouth Neon Stereo Removal
If the dash and panels look familiar to the pictures in the link, then all you need to do is follow those instructions. First pull down the ash tray and remove the cigarette lighter. When removing the panel, you'll need to put some force into pulling it. Just use your hands, working around the panel and it should come off. I usually use a socket wrench with a metric socket to unscrew the two bolts. Its really very easy. Good luck.
Sweekster 
Silver - Posts: 481
Silver spacespace
Joined: May 13, 2003
Location: United States
Posted: December 22, 2003 at 6:31 PM / IP Logged  
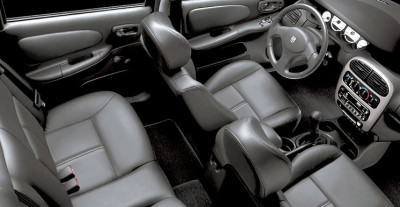
Thanks, but I checked carstereohelp.com already. the dash looks like this:
2000 Dodge Neon head unit Install - Last Post -- posted image.
Anyone done one of these cars yet?
Duane...
If you think you're confused, imagine how you feel.   2000 Dodge Neon head unit Install - Last Post -- posted image.
forbidden 
Platinum - Posts: 5,352
Platinum spaceThis member has made a donation to the12volt.com. Click here for more info.spaceThis member has been recognized as an authority in Mobile Audio and Video. Click here for more info.spacespace
Joined: November 01, 2003
Location: Alberta, Canada
Posted: December 22, 2003 at 7:31 PM / IP Logged  

Most neons are "Lego cars" and they have snap together panels. I can't remember for sure but there may be two screws up above and behind the vents on top. Stick a flashlight down there and have a good look around. I don't think that the neon has these screws but it better to check first. Have a look behind the ash tray as well, some cars have a couple of screws that hang out there. If no screws are present a gentle but quick snapping motion will usually dislodge the panel from the dash. Pull the panel directly towards the back of the vehicle, not forward, up or down.

Top Secret, I can tell you but then my wife will kill me.
jeffchilcott 
Platinum - Posts: 2,483
Platinum spacespace
Joined: April 11, 2002
Location: United States
Posted: December 22, 2003 at 8:27 PM / IP Logged  
if i remeber right the neon is like my festiva,    the front face for all the controls should pop off, then there should be screws or a pin romoval behind that
2009 0-1000 Trunk WR 154.0DB 2009 1001+ Trunk WR
2007 USACI World Champion
2007 World Record
2006 USACI Finals 2nd Place
Fredskmgi 
Member - Posts: 9
Member spacespace
Joined: March 19, 2003
Location: United States
Posted: December 24, 2003 at 10:39 AM / IP Logged  
Go to neons.org and click on the How-to section and It will give you a step by step procedure.
serialthrlla 
Copper - Posts: 57
Copper spacespace
Joined: December 23, 2003
Location: United States
Posted: December 24, 2003 at 6:02 PM / IP Logged  
you pop out the vents above the radio and remove 1 phillips screw in each vent,   pull the knob off the HVAC controls and pop the dash panel off,    four phillips screws hold the radio in
Sweekster 
Silver - Posts: 481
Silver spacespace
Joined: May 13, 2003
Location: United States
Posted: December 29, 2003 at 4:20 PM / IP Logged  
Am man...thanx. I figured is was those 2 screws but I didn't know the right way to get the vents out. so how do you pop the vents out? I was gonna try that at first but I didn't want to break anything in this guys car. But he's bringing it back to me this weekend so I'm to be able to get them out.
Duane...
If you think you're confused, imagine how you feel.   2000 Dodge Neon head unit Install - Last Post -- posted image.
forbidden 
Platinum - Posts: 5,352
Platinum spaceThis member has made a donation to the12volt.com. Click here for more info.spaceThis member has been recognized as an authority in Mobile Audio and Video. Click here for more info.spacespace
Joined: November 01, 2003
Location: Alberta, Canada
Posted: December 29, 2003 at 4:29 PM / IP Logged  
The vents should pop out if you apply gentle pressure on them to the side. Use a pry tool and push the vents to either side by prying in the center between the vent and the center divider, use only gentle pressure and use something that will not scratch the dash. Seems I remembered correct about those screws.
Top Secret, I can tell you but then my wife will kill me.
Sweekster 
Silver - Posts: 481
Silver spacespace
Joined: May 13, 2003
Location: United States
Posted: December 29, 2003 at 4:55 PM / IP Logged  
sounds good to me...thanx guys...
Duane...
If you think you're confused, imagine how you feel.   2000 Dodge Neon head unit Install - Last Post -- posted image.

Sorry, you can NOT post a reply.
This topic is closed.

  Printable version Printable version Post ReplyPost New Topic
You cannot post new topics in this forum
You cannot reply to topics in this forum
You cannot delete your posts in this forum
You cannot edit your posts in this forum
You cannot create polls in this forum
You cannot vote in polls in this forum

  •  
Search the12volt.com
Follow the12volt.com Follow the12volt.com on Facebook
Friday, May 3, 2024 • Copyright © 1999-2024 the12volt.com, All Rights Reserved Privacy Policy & Use of Cookies
Disclaimer: *All information on this site ( the12volt.com ) is provided "as is" without any warranty of any kind, either expressed or implied, including but not limited to fitness for a particular use. Any user assumes the entire risk as to the accuracy and use of this information. Please verify all wire colors and diagrams before applying any information.

Secured by Sectigo
the12volt.com spacer
Support the12volt.com
Top
the12volt.com spacer