the12volt.com spacer
icon

Fabrication dilemma


Post ReplyPost New Topic
< Prev Topic Next Topic >
cubanaffection 
Member - Posts: 2
Member spacespace
Joined: September 19, 2006
Posted: September 19, 2006 at 3:19 PM / IP Logged  
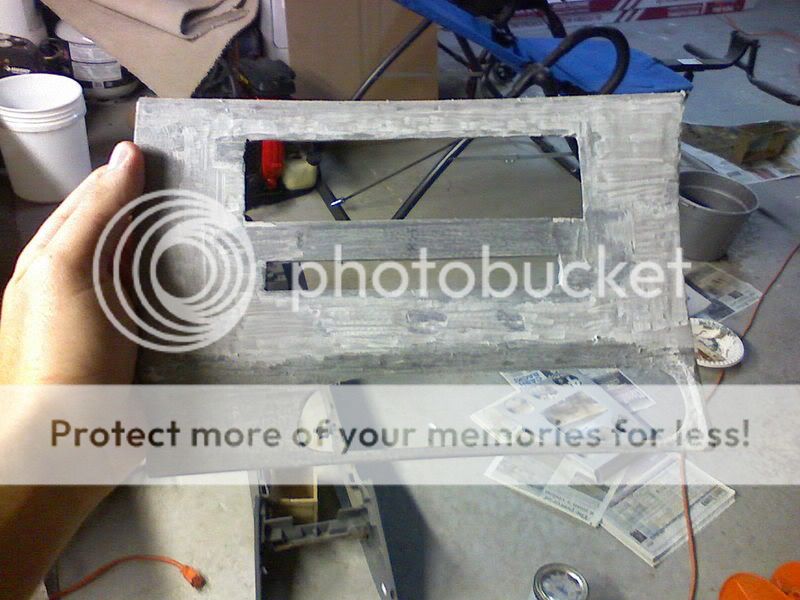
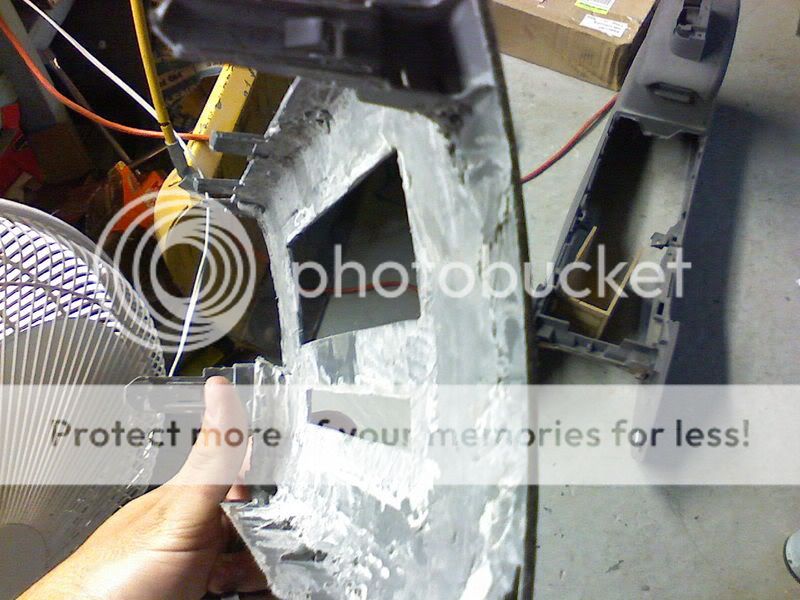
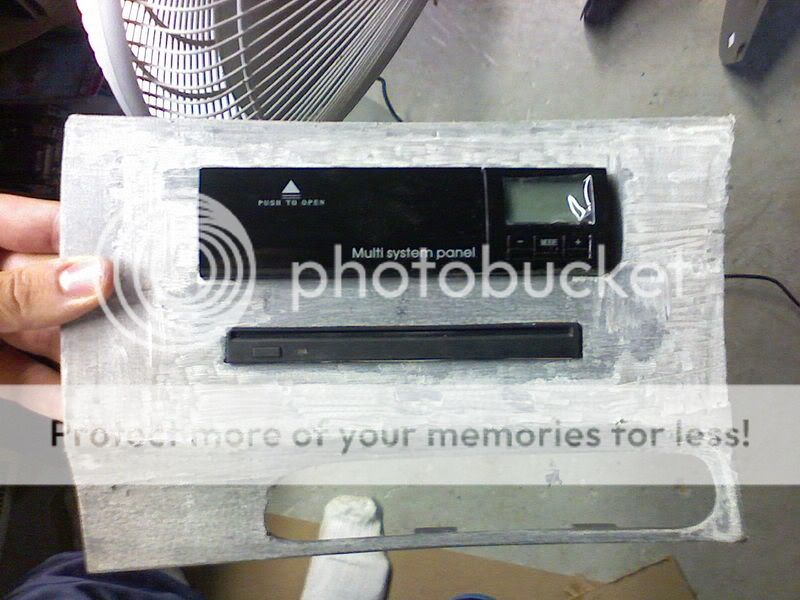
So me and my friend are kinda stuck on what to do with this piece and how to make it look good. Here's our dilemna, pictures:
Fabrication dilemma -- posted image.
Now the holes for the drives aren't perfect by any means. There's a few gaps here and there but they do manage to hold up the drives without any help. Does anyone know how could I get this to sit correctly/fil in the gaps without messing up either of the drives?
Kind of stomped here :(
cubanaffection 
Member - Posts: 2
Member spacespace
Joined: September 19, 2006
Posted: September 19, 2006 at 3:22 PM / IP Logged  
Oh by the way, this is for a 2003 Mazda6. Any advice on how I finish this panel is greatly appreciated.
austincustoms 
Copper - Posts: 232
Copper spacespace
Joined: November 15, 2005
Location: United States
Posted: September 19, 2006 at 7:39 PM / IP Logged  
It doesn't look like you've bondo'd it yet.  Mix body filler and fiberglass resin until it's runny (you can play with different consistencies) and double the cream hardener.  That should be enough to fill those gaps.  If not, use kitty hair first.
stang351w 
Silver - Posts: 350
Silver spacespace
Joined: August 20, 2003
Location: Canada
Posted: September 19, 2006 at 7:51 PM / IP Logged  
once ya bondo it, sand it nice and smooth then decide if you'd like to paint it or give it a textured look
Tri County KustomZ
certified installer
maglin 
Copper - Posts: 206
Copper spacespace
Joined: June 30, 2004
Location: United States
Posted: September 19, 2006 at 11:26 PM / IP Logged  
i'm surprised you didn't build a little shelf for the devices to sit on... a couple bumps and they'd be crooked.   i'd glass a peice in to bolt the device to, one, and two, hold it stead. in the process of making a shelf (think radio install kit) you could smooth out those edges.
wrap sandpaper around a block of wood, sand flat with that. corners press the block into, creating a 90 degree angle.
i'm also surprised you're not make the face of the drive flush with the panel... that cd player's face can come off... if you're feelin brave, you could take it off, glass it directly in, and paint it to match, then when all dry, press the deck back into it, snapping it in place.
just some thoughts.
bellsracer 
Silver - Posts: 703
Silver spacespace
Joined: January 14, 2006
Location: United States
Posted: September 20, 2006 at 2:10 AM / IP Logged  

Get some bracing on the back of the unit to better hold components in place better. To create a trick ring, cut a piece of MDF to the same sizes as the components. Cover them with masking tape. 1 layer all the way around on all sides of the boards. Don't let the tape overlap.

Coat them with mold release or you can use car wax. Mount them in place but have them stick out an 1/8" further than the components.

Duraglass (reinforced bondo) the panel to the wood up to the face edge. Let that cure and harden. Lightly sand the surface of the duraglass to remove the wax that comes up during curing. (TIP: For best results sand with 120 grit and make the base of the duraglass even distance around the component.) Now slide the wood back 1/8". This may require you to wiggle the board a little before it comes loose to let it slide back. Secure it in it's new position.

Take a flat board larger than the size of the hole and cover one side with sand paper (150 grit). Sand the trim ring until you are flush with the wood.

You just made yourself a F/G trim ring. Bondo it to smooth it out and get it ready for paint. (primer sanding etc) If you are planning on skinning it with vinyl or whatever, you are ready after bondoing it smooth.

Paint to your desired look. (If prepped for paint)

Good Luck!

Never send your ducks to eagle school.
The difference between ordinary and extraordinary is that little extra.
The 3Ls of life: Learn from the Past, Live for the Present, Look to the Future.
Melted Fabric 
Silver - Posts: 509
Silver spacespace
Joined: October 24, 2003
Location: California, United States
Posted: September 20, 2006 at 10:37 AM / IP Logged  
ditto everything before this reply
I think a texture coating would look nice in that mazda, that or a vinyl or suede wrap.
You be the judgeFabrication dilemma -- posted image.
I have not failed. I've just found 10,000 ways that won't work.
When you do not know what you are doing and what you are doing is the best -- that is inspiration.

Sorry, you can NOT post a reply.
This topic is closed.

  Printable version Printable version Post ReplyPost New Topic
You cannot post new topics in this forum
You cannot reply to topics in this forum
You cannot delete your posts in this forum
You cannot edit your posts in this forum
You cannot create polls in this forum
You cannot vote in polls in this forum

  •  
Search the12volt.com
Follow the12volt.com Follow the12volt.com on Facebook
Friday, May 3, 2024 • Copyright © 1999-2024 the12volt.com, All Rights Reserved Privacy Policy & Use of Cookies
Disclaimer: *All information on this site ( the12volt.com ) is provided "as is" without any warranty of any kind, either expressed or implied, including but not limited to fitness for a particular use. Any user assumes the entire risk as to the accuracy and use of this information. Please verify all wire colors and diagrams before applying any information.

Secured by Sectigo
the12volt.com spacer
Support the12volt.com
Top
the12volt.com spacer