the12volt.com spacer
icon

love your dashboard speakermaker


Post ReplyPost New Topic
< Prev Topic Next Topic >
puttster 
Member - Posts: 24
Member spacespace
Joined: August 21, 2006
Posted: May 30, 2007 at 8:18 PM / IP Logged  
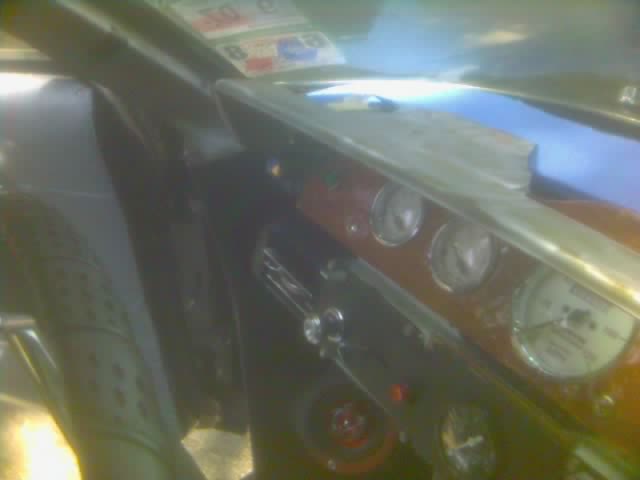
I would like your advice on how to build a dashboard like the one you did.  i have a 1965 Galaxie.  The passenger-side dash is a poured foam covered with vinyl , the vinyl having some pretty good cracks in it.   What I did was rebuilt a bigger instrument panel so the dash pad that hooded the old instruments does not fit any more.  

My question is what is a good way to build a new dash to cover the instrument panel?  There are two steel prongs that stick out from the dash frame.  These were used to support the old hood, so I tried a chicken wire frame but no success.  Is there some kind of clay, or material with enough bend to it I can mould it like yours?  Then I could cover the whole thing in glass or maybe stretchy vinyl. 

I am addressing question this to speakermaker because i have seen his work but man, I am a rookie and will take ideas from anyone!  I do not mind if the finished product is rough because it is just for me, my needs are 1.) not complicated to do, 2.)  "okay-looking," and 3.) able to stand up to the Texas sun.

puttster 
Member - Posts: 24
Member spacespace
Joined: August 21, 2006
Posted: June 02, 2007 at 7:58 PM / IP Logged  

Here's what I'm talkin about  https://www.the12volt.com/installbay/forum_posts.asp~TID~89960~PN~3  I am looking for some advice on materials.. 

Also, how can you get a dashboard  to stay fastened?  Do you have to drill holes, and somehow hide the screws?  How do you keep it from cracking around the screw?   Will velcro work instead?

speakermakers 
Copper - Posts: 231
Copper spacespace
Joined: January 02, 2003
Location: United States
Posted: June 05, 2007 at 2:17 AM / IP Logged  
Are you ready to commit to a project like that? The dash in that thread was held in place with all of the factory screws. I suggest a combination of ¼” and ½” Marine grade plywood construction. Check out your local hardwood shops. Go to your local upholstery shop and get 10 pieces of chip board (thin cardboard material about 75 cents ea.). Use this to lay out your design. Then copy onto the more expensive plywood and glue together with hobby grade supper glue (find it in big bottles at your local hobby shop). Finally stretch grill cloth over the entire project and coat with resin. Don’t use fleece! Fleece will soak up too much resin that will shrink and cause you headaches after it sits in the sun. Cut long 2” wide strips of fiberglass chop mat and tear (not cut) into 2” squares. Apply the 2” squares of matt over the entire surface and wet tout with resin. Don’t use any more resin than you have to. Grind or sand off high spots when hardened. Spread on thin layer of short strand fiberglass body filler. Grind down high spots. Paint on thin layer of body filler/resin mix. Sand down within 20 minutes of application. Don’t do more than 1.5-2 square feet at one time. Use long block to flatten large areas. Use Easy Sand (Evercoat product available at your local automotive paint store) to fill in imperfections. Spray down with Duplicolor high build filler primer (or 5 star acrylic lacquer high build primer if you have a paint gun and want to hall butt). Sand with fine and then super fine 3M sponge sanders. Coat with Duplicolor sealer primer. Don’t sand on this primer! Paint with duplicolor acrylic enamel paint. Clear coat with transtar doorjamb clear coat.this stuff goes on a mile thick and looks great!. If you don’t want to tackle the paint your self and you take your dash to a paint shop don’t primer it your self. The primers that I suggest are awesome for solvent based paints but will not be compatible with the paints that a professional paint shop will use.
puttster 
Member - Posts: 24
Member spacespace
Joined: August 21, 2006
Posted: June 10, 2007 at 3:38 PM / IP Logged  

Thanks, that was just the info I was looking for for the top and the finish of the dash.  If this pic comes through you  all will see I salvaged the metal frame from the old dash pod and cut to up some and set it up sort of where it was.  Using Speaketmakers advice I will add plywood and glass along the top from near the winshield (where I have the blue closed cell foam glued to the dash)  to the edge of the metal frame. 

Now, I have one of those plastic "dash tops" that does not fit well but it does have a pretty good rounded edge, one that matches the passendger side dash edge.  So what I want to do is cut off most of the plastic leaving a couple of inches back from the edge and place it on the frame and continue the glass over it and around it.  Is this an okay plan, will the glass stick to the plastic?

If I can get some ideas at to how to finish the bottom that woudl be great., but first things first i guess 

love your dashboard speakermaker - Last Post -- posted image.

speakermakers 
Copper - Posts: 231
Copper spacespace
Joined: January 02, 2003
Location: United States
Posted: June 10, 2007 at 11:41 PM / IP Logged  
Find out what type of plastic the top is made out of. If it is ABS you will have no problems glassing to it. Using it sounds like a good idea.

Sorry, you can NOT post a reply.
This topic is closed.

  Printable version Printable version Post ReplyPost New Topic
You cannot post new topics in this forum
You cannot reply to topics in this forum
You cannot delete your posts in this forum
You cannot edit your posts in this forum
You cannot create polls in this forum
You cannot vote in polls in this forum

  •  
Search the12volt.com
Follow the12volt.com Follow the12volt.com on Facebook
Monday, April 29, 2024 • Copyright © 1999-2024 the12volt.com, All Rights Reserved Privacy Policy & Use of Cookies
Disclaimer: *All information on this site ( the12volt.com ) is provided "as is" without any warranty of any kind, either expressed or implied, including but not limited to fitness for a particular use. Any user assumes the entire risk as to the accuracy and use of this information. Please verify all wire colors and diagrams before applying any information.

Secured by Sectigo
the12volt.com spacer
Support the12volt.com
Top
the12volt.com spacer