the12volt.com spacer
icon

1995 Buick Century Radio Removal


Post ReplyPost New Topic
< Prev Topic Next Topic >
galane 
Member - Posts: 4
Member spacespace
Joined: January 27, 2012
Location: Idaho, United States
Posted: January 27, 2012 at 9:31 PM / IP Logged  
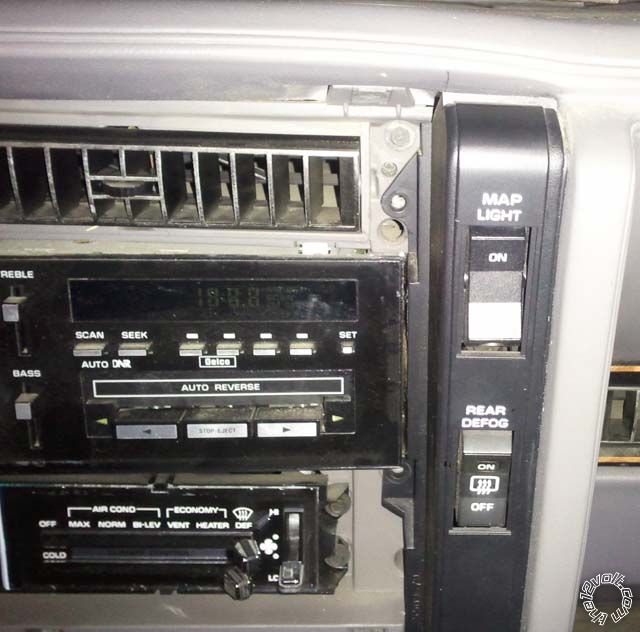
The map light and defog panel on my 1995 Buick Century has put a halt to what should have been a 15 minute job of installing a new radio.
There are three screws securing that panel. One underneath is removed while taking off the lower dash panel and the other two (one above and one below) are revealed when the instrument panel cover is off.
The problem is this panel covers the right side radio mounting screws and I cannot figure out how to remove it. It can slide up and down a little but it has resisted all efforts to pull it off.
Since GM never changed the Century dash from 1982 through 1996, I assume this panel is the same all those years. 1995 Buick Century Radio Removal -- posted image.
soundnsecurity 
Gold - Posts: 2,711
Gold spaceThis member has made a donation to the12volt.com. Click here for more info.spacespace
Joined: November 10, 2008
Location: Louisiana, United States
Posted: January 28, 2012 at 11:11 AM / IP Logged  
are you sure that you aren't trying to take apart more than you need to? i think that radio unbolts from underneath. you might have to loosen up the ac controls but dont pull them completely out because it will probably break being so old. if im right then there is 2 10mm nuts on the bottom of the radio and once those are loose the radio should slide out. i dont see any reason for why they would put a non removable panel on top of the radio mounts unless someone took it apart before and put it back together wrong.
sparkie 
Platinum - Posts: 2,061
Platinum spacespace
Joined: November 06, 2003
Location: Canada
Posted: January 28, 2012 at 2:53 PM / IP Logged  
Black trim that surrounds the 2 switches on the right of the radio is held in place by 3 screws. YYour picture shows that 2 are removed and the third is on the bottom of the trim panel. Nothing else holds the panel in place. If it has never been off, then it is likely just sticking to the dash on the right side. Try sliding a thin plastic trim tool down the right side of the panel where it meets the dash pad. Pull hard. It will come off. Once it's off you can remove the final 2 screws holding the right hand radio mounting bracket.
sparky
galane 
Member - Posts: 4
Member spacespace
Joined: January 27, 2012
Location: Idaho, United States
Posted: January 28, 2012 at 8:21 PM / IP Logged  
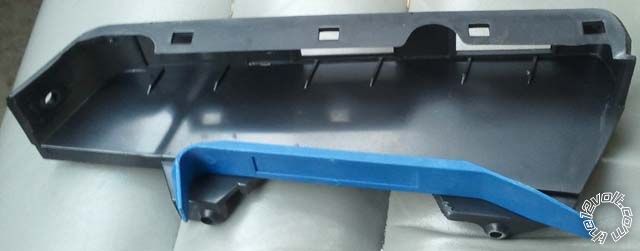
1. Get plastic trim tool with a sturdy hook on one end.
2. Get it in between the panel and the dash at the top.
3. Pull.
4. Pull harder.
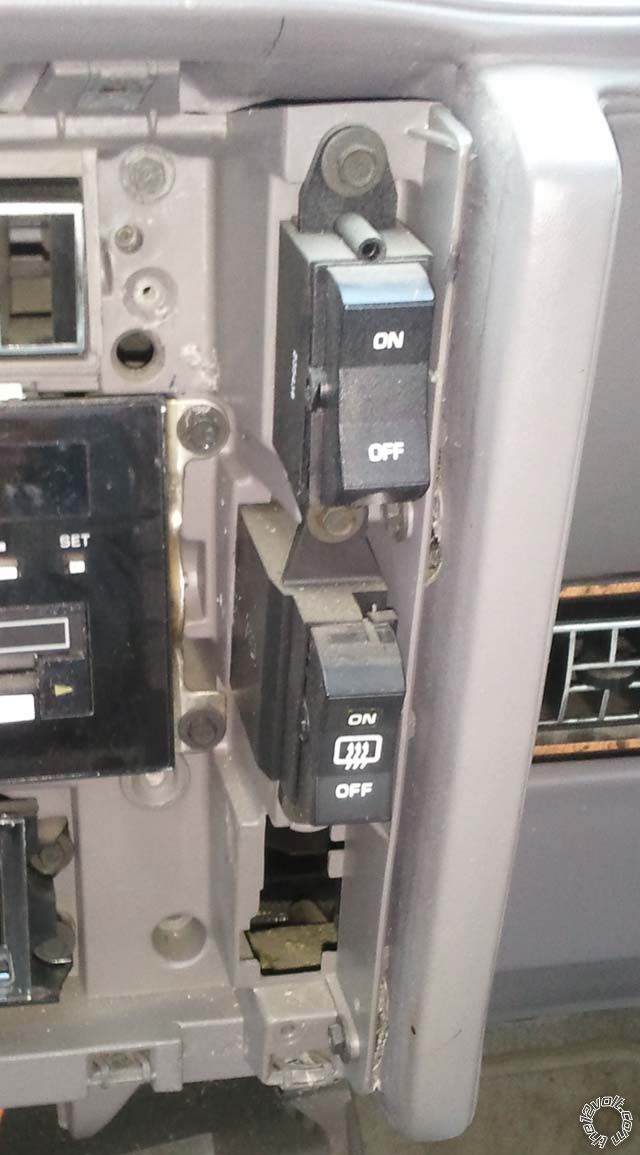
5. Pull even harder and just when you think it's going to break it pops off. 1995 Buick Century Radio Removal -- posted image.
1995 Buick Century Radio Removal -- posted image.
galane 
Member - Posts: 4
Member spacespace
Joined: January 27, 2012
Location: Idaho, United States
Posted: January 28, 2012 at 8:24 PM / IP Logged  
Now contemplating replacing the bulb in the map light with some 5mm white LEDs to make it bright enough to be useful.

Sorry, you can NOT post a reply.
This topic is closed.

  Printable version Printable version Post ReplyPost New Topic
You cannot post new topics in this forum
You cannot reply to topics in this forum
You cannot delete your posts in this forum
You cannot edit your posts in this forum
You cannot create polls in this forum
You cannot vote in polls in this forum

  •  
Search the12volt.com
Follow the12volt.com Follow the12volt.com on Facebook
Tuesday, June 11, 2024 • Copyright © 1999-2024 the12volt.com, All Rights Reserved Privacy Policy & Use of Cookies
Disclaimer: *All information on this site ( the12volt.com ) is provided "as is" without any warranty of any kind, either expressed or implied, including but not limited to fitness for a particular use. Any user assumes the entire risk as to the accuracy and use of this information. Please verify all wire colors and diagrams before applying any information.

Secured by Sectigo
the12volt.com spacer
Support the12volt.com
Top
the12volt.com spacer