the12volt.com spacer
icon

98 xcab tacoma, door baffles


Post ReplyPost New Topic
< Prev Topic Next Topic >
edhu 
Member - Posts: 2
Member spacespace
Joined: June 14, 2005
Location: United States
Posted: June 14, 2005 at 11:00 PM / IP Logged  
i am working on my first stereo upgrade in a 98 xcab tacoma. i have made a baffle for a MB Quart component speaker set that i had from awhile ago.
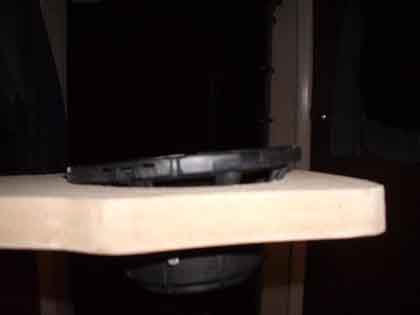
my problem is that the window guide rail is in the way so i have to put the speaker on a slant on top of the baffle i made from 3/4" mdf. how do i fill in that area where the speaker is not flush with the baffle?
98 xcab tacoma, door baffles -- posted image.
phatx96xaccord 
Copper - Posts: 118
Copper spacespace
Joined: August 31, 2004
Location: United States
Posted: June 15, 2005 at 12:25 AM / IP Logged  
you can make a shim to fit snug under the speaker, or u can try using a dowel rod.(trimmed down)  shouldnt be too hard to make a good shim.
would u like your chicken original or extra crispy?
abovestock 
Copper - Posts: 247
Copper spacespace
Joined: June 08, 2005
Location: United States
Posted: June 15, 2005 at 12:49 AM / IP Logged  
Use a speaker thrim ring for the speaker to fit into then fiberglass it smooth
hbk00 
Copper - Posts: 64
Copper spacespace
Joined: November 11, 2003
Location: United States
Posted: June 15, 2005 at 5:40 PM / IP Logged  
yeah like the other guys said, cut out a ring and use a dowel to hold it at the angle you want glue it and fleece it. May I also suggest kicking up the angle a bit, itll look better and your imaging will be better, thus your ears will thank you!98 xcab tacoma, door baffles -- posted image.
go custom or go home!!
edhu 
Member - Posts: 2
Member spacespace
Joined: June 14, 2005
Location: United States
Posted: June 15, 2005 at 6:58 PM / IP Logged  
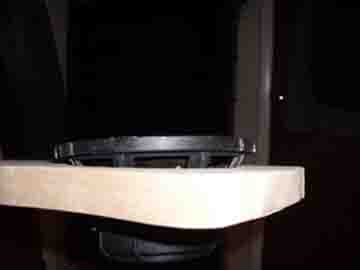
ok here is what i have done so far.
i taped off the speaker and was just going to keep that position of the speaker and fiberglass it in place.
but then i tried the shim idea with my dodgy tools i have.
is this going to work?
and i also don't know how i'm going to mount my tweeter as there is just a screw in the back and no mounting holes on the face of the speaker.
how does everyone make it look so easy. granted this is my first try at this but still...
98 xcab tacoma, door baffles -- posted image.
j68rh 
Copper - Posts: 147
Copper spacespace
Joined: March 31, 2005
Location: United States
Posted: June 19, 2005 at 5:06 PM / IP Logged  
it takes practice.  you are on the right track but the covering of the ring for the speaker is a little wrong.  un wrap it and wrap the ring and the shim together and glue the fleece to the MDF you cut out for the door.  then resin it and then glass it then use gold max or bondo smooth and and your golden.  and with the tweeter.  you can do the same thing you did for the speaker with the ring and then use dowel rods to angle it and cover it and glass it.  or if you just want the easy way out black and decker make drill bits that are like circle saws and makes a perfect circle at the right diameter you need for the tweeter keep us posted on your progress.  A little hint look through the forum for advice and pictures on how others did there work.
j68rh 
Copper - Posts: 147
Copper spacespace
Joined: March 31, 2005
Location: United States
Posted: June 25, 2005 at 12:56 PM / IP Logged  
Hey I was wondering how your project is coming along post some pictures.

Sorry, you can NOT post a reply.
This topic is closed.

  Printable version Printable version Post ReplyPost New Topic
You cannot post new topics in this forum
You cannot reply to topics in this forum
You cannot delete your posts in this forum
You cannot edit your posts in this forum
You cannot create polls in this forum
You cannot vote in polls in this forum

  •  
Search the12volt.com
Follow the12volt.com Follow the12volt.com on Facebook
Sunday, April 28, 2024 • Copyright © 1999-2024 the12volt.com, All Rights Reserved Privacy Policy & Use of Cookies
Disclaimer: *All information on this site ( the12volt.com ) is provided "as is" without any warranty of any kind, either expressed or implied, including but not limited to fitness for a particular use. Any user assumes the entire risk as to the accuracy and use of this information. Please verify all wire colors and diagrams before applying any information.

Secured by Sectigo
the12volt.com spacer
Support the12volt.com
Top
the12volt.com spacer