the12volt.com spacer
icon

carpeting my box


Post ReplyPost New Topic
< Prev Topic Next Topic >
AJRXtreme 
Silver - Posts: 302
Silver spacespace
Joined: June 08, 2004
Location: United States
Posted: February 05, 2005 at 3:32 PM / IP Logged  
Ok i built my box for one 10 inch sub last night and everything is sealed perfectly. I just bought black carpet material to cover the box. I have adhesive spray also. All i need is a tutorial on how to cover the box nice and tight. If anyone can help me with some pointers it would be greatly appreciated. Thankyou
03 F150 on 24's
HU:Pioneer DVD5700
Frt:MC57
Subs:(12)S12L7
Amps:(3)KX2500.1's, MC-2004
godd dan it 
Copper - Posts: 446
Copper spacespace
Joined: July 01, 2004
Location: New Jersey, United States
Posted: February 06, 2005 at 12:29 AM / IP Logged  
I dont have any how to's. But heres a tip. Most people cut the carpet into pieces and blend them nicely together. If you do it right......you wont see any lines.
wheelerdr 
Copper - Posts: 337
Copper spacespace
Joined: October 25, 2004
Location: Louisiana, United States
Posted: February 06, 2005 at 6:10 AM / IP Logged  
i like to cut mine up in sections to , ensure you keep it nice and tigh, you can go to local hardware store and get a carpet tractor bor about 15.00. run this over your seems and it will blend it in very nicley
customsuburb 
Gold - Posts: 1,813
Gold spacespace
Joined: January 17, 2004
Location: United States
Posted: February 06, 2005 at 10:11 AM / IP Logged  

Someone on the sounddomain forum made a nice tutorial on how to carpet boxes. http://forum.sounddomain.com/forum/ultimatebb.cgi?ubb=get_topic;f=11;t=070780

stevdart 
Platinum - Posts: 5,816
Platinum spaceThis member has made a donation to the12volt.com. Click here for more info.spaceThis member has been recognized as an authority in Mobile Audio and Video. Click here for more info.spaceThis member consistently provides reliable informationspace
Joined: January 24, 2004
Location: Pennsylvania, United States
Posted: February 06, 2005 at 11:15 AM / IP Logged  

"Now...overlap the carpet as seen in the picture. Take a straight edge and place on top of the overlapping carpet. Slice the carpet with the razor blade to cut...using the straight edge as a perfect guide. Put a lot of pressure...enough to slice through 2 pieces of carpet. Don't hurt yourself. Now tear off the excess carpet. Unfold the overlaping carpet and remove the bottompiece that's been sliced. You now have a perfectly straight cut carpet. Re-apply adhessive if necessary and place the carpet lines next to each other. The carpet should line up pefectly. Use your fingers to rub on the carpet line. There...you can hardly see the line. As demonstrated, the important idea behind carpeting is to overlap and cut."  from link above

This procedure is what will make or break a carpet job.  It's called double-cutting, a technique used in hanging wallpaper for many years.  Be careful to not get glue onto the finished outside surfaces of the carpet.

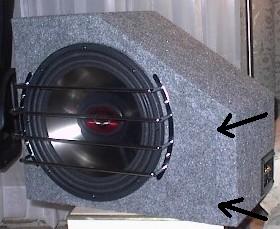
Some carpet material that you can get has no apparent front or back.  If that is the type you have, be careful to always use the same side of the roll facing outwards, as a small difference will show.  In this pic, a box I carpeted came out showing a shade difference because I got confused about which side of the carpet was facing out:

carpeting my box -- posted image.

(But it does demonstrate double-cutting because you can see the seam.)  The outer sides of the box were applied and wrapped partly onto the front and back sides.  Cut the corners to wrap, then double cut.  Cut out carpet to fit the front (or back) slightly smaller than actual size.  Glue on, and double cut overlap.

You have to plan and be precise with your timing when glueing and double cutting.  You want to leave the area where the double cutting will take place free of glue until you have the carpet secured (an idea is to put a length of masking tape along the proposed seam line, then spray glue the bulk of the material).  Lay the edges down, cut through both layers using a razor blade and straight edge, lift out the bottom cut piece and take away the top cut piece.  The carpet will seam together perfectly.  Now is when you glue the seam.  I use seam sealer glue for that as you can't control spray glue in a tight spot like this.  If you used the masking tape underneath, this is when you peel it off.  You can use most types of clear-drying glue and a small brush for the seam work.

Otherwise, http://www.bcae1.com/carpetenclosure.htm is a good tutorial and shows a method of hiding carpet edges by using double baffles on the sides.

Build the box so that it performs well in the worst case scenario and, in return, it will reward you at all times.

Sorry, you can NOT post a reply.
This topic is closed.

  Printable version Printable version Post ReplyPost New Topic
You cannot post new topics in this forum
You cannot reply to topics in this forum
You cannot delete your posts in this forum
You cannot edit your posts in this forum
You cannot create polls in this forum
You cannot vote in polls in this forum

  •  
Search the12volt.com
Follow the12volt.com Follow the12volt.com on Facebook
Thursday, May 2, 2024 • Copyright © 1999-2024 the12volt.com, All Rights Reserved Privacy Policy & Use of Cookies
Disclaimer: *All information on this site ( the12volt.com ) is provided "as is" without any warranty of any kind, either expressed or implied, including but not limited to fitness for a particular use. Any user assumes the entire risk as to the accuracy and use of this information. Please verify all wire colors and diagrams before applying any information.

Secured by Sectigo
the12volt.com spacer
Support the12volt.com
Top
the12volt.com spacer