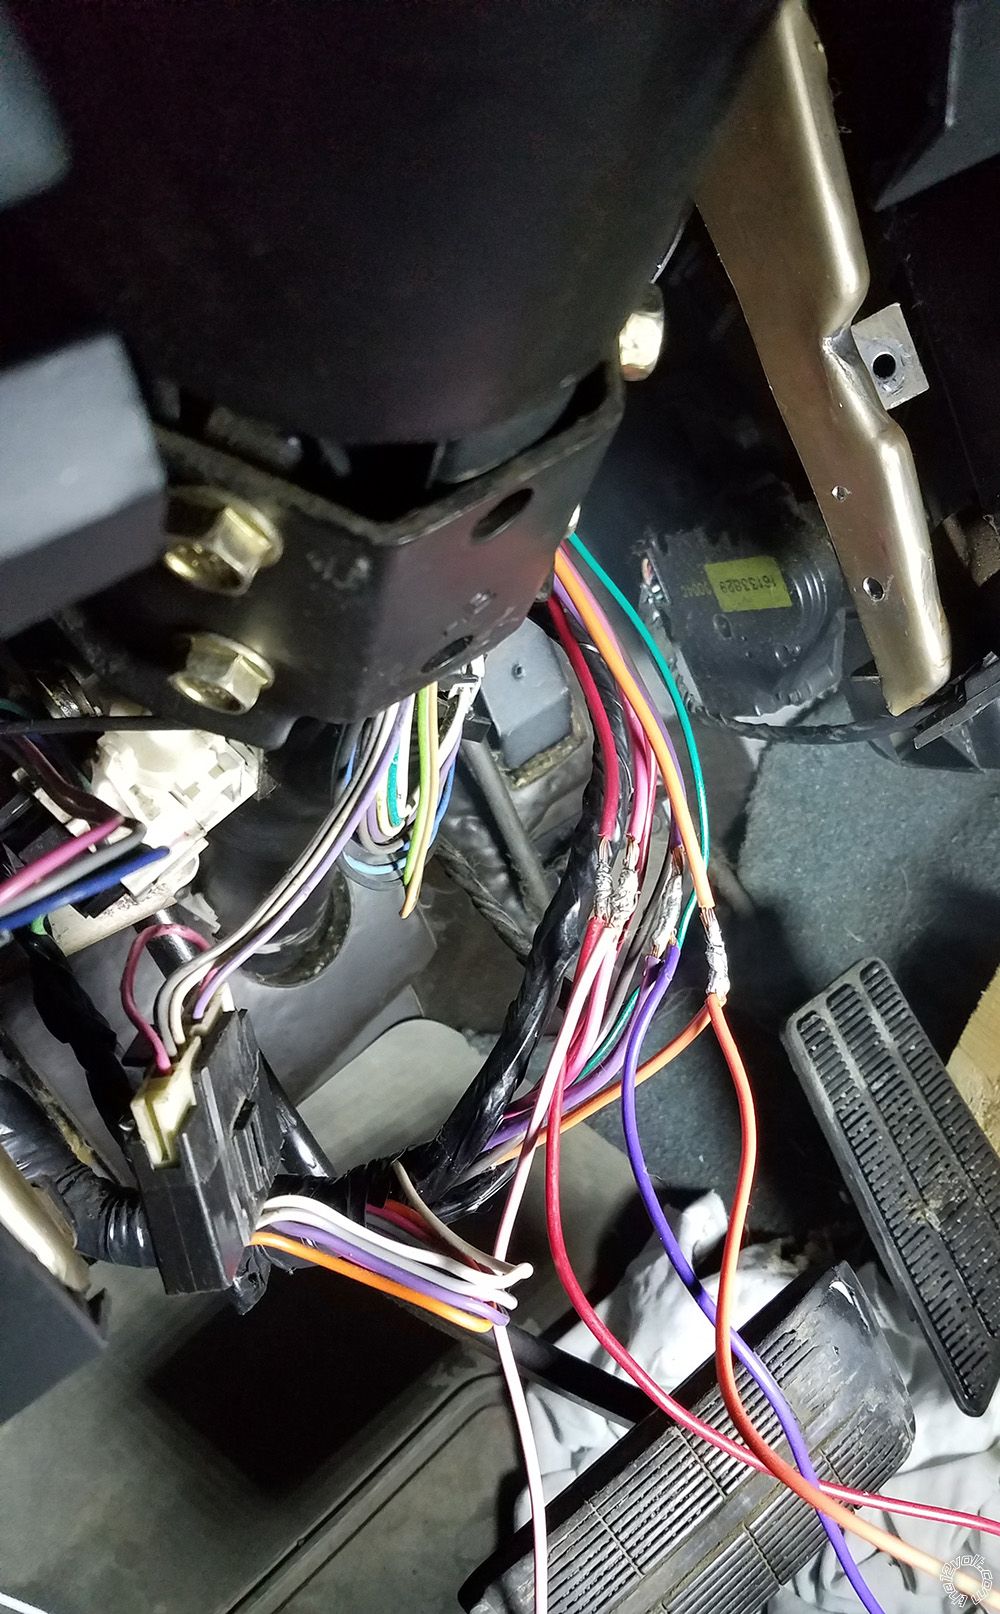
the12volt.com spacer
icon

1988 Silverado C1500 viper remote starter


Post ReplyPost New Topic
< Prev Topic Next Topic >
myke2020 
Member - Posts: 4
Member spacespace
Joined: November 06, 2017
Location: Canada
Posted: November 06, 2017 at 11:30 PM / IP Logged Link to Post Post Reply Quote myke2020
Wiring problems:
1988-1998 Cheverolet Silverado C1500. viper remote starter install
2 Door. Power windows. No security key. 1998. Gasoline.
Attempting to install a Viper 2 way remote. Model: 4305v1 (info sheet attached)
Thank you to everyone over the years that answered questions on this forum! I found wiring info and lots of help before needing to post. This was my first install attempt. About all I have so far is that the Viper remote will make the blue led turn on or off.
I am not sure If i picked the right orange and purple wires to tie into?
Do I need to tap into the ignition wires related to the key?
Did I get the right wire for the brake?
The viper install sheet did not answer many of my questions.
I am hoping one of you Pros will look at the pic and see something wrong.
Photo 1
1988 Silverado C1500 viper remote starter -- posted image.
Photo 2
1988 Silverado C1500 viper remote starter -- posted image.
What is the minimum needed to make it start?
Do I need the door wire connected?
I did the hood pin, Tach wire, ground and the wires shown in the photos.
I have not hooked up the door locks as they need new actuators. That will be the next project after the starter works.
RED Wires:
The truck has 2 red wires, both are constant 12v. I tied into one of them.
The Viper has several red wires. I connected the red on, there is a red/black stripe and red/white stripe. Do they need connected? They have fuses, so I am guessing they need connected?
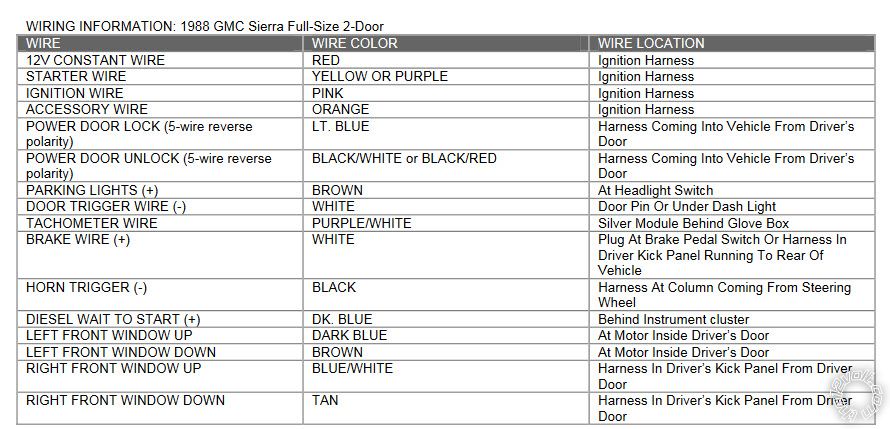
1988 wiring guide:
1988 Silverado C1500 viper remote starter -- posted image.
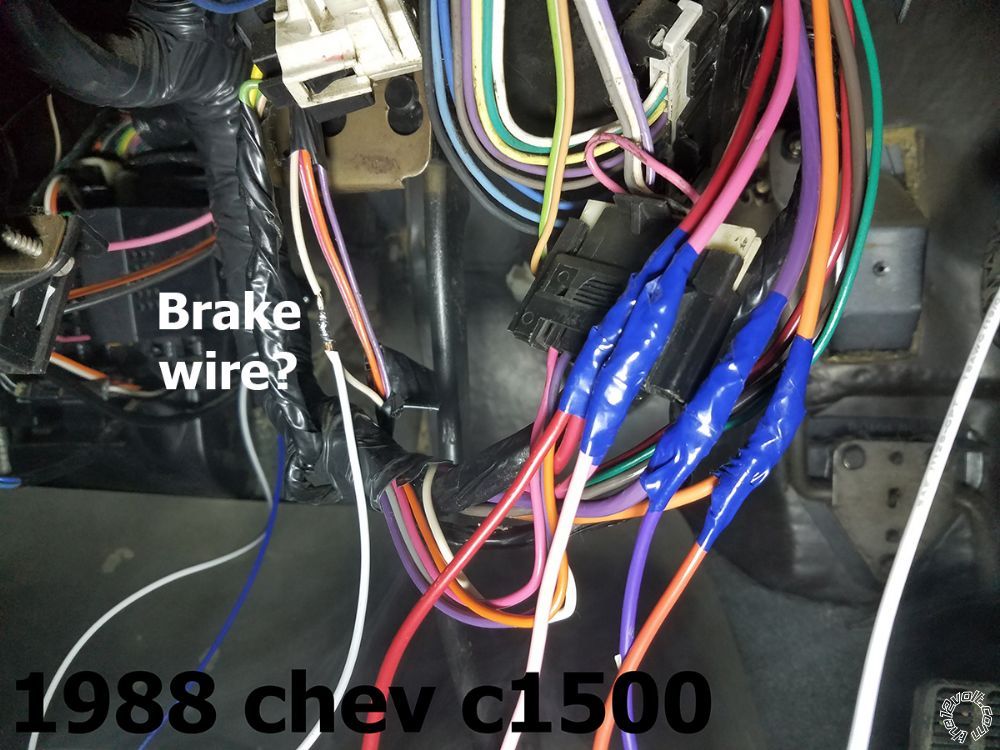
Wires I connected in green. Which are missing?
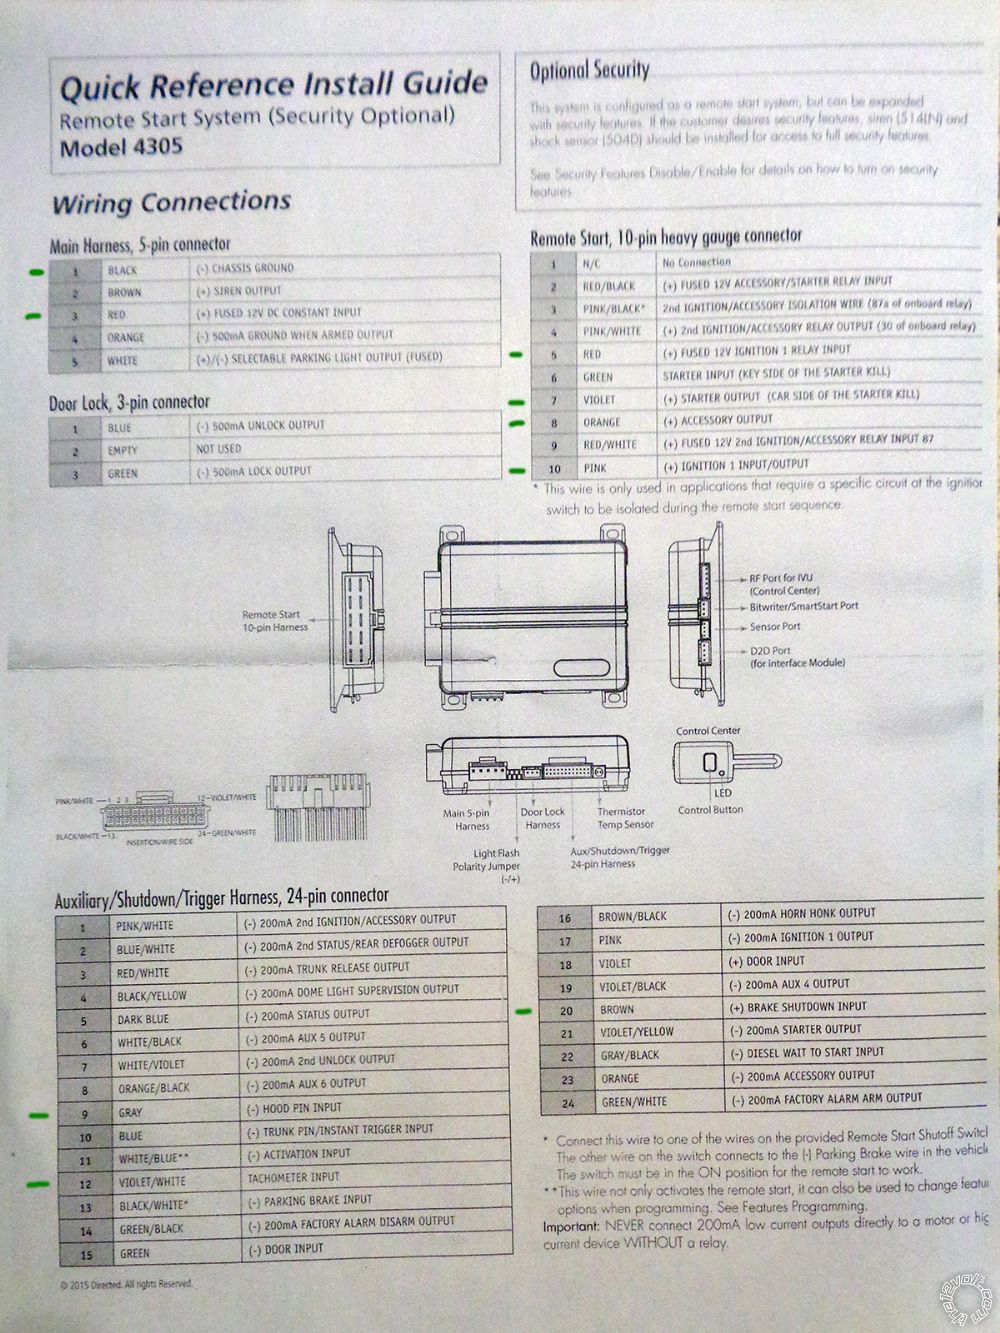
Quick reference install guide for Viper 4305v1
1988 Silverado C1500 viper remote starter -- posted image.
Thank you for any help!!
myke2020 
Member - Posts: 4
Member spacespace
Joined: November 06, 2017
Location: Canada
Posted: November 07, 2017 at 4:03 PM / IP Logged Link to Post Post Reply Quote myke2020
Anyone have suggestions on why it will not start?
geepherder 
Platinum - Posts: 3,668
Platinum spaceThis member consistently provides reliable informationspace
Joined: October 27, 2003
Posted: November 07, 2017 at 8:46 PM / IP Logged Link to Post Post Reply Quote geepherder
A few things: pins 2 on the heavy gauge harness needs to be connected to power, since it feeds the starter output. The brake wire should be correct, but you should always verify for yourself. You can do this with a multimeter, but a test light will work also.
You need to connect the door trigger, as this will be used for programming. The factory setting (if it's like the older units) is manual transmission, so you may need to change that as well. The parking brake wire may need to be connected and set, too (haven't been an installer for over 15 years, so maybe someone else can chime in).
My ex once told me I have a perfect face for radio.
myke2020 
Member - Posts: 4
Member spacespace
Joined: November 06, 2017
Location: Canada
Posted: November 08, 2017 at 10:35 PM / IP Logged Link to Post Post Reply Quote myke2020
Thanks geepherder for the info!
Got it to start, now have a problem with the tach wire. That needs to be checked or configured.
Best advice I have for anyone else is to watch more youtube videos on viper equipment.
I never connected the door sensor and the vehicle starts. You need it to turn on/off valet mode, or other setting as mentioned above, so it will be done later.
Parking lights not connected yet.
Grounded the parking brake wire to disable Manual transmission mode.
I connected all of the fused red wires to a SINGLE 12v constant red wire shown in the photos above, you could use both wires, but one was enough for me. To answer my own question, I did not have to cut or mess with the ignition wires (so far). The brake wire in the photos has not been tested at this point.
It is nice to pop the hood to kill the starter (hood pin switch) when having problems during testing. Hood pin was installed between the washer fluid and the head light.
1988 Cheverolet Silverado C1500.
I hope this info helps someone in the future.

If you wish to post a reply to this topic, you must first login.
If you are not already registered, you must first register.

  Printable version Printable version Post ReplyPost New Topic
You cannot post new topics in this forum
You cannot reply to topics in this forum
You cannot delete your posts in this forum
You cannot edit your posts in this forum
You cannot create polls in this forum
You cannot vote in polls in this forum

  •  
Search the12volt.com
Follow the12volt.com Follow the12volt.com on Facebook
Sunday, May 5, 2024 • Copyright © 1999-2024 the12volt.com, All Rights Reserved Privacy Policy & Use of Cookies
Disclaimer: *All information on this site ( the12volt.com ) is provided "as is" without any warranty of any kind, either expressed or implied, including but not limited to fitness for a particular use. Any user assumes the entire risk as to the accuracy and use of this information. Please verify all wire colors and diagrams before applying any information.

Secured by Sectigo
the12volt.com spacer
Support the12volt.com
Top
the12volt.com spacer