


keyless and door switch complete pics
Home /
the12volt's Install Bay /
Car Security and Convenience / keyless and door switch complete pics ( Topic Closed)


Posted: August 11, 2007 at 3:47 PM / IP Logged
 !
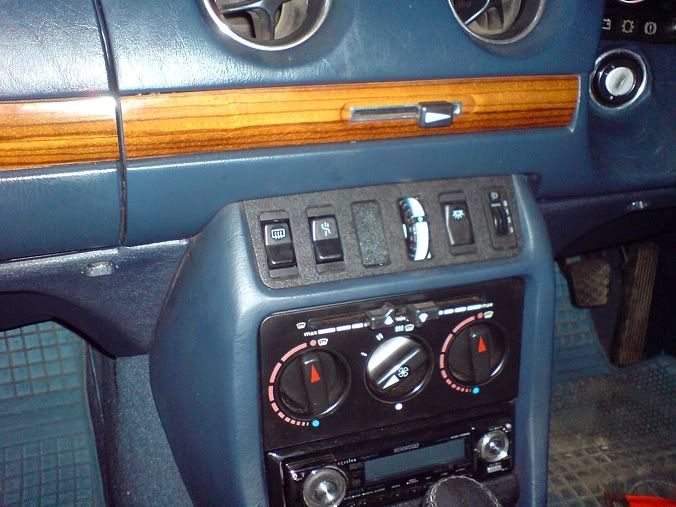
Well, I bought a normally horizontal sunroof switch for about $57. I had my first problem, however...the switch uses a fiber optic cable for its illumination, and as far as I could tell, I didn't have any "ports" open for an additional optic cable. So, off to the junk yard I went to buy a rear-door window switch and did some minor transplant surgery between the two switches.
With that sorted, I had to try and figure out how I had to connect the switch with the keyless module. I think I had it sorted for the most part, until I had to connect the window-aka-sunroof-aka-door-lock-switch to the module. I though I knew which connectors on the window switch to use, but I was too lazy to walk the few feet back to my room to double check the wiring diagram. Well, I ended up frying the locking circuit of the keyless module and a few of the door lock motors...another $70 literally up in smoke (and there was quite a bit of smoke, let me tell you!)
!
Well, I bought a normally horizontal sunroof switch for about $57. I had my first problem, however...the switch uses a fiber optic cable for its illumination, and as far as I could tell, I didn't have any "ports" open for an additional optic cable. So, off to the junk yard I went to buy a rear-door window switch and did some minor transplant surgery between the two switches.
With that sorted, I had to try and figure out how I had to connect the switch with the keyless module. I think I had it sorted for the most part, until I had to connect the window-aka-sunroof-aka-door-lock-switch to the module. I though I knew which connectors on the window switch to use, but I was too lazy to walk the few feet back to my room to double check the wiring diagram. Well, I ended up frying the locking circuit of the keyless module and a few of the door lock motors...another $70 literally up in smoke (and there was quite a bit of smoke, let me tell you!)  .
So, I ordered another module from the US, this time triple-checking everything. I also connected the horn-honk output. I have a proper set of horns, and let me tell you, when you press the panic button on the remote, it makes a good few decibels
.
So, I ordered another module from the US, this time triple-checking everything. I also connected the horn-honk output. I have a proper set of horns, and let me tell you, when you press the panic button on the remote, it makes a good few decibels  ! In total, I used six relays in addition to the module.
Well, the switch works great (it's the second one to the left, if you're wondering)...I just wonder whether it was worth all the effort!
! In total, I used six relays in addition to the module.
Well, the switch works great (it's the second one to the left, if you're wondering)...I just wonder whether it was worth all the effort!
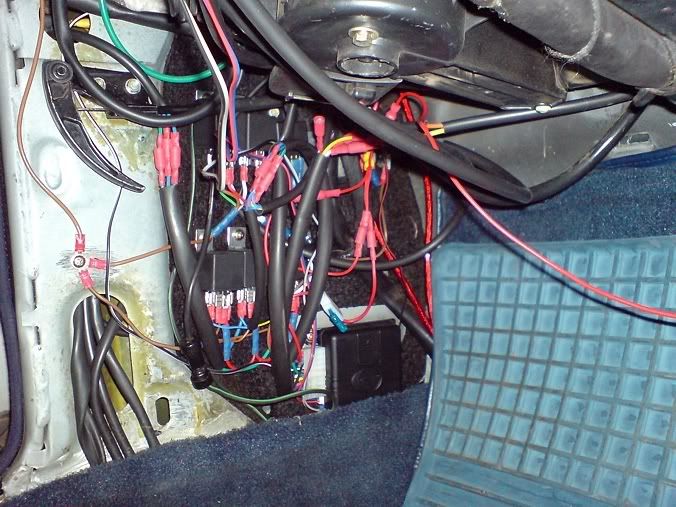
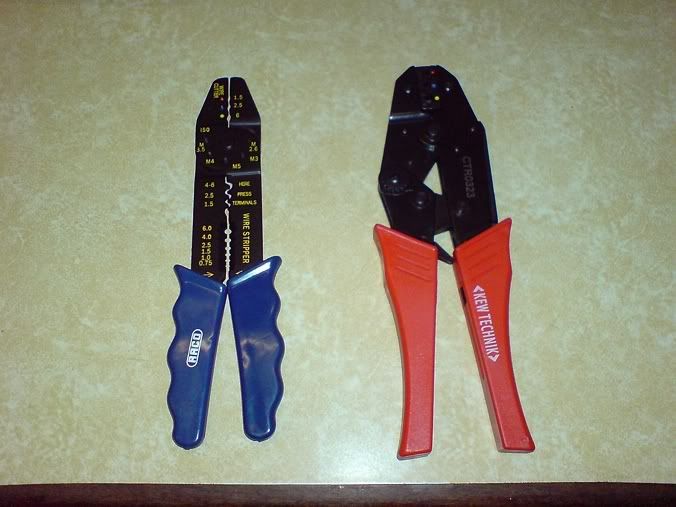
 P.S. Those crimp connections are SOLID! If you can't pull apart a crimp from its wire with a set of pliers, I believe the connection to be quite solid. I must say that the crimping tool on the left doesn't compare to the one that I use on the right - I think it's the best crimping tool for insulated crimps.


Posted: August 11, 2007 at 5:07 PM / IP Logged
Posted: August 12, 2007 at 1:24 AM / IP Logged
Posted: August 12, 2007 at 4:54 PM / IP Logged

Posted: August 12, 2007 at 6:09 PM / IP Logged
Sorry, you can NOT post a reply.
This topic is closed.
 Printable version
| You cannot post new topics in this forum You cannot reply to topics in this forum You cannot delete your posts in this forum You cannot edit your posts in this forum You cannot create polls in this forum You cannot vote in polls in this forum |

| Search the12volt.com |
Follow the12volt.com 
Wednesday, May 8, 2024 • Copyright © 1999-2024 the12volt.com, All Rights Reserved • Privacy Policy & Use of Cookies

Wednesday, May 8, 2024 • Copyright © 1999-2024 the12volt.com, All Rights Reserved • Privacy Policy & Use of Cookies
Disclaimer:
*All information on this site ( the12volt.com ) is provided "as is" without any warranty of any kind, either expressed or implied, including but not limited to fitness for a particular use. Any user assumes the entire risk as to the accuracy and use of this information. Please
verify all wire colors and diagrams before applying any information.
