


DIY Suede on an MDF Box with Pics
Home /
the12volt's Install Bay /
Fiberglass, Fabrication, and Interiors / DIY Suede on an MDF Box with Pics ( Topic Closed)


Posted: February 29, 2008 at 10:32 PM / IP Logged
 I got the basic idea for this technique in a post here on the forum, don't know who to give credit for it, but thanks.
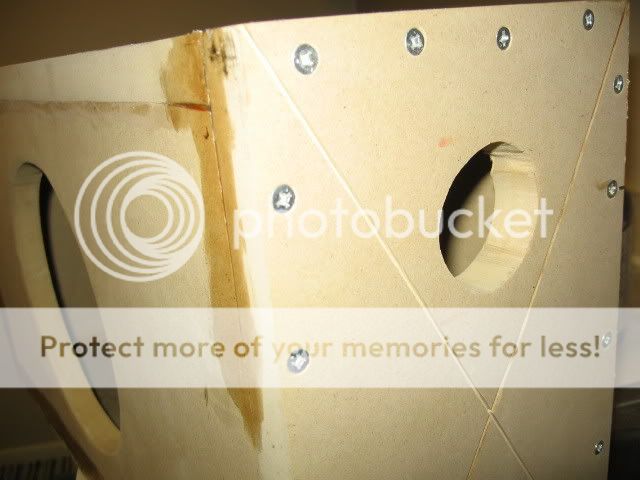
I would recommend using at least 3/4 inch material for the box as the grooves you need to cut will weaken the structural integrity of the box. 1/2 inch may not leave you enough meat left for larger subs.
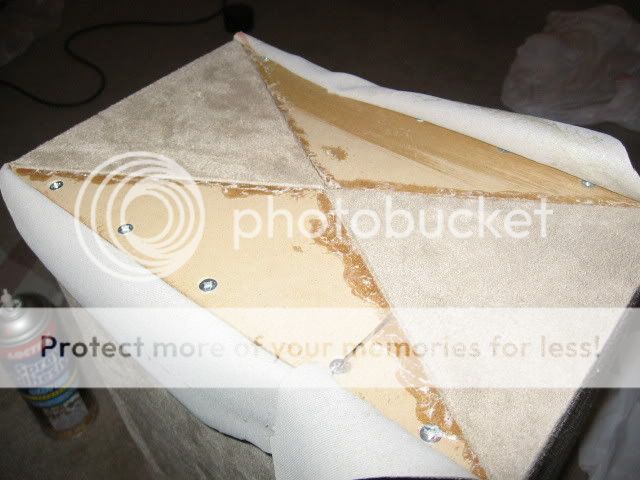
I used a grinder with a thin cutoff wheel to make the grooves, one on the back of the box length-wise, and an X pattern on each side. The grooves need to be at least 1/4 inch deep, I would suggest a bit more as deeper makes things a bit easier.
I got the basic idea for this technique in a post here on the forum, don't know who to give credit for it, but thanks.
I would recommend using at least 3/4 inch material for the box as the grooves you need to cut will weaken the structural integrity of the box. 1/2 inch may not leave you enough meat left for larger subs.
I used a grinder with a thin cutoff wheel to make the grooves, one on the back of the box length-wise, and an X pattern on each side. The grooves need to be at least 1/4 inch deep, I would suggest a bit more as deeper makes things a bit easier.

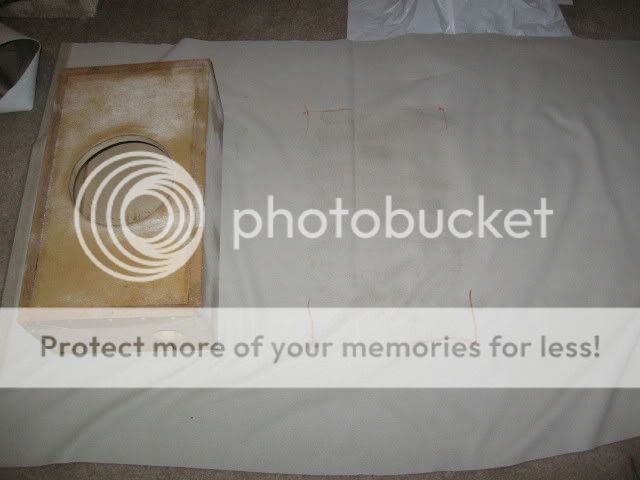
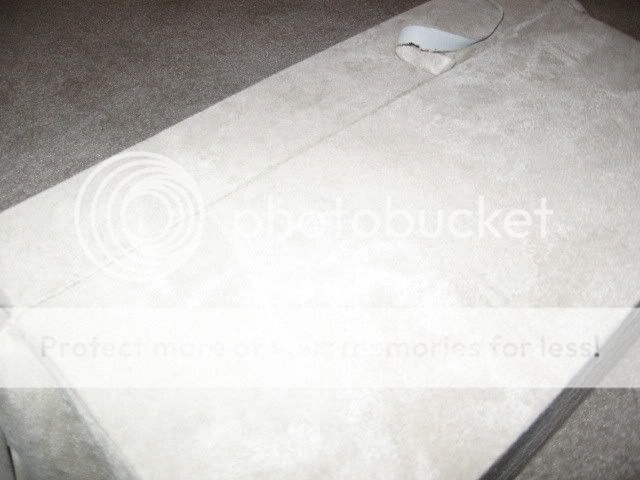
 I started with the suede on the floor to cover the front of the box first. I used Heavy Duty Permanent Spray Adhesive by Loctite. It is supposed to be high temp resistant. I coated the front of the box and the area of suede then played twister on the suede to get it stretched while I set the front of the box down. After that it is matter of stretching it over the top and bottom. It starts to get tricky when you get to the back.
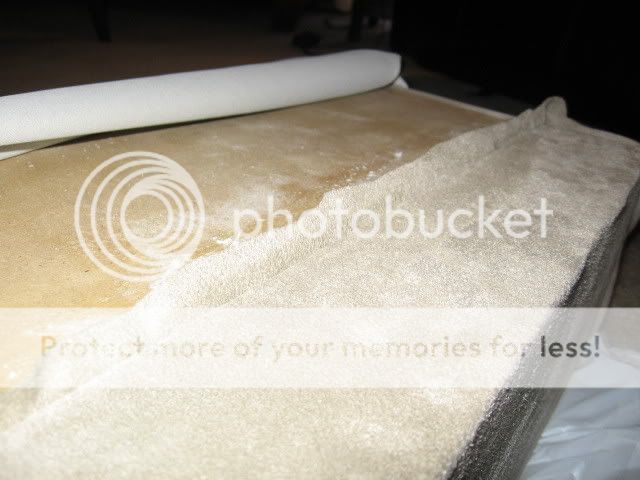
 With the top and bottom glued down put the box face down. Start with the side closest to the groove. First trim the material so that it overhangs the groove by 1/2 to 3/4 inch. Apply adhesive to the box making sure you get some into the groove.
Trick: when working on the sides with grooves, DO NOT apply adhesive to the suede, only to the box. This will help you keep from getting adhesive onto the suede you already glued down and ruining the whole thing.
Now, using a thin screwdriver or putty knife, push the material down into the groove until you have everything nice and tight.
With the top and bottom glued down put the box face down. Start with the side closest to the groove. First trim the material so that it overhangs the groove by 1/2 to 3/4 inch. Apply adhesive to the box making sure you get some into the groove.
Trick: when working on the sides with grooves, DO NOT apply adhesive to the suede, only to the box. This will help you keep from getting adhesive onto the suede you already glued down and ruining the whole thing.
Now, using a thin screwdriver or putty knife, push the material down into the groove until you have everything nice and tight.
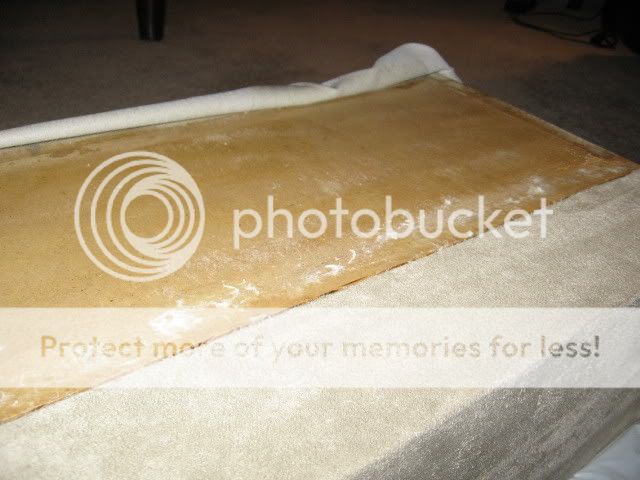
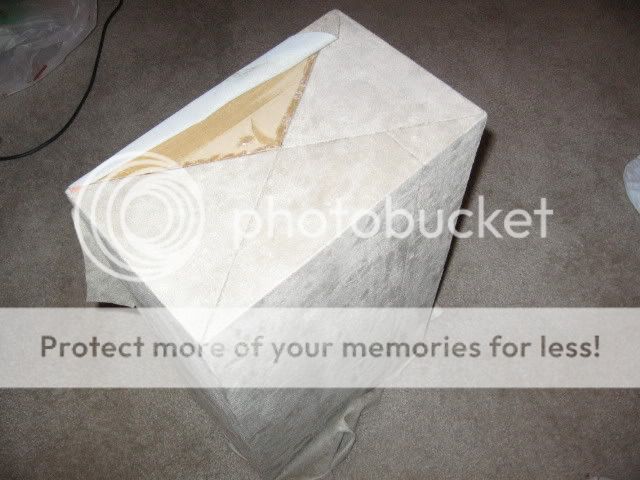
 Now using a razor, carefully trim the excess material away from the joint. Take your screwdriver or putty knife and begin pushing the leftover material down into the groove. The material will compress until you have a clean seam.
 Now repeat the procedure for the other side of the groove. This is where you need to be very careful not to let any glue onto the material that overlaps the groove as you are working.
 The sides are tricky. Cut the triangles so that they overhange the grooves and do opposite sides at a time.
Trick: when you cut the triangles, don't cut them back all the way to the corner of the box. Leave 1/4 inch or so. The extra material can be forced into the groove and you won't have any MDF showing through the corners.
The procedure is the same for working the grooves.
The sides are tricky. Cut the triangles so that they overhange the grooves and do opposite sides at a time.
Trick: when you cut the triangles, don't cut them back all the way to the corner of the box. Leave 1/4 inch or so. The extra material can be forced into the groove and you won't have any MDF showing through the corners.
The procedure is the same for working the grooves.
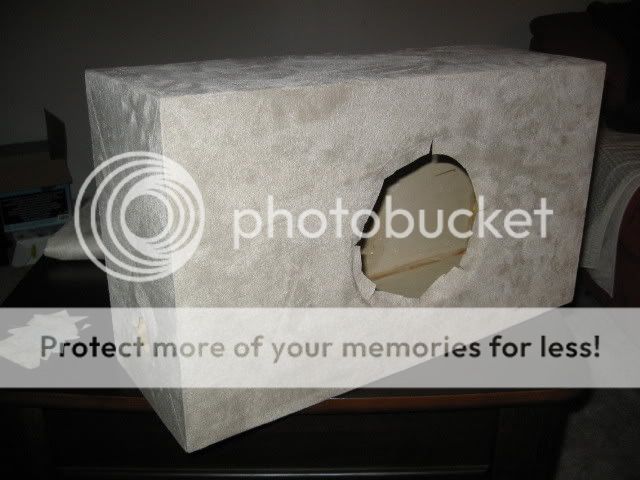
 This finished product isn't perfect, but I am quite happy for my first sub box.
Here it is ready to install:
This finished product isn't perfect, but I am quite happy for my first sub box.
Here it is ready to install:

 Good Luck!


Posted: March 02, 2008 at 9:07 AM / IP Logged
Posted: March 02, 2008 at 4:17 PM / IP Logged


Posted: March 02, 2008 at 4:41 PM / IP Logged
Posted: March 02, 2008 at 5:38 PM / IP Logged
Posted: March 02, 2008 at 6:51 PM / IP Logged
Posted: March 02, 2008 at 9:07 PM / IP Logged

Posted: March 03, 2008 at 11:49 AM / IP Logged
Posted: March 03, 2008 at 6:43 PM / IP Logged
Posted: April 02, 2008 at 9:09 PM / IP Logged
Sorry, you can NOT post a reply.
This topic is closed.
 Printable version
| You cannot post new topics in this forum You cannot reply to topics in this forum You cannot delete your posts in this forum You cannot edit your posts in this forum You cannot create polls in this forum You cannot vote in polls in this forum |

| Search the12volt.com |
Follow the12volt.com 
Friday, March 27, 2026 • Copyright © 1999-2026 the12volt.com, All Rights Reserved • Privacy Policy & Use of Cookies

Friday, March 27, 2026 • Copyright © 1999-2026 the12volt.com, All Rights Reserved • Privacy Policy & Use of Cookies
Disclaimer:
*All information on this site ( the12volt.com ) is provided "as is" without any warranty of any kind, either expressed or implied, including but not limited to fitness for a particular use. Any user assumes the entire risk as to the accuracy and use of this information. Please
verify all wire colors and diagrams before applying any information.
