


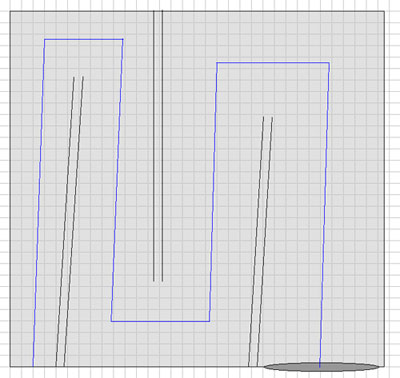
transmission line sub


Posted: May 05, 2008 at 8:38 AM / IP Logged


Posted: May 05, 2008 at 1:19 PM / IP Logged
Posted: May 05, 2008 at 2:19 PM / IP Logged
Posted: May 05, 2008 at 8:57 PM / IP Logged

Posted: May 06, 2008 at 2:09 AM / IP Logged
Posted: May 06, 2008 at 2:47 AM / IP Logged
Posted: May 06, 2008 at 3:51 AM / IP Logged
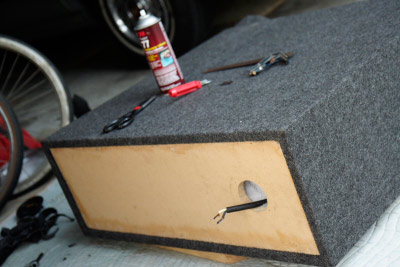
 Home Depot was nice enough to cut the wood for me, but I would later find out their saw is not square, curses! Here the box is assembled and glued together, but the top will not fit because none of the top edges are square and will result in massive air leakage. A belt sander and a little while later though, everything was flush and ready to get the top glued on. I added some polyfill at this point, to get a constant density of 0.25 lb/ft^3. There is some screen door fabric inside the line to keep the fiber from spilling out the end.
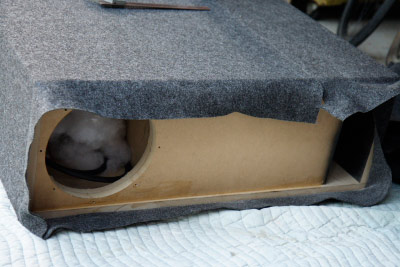
 There are a dozen screws along the top surface that helped sandwich it and the vertical pieces together despite all the sanding. I knew it wouldn't be absolutely perfect and wanted to make sure it was touching on all surfaces. The salt and pepper carpet not only hides the screws but also make the box look like a real enclosure, I'm starting to become giddy at this point! Here's a tip for rolling the carpet over the edge and forming a tight inside corner, like in the photo: use a tool with a wheel on the end. I used one designed for tucking in the rubber rings on screen windows, and it made all the difference in the world.
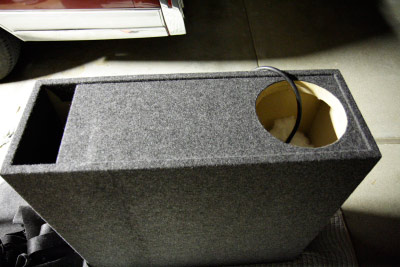
 The carpet is coming along nicely, except I don't know how to make the seam where two edges meet look decent. The best I can do is put the seam on the bottom of the box. It's clearly visible in the photo, but doesn't look bad once it's turned over.
 She's done! She's also a bit overweight and I need help to move her haha. I can't help but notice the big empty space between the terminus and the woofer. I'd love to put a big Infinity logo there, but not sure exactly how to make one. Or maybe some abstract art, I'm just not sure. Oh well, a project for another day.
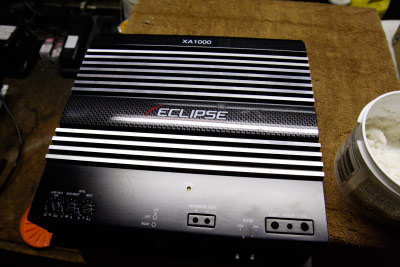
 Also, the amplifier arrived in the mail today. It was a steal! The guy selling it posted pictures with moderate "scratches" all over the face and sides. Turns out these are simply sticky gunk and cleaned off easily. Not that it matters though, since it'll be under my back seat and out of view.
 -Justin
Posted: May 06, 2008 at 3:57 AM / IP Logged

Posted: May 06, 2008 at 8:28 AM / IP Logged
Posted: May 06, 2008 at 12:14 PM / IP Logged
 I like the idea of the Dynamat under the carpet... Very slick, boogeyman!
 Printable version
| You cannot post new topics in this forum You cannot reply to topics in this forum You cannot delete your posts in this forum You cannot edit your posts in this forum You cannot create polls in this forum You cannot vote in polls in this forum |

| Search the12volt.com |
Follow the12volt.com 
Saturday, April 18, 2026 • Copyright © 1999-2026 the12volt.com, All Rights Reserved • Privacy Policy & Use of Cookies

Saturday, April 18, 2026 • Copyright © 1999-2026 the12volt.com, All Rights Reserved • Privacy Policy & Use of Cookies
Disclaimer:
*All information on this site ( the12volt.com ) is provided "as is" without any warranty of any kind, either expressed or implied, including but not limited to fitness for a particular use. Any user assumes the entire risk as to the accuracy and use of this information. Please
verify all wire colors and diagrams before applying any information.
