


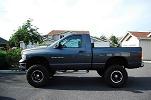
My 2003 Dodge Ram Regular Cab
Home /
the12volt's Install Bay /
Rides and Systems Gallery / My 2003 Dodge Ram Regular Cab ( Topic Closed)


Posted: June 24, 2009 at 12:27 AM / IP Logged
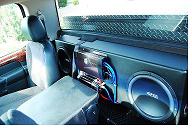

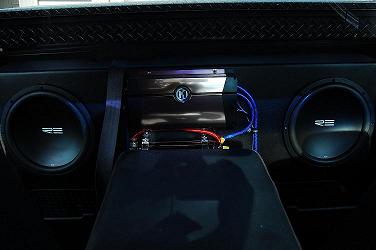
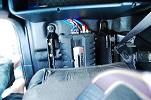

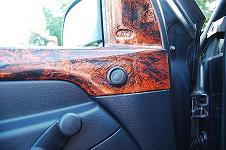
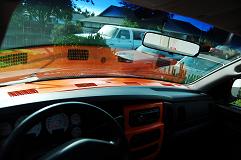 Interior panels are custom painted house of kolor tangelo , door panels are custom painted slate grey /tangelo with a marbilized effect.Audio set up: tang band 3" neodyum drivers in dash 40 watts rms (stereo),Mb quart 6.5 components set in door 140 watts rms per side (stereo) both powered by kenwood 500x4 amp under seat.2 12" re audio sr 300watts rms per side powered by a memphis 500 watt rms class d monoblock ran at svc @2ohms.4 Gauge monster cable ,12 gauge monster cableI had a ton of fun bulding this , every aspect from the sub box to the custom paint I did on my own,thanks for every body who helped out with advice on this forum along the way.
Posted: June 24, 2009 at 8:49 AM / IP Logged


Posted: June 24, 2009 at 8:33 PM / IP Logged
Posted: June 24, 2009 at 10:36 PM / IP Logged
Posted: June 25, 2009 at 7:46 PM / IP Logged
Posted: June 25, 2009 at 7:59 PM / IP Logged
Sorry, you can NOT post a reply.
This topic is closed.
 Printable version
| You cannot post new topics in this forum You cannot reply to topics in this forum You cannot delete your posts in this forum You cannot edit your posts in this forum You cannot create polls in this forum You cannot vote in polls in this forum |

| Search the12volt.com |
Follow the12volt.com 
Monday, July 14, 2025 • Copyright © 1999-2025 the12volt.com, All Rights Reserved • Privacy Policy & Use of Cookies

Monday, July 14, 2025 • Copyright © 1999-2025 the12volt.com, All Rights Reserved • Privacy Policy & Use of Cookies
Disclaimer:
*All information on this site ( the12volt.com ) is provided "as is" without any warranty of any kind, either expressed or implied, including but not limited to fitness for a particular use. Any user assumes the entire risk as to the accuracy and use of this information. Please
verify all wire colors and diagrams before applying any information.
