


Finished Adding True Aux In to my Nakamichi CD-350 - FYI
Home /
the12volt's Install Bay /
Car Audio - Hot Topics / Finished Adding True Aux In to my Nakamichi CD-350 - FYI ( Topic Closed)


Posted: August 06, 2011 at 11:22 AM / IP Logged
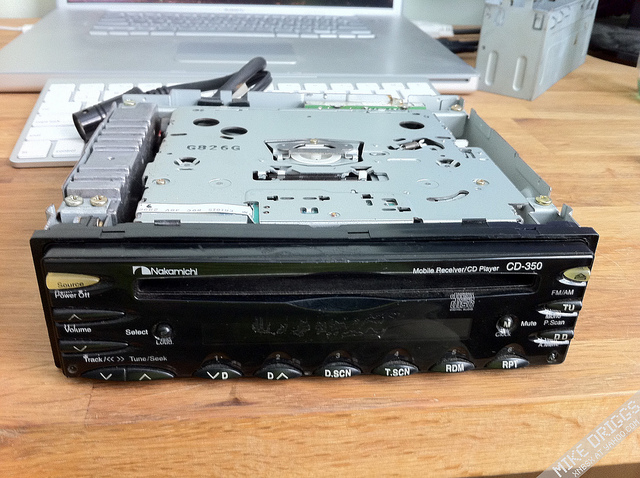
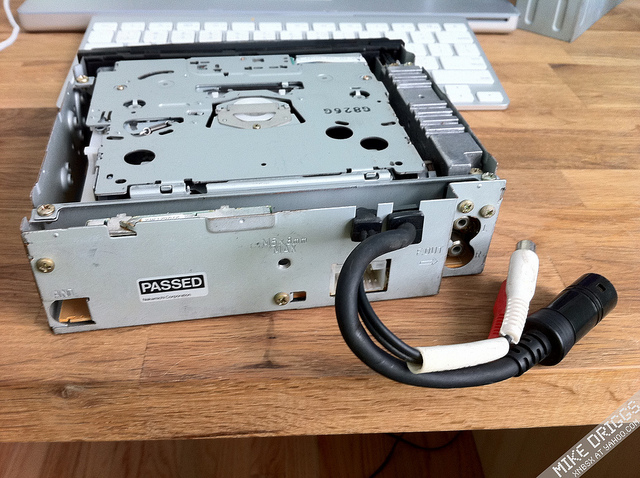
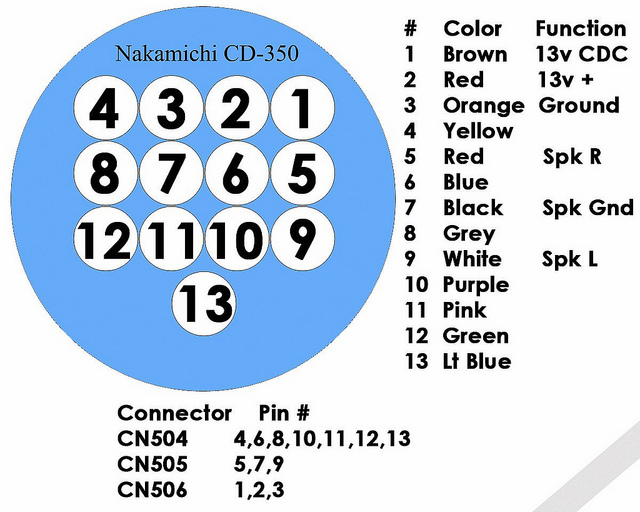
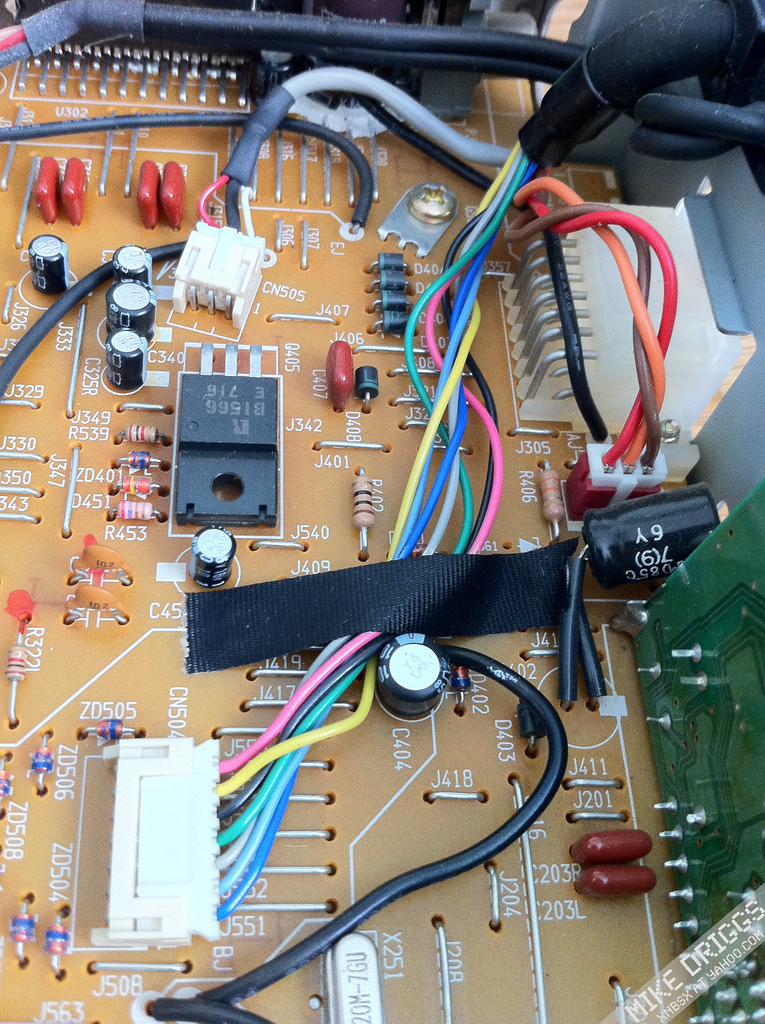 Day two:
Heres an image I drew up in photoshop indicating the wiring I found..
Enjoy!
Artwork by myself
Day two:
Heres an image I drew up in photoshop indicating the wiring I found..
Enjoy!
Artwork by myself
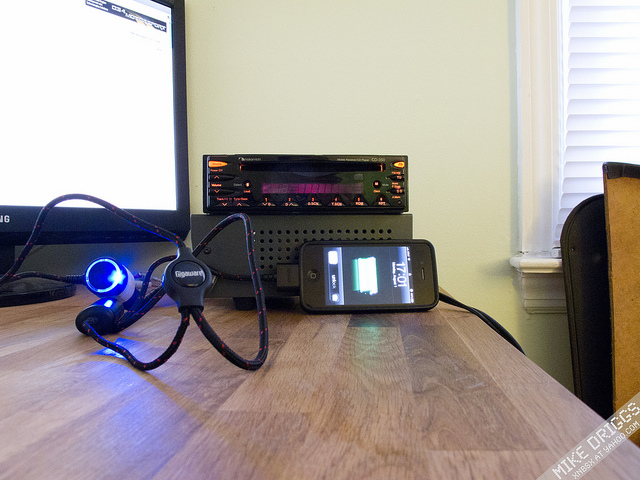
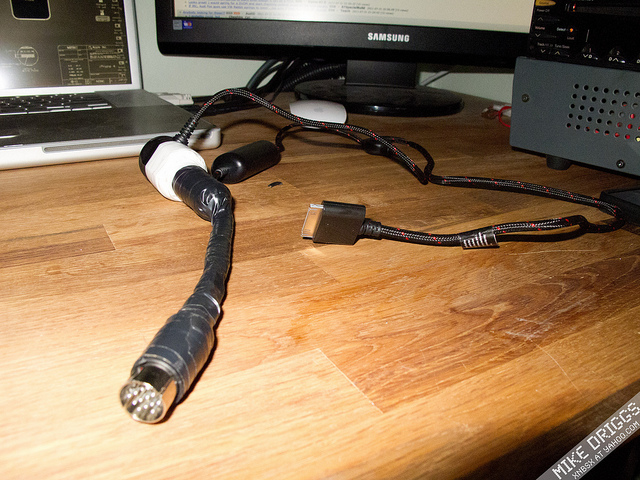
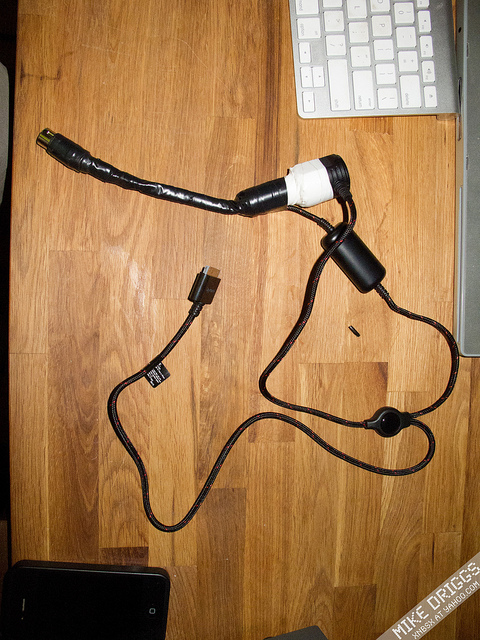
 Day three:
I took apart a "Gigaware" iPod car charger with audio out and wired the audio and power into a 13 pin connector housing I got at the local parts store.
I kept the chargers power converter and what not to keep the voltage at the iPhone/iPods 5v and I do believe it has the needed equipment to give the iPhone/iPod the "ok" to charge and play tunes.
Yeah its a bit ugly, but for Version 1 its not bad. And it will all be hidden behind the stereo so who cares!
Day three:
I took apart a "Gigaware" iPod car charger with audio out and wired the audio and power into a 13 pin connector housing I got at the local parts store.
I kept the chargers power converter and what not to keep the voltage at the iPhone/iPods 5v and I do believe it has the needed equipment to give the iPhone/iPod the "ok" to charge and play tunes.
Yeah its a bit ugly, but for Version 1 its not bad. And it will all be hidden behind the stereo so who cares!

Sorry, you can NOT post a reply.
This topic is closed.
 Printable version
| You cannot post new topics in this forum You cannot reply to topics in this forum You cannot delete your posts in this forum You cannot edit your posts in this forum You cannot create polls in this forum You cannot vote in polls in this forum |

| Search the12volt.com |
Follow the12volt.com 
Friday, May 22, 2026 • Copyright © 1999-2026 the12volt.com, All Rights Reserved • Privacy Policy & Use of Cookies

Friday, May 22, 2026 • Copyright © 1999-2026 the12volt.com, All Rights Reserved • Privacy Policy & Use of Cookies
Disclaimer:
*All information on this site ( the12volt.com ) is provided "as is" without any warranty of any kind, either expressed or implied, including but not limited to fitness for a particular use. Any user assumes the entire risk as to the accuracy and use of this information. Please
verify all wire colors and diagrams before applying any information.
