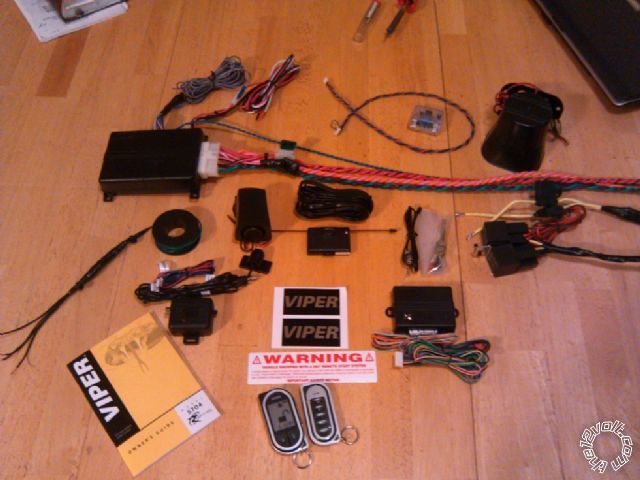
This is a pictorial for a remote start and security system into a 2004 Mountaineer/explorer. The system installed was a Viper 5704 with a Dei Pkall bypass module.
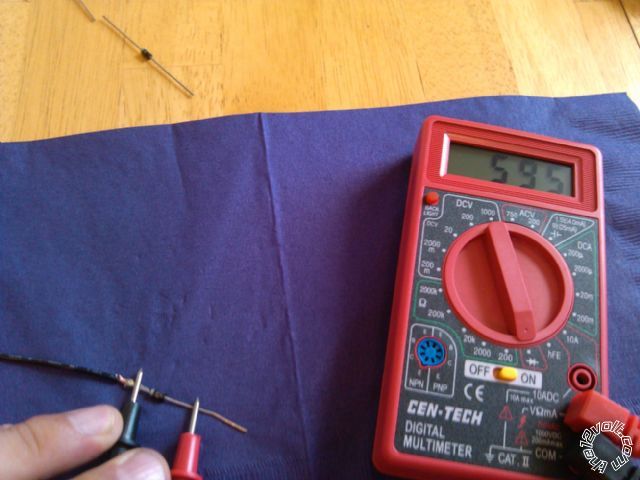
It is important to prepare your r/s alarm system as much as possible for install. find wiring diagrams and test all wires with your digital multimeter.
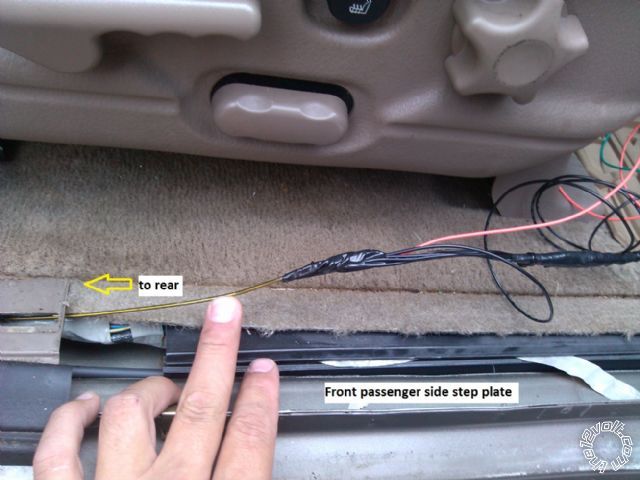
Remove front driver, front passenger, and passenger rear step panels by pulling up on them. Remove instrument panels according to diagram.
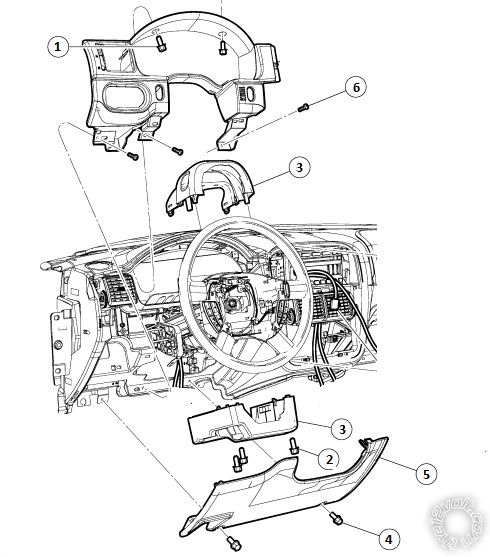
1.remove two screws at top of instrument cluster ring.
2.remove two screws at bottom of steering column casing after (there is a third screw at rear you will see after removing bottom casing.
3.remove top casing
4.remove two screws holding bottom dash cover.
5.pull cover off. (there are snaps)
6.remove three screws holding front dash cover on then simply pull out by the driver side window vent pulling from snap. (do not have to remove whole panel just loosen it)
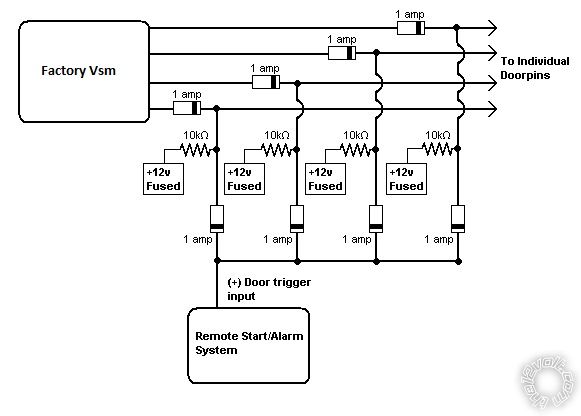
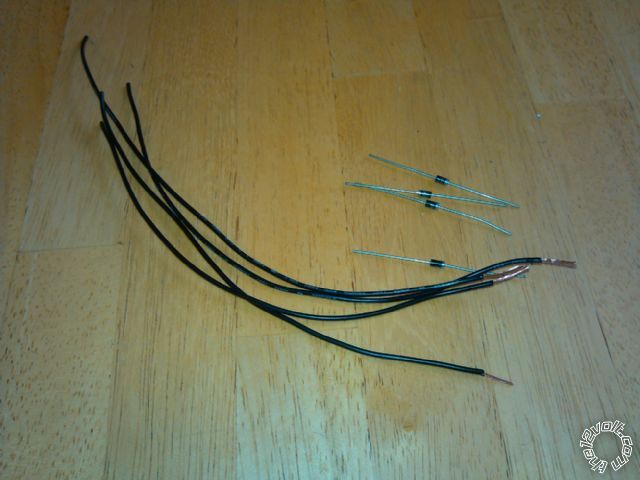
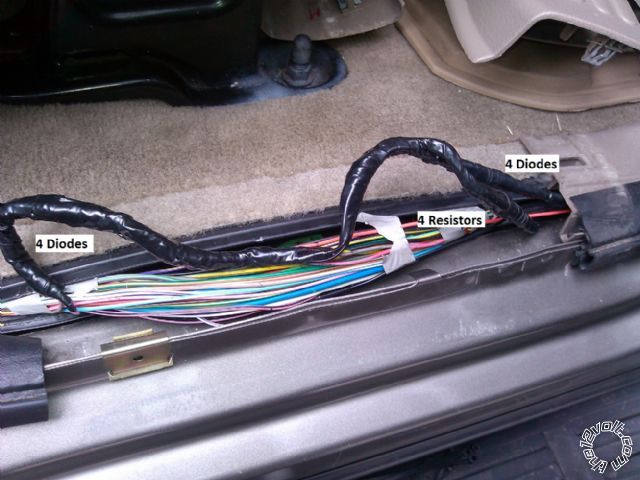
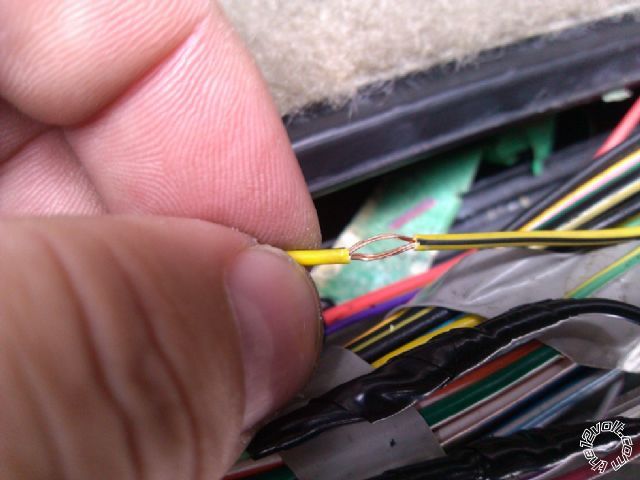
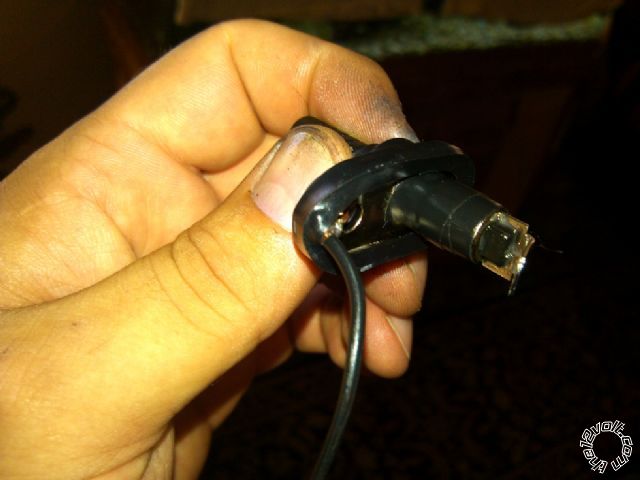
Run door triggers first that is the hardest part. You have to either use a Dei door trigger module or use 8/1amp diodes and 4/10k ohm resistors as followed (Diodes are directional, make sure your diodes are in the direction shown)
this is how I made my diodes work.
.jpg)
.jpg)
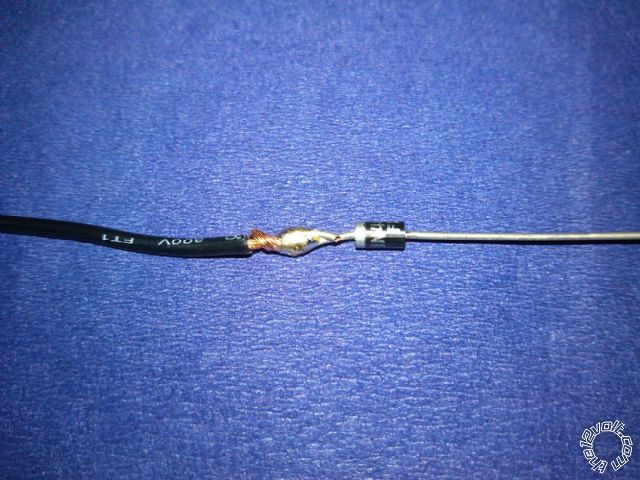
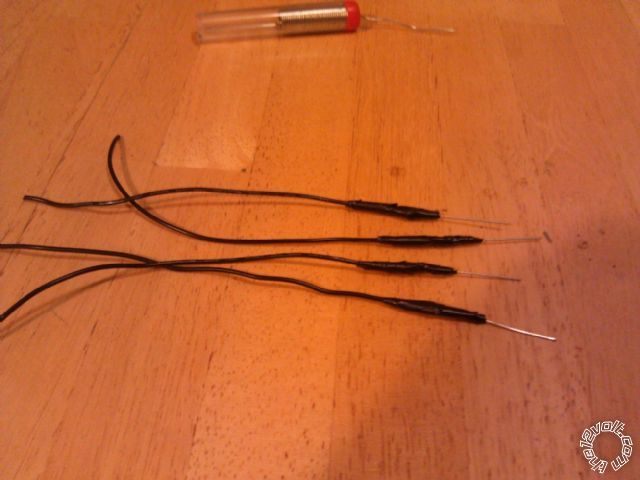
finished adapter (you can do the same method with your resistors the only difference is it dont matter what direction your resistors are)
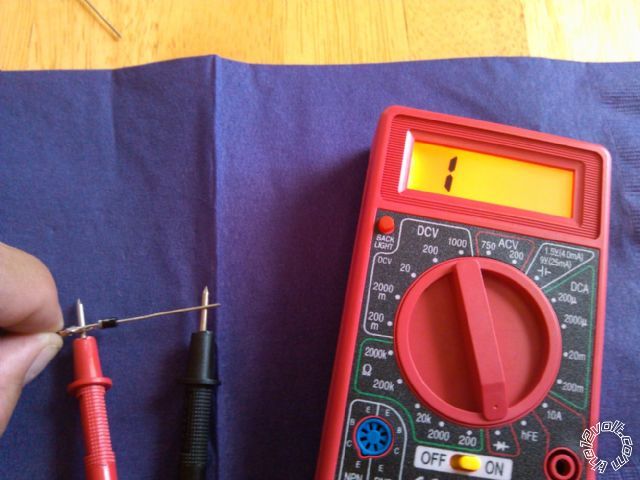
msure to test all diodes before installing in vehicle. to do this set dmm to diode mode. one way will read 0 the other way should read as shown. (aslong as you get a reading one way and no reading the other your diodes are ok.)
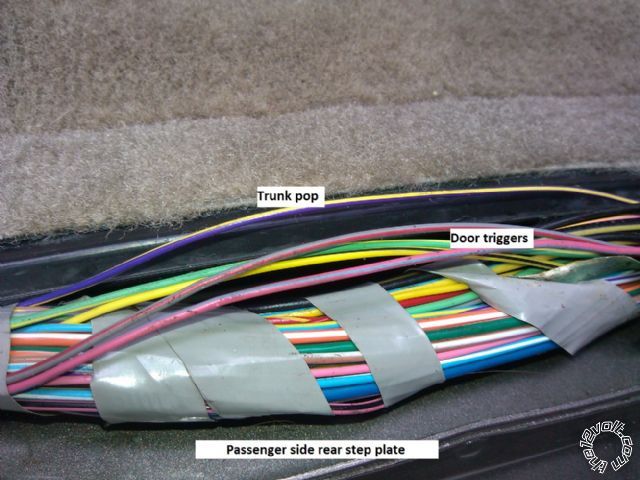
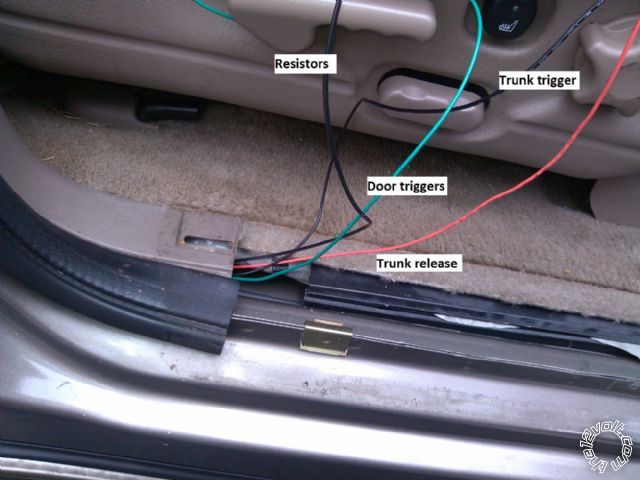
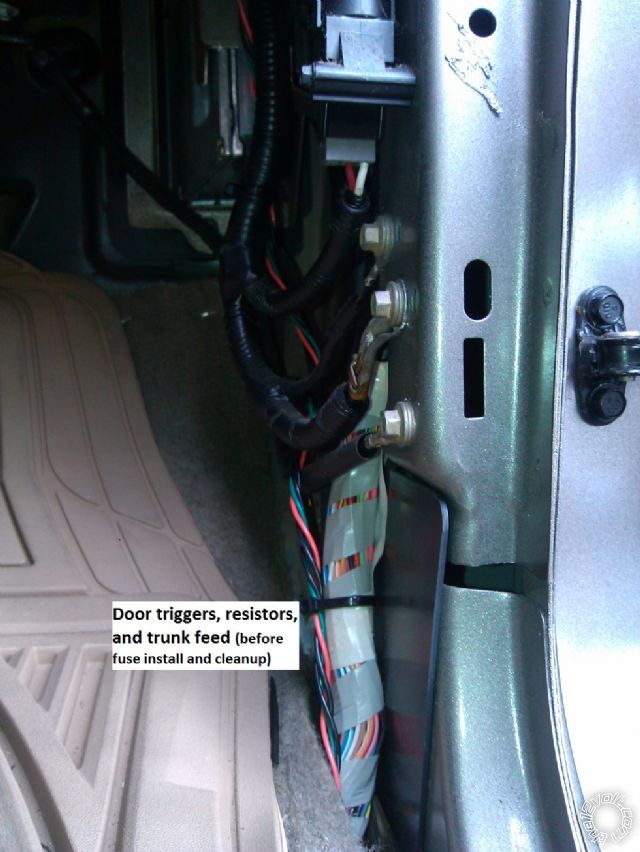
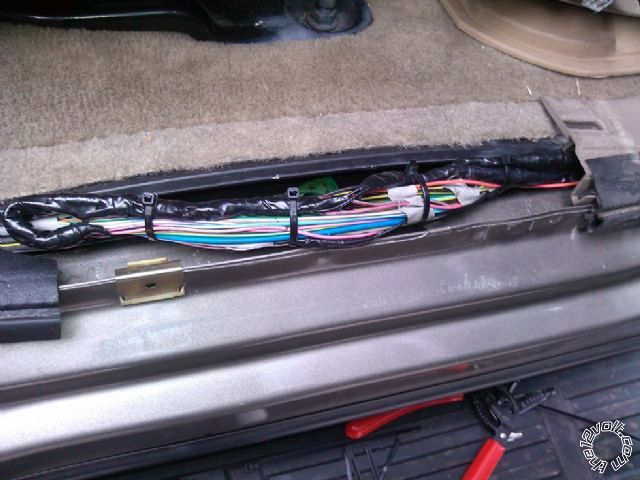
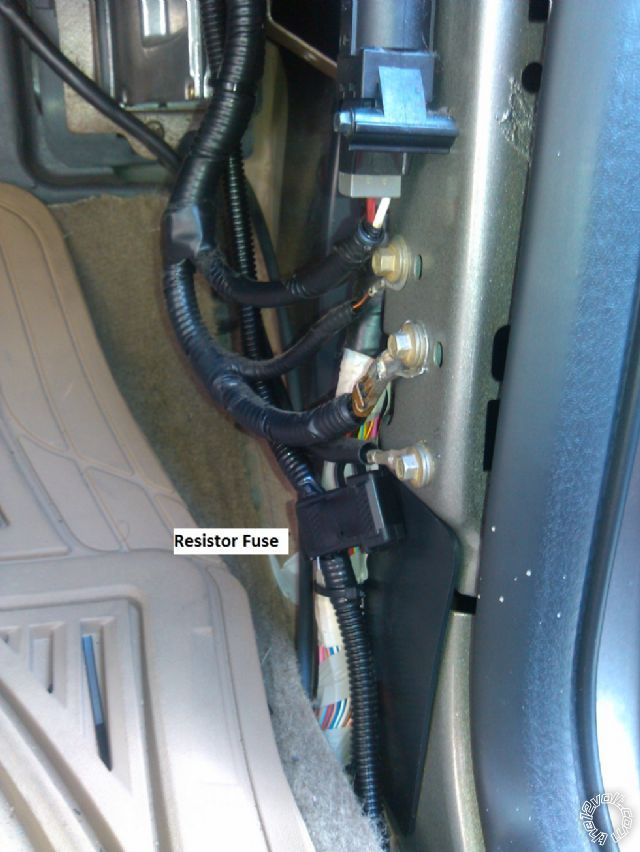
all door triggers, hatch release, and hatch trigger will be found together at rear passenger side step.
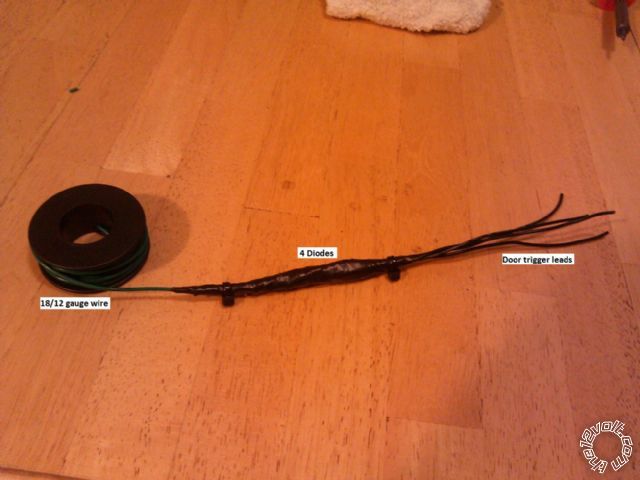
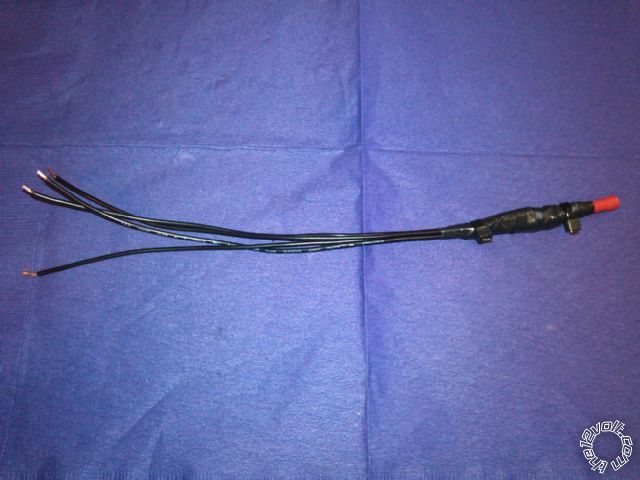
finished Door trigger setup
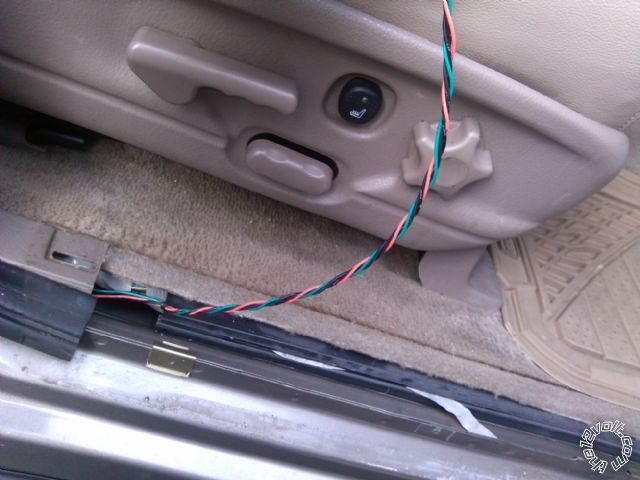
this is how to run wires for the door/hatch triggers,hatch release, and resistor 12v feed.
optional* use a drill. insert ends of all wires into drill hold the other ends heading to rear and twist wires (makes it easier to run and put tubing on.
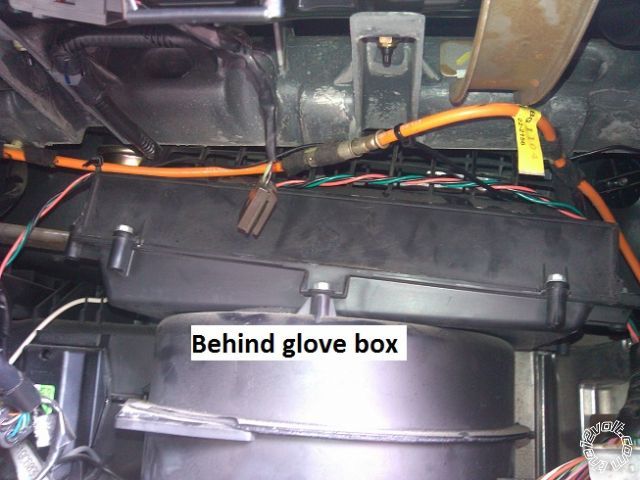
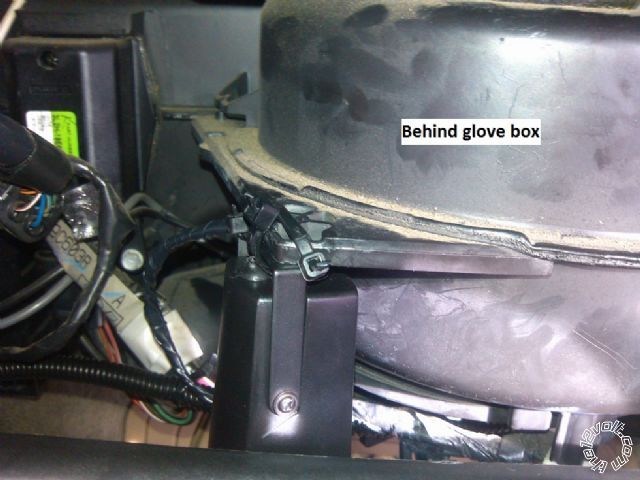
run wires up passenger kick and behind glove box like shown. wait to run to drivers side until you run your siren, hood pin, and tach wire.
finished setup
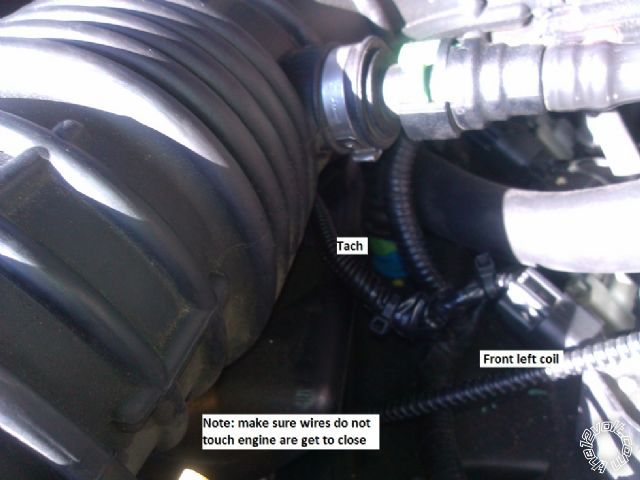
run siren, tach, and hood pin wires into glove box area as shown.
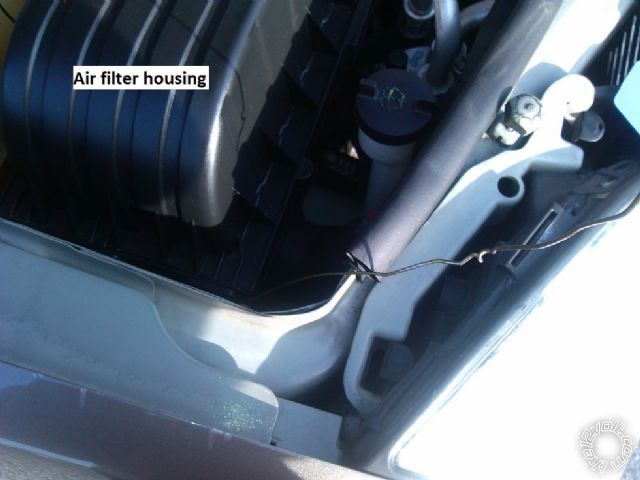
on the passenger side under the hood at the firewall there will be two wires (I think they are gray and black) coming in with a rubber boot. from the inside by the glove box run a coat hanger thru. make sure to poke thru top of rubber boot and do not mess the factory wires up. after poking coat hanger thru it makes it easier if you then poke a phillips head thru boaring out a bigger hole. then put your coat hanger back in and pull your wires into the cabin.
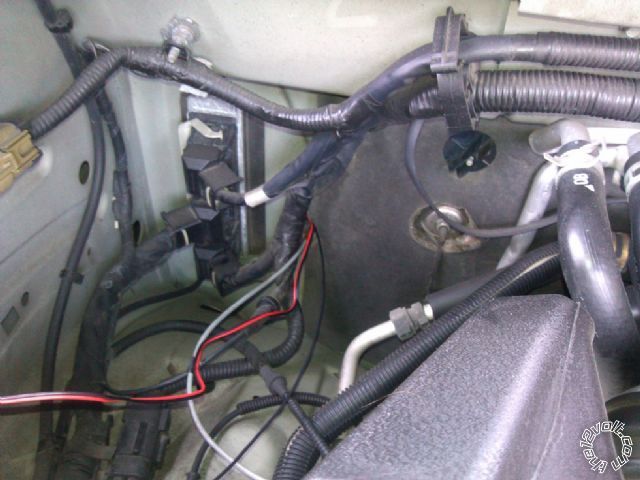
install Piezo (optional)just tap into red and black siren wires.
.jpg)
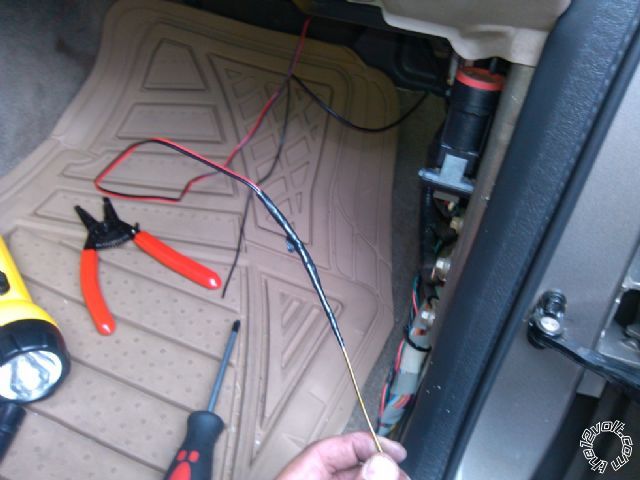
run wires into driver side
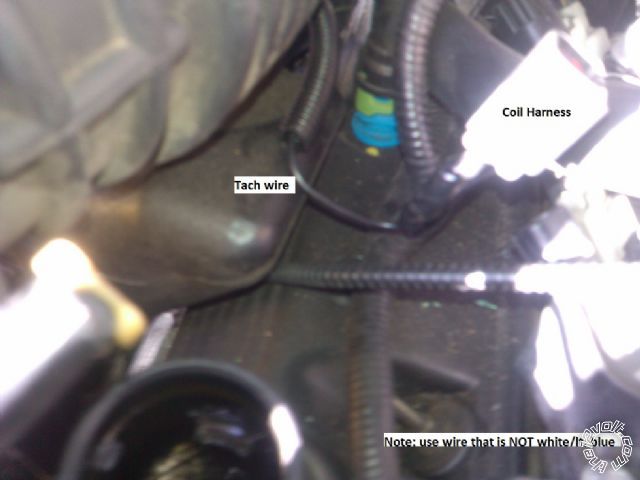
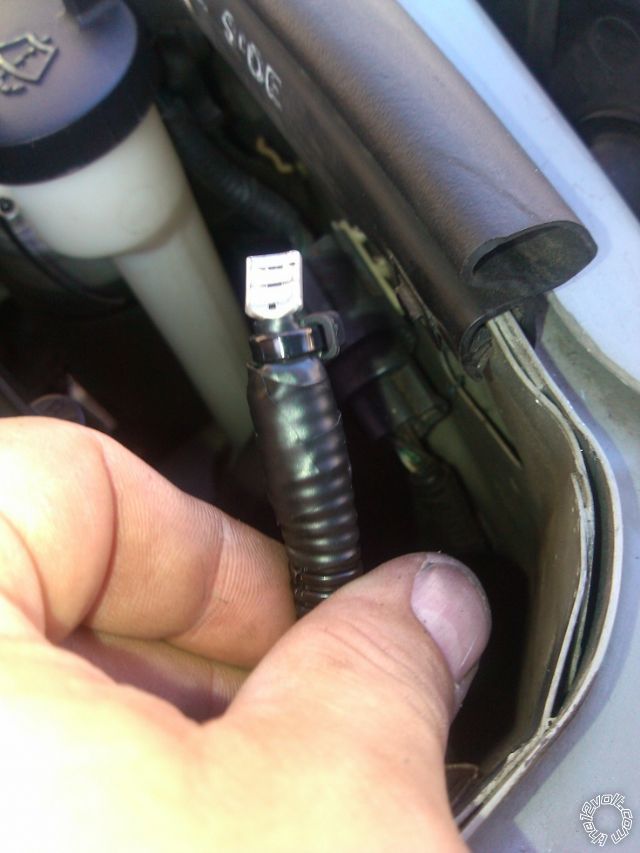
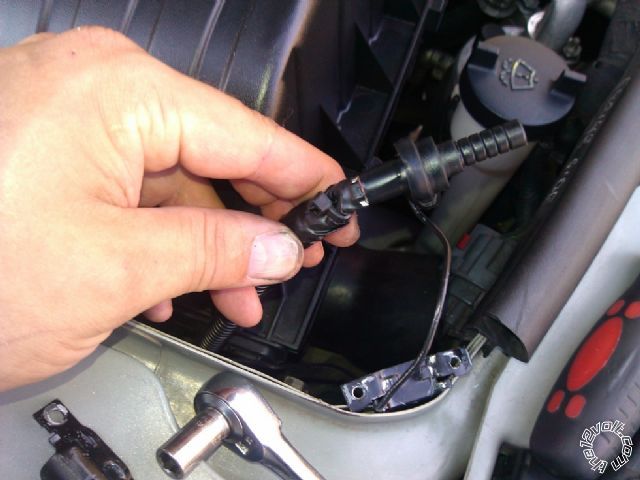
setup siren tach and hood pin under hood. (have not installed hood pin yet just ran wire)
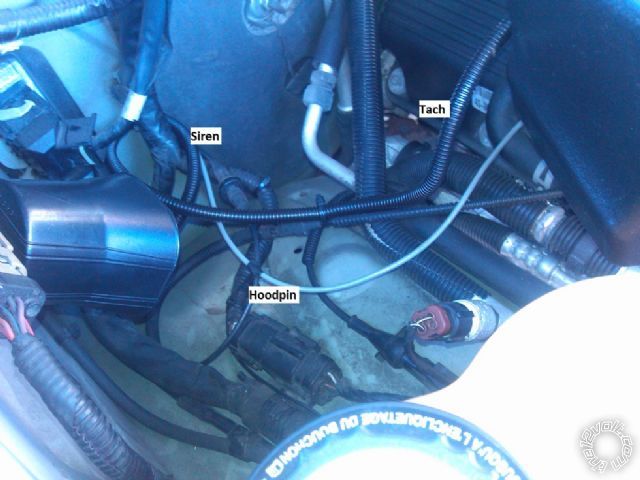
here is where I ran hood pin wire to so far..
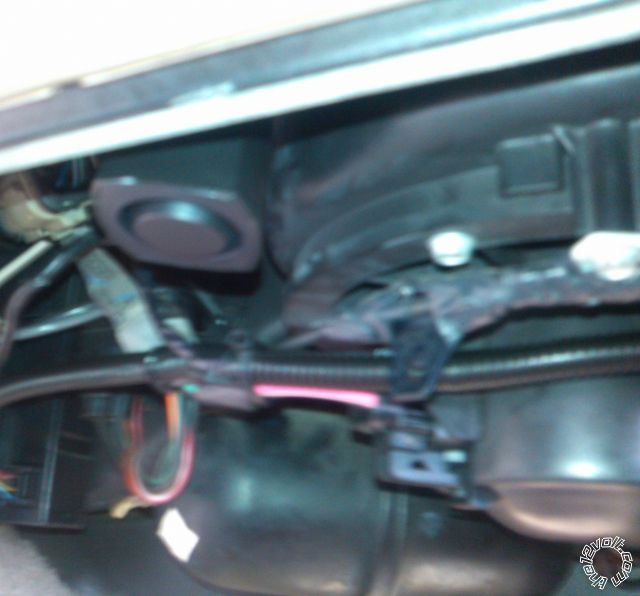
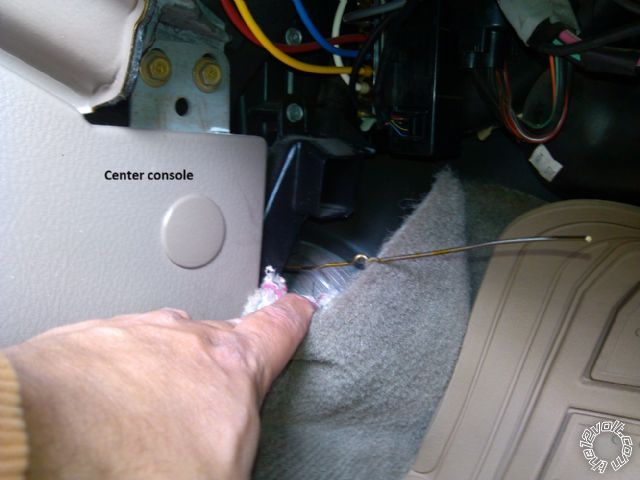
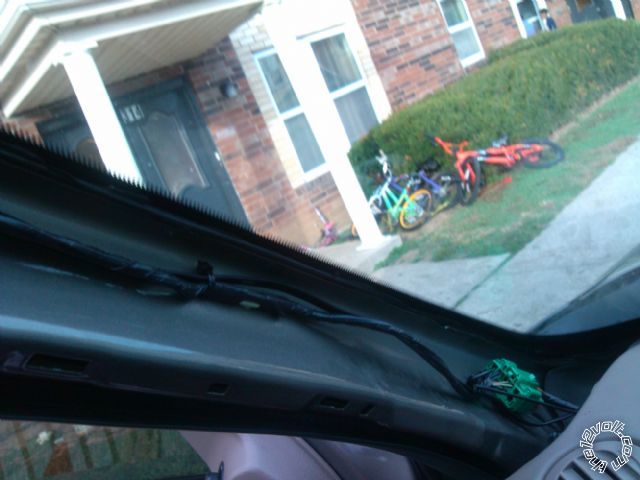
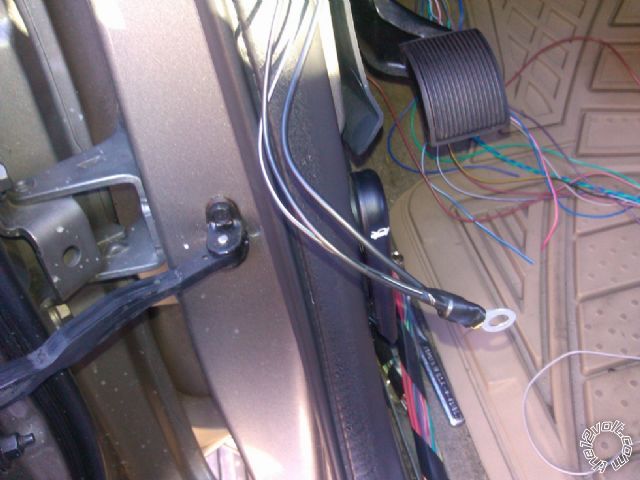
run control center behind rear view tuck wire into headliner and down driver window frame(just pull door seal off and pull trim off it just snaps on no screws) I didn't have to tape the control center on I just pulled the wire panel going to the rear view out just enough to stick one side of the antenna behind it and it stays real well.

pull wires using hanger
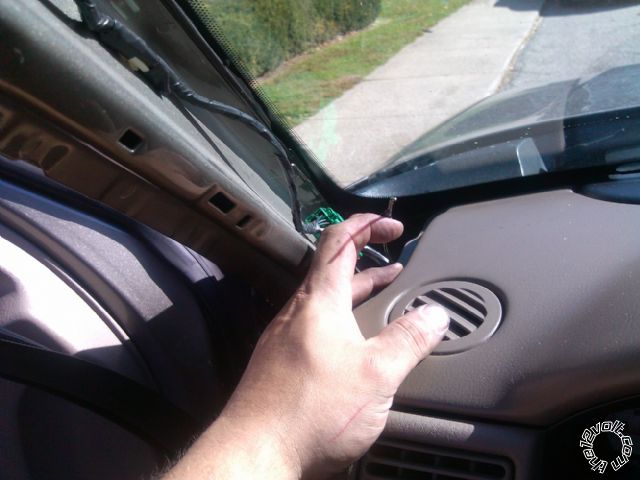
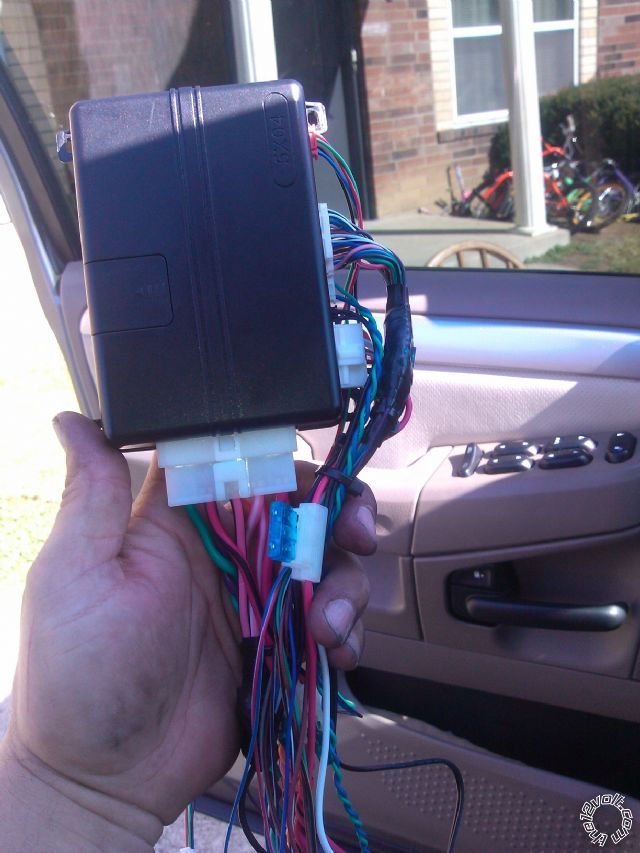
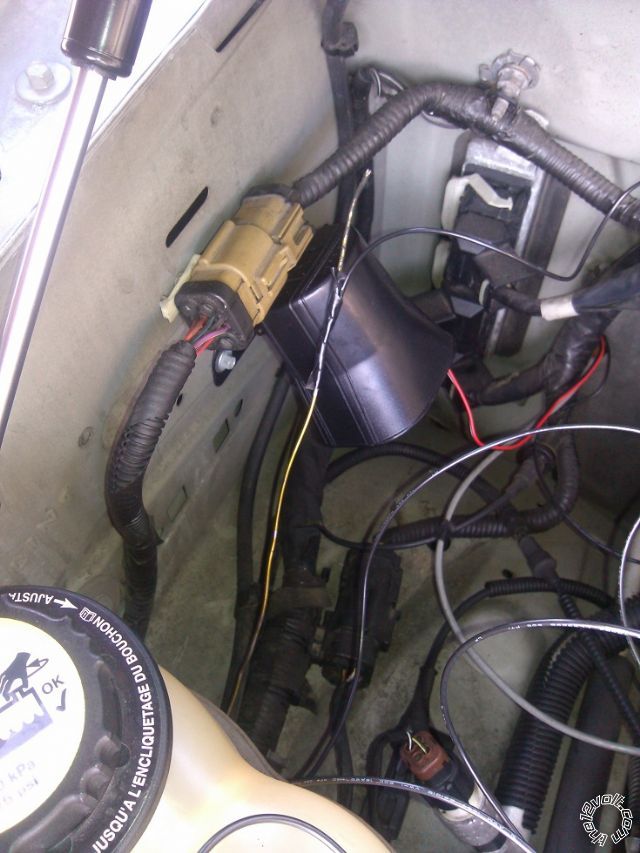
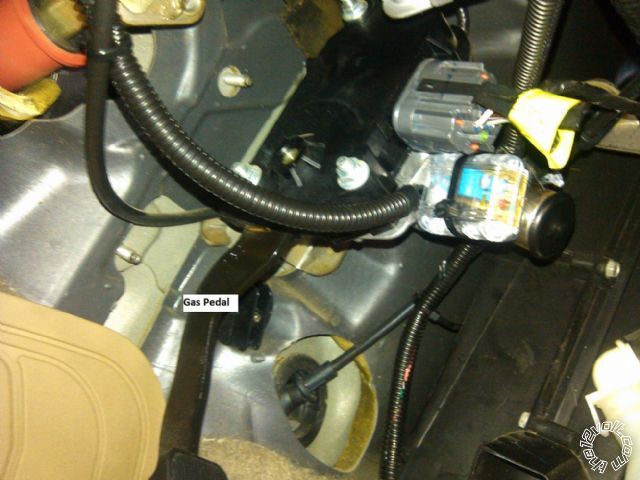
place alarm module in a good spot. it is real hard to find a spot on explorers of this year because the dash is so tight. this is how I done it.
.jpg)
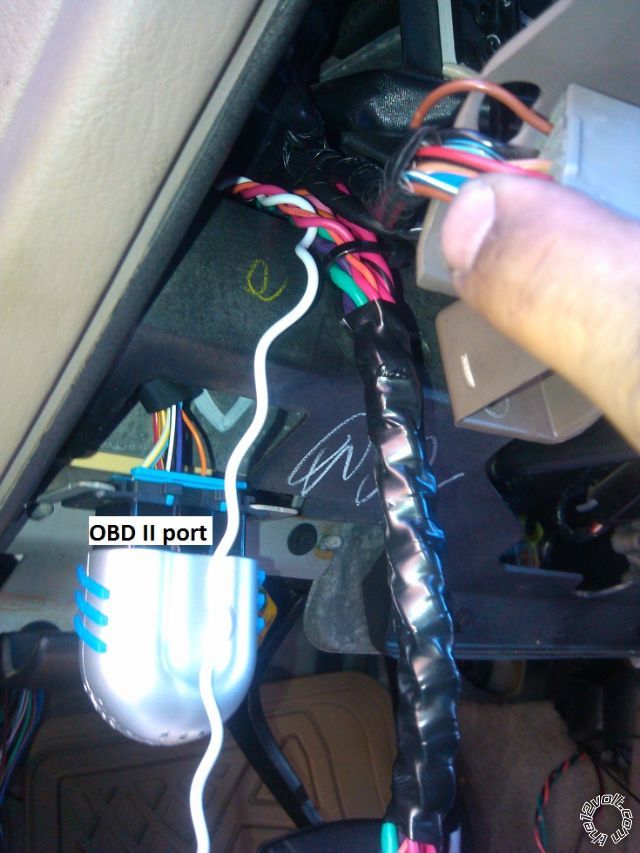
run remote start and parking light wires to the same spot as shown. Start from behind fuse box and pull using coat hanger.
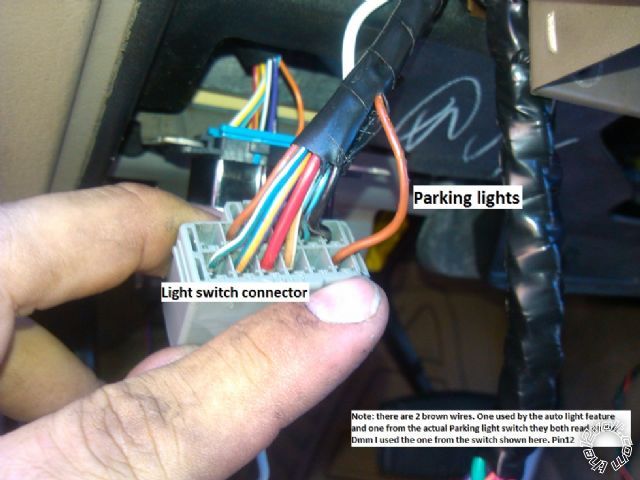
Parking light connection
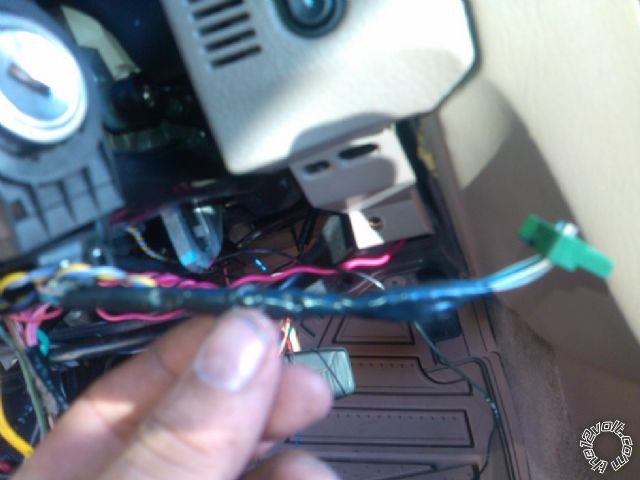
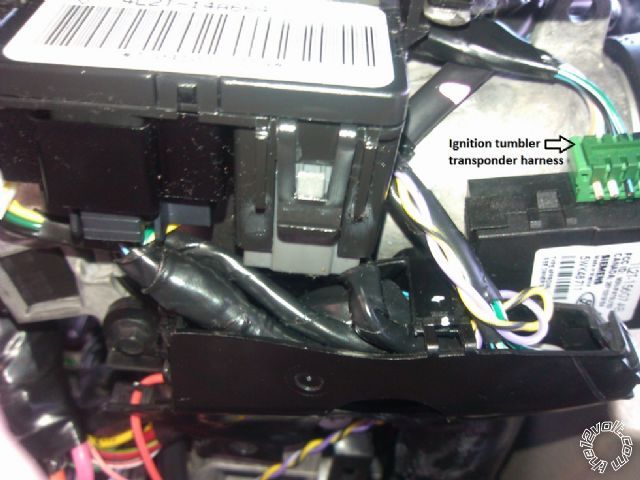
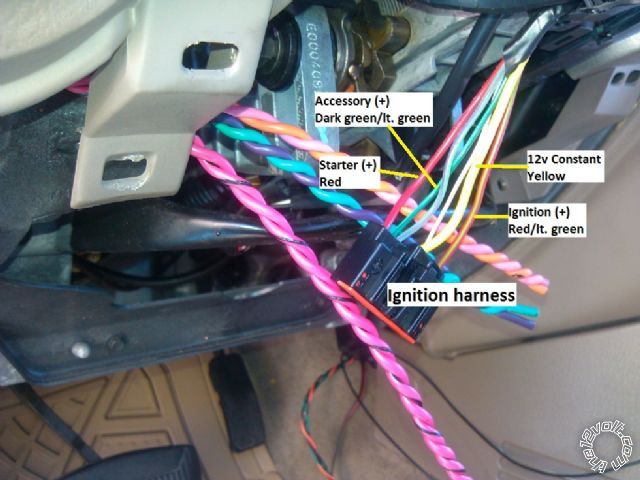
Ignition
.jpg)
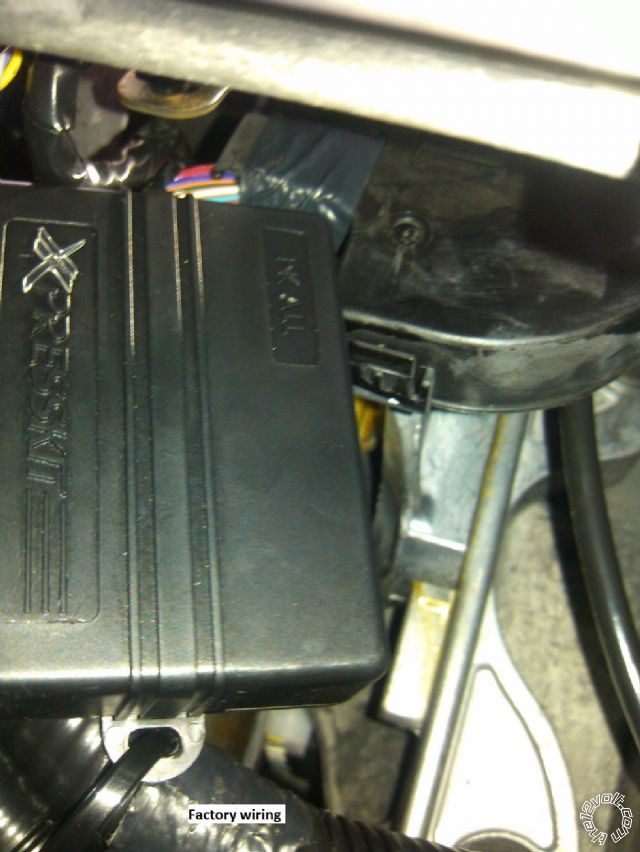
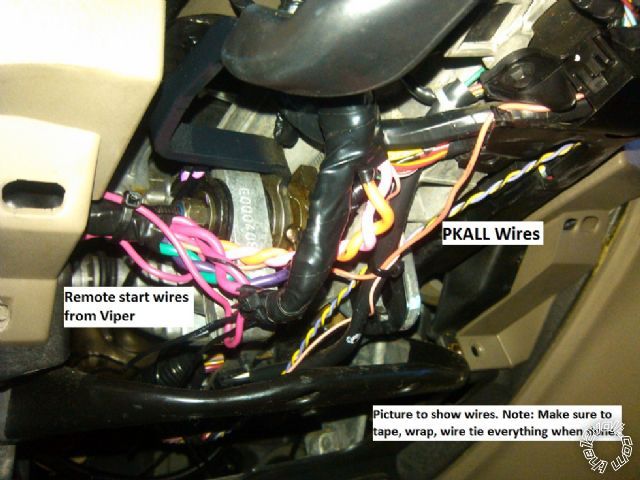
bypass module
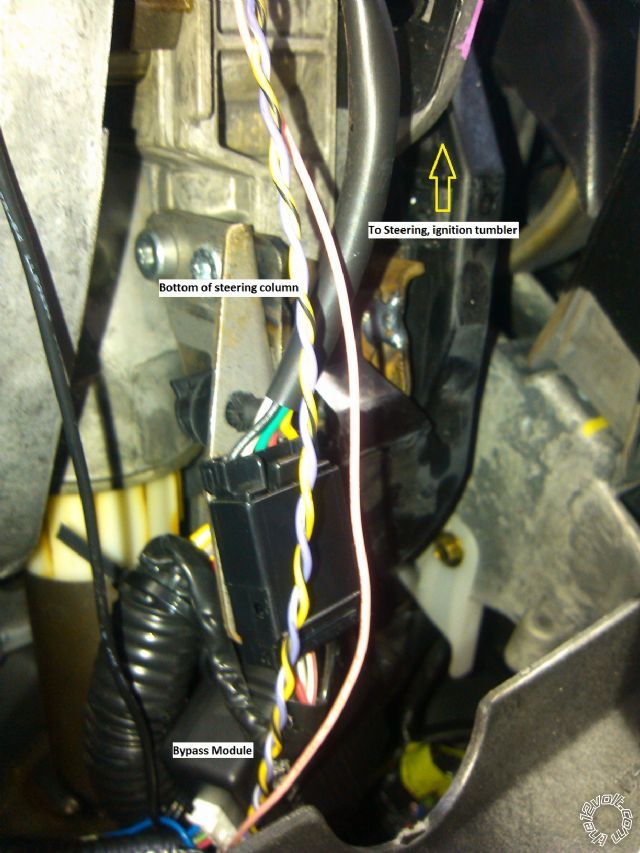
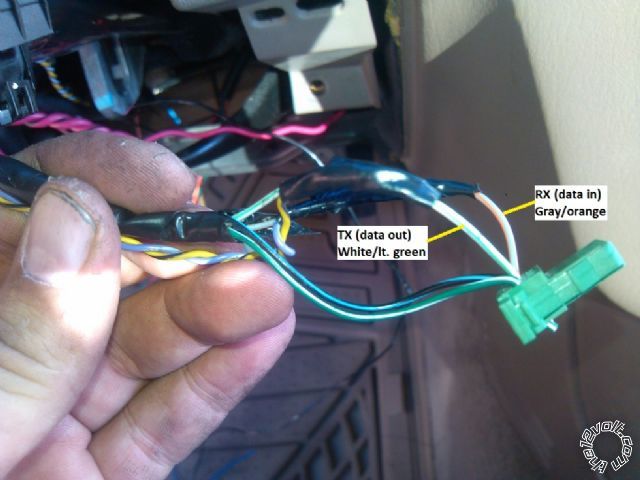
transponder connector at ignition key tumbler. (green connector)
when its done it looks like this
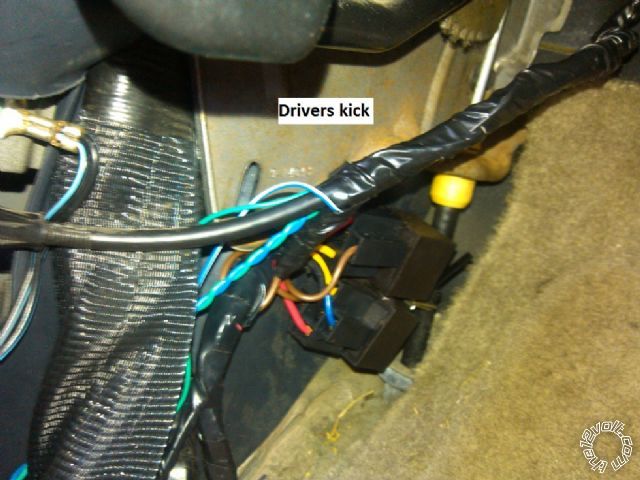
run locks, dome light and trunk pop relays
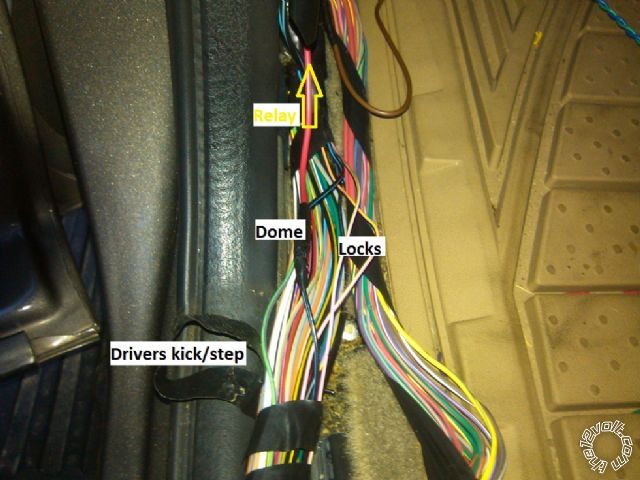
trunk and dome relays

shock sensor
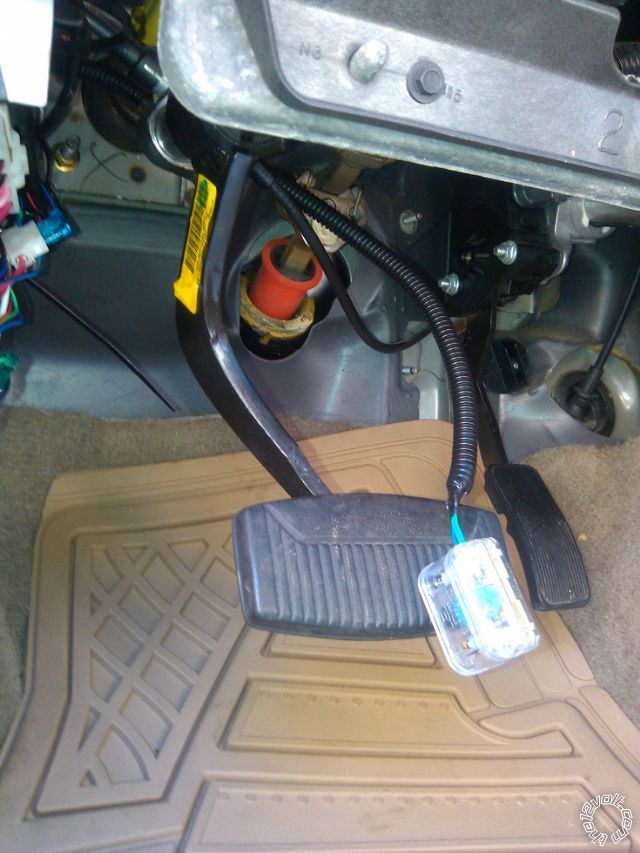
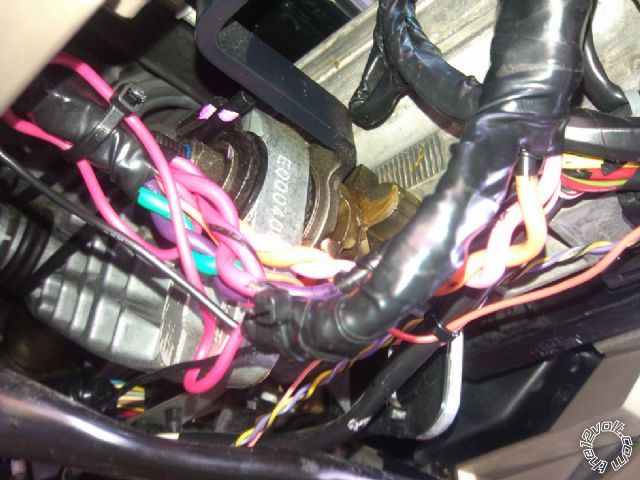
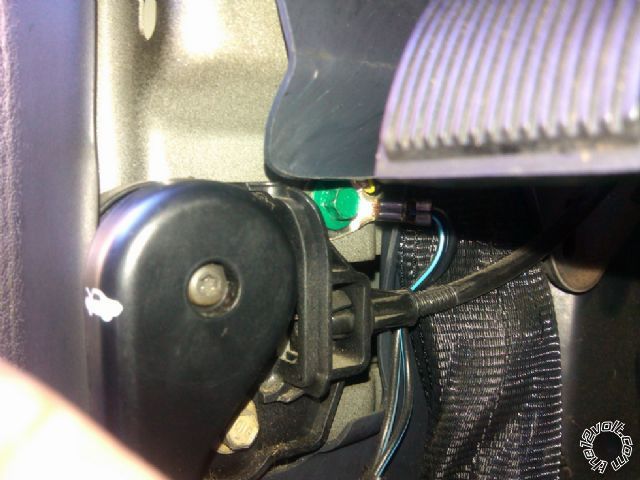
ground (alarm module, neutral safety, and sirens)
Done

when tapping into factory wires cut insulation about 1/4 inch then poke a tooth pick or rubber handled pic thru the center of wire. cut the wire you are running about a 1/2 inch poke thru hole and twist real good make sure it is not loose.
solder your connections and insulate real good! if you are not good at soldering you can really mess things up in your vehicle. it would be best for you to just make sure your connections are tight and then insulate. I like tape over heat shrink its a personal thing. if you do tape, use zip ties around everything to hold a good insulation.
its better to run once and last years then run sloppy and your car catch on fire!
this is my first alarm install and pictorial I hope it helps someone else not wanting to spend a house payment on an alarm install =)
some pictures didnt show up right this is the ignition
.jpg) When in doubt....kick it!
When in doubt....kick it!


 Topic Closed)


 It shows that you did your research. It would be nice if more people took their time and did it right.


 Piezo location (optional)
 The ignition pictures that didn't show up
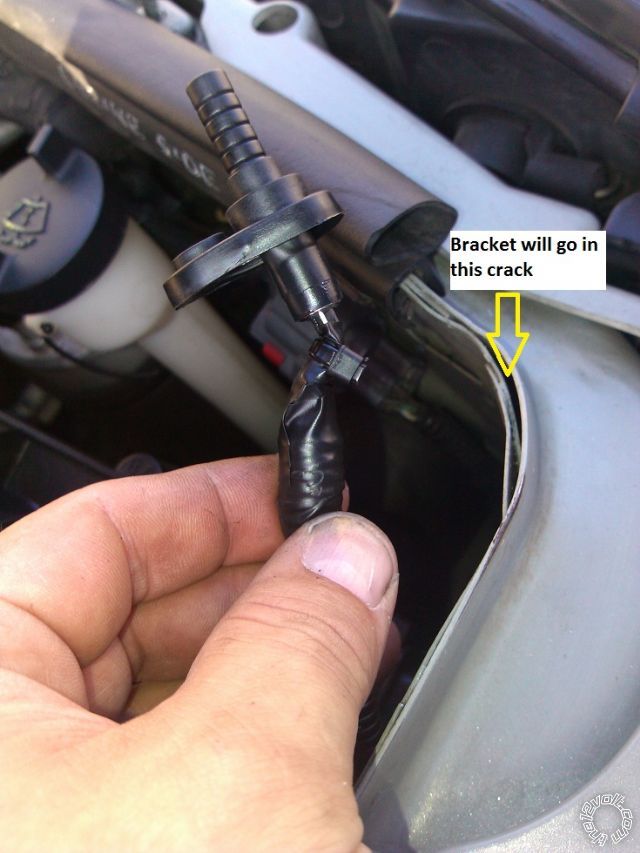
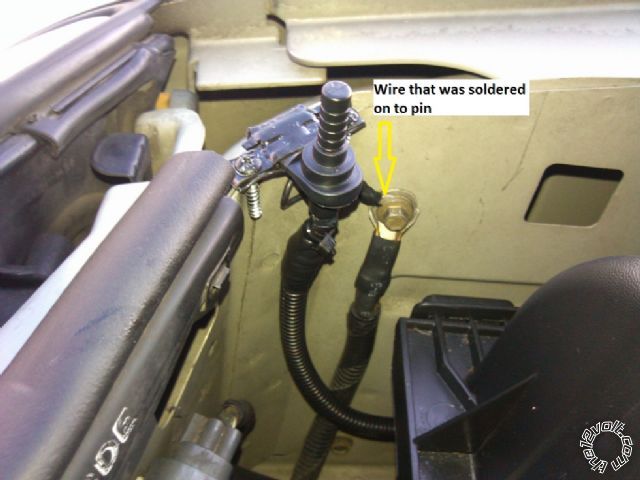
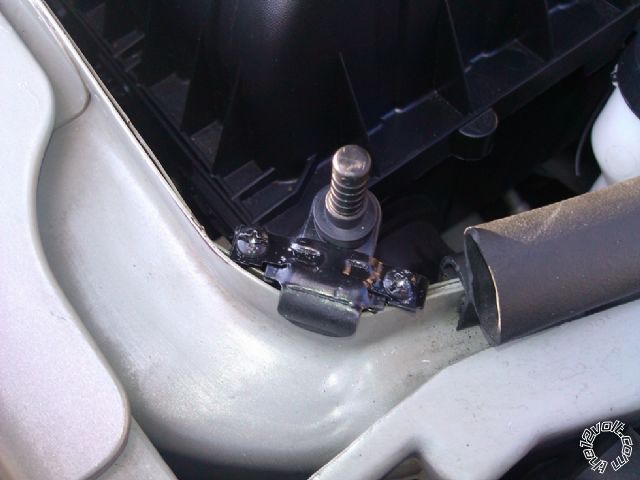
 I soldered a wire on to the metal bracket to make ground. You could make ground in another way but I feel it would help save from corrosion of any sort. I also made sure the top of the pin hit the hood head on by slowly closing the hood and looking inside and bending it slightly until it was right. I know if it his sideways sooner or later it would just break probably..
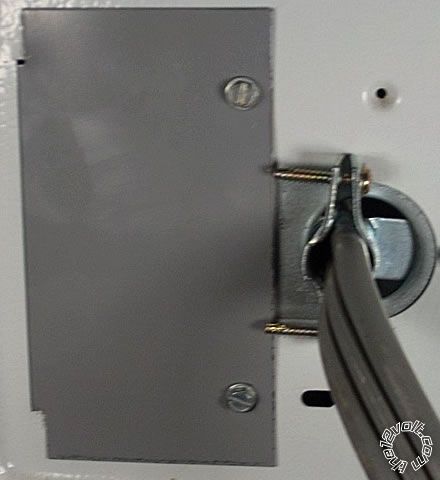

 Printable version


