the12volt.com spacer
icon

86 Chevy C20, Fiberglass Dash and Doors


Post ReplyPost New Topic
< Prev Topic Next Topic >
deeg money 
Copper - Posts: 107
Copper spacespace
Joined: October 26, 2008
Location: Florida, United States
Posted: February 27, 2013 at 10:30 PM / IP Logged  
First of all its been around 3 years since my last post. My last thread I was building a fiberglass dash for a 83 c10 I had. I ended up having to scrap the build due to a oak limb falling and crushing the cab of the truck. So I striped the truck and sold all the parts.
   Anyways, Now I have an 87 c20 Im looking to work on as a project truck. I will be glassing a new dash and doors. I have some ideas for it and will be starting this weekend. Although my last build was a while back I still remember all the screw up and mistakes I made. Now I know what not to do from that build. The old dash weighed a ton and the frame was mdf. I plan to use some mdf on the new one but if I can I would like to seek out longer lasting lighter product. Also, I am going to try my hardest to keep the stock dash frame in case i want to scrap my idea.
    Ok, So I am thinking I would like to go with the idea of keeping things more squared this time and have sleek lines. keep it custom but not wild and crazy. I would like to keep the "square body" theme going. So, if you have something in mind and you would like to voice your opinion please keep that in mind.
Here is my OLD dash that I was working on
86 Chevy C20, Fiberglass Dash and Doors -- posted image.
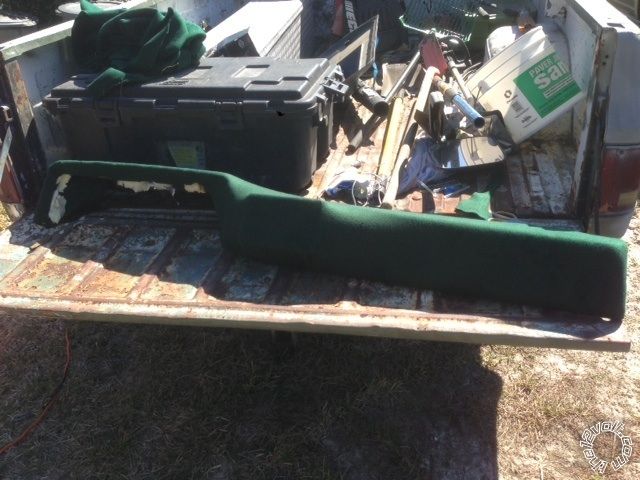
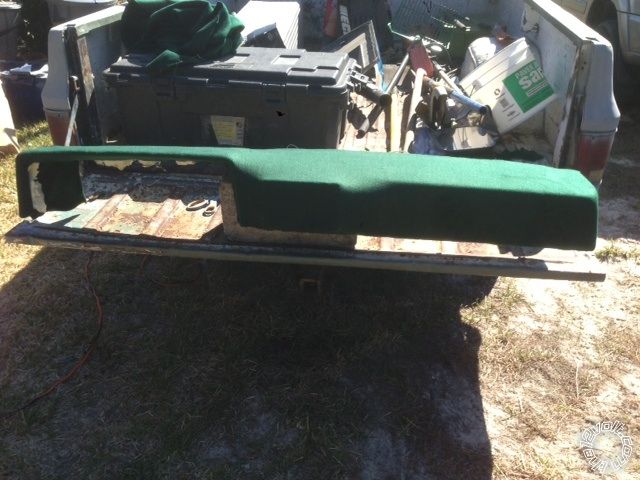
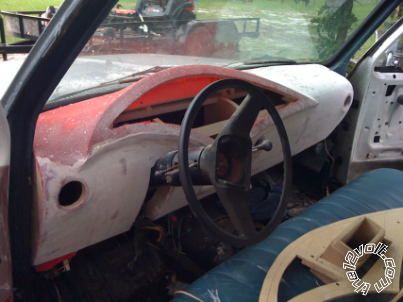
Another photo of OLD dash
86 Chevy C20, Fiberglass Dash and Doors -- posted image.
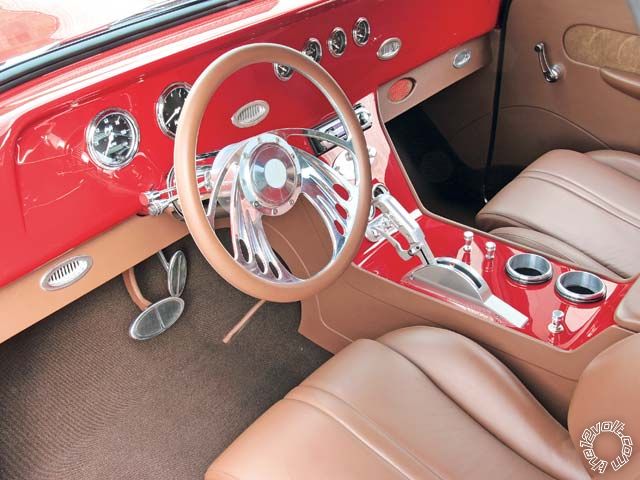
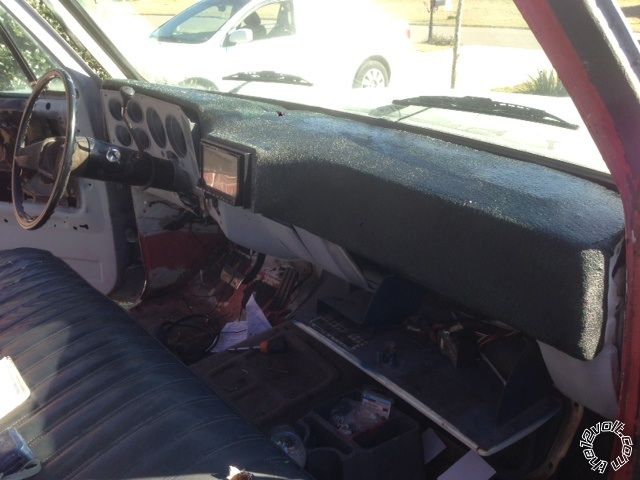
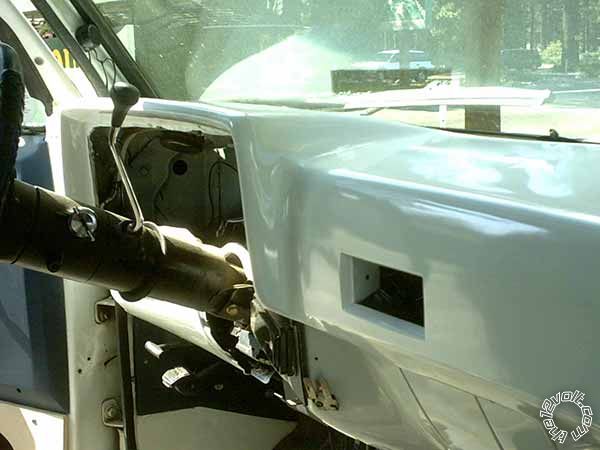
THIS photo is kind of the look Im going for. I figure (hopeful) it wont be as tough as the last one I was working on.
please note: this is a photo I found on google
86 Chevy C20, Fiberglass Dash and Doors -- posted image.
Deeg money
"If you cant be good, be good at it"
deeg money 
Copper - Posts: 107
Copper spacespace
Joined: October 26, 2008
Location: Florida, United States
Posted: March 12, 2013 at 11:02 PM / IP Logged  
ok so like always things have changed. I was wanting to completely cut out the old metal dash and start from scratch but I dont have the time now. I am moving to north dakota in the next 10-12 days and have to start and finish a dash for this truck. I took the old dash insert that was rotting away and stripped it to the bare meatl for a solid frame. (FYI I am no trying to make this cost effective, quick, but still stylish) I have a 7 inch head unit going in. I am doing to cover all of the old ac vent and smooth the dash out and create new spots for the ac when I decide where I want them to go. anyways here is what I got done in about an hour of fooling around with it.
In this photo you can see the bare dash insert. I cut out a spot for the head unit housing.
86 Chevy C20, Fiberglass Dash and Doors -- posted image.
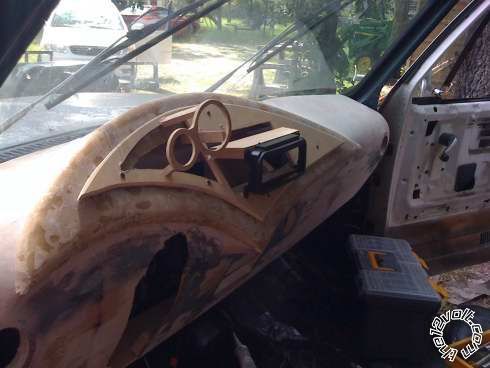
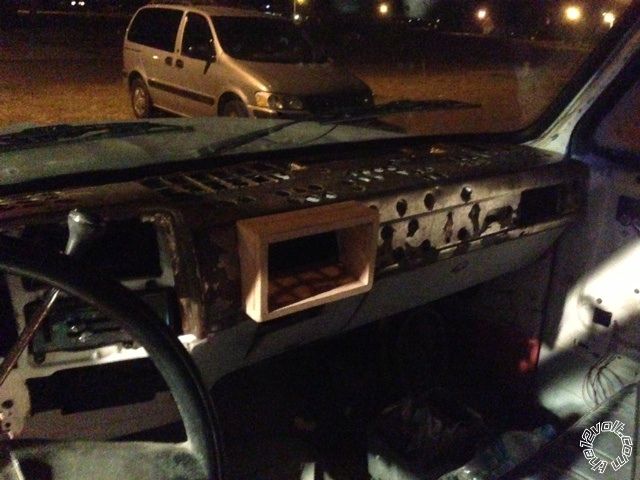
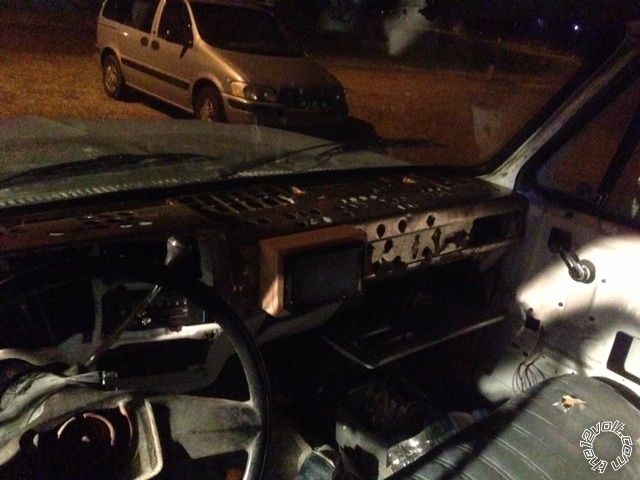
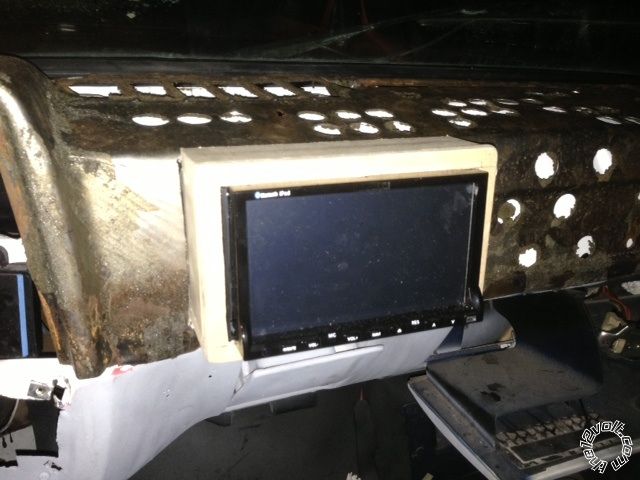
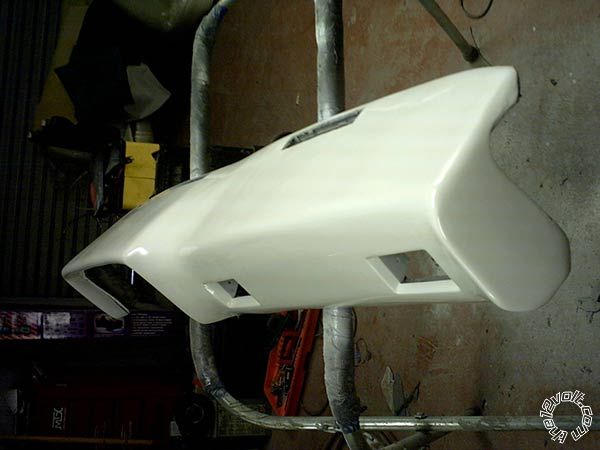
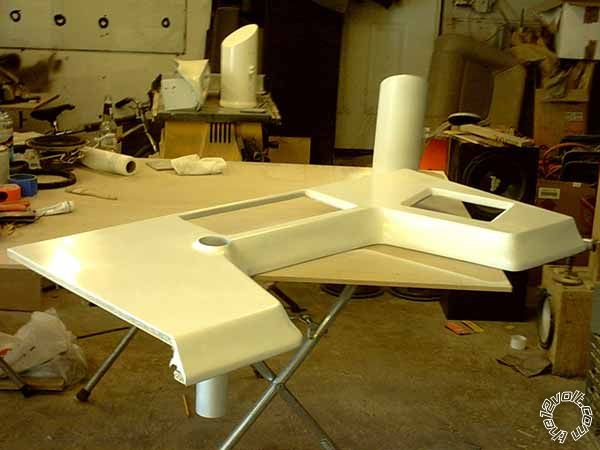
The rest of the photos are me just making sure it will fit in once I cut out the spots in the dash that is part of the cab. I used one of the AC vent holes as where I wanted the head unit and just cut out the whole area so the unit would like right in.
86 Chevy C20, Fiberglass Dash and Doors -- posted image.
Deeg money
"If you cant be good, be good at it"
deeg money 
Copper - Posts: 107
Copper spacespace
Joined: October 26, 2008
Location: Florida, United States
Posted: March 12, 2013 at 11:06 PM / IP Logged  
If anyone plans to go the route I am taking I am going to include some what not to do's to make everyone elses lives easier when they do it.
first one, When you are tearing off the old leather and foam on the dash insert be sure to leave it on where the dash meets the gauge bezel. It is a direct match and without it you will have a gap. I now to get fiberglass that gap back closed. I will show pictures of what not to do and pictures of how I plan to fix it if you tore it off like I did.
Deeg money
"If you cant be good, be good at it"
deeg money 
Copper - Posts: 107
Copper spacespace
Joined: October 26, 2008
Location: Florida, United States
Posted: March 13, 2013 at 4:42 PM / IP Logged  
Today I spent about 2 hours wrapping the fleece around the frame and glassing it. here are the photos
86 Chevy C20, Fiberglass Dash and Doors -- posted image.
Deeg money
"If you cant be good, be good at it"
speakermakers 
Copper - Posts: 231
Copper spacespace
Joined: January 02, 2003
Location: United States
Posted: March 14, 2013 at 2:33 AM / IP Logged  
Inspiring!
True fabricators are few and far between. A lot of years ago I did an install for a customer that your project reminded me of.
86 Chevy C20, Fiberglass Dash and Doors -- posted image.
Amprack
86 Chevy C20, Fiberglass Dash and Doors -- posted image.
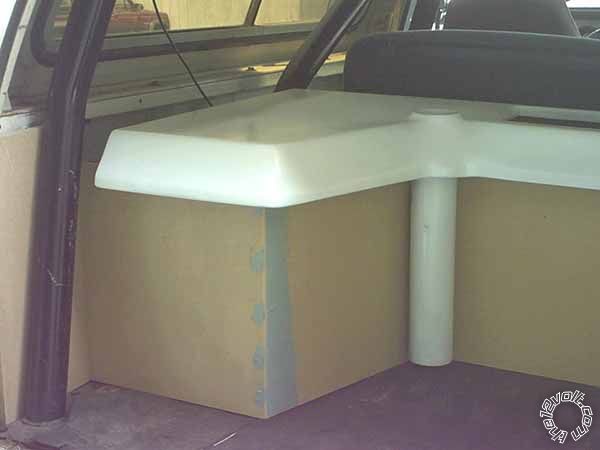
Amprack in horrible messy shop. It took me many years to learn to keep a clean shop.
86 Chevy C20, Fiberglass Dash and Doors -- posted image.
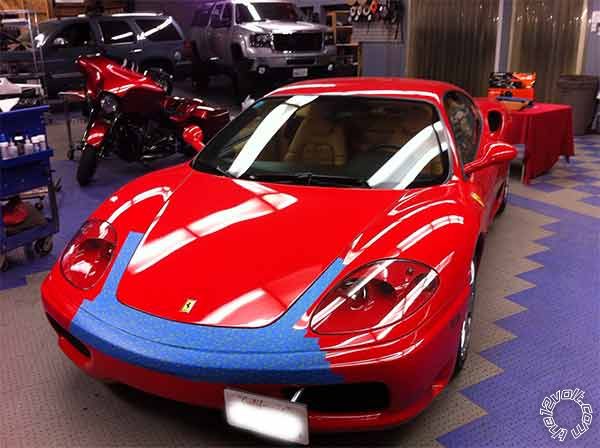
The project that I am working on today at my present shop.
86 Chevy C20, Fiberglass Dash and Doors -- posted image. 86 Chevy C20, Fiberglass Dash and Doors -- posted image.
It looks like you have a lot of talent. Of coarse a lot has changed since I did this install. Double DIN head units didn't exist back then. I like your plan. The lesson that I learned during my install was the importance of actual glass near the surface of a project like this. Fleece, resin, and body filler are not structurally stable and will crack and distort. Sun, humidity, and shrinkage from the polyester components curing can cause trouble on a project like this with large spans of fleece.
My advice is to cover your project in fatmat after fleece and before body filler. Then cover in thinned filler 1sq.ft at a time, and shoot the whole thing with evercoat polyester primer. This will give you a dense, stable piece that will withstand UV, high temps, and humidity for years to come.
Keep up the great work!86 Chevy C20, Fiberglass Dash and Doors -- posted image.
deeg money 
Copper - Posts: 107
Copper spacespace
Joined: October 26, 2008
Location: Florida, United States
Posted: March 14, 2013 at 4:41 PM / IP Logged  
Thanks for the info SpeakerMaker!
I actually wasn't going to put legit fiberglass on the top and just do it on the underside but now I'll spend the time and do it on the top. I didn't think about the sun cooking and heating it all day. I was going to work in it some more today but I won't have time when I get home. It will be too cold and dark out. I'm planning in finishing it by Monday.
Deeg money
"If you cant be good, be good at it"
speakermakers 
Copper - Posts: 231
Copper spacespace
Joined: January 02, 2003
Location: United States
Posted: March 18, 2013 at 1:24 AM / IP Logged  
When working on a project like this I will often make a sandwich of fiberglass comprised of Modified twill (available at www.tapplastics.com/product/fiberglass/fiberglass_fabrics/modified_twill/84)
and 1.5 oz. chop mat.
I do this by rolling out the chop mat on a flat surface, spraying it with 3M Super 77 adhesive and then rolling the modified twill out over it. This will bond the two mats together. I call this "FatMat". I then cut out the shape that I need and place the mat on aluminum foil on a flat surface with the twill face down. I pour the resin on and roll it out with a 1/2" roller (also available at Tap http://www.tapplastics.com/product/supplies_tools/fiberglass_tools_supplies/economy_rollers/184).
This leaves me with a resin soaked mat that has the perfect ratio of resin to fiberglass. I can then pick this fiberglass sheet up as one piece and apply to my project. Then roll it smooth to get all air bubbles out.
This sounds like a lot of steps but it goes pretty fast and you end up with an ultra smooth glass that needs very, very little filler on top to achieve a silky smooth finish.
This top layer will lock down the entire project and make it stable for years to come.
I have thought about doing an extensive documentation on this method since it is responsible for more than half of my projects (I do this full time 20 yrs. plus). But I don't know how well received it would be.

Sorry, you can NOT post a reply.
This topic is closed.

  Printable version Printable version Post ReplyPost New Topic
You cannot post new topics in this forum
You cannot reply to topics in this forum
You cannot delete your posts in this forum
You cannot edit your posts in this forum
You cannot create polls in this forum
You cannot vote in polls in this forum

  •  
Search the12volt.com
Follow the12volt.com Follow the12volt.com on Facebook
Thursday, March 28, 2024 • Copyright © 1999-2024 the12volt.com, All Rights Reserved Privacy Policy & Use of Cookies
Disclaimer: *All information on this site ( the12volt.com ) is provided "as is" without any warranty of any kind, either expressed or implied, including but not limited to fitness for a particular use. Any user assumes the entire risk as to the accuracy and use of this information. Please verify all wire colors and diagrams before applying any information.

Secured by Sectigo
the12volt.com spacer
Support the12volt.com
Top
the12volt.com spacer