the12volt.com spacer
icon

Fleece to Fiberglass + Pics


Post ReplyPost New Topic
< Prev Topic Next Topic >
khsonic03 
Member - Posts: 23
Member spacespace
Joined: July 10, 2005
Location: United States
Posted: July 10, 2005 at 11:21 PM / IP Logged  

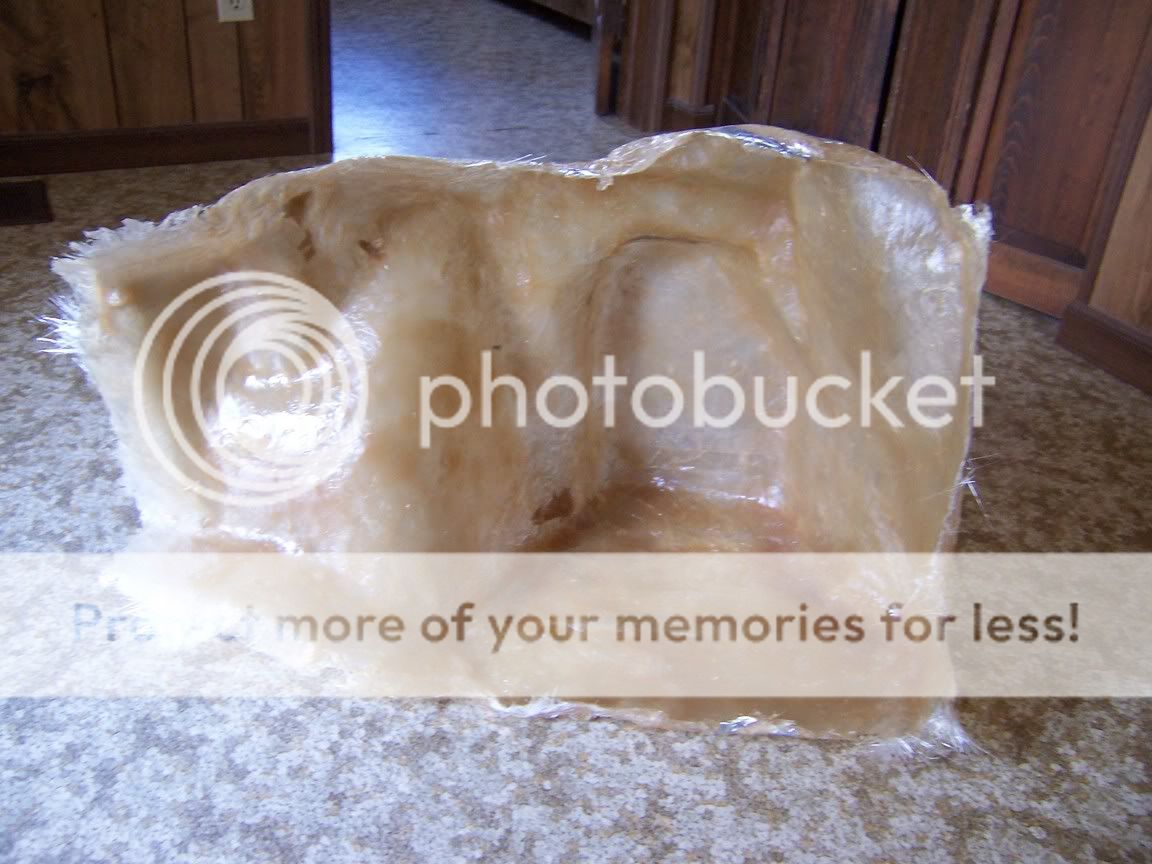
Hello.  I've done a search, but didn't find too much on the issue.  I have a 10w7 that I am making an enclosure for.  I currently have the mold done and it is 1/4-3/8" thick and does not flex with the thumb test (I would feel comfortable standing on it).  I keep reading how important it is to make sure the box doesn't flex, but my question is this:  When I stretch the Fleece over the MDF ring and glue it onto the back of the mold, and then resin it, what should I do about the seams?  I feel like they are going to be the weakest part of the enclosure, and if I try to lay down too much glass at the seam (between the fleece and the mold), it will get too thick and not fit in the trunk.  What should I do to make sure my sub doesn't blow the box at the seam?  I don't think I will be able to access the edges from inside the box either because of the construction.   Here is a pic of what I already have done (before the 8 layers of glass).  I also included one of my amp rack without the false floor on it.  BTW-this is my first time at this.

Fleece to Fiberglass + Pics -- posted image.

Fleece to Fiberglass + Pics -- posted image.

khsonic03 
Member - Posts: 23
Member spacespace
Joined: July 10, 2005
Location: United States
Posted: July 10, 2005 at 11:26 PM / IP Logged  

Here's another one of the amp fans I installed--not really related to the post, but opinions/comments are welcomed.  Thanks in advance!

Fleece to Fiberglass + Pics -- posted image.

abovestock 
Copper - Posts: 247
Copper spacespace
Joined: June 08, 2005
Location: United States
Posted: July 11, 2005 at 1:06 AM / IP Logged  
That install looks awesome by the way. As for your fleece problem, all you need to do is hot glue your fleece to the edege of the box and then resin over it. When you apply your resin be sure you put lots and lots on the edege where the mold and the fleece come together in order to glue the two together. Second reach inside the box and paint resin along the entire seam where the two come together. And last, recoat the seam after step two is hard and lay down a four inch strip of mat and saturate it to hold the two together. I hope this helps a little bit. Please keep us posted with lots of pictures and good luck.
abovestock 
Copper - Posts: 247
Copper spacespace
Joined: June 08, 2005
Location: United States
Posted: July 11, 2005 at 1:08 AM / IP Logged  
Oh yea by the way, trim the box edeges before you add any fleece to get a better shape and better adhesion of the fleece.
khsonic03 
Member - Posts: 23
Member spacespace
Joined: July 10, 2005
Location: United States
Posted: July 11, 2005 at 7:18 AM / IP Logged  
Thanks.  Yeah, I know about trimming the edges--that pic was the only one I had (it's only about 1/16" thick in that pic).  So what you are saying is to put a 4 inch layer on the OUTSIDE, correct?  Because I don't think I will be able to reach inside after the fleece is on there.  It would be very tight.  So I guess I am still wondering, is that ONE layer around the outside seam enough to hold it together?  I am worried that the sub will blow it apart.  It just seems like I focused so hard on making the thing as thick as it is, then only having ONE or two layers around the edge; I would think it would be kinda pointless to have it so thick everywhere else, then that thin at the edges.
Poormanq45 
Silver - Posts: 597
Silver spacespace
Joined: October 27, 2004
Location: United States
Posted: July 11, 2005 at 11:12 AM / IP Logged  
OK, my $0.02.
When you resin the fleece, on the edges put some fiber matte while you're applying the resin to the fleece. This will increase the seam strength like you want
crzycreations 
Copper - Posts: 52
Copper spacespace
Joined: February 22, 2005
Location: United States
Posted: July 11, 2005 at 11:20 AM / IP Logged  

If you cant get inside the box to paint resin on all the seams mabye you could mix some resin with body filler

and make it just thick enough so you can roll it around inside the box on the seams... just an idea

-Don't buy it, Build it-
khsonic03 
Member - Posts: 23
Member spacespace
Joined: July 10, 2005
Location: United States
Posted: July 11, 2005 at 11:35 AM / IP Logged  
Hmmm.  Good ideas.  I also have Bondo glass, which is bondo w/fiberglass.  I could probably put that on the inside edges.  Should I brace the edges at all?  Are there any other special tricks?  Thanks guys!
DukeDuke 
Silver - Posts: 206
Silver spacespace
Joined: November 01, 2003
Location: United States
Posted: July 11, 2005 at 12:15 PM / IP Logged  
It looks to me like your fused your remote wire, is there a point in doing that? I have NEVER heard of doing that, but I may be wrong.
Duke Duke
khsonic03 
Member - Posts: 23
Member spacespace
Joined: July 10, 2005
Location: United States
Posted: July 11, 2005 at 2:03 PM / IP Logged  
LOL, yeah.  Safety first!  I put a relay on the remote wire from the headunit, because I was going to have so many things running off of it (didn't want to kill the factory HU).  When I bought that little distribution block, I fused everything, including the remote leads.  The fans are fused off that block as well.  I read through bcae1, and that guy stresses fusing everything, so I figured I would.
Page of 2

  Printable version Printable version Post ReplyPost New Topic
You cannot post new topics in this forum
You cannot reply to topics in this forum
You cannot delete your posts in this forum
You cannot edit your posts in this forum
You cannot create polls in this forum
You cannot vote in polls in this forum

  •  
Search the12volt.com
Follow the12volt.com Follow the12volt.com on Facebook
Wednesday, April 24, 2024 • Copyright © 1999-2024 the12volt.com, All Rights Reserved Privacy Policy & Use of Cookies
Disclaimer: *All information on this site ( the12volt.com ) is provided "as is" without any warranty of any kind, either expressed or implied, including but not limited to fitness for a particular use. Any user assumes the entire risk as to the accuracy and use of this information. Please verify all wire colors and diagrams before applying any information.

Secured by Sectigo
the12volt.com spacer
Support the12volt.com
Top
the12volt.com spacer