the12volt.com spacer
icon

1999 Toyota Avalon, Alpine with OEM amp?


Post ReplyPost New Topic
< Prev Topic Next Topic >
master5 
Silver - Posts: 1,123
Silver spacespace
Joined: October 10, 2006
Location: United States
Posted: November 29, 2006 at 8:02 PM / IP Logged  
ok cool, some good news, at least the deck install is straight forward. Anyhow I enjoy fab so if you have any questions or need ideas just post a description or better yet pictures and I will offer any suggerstions. Best of Luck.
jbeletti 
Member - Posts: 36
Member spaceThis member has made a donation to the12volt.com. Click here for more info.spacespace
Joined: February 06, 2006
Location: United States
Posted: November 30, 2006 at 11:19 PM / IP Logged  
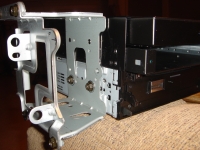
I received the Xenarc 700IDT LCD today. Below are two images (front and side views) of the LCD sitting on top of the HU.
Some initial thoughts:
  1. To mount the LCD so that when closed, the nose of it is about flush with the HU, the LCD case will be mounted farther into dash (need to check clearance)
  2. The LCD is very heavy (appears to be counter-weighted at the rear). May need to reinforce the OEM HU brackets or fab new ones and suport with straps from behind
  3. In order to retain the Alpine HU bezel and the Xenarc LCD nose/bezel, the LCD will need to be spaced up off the top of the HU by about 1/4". Maybe screw appropriate thickness of thin plates or washers to bottom of LCD case (pretty safe to bolt onto the bottom of LCD as case is pretty empty
  4. Due to LCD case being slid back so far to align fronts, it appears that I will not be able to use either of the sleeves that came with the HU and LCD as they are not close to lining up front to back - way offset
  5. Looks like I will need to fab something to strap the 2 units together on the sides. Thin plates perhaps. Drilled, then screwed into the equipment slides - preferably into existing holes but not the ones that match up (if at all) with the Toyota radio brackets
Am I on track with my thoughts above?
Thanks,
Jim
1999 Toyota Avalon, Alpine with OEM amp? - Page 3 -- posted image. 1999 Toyota Avalon, Alpine with OEM amp? - Page 3 -- posted image.
master5 
Silver - Posts: 1,123
Silver spacespace
Joined: October 10, 2006
Location: United States
Posted: December 01, 2006 at 12:13 AM / IP Logged  

Ok..toyos use whats called an "iso-mount" method..which basically means it bolts to the factory brackets and the "sleeves" are not used.

Once the units are bolted to the brackets..and then bloted to the dash..trust me..it will be rock solid..even it the units combined are heavier then the stock deck.

The tricky part will be lining everything up perfectly as there are many factors..as you are noticing already. what I do (and I do these type installs alot) is modify the factory brackets by re-drilling the holes which position the units as even and flush as possible..and not interfere with the dash bezel once reinstalled (you might have this issue if you space the lcd up to much).

The alpine should have exsiting holes that line up perfectly on the bracket so you will most likely be drilling for the perfect placement of the LCD..it may take some trial and error..basically install it all...snap the dash back on..check for fit..and repeat until it's right. No real shortcuts but with patience you will get it. In the worst case you may need to trim/cut/file some of the plastic dash bezel if the monitor hits but that is not difficult, once again just requires patience.

jbeletti 
Member - Posts: 36
Member spaceThis member has made a donation to the12volt.com. Click here for more info.spacespace
Joined: February 06, 2006
Location: United States
Posted: December 01, 2006 at 9:15 PM / IP Logged  
master5,
Spent a little time on this project tonight. As you said, the Alpine did end out bolting right up to the Toyo brackets. Once I stacked the LCD on top, I found that I was going to have to trim the top and side of the dash bezel.
Trimmed with a utility knife (don't have a Dremel), filed smooth. It fits and the trimming I did looks okay too.
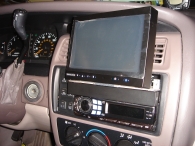
In order to allow the LCD to extend, tilt up, back and to the left, I ended up having to pull the casing out of the dash a bit. I will not be able to have the HU and LCD cases flush at the front. With the HU faceplate on, the LCD, when closed, sticks out about a half inch farther than the HU faceplate. Acceptable.
The HU sits a bit low and will not allow for the use of the snap on bezel that came with it. I'd have to cut off the entire bottom and right side to use it. I plan to skip it.
In order to allow for the HU faceplate to open downward to insert a CD without the rotation of the faceplate interfering with the bottom of the dash bezel opening, I will have to lengthen the screw holes in the factory brackets to raise the HU up about 1/16" or so.
None of the holes in the LCD case line up with the factory brackets so as you stated, I will be carefully measuring and drilling holes to mount the LCD.
Tomorrow, I plan to verify all the leads in the factory harness, then solder the Metra harnesses to the Alpine HU harness, then do a trial and see if I can get the thing to play. Then I'll pull the HU out and start working on pulling a crazy amount of wiring from the truck to the dash for the CarPC.
Thanks again,
Jim
1999 Toyota Avalon, Alpine with OEM amp? - Page 3 -- posted image.
master5 
Silver - Posts: 1,123
Silver spacespace
Joined: October 10, 2006
Location: United States
Posted: December 01, 2006 at 9:34 PM / IP Logged  

Sounds like progress..good. Most of the times with iso mounting the trim rings are not used..thats normal. However..if you are not happy with any gaps I have used thin foam to surround the circumference of the front edge of the deck..the stuff that tapes on. It comes with some speakers but you could probably find something similar at home depot or place like that. Once you put the dash on over it..it looks professional and hides any gaps well. It's less work then making a trim ring fit.

option 2 is to mount the deck back further and put the trim ring on from behind..this looks the best but would not be easy with the double stack as you are already having a tight fit.

option 3 is to space the head unit out as well..equal to the face of the LCD with the face of the alpine deck. This may or may not allow the use of the trim so if you decide to try it this way... test "line" them up before you drill. If you won't be happy with the look it is not worth the effort.

option 4 is to leave it as is..if it looks acceptable to you..then it works.

Continued good luck.

geepherder 
Platinum - Posts: 3,668
Platinum spaceThis member consistently provides reliable informationspace
Joined: October 27, 2003
Posted: December 02, 2006 at 6:21 AM / IP Logged  
Yes, as master5 says, you can bring the deck forward so it's even with the screen, and maybe use the trim ring. You'll just have to redrill the factory mounting brackets. Try a test fit first to make sure it'll work out to your liking.
My ex once told me I have a perfect face for radio.
jbeletti 
Member - Posts: 36
Member spaceThis member has made a donation to the12volt.com. Click here for more info.spacespace
Joined: February 06, 2006
Location: United States
Posted: December 03, 2006 at 12:55 AM / IP Logged  
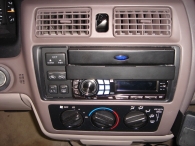
Got the HU and LCD installed (dash bezel loosely applied for now). I decided to leave the HU flush with the rest of the dash and allow the LCD to stick out another half inch or so. See clickable pics below.
Just wanted to tell everyone (especially to master5) thanks for the ideas and encouragement.
As you all stated, it took a lot of measuring, cutting, drilling, trial fitting, then Dremeling (bought the cordless model today), soldering and heatshrinking but I got'er done.
I also wired in the Motorola Bluetooth handsfree kit. I wired in the speaker that came with the kit and connected to audio mute/interrupt line to the Alpine HU. No time to try the BT kit out yet but so far, I noticed it does not appear to light up or anything. Gotta read the manual next.
While I now have tunes, the HU isn't quite done. The Alpine Siruis tuner is on back order so no satellite radio yet. The iPod cable is plugged in - now to test it out. The CarPC audio will come into the HU via an AI-Net to RCAs adapter that loops through the Sirius tuner that I don't have - so that will have to wait.
Next steps:
  1. Design/Fab/Install slide-out shelf in trunk under package tray for CarPC gear
  2. Run 4 ga from battery isolator to trunk (with 100 amp breakers at each end)
  3. Install battery box in trunk and run short 4 ga ground
  4. Install antennas (cellular, GPS and Sirius)
  5. Pull a gajillion interconnects from the trunk to the dash and console
  6. Connectorization-fest / testing / fun!
Thanks again everyone - great forum. Appreciate how you Pros take time to help the noobs.
Jim
1999 Toyota Avalon, Alpine with OEM amp? - Page 3 -- posted image.
(click image)
1999 Toyota Avalon, Alpine with OEM amp? - Page 3 -- posted image.
(click image)
master5 
Silver - Posts: 1,123
Silver spacespace
Joined: October 10, 2006
Location: United States
Posted: December 03, 2006 at 2:02 AM / IP Logged  

Lookin good.  I can see what a tight fit that massive LCD is but you got it in..patience pays off. you got a bunch of connections and wire runs yet but it really should be downhil from here.

I will be off line for a few days since I am moving from sunny South florida to freezing NY. I figure 2 -4 days min. before I am settled in and have my PC and internet set up. Looking forward to seeing the progress, until then hope all goes smooth.

I'll check back once I am set up. have a good wire fest

geepherder 
Platinum - Posts: 3,668
Platinum spaceThis member consistently provides reliable informationspace
Joined: October 27, 2003
Posted: December 03, 2006 at 5:31 PM / IP Logged  
Looks good.
My ex once told me I have a perfect face for radio.
jbeletti 
Member - Posts: 36
Member spaceThis member has made a donation to the12volt.com. Click here for more info.spacespace
Joined: February 06, 2006
Location: United States
Posted: December 03, 2006 at 9:37 PM / IP Logged  
Thanks guys. The Moto BT is not working. Next time I pull the HU/LCD, I'll troubleshoot the the BT. It was pretty straight forward to wire up so I am surprised it appears to be dead.
It's 16 degrees here. Too cold to do any wiring for now. Maybe it'll warm up next weekend.
Jim
Page of 4

  Printable version Printable version Post ReplyPost New Topic
You cannot post new topics in this forum
You cannot reply to topics in this forum
You cannot delete your posts in this forum
You cannot edit your posts in this forum
You cannot create polls in this forum
You cannot vote in polls in this forum

  •  
Search the12volt.com
Follow the12volt.com Follow the12volt.com on Facebook
Thursday, May 23, 2024 • Copyright © 1999-2024 the12volt.com, All Rights Reserved Privacy Policy & Use of Cookies
Disclaimer: *All information on this site ( the12volt.com ) is provided "as is" without any warranty of any kind, either expressed or implied, including but not limited to fitness for a particular use. Any user assumes the entire risk as to the accuracy and use of this information. Please verify all wire colors and diagrams before applying any information.

Secured by Sectigo
the12volt.com spacer
Support the12volt.com
Top
the12volt.com spacer