the12volt.com spacer
icon

fg and mdf


Post ReplyPost New Topic
< Prev Topic Next Topic >
e36rok 
Member - Posts: 18
Member spacespace
Joined: May 23, 2007
Location: Canada
Posted: May 24, 2007 at 1:33 PM / IP Logged  
^^^ Yeah exactly. I think when they say fleece they are talking about somebody who stretched fleece over a frame and then fiberglassed THAT. I have ONLY a fiberglass mold of my corner and want to attach 2 pieces of MDF to finish the front of the box. I am going out to strengthen up my mold with a couple more layers I don't have a camera I will see if I can get my friends tonight to take some pictures so you guys can see what I think quadraphonic and I mean.
quadraphonic 
Member - Posts: 8
Member spacespace
Joined: May 20, 2007
Posted: May 24, 2007 at 3:03 PM / IP Logged  

e36rok wrote:
^^^ Yeah exactly. I think when they say fleece they are talking about somebody who stretched fleece over a frame and then fiberglassed THAT. I have ONLY a fiberglass mold of my corner and want to attach 2 pieces of MDF to finish the front of the box. I am going out to strengthen up my mold with a couple more layers I don't have a camera I will see if I can get my friends tonight to take some pictures so you guys can see what I think quadraphonic and I mean.

Were you thinking MDF for the front (mounting surface) and top?  I think you and I are planning identical installs.  Looking forward to the photos.

e36rok 
Member - Posts: 18
Member spacespace
Joined: May 23, 2007
Location: Canada
Posted: May 24, 2007 at 3:27 PM / IP Logged  

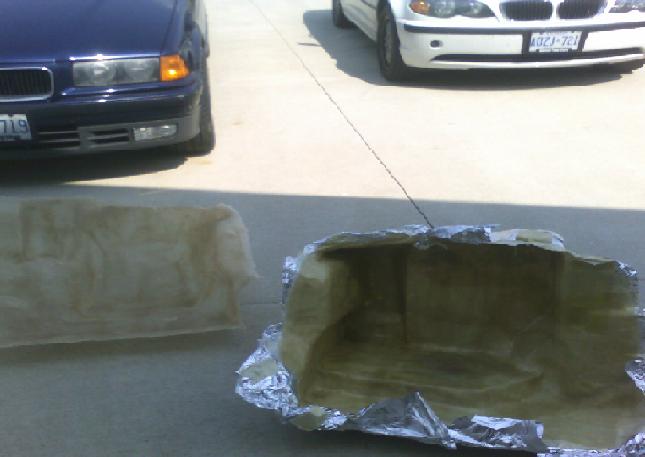
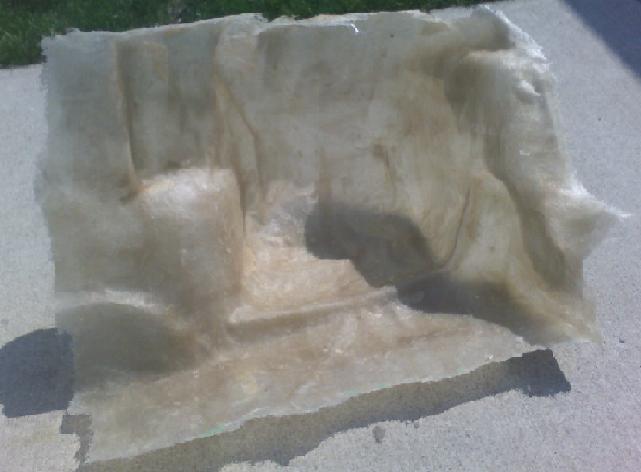
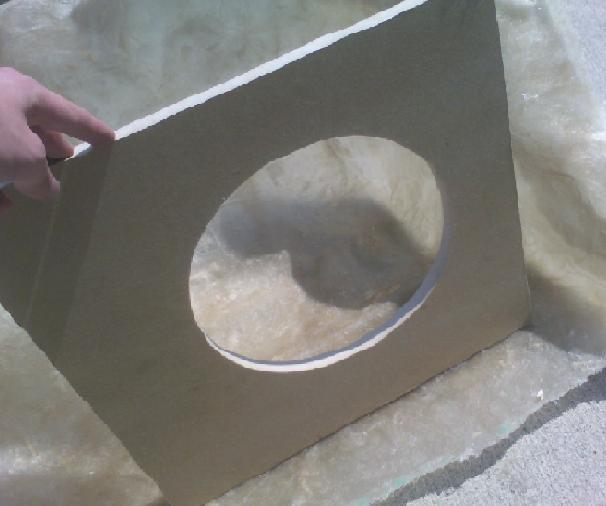
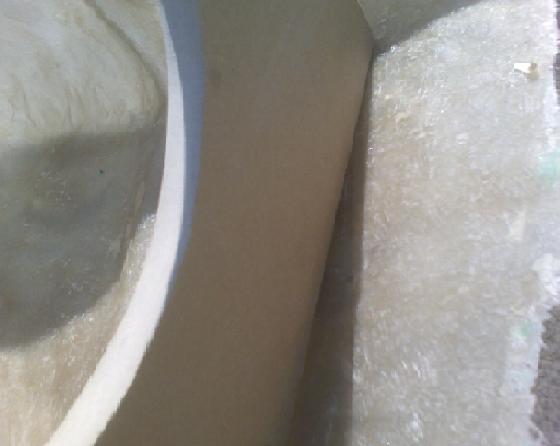
These are some pictures (sorry they are really choppy I took them with a cell phone and had to resize them with PAINT... yeah)

Both the enclosures (still have the tape and foil on one of them)

fg and mdf - Page 2 -- posted image.

The right side mold

fg and mdf - Page 2 -- posted image.

What I have in mind for the front (not this piece of mdf, just an example)

fg and mdf - Page 2 -- posted image.

Could I attach these two by the method I outlined above?

fg and mdf - Page 2 -- posted image.

icezero 
Member - Posts: 8
Member spacespace
Joined: March 09, 2005
Posted: June 27, 2007 at 6:14 PM / IP Logged  
suscribed to this thread :D
torquehead 
Copper - Posts: 144
Copper spacespace
Joined: January 15, 2006
Location: United States
Posted: June 28, 2007 at 11:40 PM / IP Logged  
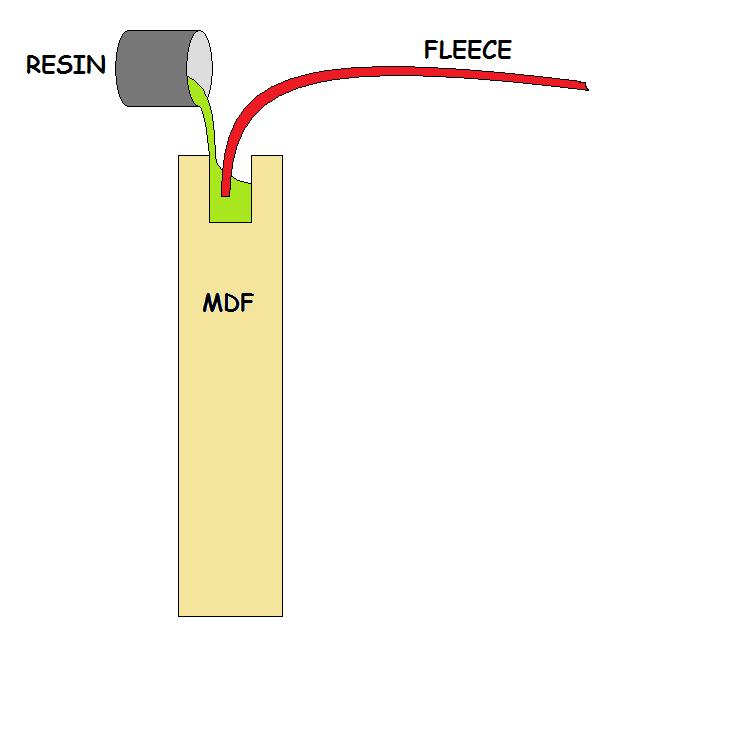
I did a paint of this, because its an alternative of rabbited edges when there is a high demand for strength.  I use this method only when well planned and depending on the situations.  You can use a circular saw and run it in the edge of the MDF, as you see, you can staple the fleece to the right side to secure it while you fill the channel with resin.
fg and mdf - Page 2 -- posted image.
e36rok 
Member - Posts: 18
Member spacespace
Joined: May 23, 2007
Location: Canada
Posted: June 30, 2007 at 3:14 PM / IP Logged  

I undertand the rabbet edge concept but what other people are saying is to attach fleece and reinforce and etc. What we have is the fiberglass mold ALREADY MADE, we are NOT stretching fleece over the top but instead making the front and top out of MDF only.

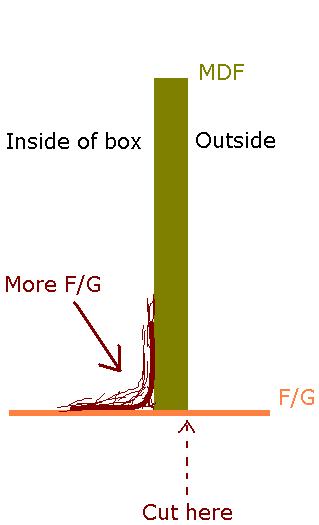
Once I have the MDF cut exactly to shape I will attach it with glue for temporary support, and glass all the edges on the INSIDE of the box through the speaker hole for strength, here is my paint of what I mean...

fg and mdf - Page 2 -- posted image.

I hope this clears up the confusion and I have one question, how many layers should I do on the inside edges to avoid a break in the sealed box down the road?

dstang24 
Copper - Posts: 98
Copper spacespace
Joined: September 06, 2005
Location: United States
Posted: June 30, 2007 at 3:48 PM / IP Logged  
The top image would be a trim piece built to fit in the enclosure location.  To this piece you could fiberglass the existing shape easily rather than through the subwoofer cutout.  From there you build an identical (or slightly larger depending on what nooks and crannies you need to fill) piece as your baffle.  Then attatch it MDF to MDF and cut out your speaker hole.  The nice thing about doing it this way too:  with the single solid baffle you could flush (or what's called recess) mount the woofer(s) by attaching an MDF speaker ring behind it and cutting the main baffle larger.  This way the woofer will be flat with the baffle.    Hopefully my Paint drawing (obviously on a laptop) is understandable.fg and mdf - Page 2 -- posted image.
Team Edge Audio
e36rok 
Member - Posts: 18
Member spacespace
Joined: May 23, 2007
Location: Canada
Posted: June 30, 2007 at 8:30 PM / IP Logged  

WOW... NO idea what is going on with the post above. Here is my plan

-I have the fiberglass mold made already
-Construct the front and top of my enclosure using MDF and attach these two pieces using woodglue and screws
             (before screwing them together I will cut my speaker ring and mount a smaller one behind it to flush mount the sub)
-Attach the MDF "top" to my fiberglass mold using something temporary like glue
-Fiberglass strands on the inside edges everywhere where the fiberglass mold meets MDF
-Once this is dry, add 3-4 layers of matt to the inside edges for support

Now the structure of the box will be finished and I can worry about making it "look pretty" later by using a roundover bit on the edges

and filling in gaps on the outside between fiberglass and MDF.
I think the problem people are telling me is the speaker ring will be too small to get a hand in and work? I don't think that will be a problem
I have small hands and that "baffle" idea baffles me (no pun intended :P).

  • --> Please let me know if my plan should give me any problems if I follow through correctly.
quadraphonic 
Member - Posts: 8
Member spacespace
Joined: May 20, 2007
Posted: June 30, 2007 at 10:53 PM / IP Logged  

The baffle concept is similar to your approach.  Whereas you and I were planning on using the mold to trace a cut template on a sheet of MDF to use it as the final surface, he's suggesting to do the same thing, but to then cut of most of the interior of that MDF sheet to allow for easy access into enclosure for FG attachment and reinforcement.  Then you would mount your final MDF surface to that baffle (screws/glue).

I agree that reaching in shouldn't be tough, but visibility could be compromised a little bit.  I'm gearing up to get mine done in the next few weeks here.  I'm definitely looking forward to seeing how you progress.

e36rok 
Member - Posts: 18
Member spacespace
Joined: May 23, 2007
Location: Canada
Posted: July 01, 2007 at 12:58 PM / IP Logged  
I think I understand now. But how do I go about attaching the middle piece of MDF back to the original piece now part of my enclosure?
I am gaining visibility to strengthen the inside of my enclosure but am screwing myself because it will be hard to reattach this middle piece
back to the original MDF because of the 1-2mm gap from the jigsaw... I'm assuming I have to now fiberglass THIS piece from the inside through
the speaker hole to reattach it?
Page of 3

  Printable version Printable version Post ReplyPost New Topic
You cannot post new topics in this forum
You cannot reply to topics in this forum
You cannot delete your posts in this forum
You cannot edit your posts in this forum
You cannot create polls in this forum
You cannot vote in polls in this forum

  •  
Search the12volt.com
Follow the12volt.com Follow the12volt.com on Facebook
Friday, April 19, 2024 • Copyright © 1999-2024 the12volt.com, All Rights Reserved Privacy Policy & Use of Cookies
Disclaimer: *All information on this site ( the12volt.com ) is provided "as is" without any warranty of any kind, either expressed or implied, including but not limited to fitness for a particular use. Any user assumes the entire risk as to the accuracy and use of this information. Please verify all wire colors and diagrams before applying any information.

Secured by Sectigo
the12volt.com spacer
Support the12volt.com
Top
the12volt.com spacer