the12volt.com spacer
icon

alarm pictures


Post ReplyPost New Topic
< Prev Topic Next Topic >
meh66 
Copper - Posts: 266
Copper spaceThis member has made a donation to the12volt.com. Click here for more info.spacespace
Joined: October 26, 2003
Location: United States
Posted: July 02, 2007 at 3:27 PM / IP Logged  
I thought I asked this question before. I wanted to know if anybody take pictures of there alarm installs. I would like to see them. I must say that I am not proud of my first three installs. However, I have never been trained...I learn by trail and error and of course by the seasoned professionals on this site. I also had the opportunity to look at some jobs that were done at well known shops. I must say the work was messy. I am a big guy so squeezing in some tight locations get pretty tight..LOL.
MEH66
"Car Performance and Mobile Electronic Enthusiats"
KPierson 
Platinum - Posts: 3,527
Platinum spaceThis member consistently provides reliable informationspace
Joined: April 14, 2005
Location: Ohio, United States
Posted: July 02, 2007 at 3:49 PM / IP Logged  

Unfortuntely, most shops don't really care about how it looks, as long as it works.

This is a side effect of commission shops that get paid per install, not per hour.  The more alarms they can throw in the more money they make.  The longer it takes to fix a problem with an alarm, the more money they lose.  Therefore, it is financially beneficial for them to make everything easily accessible, so that if it does come back, it will be quick and easy to fix.

This doesn't go for all commisioned installers, but I've seen my fair share of them (You could see one of these shops from the parking lot of the Circuit City I used to work at - I fixed quite of a few of their 'installs' while I was there).

I don't have any pictures, but a general rule of thumb from a security perspective is that with any easy-to-remove dash piece removed you shouldn't be able to see anything.  If you drop a dash and the alarm brain comes with it that is a sign that something wasn't done right!

I like to start out by finding all my wires in the vehicle.  I then bench prep the alarm, leaving the wires just long enough to go where they need to go.  I group as many wires as possible together, then wrap all the wires in electrical tape from the harness to the splice connection.  This leaves no colored wires under the dash.

For the record, I've seen some terrible installs done by hourly people, too.

Kevin Pierson
Chris Luongo 
Platinum - Posts: 3,746
Platinum spaceThis member consistently provides reliable informationspace
Joined: May 21, 2002
Location: Massachusetts, United States
Posted: July 02, 2007 at 4:55 PM / IP Logged  
I have a bunch of pictures that I keep meaning to post online, but I never get around to figuring it out.
But, you might want to take a look here:
http://www.audiogroupforum.com/csforum/showthread.php?t=10529&highlight=nissan+doorlocks
I'll say this up front: The pics you see there are a NON-STEALTH installation. That is, it's a remote starter, not an alarm.........I made no effort to hide anything, and to make future repairs easier.
That being said, if you look at the first pic, you can see my idea of what clean, neat, and simple looks like.
Again, if you're trying to make things hidden, you'll want to do something different, but that might give you an idea.
P.S. I haven't had the chance to see any of my first jobs, but I'm sure I wouldn't be proud either! But we all have to start somewhere.
enice 
Silver - Posts: 857
Silver spacespace
Joined: March 05, 2006
Location: New York, United States
Posted: July 02, 2007 at 6:34 PM / IP Logged  
I do exactly what KPierson does.  If you test all your wires first  then you can prep your alarm accordingly.  Example,  If your door locks are next to the door triggers, trunk trigger and  the trunk release are at the kick panel then I will use my drill and tie the alarm wires together and tape up and run it nice and neat to that kick panel after I mount the alarm in a place where its not easily reachable and connect(solder).  Trust me, your customer will love the fact that you can tell him, "hey look under your dash and tell me if you see an alarm".  This is a great seller and will make loyal customers even if you charge more then the competitor.  Also soldering is the only way to go.  Many times the installation fails because the wire got loose.  This will make it seem like the alarm is faulty when in reality it was the wiring.  I still have to post the 06 Galant install and have pics on my desktop of the wire locations but am having trouble adding notes on the actual pics to show which wire is which.  Its extremely easy to install an alarm when not only do you have the wire color and location but also pics. 
frans-c 
Copper - Posts: 77
Copper spacespace
Joined: February 14, 2006
Location: South Africa
Posted: July 03, 2007 at 4:09 AM / IP Logged  
This is a thread that I posted on BenzWorld.org. Keep in mind that my install is also just for keyless entry.
This is the thread:
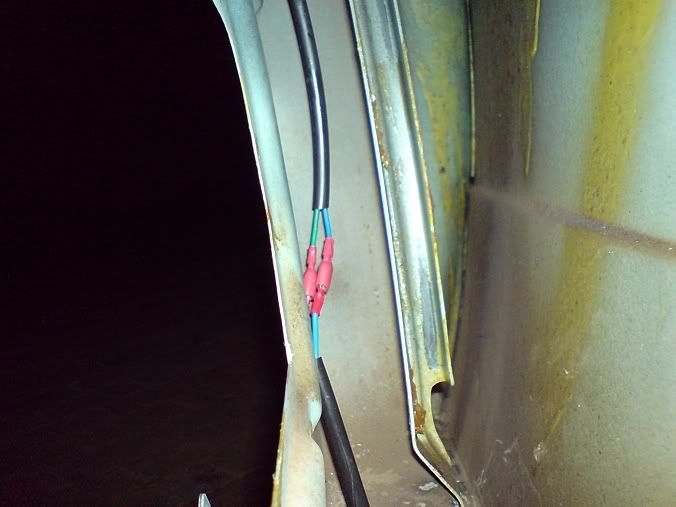
Well, I think it took me probably more than 24 hours physical hours to get my installation virtually completely installed. All I can say is, my hands are raw and ache of all the crimping I had to do!
Let me just add that a lot of those hours were wasted trying to sleeve all the wiring I had to use. It's really tough to get a bunch of loose wires to travel through a narrow PVC sleeve. In the end though, I got it right!
Just to recap, this is what I ordered from the US:
  • Four genuine MB power window regulators and motors, from Autohaus
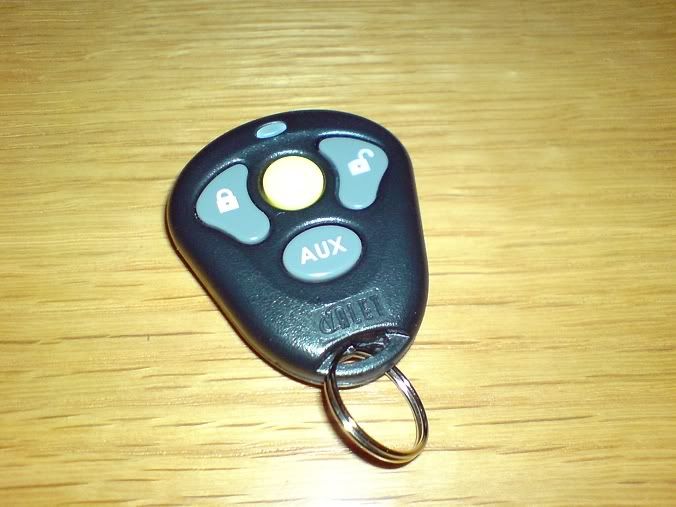
  • One Valet 712T keyless entry kit
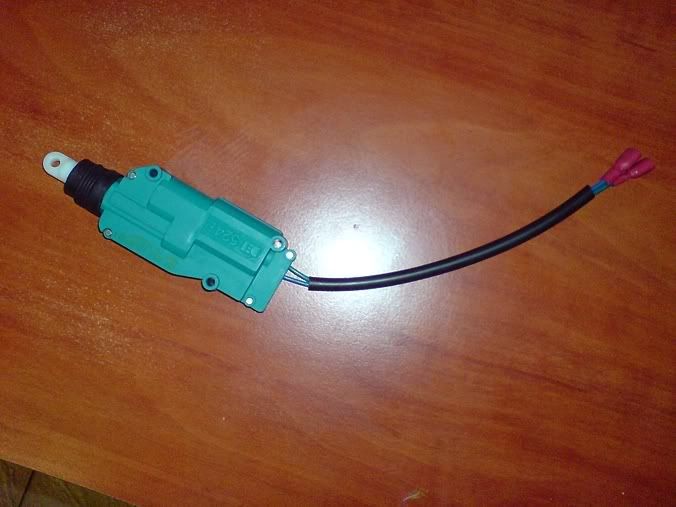
  • Six Directed high-power door lock actuators
  • Two Directed 530T window automation systems, from Digital4Cheap
So, after the old vacuum locking system had been stripped, I set out for yet another DIY project.
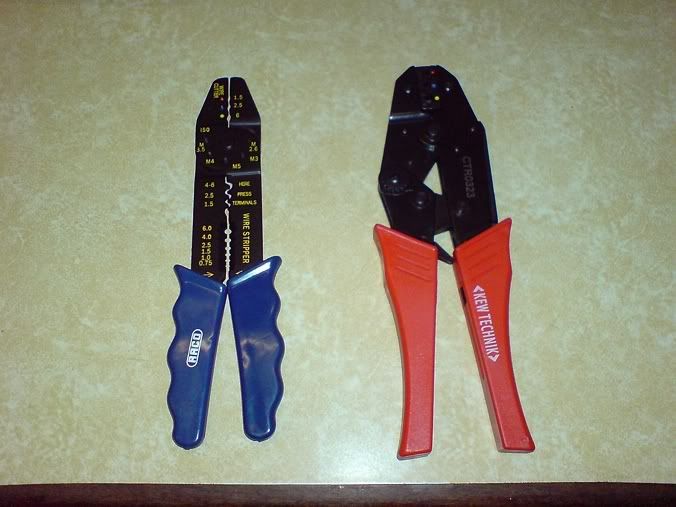
I invested in a good quality crimping tool when I bought all the crimping lugs and wires. Let me tell you, this tool is the best! The other one I had was truly dismall.
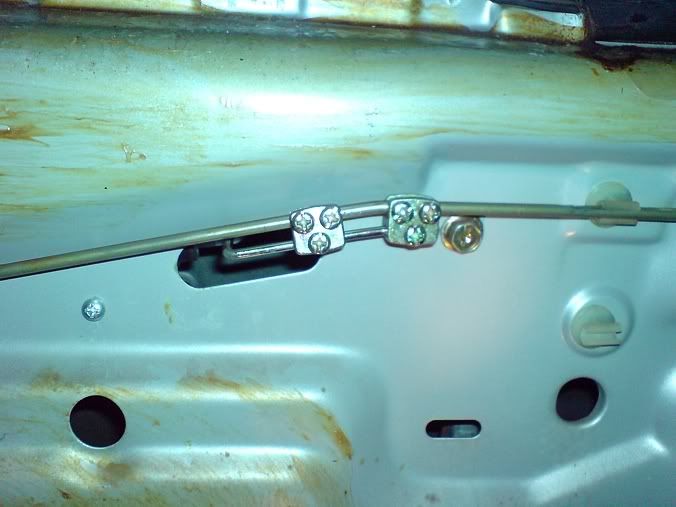
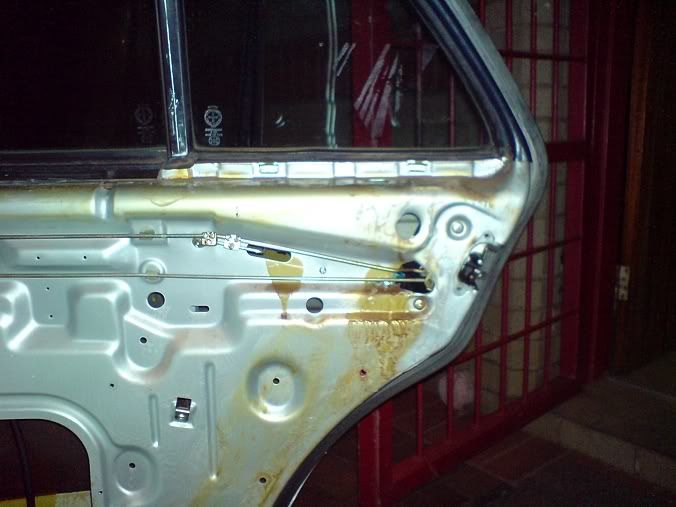
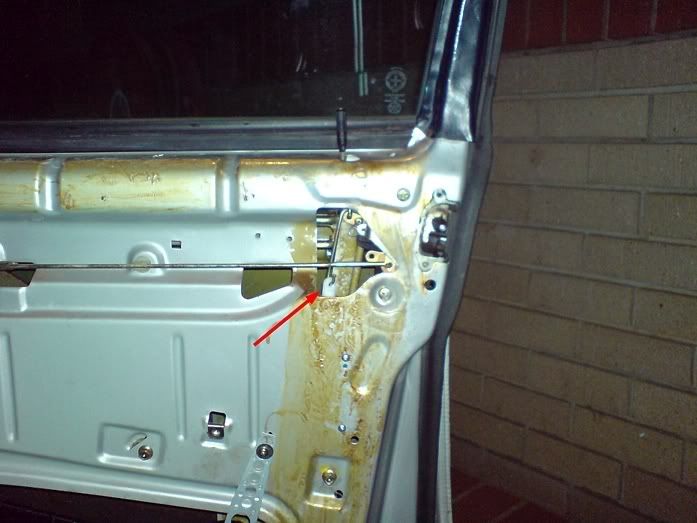
I've posted a few pics of the actuators' locations. I simply couldn't manage to mount the rear actuators where the vacuum ones were located due to a lack of space. In the end though, I think the rear actuators work great where I placed them. I completely removed the rod that was controlled by the vacuum actuator. The front actuators were easy to mount, requiring just a short extension to control the locking mechanism.
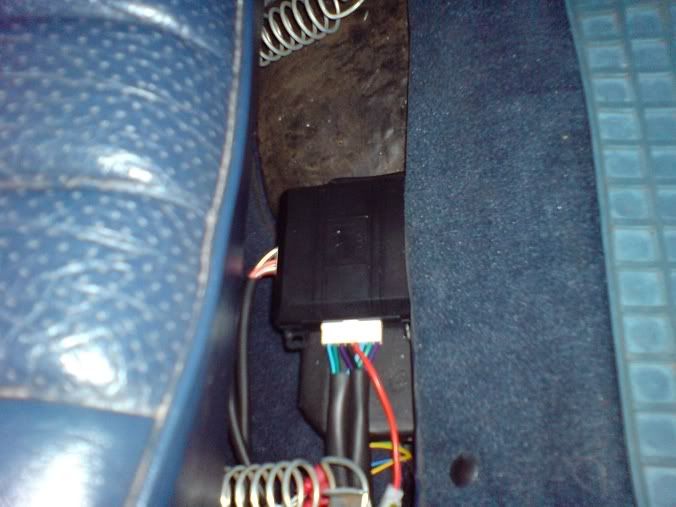
I really struggled to find a suitable location for the keyless entry control module and relays, but managed to make them fit in the passenger side kick panel. I didn't manage to fasten it due to the irregular profile of the body panel, but it fits snug in the crevace.
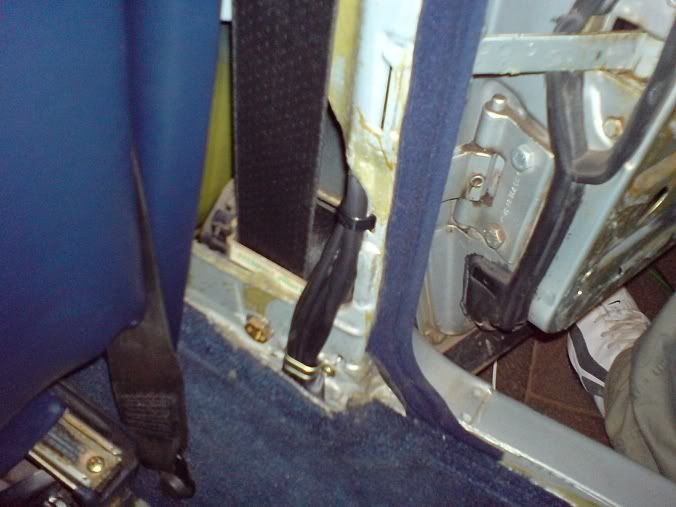
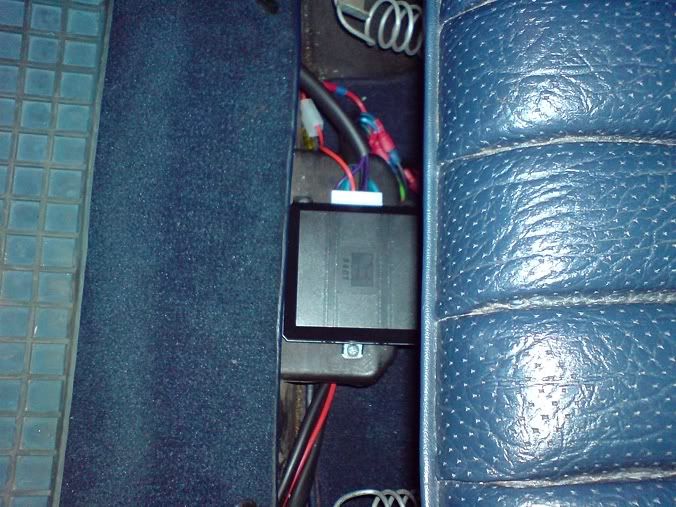
For the life of me, I couldn't find a hidden location for the window modules, except for the doors of course. However, there are so many wires going into the doors already, that more wires simply wouldn't fit too. So, the only out of sight location I could find was on top of the rear footwell air-ducts, just below the two front seats. In the end though, I think this is a great location, because it's dead-on center between the front and back doors (I connected each module to control one front and one rear window). I also posted a photo of it. The seat is in its most rearward position, so when moved forward in its normal position, the module is out of sight.
The installation of the new window regulators went without a hitch. However, I simply couldn't figure out how the rear regulators had to be mounted. After probably half an hour later, I figured out the regulator isn't mounted in the front of the door, but at the rear!
In the end, the hardest part was pulling all the wires throughout the car. If I should guess, I routed about 300 feet of wire!
On to the testing part, it went without any problems whatsoever. The entire system works great!
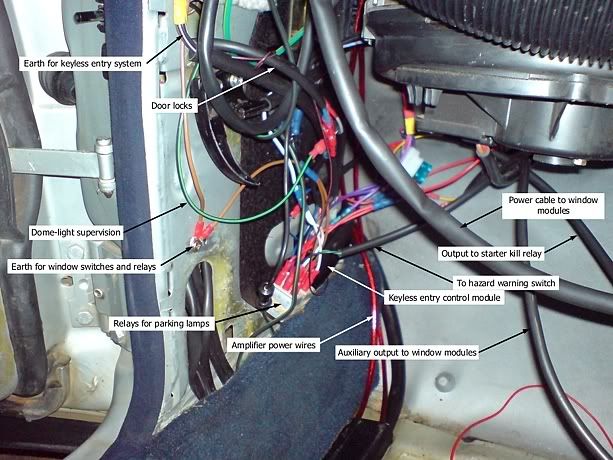
I connected the keyless system for progressive unlocking (first the driver's, then the passenger doors), domelight supervision when disarming and switching off of the ignition, doors lock on turning on the ignition, unlock when switching off.
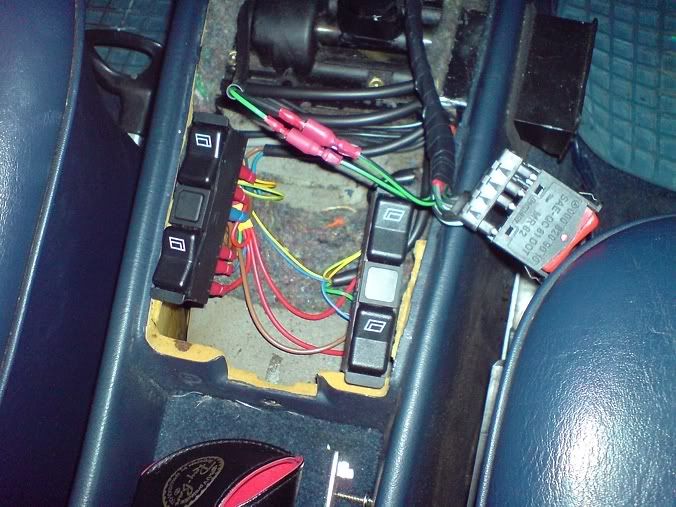
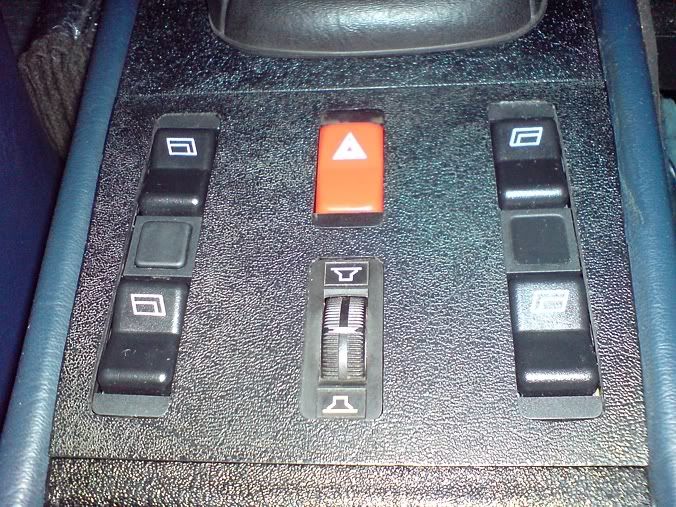
The window modules also work fantastic. One-touch up and down for all four windows from the center console switches, auto-close when arming the keyless entry system, venting of the windows when pressing the auxiliary button on the remote.
The window regulators and motors are very smooth and quiet. I really cannot comprehend why some of you want to convert to manual windows!
alarm pictures -- posted image.
F R A N S
1985 Mercedes-Benz 230E
320 000 km / 199 000 miles
Full MB Service History
xtremeaudio 
Copper - Posts: 174
Copper spacespace
Joined: August 30, 2004
Location: United States
Posted: July 04, 2007 at 5:21 AM / IP Logged  

every nice work

KarTuneMan 
Platinum - Posts: 7,056
Platinum spaceThis member has made a donation to the12volt.com. Click here for more info.spaceThis member consistently provides reliable informationspace
Joined: December 14, 2004
Location: Isle Of Man
Posted: July 04, 2007 at 2:25 PM / IP Logged  
Very clean work.... I would be proud of that attention to detail. You can work on my car     anytime!
peterubers 
Silver - Posts: 706
Silver spaceThis member has made a donation to the12volt.com. Click here for more info.spacespace
Joined: December 29, 2006
Location: United States
Posted: July 04, 2007 at 2:27 PM / IP Logged  
That's the work of a pro -- no doubt.
The search function is your friend.
frans-c 
Copper - Posts: 77
Copper spacespace
Joined: February 14, 2006
Location: South Africa
Posted: July 04, 2007 at 3:08 PM / IP Logged  
peterubers wrote:
That's the work of a pro -- no doubt.
Nope, got all my info of the keyless install, with regards to the parking light flash and priority unlocking, from this site. Window installation was accomplished with the help of an original wiring diagram, also indicating which diameter wire to use, which helped a lot. And just plain "reading the instructions". alarm pictures -- posted image.
F R A N S
1985 Mercedes-Benz 230E
320 000 km / 199 000 miles
Full MB Service History
peterubers 
Silver - Posts: 706
Silver spaceThis member has made a donation to the12volt.com. Click here for more info.spacespace
Joined: December 29, 2006
Location: United States
Posted: July 04, 2007 at 3:59 PM / IP Logged  

Are those all your 200k miles on that car! LOL! well done

The search function is your friend.
Page of 2

  Printable version Printable version Post ReplyPost New Topic
You cannot post new topics in this forum
You cannot reply to topics in this forum
You cannot delete your posts in this forum
You cannot edit your posts in this forum
You cannot create polls in this forum
You cannot vote in polls in this forum

  •  
Search the12volt.com
Follow the12volt.com Follow the12volt.com on Facebook
Thursday, March 28, 2024 • Copyright © 1999-2024 the12volt.com, All Rights Reserved Privacy Policy & Use of Cookies
Disclaimer: *All information on this site ( the12volt.com ) is provided "as is" without any warranty of any kind, either expressed or implied, including but not limited to fitness for a particular use. Any user assumes the entire risk as to the accuracy and use of this information. Please verify all wire colors and diagrams before applying any information.

Secured by Sectigo
the12volt.com spacer
Support the12volt.com
Top
the12volt.com spacer