Hey guys, just thought I would post a write-up on how to make an insert. Typically inserts are made to access mounting bolts or fuses or anythign else that you need to be able to get to but want to look nice. However, you can also make them just to add some style to your box or amp rack or dash or whatever.
This project is a sub box built for an Infinity Kappa Perfect DVQ 12" that I needed to get on display. I figured while I was at it, I would make it a little curvy with a nice insert just to dress it up and show what can be done. The design entailed building a box inside a box. Essentially I built a wedge box whose internal airspace was .6 cu. ft. and put that inside another box which after wrapping in fleece would give me some more surface area on the baffle to make a nice insert and to allow me to control the airspace the sub would see as oppose to just building a base, putting a ring on stilts and fleecing the whole thing. So there's the background, now comes the pictures.

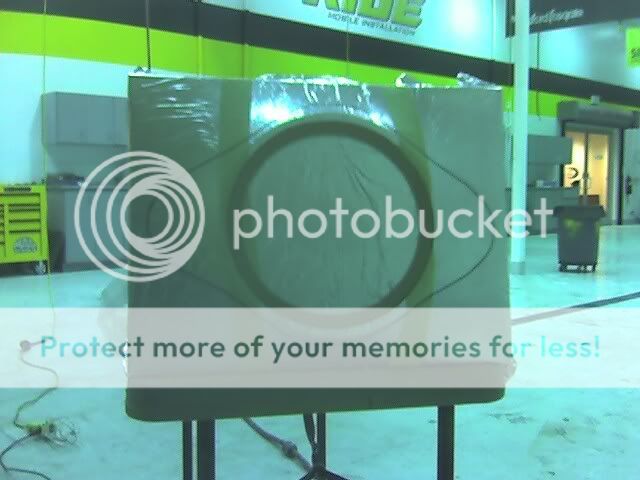
Tape off the entire baffle of the box with 2 layers of masking tape and draw out your design on top of the tape. You can see here that I also tape over the woofer mounting hole to prevent debris from getting inside the box during the construction.

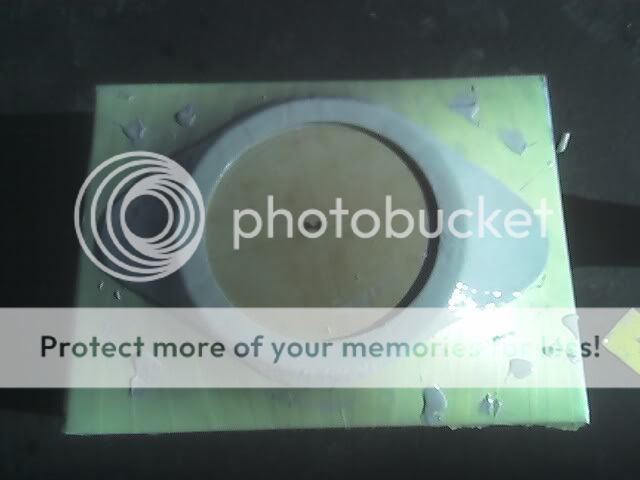
Cut out the design you have drawn and remove the excess tape. You'll notice that I have placed a mdf disk in the center here. The disk acts as the subwoofer. The box was built so that the sub will be countersunk beneath the surface and the insert will also be a ring which covers the mounting holes of the sub and allows only the cone to be seen. Therefore, the disk is placed to act as the woofer so that the mdf ring you will see in the next picture can sit on it the same way that it will sit on the woofer.
Spray some adhesive on the box and lay some aluminum foil on. Make sure that your box is protected from the resin that is coming even if you have to use some more tape. With a sharpie, trace the outline of your design which should be visible thanks to the two layers of masking tape you laid before. The sharpie line will transfer to the fiberglass and give you a nice line to follow with your air saw. You can also see the 1/4" mdf speaker ring I told you about before, this is put on top of the aluminum foil as I do want the fiberglass to adhere to this piece and not the rest of the baffle.
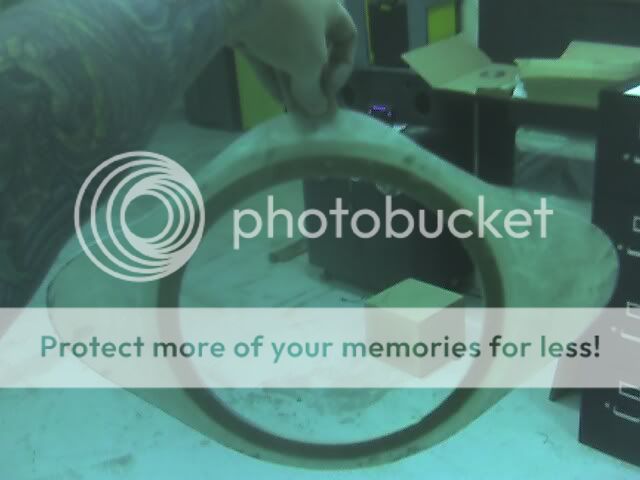
Here is the insert pulled off the baffle, you can see the mdf ring from the previous picture is now part of the insert. I used my airsaw to trim the excess fiberglass away and a router table to remove the center. The 1/4" mdf ring acts as a very handy guide for youe router bearing. I used 4 layers of 6 ounce cloth, I probably could have gone with a few more but I still had to add body filler so its okay. Word to the wise, before laying down your glass, use some mold release wax on the aluminum foil so that it will remove easily, I forgot this step and it was not fun.
Time to smooth the piece out. Rough of the fiberglass to help with adhesion and then apply your body filler. I like to use a mixture of body filler and resin in a 5:1 ratio so that I can paint it on and it just kinda levels itself out. Don't forget to protect your box with some tape or plastic or something.


I jumped ahead a step or two here but basicly all I did was wait until the bondo mix cured on the insert and then sanded it down until it was nice and smooth making sure that all of my edges kept with the original shape meaning there was no body filler on them. Once thats done, put the piece back on the box, this time with no tape on the box at all, however, you will have to put tape on the insert. (What kind of tape and what thickness depend on what you are going to wrap the pieces in. I know that I am going to wrap the box in vinyl and the insert in suede so I need to ensure that I end up with about 1/16th of an inch gap all the way around the insert. I accomplish this with 1/4" 3m double sided red tape. I wrap it around the outside of the insert and and fold it under the insert as well, to allow for the thickness of the vinyl that will go under the insert.) Protect any areas that you dont want to get body filler on, such as the insert, with masking tape. Mix up some body filler and start to blend the insert into the box. Use a plastic spreader to make sure you get a nice even transition up to the tape that surrounds the insert. Wait for it to cure and you should have what you see in the top picture. Sand both the insert and the box down but be careful not to lose the shape of the perfect copy you just created. Check to make sure everything lines up nice as in the bottom two pics.


Now after some finishing details you're ready for the big show. Time to test your wrapping skills. Mine aren't so great so I had my coworker brian give me a hand and he did a great job with that carbon fiber vinyl. As you can see, the first picture is the insert wrapped in charcoal suede, the second one is the box wrapped in carbon fiber vinyl, the third is the two pieces together and the fourth is a side shot so you can see how the insert flows down the box kinda like lava from a volcanoe! All thats left now is to make some endcaps for the box which I think I'll wrap in suede and maybe do a raised infinty logo.
Its very easy to see how many ways you can use this concept one of which is hiding things, such as the screws and mounting gasket of this sub. I hope that this has been helpful and I appreciate all feedback and especially any tips or criticism anyone has for me. Thanks for checking out my thread.


 Topic Closed)


 Printable version


